This means that every hour an 800 cubic foot room needs
to replenish it back up to 1500 PPM. Because our
system operates on a 15 minute
rate setting should allow 0.1665 (or 0.2) cubic foot of CO
To arrive at the appropriate flow rate setting we need to divide .333
2 (there are two 15 minute ON periods per hour) to reach the flow
= 0.1665 cubic feet per 15 minutes of flow).
For practical purposes, round this up to 0.2 cubic feet. This is the
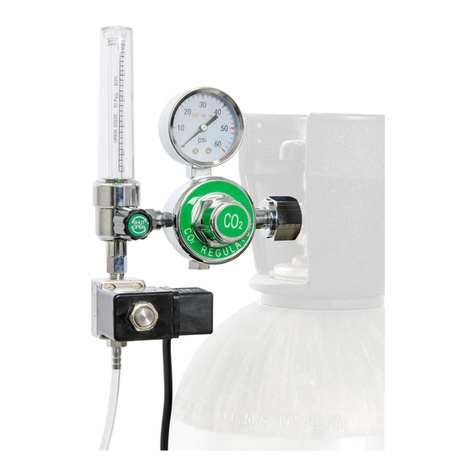
After following the regulator adjustment steps, set the flow with the
flowmeter adjusting knob as described above.
Once the flow rate and programmable timer have been set, the system
should be tested by plugging it in and slowly rotating the timer dial
clockwise to check the on/off of the solenoid valve and the flow of CO
by checking the flowmeter setting.
PROGRAMMABLE TIMER SETTING
Set your timer to go on continuously for 2.5 hours each day when your
lights turn on. This time period will bring your room level close to the
desired range. After this period, set the timer to go off for 15 minutes,
then on for 15 minutes. Repeat this on/off cycle throughout the lighted
period until 1 hour before the lights turn off.
This is the basic formula for determining flowmeter settings:
cubic ft. of growing area x .0012 = A
cubic ft. of growing area x .0012 = A
A ÷ 3 = B B
cubic ft. of growing area x .0012 = A
To determine the flow rate for your growing area, follow the steps
- Determine the cubic volume of your area:
Room height x width x length = cubic volume
Example: 8' high x 10' long x 10' wide = 800 cubic feet
- Take desired level of CO
(1500 PPM) and SUBTRACT exist-
; 1500PPM - 300PPM = 1200 PPM. This is the amount of
you need to add to raise the level to optimum.
- Multiply your room volume x .0012 (1200 PPM) to determine
Example: 800 cubic feet x .0012 = .96 cubic feet.
For practical purposes we will round this off to 1 cubic foot. This is
to add in an 800 cubic foot size room to reach the
Before continuing on to the next steps the following assumptions need
The average growing area enriched to
will return to normal levels in about 3 hours
due to plant usage and room leakage.
When calculating the flow rate for any
growing area, this usage and leakage of CO
sated for in that particular area.
- Now for the 800 cubic foot room, we take the approximately 1
and divide it up over the 3 hour average period into
1 hour increments. There are 3 one hour periods in 3 hours.
1 cubic foot ÷ 3 = 1/3 cubic foot of CO
© HYDROFARM 2005 PETALUMA CA www.hydrofarm.com
TROUBLESHOOTING
1. In case of any problems, carefully reread all the instructions to
make sure everything is set up properly.
2. Test the regulator assembly with some soapy water if you suspect
3. Check all your connections up to the flowmeter.
ALWAYS TURN OFF THE TANK VALVE BEFORE DETACH-
ging and unplugging it directly to an outlet.
5. Any fitting leakage can be remedied by re-attaching firmly with
some teflon tape which is available from your local hardware store.
6. Plug the system back into the timer and slowly rotate the dial
clockwise to check its on/off functions.
7. If these steps donʼt solve your problem, contact the place of pur-
chase to work out the problem and get a return authorization if
© HYDROFARM 2005 PETALUMA CA www.hydrofarm.com
rev 2/05
© HYDROFARM 2005 PETALUMA CA www.hydrofarm.com
One of the unique features of our system is its ability to raise the CO
up to the appropriate level
each day when your lights come on and then maintain it.CO
is an essential ingredient for photo-
synthesis which is the main provider of energy for plant growth. Without enough carbon dioxide, plant
growth will slow down or can actually stop. A lack of
can occur very easily in an enclosed growing
area unless you can add a supplemental source of
is an odorless, invisible, and non-flammable gas. It is also safe for humans in the maximum
concentrations recommended for plant growth.
in the atmosphere is about 300 PPM (parts per million). If the level
decreases down below 200 PPM in an enclosed growing area, plant growth slows to a halt. Through
the years of testing and research, the optimum enrichment level of CO
for plant growth has been
agreed to be about 1500 PPM. This is assuming, of course, that there is plenty of bright light and a
good growing system. With CO
enrichment, under good conditions, plant growth rates and flower-
ing will increase 20-100%. CO
should be used from seedling right through harvest.
The easiest way to raise the CO
level is by the compressed CO
gas method with a tank. They
come in 20 lb. and 50 lb. sizes and are available for rent at your local beverage supply, welding, or
gas products company. Your local beverage supply is used to renting CO
operators and usually charges less. Look in your local yellow pages for a supplier.
Tank Quantities - A 50 lb. tank holds approximately 440 cubic feet of CO
flow rate per hour times the number of hours of "on" time, you will find out how long a tank will
Constant/Intermittent System
