Hydrotechnik HySense CX 197 User manual

ENG
HySense®CX 197
Service-Measuring-Kit
Operating Instructions
Version 1.5 ENG
02/2020

HySense®CX 197 2
ENG
Table of contents
1. SAFETY....................................................................................................................... 4
1.1 General safety and warning information .................................................................................. 4
1.2 Notes on handling the service measuring kit........................................................................... 5
1.3 Information about the handling of sensors and cables ............................................................ 6
2. BASICS ....................................................................................................................... 7
2.1 Scope....................................................................................................................................... 7
2.2 Copyright.................................................................................................................................. 7
2.3 Limitation of liability.................................................................................................................. 7
2.4 Intended use ............................................................................................................................ 8
2.5 Warranty................................................................................................................................... 8
2.6 Customer obligations ............................................................................................................... 8
2.7 Authorized personnel............................................................................................................... 9
3. DESCRIPTION OF THE SERVICE MEASURING KIT................................................10
3.1 General................................................................................................................................... 10
3.2 Dimensions of the service measuring kit ............................................................................... 11
3.3 Scope of delivery of the service measuring kit ...................................................................... 12
4. START-UP OF THE SERVICE MEASURING KIT ......................................................13
4.1 Connection to a hydraulic system.......................................................................................... 13
4.1.1 Installation in the pressure line ......................................................................................... 14
4.1.2 Installation in the return line.............................................................................................. 15
4.1.3 Setting the flow.................................................................................................................. 16
4.2 Ventilating the service measuring kit ..................................................................................... 16
4.3 Connecting the sensors ......................................................................................................... 17
5. USE WITH A MULTISYSTEM MEASUREMENT INSTRUMENT................................19
5.1 Use with the MultiSystem 5070/4070..................................................................................... 20
5.1.1 Opening the “HySense CX 197” function.......................................................................... 20
5.1.2 Operating the “HySense CX 197” function ....................................................................... 21
5.1.3 Selection of the metering point ......................................................................................... 22
5.1.4 Evaluation of the measurements - Condition menu.......................................................... 25
5.1.5 Display of the measurement values.................................................................................. 29
5.1.6 Exporting the measurement data...................................................................................... 30
5.1.7 Evaluating measurements ................................................................................................ 31
5.2 Use with the MultiSystem 5060Plus....................................................................................... 32
5.2.1 Opening the “Measuring section CX 197” function ........................................................... 32

HySense®CX 197 3
ENG
5.2.2 Operating the “Measuring section CX 197” function......................................................... 32
5.2.3 Measurement menu “Measuring section CX 197” ............................................................ 34
5.2.4 Selection of the metering point ......................................................................................... 34
5.2.5 Display of the measurement values.................................................................................. 37
5.2.6 Exporting the measurement data...................................................................................... 38
5.2.7 Evaluation of the measurements - Condition menu.......................................................... 39
6. Interpretation of the measurement results..............................................................42
6.1 Specific oil parameter change................................................................................................ 42
6.1.1 Viscosity............................................................................................................................ 42
6.1.2 Permittivity (dielectric constant)........................................................................................ 43
6.1.3 Conductivity....................................................................................................................... 44
7. Service and accessories...........................................................................................45
7.1 Cleaning and maintenance .................................................................................................... 45
7.2 Calibration.............................................................................................................................. 45
7.3 Accessories and spare parts.................................................................................................. 46

SAFETY
ENG
1. SAFETY
1.1 General safety and warning information
•Heed the valid regulations for accident protection and environmental
protection.
•Heed the safety regulations and provisions of the country in which the
product is used/applied.
•Use HYDROTECHNIK GmbH products only if they are in technically
perfect condition.
•Heed all instructions on the product.
•People who install, operate, uninstall or maintain HYDROTECHNIK GmbH
products may not be under the influence of alcohol or other drugs or
medications that influence the ability to react.
•Use only accessory and spare parts approved by the manufacturer in order
to exclude danger to people due to unsuitable spare parts.
•Adhere to the technical data and environmental conditions specified in the
product documentation.
•If in safety-relevant applications unsuitable products are installed or used,
unintended operating conditions can arise in the application; these can
cause personal injury or property damage. Therefore, only use a product in
safety-relevant applications if these are explicitly specified and permitted in
the product documentation.
•You may only start the product up if it has been determined that the end
product (for example, a machine or system) in which the HYDROTECHNIK
GmbH products are installed complies with the country-specific provisions,
safety regulations, and standards of the application.

SAFETY
HySense®CX 197 5
ENG
1.2 Notes on handling the service measuring kit
•Close the pressure and tank lines in the correct sequence.
•Heed the maximum permissible pressure range.
•If the service measuring kit is operated with a hot medium, then there is
a danger of burns when touching the block.
Dangerous electrical voltage
•Never cut, damage or modify the power pack cables or place things on
it.
•Never touch the power pack with wet or moist hands.
•Only connect the power pack to power supplies for which it is suited,
•Unplug the power cable from the outlet during a thunderstorm.
•Unplug the power cable if you detect smoke or there is an odor, or if the
power cable is damaged.
•Ensure sufficient grounding of your system. Inadequate grounding may
cause incorrect measurements.
Caution
Caution
Laser
The particle counter contains a laser, which with proper use is classified as a
Class 1 laser according to DIN EN 60825-1:2001-11. The accessible laser beam
is not dangerous under reasonably foreseeable conditions.
•For Class 1 laser equipment, in the upper performance range, blinding,
compromising of color vision, and disruptions cannot be excluded.
•Do not remove any covers or panels.

SAFETY
HySense®CX 197 6
ENG
•When ventilating, note that skin contact with hot oil can cause burns.
Adjust the oil pressure so that only a little oil escapes.
•The service measuring kit should be fastened securely in a suitable
location so that falling or damage to the sensors is avoided.
•Handle the service measuring kit and measurement technology
properly.
•If hydraulic fluid escapes or is spilled, avoid contamination of the
environment and the ground water. Use oil binders to bind escaped oil.
•During installation, pay attention to cleanliness in order to prevent
foreign bodies such as metal chips or fibers from cleaning cloths from
getting into the hydraulic lines and causing wear and malfunctions in
the product.
•Before start-up, check whether all hydraulic and mechanical
connections are connected and tight, and ensure that all gaskets and
seals of the plug connections are inserted correctly and undamaged.
•Do not use hemp as a sealant.
1.3 Information about the handling of sensors and cables
•Protect the sensors from exceeding the allowed power range, mechanical
overload and incorrect pin assignment.
•Never expose the service measuring kit to excessive heat or humidity and
observe the technical data.
•Never submerge the sensors in water or other liquids. Never let liquids
penetrate the instrument.
•Never open the instruments.
•Avoid strong magnetic fields. Keep the sensors away from electric motors
or other instruments that generate electromagnetic fields. Strong magnetic
fields can cause malfunctions and influence measurement values.
•Prevent the formation of condensation. If condensation has formed, let the
instrument acclimate before you switch it on. Otherwise it can be damaged.

BASICS
HySense®CX 197 7
ENG
2. BASICS
2.1 Scope
This manual is valid for the service measuring kit HySense®CX 197 (called the
service measuring kit or CX 197 below). It is intended for the operator of this CX
197, that means the person who works with the instrument. This is not a
technical manual. Please contact our customer service if you have questions
that go beyond the contents of this manual.
2.2 Copyright
The instrument and this manual are protected by copyright. Reproduction
without license will be prosecuted. All rights to this manual are reserved; this
includes the reproduction and/or duplication in any conceivable form, e.g. by
photocopying, printing, on any data recording media or in translated form.
Reproduction of this manual is only permitted with written approval from
HYDROTECHNIK GmbH.
The technical state at the time of delivery of the instrument and the manual is
decisive if no other information is given. We reserve the right to make technical
changes without special announcement. Earlier manuals are no longer valid.
The general conditions of sale and delivery of HYDROTECHNIK GmbH are
valid.
2.3 Limitation of liability
We guarantee the faultless functioning of our product in accordance with our
advertising, the product information we publish, and this manual. Additional
product properties are not assured. We assume no liability for efficiency and
fault-free function if the product is used for a different purpose than the one
described in the Intended use section.
Compensation for damages is generally excluded except in case intention or
gross negligence on the part of HYDROTECHNIK GmbH is proven.
If this product is used in environments for which it is not suited or that do not
correspond to the technical standard, HYDROTECHNIK GmbH is not
responsible for the consequences. HYDROTECHNIK GmbH assumes no
liability for damage to installations and systems around the product that is
caused by a fault of the product or an error in this manual. HYDROTECHNIK
GmbH is not responsible for the violation of patents and/or other rights of third
persons outside the Federal Republic of Germany.
HYDROTECHNIK GmbH is not liable for damage that results from improper
operation and non-compliance with the instructions in this manual.

BASICS
HySense®CX 197 8
ENG
HYDROTECHNIK GmbH is not liable for lost profits and for consequential
damages that arise from non-compliance with safety and warning information.
HYDROTECHNIK GmbH accepts no liability for damage that results from the
use of accessories and/or wearing parts that are not provided and/or approved
by HYDROTECHNIK GmbH.
In case of faults and/or technical trouble, please contact HYDROTECHNIK
GmbH's customer service. HYDROTECHNIK GmbH assures you that it will take
suitable measures immediately. HYDROTECHNIK GmbH’s warranty provisions
apply; we will send you these on request.
2.4 Intended use
The service measuring kit handles the control and monitoring of the oil condition
and the interval for oil changes in stationary and mobile hydraulic systems. The
service measuring kit is to be used with hydraulic oils and Group 2 fluids
according to classification of the pressure equipment directive 2014/68/EU
(non-hazardous fluids).
2.5 Warranty
In accordance with our general terms and conditions, HYDROTECHNIK GmbH
guarantees the perfect condition of the CX 197 for a period of twelve months.
Wearing parts and rechargeable batteries are excluded from this warranty. The
warranty is voided if repair work or interventions are executed by people who
are not authorized for this by HYDROTECHNIK GmbH.
Within the warranty period, we will repair damage or defects that are caused by
a manufacturing fault insofar as they are reported to us immediately after their
discovery, but no later than twelve months after delivery. The warranty service
is done at our option through free repair of defective parts or replacement with
sound parts. Please send the instruments for which you are making warranty
claims postage-paid and with a copy of the invoice or the delivery slip to
HYDROTECHNIK GmbH customer service. You can find the address at the end
of this manual.
2.6 Customer obligations
The operator of the service measuring kit must ensure that only people who
•are familiar with the regulations concerning occupational safety and
accident prevention,
•have been instructed in the operation of this measurement instrument,
•have read and understood this manual,
are permitted to use and operate this instrument.

BASICS
HySense®CX 197 9
ENG
2.7 Authorized personnel
People are considered to be authorized if they have a professional education,
technical experience, and knowledge of the relevant standards and regulations
and if they are able to assess their duties and recognize possible dangers early
on.
Operator of the CX 197
People are considered to be authorized if they have been instructed in the
operation of the instrument and have read and understood this manual
completely.
Personnel for installation and maintenance
People are considered to be authorized if they have been trained in all aspects
of the instrument and have read and understood this manual completely.

DESCRIPTION OF THE SERVICE MEASURING KIT
HySense®CX 197 10
ENG
3. DESCRIPTION OF THE SERVICE MEASURING
KIT
3.1 General
The service measuring kit consists of a measurement block that is equipped
with a Patrick particle monitor, HySense®CV 100 viscosity sensor, and
HySense® CM 100 humidity sensor. These instruments can also be read out
separately. Furthermore, the instrument is also equipped with a power pack,
CAN data cable, and three connection lines.
In connection with the HYDROTECHNIK MultiSystem 5060Plus,
MultiSystem5070 or MultiSystem4070 measurement instrument, the CX 197
handles the diagnosis and monitoring of changes to the hydraulic and
lubrication media. Measurements can be made periodically on systems or
machines and stored in a measurement value database for the appropriate
metering point. Through analysis of the data, it is possible to make an
evaluation in which the oil change, deviation from target values, and exceeding
of limit values are determined.
Furthermore, it is possible to check whether the correct viscosity class is used,
the particle contamination is becoming critical or if a high humidity content is
threatening the formation of free water. This way, looming damage can be
detected at an early stage or avoided completely. This offers the opportunity to
avoid severe machine faults and consequential damages by taking suitable
measures and to extend maintenance and oil change intervals. With the
monitoring of the lubrication medium, oil changes and fill-ups can be detected
and thus system maintenance can be performed and the use of the prescribed
lubricant quality documented.
The CX 197 records the following physical oil variables:
•Temperature
•Viscosity
•Relative humidity
•Particle contamination
•Relative permittivity
•Conductivity
Since the viscosity and relative permittivity depend heavily on the temperature,
these variables are converted to a fixed reference temperature of 40°C. For the
analysis of a system, the metering point is created in the measurement
instrument and an oil type is assigned from the oil database.

DESCRIPTION OF THE SERVICE MEASURING KIT
HySense®CX 197 11
ENG
3.2 Dimensions of the service measuring kit
For the dimensions of the CX 197, see the following technical drawing:
Table 1 CX 197 components
Component
Number
Function
Part number
Measuring block
1
Holder for the sensors
3402-CX10-D100-200
MINIMESS® test
point
5
Connection to oil circuit, ventilation of the
system
2103-01-18.00N
Direct connection
1
Holds the particle monitor
2103-07-41.62N
Bursting disk
2
Protection of the sensors against damage
880C-00-00.02
Current regulation
valve
1
Handles the reduction of the incoming system
pressure to <10 bar
8803-08-00.01
Sieve
1
Filtering of coarse contamination in the oil
8806-01-06.01
Figure 1: Technical drawing CX 197

DESCRIPTION OF THE SERVICE MEASURING KIT
HySense®CX 197 12
ENG
3.3 Scope of delivery of the service measuring kit
In this section, the scope of delivery of the products is depicted and labeled:
A: CAN connection cable D: Power pack with connection to
measurement instrument and CAN cable
B: CX 197 E: Minimess® connection
C: Country plug adapter lines
The service measuring kit includes all necessary parts for connecting the CX
197 to a hydraulic system that is equipped with Minimess®1620 test points. For
this, two simple Minimess®connection lines Efor the tank line and ventilation
are included in the scope of delivery (see Figure 1). The third connection line
has a check valve on one side and serves as connection for the pressure line.
Here, the simple end is connected to the CX 197 and the end with the check
valve to the system’s pressure line. The CAN connection cable Aconnects the
sensors and enables a connection to a measurement instrument (optionally
Multisystem 5060Plus, Multisystem 5070 or Multisystem 4070). With the power
pack D, there is an independent power supply to the sensors via the CAN cable.
C
B
A
D
E
Figure 2: CX 197 scope of delivery

START-UP OF THE SERVICE MEASURING KIT
HySense®CX 197 13
ENG
4. START-UP OF THE SERVICE MEASURING KIT
Figure 3 depicts the connected CX 197. The next section describes the start-up
in more detail.
A: Supply line (pressure connection) D: Connection for ventilation
B: Connection to sensors E: Drain (tank connection)
C: Connection to measurement instrument or
CAN sensors
4.1 Connection to a hydraulic system
Heed the correct sequence when connecting to a hydraulic system:
•First connect the tank line to the CX 197 with a simple hose line (point E,
Figure 3)
•Connect the other end of this hose line to the tank line of your hydraulic
system
A
B
D
E
C
Figure 3: Connections to the CX 197

START-UP OF THE SERVICE MEASURING KIT
HySense®CX 197 14
ENG
•For the pressure connection, use the hose line with the check valve on one
side. First connect the simple side (without check valve) to the CX 197 on
the input side (point A, Figure 3)
•Then finally, you can connect this hose line with the check valve to the
pressure connection of the hydraulic system
The CX 197 does not have its own pump, which is why it is installed in the
pressure line. The symbols P and T with an arrow are engraved on the front
side of the CX 197. The arrows on the CX 197 indicate the flow direction of the
medium. The P symbol stands for pressure and the T for the tank side (Figure 3
or Figure 4). The warning on the front of the CX 197 (Figure 4) symbolizes the
correct connection sequence with the maximum pressures that may not be
exceeded.
Figure 4: Printing on the CX197 (pictograms)
4.1.1 Installation in the pressure line
An installation of the CX 197 is recommended in a pressure line to the Figure 5
left. Here, it can be connected directly to a Minimess®test point with the
included lines. The return can be connected directly to a tank line on the system
(heed connection sequence, see Chapter 4.1).
Alternatively, test points can be selected for which there is a sufficient pressure
difference for a suitable flow (Figure 5 right).
Warning
Incorrect sequence during connection
•Sensors can be damaged
•Oil can escape

START-UP OF THE SERVICE MEASURING KIT
HySense®CX 197 15
ENG
4.1.2 Installation in the return line
If it is possible to establish pressure in the return line that generates a
necessary flow (e.g. with a pre-tensioned check valve), then the CX 197 can
also be installed there.
Due to a prior measurement, the CX 197 can be filled with an oil that is
incompatible with other oils. In order to avoid the danger of contamination,
empty the CX 197 or flush it out sufficiently. Flush with at least 200 ml and
separate the oil at the return.
Alternative:
Figure 5: Installation situation of the CX 197; left: recommended installation; right: alternative installation
Figure 6: Installation situation of the CX 197 in the return line

START-UP OF THE SERVICE MEASURING KIT
HySense®CX 197 16
ENG
4.1.3 Setting the flow
Since the Patrick particle monitor requires a constant flow between 50 and 400
ml/min, attention should be paid to the appropriate flow. It can be checked
directly after current is connected to the Patrick. For this, use the arrow key to
go into the menu and select:
SENSORPARAM. / SET FLOW.
The bar diagram reflects the flow between 50 and 400 ml/min.
In case of heavily soiled oil:
If larger particles (> 125µm) go through the CX 197, they can stop up the sieve
installed in front of the current regulation valve. Normally the sieve protects the
downstream current regulation valve that has a small nozzle.
If it happens that there is no sufficient flow despite the pressure applied, the CX
197 can be opened and the current regulation valve unscrewed. This way, it is
possible to clean the soiled parts.
4.2 Ventilating the service measuring kit
Before the first measurements can be made, the CX 197 must be ventilated.
Proceed as follows:
•Connect the CX 197 as described in Chapter 4.1. The flow should be at
least 50 ml/min.
•Now connect the MINIMESS®test point between particle monitor and
moisture sensor to the third MINIMESS®hose line.
•During ventilation, move the CX 197 a little in order to convey all the air out
of the CX 197.
Caution
Danger of contamination with other oil
Since the CX 197 could still be filled with incompatible oil from the last
measurement, empty or flush the CX 197 with at least 200 ml of oil.

START-UP OF THE SERVICE MEASURING KIT
HySense®CX 197 17
ENG
4.3 Connecting the sensors
Figure 7 shows the CAN data line together with the power pack and the data
line. Proceed as follows:
•Connect the sensors with the included CAN cable (point A, Figure 7)
•Connect the plug of the CAN cable (point B, Figure 7) to the CAN system
or measurement instrument (MS5060Plus, MS5070 or MS4070)
•If the sensors are supplied autonomously with current, the plug on the CAN
data line (point B, Figure 7) is connected to the socket of the power pack
(point C, Figure 7). Then the plug on the power pack (point D, Figure 7) is
used as the data line of the CAN bus.
Warning
Risk of burns
When ventilating, note that skin contact with hot oil can cause burns. Adjust the oil
pressure so that only a little oil escapes.
A
B
C
D
Figure 7: CAN data line with network connection

START-UP OF THE SERVICE MEASURING KIT
HySense®CX 197 18
ENG
The communication of the sensors takes place via the data line of the CAN
connection cable. For this, connect the connection line of the CAN connection
cable or the data cable of the connected power pack to a CAN bus or a
measurement instrument (Multisystem 5060Plus, Multisystem 5070 or
Multisystem 5070).
The bus system for the communication of the sensors with the measurement
instrument is done via CANOpen. For this, the sensors must be set to this bus
system. If this is not the case, this configuration is described precisely in the
operation manual for the individual sensors (HySense®CM 100 or HySense®
CV 100).
In principle, it is also possible to use the individual sensors directly on the
connected CX 197 via serial interface (RS232), CANOpen or with analogue
current output. The sensors offer other possibilities for this (such as continuous
measurement with learning phase and the detection of oil parameters). For
additional information and instructions, see the operation manual for the
sensors in question.
Note
Power supply
The measurement instrument's rechargeable battery is only sufficient for a limited
time. For longer supply of the sensors, either connect the power pack of the
measurement instrument or operate the sensors with the included power pack.
For this, connect the power pack to the three-way CAN cable.

USE WITH A MULTISYSTEM MEASUREMENT
INSTRUMENT
HySense®CX 197 19
ENG
5. USE WITH A MULTISYSTEM MEASUREMENT
INSTRUMENT
The service measuring kit can be operated directly with a hand measurement
instrument MultiSystem 5060Plus, MultiSystem 5070 or MultiSystem 4070. If
your measurement instrument has earlier firmware, it's easy to update the
instrument via the HYDROTECHNIK software “hydrocenter” (can be
downloaded from the homepage HYDROTECHNIK.com).
Connect the data cable to the 8-pin CAN connection on the measurement
instrument as described in Chapter 4.3. Note that the power output on the
measurement instrument is activated if the sensors should be supplied with
power by the measurement instrument. The CAN interface on the measurement
instrument must also be activated (see operation manual for the MultiSystem
instrument).
Chapter 5.1 below will describe use with a MultiSystem 5070 or MultiSystem
4070 measurement instrument. Menu guidance is the same in both
measurement instruments.
The description for the MultiSystem 5060Plus is in Chapter 5.2.
Figure 8: Service measuring kit connected to the MultiSystem 5070

USE WITH A MULTISYSTEM MEASUREMENT
INSTRUMENT
HySense®CX 197 20
ENG
5.1 Use with the MultiSystem 5070/4070
Essentially, display of the options of the F1 to F5 keys can be done as text or
symbols. For this, the measurement instrument is set under:
•Set (5) / Instrument (3) / General Settings (2)
•then right arrow key
•under “Softkeys”
(see Figure 9). In the following figures, the display will be in "text.”
Figure 9: Display options, text or symbol
On this menu, you can also set the separator for the CSV file.
Furthermore, you can also select the unit system that should be used to display
the units. These include the metric system and the US measurement system.
5.1.1 Opening the “HySense CX 197” function
Use the menu key to reach the main menu (home). By selecting the folder
“Extras / Special applications / Oil condition” (see Figure 10)
you can reach the user menu for the service measuring kit.
Alternatively with the MultiSystem 5070/4070, you can also press the
corresponding number with the number keys 1-9 to select the window. To reach
the menu, these would be the keys: 6-2-1-2.
This manual suits for next models
1
Table of contents
Other Hydrotechnik Measuring Instrument manuals

Hydrotechnik
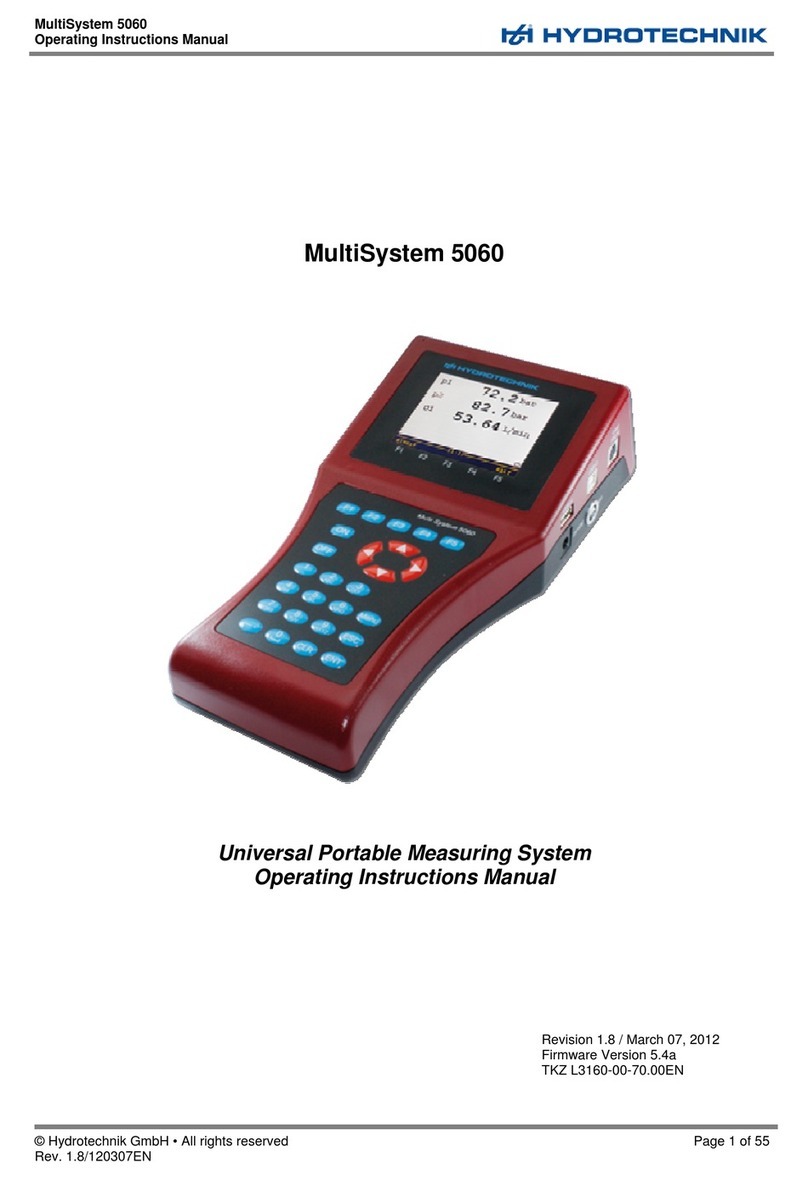
Hydrotechnik MultiSystem 5060 User manual

Hydrotechnik
Hydrotechnik MultiSystem 5070 User manual

Hydrotechnik
Hydrotechnik Patrick User manual

Hydrotechnik
Hydrotechnik MultiSystem 4070 User manual

Hydrotechnik
Hydrotechnik SEG 1060 User manual

Hydrotechnik
Hydrotechnik MultiSystem 4010 User manual

Hydrotechnik
Hydrotechnik NCTE User manual

Hydrotechnik
Hydrotechnik Patrick in the Box User manual

Hydrotechnik
Hydrotechnik MultiSystem 5060 User manual

Hydrotechnik
Hydrotechnik HTE2 User manual