Hytronik HCD038/P User manual

HCD038/P + HIR17 or HIR17/R
Detached Linear Version with Remote Control
Tri-level Control & Daylight Harvest Sensor
Applications
Occupancy detector with tri-level dimming control suitable for indoor use:
Classroom
Meeting Room
Use for new luminaire designs and installations
Technical Data
Subject to change without notice. Edition: 1 Mar. 2023 Ver. A0 Page 1/9
Tri-level dimming control based upon occupancy (also known as corridor function)
TM
Features
5-year warranty
Ambient daylight
thresholdOne-touch daylight learning via remote control
Active Lux Switching, daylight threshold prior to motion detection
Daylight harvest function to regulate light output for maintaining required lux level
Stand-by power
220~240VAC 50/60Hz
Operating voltage
Load ratings:
<0.5W
80mA (max. 40devices)
20s
Warming-up
Input & Output Characteristics
EMC standard (EMC)
Safety standard (LVD)
EN55015, EN61000-3-2/-3-3, EN61547
CE , EMC, RCM,UKCA
EN60669-1/-2-1, AS/NZS60669-1/-2-1
Safety & EMC
Tc: +75°C
Operation temperature
Case temperature (Max.)
Ta: -20°C ~ +55
Environment
IP20
IP rating
Detection angle360°
5VDC
PIR detection
Sensor principle
Operation voltage
Detection range *
PIR Sensor Propertie (HIR17 & HIR17/R)
5VDC
HIR17
Max installation height:3m (single person)
Max detection range (Ø):12m
HIR17/R
Max installation height:8m (single person)
Max installation height:12m (forklift)
Max detection range (Ø):14m
DALI-2 and D4i certied
Active Lux
Switching
HCD038/P+HIR17
IEC62386 101
IEC62386 103
IEC62386 303
IEC62386 304
DALI-2 Standards
DALI Part 351

PIR Sensor Head
(DALI output with 2 push)
RJ12 connector
DALI– L
PUSH1
PUSH2
N
N
DALI+
120
30
21
4.5
Ø
4.5
110.5
Mechanical Structure & Dimensions
A. HIR17
PIR sensor head
The cable length is around 30cm.
B. HIR17 with HA04
PIR sensor head
Optional accessory
The cable length is around 30cm.
33
9
Ø 15
22
52
Installation hole
17.2±0.1
44.2±0.1
R2.3±0.1
RJ12
Installation hole
+ 0.78
Ø 22.23 - 0.41
RJ12
21.7
22.4
31.8
Ø 26
C. HIR17 with HA05
PIR sensor head
Optional accessory
The cable length is around 30cm.
27
Ø 15
68
9.4
31.8
21.7
Installation hole
22±0.2
60±0.2
Max R0.5
RJ12
D. HIR17/R
PIR sensor head
IP65 (facia / lens part)
The cable length is around 30cm.
Ø 36.7
43.4
21.7
22.7
33.9
Installation hole
+ 0.78
Ø 22.23 - 0.41
RJ12
.
Subject to change without notice. Edition: 1 Mar. 2023 Ver. A0 Page 2/9
.
Note: Only when both HCD038/P and HIR17 or HIR17/R are used together, then the combination is DALI-2 enabled as a whole.
HIR17 can freely switch between tri-level control and daylight harvest through remote controller HRC-11 setting.
Ambient daylight
threshold
6
0
6
Detection Pattern
One-Key
Commissioning
Note:We recommend the mounting distance between sensor to sensor should be more than 2m to prevent sensors from false-triggering.
Active Lux
Switching

light does not switch on when
presence is detected.
the sensor switches on the light
automatically when presence is
detected.
After hold-time, the light dims to
stand-by level if the surrounding
natural light is below the
daylight threshold.
Light switches off automatically
after the stand-by period
elapses.
Subject to change without notice. Edition: 1 Mar. 2023 Ver. A0 Page 3/9
Functions and Features
Tri-level Control (Corridor Function)
1
Hytronik builds this function inside the motion sensor to achieve tri-level control, for some areas which require a light change notice
selectable waiting time: motion hold-time and stand-by period; Selectable daylight threshold and freedom of detection area.
3
Daylight Harvest
Light will not switch on
when natural light is
motion detected.
The light switches on
automatically with
presence when natural
The light turns on at full or dims to maintain the lux level. The light output
regulates according to the level of natural light available.
2
The light dims to stand-by
period after hold-time and
stays on selected minimum
dimming level.
The light switches off when
the ambient natural light is
The light switches off
completely after the
stand-by period.
Note:
The Light automatically dims down and
eventually turns off if thenatural light lux
level exceeds the daylight threshold.
However, if the stand-by period is preset
but dim to minimum level,even the
Master-slave function
3
HCDO38/P+ HIR17 supports multiple sensors to access DALl network at the same time. In order to prevent conict during daylight harvest
control, you need to manually select one HCDO38/P+ HIR17 as the master when conguring the network. The master has the control
authority of this DALI network. Other HCDO38/P+ HIR17 will only report sensing events.

Subject to change without notice. Edition: 1 Mar. 2023 Ver. A0 Page 4/9
L
N
L
N
L
N
L
N
DALI-
DALI+
LED Driver
L
N
DALI-
DALI+
LED Driver
L
N
DALI-
DALI+
LED Driver
L
N
DALI-
DALI+
LED Driver
L
N
DALI-
DALI+
LED Driver
L
N
DALI-
DALI+
LED Driver
HIR17
HIR17
HIR17
L
N
DALI-
DALI+
HCD038/P
N
PUSH1
PUSH2
L
N
DALI-
DALI+
HCD038/P
N
PUSH1
PUSH2
L
N
DALI-
DALI+
HCD038/P
N
PUSH1
PUSH2
Note: When loaded with D4i driver, please disable the PSU of D4I drivers and the total maximum bus supply current in the same
DALI bus line shall not exceed 250 mA, hence Max 3pcs HCD038/P allowed
.

Semi-auto Mode (Absence Detection)
6
sensor to switch on the light automatically, for example, when people just quickly pass-by, there is no need to have the light on. The
solution is to apply this “absence detector”: motion sensor is employed, but only activated on the maunal press of the push switch, the
light keeps being ON in the presence, and dims down in the absence, and eventually switches off in the long absence.
This is a good combination of sensor automation and maunal override control, to have the maximum energy saving, and at the same
Subject to change without notice. Edition: 1 Mar. 2023 Ver. A0 Page 5/9
Manual Override
5
* Short Push (<1s): on/off function;
On →Off: the light turns off immediately and cannot be triggered ON by motion until the expiration of pre-set hold-time. After this
period, the sensor goes back to normal sensor mode.
Off →On: the light turns on and goes to sensor mode, no matter if ambient Lux level exceeds the daylight threshold or not.
* Long Push (>1s): adjust the hold-time brightness level between10% and 100%.
Note: if end-user do not want this manual override function, just leave the “push” terminal unconnected to any wire.
This sensor reserves the access of manual override function for end-user to switch on/off, or adjust the brightness by push-switch,
Active Lux Switching (Daylight Detection Prior to Motion Detection)
switches on the light automatically when
presence is detected.
does not switch on when presence is
detected.
The sensor switches off the light when
presence.
The built-in photocell will also automatically turn off the light when the ambient ambient light exceeds the programmed lux level for
more than 5min, regardless of whether motion is detected or not.
4
The light turns on full, and the sensor stays in
sensor mode.
The light does not switch on when there is
presence being detected.
Short push to activate the sensor
and switch on the light

Note: end-user can choose either function or function for application. Default function is manual override.
56
People left, the light dims to stand-by level
after the hold-time.
The light switches off automatically after the
stand-by period elapses.
The lightkeeps being ON during the presence.
Subject to change without notice. Edition: 1 Mar. 2023 Ver. A0 Page 6/9
Detection Pattern
HIR17 HIR17/R
*The detection patterns are based upon 5km/h movement speed.
Tangential movement up to 12m
3m
Tangential movement up to 14m
12m(for forklift)
8m(for person)
Wiring Diagram
LED Driver
DALI --
L
N
DALI +
L
N
N
PUSH1
PUSH2
DALI --
DALI +
L
N
LED Driver
DALI --
L
N
DALI +
1. 200 metres (total) max. for 1mm² CSA (Ta = 50℃)
2. 300 metres (total) max. for 1.5mm² CSA (Ta = 50℃)
Note: 1. When HIR17 or HIR17/R plug with HCD038/P, only one push terminal can be activated for conguration.
2. When loaded with D4i driver, please disable the PSU of D4i drivers.

Subject to change without notice. Edition: 1 Mar. 2023 Ver. A0 Page 7/9
AUTO mode
Press button “AUTO” to initiate automatic mode. The sensor starts working and all
settings remain as before the light is switched ON/OFF.
Note:
manually turned on by pressing the push-switch, and goes off automatically after
stand-by time. (Absence detection mode)
SEMI-AUTO mode
Sensor off Twilight
Shift
AUTO
100% 75% 50% 10%
2 Lux
100 Lux
10 Lux
300 Lux
50 Lux
500 Lux
Disable
Ambient
MemoryApply
Test
2 s
30 s
1 min 10 min
5 min 15 min 30 min
0s
10 s 1h
10% 20% 30% 50%
Dual tech & RFmode
SEMI-AUTO
Hold-time
Stand-by time
Stand-by dimming level & Auto-config.
Detection range & Sensor function
Scene prog.
Daylightthreshold
RX STBY%
PIR
RX 100%
HF HF+PIR HF/ PIR
Shift Send
5 min 30 min
20 min
Power
100%
Power
80%
1 min 10 min +
Start
RESET
ON
OFF
24h 30s
12h 4h
Learn
Erase Transmit
Brightness
CCT-
CCT+
Tri-level Harvest Master
HRC-11
Settings (Remote Control HRC-11, for HIR17 & HIR17/R)
Permanent ON/OFF function
Press button “ON/OFF” to select permanent ON or permanent OFF mode.
* Press button “AUTO”, “RESET” or “Ambient” to quit this mode.
The mode will change to AUTO Mode after power failure.
ON/
OFF
Press button “RESET”, all settings go back to default values (Tri-level Control mode).
Detection range: 100%; Hold-time: 5min; Stand-by period: 10min;
Stand-by dinmming level:10%; Lux disabled
Reset Settings
Press button “Shift”, the LED on the top left corner is on to indicate mode selection.
All values / settings in RED are valid for 20 seconds.
Shift Button
Press the buttons to select light output at 80% (at initial 10,000 hours) or 100%.
Power output
Press button “Shift”, the red LED is on for indication.Then press “Tri-level” or “Harvest” to switch.
100% 75%
Tri-level Harvest
Switching between Tri-level and Daylight Harvest
Sensor off & Twilight
Press button “Shift”, the red LED is on for indication. Press button “Twilight”, the function of motion detection is disabled. The function of
photocell is still working, and the product becomes a pure dusk / dawn daylight sensor. Press button “Sensor off”, the function of motion
detection is disabled. The function of photocell is also disabled.

Subject to change without notice. Edition: 1 Mar. 2023 Ver. A0 Page 8/9
Stand-by time (corridor function)
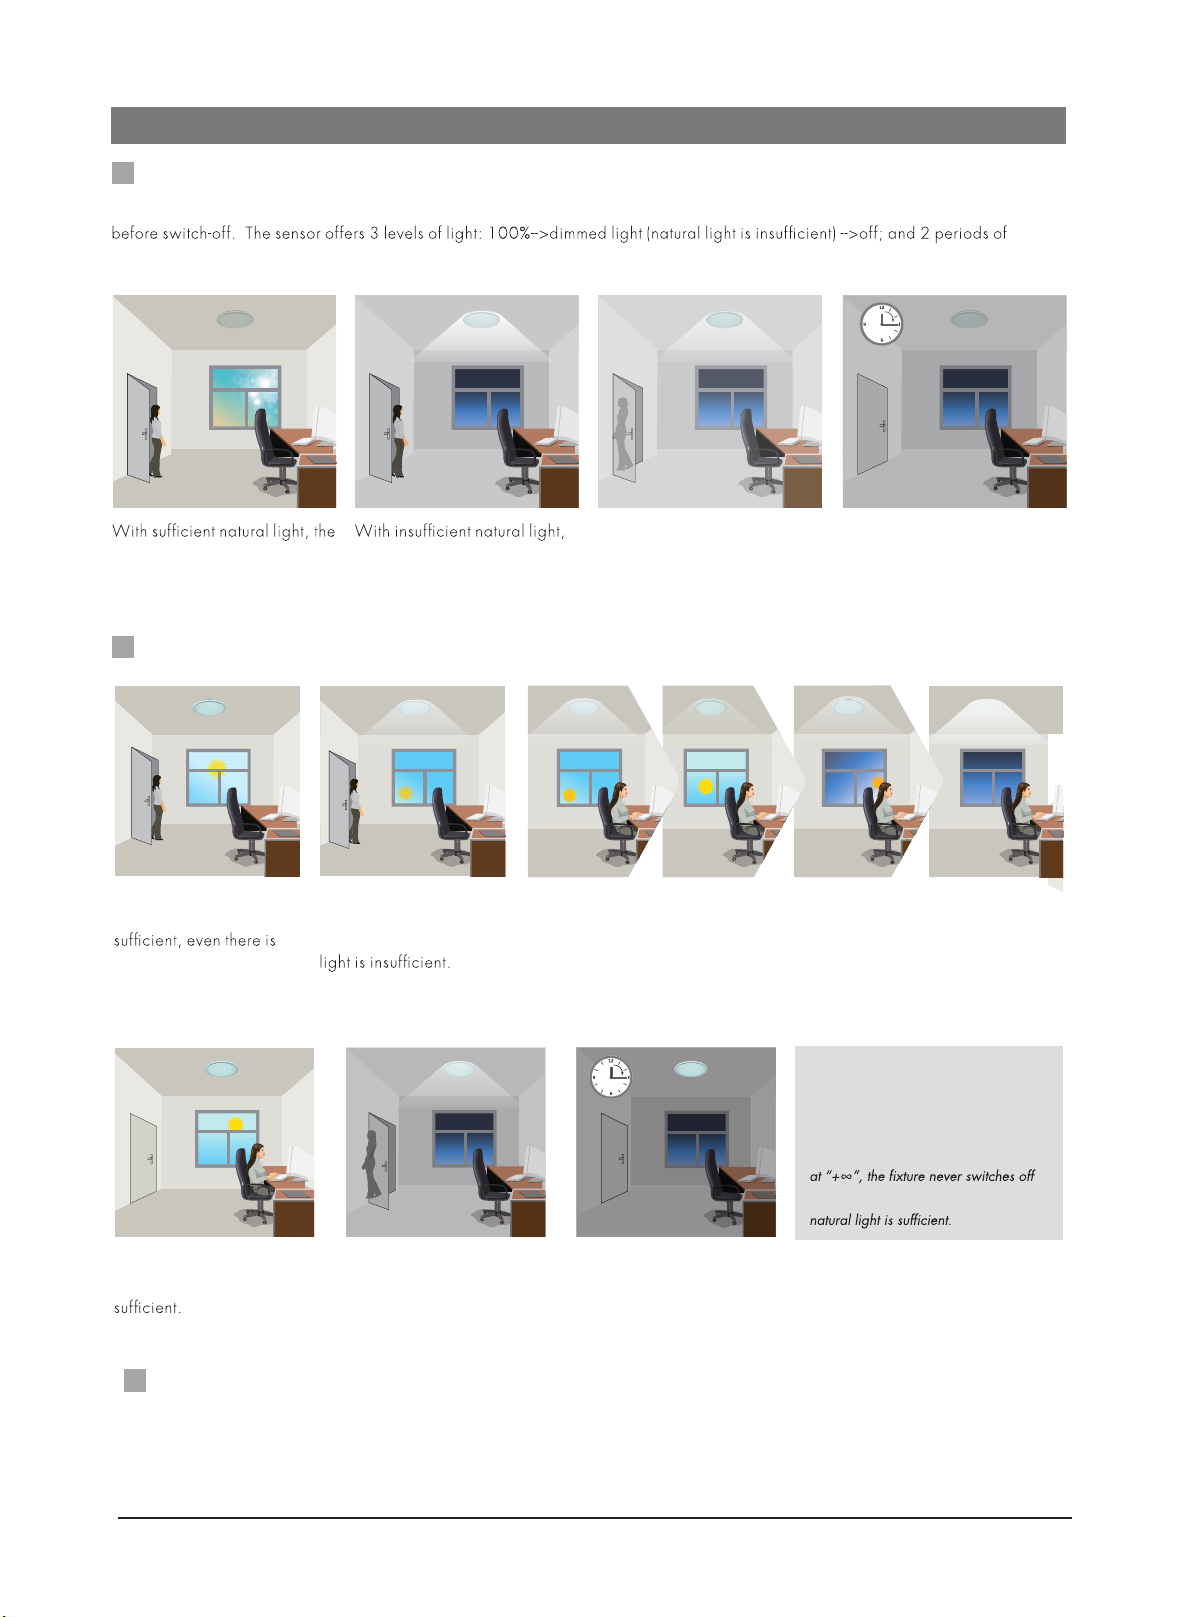
Press buttons in zone “stand-by time” to set the stand-by period at 0s / 10s / 1min / 5min / 10min / 30min / 1h / +∞.
Hold-time
Press buttons in zone “hold-time” to set the hold-time at 2s / 30s / 1min / 5min / 10min / 15min / 20min / 30min.
2. 2s is for testing purpose only, stand-by period and daylight sensor settings are disabled in this mode.
*To exit from Test mode, press button “RESET” or any button in “Hold-time”.
2. Press button “Ambient”, the surrounding lux level is sampled and set as the new daylight threshold.
Ambient daylight threshold
Press buttons in zone“ Daylight threshold” to set daylight sensor at 2Lux/ 10Lux / 50Lux / 100Lux / 300Lux / 500Lux / Disable.
Daylight threshold
network. Other HIR17 will only report sensing events.
50%
Master
Master (HCD038/P)
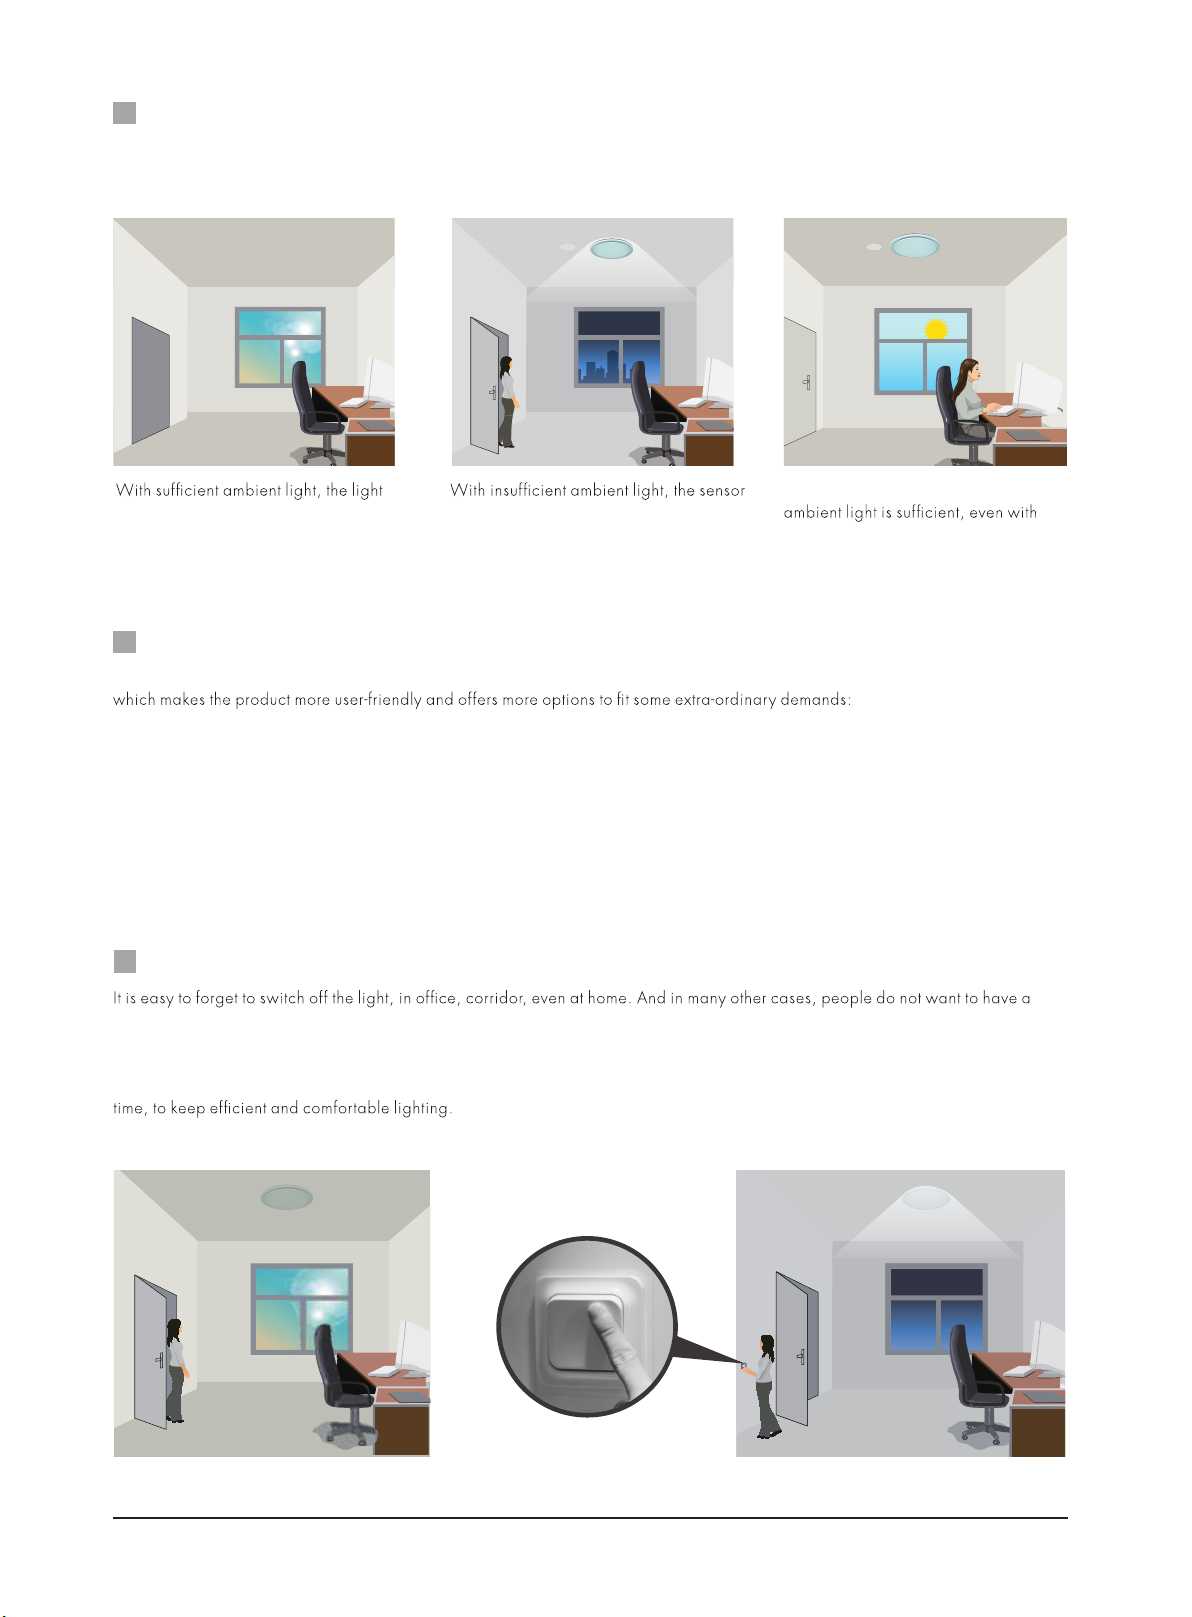
Scene program - 1-key commissioning
1. Press button “Start” to program.
2. Select the buttons in “Detection range”, “Daylight threshold”, “Hold-time”, “Stand-by time”, “Stand-by dimming level” to set all
parameters.
3. Press button “Memory” to save all the settings programmed in the remote control.
4. Press button “Apply” to set the settings to each sensor unit(s).
For example, to set detection range 100%, daylight threshold Disable, hold-time 5min, stand-by time +∞, stand-by dimming level 30%, thesteps should be:
Press button“Start”, button ”100%”, “Disable”, “Shift”,“5min”,“Shift”, “+∞”, “30%”, “Memory”. By pointing to the sensor unit(s) and pressing “Apply”, all
settings are passed on the sensor(s).
Detection range
All buttons in this zone are disabled.
CCT-
CCT+
For Tri-level control, press these two buttons to adjust the light output brightness. Press button “Shift”, the red LED is on for indication.
Press these two buttons to adjust the light output colour temperature.
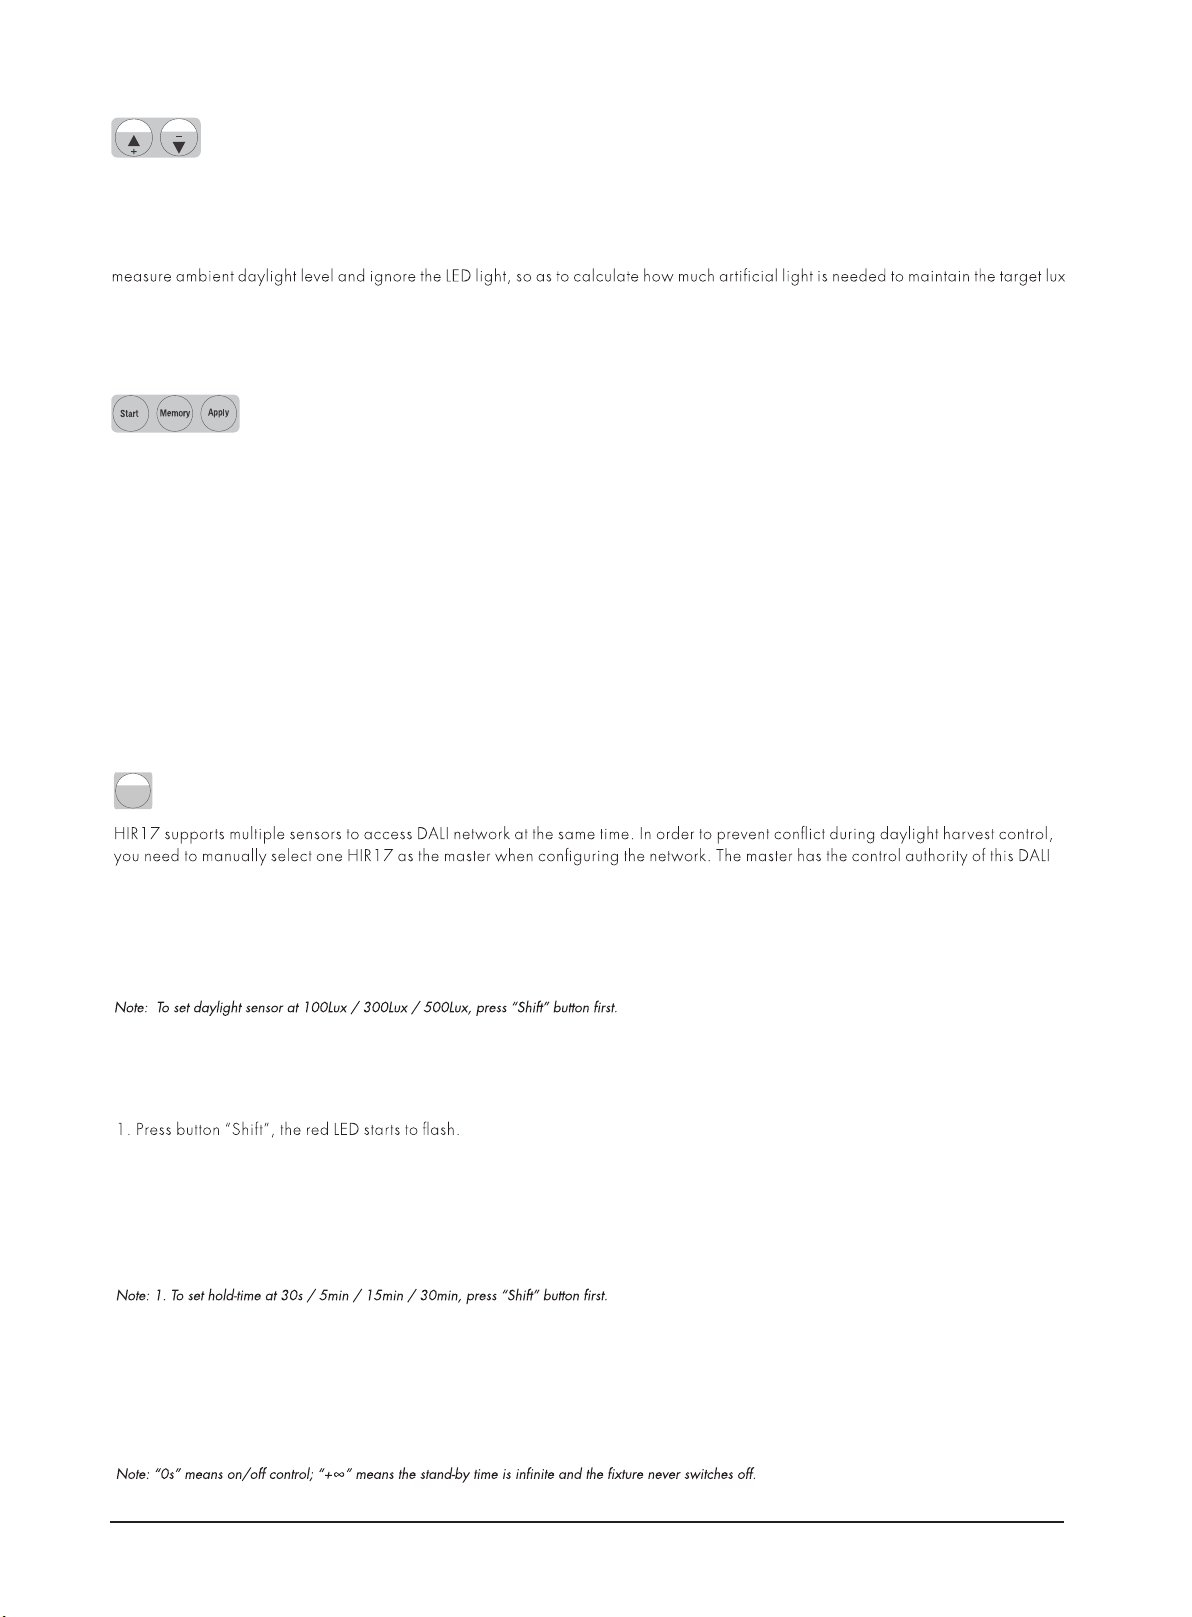
For Daylight Harvest, press these two buttons to adjust the light output brightness and set a new target lux level.The daylight sensor can
level. Press button “Shift”, the red LED is on for indication. Press these two buttons to adjust the light output colour temperature.
Brightness +/-

Subject to change without notice. Edition: 1 Mar. 2023 Ver. A0 Page 9/9
Additional Information / Documents
1. Regarding precautions for PIR sensor installation and operation, please kindly refer to
www.hytronik.com/download ->knowledge ->PIR Sensors - Precautions for Product Installation and Operation
2. Regarding precautions for Photodiode/Photocell Usages, please kindly refer to
www.hytronik.com/download ->knowledge ->Precautions for Photodiode/Photocell Usages
3. Data sheet is subject to change without notice. Please always refer to the most recent release on
www.hytronik.com/products/Motion Sensors ->Built-in HF Sensor
4. Regarding Hytronik standard guarantee policy, please refer to
www.hytronik.com/download ->knowledge ->Hytronik Standard Guarantee Policy
Dual tech & RF mode
Stand-by dimming level
Press the button in zone “stand-by dimming level” to set the stand-by dimming level at 10% / 20% / 30% / 50%.
All buttons in this zone are disabled.
This is a function for Daylight Harvest mode, select a time period and the sensor will do light level measurement and determine / save
the lowest light level (commission line) with 100% on, so as to automatically set the target lux level for daylight harvesting.
For Tri-level Control, All buttons in this zone are disabled.
This manual suits for next models
2
Table of contents
Other Hytronik Lighting Equipment manuals