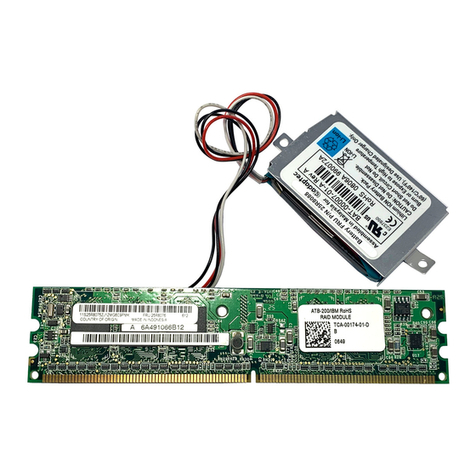
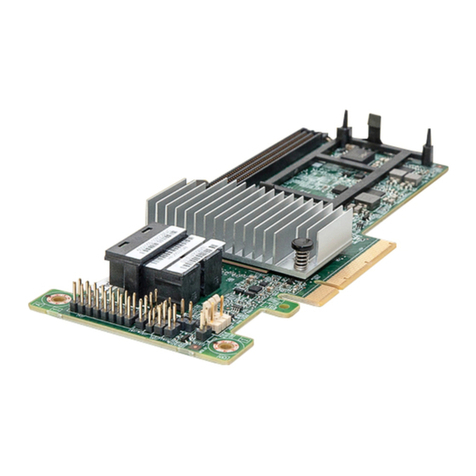
IBM Netfinity ServeRAID-4H Ultra160 Service manual

IBM
®
Netfinity
®
User’s
Reference
ServeRAID
™
-4H Ultra160 SCSI Controller
SC00-N913-20


IBM
®
Netfinity
®
User’s
Reference
ServeRAID
™
-4H Ultra160 SCSI Controller
SC00-N913-20

NOTE: Before using this information and the product it supports, be sure to read the general information under “Appendix. Product
warranties and notices” on page 155.
First Edition (April 2000)
© Copyright International Business Machines Corporation 2000. All rights reserved.
US Government Users Restricted Rights – Use, duplication or disclosure restricted by GSA ADP Schedule Contract
with IBM Corp.

Contents
Safety Information .......................vii
Preface............................xi
How this book is organized.....................xi
Notices used in this book .....................xii
Related publications .......................xii
Chapter 1. Getting started.....................1
Option package contents......................1
Understanding RAID technology ...................1
Stripe-unit size ........................2
Supported RAID levels .....................2
Selecting a RAID level and performance tuning ............10
Drive state descriptions.....................10
Chapter 2. Installing and configuring ServeRAID controllers.......13
Obtaining ServeRAID updates ...................13
Downloadable files from the World Wide Web ............14
Step 1: Installing and cabling a ServeRAID controller...........15
Controller features ......................15
Connector locations ......................15
Using a ServeRAID controller in a server with Hot-plug PCI features ....17
Installing the ServeRAID controller.................17
Connecting external devices ...................21
Step 2: Updating BIOS and firmware code...............21
Step 3: Configuring ServeRAID controllers...............22
Using the ServeRAID Manager program ..............22
Step 4: Installing device drivers...................33
Installing device drivers while installing the operating system .......34
Installing or updating device drivers after installing the operating system. . . 42
Step 5: Installing the ServeRAID Manager program and other utilities.....48
Installing the ServeRAID Manager program .............49
Installing the IPSSEND and IPSMON command-line programs ......53
Step 6: Starting the ServeRAID Manager program ............56
Starting the ServeRAID Manager program in Windows 2000 and Windows
NT ...........................56
Starting the ServeRAID Manager program in NetWare .........57
Starting the ServeRAID Manager program in OS/2...........57
Starting the ServeRAID Manager program in OpenServer, UnixWare, and
Linux...........................58
Chapter 3. Configuring two ServeRAID controllers in a failover
environment (Windows NT 4.0 and Windows 2000 only) .......61
Hardware requirements......................61
Installation guidelines and restrictions ................61
Preparing the controllers .....................62
Connecting the expansion enclosures ................65
Configuring ServeRAID arrays and logical drives ............66
Completing the failover environment installation .............67
Chapter 4. Introduction to IBM ServeRAID Cluster Solution .......69
Chapter 5. Preparing to install or change a cluster solution .......73
© Copyright IBM Corp. 2000 iii

Terms and definitions ......................73
ServeRAID considerations.....................74
Hardware considerations ....................74
Controller considerations ....................74
Array or logical drive considerations ................74
Chapter 6. Updating the ServeRAID BIOS, firmware, and software code 77
Chapter 7. Configuring ServeRAID controllers for clustering ......79
Configuring the controller for Microsoft Cluster Service using Windows NT 4.0 or
Windows 2000 ........................79
Configuring the controller for Vinca High Availability for Novell IntranetWare or
Novell High Availability Server ..................79
Configuring a controller for clustering.................80
Configuring ServeRAID arrays and a logical drive ............82
Chapter 8. Installing the Microsoft Cluster Service software on Windows
NT 4.0 ...........................85
Installing the Microsoft Cluster Service ................85
Creating a ServeRAID disk resource on a Windows NT 4.0 ServeRAID cluster 88
Deleting and re-creating a ServeRAID logical drive resource ........89
Uninstalling MSCS on ServeRAID servers ...............89
Updating ServeRAID software in an MSCS cluster environment .......90
Step 1: Upgrading the IBM ServeRAID Manager program ........90
Step 2: Upgrading the IBM ServeRAID Microsoft Windows NT Cluster
Solution..........................90
Step 3: Upgrading the IBM ServeRAID Windows NT device driver .....91
Step 4: Upgrading the IBM ServeRAID BIOS and firmware........91
Step 5: Upgrading the software for the other server in the cluster .....91
Chapter 9. Installing the Microsoft Cluster Service software on Windows
2000 ............................93
Installing the ServeRAID Manager program ..............93
Installing the Microsoft Cluster Service ................93
Creating a ServeRAID disk resource on a Windows 2000 ServeRAID cluster 96
Deleting and re-creating a ServeRAID logical drive resource ........98
Upgrading the IBM ServeRAID Cluster Solution from Microsoft Windows NT 4.0
to Windows 2000 .......................98
Uninstalling MSCS on ServeRAID servers ...............99
Chapter 10. Monitoring and updating an IBM ServeRAID Cluster Solution 101
Checking the ownership of a physical drive ..............101
Adding logical drives to a cluster ..................102
Validating a cluster .......................103
Viewing merge group numbers and other cluster information .......105
Chapter 11. Using utility programs ................107
Using the ServeRAID Mini-Configuration program ...........107
Viewing the controller status ..................107
Viewing the configuration....................108
Using the advanced configuration functions .............108
Using the IPSSEND command-line program..............110
FlashCopy function (for Windows NT and Windows 2000 only) ......110
Server roll-out functions ....................116
Error-recovery functions ....................118
Problem-isolation and debug functions...............119
iv IBM®Netfinity®User’s Reference: ServeRAID
™
-4H Ultra160 SCSI Controller

RAID Configuration functions ..................122
Using the IPSMON command-line program (NetWare only) ........123
Chapter 12. Solving ServeRAID problems .............125
ServeRAID Manager fails to start (Windows NT and Windows 2000 only) 125
ServeRAID controller messages ..................125
ServeRAID startup (POST) messages ................130
ServeRAID ISPR, BCS, and ECS POST error codes .........131
Rebuilding a defunct drive ....................136
Steps for recovering from defunct drives ..............136
Rebuilding a hot-swap drive...................136
Recovering from an incomplete format of a physical drive.........137
Solving problems in a failover environment ..............138
Recovering from a failure in a failover environment ..........138
Replacing a controller of a failover pair in non-hot-plug PCI slot .....138
Replacing a controller of a failover pair in hot-plug PCI slot .......139
Recovering from a power failure during a failover...........139
Troubleshooting an IBM ServeRAID Cluster Solution ..........139
Recovering from a failed ServeRAID server .............140
Recovering from a failed ServeRAID controller............140
Recovering from a failover in a Microsoft Cluster Service server .....143
Recovering from a failed server in a ServeRAID cluster ........143
Troubleshooting ServeRAID subsystems in a cluster environment.....144
Chapter 13. Getting help, service, and information ..........147
Service support ........................148
Before you call for service ....................148
Getting customer support and service ................149
Using the World Wide Web ...................149
Using electronic support services.................149
Getting information by fax ...................150
Getting help online ......................150
Getting help by telephone ...................150
Getting help around the world ..................151
Purchasing additional services...................152
Enhanced PC support line ...................152
900-number operating system and hardware support line ........152
Network and server support line .................152
Ordering support line services ..................153
Warranty and repair services ..................153
Ordering publications ......................154
Appendix. Product warranties and notices .............155
Warranty Statements ......................155
IBM Statement of Limited Warranty for United States, Puerto Rico, and
Canada (Part 1 - General Terms) ................155
IBM Statement of Warranty Worldwide except Canada, Puerto Rico, Turkey,
United States (Part 1 –General Terms) .............158
Part2-Worldwide Country-Unique Terms .............160
Notices ...........................164
Edition Notice ........................164
Non-IBM Web sites......................165
Year 2000 readiness and instructions ...............165
Trademarks.........................165
Important notes .......................166
Electronic emission notices ....................167
Contents v
Federal Communications Commission (FCC) Statement ........167
Industry Canada Class A emission compliance statement ........167
Australia and New Zealand Class A statement ............167
United Kingdom telecommunications safety requirement ........167
European community directive conformance statement.........168
Taiwan electrical emission statement ...............168
Japanese Voluntary Control Council for Interference (VCCI) statement 168
Index ............................169
vi IBM®Netfinity®User’s Reference: ServeRAID
™
-4H Ultra160 SCSI Controller

Safety Information
Before installing this product, read the Safety Information book.
Antes de instalar este produto, leia o Manual de Informações sobre Segurança.
Před instalací tohoto produktu si přečtěte příručku bezpečnostních instrukcí.
Læshæftet med sikkerhedsforskrifter, før du installerer dette produkt.
Lue Safety Information -kirjanen, ennen kuin asennat tämän tuotteen.
Avant de procéder àl’installation de ce produit, lisez le manuel Safety Information.
Vor Beginn der Installation die Broschüre mit Sicherheitshinweisen lesen.
Przed zainstalowaniem tego produktu należy przeczytać broszurę Informacje Dotyczące
Bezpieczeństwa.
Prima di installare questo prodotto, leggere l’opuscolo contenente le informazioni
sulla sicurezza.
Lees voordat u dit product installeert eerst het boekje met veiligheidsvoorschriften.
Les heftet om sikkerhetsinformasjon (Safety Information) før du installerer dette
produktet.
Antes de instalar este produto, leia o folheto Informações sobre Segurança.
Перед установкой продукта прочтите брошюру по технике безопасности
(Safety Inf rmati n).
© Copyright IBM Corp. 2000 vii

Pred inštaláciou tohto produktu si pre ítajte Informa nú brožúrku o bezpe nosti.
Preden namestite ta izdelek, preberite knjižico Varnostne informacije.
Antes de instalar este producto, lea la Información de Seguridad.
Lässäkerhetsinformationen innan du installerar den här produkten.
Installálás el tt olvassa el a Biztonsági el írások kézikönyvét !
Statement 1:
DANGER
Electrical current from power, telephone, and communication cables is
hazardous. To avoid a shock hazard:
vDo not connect or disconnect any cables or perform installation,
maintenance, or reconfiguration of this product during an electrical
storm.
vConnect all power cords to a properly wired and grounded electrical
outlet.
vConnect to properly wired outlets any equipment that will be attached to
this product.
vWhen possible, use one hand only to connect or disconnect signal
cables.
vNever turn on any equipment when there is evidence of fire, water, or
structural damage.
vDisconnect the attached power cords, telecommunications systems,
networks, and modems before you open the device covers, unless
instructed otherwise in the installation and configuration procedures.
vConnect and disconnect cables as described in the following table when
installing, moving, or opening covers on this product or attached
devices.
To connect:
1. Turn everything OFF.
2. First, attach all cables to devices.
3. Attach signal cables to connectors.
4. Attach power cords to outlet.
5. Turn device ON.
To disconnect:
1. Turn everything OFF.
2. First, remove power cords from outlet.
3. Remove signal cables from connectors.
4. Remove all cables from devices.
viii IBM®Netfinity®User’s Reference: ServeRAID
™
-4H Ultra160 SCSI Controller

Statement 2:
CAUTION:
When replacing the lithium battery, use only IBM Part Number 38L3386 or an
equivalent type battery recommended by the manufacturer. If your system has
a module containing a lithium battery, replace it only with the same module
type made by the same manufacturer. The battery contains lithium and can
explode if not properly used, handled, or disposed of.
Do not:
vThrow or immerse into water.
vHeat to more than 100 C (212 F)
vRepair or disassemble
Dispose of the battery as required by local ordinances or regulations.
Statement 5:
CAUTION:
The power control button on the device and the power switch on the power
supply do not turn off the electrical current supplied to the device. The device
also might have more than one power cord. To remove all electrical current
from the device, ensure that all power cords are disconnected from the power
source.
1
2
Safety Information ix

xIBM®Netfinity®User’s Reference: ServeRAID
™
-4H Ultra160 SCSI Controller

Preface
This book provides information for configuring an IBM
®
Netfinity
®
ServeRAID
™
controller, installing device drivers, and installing and using the ServeRAID utility
programs.
Note: The IBM ServeRAID product can be either a controller on an adapter, such
as the one in this option package, or a controller on the system board of
your server. For consistency in this manual, the ServeRAID product is
referred to as a ServeRAID controller, unless it is specifically noted
otherwise.
To install device drivers and utility programs for an IBM ServeRAID controller
that comes as a standard feature on an IBM Netfinity or PC Server system
board, see the installation instructions and CDs provided with your server for
instructions.
How this book is organized
“Chapter 1. Getting started”on page 1 contains introductory information about the
IBM ServeRAID-4H controller and general information about RAID technology.
“Chapter 2. Installing and configuring ServeRAID controllers”on page 13 explains
the ServeRAID installation and configuration process. You can refer to the
information in this chapter when configuring one or more devices attached to a
ServeRAID controller.
“Chapter 3. Configuring two ServeRAID controllers in a failover environment
(Windows NT 4.0 and Windows 2000 only)”on page 61 contains instructions for
configuring two ServeRAID controllers in a failover environment.
“Chapter 4. Introduction to IBM ServeRAID Cluster Solution”on page 69 through
“Chapter 10. Monitoring and updating an IBM ServeRAID Cluster Solution”on
page 101 contains information for installing and configuring ServeRAID controllers
in a clustering environment.
“Chapter 11. Using utility programs”on page 107 contains instructions for using the
Mini-Configuration, IPSSEND, and IPSMON programs. You can use these
operating-system specific programs to maintain and monitor your ServeRAID
subsystem.
“Chapter 12. Solving ServeRAID problems”on page 125 describes the ServeRAID
POST error codes and startup messages. This chapter also includes some basic
information for rebuilding a defunct drive.
“Chapter 13. Getting help, service, and information”on page 147 provides
information about accessing the IBM HelpCenter and World Wide Web sites to
obtain future code and information updates for the ServeRAID controller.
“Appendix. Product warranties and notices”on page 155 contains warranty
information, product notices, and trademarks.
© Copyright IBM Corp. 2000 xi

Notices used in this book
This book contains notices to highlight information as follows:
vNotes: These notices provide important tips, guidance, or advice.
vAttention: These notices indicate possible damage to programs, devices, or
data. An attention notice is placed just before the instruction or situation in which
damage could occur.
vCaution: These notices indicate situations that can be potentially hazardous to
you. A caution notice is placed just before descriptions of potentially hazardous
procedure steps or situations.
Related publications
The following books are available on the IBM ServeRAID Support CD in the
/BOOKS directory:
vIBM Netfinity ServeRAID-4H Ultra160 SCSI Controller User’s Reference
(4SRAIDUR.PDF)
vIBM Netfinity ServeRAID-3H, ServeRAID-3HB, and ServeRAID-3L Ultra2 SCSI
Controllers Installation and User’s Guide (3SRAIDUG.PDF)
The following booklets are extracted from the IBM Netfinity ServeRAID-4H Ultra160
SCSI Controller User’s Reference and are available on the IBM ServeRAID Support
CD in the /BOOKS directory:
vIBM ServeRAID-4H Ultra160 SCSI Controller Installation Guide (4INSTALL.PDF)
vConfiguring IBM ServeRAID Controllers for Failover (4FAILCFG.PDF)
vInstalling the IBM ServeRAID Cluster Solution (4CLUSTER.PDF)
vUnderstanding IBM ServeRAID Technology (4TECHNOL.PDF)
Note: Use Adobe Acrobat Reader to view these files. The IBM ServeRAID Support
CD has the Acrobat Readers for Microsoft Windows, IBM OS/2, and Linux in
the /BOOKS directory.
If you are installing the IBM ServeRAID Cluster Solution, you might need to refer to
the IBM Shared Disk Clustering Hardware Reference.This book provides general
information about planning and configuring a shared-disk cluster using IBM Netfinity
and PC Server products. It contains illustrations, descriptions, and parts listings for
various high-availability, shared-disk cluster examples.
Note: You can obtain this publication from the IBM Support Web site. See
“Downloadable files from the World Wide Web”on page 14 for additional
information.
xii IBM®Netfinity®User’s Reference: ServeRAID
™
-4H Ultra160 SCSI Controller

Chapter 1. Getting started
This book provides information needed to install and configure an IBM
ServeRAID-4H Ultra160 SCSI controller. This high-performance, redundant array of
independent disk (RAID) controllers are ideally suited for data-storage environments
that require superior performance, flexibility, and reliable data storage. (See
“Controller features”on page 15 for more information.)
You also can use the configuration and reference information in this book to
configure the IBM ServeRAID controllers provided on some IBM Netfinity and PC
Server system boards.
Option package contents
In addition to this book, the ServeRAID option package contains:
vIBM Netfinity ServeRAID-4H Ultra160 SCSI controller
Attention: Do not open the static-protective bag containing the controller until
you are instructed to do so.
vIBM ServeRAID Support Package:
–IBM ServeRAID Support CD
–IBM ServeRAID Device Drivers diskette
–IBM ServeRAID Device Drivers for SCO Operating Systems - UnixWare HBA
and OpenServer BTLD diskette
See “Obtaining ServeRAID updates”on page 13 and “Step 4: Installing device
drivers”on page 33 for more detailed information.
Contact your place of purchase if any items are missing or damaged.
Understanding RAID technology
RAID is the technology of grouping several physical drives in a computer into an
array that you can define as one or more logical drives. Each logical drive appears
to the operating system as a single drive. This grouping technique greatly enhances
logical-drive capacity and performance beyond the physical limitations of a single
physical drive.
When you group multiple physical drives into a logical drive, the ServeRAID
controller can transfer data in parallel from the multiple drives in the array. This
parallel transfer yields data-transfer rates that are many times higher than with
nonarrayed drives. This increased speed makes the system better able to meet the
throughput (the amount of data processed in a given amount of time) or productivity
needs of the multiple-user network environment.
The ability to respond to multiple data requests provides not only an increase in
throughput, but also a decrease in response time. The combination of parallel
transfers and simultaneous responses to multiple requests allows disk arrays to
provide a high level of performance in network environments.
© Copyright IBM Corp. 2000 1

Stripe-unit sizeWith RAID technology, data is striped across an array of physical drives. This
data-distribution scheme complements the way the operating system requests data.
The granularity at which data is stored on one drive of the array before subsequent
data is stored on the next drive of the array is called the stripe-unit size.
You can control the stripe-unit size and maximize the performance of your
ServeRAID controller by setting a stripe-unit size to a value that is close to the size
of the system I/O requests. You can set the stripe-unit size to 8 KB, 16 KB, 32 KB,
or 64 KB. For example, performance in transaction-based environments, which
typically involve large blocks of data, might be optimal when the stripe-unit size is
set to 32 KB or 64 KB. However, performance in file and print environments, which
typically involve multiple small blocks of data, might be optimal when the stripe-unit
size is set to 8 KB or 16 KB.
The collection of stripe units, from the first drive of the array to the last drive of the
array, is called a stripe.
The ServeRAID-4H controller supports 16 physical drives in an array if the
stripe-unit size is set to 32 KB or 64 KB.
Supported RAID levels
Disk arrays are used to improve performance and reliability. The amount of
improvement depends on the application programs that you run on the server and
the RAID levels that you assign to the logical drives.
The ServeRAID controllers support RAID level-0, 1, 1E, 5, 5E, 00, 10, 1E0, and 50.
Understanding RAID level-0
RAID level-0 stripes the data across all the drives in the array. This offers
substantial speed enhancement, but provides no data redundancy. RAID level-0
provides the largest storage capacity of the RAID levels that are offered, because
no room is taken for redundant data or data-parity storage.
RAID level-0 requires a minimum of one drive and, depending upon the level of
firmware and the stripe-unit size, supports a maximum of 8 or 16 drives.
The following illustration shows an example of a RAID level-0 logical drive.
Start with two physical drives.
2IBM®Netfinity®User’s Reference: ServeRAID
™
-4H Ultra160 SCSI Controller

Create an array using the two physical drives.
Then, create a logical drive within that array.
The data is striped across the drives, creating blocks.
Notice that the data is striped across all the drives in
the array, but no redundant data is stored. 12
34
56
78
A physical drive failure within the array results in loss of data in the logical drive
assigned RAID level-0, but only in that logical drive. If you have logical drives
assigned RAID level-1, 1E, 5, or 5E in the same array, they will not lose data.
Note: If you have an array that contains only one physical drive, you can assign
only RAID level-0 to the logical drive in that array.
When you replace a failed drive, the ServeRAID controller can rebuild all the RAID
level-1E and RAID level-5E logical drives automatically onto the replacement
physical drive. However, any data stored in a failed RAID level-0 logical drive is
lost.
Although the risk of data loss is present, you might want to assign RAID level-0 to
one of the logical drives to take advantage of the speed this RAID level offers. You
can use this logical drive to store data that you back up each day and for which
safety is not of primary importance, that is, data that you can re-create easily. You
also might want to use a RAID level-0 logical drive when you require maximum
capacity.
Understanding RAID level-1
RAID level-1 provides 100% data redundancy and requires only two physical drives.
With RAID level-1, the first half of a stripe is the original data; the second half of a
stripe is a mirror (that is, a copy) of the data, but written to the other drive in the
RAID level-1 array.
Chapter 1. Getting started 3

Because the data is mirrored, the capacity of the logical drive when assigned RAID
level-1 is 50% of the array capacity.
The following illustration shows an example of a RAID level-1 logical drive.
Start with two physical drives.
Create an array using the two physical drives.
Then, create a logical drive within that array.
The data is striped across the drives, creating blocks.
Notice that the data on the drive on the right is a copy
of the drive on the left. 11
22
33
44
With RAID level-1, if one of the physical drives fails, the ServeRAID controller
switches read and write requests to the remaining functional drive in the RAID
level-1 array.
Understanding RAID level-1 Enhanced
If you have three or more physical drives in the array, you cannot select RAID
level-1; you can select RAID level-1 Enhanced (RAID level-1E).
RAID level-1E combines mirroring with data striping. This RAID level stripes data
and copies of the data across all of the drives in the array. As with the standard
RAID level-1, the data is mirrored, and the capacity of the logical drive is 50 percent
of the array capacity of the grouping of physical drives in the array.
4IBM®Netfinity®User’s Reference: ServeRAID
™
-4H Ultra160 SCSI Controller

RAID level-1E requires a minimum of 3 drives and, depending upon the level of
firmware and the stripe-unit size, supports a maximum of 8 or 16 drives.
The following illustration is an example of a RAID level-1E logical drive.
Start with three physical drives.
Create an array using the physical drives.
Then, create a logical drive within that array.
The data is striped across the drives, creating
blocks.
Notice that the stripe labeled
.
is the data
stripe and the stripe labeled
..
is the copy of
the preceding data stripe. Also notice that
each block on the mirror stripe is shifted one
drive.
12
6
3
5
4
1
46
5
3
2
*
*
**
**
With RAID level-1E, if one of the physical drives fails, the ServeRAID controller
switches read and write requests to the remaining functional drives in the RAID
level-1E array.
Understanding RAID level-5
RAID level-5 requires a minimum of three physical drives. This RAID level stripes
data and parity across all drives in the array. When you assign RAID level-5 to an
array, the capacity of the array is reduced by the capacity of one drive (for
data-parity storage).
Chapter 1. Getting started 5

RAID level-5 offers both data protection and increased throughput. RAID level-5
gives you higher capacity than RAID level-1, but RAID level-1 offers better
performance.
RAID level-5 requires a minimum of 3 drives and, depending upon the level of
firmware and the stripe-unit size, supports a maximum of 8 or 16 drives.
The following illustration is an example of a RAID level-5 logical drive.
Start with four physical drives.
Create an array using three of the
physical drives, leaving the fourth as a
hot-spare drive.
Then, create a logical drive within that
array.
The data is striped across the drives,
creating blocks.
Notice that the storage of the data
parity (denoted by
.
) also is striped,
and it shifts from drive to drive.
A parity block (
.
) contains a
representation of the data from the
other blocks in the same stripe. For
example, the parity block in the first
stripe contains data representation of
blocks 1 and 2.
12
3
5
7
4
6
8
2
*
*
*
*
6IBM®Netfinity®User’s Reference: ServeRAID
™
-4H Ultra160 SCSI Controller
Table of contents
Other IBM Controllers manuals

IBM
IBM ServeRAID M5014 User manual

IBM
IBM ServeRAID M5110e User manual

IBM
IBM BladeCenter T Series User manual

IBM
IBM 3745 Series User manual

IBM
IBM 3746 User manual

IBM
IBM 3174 User manual

IBM
IBM Netfinity ServeRAID-3H User manual

IBM
IBM 3745 21A User manual

IBM
IBM 3745 130 Setup guide

IBM
IBM TotalStorage User manual

IBM
IBM N6000 Series Manual

IBM
IBM ServeRAID M1215 SAS User manual

IBM
IBM 3270 User manual

IBM
IBM 3746-900 Instruction Manual

IBM
IBM System x Education ServeRAID M1000 Series User manual

IBM
IBM 3708 Technical manual

IBM
IBM Nways 3746-900 Service manual

IBM
IBM SAN Volume Controller 2145-8F4 User manual

IBM
IBM ServeRAID M5210 User manual

IBM
IBM 3745 Series Quick setup guide