manuals.online logo
Brands
  1. Home
  2. •
  3. Brands
  4. •
  5. IBM
  6. •
  7. Storage
  8. •
  9. IBM FC 5026 User manual

IBM FC 5026 User manual

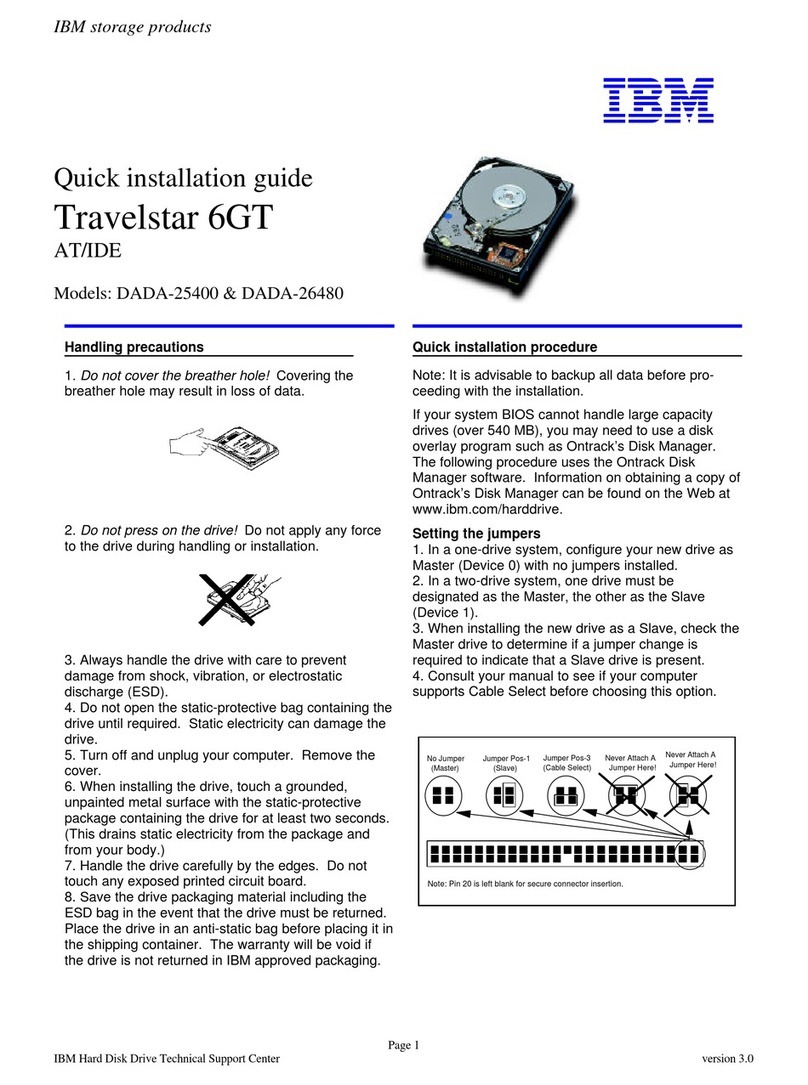
IBM Installation Instructions
Field Feature Bill of Material
PN 29H4179
Exchange Hard Disk Drive (FC 5026)
on Service Processor Type 9577 or 9585
on IBM 3745 Model XXA or 3746 Model 9X0
Written by: J. Michaut
Checked by: J. Thabourin
Approved by: A. Badino
Reviewed by: B. Kelly
3746 PN 29H4179 EC D55911A EC E46709
FFBM 1 of 24 08 DEC 95 16 MAY 97
 Copyright IBM Corp. 1995 1
IBM Installation Instructions
3746 PN 29H4179 EC D55911A EC E46709
FFBM 2 of 24 08 DEC 95 16 MAY 97
2
IBM Installation Instructions
Before Installation (Steps 1-8)
1.0 Machines Affected
3745 Model XXA or 3746 Model 9X0 with:
Feature
Code Designation
5020 Service Processor type 9577, or
5021 Service Processor type 9585 (Only).
This feature should only be applied on the machine serial for which it is specified
.
2.0 Related BMs and ECs
None.
3.0 BMs to be Installed
FFB/M Title
29H4179 Exchange Hard Disk Drive (FC 5026)
4.0 Preparation
Familiarize yourself with the purpose and details of the installation instruction
before negotiating machine time with the customer.
Check all items listed on the BM(s) to determine that all parts have been
received.
Get the up-to-date backup copy of the Service Processor Reference Diskette
and LIC Backup Optical disk.
The exchange of the Hard Disk Drive on Service Processor has no impact on
customer operations.
3746 PN 29H4179 EC D55911A EC E46709
FFBM 3 of 24 08 DEC 95 16 MAY 97
3
IBM Installation Instructions
5.0 Programming
None.
6.0 Purpose and Description
6.1 Purpose To allow the Service Processor type 9577 or 9585 to support the Network Node
Processor operation on the 3746-900 .
6.2 Description
These instructions explain how to exchange the actual HDD by a 2GB HDD. The
exchange of the Hard Disk Drive is divided into four parts:
1. Saving the Service Processor Hard Disk contents on the Optical Disk (Dura-
tion 2 Hrs).
2. Exchanging the Hard Disk Drive.
3. Updating the System Program.
4. Restoring the Service Processor Hard Disk from the Optical Disk (Duration 1.5
Hrs).
7.0 Installation Time
FFB/M Machine Hrs System Hrs Nbr. of CE
29H4179 00.0 00.0 1
8.0 Tools/Material Required
None.
3746 PN 29H4179 EC D55911A EC E46709
FFBM 4 of 24 08 DEC 95 16 MAY 97
4
IBM Installation Instructions
Installation (Steps 9-12)
9.0 Safety
None.
10.0 Details of Installation.
Is the SP installed in a Controller Expansion?
NO, go to 10.1, “Saving the Service Processor Hard Disk on the Optical
Disk.”
YES, continue with next step.
1. Open the front and rear doors of the Controller Expansion
10.1 Saving the Service Processor Hard Disk on the Optical
Disk. Very Important
This function is available from the Service Processor Installation Diskette 1,
use the backup optical disk to save the hard disk data and can take up to 2
hours
If the Service Processor data has been already saved on the backup optical
disk, this procedure can be bypassed.
Are the Service Processor data already saved on the backup optical disk?
1. YES, go to 10.2, “Shut-down and Power OFF the Service Processor” on
page 6
2. NO, continue with next step.
Shut-down and Power OFF the Service Processor:
1. If the Service Processor is operational, use the following procedure:
a. On the MOSS-E view window click on Program
b. Click on Shut down, then enter the Service Processor mainte-
nance password (default is IBM3745) and click on OK.
You are now able to power OFF the Service Processor.
2. Power OFF the Service Processor.
3746 PN 29H4179 EC D55911A EC E46709
FFBM 5 of 24 08 DEC 95 16 MAY 97
5
IBM Installation Instructions
3. Install the Service Processor Installation diskette 1. in the diskette
drive.
4. Power ON the Service Processor.
Backup the HDD on the Optical Disk:
5. Install the backup optical disk in the optical drive.
6. On the first screen displayed, press Enter
7. From the primary window select option Save hard disk and follow the
prompts.
Note: Wait for the message: 'Operation successfully completed'.
8. At the end, select Exit from the primary window and follow the prompts:
On prompt, remove the Service Processor Installation diskette 1,
Remove the backup optical disk from the optical drive.
Secure then for further use.
10.2 Shut-down and Power OFF the Service Processor
1. On the MOSS-E view window click on Program
2. Click on Shut down, then enter the Service Processor maintenance pass-
word (default is IBM3745) and click on OK.
3. Remove any media (Diskette or Optical Disk) from the drives.
4. Power OFF the Service Processor (Control Unit and Display).
Service Processor type ?
9577, go to 10.3, “Replacing the Hard Disk Drive on SP Type 9577..”
9585, go to 10.4, “Replacing the Hard Disk Drive on SP Type 9585.” on
page 13.
10.3 Replacing the Hard Disk Drive on SP Type 9577.
CAUTION
Before removing any FRU, power-off the Service Processor, unplug all power
cords from the electrical outlets, and disconnect any interconnecting cables.
On the rear side of the Service Processor:
1. Unplug the Power cord,
2. the Keyboard and Mouse cables connectors,
3. the LAN cable connector,
4. the Display cable connector and
3746 PN 29H4179 EC D55911A EC E46709
FFBM 6 of 24 08 DEC 95 16 MAY 97
6
IBM Installation Instructions
5. the Modem cable connector.
Is the SP installed in a Controller Expansion?
NO, go to 8
YES, continue with next step.
On the rear side of the Controller Expansion:
6. Slide the base unit from the Controller
Expansion
5
4
3
2
1
Figure 1. Removing the Service Processor Unit from
the Controller Expansion (Rear Side)
7. Take the unit and put it down on a table.
8. Unlock the cover on the front of the
Service Processor base unit.
9. Loosen the cover screws on the back of
the Service Processor. You might need to
use a screwdriver or a coin to turn the
screws if they are too tight.
3746 PN 29H4179 EC D55911A EC E46709
FFBM 7 of 24 08 DEC 95 16 MAY 97
7
IBM Installation Instructions
Remove the cover:
10. Slide the cover toward the front approxi-
mately 25 mm (1 in.).
11. Lift the cover off.
Remove the drive retainer:
12. Press the latch.
13. Pivot the drive retainer downward.
3746 PN 29H4179 EC D55911A EC E46709
FFBM 8 of 24 08 DEC 95 16 MAY 97
8
IBM Installation Instructions
Remove the hard disk drive:
14. Locate the hard disk drive (bay 4) on the
right hand side.
15. Disconnect the Power and Signal cables
from the hard disk drive (Leave the termi-
nator on the drive).
16. Slide the drive forward and out of the bay
(Lift and hold the latch), then
17. place it in a safe place to avoid physical
and ESD damage.
Prepare the drive for installation:
18. Touch the static-protective package to any
unpainted metal surface on the Service
Processor, then remove the drive from the
static-protective package.
19. Check that SCSI ID is set to 6 (Jumpers
should be in positions .2/ and .3/).
Compare with the figure below.
Note: The jumper in position .4/ (Illus-
trated above) is the motor-start. The
jumper should be in place to allow the
hard disk motor to start instantly when you
power-on the system.
3
4
1 2
Figure 2. Jumpers location for SCSI ID 6.
3746 PN 29H4179 EC D55911A EC E46709
FFBM 9 of 24 08 DEC 95 16 MAY 97
9
IBM Installation Instructions
20. Install the rail under the drive, using the
four screws.
21. Slide the new drive completely into the
bay (4).
If the drive does not slide all the way into
the Service Processor, it might be upside
down.
Connect the cables to the drive:
22. Connect the signal cable to the drive, with
the terminator in place.
23. Connect the four-wire power-supply cable,
if required, to the drive.
If you have difficulty connecting a cable,
turn the cable connector over and try
again; cable connectors are keyed and
connect only one way.
Reinstall the drive retainer:
24. Place the bottom edge of the drive retainer
on the tabs that stick up from the bottom
of the Service Processor frame.
25. Pivot the drive retainer up until it snaps in
place over the latch.
3746 PN 29H4179 EC D55911A EC E46709
FFBM 10 of 24 08 DEC 95 16 MAY 97
10
IBM Installation Instructions
Install the cover on the Service Processor:
26. Place the cover on the Service Processor,
leaving approximately 25 mm (1 in.) of
space between the edge of the cover and
the back of the Service Processor.
27. Slide the cover to the back of the Service
Processor until it is completely on.
28. Tighten the cover screws on the back of
the Service Processor.
29. Lock the cover on the front of the Service
Processor.
3746 PN 29H4179 EC D55911A EC E46709
FFBM 11 of 24 08 DEC 95 16 MAY 97
11
IBM Installation Instructions
30. Reinstall the Service Processor unit at its original place.
On the rear side of the Service Processor:
31. Replug the Power cord,
32. the Keyboard and Mouse cables connectors,
33. the LAN cable connector,
34. the Display cable connector and
35. the Modem cable connector.
Go to 10.5, “Updating the System Program.” on page 21
3746 PN 29H4179 EC D55911A EC E46709
FFBM 12 of 24 08 DEC 95 16 MAY 97
12
IBM Installation Instructions
10.4 Replacing the Hard Disk Drive on SP Type 9585.
CAUTION
Before removing any FRU, power-off the Service Processor, unplug all power
cords from the electrical outlets, and disconnect any interconnecting cables.
On the rear side of the Service Processor:
1. Unplug the Power cord,
2. the Keyboard and Mouse cables connectors,
3. the LAN cable connector,
4. the Display cable connector and
5. the Modem cable connector.
Is the SP installed in a Rack?
NO, go to 8 on page 14
YES, continue with next step.
On the front side of the 3746-9x0:
6. Slide the base unit from the rack.
7. Take this unit and put it down on a table.
3746 PN 29H4179 EC D55911A EC E46709
FFBM 13 of 24 08 DEC 95 16 MAY 97
13
IBM Installation Instructions
Remove the front cover of the Service Processor:
8. Unlock the cover.
9. Grasp the front cover at the bottom and firmly pull it away from the server.
10. Unhook the top corners of the cover from the SP.
1234567
Remove the side cover:
11. Pivot the side cover away from the front of the SP.
12. Pull the cover forward.
13. Place the cover in a safe place so that the fan is protected from possible
damage.
Remove the metal drive retainer
14. Press down on the two top latches.
15. Pull the retainer out from the server.
16. Lift the retainer up.
3746 PN 29H4179 EC D55911A EC E46709
FFBM 14 of 24 08 DEC 95 16 MAY 97
14
IBM Installation Instructions
17. Unplug the SCSI cable from the system board. Release the SCSI cable
from the clip on top of the power supply by turning the top of the clip.
Tilt out the power supply:
CAUTION:
When you tilt out the power supply, do not let it drop. Personal injury or
damage to the system might result.
18. Disconnect the twisted power cables from the power supply.
19. Unscrew the spring-loaded power supply retaining knob until it releases.
20. Place one hand on top of the server for support.
21. Tilt out the power supply with the other hand. (Be sure the power cord is
removed from the back of the server before you try to tilt out the power
supply.)
Remove the drive:
22. Find the drive you plan to remove.
23. Disconnect the cables from the back of the drive.
24. Slide the drive out of the server and store it in a safe place.
3746 PN 29H4179 EC D55911A EC E46709
FFBM 15 of 24 08 DEC 95 16 MAY 97
15
IBM Installation Instructions
25. Touch the static-protective package to any unpainted metal surface on the
Service Processor, then remove the drive from the static-protective
package.
Prepare the drive for installation:
26. Check that SCSI ID is set to 6 (Jumpers should be in positions .2/ and
.3/). Compare with the figure below.
3746 PN 29H4179 EC D55911A EC E46709
FFBM 16 of 24 08 DEC 95 16 MAY 97
16
IBM Installation Instructions
3
4
1 2
Figure 3. Jumpers location for SCSI ID 6.
Note: The jumper in position .4/ (Illustrated above) is the motor-start.
The jumper should be in place to allow the hard disk motor to start
instantly when you power-on the system.
27. Install the rail under the drive, using the four screws.
28. Align the rails on the drive tray with the guide rails on each side of the
bay.
29. Position the drive so that the connector is facing the rear of the server.
30. Slide the drive tray into the bay until it stops.
Connect the cables to the drive:
31. Align the connector on the SCSI cable with the connector on the back of
the drive. (You might need to slide the drive forward slightly to manipulate
the cable.)
32. Connect the SCSI cable to the drive.
3746 PN 29H4179 EC D55911A EC E46709
FFBM 17 of 24 08 DEC 95 16 MAY 97
17
IBM Installation Instructions
33. Attach the available power-cable connector to the back of the drive. If
there is no available connector on the power cable, use one of the power
cables found in the storage trays.
34. If you took the power cable out of the clip on the bottom of the server,
reroute it back under the clip.
Reinstall the power supply:
35. Carefully move the cables out of the way.
36. Tilt the power supply into the server.
37. Press in the retaining knob and turn it to the right until it is tight.
38. Connect all twisted power cables to the power supply.
Note: These cables do not have to be connected in a specific order or to
a particular connector. All of the cables are identical, and all of the con-
nectors are identical.
39. Plug the SCSI cable connector into the connector on the system board.
40. Route the SCSI cable through the fastener on the top of the power supply.
Replace the drive retainer:
3746 PN 29H4179 EC D55911A EC E46709
FFBM 18 of 24 08 DEC 95 16 MAY 97
18
IBM Installation Instructions
41. Align the tabs on the drive retainer with the bottom of the server.
42. Insert the tabs on the retainer plate into the slots at the bottom of the
server.
43. Pivot the retainer into position.
44. Push the retainer until it clicks into place.
Note: Be careful not to damage the hardware around the fan on the side
cover when installing the covers.
Replace the side cover:
45. Align the rear of the side cover with the groove on the rear of the frame.
46. Align the groove at the top of the side cover with the top of the frame.
47. Push the side cover to close it.
Replace the front cover:
48. Slide the top posts into the holes at the top of the server.
49. Firmly press the bottom of the front cover, one corner at a time until it
snaps into place.
50. Lock the front cover.
3746 PN 29H4179 EC D55911A EC E46709
FFBM 19 of 24 08 DEC 95 16 MAY 97
19
IBM Installation Instructions
Note: If you ever move your system, be sure not to jar or pull on the front
cover. Security features on the cover will respond as if someone is trying
to break into your server, giving you an error message.
1234567
51. Reinstall the Service Processor at its original place.
Important
Blocking the air vents can cause overheating, which will result in a
malfunction or permanent damage. Therefore, be sure to maintain a
clearance of at least 51 mm (2 in.) on all sides of the server to allow
for air circulation.
On the rear side of the Service Processor:
52. Replug the Power cord,
53. the Keyboard and Mouse cables connectors,
54. the LAN cable connector,
55. the Display cable connector and
56. the Modem cable connector.
Go to 10.5, “Updating the System Program.” on page 21
3746 PN 29H4179 EC D55911A EC E46709
FFBM 20 of 24 08 DEC 95 16 MAY 97
20

Other IBM Storage manuals

IBM DTLA-305040 - Deskstar 41.1 GB Hard Drive User manual

IBM

IBM DTLA-305040 - Deskstar 41.1 GB Hard Drive User manual

IBM DMDM-10340 User manual

IBM

IBM DMDM-10340 User manual

IBM DARA-206000 - Travelstar 12 GB Hard Drive User manual

IBM

IBM DARA-206000 - Travelstar 12 GB Hard Drive User manual

IBM Slicestor 2584 User manual

IBM

IBM Slicestor 2584 User manual

IBM SAN384B-2 Manual

IBM

IBM SAN384B-2 Manual

IBM System storage DS6000 Series User manual

IBM

IBM System storage DS6000 Series User manual

IBM FlashSystem 720 Instruction Manual

IBM

IBM FlashSystem 720 Instruction Manual

IBM 31P8128 User manual

IBM

IBM 31P8128 User manual

IBM magstar mp 3570 Setup guide

IBM

IBM magstar mp 3570 Setup guide

IBM IC35L020 - Deskstar 20 GB Hard Drive User manual

IBM

IBM IC35L020 - Deskstar 20 GB Hard Drive User manual

IBM 4mm DDS-2 Tape Autoloader User manual

IBM

IBM 4mm DDS-2 Tape Autoloader User manual

IBM SAN384B-2 Manual

IBM

IBM SAN384B-2 Manual

IBM TotalStorage 3580 L33 User manual

IBM

IBM TotalStorage 3580 L33 User manual

IBM TS4300 3555 User manual

IBM

IBM TS4300 3555 User manual

IBM DR550 User manual

IBM

IBM DR550 User manual

IBM ESS 5000 SC Series Installation instructions

IBM

IBM ESS 5000 SC Series Installation instructions

IBM TotalStorage IP Storage 200i 110 User manual

IBM

IBM TotalStorage IP Storage 200i 110 User manual

IBM XIV STORAGE SYSTEM Manual

IBM

IBM XIV STORAGE SYSTEM Manual

IBM Tape Library Magstar 3494 Manual

IBM

IBM Tape Library Magstar 3494 Manual

IBM DTCA-23240 - Travelstar 3.2 GB Hard Drive User manual

IBM

IBM DTCA-23240 - Travelstar 3.2 GB Hard Drive User manual

IBM SAN192C-6 Manual

IBM

IBM SAN192C-6 Manual

IBM Travelstar VP User manual

IBM

IBM Travelstar VP User manual

IBM DDRS-39130 - Ultrastar 9.1 GB Hard Drive User manual

IBM

IBM DDRS-39130 - Ultrastar 9.1 GB Hard Drive User manual

IBM TotalStorage 3494 Tape Library Manual

IBM

IBM TotalStorage 3494 Tape Library Manual

Popular Storage manuals by other brands

Sony MRW68E/D1/181 - Pro Duo USB Limited warranty

Sony

Sony MRW68E/D1/181 - Pro Duo USB Limited warranty

Linksys NSS4000 Series Administrator's guide

Linksys

Linksys NSS4000 Series Administrator's guide

Compaq MSL5026 reference guide

Compaq

Compaq MSL5026 reference guide

Verbatim 96527 user guide

Verbatim

Verbatim 96527 user guide

Hitachi G1000 user guide

Hitachi

Hitachi G1000 user guide

CRU Data Express DX175 user manual

CRU

CRU Data Express DX175 user manual

HP J3278B - SureStore CD-ROM Server/Tower 7 NAS... Administrator's guide

HP

HP J3278B - SureStore CD-ROM Server/Tower 7 NAS... Administrator's guide

Spectra T950 user guide

Spectra

Spectra T950 user guide

Ranger design N5-PS20-8 installation guide

Ranger design

Ranger design N5-PS20-8 installation guide

archgon MH-3231-U3V3 Sphere III manual

archgon

archgon MH-3231-U3V3 Sphere III manual

Transcend JetFlash 128MB-256MB JetFlash user manual

Transcend

Transcend JetFlash 128MB-256MB JetFlash user manual

Ciprico MV 4440 user manual

Ciprico

Ciprico MV 4440 user manual

HP Surestore 6164 - Switch user guide

HP

HP Surestore 6164 - Switch user guide

Western Digital MY PASSPORT AIR user manual

Western Digital

Western Digital MY PASSPORT AIR user manual

Dell PowerVault 120T user guide

Dell

Dell PowerVault 120T user guide

Western Digital ArmorLock Encrypted NVMe user manual

Western Digital

Western Digital ArmorLock Encrypted NVMe user manual

Seagate BARRACUDA ST8000DM004 product manual

Seagate

Seagate BARRACUDA ST8000DM004 product manual

Nexto Di NVS1501 user guide

Nexto Di

Nexto Di NVS1501 user guide

manuals.online logo
manuals.online logoBrands
  • About & Mission
  • Contact us
  • Privacy Policy
  • Terms and Conditions

Copyright 2025 Manuals.Online. All Rights Reserved.