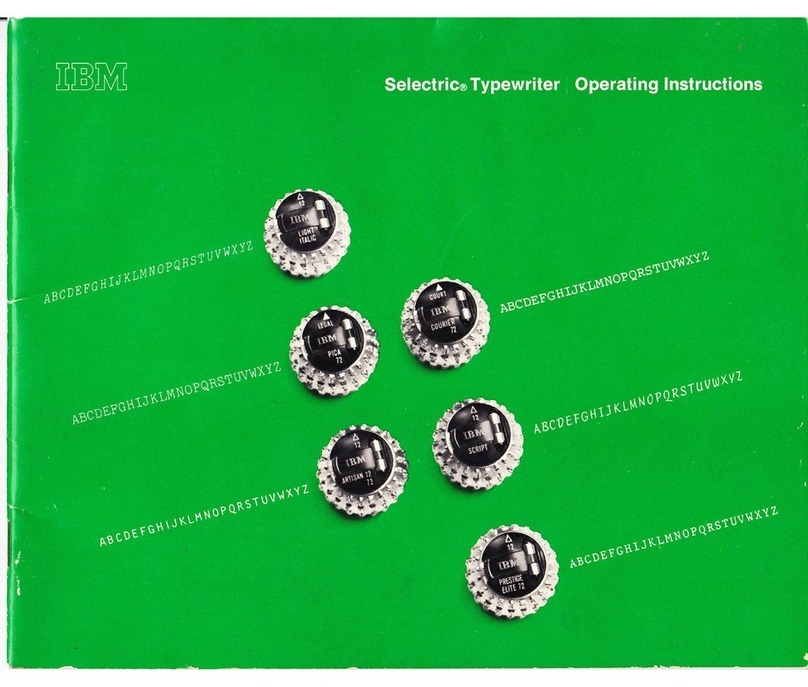
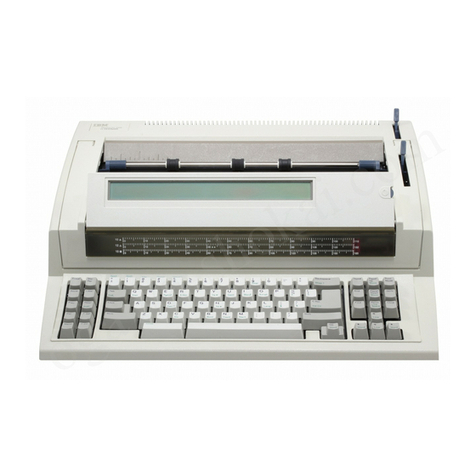
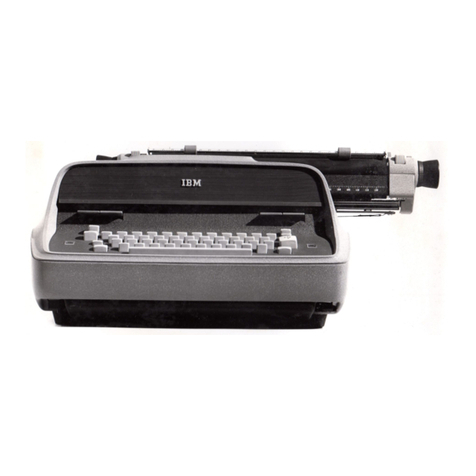
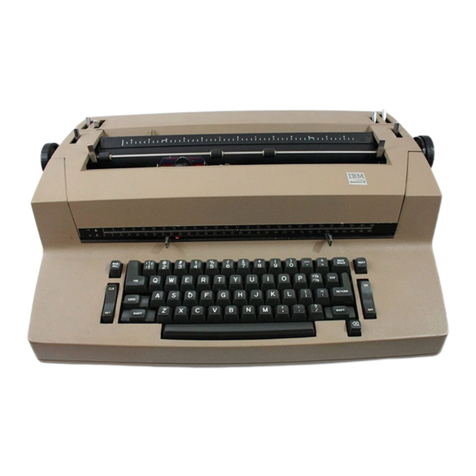
IBM Selectric User manual

Selectric
I/O
®
KeyboBrdless
Printer
Field
Engineering
Maintenance
Manual
en
CD
-
CD
n
-
"1
....
n
-
........
c
:IC
CD
~
a
III
"1
s:L
-
CD
..
..
."
"1
....
::I
-
CD
"1

Selectric®
Vo
Keyboardless
Printer
Field
Engineering
Maintenance Manual

Major
Revision (February
1966)
This
edition,
225-3207-2,
is
a reprint
of
225-3207-1
with
the
following supplements inserted:
529-4502-0
529-4505-0
529-4509-0
529-4517-0
'529-4512-0
Copies
of
this
and
other
IBM
publ
ications
can
be
obtained
through
IBM
Branch
Offices.
A form has
been
provided
at
the
back
of
this pubI
ication
for
readers'
comments.
If
the
form has
been
detached,
comments may
be
directed
to:
IBM
Product Publ
ications,
P.
O.
Box
9592,
Raleigh,
North
Carolina
27603

FE
Supplement Console Printing Unit
System
Unit
____________
-=-_-:-
Re:
Form
No.
________
--'2=2:..:5_-~32-0.;...7--...,2
This Supplement No.
______
--'S.,.::.2.;...6_-3_0:.,:0-:1...,.--':-0
Date:
____________
M_a_rc_h_1_5.:....,
...,.1_9_6_6
Previous
Supplement
Nos.
________
.:....N..:..;o:;.:.n=e
This
supplement,
Form
526-3001-0,
presents
the
additional
reference
data
and procedures
needed
for the modified
"5electri
c"
I/O
Keyboordless Printing Unit
that
serves
as
a
con-
sole printer for
System/360.
Replace the present contents sheet with
the
new contents
sheet,
and insert the
text
pages
between
page
4-36
and the
index.
IBM Corp.,
Product
Publications
Dept.,
P. O.
Box
9592, Raleigh,
N.
C. 27603
PRINTED
IN
U.S.A.

Section
1
Lubrication
General
Procedure
Lubrication
Procedure
Improved
Lubrication
Printer
Contact
Locations
I
nspection
Procedure
First
Inspection
Period.
Second
I
nspection
Period
Third
Inspection
Period.
Fourth
Inspection
Period
Motor
and
Drive
Section
2
Adjustments
Selection
Mechanism
Latch
Pusher Assembly
Printer
Selection
Magnets.
Cycle
Clutch
Trip
Mechanism.
Cycle
Clutch
Latch
Inhibitor.
Print
Feedback
Contect
Assembly,
C2
Shift
Mechanism.
•
Shift
Magnet
AssembJy •
Cycle
Clutch
Mechanism
Shift
Contact
Assembly.
Carrier
and
Rocker
Mechanism
Alignment.
Print
Mechanism.
Print
Mechanism
(Stick
Shift)
.
Escapement
Mechanism.
Mainspring
and Cords
Operational
Control
Mechanism.
Operational
Magnet
Assembly.
Operational
Contact
and
Latch
Assembly
Operational
Feedback
Contacts
Backspace
Mechanism
Spacebar
Mechanism
Carrier
Return
Mechanism.
Indexing
Mechanism
,
Tabulator
Set
and
Clear
Mechanism
Tabulator
Mechanism
(Late)
Tabulation
Mechanism
.
Margin
Control
Mechanism
Paper
Feed
Mechanism.
Ribbon
Med:-ani~m
Ribbon
Shift
Mechanism
Index
Selection
Solenoids.
Vertical
Forms Control
End of Form
Contact.
Cover
Adjustment
TABLE
OF
CONTENTS
1
1
6-1
8
10
10
10
1-11
1-12
2-1
2-1
2-2
2-3
2-5
2-6
2-6
2-7
2-8.1
2-10
2-10
2-12
2-16
2-27
2-31
2-32
2-34
2-35
2-38
2-40
2-40
2-41
2-41
2-42
2-45
2-47
2-48
2-50
2-51
2-54
2-56
2-57
2-59
2-59
2-60
2-60
Section
3
Removals
Cycle
Clutch
and
Cycle
Shaft Removal
Belt
Replacement
Rotate Spring
Replacement
•
Lower Ball
Socket
and
Tilt Ring
Removal.
Rotate Tape Repl
acement
.
Tilt Tape
Replacement.
Rotate
Selection
Differential
Removal.
Tilt
Selection
Differential
Removal
Differential
Plate
Removal
Selector
Bail Removal.
Print
Magnet
Assembly Removal.
Latch Pusher
Removal.
Shift
Magnet
Assembly Removal
Backspace
Rack
Removal.
Shift
Arm
Removal.
Operational
Cam
Check
Pawl
Escapement Cam
Follower
Removal.
Operational
Cam
Follower
•
Operational
Contact
Removal
Operational
Magnet
Assembly Removal
Operational
Latch
Bracket
Removal
Shift
Cam Removal
Operational
Shaft
Removal •
Operational
Interposer
Bracket
Removal
Carrier
Shoe
Removal.
Carrier
and
Rocker
Removal.
Cycle
CI
utch
Pulley
Removal
Cycle
Clutch
Pulley
Removal (Late)
Cord
Replacement.
Backspace
Spacing
Print Escapement
Shift
or Enter
Tab
Mechanism
Carrier
Return
Index
Section
4
Service
Index
Operational
Area
in
Output
Mode
Operational
Area
•
Mal-Selection
(Flow
Chart)
.
Extra
Cycles
(Mechanical
Keyboard
Onl
y)
Flicking
(Mechanical
Keyboard
only)
Selection
System
Check
forMal-Selection
Print
Magnets,
Print
Area
in
Output
Mode
Cycle
Clutch
Adjustments
and
"Special
Notes!!"
Tapes
Keyboard Lockup
Transmit Errors .
3-1
3-2
3-4
3-4
3-5
3-6
3-6
3-7
3-7
3-8
3-9
3-9
3-10
3-10
3
...
10
3-10
3-10
3-11
3-11
3-11
3-12
3-13
3-13
3-13
3-13
3-14
3-15
3-15
3-15
4-1
4-3
4-5
4-7
4-9
4-10
4-11
4-12
4-13
4-14
4-17
4-17
4-18
4-19
4-20
4-24
4-25
4-25

Form
225-3207-2
Page
Revised
3/15/66
By
FES
S26-3001-0
Machine
Lockup.
Fai Iure
to
Start
.
Contact
Assemblies
Tool List
Preventive
Maintenance
Olsa
Olsa
Service
Hints •
Safety
Scoping Procedures with
Olsa
Selectric
I/O
Specifications
4-26
4-26
4-27
4-27
4-28
4-29
4-29
4-30
4-30
4-32
Selectric
I/O
Modes of
Operations.
Osc
ilIoscope Interpretations
I/O
Component Location .
Section
5
4-32
4-32
4-36
Console
Reduced-Function
Printing
Unit
Lubrication
Adjustments·
Removals •
5-1
5-1
5-4

Section
1.
Lubrication
GENERAL PROCEDURE
Power
clean
the
printer
with
the
covers
removed.
Clean
the
feed
rolls,
platen,
and
deflector.
Unless
otherwise
stated,
all
parts
of
the
printer
should be
inspected
and
lubricated
once
every
three
months.
NOTE:
Lubrication
must be
applied
judiciously
to
el
iminate
excessive
quantities
and
prevent
migration
or
spin-off
into
electrical
con-
tacts.
LUBRICATION
Figures 1 through 7 show
the
points
that
require
lubrication.
The number
references
require
IBM
#10. The
letter
references
require
IBM
#23. Points
that
do
not
require
lubrication
every
three
months
are
identified
with
the
required
frequency
in
the
ref-
erence
list.
A rule
of
thumb should be "All
bearing
areas
having
a
sliding
motion
use
IBM
#23
and
all
bearing
areas
having
rotational
motion use
IBM
#10 unless
other-
wise
specified".
Machines
with
power
on
24
hours
daily
require
more
frequent
lubrication
than
ma-
chines
used for
single-shift
operation.
The following
areas
are
primarily
affected
by
idling
time,
since
only
the
operational
shaft
is
driven:
1.
Motor
and
motor
pulley
2.
Cycle-clutch
spring
and
arbor
3.
Driven-pulley
hub
and
bearing
4.
Operational
cam
bearings
5.
Right-hand
operational
shaft
and
shift cam
bearing
6.
Shift-clutch
spring
and
arbor.
Since
these
machines
are
hot
24
hours
daily,
some
lubricant
evaporation
can
be
ex-
pected
in
areas
not
driven
during
idling,
however,
they
are
not
nearly
so
affected
as
items 1 through
6.
Where
power
is
on
24
hoursdaily,
we recommend
lubricating
these
items
every
six
weeks·.
1-1

15
13
10
II
FIGURE
1.
Bottom View
Of
The Printer
IBM
#10
1.
Cycle-clutch
pawl
2.
Selector
bail
roller
pivots
3.
Negative-five
bail roller pivot
4.
Actuating-arm
pivots
5.
Operational
pull links
11.
Cycle-clutch
trip
pivots
12. Switch or
contact
latch pivots
13.
Cycle-clutch
trip-bail
pivot points
14.
Selector-latch
bai I pivots
15.
Pusher bail pivots
6.
Pusher
bail-arm
pivots
7.
Carrier-return
actuating-arm
pivot
8.
Rotate-link
pivots
9.
Pusher-arm pivots
10.
Negative-five
link bearing
A.
Operational-arm
pivots
B.
Selector-latch
surfaces
1-2

FIGURE
2.
Right Side
Of
The
Printer
IBM
#10 15. Index-link pivot
1.
Platen-release
pivot 16.
Carrier-retum-link
pivots
2.
Paper-release-lever
pivots 17.
Operational-contact
link-rod pivots
3.
Rotate and
tilt
pulley bearings 18.
Contact-bail
pivots·
4.
Tab-rack support bearing 19.
RH
pri
nt shaft bearing
5.
Copy-control
eccentric
pivot 20. Shift arm
6.
Pulley-assembly pivots
7.
Right-hand
cord-pulley
bea~ing
8.
Escapement
torque-bar
pivot
IBM
#23
9.
Carrier-return
unlatching-bellcrank
pivot
10. Carrier-return
unlatching-link
pivot
A.
Guide-bracket
sliding surface
11. Bellringer bail pivot
B.
Copy-control
eccentric
surface
12.
Fi
Iter-shaft bearing
C.
Carrier-return latch
keeper
13.
Operational-shaft
bearing D. Shift
clutch
spring and arbor
14. Carrier-return
latch-keeper
pivot
E.
Paper release
lever
1-3

FIGURE
3.
Left Side
Of
The Printer
IBM
#10
12.
Wear-compensator
pivots
1.
Platen-release
pivot
13.
Cycle-shaft
bearing
2.
Copy-control
eccentric
pivot
14.
Tilt link
3.
Tab-rack
support bushing
4.
Rotate and
tflt
pulley
bearings
5.
Print-shaft
bearing
IBM
#23
6.
Left-hand
margin-rack
bushing
7.
Tilt-arm pivot
A.
Copy-control
eccentric
surface
8.
Idler-gear
bearings (lightly)
B.
Guide-bracket
sliding surface
9.
Fi
Iter-shaft bearing
C.
Tab
set/clear
bellcrank
10.
Rotate link D. Idler
gear
teeth
11.
Tab
set/clear
link pivots E. C1 and
C2
cam surfaces
1-4

FIGURE
4.
Bock
Of
The
Printer
IBM
#10
l.
Index-control
lever
{old style}
2.
Motor
bearings
All
pivots
and
bearings
in
operational
unit
J.
Motor
pulley
and
clutch
assembly
1-5

(Fig.
5.
Differential Mechanism)
IBM
#10
1.
Cycle-clutch
latch
pivot
2.
Center
bearing
-#9
3.
Carrier-return
pulleys
4.
Cycle-c1ufch
check-latch
pivot
5.
Check-selector
latch
pivot
6.
Tab-torgue-bar
pivot
7.
Feed
roll bearings
8.
Escapement-torgue-bar
pivot
9.
Latch pusher
roller
and
pivot studs
FIGURE
5.
Differential
Mechanism
1-6
10.
Surface
of
the
escapement
rack
11.
All
selector
latch
and
differential
mechanism pivots
12.
Restore
roller
pivot
IBM
#23
A.
Cycle-clutch
sleeve
surface
B.
Cycle-clutch
restoring cam
and
roller
C.
Negative-five
cam surface
D.
Selector-cam
surface
and
roller
E. Pusher baiI cam surface
and
arm rollers
F.
Torgue bars
(light
film)
X.,
Cycle
clutch
(inside)

FIGURE
5.1
Improved Lubrication
Machines
IBM
#10
IBM
#23
A.
Cycle
clutch
(inside) (with
grease
gun).
B.
Cycle
clutch
sleeve
and
restoring cam
surfaces.
C.
Operational
cam
surfaces,
rollers,
and
drive
ratchets.
D.
R.H.
bearing
and
shift
clutch
(inside) (with
grease
gun).
1. Latch
restore
roll
er
pivot.
2.
Center
Bearing.
3.
C-5
cam
follower
roller.
4.
Operational
cam
wicks
and
pawl
pivots.
5.
Operationa
I
shaft
stabi
I
izer
(sintered
iron).
*
Do
not
lubricate
-
oil
impregnated,
or
self
lubricating
1-6.1

FIGURE
6.
Carrier
Mechanism
(Fig.
6.
Carrier
Mechanism)
*
Keep
cartridge
and
spindles free
of
all
lubricants
IBM
#10
1. Tab-I
ever
pi
vot
2.
Tab-lever
latch
pivot
3.
Rocker pivots
4.
Detent
pivots
5.
Tilt-ring
pivots
6.
Lower ball
socket
7.
Print-cam
roller
bearing
8.
Print-shoft
wipers
1-7
9.
Interposer-lever
sl
i.ding
surface
10.
Detent-lever
bearings
11.
Ti
It be
Ilcrank
pivot
IBM
#23
A.
Tilt
ring
and
ball
joint
B. Ribbon-I
ift
cam
surface
C.
D.
E.
F.
Ribbon-feed
ond
detent
cam surfoce
Print-cam
surface
Ribbon-feed
pawl
Ve
locity
control
plate
pin

FIGURE
7.
Operational
Mechanism
IBM
#10
1.
Escapement-cam-follower
roller
2.
Print-shaft
bearing
3.
Escapement
clevis
4.
Spring-clutch
arbor.
Oil
carriage
return spring
clutch
only
when reassembly is necessary
5.
Index pawl
6.
Tab-torque-bar
pivot
7.
Power-tab
bell
crank-link
ends
and
pivots
8.
Feed-roll
bearings
9.
Escapement-shaft
bearing
10.
Operational
shaft
bearing
11
•
Operational
cam pivot
(ratchet)
(Use #23 when parts
are
removed
or
repl.aced.)
FIGURE
8.
Bottom
View
Showing
Contact
Location
1-8
Carrier-Return
Interlock
Contact
FIGURE
9A.
Right
View
Showing
Contact
Location
IBM
#23
A.
Operational-cam
surfaces,
rollers,
and
drive
ratchets
B.
Actuating
arm
and
check-pawl'
contact
surface
C.
Torque-limiter
spring
clutch*
*Every 6 months / 1 Shift
Operation
Every 3,months / 2 Shift
Operation
Every 6 weeks
/3
Shift
Operation
PRINTER
CONTACT LOCATIONS
Figures 8
to
12 show
the
locations
of
the
printer
contacts.
FIGURE
9B. Right
View
Showing
Contact
Location

PRINT FEEDBACK
CONTACTS
(CI,C2)
TAB
INTERLOCK
CONTACT
FIGURE
10.
Left
View
Showing
Contoct
Location
FIGURE
12.
Upper
Left Rear
Corner
Showing
Contact
Location
RRIER
RETURN
NTERLOCK
FIGURE
11.
Rear
View
Showing
Contact
Location
1-9
C2
CI

INSPECTION
PROCEDURE
Inspection
Period
2
3
4
FIRST
INSPECTION
PERIOD
CYCLE CLUTCH
Inspection Area
Cycle
Clutch
Tilt Mechanism
Ribbon Feed Mechanism
Impression and Alignment
Rotate Mechanism
Detenting
Selection
Magnet Units
Cycle
Clutch
Ilnlatching
Operational
Magnet Units
Pusher Unit
Contact
Cleanin!?
Escapement
Motor Drive and
Carrier
Return
Indexing and Paper Feed
Shift (Enter Mechanism)
1.
Latch height: Measure with #3 scribe
line
on
Hoover-
.ometer.
2.
Cycle
shaft
collar:
The
cycle
clutch
shoul~·begin
to \
slip
approximately 150 before the
check
pawl
detents.
Hand
cycle
the
machine,
using a
-5
rotate;
O-tilt
char-
acter.
3.
Nylon stop:
Ad
just for four degrees rotation
or
over-
throw when
the
cycle
shoft
is
latched
home.
4.
Shaft end play:
.001"
-
.003".
5.
All gears: Minimum
play,
no binds, screws
tight.
6.
Print-shaft timing: The keyway should be toward
the
dowel pin on
the
carrier.
TILT
MECHANISM
1.
Check
the
tilt
motion: Use
TO
and T3.
2.
Check
the
tilt
detenting:
Use
a
T3
character
and
hal
f-
cycle
the
machine.
Place
a slight pressure on
the
rear
of
the
tilt
ring.
Remove
the
detent,
and
allow
it
to
re-
turn slowly. The ring should move
~o
more
than
.005".
RIBBON
FEED
MECHANISM
1.
A
-5
rotate,
I-tilt
character
should strike
the
ribbon
1/16"
from
the
bottom in
the
high lift
position.
2.
Check
for enough tension
of
the
ribbon-feed
mechanism-
ratchet-brake
springs
to
hold the ribbon
ratchets
in a
rotated
position,
to
overcome positively
the
action
of
the
centering
spring.
3.
The
ribbon-feed
pawl should hold the reversing
inter-
poser
within
.005"
-
.010"
of
its
total
travel with
the
ribbon-feed
cam on its high point
and
the
ribbon
mech-
anism set for a reversing
operation.
Positive
two-tooth
feed plus
.010"
overthrow should
result.
SECOND INSPECTION
PERIOD
DYNAMIC CHECK
1.
a.
Move the
roller
to
the
top
of
the
compensator.
b.
Repetitively type minus-five
selections.
The
roller
should return
to
rhe compensated
position.
If
wear
has caused the compensator
foller
to drop almost
to
the
bottom
of
the
slot,
hal
f-cycle
a
-5
character.
Ti
It
the
machine up on its
back.
Raise
the
nylon
wedge
manually,
and
tighten
the
rotate
link until
there
is
1/16"
travel
left
in
the
nylon
wedge.
Tighten
the
nuts on
the
rotate
I
ink.
Note:
The
compensator nylon wedge must be
clean
and
free
of
oi
I. If it does not drop easilyI or
appears
to
be
oily
or
dirty,
flush the wedge with
cleaning
fluid
and
wi pe
dry.
2.
The general
condition
of
all
selection
and
outout-motion
adjustments
can
be
checked
by making a complete
strike-
up
of
the
keyboard.
Type
back
over
it
several times,
watching
for signs
of
misalignment with
the
previously
typed
characters.
If alignment
is
not
satisfactory,
the
need for closer inspection
can
be met by observing
the
dynamic
detenting
action
of
the
typehead.
Manually
half-cycle
the following
selections
one
at
a
time,
and observe
the
latches:
O-rotate,
1
-ti
It
character
-5
rotate,
l-ti
It
character
+1
rotate,
O-tiIt
character
+2
rotate,
O-tilt
character
+3
rotate,
O-tilt
character
These
characters
allow
each
latch
to
be
checked
in-
dividually.
Observe
that
the
selected
latches
clear
the bail
fully,
and
do not snap
off.
Observe
that
the
nonselected,
or
operated,
latch
seats fully on
the
bail,
does not jump
Offi
and makes the
correct
selection.
IMPRESSION AND ALIGNMENT
1.
The
rotate
and
ti
It
tapes must be free
from
kinks
and
nicks.
2.
Check
for binds or excessive
play
in
the
tilt
and rotate
detents with respect
to
their
guides.
Check
the
tilt
ring
in
relation
to
its
pivots,
and
the
upper ball
socket
with
respect
to
the
ti
It-ring
spacer.
3.
Check
for smooth compensator
action.
Static
check:
a.
Half
cycle
a
-5
selection
with
the
typehead
removed.
b.
Pull
the
rotate
arm out until it is
completely
removed
from
the
compensator
leaf
spring.
1-10
c.
Release
the
rotate
arm. This should
cause
the
leaf
spring
to
collapse
against
the
power frame.
ROTATE
MECHANISM
1.
Half-cycle
a
O-rotate,
3-tilt
character
and observe
the
detenting.
Folloy,
the
same procedure for a
+5
rotate,
3-tilt
character
I a
-3
rotate,
3-tilt
character
I
and
a
-5
rotate
I
3-tilt
character.
The
variance
in bandwidth
of
these
characters
should not
exceed
.030".

Note:
Check
as follows.
Half-cycle
the
character
and
remove
detent
from
the
head.
Take the play out
of
th-e
head in a clockwise
direction.
Allow
the
detent
to
re-
turn slowly, and observe
the
point
the
detent
strikes or
enters
the
skirt.
Bandwidth equals
the
difference between
the
best and worst
character.
DETENTING
I
1.
\
2.
Print-shaft timing: The
detent
must
enter
and
leave
the
head without hitting
the
skirt.
Check
by manually hal
f-
cycling.
Use a
-5,
home, and a +5
character.
The skirt
clearance
should be
.025"
-
.035"
in a
2-tilt
position. When both dp.tents
are
engaged
fully in
their
respective
notches,
there
should be
.001"
minimum
mo-
tion
of
the
detent-cam
follower with respect
to
the
detent
lever.
THIRD
INSPECTION
PERIOD
)
SELECTION MAGNET UNITS
--
SCOPE
PROCEDURE
,\.
Check
the
pick times
of
all magnets by observing (on an
osci lIoscope)
the
voltage
rise across a 1O-ohm,
1/2
watt
resistor (part 321271) in series with
the
individual magnet
coiIs, when a
48-volt
pulse
is
applied
to
the
coi
\.
All
pick times must be
ten
milliseconds
Qr
less, with
the
ex-
ception
of
U.C.
shift magnet, red ribbon shift magnet
and
the
keyboard-lock
solenoid. The
U.C.
shift magnet
and red ribbon shift magnet armatures must seal within 12
milliseconds maximum and
the
keyboard lock solenoid
must pick in a maximum
of
55 milliseconds. See Figure
13 for wave
form
of
magnet pick
time.
Pick-time
readings
are
the
best
indicator
of
magnet
per-
formance. High pick times foretell adjustment
discrepan-
cies,
wear,
or
sluggishness. They
are
often
evidenced
by
noticeable
machine slowness when
repeat
operations
are
performed.
Note
the following items when high pick
times
are
encountered:
a.
With
the
armature manually
attracted,
an
armature-
to-yoke
clearance
of
•001" - •006"
is
necessary
to
prevent an armature
from
rocking on
the
yoke.
Care-
fully
check
the
pivot points for Wear (pivot
plate
ad-
justment) •
b.
Except
in
the
case
of
the
operational magnets,
the
armature stops
are
to
be adjusted for a
.004"
- •008"
armature-to-yoke
clearance.
This
clearance
must be
maintained
to
prevent permanent residual
effects
in
the
armature.
c.
In
no case should an armature rock on
the
core.
I
PICK
or
SEAL
I-
~
TIME
FIGURE
13.
Waveform
of
Magnet Pick Time
1-11
CYCLE
CLUTCH
UNLATCHING
1.
Positive
unlatching
of
the
cycle
clutch
must
occur
when
each
armature
is
operated
by
hand,
with
the
latch
over-
throw
.002"
-
.007"
(old style trip mechanism).
On
the
spring-loaded (new style)
trip
mechanism, overthrow
(with an armature operated) should measure
.005"
-
.020"
between
the
trip
lever
and
the
latch
lever.
Check
to
in-
sure that
the
K.O.
eccentrics
do not choke off
the
arma-
ture travel
(K.O.
eccentrics
should
clear
trip
bail
exten-
sions
by
•003" - •008" with armatures manually
attrocted).
2.
Check
for
.005"
-
.010"
vertical
clearance
between
the
selection-armature
latching surface and
the
pushers, and
for
.001"
-
.010"
horizontal between
the
tip
of
the
push-
ers and
the
armatures.
3.
The trip bail pivot
eccentrics
must
allow
equal
motion to
be transmitted
from
the
T2
and
R5
armatures
to
the
trip
link.
The
eccentrics
must be
in
the
upper sphere
of
their
adjustment to prevent
binding.
OPERATIONAL MAGNET UNITS
1.
When an armature
is
operated,
the
armature
pull-link
ad-
justment should
allow
for positive interposer tripping with
.002" - •
01
A"
overthrow
clearance
between
the
interposer
and the pawl guide
plate
at
the
point
of
unlatching.
PUSHER
UNIT
1.
Both
latch-pusher
cam-follower rollers must
contact
the
cams
on
the
selector
cam shaft throughout a
cycle.
2.
Check
the individual
pusher-to-Iatch
extension
clear-
ances.
Clean
all operaHonal
circuit-breaker
contacts,
and check for
pitting.
CONTACTS
1.
The operational transmitting
contact
latches
should
be
flush with
the
end
of
the
contact-strap
stop (interposers
latched),
and
should have
.005"
-
.015"
clearance
be-
tween
the
contact-strap
stop and
the
latch
(interposers
unlatched) •
2.
There shou
Id
be
.002"
- •010"
clearance
between
the
print-feedback
O/S's
and
the
low point
of
the
feedback
cams.
3.
The
tab
interlock
microswitch should move
at
least
.031"
after
the
switch has transferred when
the
tab
torque bar
is moving toward its rest position. The switch must
re-
main transferred during
tabulation
and must transfer before
the
backspace cam reaches its high
point.
4.
The
carrier-return-interlock
(normally-open) strapshould
rise a minimum
of
.010"
off its support terminal with
the
carrier-return-clutch
latch
latched.
5.
Check
the
timing and
air-gap
adjustments on all
contacts.
All transmitting and
checking
contacts
should have:
a.
.020"
air
gap
except
the
shift which
is
.040".
b.
All
circuit-breaker
contacts
and interlocks should
have a
.040"
air
gap.
CONTACT CLEANING
Caution:
Under no condition should
contact
files,
burnishing
blades
or
similar tools be used to
clean
contacts
in this
machine.
To
clean
the
contacts,
use
IBM
Contact
Cleaner
and
clean
bond
paper.

FOURTH
INSPECTION
PERIOD
ESCAPEMENT
1. The
carrier
should
escape
smoothly and positively
through-
out
the
full length
of
the
writing Iine
and
through
the
right-
hand margin under
letter
escapement,
spacebar
operation,
and
tabulation.
2.
Check
for frayed
or
loose transport cords.
3.
Tension should be maintained on
the
right-hand
transport
pulley
to
maintain its mounting parallel
to
the
power
frame. Its outside flanges should be
1-7/32"
from
the
right-hand
outside surface
of
the
power frame.
4.
The
line-gage
holder must
clear
the
platen
at
all points,
and not impede
carrier
motion.
5.
A minimum
of
.010"
clearance
should exist between
the
carrier-return
shoe and
the
spring-clutch.
Note,
however,
that
excessive
clearance
can result
in
erratic
carrier-
return motion.
6.
Check
for
1/2-3/4
pounds
of
mainspring tensiqn measured
at
the
carrier
as it escapes through the
linelock
load
at
the
extreme
right-hand
margin.
7.
Check
for
.002"
-
.004"
backlash
of
the
tab
gOVElrnor
and
carrier-return
pinion gears with
the
escapement
gear;
8.
Letter escapement should
occur
as soon
after
print as
pos-
sible.
9.
The
trigger
guide should disengage the trigger
from
the
escapement-torque-bar
arm when
the
escapement pawl
has
cleared
the
rack by
.010"
-
.015".
Both
the
letter-
escapement and
the
spacebar
operation should allow
.005"
-
.010"
excess motion
after
the
trigger
has
dis-
engaged
the
trigger
from
the
torque-bar
arm.
10. When
operated,
the
tab
lever
should overthrow
the
tab-
lever
latch
by
.005"
-
.010"
without being choked off
by
the
tab
torque-bar
lockout lug or backup
eccentric,
and
without overthrowing into
the
tab
rack.
Observe
the
operation
at
both ends and
the
middle
of
the
torque
bar.
Dynamically
check
for
tab
failures using five irregularly
set
tab
stops for
at
least five columns.
11.
Check
to make sure
that
the
carrier-return
operation
un-
latches
the
tab
when both operations
occur
simultaneous-
ly.
12. With
the
backspace
operated
manually,
the
escapement
pawl should just fail
to
get
a new tooth on
the
escape-
ment
rack.
13.
There should be a
clearance
of
.005"
-
.015"
between
the
front
of
the
backspace pawl
and
a tooth
of
the
back-
space
rack (with
the
carrier
at
rest).
14.
Overthrow
clearance
of
.010"
-
.020"
is
required
be-
tween
the
interposer pawls and
the
operational-latch
bracket
wh'en
the operational cams
are
on
their
high
point.
MOTOR
DRIVE
AND
CARRIER
RETURN
1.
Check
for
adequate
tension
of
the
motor-pulley
belt,
or
for a frayed
or
noisy
belt.
2.
The
selector
and operational cam shafts, and
the
print
and
filter
shafts, must have
.002"
end
play.
3.
There must be freedom
from
binds
in
the
idler
gear
train
with minimum
backlash.
4.
With
the
carrier-return
cam on its high
point,
the
carrier-
return arm should overthrow its
keeper
by
.020"
- .030" .
5.
The
carrier-return
brake shoe should cause
the
carrier-
return spring
clutch
to
drive
the
carrier
no
later
than
when
the
escapement pawl
clears
the
last
one-third
of
the escapement rack
tooth.
The
clutch
shoe should
overlap
the
last three coils
of
the
spring
clutch.
6.
The
carrier-return
unlatching
link must positively
un-
latch
the
carrier-return
latch
at
the
left-hand
margin
with
.005"
-
.010"
overtravel when the margin-rack
overbank
is
set.
7.
The escapement pawl must not drag
the
escapement rack
during
carrier-return
operations.
8.
Measure
one-half
to one pound tension
of
the
shock
un-
loader
at
the
left-hand
margin while unlatching
the
carrier-return
keeper-latch
arm.
INDEXING
AND
PAPER
FEED
1.
Check
for.
015" -
.030"
clearance
between
the
platen
ratchet
and
the
index
pawl,
at
rest.
2.
Index operation should result
in
one
full-tooth
motion
of
the
index pawl with respect
to
the
platen
ratchet (in
single-linespace
position) and two
full-teeth
motion
with no
evidence
of hesitation
or
drag (in
the
double-
Iinespace position).
SHIFT
Check
the
cam and spring for rust.
Turn
power
on,
and hold
the
shift
ratchet
(grey
section).
Release
the
ratchet
by press-
ing
the
magnet. Allow
the
ratchet
to
rotate
slowly while
holding down on the
magnet.
The
shift cam should stop
at
a
fully
detented
position for
each
1800
operation.
The white
nylon
roller
should seat fully
in
cam
notch.
1-12

Section
2.
Adjustments
ADJUSTMENT
THEORY
This
adjustment
is
extremely important because
the
rollers
on the latch bai I
MUST
contact
their
respective
selector
MOTOR AND
DRIVE
cams
at
the
same point and with
the
same pressure in
ord.
er
to insure
tha"t
both cams
operate
the
bail
together.
1.
Drive Belt -Adjust
the
motor mounting brackets forward
or
back
to obtain a minimum amount
of
belt
noise.
Both
ends of the motor must be adjusted
the
same in order
to
maintain
the
rotor shaft
perpendicular
to
the
drive belt.
The
belt
must never be so loose
that
jumping cogs
on
the
motor pulley
is
a possibility.
Check
by operating
the
shift mechanism while holding
the
carrier
with
the
car-
rier return
in
operation.
This
loads
the
motor
to
a point
where failure will be most
probable.
2.
Motor Pulley -Adjust the motor
pulley
left or right so
that
the
drive
belt
rides fully on
the
teeth
of
both
pul-
leys without rubbing
the
flange of
either.
Position
the
retaining
clip
for
.005"
to
.015"
end
play.
3.
Motor Clutch Pawl Stops
(Fig.
1)
-
Form
for a
clearance
of
.010"
to
.020"
between
the
clutch
pawl
tip
and
pul-
ley
ratchet
when
the
pulley
is
manually
rotated.
Form
This Tip
FIGURE
1.
Motor
Clutch
Pawls
4.
Idler Gears -Adjust
the
idler
gear
studs so
that
minimum
backlash
is
present between mating
gears.
The
mechan-
ism
must be free
of
binds throughout 3600 rotation of
the
gears.
Minimum backlash
is
necessary to prevent
erratic
opera-
tion
of
the
drive train
and
to insure minimum overthrow
of
the
driven
shafts.
The
lower
idler
gear
must be adjusted first because
the
upper
idler
gear
is
adjusted
to
the
final position
of
the
lower
gear.
CAUTION: After
any
removal and replacement
of
the
left hand
cycle
shaft
bearing,
the
mesh of
the
lower
id-
ler
gear
must be
checked.
The lower idler
gear
stud
is
mounted
to
the
bearing
plate;
therefore
any
slight
rota-
tion of
the
plate
wi
11
affect
the
gear
mesh.
Selection
Mechanism
5.
latch
Bail Shaft -Adjust
the
plate
that
supports
the
right
end
of
the
bail shaft so
that
the
bail shaft is
parallel
to
the
cycle
shaft.
2-1
The
bail shaft
is
set
at
the
factory and should not require
a readjustment
un
less
the
plate
becomes loosened
or
parts replacement
is
necessary.
This
is
a
difficult
ad-
justment to make
and
should not be loosened unless
ab-
solutely necessary.
The bail shaft
plate
must be adjusted both
vertically
and
horizontalIy in order to make
the
rollers
of
the
latch
bai I
ride
their
respective cams
equally.
Changing
either
the
vertical
or horizontal position will
affect
the
other;
therefore both adjustments must be considered
together
and adjusted
alternately
until both
are
correct.
If
a
re-
adjustment
is
necessary,
the
following procedure may
be
used.
a.
The
correct
vertical
position
is
obtained
by raising
or lowering
the
bail shaft mounting
plate
until both
bail rollers have
equal
pressure
against
their
re-
spective
cams.
Check
by testing
the
drag on strips
of
paper inserted between
the
rollers and
the
cams.
b.
The
front to rear position
of
the
bail shaft
plate
can
be
set
relative
to
the
cycle
shaft.
Set
the
Hoover-
ometer to span
the
distance
between
the
cycle
shaft
and
the
left end
of
the
bail shaft as
illustrated
in
Fig.
2.
Move
the
Hooverometer
to
the
right
(;md
adjust
the
bai I shaft
plate
forward or
back
to
the
same
clearance
as
at
the
left
side.
With
the
baiI
shaft
parallel
to
the
cycle
shaft,
the
bai I rollers
should be
contacting
their
respective cams
at
the
same
point.
NOTE:
As
a final
check
for
the
adjustment
of
the
latch
bail
plate,
hand
cycle
the
machine using a
zero
rotate,
zero
ti
It
character
(a
II
latches
removed
from
the
bai
I)
•
Both
latch 'bai I rollers should maintain
contact
with
their
respective cams throughout
the
cyc
Ie.
CAUTION:
On
early
level machines
the
cycle
bai Istop
and
the
character
interrupter
must be readjusted
after
any
change in
the
position
of
the
bail shaft
plate,
because
both
of
these parts
are
mounted on
the
plate.
,--
"'"
/ \
leo
q
t_J
J
\ )
"---
.-/
FIGURE
2.
Latch
Bai
I Shaft
Plate
Adjustment
Other manuals for Selectric
6
Table of contents
Other IBM Typewriter manuals

IBM
IBM Selectric III Operating instructions

IBM
IBM Executive User manual

IBM
IBM Wheelwriter 2500 User manual

IBM
IBM Selectric II User manual

IBM
IBM Selectric User manual

IBM
IBM Selectric User manual

IBM
IBM Selectric User manual

IBM
IBM Quietwriter III 5202 User manual

IBM
IBM 6747 Manual

IBM
IBM Selectric II User manual

IBM
IBM Correcting Selectric User manual
IBM
IBM Selectric User manual

IBM
IBM Selectric User manual

IBM
IBM B-1 User manual

IBM
IBM B-1 Guide

IBM
IBM Selectric II User manual

IBM
IBM 01 Operating manual

IBM
IBM Wheelwriter 10 - IBM Wheelwriter 10 Professional... Manual

IBM
IBM Selectric III - Correcting Selectric III User manual
IBM
IBM Selectric Personal Typewriter User manual