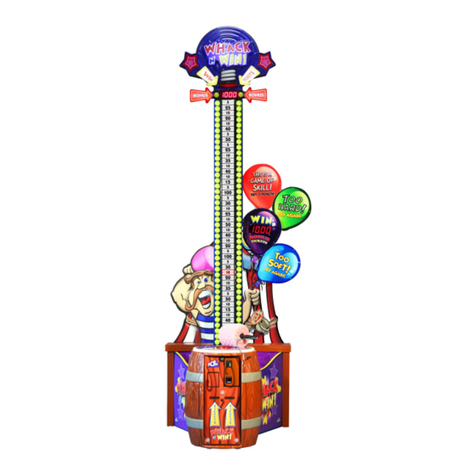
ICE Games Go Ballistic User manual

1

3
TABLE OF CONTENTS
Safety and Warnings 4
Setup
Game Play 5
Setup 6
Volume Controls
Programming 7
Sensor Test
Assembly 8
Service
Assembly Diagrams
Sensor Array 9
Front Assembly 10
Main Cabinet 11-12
Marquee 13-14
Wiring Diagrams 15-30
Main Board Connector Layout 31
REVISION A 7-15-09

4
BEFORE YOU BEGIN
WARNING: WHEN INSTALLING THIS GAME, A GROUNDED A.C. RECEPTACLE MUST BE USED. FAILURE
TO DO SO COULD RESULT IN INJURY TO YOURSELF OR OTHERS. FAILURE TO USE A GROUNDED RE-
CEPTACLE COULD ALSO CAUSE IMPROPER GAME OPERATION, OR DAMAGE TO THE ELECTRONICS.
DO NOT DEFEAT OR REMOVE THE GROUNDING PRONG ON THE POWER CORD FOR THE SAME REA-
SON AS GIVEN ABOVE. USING AN IMPROPERLY GROUNDED GAME COULD VOID YOUR WARRANTY.
HAVE A QUALIFIED ELECTRICIAN CHECK YOUR A.C. RECEPTACLE TO BE SURE THE GROUND IS FUNC-
TIONING PROPERLY. DO NOT WASH YOUR GAME WITH A PRESSURE WASHER.
AVERTISSEMENT: lors de l'installation de ce jeu, la terre AC récipient doit être utilisé. Ne pas le faire pourrait en-
traîner un préjudice à vous ou à d'autres. Le non-recours à la terre récipient pourrait également causer une mau-
vaise opération de jeu, ou les dommages causés à l'électronique. NE PAS détériorer ou de retirer la broche de
terre sur le cordon d'alimentation pour la même raison, comme indiqué ci-dessus. Indûment l'aide d'un jeu de la
terre pourrait annuler votre garantie. Ont un électricien qualifié de vérifier votre récipient AC pour s'assurer que le
sol fonctionne correctement. Ne lavez pas votre jeu avec une laveuse à pression.
INSTALLATION
The game comes ready to play with just a few simple things to keep in mind.
1. Plug the game into the A.C. outlet and turn on power to the game. The switch for the game is located on a
power module on the outside rear of the game.
THIS GAME IS DESIGNED TO DISSIPATE STATIC ELECTRICITY THROUGH THE GROUNDING PLANE OF THE
GAME. IF THE A.C. GROUND DOES NOT WORK, THE GAME COULD DISCHARGE STATIC ELECTRICITY
THROUGH THE GAME CIRCUITRY, WHICH COULD CAUSE DAMAGE.
2. Make sure the game is level after installation. It is necessary to make sure the game is level for safety
concerns.
3. Check that the A.C. voltage rating on the back of the game matches the A.C. voltage of your location.
THE POWER SUPPLY IS NOT VOLTAGE ADJUSTABLE. TO OPERATE THE GAME AT VOLTAGES OTHER THAN
THOSE IT WAS DESIGNED FOR. PLEASE CONTACT OUR SERVICE DEPARTMENT FOR VOLTAGE CONVERSION
INFORMATION. WARNING
DO NOT remove any of the components on the main board (e.g. compact flash and eproms) while
the game is powered on. This may cause permanent damage to the parts and the main board. Re-
moving any main board component part while powered on will void the warranty.
Ne retirez pas l'un des composants sur la carte principale (par exemple Compact Flash et
EPROMs), tandis que le jeu est sous tension. Cette mai causer des dommages permanents aux
parties et la carte principale. Suppression de tout bord principal élément sous tension alors que an-
nulera la garantie.
NOTE: THIS GAME IS INTENDED FOR INDOOR USE ONLY.
ON THE BACK PANEL OF THE GAME: WARNING: SHOCK HAZARD - DO NOT OPEN. REFER
SERVICING TO SERVICE PERSONNEL.
REMARQUE: CE JEU EST DESTINÉ POUR USAGE À L'INTÉRIEUR SEULEMENT.
SUR LE PANNEAU ARRIÈRE DU JEU: AVERTISSEMENT: RISQUE DE CHOC - NE PAS OU-
VRIR. RÉPARATION À UN PERSONNEL DE SERVICE.
SAFETY AND WARNINGS

5
SETUP - INTRODUCTION
Game play:
The player has five exciting games to choose from when they insert their money to play. In “Wood
Chucker”, the player throws at as many wood chucks as possible to score the most points. Beware,
as the Wood Chucks fight back and throw logs, axes and stones at you! In “Sweet Shop” the player
tries to break as many delicious treats as possible within the specified amount of time. Mom won’t
be cleaning up in “Crazy Kitchen”. Here the player attempts to break as many dishes, appliances,
and utensils as possible. Watch out in “Pain Ball” as you try to knock out as many enemies as pos-
sible with your paint ball without getting hit! And finally “Counter Attack” where the enemy comes in
many waves both land and air! Take out as many as possible before the timer runs out!
Setup:
Your game can arrive in up to three sections. The front cabinet, back cabinet, and marquee. To as-
sembly your game, located on the left side of the back half of the cabinet two female plugs. The
male ends are located in the front cabinet which need to be connected. Along with these two plugs
you will find a Audio 3.5mm male plug that will need to be connected to the audio jack of the com-
puter located in the back cabinet. See picture A below and on the following page for clarification.
The marquee’s power is plugged through the top of the cabinet.
Volume adjustment
Located inside the coin door on the left is where the volume controls are located. There are three
knobs to adjust the volume. The closes knob to you is for the bass and turning this clockwise will
increase the bass. The next knob is the treble control and turning this clockwise will increase the
treble. The last knob adjusts the volume and turning clockwise will increase the volume. See pic-
ture B.
Connect to center jack of au-
dio in (GREEN JACK) on
back of computer. Bass
Volume
Treble
PICTURE A
PICTURE B

6

7
SETUP - ASSEMBLY
METERS LOCATION
The meters are located through the coin door. Both coin and ticket meters can be found there.
LOADING TICKETS
If during game play the ticket dispenser runs out of tickets, the screen will display “Error Tickets” Af-
ter loading tickets into the dispenser, press the ticket reset button found below the dispenser at the
game floor.
ACCESSING PROGRAMMING
The program button is located in the coin door. Press the button “PROG” at the attract screens to
enter programming.
PROGRAMMING
Press “SEL” to move the cursor down and “ENTER” to change its value. To move to the next
screen, select the option page down or the option page up and press “ENTER”. When changing
ticket values for each game, you must first press “ENTER” to start editing the line and press “SEL” to
advance to the next setting. When finished, press “ENTER” on the option “ENTER” to exit that line.
OPTION PAGE 1 DESCRIPTION DEFAULT MIN MAX
1 - Coins per credit How many coins to start a game. 2 1 4
2 - Free Play No coins needed to play game. . off On Off
3 - Time to play Sets the amount of game time for each game 30 20 40
4 - Start Music Turns on intro music. On Off On
5 - Bonus Tickets Allows players to win the bonus tickets On Off On
6 - Mercy Tickets Gives players tickets for just playing. Off 1 2
7 - Fixed Tickets Game will always give out this amount. Off 1 50
8 - Play for Fun Disable ticket output. Off On Off
9 - Page Down Selecting this will go to the next screen of options
OPTION PAGE 2
There are seven options for each game. The first column enables or disables the game. The next
option sets how many hits it takes to hit a target. The next option is how many tickets you get for
each hit. The next column sets how many hits before the bonus can be won. The next column sets
how many tickets the player gets when they make the bonus. The next column sets how many tick-
ets are paid out for just playing if Mercy tickets are enabled. The last column sets how many tickets
are paid at the end of the game if fixed tickets are enabled.
The next option “reset coins” will clear all credits. The next option “reset tickets” will clear all tickets
owed. The last option will return to the previous page.
SENSOR TEST BUTTON
When you select this option the game will display a horizontal set of blocks numbered 1 to 48 and a
vertical set of blocks numbered 1 to 24. These numbers relate to their LED number. If you where to
block a section of the screen with either your hand or throw a ball, the LED that are blocked will light
the corresponding block number. If a sensor board is not working, the entire row of blocks will not
light when blocked. Pressing “sensor test” button again will exit test and return to game mode.

8
SERVICE
CAUTION
This game uses complex electronic components that are very sensitive to static electricity. Observe precau-
tions below before handling these electronics. Failure to do so may void the warranty and damage electronic
assemblies.
Before servicing electronics, turn off AC power to the game. Wait for capacitors to discharge.
DO NOT remove any of the components on the main board (e.g. compact flash and eproms) while the game is
powered on. This may cause permanent damage to the parts and the main board.
Before touching or handling electronic assemblies, discharge static electricity on your body. To discharge this
static, begin by connecting the line cord to a grounded outlet. Don’t turn on the game. Next, touch the safety
ground stud of the power supply chassis.
Store electronic assemblies in an anti-static area. Use anti-static bags to store or transport the game circuit boards.
Don’t remove or connect electronic assemblies when cabinet power is on. Otherwise, you’ll damage electronic as-
semblies and void the game’s warranty.
After you complete maintenance or service, replace ground wires, shields, safety covers and install and tighten
ground and mounting screw.
AC Service switch
This game using a AC cutoff switch located in the back. When servicing the game if you remove the
back cabinet panels with the power on, the deck pusher will stop. This is normal. If service is re-
quired with AC applied, pull the AC switch out which will allow power to the deck pushers. There
one for each cabinet side.
*** WARNING *** This ac cut off switch is for your safety as serious injury could result if disabled.
*** ATTENTION *** Cette ac couper commutateur est pour votre sécurité aussi grave peut en
résulter des blessures si handicapés.
Disable safety switch by
pulling out switch.

9

10

11

12

13

14

15
DATE 3/20/09
DESCRIPTION MAIN HARNESS DRAWN BY MMARTIN
FILENAME BA1000X.VSD
PAGE 1 OF 16
REVISED 7/2/09
TITLE BA1000X - Go Ballistic
PART NO. BA2050HX
12 PIN CAP #E02105
FEMALE PIN #E02102
1
2
3
4
5
6
7
8
9
10
11
12
1
2
3
4
5
6
7
8
8 PIN JST VHR HOUSING #E08120
JST SVH PIN #E08116
1
2
3
4
5
6
7
8
8 PIN JST VHR HOUSING #E08120
JST SVH PIN #E08116
1
2
3
4
4 PIN JST VHR HOUSING #E08118
JST SVH PIN #E08116
1
2
3
4
5
6
7
8
9
9 PIN PLUG MOLEX #2973
MALE PIN #2159
PIN 8 #E02112
1
2
3
4
5
6
7
8
9
9 PIN PLUG MOLEX #2973
MALE PIN #2159
PIN 8 #E02112
ORANGE *2
BLACK *2
white/black
white/brown
tan
yellow/white
gray/blue
violet/black
gray/yellow
gray/green
ORANGE + orange
BLACK + black
orange
black
BLACK
BLACK
ORANGE
ORANGE
RED
RED
BLACK
BLACK
BLACK
ORANGE *2
BLACK
black
ORANGE + orange
J5
J17
J15
yellow/orange
yellow/red
yellow/brown
yellow/black
15 PIN CAP #E02367
FEMALE PIN #E02102
PINS 1 & 2 E02013
PINS 11 & 12 E08259
1
2
3
4
5
6
7
8
9
10
11
12
13
14
15
12
34
56
78
910
11 12
13 14
15 16
17 18
19 20
21 22
23 24
25 26
1
2
3
4
5
6
7
8
9
10
11
12
13
14
15
16
17
18
19
20
21
22
23
24
25
26
D
C
B
A
4321
D
C
B
A
4321
BLACK
yellow/orange
yellow/red
yellow/brown
yellow/black
gray/brown
gray/red
gray/orange
RED
RED
J3
white/yellow
white/black
gray/blue
white/green
white/brown
white/violet
white/orange
gray/brown
gray/red
gray/orange
gray/yellow
gray/green
white/blue
9 PIN CAP #E02551
FEMALE PIN #E02102
1
2
3
4
5
6
7
8
9
orange
black
yellow/green
yellow/blue
white/orange
white/yellow
white/green
white/blue
white/violet
yellow/white
yellow/green
yellow/blue
tan
violet/black
24 "
24 "
24 "
24 "
24 "
24 "
24 "
24 "
42 "
42 "
42 "
42 "
42 "
24 "
24 "
24 "
24 "
34 "
34 "
34 "
42 "
42 "
42 "
42 "
24 "
42 "
55 "
55 "
24 "
55 "
55 "
42 "
6 "
6 "
55 "
55 "
27 "
27 "
42 "
42 "
27 "
42 "
27 "
27 "
55 "
55 "
42 "
42 "
27 "
27 "
27 "
27 "
27 "
24 ",
24 ",
#BA7013 DECAL (QTY 1)
J3 BA
ON “WINDOW”
DO NOT COVER
ARROW
E00449 DUAL ROW 26 PIN
E08541 PIN
6 "
6 "
TO: BA2051HX
TO: BA2057LX
TO: WA2010 POWER
SUPPLY

16
D
C
B
A
4321
D
C
B
A
4321
DATE 3/20/09
DESCRIPTION FRONT CABINET HARNESS DRAWN BY MMARTIN
FILENAME BA1000X.VSD
PAGE 2 OF 16
REVISED 7/2/09
TITLE BA1000X - Go Ballistic
PART NO. BA2051HX (1 OF 2)
1
2
3
4
5
6
7
8
9
10
11
12
13
14
15
15 PIN PLUG #E02144
SPLIT PIN #E02100
PINS 11&12 #E08260
2 PIN CAP MOLEX #E08175
FEMALE PIN #E02176
1
2
.187 #E00651
.187 #E00651
.187 #E00651
.187 #E00651
orange *2
black *2
white/black
white/brown
tan
yellow/white
gray/blue
violet/black
gray/yellow
gray/green
ORANGE + orange
BLACK + black
orange
black
.110 #E00650
.110 #E00650
.110 #E00650
.110 #E00650
.250 FLAG
#E00648
.250 FLAG
#E00648
.250 FLAG
#E00648
.250 FLAG
#E00648
white/black
black x 2
white/brown
black
COIN 1
COIN 2
COIN LIGHTS 1
COIN LIGHTS 2
orange x 2
black x 2
orange
black
.187 #E00651
.187 #E00651
.187 #E00651
.187 #E00651
orange x 2
tan x 2
orange
tan
LOCKOUTS
SPIRAL WRAP – ¼”
#E08069 @ 6"
8"
8"
10"
10"
1
2
3
4
4 PIN JST VHR HOUSING #E08118
JST SVH PIN #E08116
orange
violet/black
BALL GATE
MOTOR
BALL GATE
OPEN
BALL GATE
CLOSED
TICKET
BOARD
gray/blue
ORANGE
BLACK
yellow/white
gray/yellow
black *2
gray/green
black
J1
95 "
84 "
84 "
18 "
95 "
108 "
106 "
106 "
106 "
111 " 76 "
* ALL PLUGS ARE SOLDERED TIP
POSITIVE
#E00047 - PLUG COAXIAL
DC POWER PLUG (#274-
1569)
orange or red
black
orange
black
95 "
* E08567 1/16 SHRINK TUBE OVER
ORANGE WIRE @ 1"
TO:
BA2050HX
BA

17
D
C
B
A
4321
D
C
B
A
4321
DATE 3/20/09
DESCRIPTION FRONT CABINET HARNESS DRAWN BY MMARTIN
FILENAME BA1000X.VSD
PAGE 3 OF 16
REVISED 7/2/09
TITLE BA1000X - Go Ballistic
PART NO. BA2051HX (2 OF 2)
9 PIN PLUG #E02292
SPLIT PIN #E02100
1
2
3
4
5
6
7
8
9
orange
black
yellow/green
yellow/blue
white/orange
white/yellow
white/green
white/blue
white/violet
0000000000
black
red
12V COUNTER
#PC20224
COIN
0000000000
red
black
12V COUNTER
#PC20224
TICKET
#E02558
#E02815
#E02558
.187 #E00651
.187 #E00651
.187 #E00651
.187 #E00651
.187 #E00651
.187 #E00651
.187 #E00651
.187 #E00651
.187 #E00651
.187 #E00651
orange
yellow/green
yellow/blue
white/orange
black *2
white/yellow
black *2
white/green
black *2
white/blue
black *2
white/violet
black
Test
Up
Down
Sensor
Test
Ticket
Reset
84 "
95 "
6 "
6 "
6 "
6 " TO:
BA2050HX

18
D
C
B
A
4321
D
C
B
A
4321
DATE 3/20/09
DESCRIPTION TICKET DOOR HARNESS DRAWN BY MMARTIN
FILENAME BA1000X.VSD
PAGE 4 OF 16
REVISED 7/2/09
TITLE BA1000X - Go Ballistic
PART NO. BA2053HX
4 PIN MLX CAP #E02158
FEMALE PIN #E02176
PIN 2,4 #E08177
1
2
3
4
1
2
2 PIN MOLEX HOUSING #2089
MINI KK PIN #2074
E00241 – 3/8" CLEAR SHRINK
TUBE @ 1"
ZIP TIE TIGHT TO SHRINK TUBE
LOW TICKET LED
E08212 RED FLASHING LED
WITH LED HOLDER #1017
.187 #E00651
.187 #E00651
T Sense
P GND
T Run
+ 12 VDC
violet/blue
BLACK + black
violet/white
ORANGE+orange
TO:
LOW TICKET SWITCH
orange
violet/green
black
violet/green
SPIRAL WRAP – ¼”
#E08069 @ 6"
12"
31"
29"
34"
FLASHING
BA
10 " 1
2
3
4
4 PIN JST VHR HOUSING #E08118
JST SVH PIN #E08116
violet/blue
ORANGE
BLACK
violet/white
LOOP TIE #E08072
LOOP TIE #E08072
LOOP TIE #E08072
3-1/2"
10-1/2"
17"

19
D
C
B
A
4321
D
C
B
A
4321
1
2
3
4
5
6
7
8
9
10
10 PIN JST VHR HOUSING #E08122
JST SVH PIN #E08116
1
2
3
4
5
6
7
8
9
10
11
12
12 PIN PLUG #E02106
SPLIT PIN #E02100
10 "
DATE 3/20/09
DESCRIPTION SENSOR ARRAY INTERCONNECT
HARNESS DRAWN BY MMARTIN
FILENAME BA1000X.VSD
PAGE 5 OF 16
REVISED 7/2/09
TITLE BA1000X - Go Ballistic
PART NO. BA2057LX
BLACK
yellow/orange
yellow/red
yellow/brown
yellow/black
gray/brown
gray/red
gray/orange
RED
RED
BA
BLACK
gray/orange
gray/red
gray/brown
yellow/black
yellow/brown
yellow/red
yellow/orange
RED
RED

20
D
C
B
A
4321
D
C
B
A
4321
DATE 3/20/09
DESCRIPTION AC COMPUTER/POWER SUPPLY
HARNESS DRAWN BY MMARTIN
FILENAME BA1000X.VSD
PAGE 6 OF 16
REVISED 7/2/09
TITLE BA1000X - Go Ballistic
PART NO. BA2060LX
POWER CORD FROM
WA2010 POWER SUPPLY
N
E
L
POWER CORD FROM BA2000X COMPUTER N
E
L
1
2
3
3 PIN PLUG #E02206
MALE PIN #E02422
56"
19"
BLACK
GREEN
WHITE
BA
TO:
PH2007X POWER MOD

21
D
C
B
A
4321
D
C
B
A
4321
DATE 3/20/09
DESCRIPTION AC POWER SPLITTER HARNESS DRAWN BY MMARTIN
FILENAME BA1000X.VSD
PAGE 7 OF 16
REVISED 7/2/09
TITLE BA1000X - Go Ballistic
PART NO. BA2061LX
1
2
33 PIN PLUG #E02206
SOLID PIN #E02100S 3 PIN CAP #E02288
FEMALE #E08259
1
2
3
SJT
SJT
3 PIN CAP #E02288
FEMALE #E08259
PIN 2: #E02013
1
2
3
#E20217
82"
TO:
MS2364X – FAN ASY
76" BROWN
GREEN/YELLOW *2
BLUE
GREEN/YELLOW (600V)
8"
BROWN
GREEN/YELLOW
BLUE
BROWN *2
GREEN/YELLOW *2
BLUE *2
TO: PEM STUD ON WIRE WAY COVER
TO:
BA2062LX AC POWER MARQUEE
HARNESS
BA
TO:
PH2007X – POWER MOD
DECAL #7902
Table of contents
Other ICE Games Arcade Game Machine manuals
Popular Arcade Game Machine manuals by other brands

Sega
Sega THE KING OF ROUTE 66 Service manual

Sega
Sega LINDBERGH RED Service manual

Sting
Sting KC Cobra Operation & instruction manual

Konami
Konami Lethal Enforcers II Gun Fighters instruction manual

Merit
Merit Mr. VIPS Removal/Installation Instructions

Raw Thrills
Raw Thrills Bust-a-Move Frenzy Operator's manual