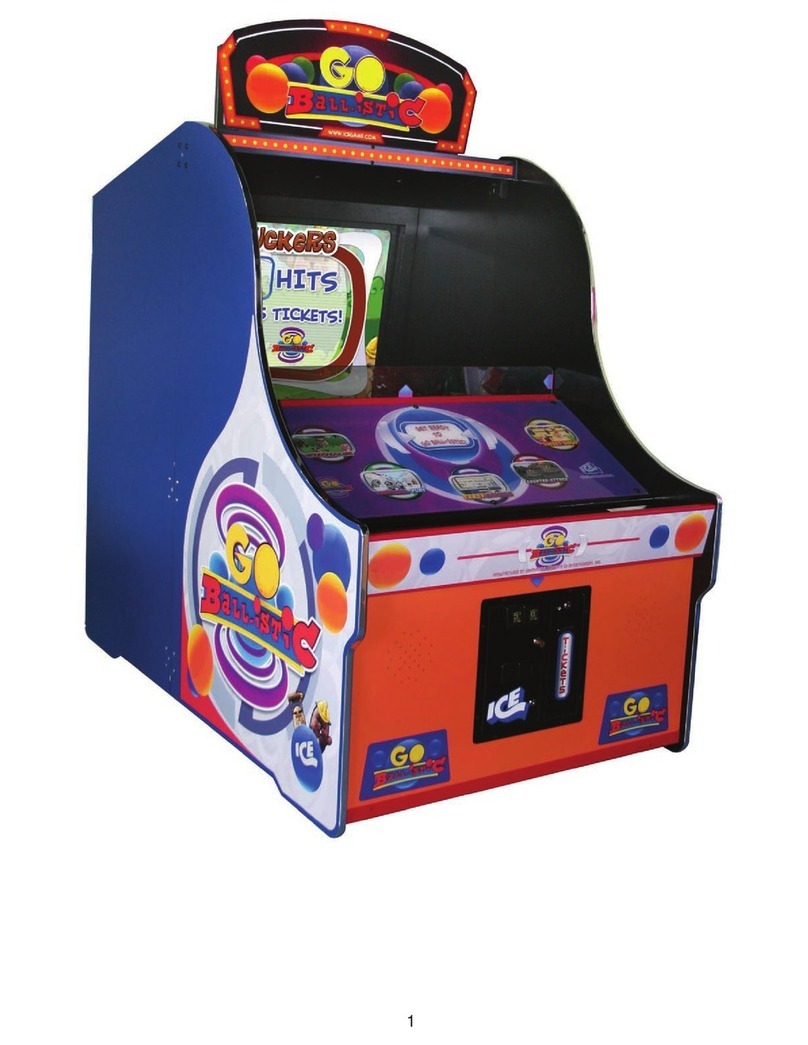
ICE Games SNACK ATTACK Instruction Manual

1
OWNERS AND SERVICE MANUAL
INNOVATIVE CONCEPTS IN ENTERTAINMENT INC.
10123 MAIN STREET, CLARENCE, NY 14031
SERVICE: 1-716-759-0360
FAX: 1-716-759-0884
WEBSITE: www.icegame.com
ICE MINI CRANE MODELS

2
INTRODUCTION……………………………….....…...PAGE 3
•GAME FEATURES
•GAME PLAY
SET-UP / TESTING / MAINTENANCE…………..…..PAGE 4
•SAFETY PRECAUTIONS
•GAME SET-UP
•ASSEMBLY
•TESTING
•CLEANING
PROGRAMMING……………………………………....PAGE 5 - 10
•PROGRAMMING MODES
•OPTION MODES
•ERROR CODES
MANUAL SETUP / PERCENTAGING…………...…...PAGE 11 - 14
•OVERVIEW
QUICK TROUBLESHOOTING…………….…….....…PAGE 15 & 16
•PROBLEMS AND SOLUTIONS
GAME REPAIR…………………..…………….………..PAGE 17 - 19
•GLASS REPLACEMENT
•MECHANICAL REPAIR
•ELECTRICAL / ELECTRONIC REPAIR
PARTS LISTINGS……………………………...…........PAGE 20 & 21
SCHEMATICS…………………………………………..PAGE 22 & 23
WIRING DIAGRAMS………………………...…….......PAGE 24 - 41
WARRANTY INFORMATION……….…………….......PAGE 42 & 43
TABLE OF CONTENTS
ICEDOC CS9001
REVISION E 11-11-02

3
INTRODUCTION
GAME FEATURES
The new MINI CRANE by I.C.E. was designed
with the operator in mind. Reliability, low main-
tenance, available custom cabinetry, and all
metal exterior construction are some of the most
important design features to be added to the
newest member of our crane family.
To keep things easy for the operator, all of our
best features have been carried over from our
other designs. Things such as an all-metal exte-
rior, powdered epoxy paint, tempered glass win-
dows, and full-featured programming are stan-
dards you’ve come to expect from I.C.E. prod-
ucts.
The MINI CRANE uses state of the art electron-
ics with a new drive circuit for all motors. In our
new design, even direct short circuits can’t dam-
age the motor or coil drivers. The protection is
built into the drivers themselves! Another advan-
tage is that the new board incorporates modular
driver circuits so the same main board can be
used on multiple products.
This crane has been made to give you a crane
that is competitive with other smaller cranes of
its size, but it has been engineered to leave the
competition behind. Every aspect of small crane
design has been scrutinized and improved to
bring it up to the standards necessary to com-
pete in today’s market.
We hope you thoroughly enjoy your ownership
experience with your new MINI CRANE. If you
have any questions or comments, please con-
tact our service department at: (716) 759-0360
GAME PLAY
As coins are inserted into the MINI CRANE a
coin in sound will be heard. When sufficient
coins have been inserted, the game sound
starts, the claw clicks closed and re-opens,
which signals the start of the game. The crane
will position its self in the middle of the “play
field” and remain there, with the cranes sound
theme playing until the player is ready.
When the player has moved the joystick or
pressed the buttons, to move the crane, the
timer on the right display will begin to count
down. The player will position the crane above
the prize and they are attempting to win and
press the drop button to lower the claw.
If the nudging option is on, then the player will
have the ability to keep “nudging” the claw down
each time the button is pressed to hone in on
the chosen prize. If the nudging option is off,
then the player will have only one chance to
drop the claw.
When the claw is fully dropped it will close and
retract to its upper most position. The crane will
then automatically position its self over the prize
chute at the rear of the cabinet. The claw will
open, releasing the prize (if grabbed) into the
prize chamber. The player can now remove the
prize from the chamber through the prize door
located in the front, lower left corner of the
game. The game is now in its home position
and is ready for the next player in line.

4
SET-UP / TESTING / MAINTENANCE
SAFETY PRECAUTIONS
IMPORTANT: FAILURE TO FOLLOW THESE DIREC-
TIONS CLOSELY COULD CAUSE SERIOUS DAMAGE
TO YOUR GAME.
WARNING: WHEN INSTALLING THIS GAME, A 3
PRONG GROUNDED RECEPTACLE MUST BE USED.
FAILURE TO DO SO COULD RESULT IN SERIOUS IN-
JURY TO YOURSELF OR OTHERS. FAILURE TO USE
A GROUNDED RECEPTACLE COULD ALSO CAUSE
IMPROPER GAME OPERATION, OR DAMAGE TO THE
ELECTRONICS.
DO NOT DEFEAT OR REMOVE THE GROUNDING
PRONG ON THE POWER CORD FOR THE SAME REA-
SONS AS GIVEN ABOVE. USING AN IMPROPERLY
GROUNDED GAME COULD VOID YOUR WARRANTY.
GAME SET-UP
BEFORE PLUGGING THE GAME IN, OR TURNING IT
ON, BE SURE THE GAME HAS BEEN SET TO THE
PROPER VOLTAGE. YOUR GAME SHOULD COME
PRE-SET FROM THE FACTORY CORRECT VOLTAGE,
HOWEVER IT IS A GOOD IDEA TO CHECK THE A.C.
WALL RECEPTACLE VOLTAGE BEFORE PLUGGING
THE GAME IN.
ASSEMBLY INSTRUCTIONS
1. Carefully unbox the game from its packaging.
2. Using the supplied keys, unlock the front door of
the cabinet.
3. Cut all tie wraps holding the wagon assembly and
crane in place.
4. Plug the game into a three prong grounded re-
ceptacle. NOTE: The appliance must be posi-
tioned such that the plug is accessible during use.
5. The game is now ready for start up.
TESTING
After the initial setup, it is time to test your game for
proper operation.
1. Locate the game in its permanent location.
2. Be sure the game has been properly plugged into
a 3 prong grounded outlet, and that the recepta-
cle is in good working order.
3. If using an extension cord, be sure it is a 3 prong
grounded type of at least 16Ga.
4. Verify that the game is set up for the proper volt-
age, and turn the power to the game on.
5. The game will run through a test mode at every
startup. See test mode explanation in the pro-
gramming section for details.
6. Insert coins/bills into the machine at least ten
times into the coin mech/bill acceptor to assure
proper operation
7. Check the credit and prize counters for proper
operation.
8. Check game volume during busy time at location
to set it at the proper level.
CLEANING
Regular cleaning of this game will keep it looking new,
and greatly enhance its appeal.
Clean the windows of your MINI CRANE with a standard
window cleaner such as Windex®
Clean the cabinet sides with a good cleaner such as
“Fantastic” or “409” and a soft rag. A mild soapy solution
can be used. You may use a furniture polish when fin-
ished to protect the game and make it look more attrac-
tive,
NOTE: DO NOT USE ALCOHOL, THINNERS OF ANY KIND,
OR PINBALL PLAY FIELD CLEANERS ON ANY OF THE CABI-
NET SURFACES ESPECIALLY THE DECALS.
IF YOU HAVE ANY QUESTIONS OR COMMENTS REGARD-
ING INSTALLATION OR PROPER FUNCTION OF YOUR
GAME, PLEASE CALL OUR SERVICE DEPARTMENT AT 1-
716-759-0360

5
PROGRAMMING
ENTERING THE
PROGRAMMING MODE
To enter the programming mode, open the front
door and press the button marked PROG. Lo-
cated on the main board housing inside the front
door and the crane will move to the front center
of the game.
Once you are in the programming mode move
the joystick forward and backward or use the
forward button to move through the modes. To
change the value of the mode move the joystick
left and right or use the right button. Once all
options have been set, press the drop button
and the game will return to regular game plat
with the new settings.
MODE EXPLANATIONS
MODE "0" GAME TYPE
– There are 5 game types:
"0" Left, Right, Forward, Backward, Nudge –
This mode is for a control panel that commonly
has a joystick and allows the player to lower the
claw each time the drop button is pressed. This
allows the player to hone in on the prize they
are attempting to win. NOTE: The crane will po-
sition it self according to the operator presets,
options 10 and 11, at coin up if option 17 is set
to “0” (off). The crane will position it self accord-
ing to the operator presets, options 10 and 11,
at the end of the game option 17 is set to
“1” (on).
"1" Left, Right, Forward, Backward, Drop -
This mode is for a control panel that commonly
has a joystick and the claw drops fully when the
button is pressed. NOTE: The crane will posi-
tion it self according to the operator presets, op-
tions 10 and 11, at coin up if option 17 is set to
“0” (off). The crane will position it self according
to the operator presets, options
100 and 11, at the end of the game option 17 is
set to “1” (on).
MODE "1" GAME MODE
There are two game modes:
−Normal play – This is the standard type of
play where a player has inserted enough
coins to create 1 credit and then plays the
game. Whether the player wins a prize or
not, the game is over.
−Play till win – In this mode the player has
inserted enough coins to create 1 credit and
will be able to play the game until they win a
prize.
MODE "2" TIME
This option allows the operator to set the game
play length. Options are from 10 seconds to 60
seconds in 5 second intervals.
MODE "3" COIN
This option allows the operator to set the
number of coins needed to create 1 credit. A
setting of “0” will put the game into free play.
MODE "4" BILL
This option allows the operator to set the
number of coins each bill is worth. A setting of
“0” turns this option off.

6
PROGRAMMING
MODE "5" COUNTER TYPE
Setting this option to “0” will have the game
count credits on the mechanical and software
counters. Setting this option to “1” will have the
game count coins.
MODE "6" ATTRACT
This option allows the operator to set the num-
ber of minutes between attract modes. Avail-
able settings are from 1 minute to 30 minutes in
1 minute intervals.
MODE "7" ATTRACT TYPE
This option allows the operator to choose what
type of attract mode they want.
“1” will have an attract mode with movement
only.
“2” will have an attract mode with both audio
and movement.
MODE "8" MANUAL
STRENGTH
This allows the operator to set the strength of
the claw for manual percentaging. Available
claw strengths are 50-99 with 99 = 100% claw
strength. NOTE: When in this mode the claw
will open and close with the strength set in this
mode. The operator will be able to feel each
strength setting to determine which best suits
their needs. When the correct strength setting
is determined the operator can just move to the
next option, and the manual strength option is
set.
MODE "9" AUTO
STRENGTH
This option allows the operator to set the claw
strength for the auto percentaging mode. Avail-
able claw strengths are 50-99 with 99 = 100%
claw strength. NOTE: When in auto percentag-
ing mode the claw will, at bottoming, close with
100% strength and will then be backed off to the
number set in this mode. i.e. With this mode set
to 75, the claw will at bottoming close with 100%
strength then back off to 75. NOTE: The claw
will open and close allowing the operator to feel
each strength setting to determine which best
suits their needs. When the correct setting is
determined the operator can just move to the
next option, and the auto strength option is set.
MODE "10" RIGHT TIME
This option allows the operator to adjust the
time the right motor drive will stay on, for center-
ing purposes at game start up. Available set-
tings are 0-40 intervals of ¼ sec. EXAMPLE: If
this option is set at five, then the right drive mo-
tor will stay on for (5*¼ sec = 1¼ sec.) 1¼ sec.
This option is used to correctly center the crane
at coin up with different coin speeds and crane
sizes. The operator can also use this option
along with option 17 to adjust the position of the
crane head when the game is over.
MODE "11" FORWARD
TIME
This option allows the operator to adjust the
time the forward motor drive will stay on, for
centering purposes at game start up. Available
settings are 0-40 intervals of ¼ sec. EXAM-
PLE: If this option is set at five, then the forward
drive motor will stay on for (5*¼ sec = 1¼ sec.)
1¼ sec.

7
PROGRAMMING
This option is used to correctly center the crane
at coin up with different coin speeds and crane
sizes. The operator can also use this option
along with option 17 to adjust the position of the
crane head when the game is over.
MODE "12" PLUSH COST
The operator will use this option to detail the
cost of an average piece of plush used in their
crane, in terms of the lowest denominator coin
used to coin up the game. EXAMPLE: If the av-
erage cost of a piece of plush is $1.50 and the
lowest denominator coin used to coin up the
game is $0.25 then the number entered for this
option will be 6 ($1.50 / $0.25 = 6). The avail-
able plush costs for this option are 1-20.
MODE "13" PAYOUT
The Operator will input the desired payout for
the auto percentaging mode. The available per-
centages for this option are 20% - 50%.
MODE "14" TICKETS TO
PLAY
This option is used only if you have a ticket dis-
penser. In this option the operator has the abil-
ity to set the number of tickets that a player will
be awarded just for playing the game. The
available range is 0-99 tickets.
MODE "15" TICKETS IF
LOSE
This option is used only if you have a ticket dis-
penser. In this option the operator has the abil-
ity to set the number of tickets that a player will
be awarded when a piece of plush is not won.
The available range is 0-99 tickets.
MODE "16" FACTORY
DEFAULT
A setting of “0” for this option will keep the lat-
est operator settings. A setting of “1” for this
option will restore all options to factory defaults.
MODE "17" CENTERING
ON / OFF
This option allows the operator to position the
crane any where on the play field. If option 17
is set to “0” (Off) the crane head will position its
self at the beginning of the game according to
the operator pre sets in options 10 and 11. If
option 17 is set to “1” (On) the crane head will
position its self at the end of the game accord-
ing to the operator pre sets in options 10 and
11.
MODE "18" SNAP ON / OFF
This option allows the operator to turn off and
on the snap of the claws at the start of the
game. If option 18 is set to “0” (Off) the claws
will not snap together at the start of a game. If
option 18 is set to “1” (On) the claws will snap
together at the start of a game.

8
PROGRAMMING
MODE "19" CREDIT
DISCOUNTING
This mode allows the operator to give a free
game for multiple CONSECUTIVE credits. In
other words, if for example you set a "2" for this
option, for every 2 credits IN A ROW that are in-
serted a free game will be given. The range for
this option is 0-5. Setting a "0" turns this option
OFF.
MODE "20" UP / DOWN
MOTOR TEST
When the operator moves the joystick left and
right the claw will raise and lower respectively.
The display will change from:
0-1 if the up switch is made
0-2 if the down switch is made
0-3 if both switches are made
MODE "21" LEFT/RIGHT
MOTOR TEST
When the joystick is moved left and right the
wagon assembly will move to the left and right.
The right display will change from:
0-1 if the left home switch is made
MODE "22" FRONT/BACK
MOTOR TEST
When the joystick is moved left and right the
wagon assembly will move to the forward and
backwards. The right display will change from:
0-1 if the back home switch is made
Entering the Accounting Mode
To enter the accounting mode, open the front
door and press the button marked ACCOUNT.
Located on the main board housing inside the
front door. The left displays will flash between
“cr” (credits) then the number of credits 1-9999.
If the operator presses the drop button the dis-
plays will flash “pl”(plush), then the number of
plush that has passed through the sensor.
These numbers can never be reset and WILL
NOT match the numbers on the mechanical
counters from the counters. It is advisable that
the owner, note this difference so that they will
be able to track actual software coins/credits
and plush out vs. mechanical counters for ac-
counting purposes.
Test Mode Explanation
Every time that the game is powered up, of the
door is closed, the game will run through a test
mode to check the following items.
-HOME BACK SWITCH
-FRONT/BACK MOTOR
-PRIZE SENSOR
-HOME LEFT SWITCH
-LEFT/RIGHT MOTOR
-OUT OF RANGE
-UP SWITCH
-CREDIT/COIN DISCONNECT
-E² (MEMORY)
-DOWN SWITCH
-CLAW CLOSE, CLAW OPEN
If any of the above items are malfunctioning, the
game will light the 4 decimal points on the po-
dium displays. This will alert the operator that
there has been a problem. The operator needs
only unlock and open the front door and the er-
ror codes will be displayed one at a time on the
left display. To move to the next error code the
operator needs to press the drop button. Re-
pairs should be made to those areas in which
errors have been logged. When all codes have
been seen

9
PROGRAMMING
and the door is closed the game will reset error
codes, run through a test mode to check for
proper operation and if all is well, game play can
start, if the 4 decimals will once again light up,
the operator will need to check the error codes
again. The play can continue to the best of the
machines abilities, with problems, until the er-
rors are corrected. At no time should the game
be inoperable unless a key component is dam-
aged.
Error code 10/11 will alert the operator that the
game has paid out 8 too many or 8 too little
pieces pf plush then in auto percentaging. If
this error is logged the game will automatically
revert to MANUAL settings until one of the fol-
lowing options is changed. (COST OF PLUSH,
AUTO % MIN., % PAYOUT, OR GAME COST)
This is why it is imperative that the manual set-
ting be setup before auto percentaging is used.
NOTE: Changing one of these options will reset
error code 10/11 and the game will begin auto
percentaging with the new settings.
NOTE: Some items on the list can not be de-
tected by the game and require that the opera-
tor watches for these actions to be performed
during the start up test mode. (Claw close, Claw
open).
Error Codes
#
1 E² (Memory)
2 Prize Sensor
3 Up Sensor
4 Down Sensor
5 Left/Right Sensor
6 Front/Back Sensor
7 Left/Right Motor
8 Front/Back Motor
9 Counter Disconnect
10 Out Of Range (High)
11 Out Of Range (Low)

10
PROGRAMMING
MODE DESCRIPTION MIN / MAX / DEF MEANING
(Credit Display) (Timer Display)
BASIC PROGRAMMING
0GameType0, 1,00—Left,Right, Forward,Backward,Nudge
1—Left, Right, Forward, Backward, Drop
1 Game Mode 0, 1, 0 0—Normal Play
1—Play till you win
2 Time 10, 60, 20 10—60 Seconds (Inc. every 5 seconds)
3 Coin 0, 9, 2 0—Free Play
1—9 Coins required for a single credit
4 Bill 0, 9, 4 0—Off
1—9 Number of coins each bill is worth
5 Counter Type 0, 1, 0 0—Credit counter
1—Coin counter
6 Attract 1, 30, 20 1—30 Minutes between attract modes
7AttractType1, 2,21—Motiononly
2—Audio and motion
8 Manual Strength 60, 99, 75 40—99 Claw strength Inc. by 1 (99= MAX)
ADVANCED PROGRAMMING
9 Auto Skill Leveling Strength 0, 99, 0 0—Auto off
60—99 Claw strength in auto (99 = MAX)
10Right Time0, 9,50—9Numberof1/4sec. timeintervalsright
11ForwardTime0, 10,50—10 Numberof1/4sec. timeintervalsforward
12 Plush Cost 1, 20, 4 Coins per piece of plush
13 Payout 20, 50, 33 20—50 Desired payout percentage
14Tickets toPlay0, 50,00—50 ticketsto bepaidjust to playgame
15Tickets ifLose 0, 50,00—50 ticketsto bepaidif youdo notwinplush
16 Factory Default 0, 1, 0 0—Normal
1—Restore factory defaults upon next startup
17 Center On / Off 0, 1, 0 0—Center option off
1—Center option on
18 Snap On / Off 0, 1, 1 0—Snap option off
1—Snap option on
19 Credit Discounting 0, 5, 0 # of Consecutive credits inserted for 1 free game
20 Up / Down Motor Test DIAG. Right display changes: 0 – 1 Up switch is made
0 – 2 Down switch is made
0 – 3 Both switches are made
21 Left / Right Motor Test DIAG. Right display changes: 0 – 1 Left switch is made
22 Front / Back Motor Test DIAG. Right display changes: 0 – 1 Back switch is made
0 – 2 Front switch is made

11
MANUAL SETUP / PERCENTAGING
OVERVIEW
Although our crane offers the option of being
able to be set up for MANUAL or AUTOMATIC
PERCENTAGING modes, many operators pre-
fer to use the MANUAL percentaging mode for a
number of reasons.
NOTE: THE FOLLOWING INFORMATION IS
NOT APPLICABLE TO CANDY CRANES.
CANDY CRANES ARE GENERALLY SET UP
AS PAY 'TILL YOU WIN AND ARE NOR-
MALLY SET UP FOR THE SHOVEL OR
SCOOP TO GRAB AS STRONGLY AS
POSSIBLE.
When Manually percentaging your cranes, ALL
of the following factors may affect your payout:
- Claw open position
- Claw closed position
- Claw Slider positioning
- Claw shape
- Claw Strength
- Size and Texture of the Plush
- Packing of the Plush
- Type of Customer
Basic EXPERIENCE and EXPERIMENTATION
will determine the best set-up for you. Our
cranes offer all of the popular adjustment op-
tions, so you can easily set your crane up to
work just as any other cranes you may have
previously used.
The above mentioned factors are described in
greater detail below. We will review all of these
in detail, so you will know better how to set up
your game.
NOTE: IF YOU ALREADY KNOW HOW ALL
OF THE ABOVE MENTIONED FACTORS
AFFECT YOUR EARNINGS, YOU MAY
PROCEED TO THE SETUP SECTION.
CLAW OPEN POSITION
The CLAW OPEN POSITION is determined by
how you set the adjustable washer that is
located under the solenoid plunger. This should
be adjusted so that the claw will go around one
plush prize, but will not go around more than
one. This is important so you can limit the
payout and more accurately keep track of your
prize count (if you have a prize sensor). It is
especially important to adjust the claw open
position if you use small or beanie type prizes.
If the claw opening is too large, you could pick
up multiple prizes at once very easily.
This open position can be easily changed by
ROTATING the "Saw Blade" shaped cam
washer located just under the solenoid plunger.
Loosen the Allen head bolt under the claw
assembly, rotate the washer until the claw open
position what you want, then re-tighten the Allen
bolt.
CLAW CLOSED POSITION
The CLAW CLOSED POSITION is important for
determining the OVERALL grab or
"appearance" of grab of the claw. Normally, the
claw closed position is set so that when the
solenoid in engaged, the claw appears to close
fully. For the most part, the prizes are big
enough that the tips of the claw can be set up to
be slightly apart when the solenoid is energized.
Normally you do not want the tips to bang
together as they can lock into each other if they
overlap too far, then even when the solenoid
releases, the claw tips are stuck together. For
this reason we generally recommend that you
keep about a "dime" sized space between the
claws when they are closed. Of course you can
also adjust this opening size to anything you
would like.
To adjust the claw closed position, loosen the
bottom collar on the solenoid housing, and raise

12
MANUAL SETUP / PERCENTAGING
or lower the position of the collar to adjust the
closed position of the claws. Push the solenoid
plunger in by hand to verify the claw position
and re-tighten the collar.
CLAW SLIDER POSITIONING
The job of the CLAW SLIDER is to determine
the ACTUAL grab of the claw. This actual grab
however, will change based on where the claw
contacts the plush. This change is what actually
makes the game exciting to the customers and
allows for more challenging game play.
The slider will move up and allow the claw to
open whenever there is lateral (side to side)
pressure exerted on the claw tips. When the
pressure is removed the claw instantly returns
to the closed position.
Since the lateral (side to side) pressure against
the claw tips is what allows the slider to func-
tion, the shape of the claw will influence how
easily the slider will work. (For more on claw
shape, read the claw shape section of the
manual).
The claw slider is adjusted by the position of the
upper collar on the solenoid body. If you set the
collar against the slider, it will not function at all.
This effectively locks the slider out. This is
"usually" what is done for the auto-percentaging
mode.
If the collar is adjusted for a larger gap, the claw
will open further. The bigger the gap, the more
the claw grab is actually limited.
You may wish to adjust the slider so that a grab
of an arm, leg or hand will not work, but a grab
of the body will.
You may wish to set the slider so that even a
body grab won't work, but a grab across the
body and shoulder will.
NOTE: THIS ADJUSTMENT HAS THE MOST
IMPACT ON YOUR PERCENTAGING.
ALLOWING THE SLIDER MORE OR LESS
MOVEMENT WILL CHANGE YOUR OVERALL
PAYOUT PERCENTAGE.
Play around with the upper collar positioning to
get an idea of how this adjustment works.
CLAW SHAPE
CLAW SHAPE will determine how easily the
plush is grabbed. A rounder shape will "cradle"
the plush more making it easier to pick up plush.
You will want to use this shape (see illustration)
if you have large or heavy plush and are having
a difficult time dispensing enough product.
On the other hand, if the game consistently
pays out too much, you may wish to change the
shape of the claw if none of your other adjust-
ments will percentage the game properly. You
will want to bend the claws into more of a
"HEART" shape. (See illustration) This will allow
the plush to slide more easily through the claws.
CLAW STRENGTH
CLAW STRENGTH can also be used to fine
tune your payout percentages. By increasing
claw strength from lowest power (40) to (99)
highest you can adjust the strength of the sole-
noid. You will normally want to keep your claw
strength between 80-99 unless you are using
very light prizes.
SIZE AND TEXTURE OF PLUSH
The size and texture of plush will had a dramatic
impact on how your game pays out.
Under normal circumstances, the closer you can
keep the prizes to having the same general size
and weight, the easier it will be to get consistent
payouts. While it is sometimes necessary to mix

13
MANUAL SETUP / PERCENTAGING
different size prizes, please be aware that this
will affect your payout to some extent.
The biggest issue with plush size will be adjust-
ing the slider to compensate for the different
sizes.
Texture of the plush can affect payouts as well.
Vinyl toys will stick and grab the claws differ-
ently than fur covered toys that will slide through
more easily.
PACKING OF THE PLUSH
How you "pack" the plush will have a big impact
on how your game pays out. Some people pre-
fer to tightly pack the plush to keep the payout
lower. This works fine until a few prizes are won
and then it becomes much easier to win. We
suggest a loose pack as it is much easier to be
consistent with, and much easier to percentage.
TYPE OF CUSTOMER
Lastly, don't forget the type of customer at your
location will be a determining factor. You may
need to make adjustments just for this.
SETTING UP YOUR MACHINE
MANUALLY
PLEASE READ THIS SECTION CAREFULLY
TO GET THE BEST POSSIBLE RESULTS
FROM YOUR MACHINE
In this section we will give you an example of
how you might like to set your machine up.
As you become more familiar with this machine,
you may be able to eliminate some steps.
CALCULATIONS
The best way to set up your crane manually is
to test it in house over a number of games.
We suggest testing in 100 game increments to
get the best idea of an accurate payout. Once
you become familiar with your crane and your
prizes, you may not need to test as extensively
in house. Of course, you could bypass this en-
tire step, but you might get undesirable results
in the field.
Use the following example to figure out your
PAYOUT using the following example.
Let's say your game costs 50 cents to play, you
want to pay out 33 percent, and your plush cost
is $2.50.
First, if you play 100 games at 50 cents you
need to figure out what is 33 percent of 100
games at 50 cents.
Calculate 100 X .50 (50 cents). This equals
$50.00.
Next Calculate $50.00 X .33 which is 33 per-
cent. Your result will be $16.50.
Next, divide the $16.50 by the value of your
plush which in this case is $2.50. The answer is
6.6 This would mean that for each 100 games
you play, you would want to pay out approxi-
mately 6.6 prizes.
Let's do the same calculations again with differ-
ent beginning values…
Let's say your game costs 25 cents to play, you
want to pay out 20 percent, and your plush cost
is $1.50
First, if you play 100 games at 25 cents you
need to figure out what is 20 percent of 100
games at 25 cents.

14
MANUAL SETUP / PERCENTAGING
Calculate 100 X .25 (25 cents). This equals
$25.00.
Next Calculate $25.00 X .20 which is 20 per-
cent. Your result will be $5.00
Next, divide the $5.00 by the value of your plush
which in this case is $1.50. The answer is 3.3
This would mean that for each 100 games you
play, you would want to pay out approximately
3.3 prizes.
INITIAL ADJUSTMENT
Set your game up as follows before testing:
Claw Open Position - Leave stock from the
factory unless the open position is too small to
go around the plush prizes.
Claw Closed Position - Leave an opening
about the size of a dime when claws are closed.
This will prevent the claw tips from overlapping
which could cause the claw tips to stick to-
gether.
Claw Slider Position - The initial setting of the
slider should be set so that if the claw tips grab
onto an arm or leg of the plush the claws will
slip off. This only applies when the tips grab
onto the plush from the side.
NOTE: WHEN THE CLAW TIPS ARE UNDER
THE PRIZE THE SLIDER WILL HAVE VERY
LITTLE EFFECT UNLESS THE CLAW SHAPE
HAS BEEN CHANGES NOTICEABLY.
Loosen the top collar or cap located on top of
the slider and raise or lower to allow greater or
lesser effect from the slider.
Claw Shape - do not change at this time.
Claw Strength - Set the initial strength value to
"70"
FINAL ADJUSTMENT
After playing 100 games check to see what your
payout is at. Use the adjustments to change the
percentages. Since there are so many different
ways and preferences by the customers to raise
or lower payouts, please feel free to experiment
with different ways. The information at the be-
ginning of this section details all of the possible
adjustments and their affects on the game.
Retry until you are comfortable that you have a
good initial set-up for the street.
You will find that various locations will payout
differently just because of the types of players
that frequent the locations.
You will also find that the plush can have a big
impact on the payout percentages.
HINTS FOR CONSISTENT PAYOUTS
1. Find an adjustment method that works good
and stick with it for all of your ICE cranes.
2. Try to keep the plush size and type as consis-
tent as possible within the machine.
3. Try to write down settings for certain types of
plush.
EXAMPLE: When you put in the "Valentines
Day or Christmas" mix, write down those set-
tings so you can set your crane up the same
way the next time you put that particular mix into
the machine. Also, if you have a lot of locations,
you can just tell your route man how to set up
the cranes for that particular type of plush.

15
QUICK TROUBLESHOOTING
PROBLEM PROBABLE CAUSE SOLUTION
THE DECIMALS ON THE 4
DISPLAYS ARE LIT UP
NO GAME POWER
GAME WILL NOT TAKE MONEY
OR GIVE CREDITS CORRECTLY
DISPLAYS DO NOT WORK
CRANE OR WAGON DOES NOT
MOVE
CRANE KEEPS TRYING TO
MOVE IN TO THE HOME
POSITION
CLAW WILL NOT CLOSE
CLAW STAYS CLOSED
AUTO PERCENTAGING IS NOT
FUNCTIONING
CLAW GOES DOWN AND THEN
UP BUT DOES NOT CLOSE
CLAW COMES UP AND ABOUT
15 SEC. PASSES BEFORE
CRANE MOVES TO THE HOME
POSITION
CRANE OR WAGON WHEELS
SLIP
THIS IS IN FACT NOT A PROBLEM BUT A WAY
OF LETTING THE OPERATOR KNOW THAT
THERE WAS A PROBLEM DURING THE START
UP MODE
ON-OFF SWITCH ON THE GAME IS TURNED OFF
BLOWN A.C. POWER FUSE
GAME NOT PLUGGED OR CORD DAMAGED
BAD TRANSFORMER
TRANSFORMER HARNESS NOT CONNECTED
BAD POWER MODULE
BAD COIN SWITCH
COIN DISCOUNTING SET WRONG
COINS PER CREDIT SETTING INCORRECT
BAD COIN MECHANISM
LOOSE OR DAMAGED HARNESSING
BAD MAIN P.C. BOARD
BAD 12V FUSE
BAD DISPLAY P.C. BOARD
BAD MAIN P.C. BOARD
LOOSE OR DAMAGED DISPLAY HARNESSING
BAD MOTOR
LOOSE OR DAMAGED HARNESSING
BAD SWITCH ON BUTTON OR JOYSTICK
BAD HARNESSING TO BUTTONS OR JOYSTICK
BLOWN FUSE TO MOTORS ON MAIN P.C.B.
BROKEN DRIVE BELT
BAD LIMIT SWITCH (S)
LIMIT SWITCH NOT ALIGNED WITH ACTUATOR
BLOWN FUSE TO CLAW ON MAIN P.C. BOARD
BAD COIL
LOOSE OR DAMAGED HARNESSING
CLAW HAS MECHANICALLY JAMMED
BAD DRIVE TRANSISTOR ON MAIN P.C.B.
CLAW HAS MECHANICALLY LOCKED
PROGRAMMING IS NOT CORRECTLY SET
BAD PRIZE SENSOR
LOOSE OR DAMAGED SENSOR HARNESS
DOWN SWITCH BAD
LOOSE OR DAMAGED HARNESS TO DOWN
SWITCH
UP SWITCH BAD
LOOSE OR DAMAGED HARNESS TO UP SWITCH
MISSING OR DAMAGED O-RING DRIVE BELTS
LOOSE SET SCREWS IN WHEELS
LOOSE SET SCREWS IN DRIVE COUPLER
RAILS NEED TO BE SCUFFED
OPEN THE FRONT DOOR AND THE
ERROR CODES ARE SHOWN ON THE
DISPLAYS. TO ADVANCE THROUGH
THE ERROR CODES, PRESS THE
FIRE BUTTON
TURN POWER ON
REPLACE WITH PROPER FUSE
CHECK POWER CORD
CHECK FOR PROPER VOLTAGES
CHECK HARNESS
REPLACE POWER MODULE
CHECK W/METER AND REPLACE
CHECK PROGRAMMABLE SETTING
ADJUST OR REPLACE
CHECK W/METER—REPAIR
REPAIR OR REPLACE MAIN BOARD
REPLACE WITH PROPER FUSE
REPAIR OR REPLACE P.C. BOARD
CHECK W / METER AND REPAIR
REPLACE MOTOR
CHECK W / METER—REPAIR
REPLACE SWITCH
CHECK W / METER—REPAIR
REPLACE WITH PROPER FUSE
REPLACE BROKEN BELT
REPLACE SWITCH(S)
ALIGN SWITCH AND ACTUATOR
REPLACE WITH PROPER FUSE
REPLACE COIL
CHECK W / METER AND REPAIR
FIND JAM AND REPAIR
REPLACE TRANSISTOR
FIND JAM AND REPAIR
SET OPTIONS “9” AND “16”
REPLACE PRIZE SENSOR
CHECK W / METER AND REPAIR
REPLACE DOWN SWITCH
CHECK W / METER AND REPLACE
REPLACE UP SWITCH
CHECK W / METER AND REPLACE
REPLACE O-RING BELTS
TIGHTEN SET SCREWS
TIGHTEN SET SCREWS
SCUFF TOP OF RAILS WITH
SANDPAPER

16
QUICK TROUBLESHOOTING
1. A self-test will be performed each time the front door is “closed” or the game is powered up.
2. If the Wagon does not move smoothly through a full travel from left to right, check to see that the
wheel spacing is correct. If the spacing is correct then check the 2 cabinet rails for burrs that may
cause the wheels to bind. Also check for broken or loose drive belts.
3. If the Wagon does not move smoothly through a full travel from front to back, check to see that the rod
bushings are straight and not binding. Check for excessively loose drive belts or one of them broken.
4. If the front door is having trouble closing fully, check to see that the front door harness is routed prop-
erly. Also be sure the prize door is fully shut. If it is partially open it will not allow the front door to open
or close properly.
5. If the door will not lock properly or locks with difficulty, check to see if the lock rotates smoothly. Next
check that the lock rods are not binding on the lock cam or the lock rod guides. Next check that all
friction points have been lubricated with molly grease. Finally if need be, file the lock rod guides such
that the door closes and locks smoothly but be careful not to file out too much, for this may cause the
door not to pull tightly to the cabinet as it was intended to do.
6. If the decimals light up on the displays after a self-test, an error has been locked. To advance through
the error codes press the drop button when in error detection mode.
7. If, at the beginning of the self-test mode, the claw does not drop, one or more of the following may ap-
ply. The prize sensor is not working, or blocked. The string or string lever is mechanically binding.
The up or down switch is sticking or misaligned from its actuator.
8. If claw stays closed it is likely that the diode has blown and the transistor controlling the claw has also
blown. Shut off the game immediately and have a new diode, in coil assembly, and transistor, on
main board, installed.
9. If claw is jerky while being lowered, it is likely that the string has mechanically bound on the spool. To
fix the string binding enter programming mode and go to CLAW UP/DOWN MODE. By moving the
joystick to the left and right you are able to raise and lower the claw mechanism. Move the crane over
the prize chute and lower the claw mechanism all the way until it starts to wind up backwards. Re-
verse the motor direction to raise the claw mechanism and properly rewind the string on the spool.
Exit the programming mode and the string should be free of mechanical binding.
10. If the claw stays open First check for bad fuses on the main board, next check that there are no wires
dislodged from the connectors in the harness between the wagon and the crane, the harness between
the wagon and the main board, the crane assembly and the wagon assembly. If the problem still ex-
ists and no fuses are blown or wires dislodged it is likely that the transistor controlling the voltage to
the claw has blown on the main board. Replace main board and have the other main board repaired
by electronics.
11. If the crane/wagon in the home position still tries to move left or back, check to see that the actuators
are both present. Check to see that the sensors are present. Next check to see that the sensors and
the actuators are both aligned. Then check to see that the sensor wires are not dislodged from the
connectors. Finally replace the sensor; it is likely to be bad.

17
GAME REPAIR
WARNING: ALWAYS REMOVE POWER TO
THE GAME BEFORE ATTEMPTING ANY
SERVICE, UNLESS NEEDED FOR SPECIFIC
TESTING. FAILURE TO OBSERVE THIS
PRECAUTION COULD RESULT IN SERIOUS
INJURY TO YOURSELF OR OTHERS.
TROUBLESHOOTING
PHILOSOPHY
To find problems with this game, always first check
what should be obvious. See that the game is
plugged in, and all of the fuses on the game are
good.
Next, check to see that all of the connectors are
firmly seated, and that none of the wires have pulled
out of them.
When trying to find out if specific components are
bad or not, try swapping them with components from
another player station to see if the problem moves
with the component, or stays where it was. This will
help you to know if you have a problem with a spe-
cific component, or maybe a problem with either the
wiring or the Main P.C. Board. Use extreme caution
when using probes or voltmeters if the game is pow-
ered up. If checking continuity, it is important to dis-
connect the harnessing at both ends, as attached
they may yield erroneous results.
If P.C. Boards are suspected as causing problems,
check to see that all I.C. chips are firmly seated on
the boards.
MAIN P.C. BOARD
REPLACEMENT
1. Remove all A.C. power from the game.
2. Unlock and open the front door.
3. Carefully remove all of the connectors from
the P.C. Board.
4. Remove the 4 long plastic hexagon nuts that
secure the board to the main board housing.
5. Gently pull the P.C. Board from the mounting
studs.
6. Reassemble in the reverse order using a
new main P.C. Board.
GLASS
REPLACEMENT
1. Remove all A.C power from the game.
2. Open the front door and unscrew the brack-
ets that retain the glass.
3. Carefully remove all broken glass from the
game. Vacuum up any remaining pieces.
4. Carefully install the new glass and replace
the mounting brackets.
REMOVAL OF CRANE
MECHANISM
1. Remove all A.C. power from the game.
2. Unlock and open the front door.
3. Slide the crane assembly to the front center
of the machine for access to the micro track.
4. Pull down on the micro track and pull away
from the Crane. This will unlock the micro
track from its mounting bracket.
5. Disconnect the connector from the crane as-
sembly.
6. Carefully lift the entire crane assembly off the
rails approximately 2 inches, rotate clockwise
as far as possible, and drop past the crane
rail and remove the entire assembly out from
the game.
7. Reassemble in reverse order.
STRING REPLACEMENT
1. Remove all A.C. power from the game.
2. Unlock and open the front door.
3. Remove crane assembly as detailed above.
4. Pull the string out a bit and remove from the
spool. Remove the coil cap from the claw coil
and remove the other end of the string.
5. Take the replacement string and feed up
through the bottom hole in the crane assem-
bly.

18
GAME REPAIR
6. NOTE: STRING PURCHASED FROM I.C.E.
WILL HAVE GLUE ON THE LAST 2 INCHES
TO MAKE IT EASIER TO FEED UP INTO
THE MECHANISM. IF YOU ARE USING
YOUR OWN STRING, WE WOULD SUG-
GEST YOU GLUE THE END AND LET IT
DRY SO THE END OF THE STRING IS
STIFF.
7. Using a tweezers or suitable tool, grasp the
string and route it through the small pulley
wheels as shown in the photograph above.
8. Pull the string up and through the hole in the
spool to secure. Tie a knot. Secure the knot
with a small amount of glue and cut off any
excess string.
9. Feed the other end of the string through the
coil cap, knot and secure with a small
amount of glue. BE SURE THE STRING
CAN NOT PULL THROUGH THE HOLE.
10. Reposition the coil cap on the coil and adjust
so the slider on the coil works properly.
Tighten the Allen screw.
CRANE MOTOR
REPLACEMENT
1. Remove all A.C. power from the game.
2. Unlock and open the front door.
3. Remove crane assembly. (See previous in-
structions)
4. Remove any drive o-rings and pulley wheels
from the bad motor.
5. Unsolder the motor leads from the bad mo-
tor. NOTE: Be sure to note which wire goes
to which motor lead. If they are reinstalled
backwards the motor will run the opposite of
its intended direction.
6. Remove the 3 bolts securing the motor to the
housing.
7. Carefully remove the bad motor.
8. Reassemble in reverse order using new mo-
tor. NOTE: When motor is completely rein-
stalled, place one drop of thread lock on
each of the 4 bolts that secure the motor in
place to prevent the bolts from backing out.
FUSE REPLACEMENT
CAUTION FOR CONTINUED PROTECTION
AGAINST RISK OF FIRE, REPLACE ONLY WITH
THE SAME TYPE OF FUSE HAVING THE SAME
ELECTRICAL RATING.
AREA LOCATION AMP VOLT
MAIN BOARD F2 6 MDQ 250
F3 3 MDQ 250
F4 4 MDQ 250
F5 4 MDQ 250
POWER MOD -- 3 MDQ 250
BULB
REPLACEMENT
1. Remove all A.C. power from game.
2. Unlock and open front door.
3. Remove the clear plastic clip that holds the
bulb into the bulb holder.
4. Unsnap the bulb from the bulb holder. This
can be done by pushing on the release but-
ton while pulling on the bulb.
5. Replace in reverse order.
6. Be sure the bulb is snapped securely in
place.
7. Snap the clear plastic bulb retainer back into
place.

19
GAME REPAIR
PRIZE FENCE
REPLACEMENT
1. Remove all A.C. power from the game.
2. Unlock and open the front door.
3. Carefully unbolt the 3 bolts and 2 screws
holding the prize fence to the play field.
4. Remove the old prize fence.
5. Assemble in reverse order.
PRIZE SENSOR
REPLACEMENT
1. Remove all A.C. power from the game.
2. Unlock and open the front door.
3. Remove the cover to the prize chute to ac-
cess the sensor.
4. Remove the 2 plastic hex spacers securing
the sensor board to the bracket.
5. Carefully remove the sensor board from its
mounting studs.
6. Reassemble in reverse order using a new
prize sensor board.

20
PARTS LISTINGS
MECHANICAL PARTS
655 Square Drive Screw, Black 3/4"
655S Square Drive Screw, Silver 5/8"
4006 Foam Weather-stripping
5006 Cash Box
5101x Coin Mech Holder
1030 Dollar Bill Validator Cover Plate
2033X Rope Light Controller
2089X AC Rope Light
2133CR Rope Light, Red / Chase
2133CW Rope Light, Clear / Chase
2133U Rope Light "U" Channel
2134 Rope Light End Cap
6324 #6-32 Acorn Nut
6356 Hex Spacer, Aluminum 2-56 x 3/8"
6364 Plastic Glides
6365 Mirror Clip
BC1018 Podium
CG1078A Claw
CG2014 4 way Joystick w/Push Button
CG3036 Claw/Coil Interconnects
CG5014 "T" Lock, 90 deg. swing
CG5015 "T" lock - Lock Barrel
CH1052 Rare Earth Magnet
CH3002F Magnet Enclosure
CP2090X Harness, Rope Light "Y" Splitter
CS1006 Door Assembly
CS1020 Candy Jaw
CS2021 Jaw Bracket
CS1034 Clip Holder
CS1035 Clip Spacer
CS1036 Adjusting Clip
CS1037 Switch Trigger
CS1050 Drive Pulley, Motor
CS1058 Wagon Drive Shaft
CS1059 Candy Jaw Shaft
CS1066 Spring
CS1070 Coil Housing
CS3004 Prize Fence
CS3005 Prize Chute
CS3008A IGUS Micro Track 42 Link Section
CS3008B IGUS Mounting Link w/modified end
CS3008C IGUS Mounting Link
CS3008D IGUS Quick Connect Mounting Link
CS3013 Coin Slide
CS3025 Prize Sensor Mirror
CS3026 Rear Mirror
CS3027 Door Glass
CS3028 Side Glass
CS3030 Guide Pulley, Shaft
CS3031 O-ring Retainer
CS3032 String Spool
CS3037 Claw Spider
CS3039 Coil Cap
CS3040 Guide Pulley, Idler
CS3041 Drive Pulley, Idler
CS3042 String Guide
CS4001 O-Ring, Large Urethane
CS4002 O-Ring, Medium Urethane
CS4003 O-Ring, Small Urethane
CS4004 String
FP1004 Foot Mounting Plate
FP2007 4" Speaker
HH1006 Cash Box Lid
HR1019 Leveling Feet, 1-1/2”
ELECTRONIC / ELECTRICAL
8312 PLL Fluorescent Light Bulb, 40 watt
8422 Sub-miniature Micro Switch
8452 Micro Switch, Standard Size - Basic
BC2032X Display P.C. Board Assembly
BW2017 Bulb Retainer Clip
BW2018 Light Bulb Retainer
CS2008 Globe Motor DC 24 volt
CS2009X Solenoid Coil Sub Assembly
CG2012 Hamlin Reed Switch
CS2002X Transformer
CS2007X Power Module Assembly
CS2027 20FT. Power Cord
CS2034X Main P.C. Board
CS2039X Prize Sensor Opto P.C. Board
CS2050X Door Harness
CS2052AX Harness Assembly, Upper
CS2053X Wagon / Crane Harness
CS2054X Display Harness
CS8449X Fluorescent Light Ballast, Work Horse 3
PP250X Light Bulb Socket, PLL
This manual suits for next models
4
Table of contents
Other ICE Games Arcade Game Machine manuals
Popular Arcade Game Machine manuals by other brands

Bally
Bally BONANZA Service Manual & Parts Guide

BMI Gaming
BMI Gaming SideShow 1889 Installation and Maintenance

MD SPORTS
MD SPORTS AWH084 017E Assembly instructions

PlayMechanix
PlayMechanix amc The Walking Dead Setup and Operation Service Manual

SereneLife
SereneLife SLARHKY54 user guide

MD SPORTS
MD SPORTS AC208Y21003 Assembly instructions

Sega
Sega House of the Dead Operator's manual

Bandai Namco
Bandai Namco DC HEROES vs. VILLIANS AIR HOCKEY owner's manual

DPS-Promatic
DPS-Promatic SPEED TEST instruction manual

Altronic
Altronic The Game of Life Set up and configuration

AtGames
AtGames HA8801 manual

Benchmark Games
Benchmark Games Ticket Station manual