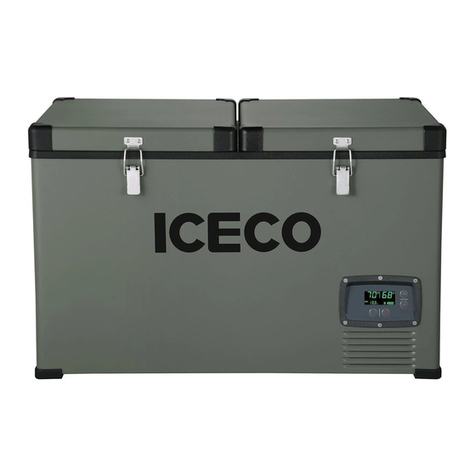
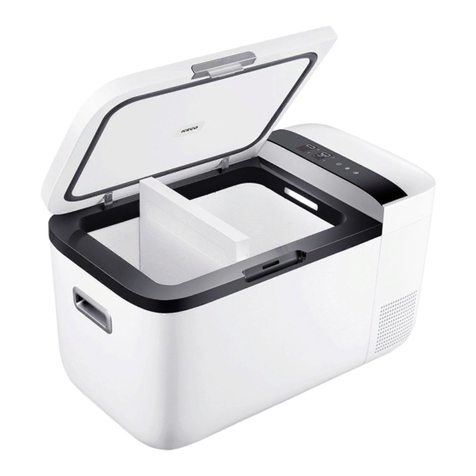
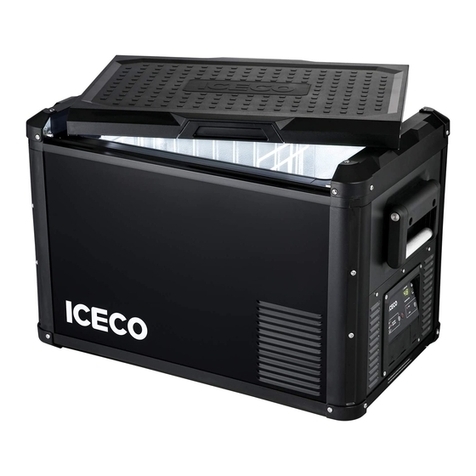
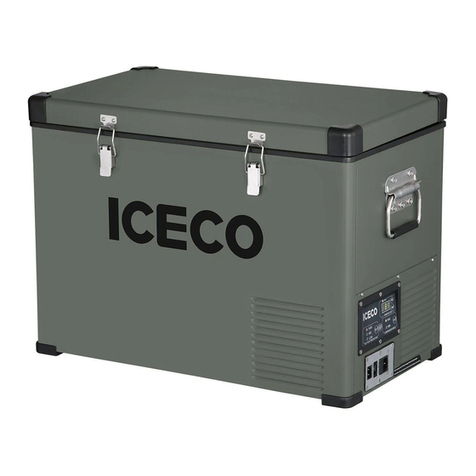
Iceco VL35 Series User manual

VL35 / VL42 / VL45 / VL52

1 SAFETY INFORMATION
1.1 Warning
1.2 Notice
1.3 Inended to Use
1.4 Correct Disposal of This Product
1.5 Danger
2 MEASUREMENTS
3 CONTROL PANEL
3.1 Using The Control Panel
3.2 Opreating
3.3 Display
4 IMPORTANT INFORMATION
5 FITTING THE EXTENSION COLLAR AND HIGH LID
6 INSTALLATION AND OPERATION
6.1 12V Installation
6.2 240V Installation
6.3 Efficient Operation
7 USING A GENERATOR
7.1 Common 12V Power Supply Issues
7.2 Cut in / Cut out
8 TROUBLE SHOOTING
8.1 Troubleshooting Flow Chart
8.2 Red Led Error
CONTENTS

SAFETY INFORMATION
Please read this operating manual carefully before starting the appliance. Keep it in a safe place for
future reference. If the appliance is passed on to another person, this instruction manual must be
handed over to the user along with it.
The manufacturer cannot be held liable for damage resulting from improper usage or incorrect operation.
WARNING
● This appliance is not intended for use by persons (including children) with reduced physical,
sensory or mental capabilities, or lack of experience and knowledge, unless they have been given
supervision or instruction concerning use of the appliance by a person responsible for their safety.
● Children should be ensured that they do not play with the appliance.
● Cleaning and user maintenance shall not be carried out by children without supervision.
● Do not store explosive substances such as aerosol cans with a flammable propellant in this appliance.
● Do not use this appliance near direct heat sources, for example, a cooker, radiator or exposing it to
direct sunlight.
● The appliance shall not be exposed to rain. Place the refrigerator on a dry, protected surface, away
from edges.
NOTICE
● No responsible for the damage by ignoring the safety instructions ICECO.
● The use of accessories that are not recommended by ICECO can cause injuries and will invalidate
any warranty that you may have.
● Place the products so that they do not collide against each other or break when the appliance is in
motion.
● If the SUPPLY CORD is damaged, it must be replaced by the manufacturer, its service agent or
similarly qualified persons in order to avoid a hazard.
● Disconnect the power cable from the plug before carrying out any maintenance.
● Do not place carbonated drinks and gaseous drinks under 0°C(32°F) in this appliance.
INENDED TO USE
unless they are of the type recommended by ICECO.
●Do not place ice or liquids which are not sealed in containers within the refrigerator.
●Do not place hot products or hot food in this appliance.
CORRECT DISPOSAL OF THIS PRODUCT:
To prevent possible harm to the environment or human health from uncontrolled waste disposal, recycle
it responsibly to promote the sustainable reuse of material resources. To return your used device, please
use the recovery systems or contact the retailer that they can take this product for environmental safe
recycling.
DANGER
●Risk of child entrapment.
Before you throw away your old refrigerator or freezer:
● Leave the shelves in place so that children may not easily climb inside.
1
THE ORIGINAL VL35-52 ONE FRIDGE THAT EXPANDS TO 4 SIZES
37
qt
44
qt
48
qt
55
qt

Adjusting the set temperature
1. Flick the power switch to the ON position. The red power light and blue screen will light up.
2. To display the set temperature, hold down the SET button.
3. To adjust the set temperature, hold down the SET button whilst pressing either the UP or DOWN button until the
desired set temperature is displayed.
4. When your ICECO is running it will operate at 2˚C either side of set temperature. For example, with your ICECO set
at 0˚C it will run until reaches –2˚C and then stop. The green energy saving light illuminates when the compressor
is cycled off. The compressor will cut back in when the cabinet cycled off. The compressor will cut back in when the
cabinet temperature reaches +2˚C.By running 2˚C either side of the set temperature the compressor will not cut in and
out excessively and this will reduce your power consumption.
USING THE CONTROL PANEL
2
MEASUREMENTS
CONTROL PANEL
Keep things cooland frozen at the same time.
The ICECO can be used asadedicated fridge, dedicated freezer or as afridge, keep-freeze and crisper at the
same time. Simply set the thermostat to 25ºF, use your top basket as a crisper, your middle basket as a fridge and
thelower basket to keepthings frozen. You’ll also get easy access to your food using the handy lift-out baskets,
so no more rummaging required.
EXPANDABLE

When you first fit your extension collar and high lid, adjustment to the hinges may be necessary if they do not sit flat.
If required, please adjust your hinges as follows:
1. Remove the flat lid.
2. Slide on your extension collar followed by your high lid.
3. Release the tension on all hinge screws.
4. Close the high lid and extension collar and clip them down.
5. Retention all screws with the high lid and extension collar in the clipped down position.
•
Do not lay your ICECO on its back or sides or at any angle exceeding 40º.
•
Never operate your ICECO directly from 240V mains power without using a 240V – 12V adapter.
•
Never place items on top of the vents above the compressor, heat will not be able to escape and overheating
could occur.
•
Do not use a modified sine wave inverter to operate your ICECO.
3
2. Working process:
●
Power on for the first time, turn on the power switch of the control panel(S1), the LCD displays the measured temperature,
the default setting temperature is -2˚C, you can hold down the "SET" key and "UP" or "DOWN" key to adjust the setting
temperature.
●
When the measured temperature is greater than or equal to the set temperature of 2˚C, the refrigerator starts to cool,
the red LED indicator is on, and the green LED indicator is off. When the measured temperature is less than or equal to
the set temperature of 2˚C, the refrigerator stops cooling, the red LED indicator is off, and the green LED indicator is on.
●
Turn off the power switch of the control board(S1), the control board does not work, and all loads stop working.
●
When the setting temperature is -22˚C, the refrigeration will stop working when the measured temperature reaches -22˚C.
IMPORTANT INFORMATION
FITTING THE EXTENSION COLLAR AND HIGH LID
OPERATING
DISPLAY
1.
After the whole machine is powered on, turn on the S1 switch, the refrigerator starts to work, and the refrigerator
screen displays the measured temperature of the unit.
2.
When the compressor is running, the red LED indicator lights, and the green LED indicator does not work;
3.
When the compressor stops normally, the green LED indicator lights, and the red LED indicator does not work;
4.
The LCD display temperature range is -25˚C ~ 40˚C, greater than 40˚C display HI, less than -25˚C display LO;
5.
Turn off the S1 switch, the LCD screen and LED indicators stop working.
1. Front Key Function
●
K1-“COOL”, can adjust the set temperature “-18˚C”, “-20˚C”,
“-22˚C” in conjunction with “SET” key.
●
K2-“C / F”, Celsius-Fahrenheit conversion button, can perform
temperature conversion between Celsius and Fahrenheit.
●
K3-“SET”, hold “SET” key and simultaneously hold “UP” or
“DOWN” to set the temperature value, the temperature setting
range is -22˚C ~ 10˚C;
●
K4-“UP” / set temperature plus key, pressing this key alone
will not work, and it must be coordinated with “SET” key to set
the temperature;
●
K5-“DOWN” / set temperature decrement key, pressing this
key alone will not work, it must cooperate with “SET” key to
set temperature;
●
K6-"RESET" / reset button, when the machine is working
normally, you can press this button to reset the whole machine
and the default setting temperature is -2˚C.
Plug your 12V lead into the 240V adaptor and then direct to mains power.
Never run direct from the refrigerator to mains power without a 240V adaptor, irreversible damage can occur.
Ventilation
Always allow sufficient air ventilation around the rear, sides and top of the compressor compartment. This will ensure
heat can escape easily from the compressor and condensor.
Transit cover
Your transit cover is designed to protect your ICECO from scratches, minor dints and direct sunlight.
Equalising fridge temperature
If you run your ICECO using the 240V adapter for 4 or 5 hours before placing in your vehicle, this will ensure that
the internal air temperature, condensor and insulation has had time to equalise. Doing this will result in shorter cycle
times and more efficient operation once you run your ICECO on 12V.
Normal Operating Sounds
You may hear faint gurgling, bubbling or whirring sounds when your ICECO is running. This is normal as the refrigerant
is being pumped through the refrigerant coils.
Only use a high quality pure sine wave generator to operate your ICECO. Fluctuations in generator current will damage
the refrigerator and / or the 240V adaptor.
For fail safe operation with a generator we recommend running a battery charger from your generator outlet to a 12V
battery, and then running your ICECO directly from the battery.
COMMON 12V POWER SUPPLY ISSUES
Wiring
Often the standard wiring from the car battery to the 12V outlet is too small.
A minimum 6mm automotive wiring should be used and the earth should bewired directly back to the battery.
Battery
The car battery could be old, undersized or have a dead cell causing too much voltage drop.
Connections
The 12V plug, car 12V socket or any of the connections between the fridge and the battery could be faulty or
have come loose since installation.
6mm(0.24 inch) wiring direct to battery
Having a good power supply is key to your ICECO operating at its best. For optimum results, we recommend using
minimum 6mm automotive wire directly from your 12V power outlet to your cars battery through a 10 Amp fuse. Ensure
the earth is wired back to your battery, not to the chasse. If your wiring is not minimum 6mm or is not direct to your
battery, your ICECO may cut out early due to power drop in your wiring.
100 Ah battery
We recommend using a minimum 100 Ah deep cycle battery for the best long term results.
Matching 12V fittings
Your ICECO is supplied with a 12V cigar plug. If you are using your ICECO in a 4WD then we recommend fitting
a matching 12V socket and 12V plug set. Different cars have varying sized 12V power sockets, so having a matching
set will provide your 12V lead with the best possible connection at all times.
If you decide to fit a different type of 12V fitting other than the one supplied, note that the smooth side of the 12V
lead or the one with writing on it, is the positive.
12V INSTALLATION
240V INSTALLATION
EFFICIENT OPERATION
4
USING A GENERATOR
INSTALLATION AND OPERATION

ICECO VL35 are fitted with a red LED error light inside the compressor compartment. If your ICECO cuts out or
will not operate, look inside the compressor compartment for a flashing red LED light. The number of flashes
corresponds to the following error type.
NO. OF
FLASHES
ERROR TYPE
1BATTERY PROTECTION CUT-OUT
The voltage is outside the cut-out setting, Refer to VOLTAGE ISSUES below.
2FAN OVER-CURRENT CUT-OUT
The fan loads the electronic unit with more than 0.5A avg.
3MOTOR START ERROR
The rotor is blocked or the differential pressure in the refrigeration system is too high (
>5 bar).
4MINIMUM MOTOR SPEED ERROR
Refrigeration system is too heavily loaded. Motor cannot maintain minimum speed approx 1,850 rpm.
5THERMAL CUT-OUT OF ELECTRONIC UNIT
Refrigeration system too heavily loaded or ambient temperature is high. Electronic unit will run too hot.
6THERMOSTAT FAILURE
If the NTC thermistor is short-circuit or has no connection.
CUT IN / CUT OUT
● Your fridge has built in battery protection and needs a minimum 10.9V to start and 9.6V to continue operating.
● During operation a load is placed on the power supply and voltage can drop by as much as 2V, especially if the
wiring in insufficient (less than 6mm direct to battery) or if there is a loose connection somewhere.
● If this occurs when you try and start your ICECO and the power supply drops under 10.9V it will not start.
If this occurs when your ICECO is running and the power supply drops below 9.6V it will stop.
RED LED ERROR LIGHT
REPAIR CAR WIRING
OR BATTERY
REPLACE
CONTROL PANEL
(CONTACT HEAD OFFICE)
REPLACE LEAD OR
REPAIR CONNECTION
(1) USE A DIFFERENT POWER SUPPLY
Run the fridge using a 240V to 12V adaptor. If
not available, use a different outlet with the car
running,or in a different car.
(2) OVERIDE THE CONTROL PANEL
Flick the override switch located on the back
of the ICECO control panel, then turn on the
fridge.
FRIDGE RUNS
FRIDGE RUNS
FAULTY CONNECTION
We solve 9 out of 10 ICECO issues by using this flow chart:
TROUBLESHOOTING FLOW CHART
(3) CHECK ALL CONNECTIONS
Check all connections and solder points
inside all sockets andplugs. Check your car
12Vsocketconnection by turningon the fridge
and wiggling the connections to see if the
power light flickers.
5
TROUBLE SHOOTING

ICECO product comes with a 5-year warranty on
the compressor and 1 year warranty on all other
parts for your peace of mind. In the unlikely event
this product fails when used according to our user
guide, we will either repair or replace it. For full
warranty terms and conditions on this product,
please see the user guide.
Customer Support
For any technical or warranty
enquires please visit our customer
service portal at:
www.icecofreezer.com
This product is warranted for 5 years on the compressor and 1 year for all
other parts from the date of purchase. Our goods come with guarantees
that cannot be excluded under the Local Consumer Law. You are entitled to a
replacement or refund for a major failure and compensation for any other
reasonably foreseeable loss or damage. You are also entitled to have the goods
repaired or replaced if the goods fail to be of acceptable quality and the failure
does not amount to a major failure.
Warranty does not cover products that have not been used in accordance with
user guide or are outside the warranty terms and conditions.
Quality Service Guarantee
QUESTIONS AND COMMENTS
Other manuals for VL35 Series
1
This manual suits for next models
3
Table of contents
Other Iceco Refrigerator manuals

Iceco
Iceco STEEL VL45 Series User manual

Iceco
Iceco GO20 User manual

Iceco
Iceco TR45 User manual

Iceco
Iceco JP42 User manual

Iceco
Iceco GO20 User manual

Iceco
Iceco STEEL VL60S Series User manual

Iceco
Iceco VL75/90 ProD User manual

Iceco
Iceco STEEL VL45 Series User manual

Iceco
Iceco JP30 Series User manual

Iceco
Iceco VL35 Series User manual