ICI STEP INSTALLATION
Step 4 (Hang bar
on Brackets)
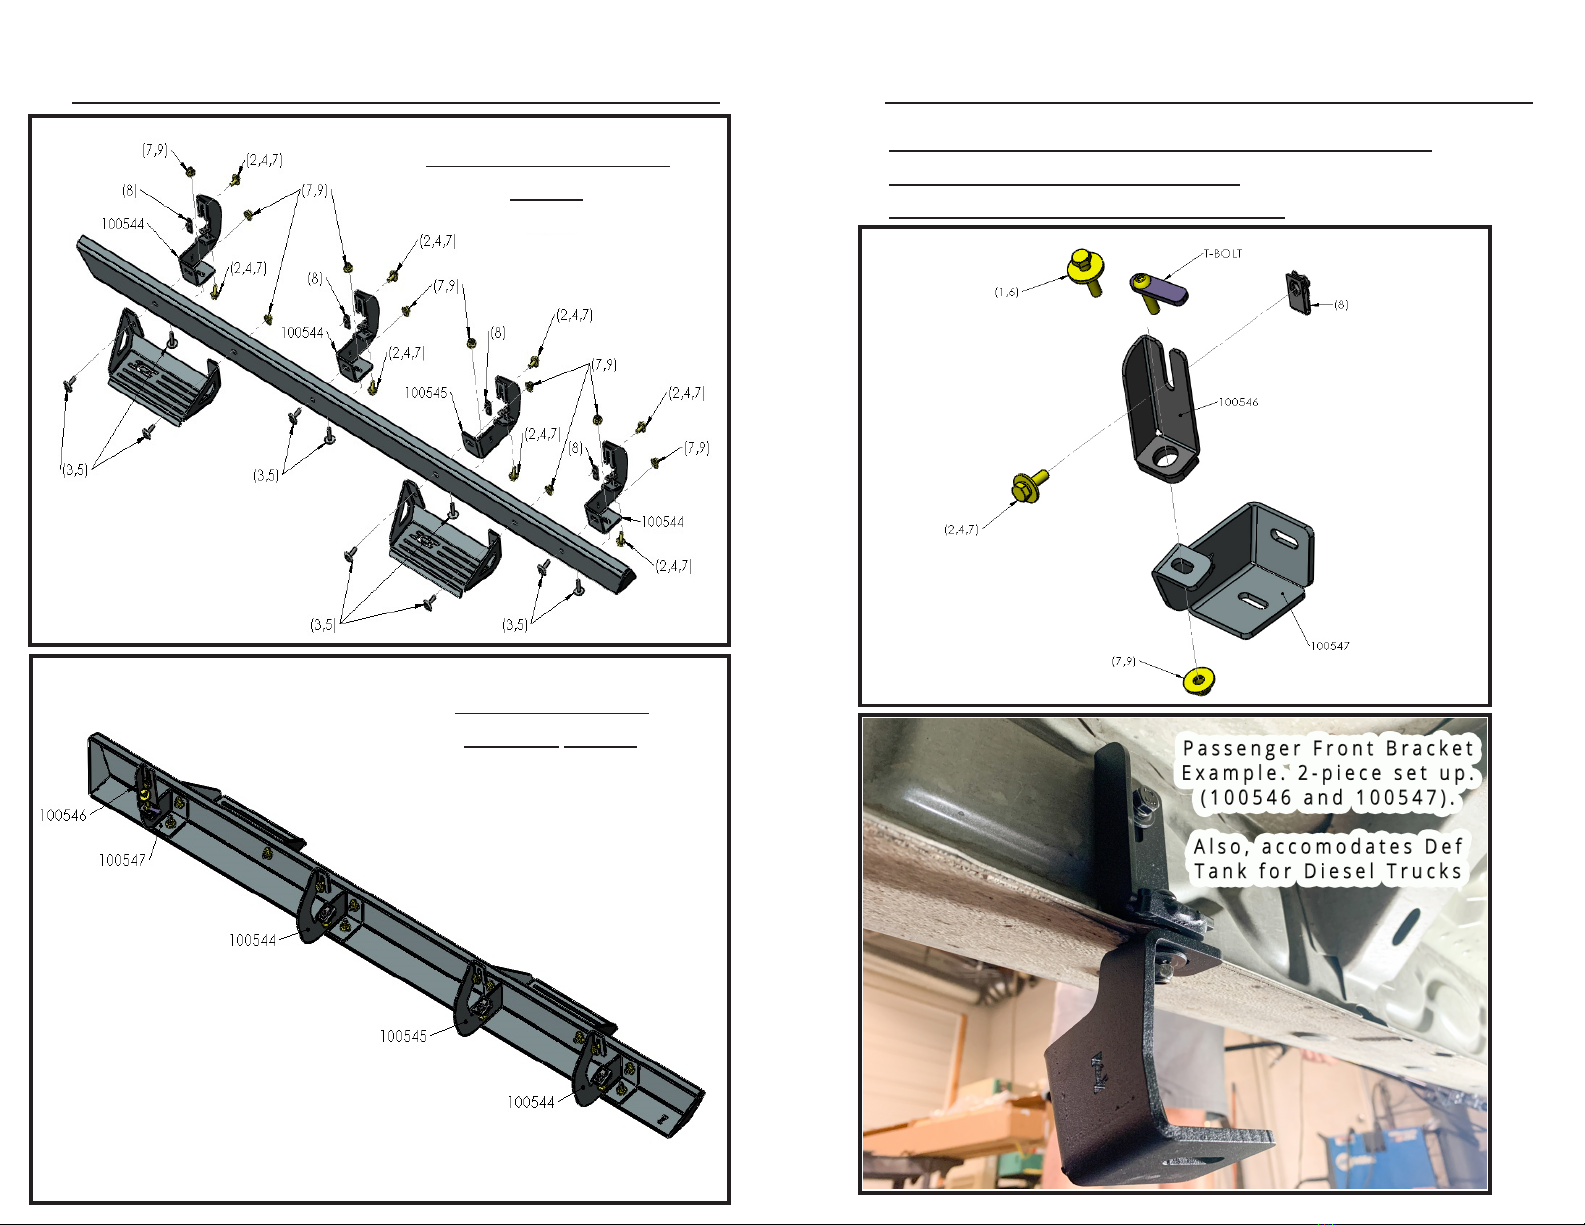
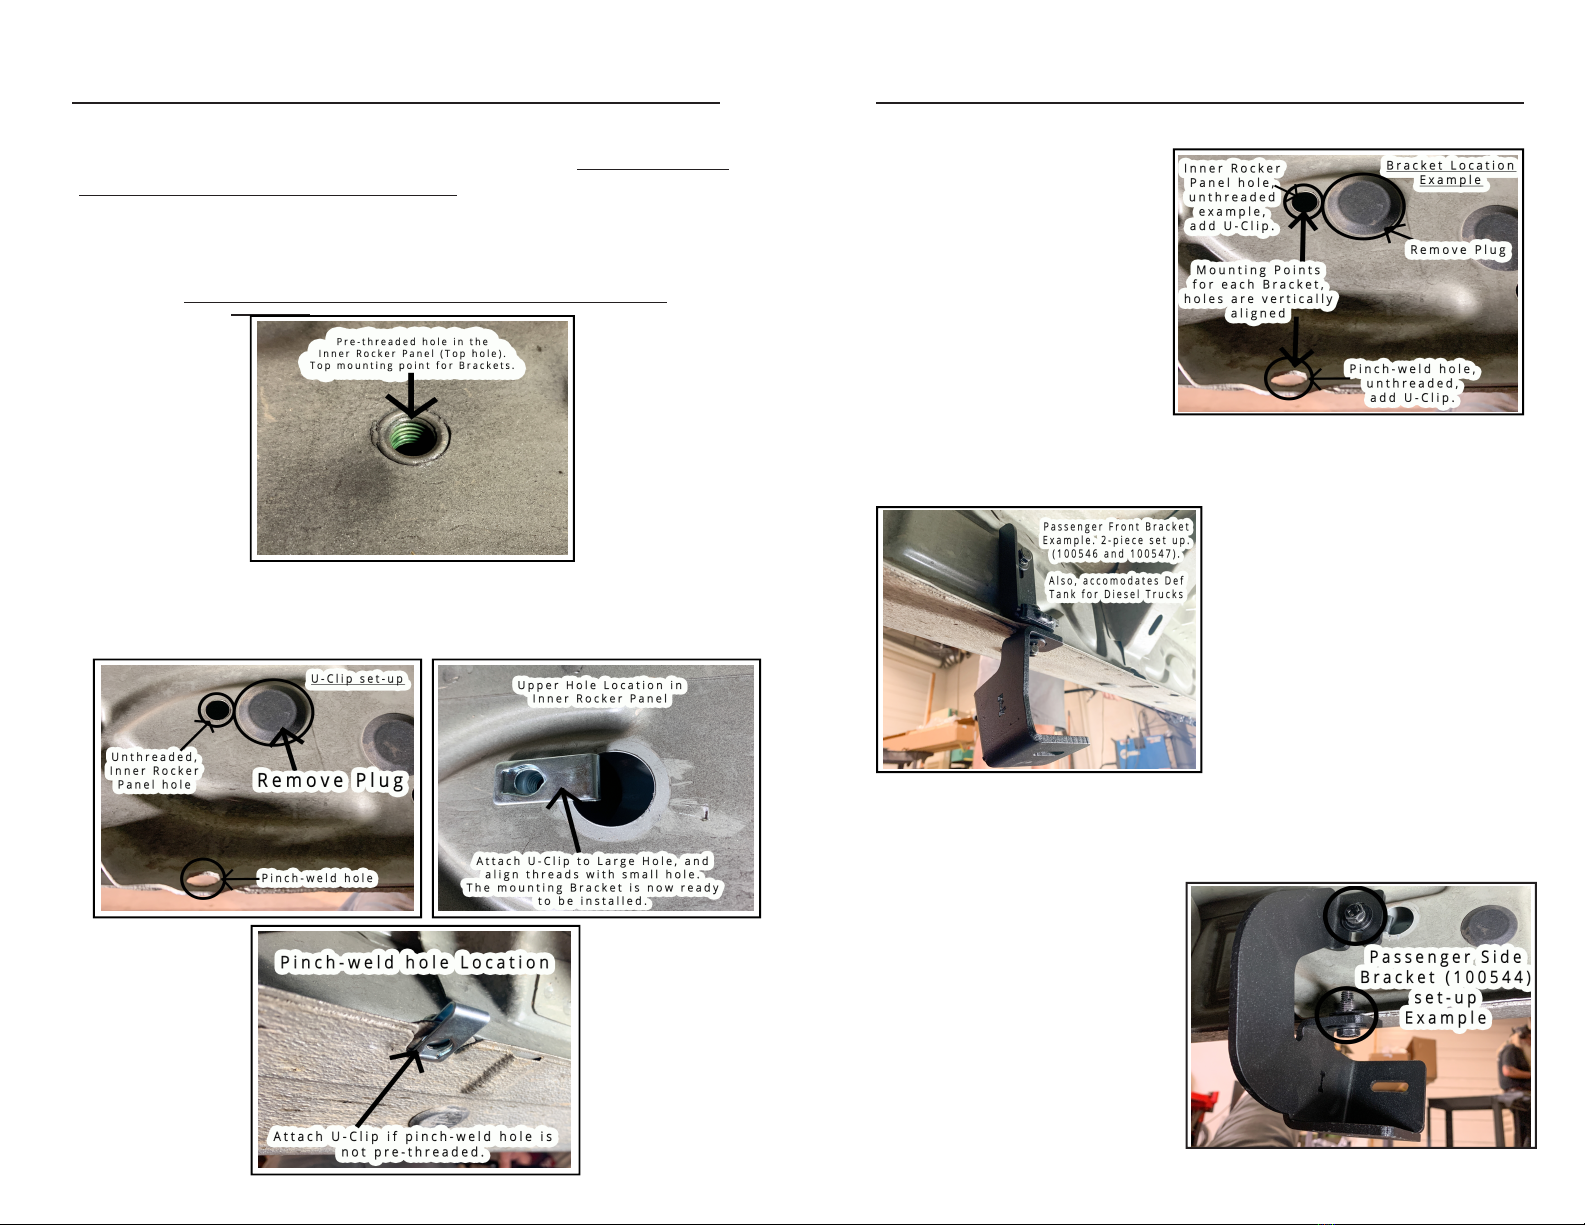
Next, locate the passenger side
bar. The three holes on the front
half of the bar are farther spaced
than the three holes on the rear
half of the bar. Reference diagram
on page 6. The top of the bar has a
small lip, use the lip to hang the
bar on the brackets. This will make
the installation process easier and
hands-free.
Figure 5.
Figure 4.
Step 5 (Bolt Mid-Front
Bracket and Rear
Bracket to Bar)
Next, bolt the Mid-Front bracket
(100544) to the bar, 3rd hole from
front of bar. Use (2 sets) of M8 finish
washers, M8x24x2mm flat washers,
M8x35mm hex countersunk bolts,
and M8 Nylock Nuts. Use a 13mm
socket and the provided Allen
wrench. Do not fully tighten.
Repeat steps above for Rear
Bracket (100544), last hole from
front of bar. See diagram on page 6
for reference.
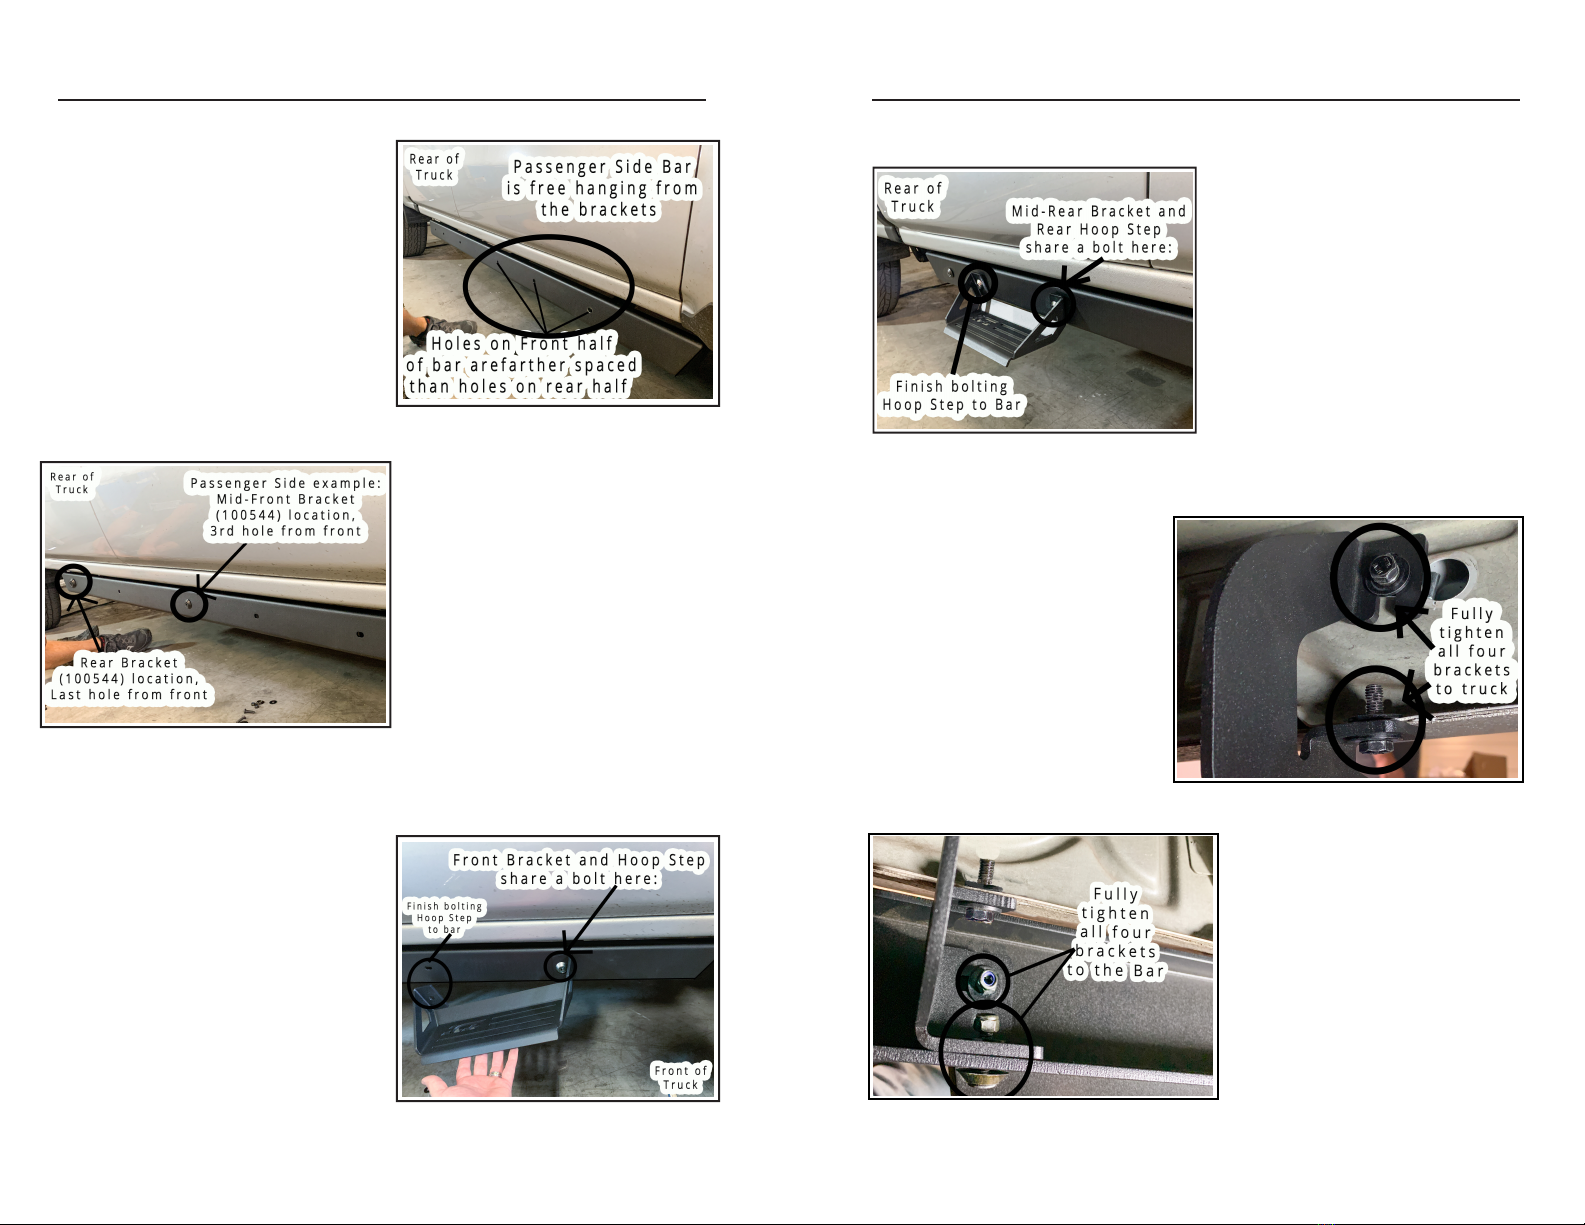
Step 6 (Bolt Front
Bracket to Bar and
Front Hoop Step)
Bolt the Front Bracket to the Bar
and front hoop step. Then finish
bolting hoop step to the bar. View
diagram on page 6. Note that the
hoop step and front bracket share
a bolt. Use (3 sets) of M8 finish
washers, flat washers, hex
countersunk bolts, and nylock
nuts. Use a 13mm socket and the
provided Allen wrench. Do not fully
tighten. Figure 6.
10
ICI STEP INSTALLATION
Figure 7.
Step 7 (Bolt Mid-Rear
Bracket to Bar and
Rear Hoop Step)
Bolt the Mid-Rear bracket (100545)
to the Bar and rear hoop step.
Then finish bolting hoop step to
the bar. View diagram on page 6.
Note that the hoop step and mid-
rear bracket share a bolt. Use (3
sets) of M8 finish washers, flat
washers, hex countersunk bolts,
and nylock nuts. Use a 13mm
socket and the provided Allen
wrench. Do not fully tighten.
STEP 8 (Tighten
Brackets to Truck)
Make sure all 4 brackets, the
bar, and the 2 hoop steps are
loosely fitted to each other and
to the vehicle. Using a 13mm
socket, fully tighten the front
bracket to the vehicle, make
sure the bracket is flush with
the mounting surface. Repeat
on the other brackets, checking
the bracket alignment as
needed.
STEP 9 (Tighten
Brackets to the Bar
and Hoop-Steps)
Now, adjust the bar from
front to back and tighten the
bar to the brackets with a
13mm socket and provided
Allen wrench. Make sure the
bar is flush with the front and
bottom face of the brackets
Figure 8.
*PRO TIP: When tightening the Finish Washers, hold the Allen Key tight so the Bolt does not
spin. Then, tighten the Nut on the backside. This will prevent the Bolt and Finish Washer from
spoinning and scratching the Bar.
Figure 9.
11