ICON G-BOARD User manual

G-Boar d
N16549
USB MIDI foot switch pedal controller
User manual

Important Safety Instructions
1. Read these instructions.
2. Keep these instructions.
3. Heed all warnings.
4. Follow all instructions.
5. Do not use this apparatus near water.
6. Clean only with dry cloth.
7. Do not block any ventilation openings. Install in accordance with the manufacture’s
instructions.
8. Do not install near any heat sources such as radiators, heat registers, stoves, or other
apparatus (including amplifiers) that produce heat.
9. Only use attachments/accessories specified by the manufacturer.
G-Boar d

Introduction
What's in the package
Features
Front Panel Layout
Side Panel Layout
Getting Started
Connecting your G-Board controller
TM
Installing iMap Software for Mac OSX
TM
Installing iMap Software for Windows
TM
Assigning MIDI functions with iMap
TM
iMap G-Board software panel
Services
Register your ICON ProAudio product to your personal
account
Firmware upgrade
Restore the factory default settings
Daisy chain your G-Board to other i-series controllers
Specifications
Contents
3
4
1
4
4-5
5
6-7
12
8-9
11
8
13
11
G-Boar d
10
2

Introduction
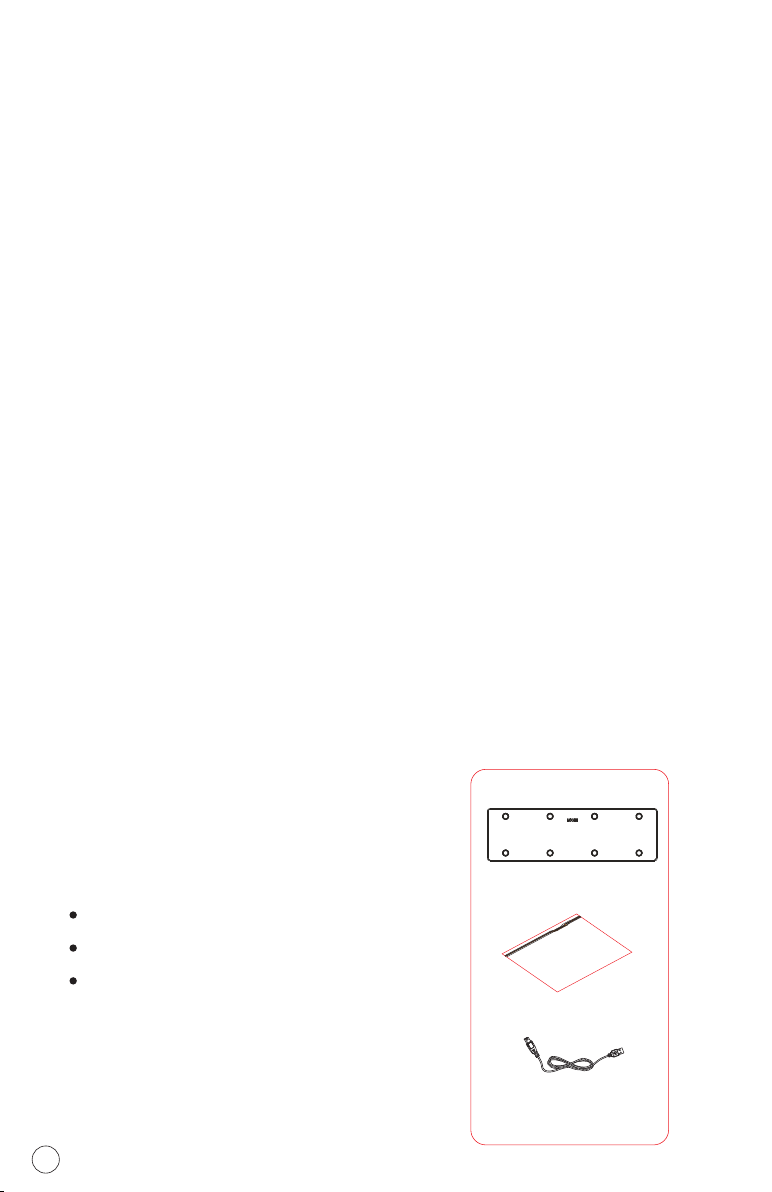
What's in the package?
G-Board USB MIDI controller x 1
Quick Start Guide
USB2.0 Cable
1
Quick Start Guide
USB2.0 Cable
G-Board
G-Boar d
G-Board
Thank you for purchasing the ICON controller. We sincerely
trust this product will provide years of satisfactory service, but if anything is not to
your complete satisfaction, we will endeavor to make things right.
In these pages, you'll find a detailed description of the features of the ,
as well as a guided tour through its front and rear panels, step-by-step instructions
for their setup and use, and full specifications.
Please register the product on our website at the below link
www. iconproaudio.com/registration:
Please follow the step by step procedures. Start by inputing the device’s serial
number as well as your personal information, etc. By registering your product online,
you will be entitled to service and after-sales support at our Help Center by visiting
our website at www.iconproaudio.com. Also, all the registered products under your
account will be listed on your personal product page where you will find updated
information such as firmware/driver upgrades, software bundles, user manual
downloads, etc. for your device.
As with most electronic devices, we strongly recommend you retain the original
packaging. In the unlikely event the product must be returned for servicing, the
original packaging (or reasonable equivalent) is required.
With proper care and adequate air circulation, your will operate without
any trouble for many years.
G-Board USB MIDI
G-Board
G-Board

Register your ICON ProAudio product to your
personal account
1.Check serial number of your device
Please go to http:// iconproaudio.com/registration or scan the QR code
below.
Input your device’s serial number and the other information on the
screen. Click“Submit”.
A message will pop up showing your device information such as
model name and its serial number - Click “Register this device to my
account” or if you see any other message, please contact our after-
sales service team
2.Log in to your personal account page for existing user or sign
up for new user
Existing user: Please log into your personal user page by inputing
your user name and password.
New user: Please click “Sign Up” and fill in all the information.
3.Download all useful materials
All your registered devices under your account will show on the
page. Each product will be listed along with all its available files
such as drivers, firmware, user manual in different languages and
bundled software etc. for download.
Please make sure you have download the necessary files such as
driver before you begin device installation.
2

Features
8 robust metal click type foot switches
Ideal for guitarists
TM
Extremely compact and perfectly match with MacBook
Class-compliant with Windows XP, Vista (32 bit / 64 bit), and Mac OS X
USB bus-powered
2xUSB Connectors for daisy chain with other i-series controller
Available in Black and White
Difference colors aluminum cover is available (optional)
Custom laser-engraving service for aluminum cover is available at
on-line purchase (optional)
Front Panel Layout
8 foot switches
Assignable foot switches to control different functions of a DAW or
other application. The foot switches may be assigned using a midi
function or with the iMap software provided.
1
1
G-Boar d
3

Side Panel Layout
USB port (B-Type)
Functions as a MIDI port to your notebook (or computer) and compatible
software. Also provides power to your G-Board.
USB port
Use to daisy chain with the second unit of G-Board or any i-series
controllers such as iPad
Note: For recommendations on the combination and daisy chain sequence of
different i-series controllers, please visit the ICON website at the following
link: www.icon-global.com
1
2
Getting Started
Connecting your controllerG-Board
Diagram 1 Diagram 2
a
b
Esc F1 F2 F3 F4
F5
F6
F7 F8 F9 F10 F11 F12
Prtsc
sysrq
pause
Break Lns Del
Home
Pgup
PgDN
End
$
~
`
!
1
··
23456778 90
)
)
*—
-
+
=
#¥%*##
QWERTYUIOP{}|
ASDFGHJKL:
;
ZXCVBNM<>?
Tab
CapsLook
Shift
Ctrl Alt AltGr Ctrl
Backspace
[
]
|
Enter
Shift
intel
Connect the to your Mac/PC via the USB port
Choose a USB port on your Mac/PC and insert the wide (flat) end of the
USB cable. Connect the cable's small jack end to the . Your Mac/PC
should automatically “detect” the new hardware and notify you that it is
ready to use.
G-Board
G-Board
1
ico nnet
2
1
ico nnet
G-Boar d
4

TM
Installing iMap Software for MAC OSX
Assign the MIDI messages to G-Board
TM
Refer to page.7 for “Assign the MIDI messages with “iMap ” software.
2
TM
Please follow the procedures below step-by-step to install your iMap
software to Mac OS X
1
2
3
Download the Mac iMap from
your Personal User Page at
After you downloaded the file,
please click it to start the installation
process
www.iconproaudio.com
Turn on your MAC.
Diagram 1
iMap “Device select” window pop-up, click the device button
TM
accordingly to launch the iMap software.
Tips: By “drag and drop” the “iseries iMap” icon into the “Applications”
folder, you could create a “iMap” shortcut on your Mac's desktop.
G-Boar d
5

TM
Installing iMap Software for Windows
TM
Please follow the procedures below step-by-step to install your iMap
software.
1
2
3
Turn on your PC.
Diagram 1
Setup Wizard appear
Setup wizard appears, please click
"Next"
4Choose Install Location
Choose your preferred install
TM
location for iMap or use the
default location and click "Next"
Diagram 3
Diagram 2
G-Boar d
After you downloaded the file, please click it to start the installation
process.
Download the Mac iMap from your Personal User Page at
www.iconproaudio.com
6

6TM
iMap started to install
TM
The iMap installation has now
started, wait for it to finish. Then
click "Finish"
7Installation finished
Click "Finish" to complete the
TM
iMap software installation.
Diagram 5
TM
Installing iMap Software for Windows(continues)
Diagram 6
G-Boar d
5Create a shortcut on your desktop
Please untick the box if you do
not want to place a shortcut icon
TM
on your desktop for iMap ,
otherwise click "Next"
Diagram 4
7

TM
Assigning MIDI functions with iMap
TM
You can use iMap to easily assign the MIDI functions of your G-Board.
TM
iMap G-Board software panel
Master/Slave selector
Select “Master” if you use it as a standalone device and select “Slave” if
you are cascading it as a salve unit with another ICON i-series controller.
Mode
Mackie Control & Preset
1
2
G-Boar d
137 4 5 6
2
User define
Select the preferred MIDI message type from the Note value, CC
number or Program change for assigning the foot switches.
GTR
Abelton Live
Logic (Mackie Control)
Samplitude/Cube (Mackie Control)
Select your preferred mode.
CC Number
Note Value
Program Change
Assign the MIDI channel and CC number to the foot switches.
Assign the MIDI channel and Note value to the foot switches.
Assign the MIDI channel and program number to the foot switches.
8

TM
iMap G-Board software panel(continues)
“Save file” button
Click this button to save your current settings for the G-Board.
The file is an “.G_Board” file.
“Load file” button
Click this button to load a previously saved “. ” setting file for
your G-Board.
“Send Data” button
Click this button to upload the iMap software settings to your
G-Board via USB connection.
(Note: You must have connected your G-Board to your Mac/PC, otherwise
the settings upload will not be successful.)
“MIDI Devices” button
Click this button, a MIDI device select
window will appear as shown in diagram1.
Please select“ICON G-Board” for the MIDI
Out Devices.
“Firmware Upgrade” button
Click this button to enter into the firmware upgrade window for
G-Board. Please refer to P.9 for the firmware upgrade procedure.
G_Board
TM
3
4
5
6
7
Diagram 1
iCON G-BOARD
G-Boar d
9

Step 1: Connect the ICON product using a USB connection. Press the “MIDI
Device” button at the top to select your connected ICON product as the
“MIDI In and Out” device at the pull-down menu.
Note: If your connected ICON product model name does not appear on the
pull-down menu, select “USB Audio” as the MIDI In and Out device.
Step 2: Click the “Update” button.
Step 3:Press the “MIDI Device” button at the top to select your connected
ICON product as the “MIDI In and Out” device at the pull-down menu.
Step 4: Click the “Open File” button to browse the new firmware file.
Step 5: Click the “Upload” button to upload the firmware.
Warning:The firmware upload process “MUST” be completed and not be
interrupted during the file uploading, otherwise the firmware
may not be rewritten again.
Firmware upgrade
Diagram 2Diagram 1
G-Boar d
10

Connect the next of the i-series controllers
Insert the wide (flat) end of the USB cable to the first i-series
controller 's second USB port and the other small end (B-type
USB jack) to the second i-series controller's USB port
Note: Due to the limitation of power supply via USB port, your connected
devices chain might excess the power supply limit of the USB port and cause
malfunction. For recommendations on the combination and daisy chain
sequence of different i-Pro series controllers, please visit the ICON website
at the following link: www.icon-global.com
Restore the factory default settings
Daisy Chain with G-Board or any
i-series Controllers
You may daisy chain i-series controllers including G-Board. As i-series
controller is USB bus-powered the stability depends on the total power
demand of the chain. Please visit our website for recommendations on
daisy chain sequence for different i-series controllers.
To restore your G-Board settings to factory default, simply import the
“Factory Default” setting file into your G-Board with the original
setting of the iMap software.
Connect the first of the i-series controllers to your Mac/PC
via the USB port
Select a USB port on your Mac/PC and insert the wide (flat) end of
the USB cable and the other small end (B-type USB pack) to i-series
controller.
1
2
G-Boar d
C o n t ro l s
e1
Layer
e2 e3 e4 e5 e6 e7 e8 e9
1 2
3 4
f1 f2 f3 f4 f5 f6 f7 f8 f9
- +
USB2.0 Cable
11

G-Boar d
Specifications
Power supply: USB bus power
Current consumption: 100mA or less
Weight: 0.77kg (1.7lb)
Dimensions: 325(L) X 99(W) X 20(H)
12.78"(L) x 3.78"(W) x 0.75"(H)
Connector: To computer USB connector (mini B type)
12

Services
G-Boar d
If your needs servicing, follow these instructions.
Check our online Help Center at http://suppor t.iconproaudio.com/hc/en-us,
for information, knowledge, and downloads such as:
1. FAQ
2. Download
3. Learn More
4. Forum
Very often you will find solutions on these pages. If you don’t find a solution,
create a support ticket at our online Help Center at the link below, and our
technical suppor t team will assist you as soon as we can.
Navigate to http://support.iconproaudio.com/hc/en-us and then sign in to
submit a ticket.
As soon as you have submitted an inquir y ticket, our support team will assist
you to resolve the problem with your ICON ProAudio device as soon as
possible.
To send defective products for service:
1. Ensure the problem is not related to operation error or external system
devices.
2. Keep this owner's manual. We don't need it to repair the unit.
3. Pack the unit in its original packaging including end card and box. This is
very important. If you have lost the packaging, please make sure you have
packed the unit properly. ICON is not responsible for any damage that
occurs due to non-factory packing.
4. Ship to the ICON tech support center or the local return authorization.
See our service centers and distributor service points at the link below:
If you are located in US
Send the product to:
Nor th America
Mixware, LLC – U.S. Distributor
11070 Fleetwood Street – Unit F.
Sun Valley, CA 91352; USA
Tel.: (818) 578 4030
If you are located in Europe
Send the product to:
Sound Service
GmbHEuropean
HeadquarterMoriz-Seeler-Stra遝
3D-12489 Berlin
Telephone: +49 (0)30 707 130-0
Fax: +49 (0)30 707 130-189
G-Board
Contact: www.mixware.net/help
E-Mail: info@sound-ser vice.eu
If you are located in Hong Kong
Send the product to:
ASIA OFFICE:
Unit F, 15/F., Fu Cheung Centre,
No. 5-7 Wong Chuk Yueng
Street, Fotan,
Sha Tin, N.T., Hong Kong.
Tel: (852) 2398 2286
Fax: (852) 2789 3947
Email: info.asia@icon-global. com
5. For additional update information please visit our website at:
www.iconproaudio.com
13

GBD PD3V100-E
Table of contents
Other ICON Recording Equipment manuals

ICON
ICON P1-NANO User manual

ICON
ICON PLATFORM-M User manual

ICON
ICON QconProX Quick start guide

ICON
ICON i-Controls Pro User manual

ICON
ICON AIRMON PRO User manual

ICON
ICON Cube 2nano User manual

ICON
ICON QCon User manual

ICON
ICON PlatformNano User manual

ICON
ICON FireXon User manual

ICON
ICON ProAudio PlatformNano Air User manual