manuals.online logo
Brands
  1. Home
  2. •
  3. Brands
  4. •
  5. IDEAL
  6. •
  7. Cable Tester
  8. •
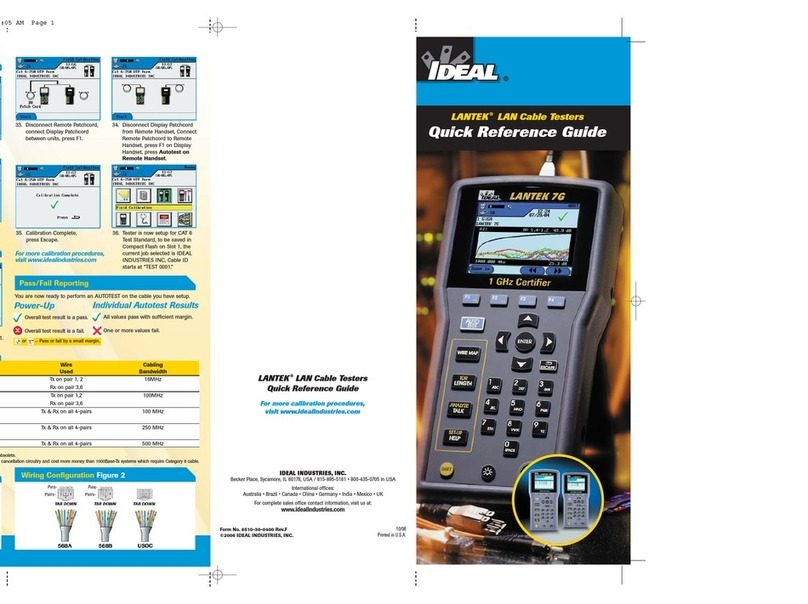
  9. IDEAL LT 8000 series Reference guide

IDEAL LT 8000 series Reference guide

LT 8000 Series: Quick Reference Card - 1
6510-30-0326 Rev. A
I. Display and Remote Handsets
13
15
1614
17
18
19
20
21
22
23
25
24
1
14 15
2
34
5
67
9
10
11
8
12
16
13
1. Graphical Display 14. Talkset Jack
2. Option Keys 15. DB-9 Serial Port
3. Autotest Key 16. DC Input Jack
4. Arrow Keys 17. Pass LED
5. Wiremap Key 18. Fail LED
6. Length Key 19. Testing LED
7. Enter Key 20. Talk LED
8. Alphanumeric Keys 21. Tone LED
9. Escape Key 22. High Voltage LED
10. Cable Selection Key 23. No Patch Cable LED
11. Backlight Key 24. Battery Level LED’s
12. On/Off Switch 25. Tone switch
13. Connector Port
II. Soft Keys
Okay or confirm an action.
Stop or cancel an action.
Print data.
Save data using Auto Increment naming convention.
Overwrite or rename data.
Run the selected test in continuous mode (real time).
Page-up for information.
Soft Keys (Continued)
Page-down for information.
Select/Deselect an item in a list box.
Select an action item.
Activate/Deactivate the Talk Set option.
Delete characters.
III. Ready Screen
1234
5
6
7
8
9
10 11 12
13 14 15 16
Screen Indicators
1. Memory Usage 5. Time and Date
2. Battery Meter or AC Cable 6. Setting
3. Talk Set Indicator 7. Label
4. Screen Title 8. Label
Screen Functions
9. Cable ID 13. Instrument Information
10. Test Record 14. Analyze
11. Field Calibration 15. Talk Set Select
12. Preferences 16. Help
IV. Tester Calibration
A calibration screen will always appear 24 hours after the last
field calibration.
1. To recalibrate the tester, connect the DH and RH end-to-
end using the Field Calibration Adapter.
2. From the DH Toolsscreen, select the Field Calibration
icon.
Tester Calibration (Continued)
1. Press the Tone Key on the RH.
2. Select the Run option on the DH.
If the calibration was successful, remove the Field Calibration
Adapter.
If the calibration was unsuccessful, refer to the User’s Guide,
Chapter 3, Tester Field Calibration.
V. Tester Configuration
Most tester configuration parameters are set from the
Preferences screen
1. From the Tools screen, select the Instrument Icon.
The Preferences screen displays.
2. Use the Arrow keys to select one of the following
configuration options:
- User Information - Autotest Preferences
- Display Contrast - Time-out Options
- Measurement Units - PC & Printer I/F
- Talkset Option - Date & Time
- Display Language - Factory Defaults
- Clear Memory
3. Enter new configuration parameter(s) as required.
VI. Cable Type Selection
1. Press the Cable Selection hard key.
2. Press Enter to select a cable type and its associated
default NVP for testing.
3. Position the cursor and press Enter to change to a
new cable type and its associated default NVP for testing.
Note: A number of unique cable manufacturer NVP values
are stored in the tester memory. To access the list of
manufacturer cables for the currently highlighted test
standard, press the soft key.
4. If you want to use the selected cable as the basis for a
Custom Cable, press the soft key
5. Change the default cable features and save the cable as a
new Custom Cable.
LT 8000 Series: Quick Reference Card - 2
6510-30-0326 Rev. A
VII. Test Setup
Basic Link Test Setup
1. Attach the Basic Link Adapters to both the DH and RH.
2. On the horizontal network cable to be tested, disconnect
the corresponding user patch cords from the network
patch panel and the RJ-45 wall outlet.
3. Connect the DH Basic Link Adapter to the network patch
panel, and the RH Basic Link Adapter to the wall outlet.
Note: Don’t forget to change the Cable Type to Basic Link.
Channel Link Test Setup
1. Attach the Channel Link Adapters to both the Display and
Remote Handsets.
2. On the horizontal network cable to be tested, disconnect
the corresponding user patch cords from the network
equipment.
3. Connect the DH Basic Link Adapter to the network patch
panel user patch cord, and the RH Basic Link Adapter to
the wall outlet user patch cord.
Note: Don’t forget to change the Cable Type to Channel Link.
VIII. Running Autotest
1. Press the Autotest key .
2. If the RH unit is not found, a Searching for Remote
Handset warning message is displayed on the DH.
Press to cancel the test and return to the Tools
menu.
3. If the RH is found, Autotest compares the cable test
readings to standards for the cable type selected and
issues pass/fail statements for each test.
4. While Autotest is in progress, a circular timer displays test
progress and indicates pass or fail for each completed
test.
Note: Press and hold Stop/Cancel prior to Autotest
completion to stop Autotest after completion of the
test in progress.
Running Autotest (Continued)
5. When the Autotest is completed, an overall result of pass
or fail is displayed at the top right of the test
information columns. Results for individual tests are
displayed opposite each test name.
6. To begin the next Autotest, press Autotest .
7. If results from the current test have not been printed, or
you did not have AutoSave enabled in the Autotest
Preference screen, you will be prompted to discard
or save the current test results before the next
Autotest will run.
Overall Test Result Symbols
Overall test result is a pass if each individual test is a
pass or a pass*.
Overall test result is a fail if one or more individual test
is either a fail or a fail*.
IX. Individual Test Pass/Fail Reporting
1. Autotest results can be viewed at the completion of the test
sequence or saved for later viewing.
2. Use the Arrow keys to position the cursor bar on the
desired test.
3. Press Enter to view test results.
4. When finished, press to return to the Autotest screen.
Individual Autotest Results
Pass
All values passed with sufficient margin.
Pass*
All values passed, but one or more test values
passed by a margin smaller than the unit’s specified
accuracy for the measurement. The pass* result
does not fail the cable.
Fail
One or more values failed by a significant margin.
Individual Test Pass/Fail Reporting (Continued)
Fail*
One or more values failed, but the margin of failure is
smaller than the unit’s specified accuracy for the
measurement. The fail* result fails the cable and
must be cleared up, just like a standard fail.
X. Saving Current Autotest Results
Autotest results can be saved immediately following the test.
1. To manually save an Autotest, press the key.
2. The Test Saved screen will be displayed for a brief period,
showing the name the test is saved under.
3. If the current name already exists, the following Warning
screen appears.
4. Press to Escape and return to the previous screen
without performing a save operation, or Press to
Overwrite the existing file.
5. Press to select the Save As option to rename the
current test. The Save Test screen will display with a new
name option.
XI. Printer Setup
Once a serial printer is connected to the DH, test results are
printed by pressing the print key.
1. Connect a serial printer to the tester’s DB-9 serial port
(RS 232). Parallel printers will not function with tester.
2. From the Ready screen, select the Preferences icon
to open the Preferences screen.
3. In the Preferences screen, use the Arrow keys to select
the PC & Printer I/F option.
4. In the PC & Printer I/F screen, set the correct printer
parameters.
- Baud Rate: 9600 - Data Bits: 8 - Stop Bit: 1
- Parity: None - Flow Control: XON/XOFF
5. Press Enter to save changes.
6. Press to return to the previous screen after setting
the printer communication settings.
Other IDEAL Cable Tester manuals

IDEAL LANTEK 7G User manual

IDEAL

IDEAL LANTEK 7G User manual

IDEAL 33-772 User manual

IDEAL

IDEAL 33-772 User manual

IDEAL 33-856 User manual

IDEAL

IDEAL 33-856 User manual

Popular Cable Tester manuals by other brands

Softing WireXpert 4500 user manual

Softing

Softing WireXpert 4500 user manual

Extron electronics Cable Cubby 600 user manual

Extron electronics

Extron electronics Cable Cubby 600 user manual

Armada Pro290 operating instructions

Armada

Armada Pro290 operating instructions

Whirlwind DCT-9 connect Operation

Whirlwind

Whirlwind DCT-9 connect Operation

Greenlee 45280 instruction manual

Greenlee

Greenlee 45280 instruction manual

Fluke IT200 user manual

Fluke

Fluke IT200 user manual

Kingfisher KI-TK800 Series Quick reference guide

Kingfisher

Kingfisher KI-TK800 Series Quick reference guide

Greenlee 45057 instruction manual

Greenlee

Greenlee 45057 instruction manual

Sperry instruments Cable-Test TT64200 operating instructions

Sperry instruments

Sperry instruments Cable-Test TT64200 operating instructions

Fluke LinkRunner Duo quick start guide

Fluke

Fluke LinkRunner Duo quick start guide

RS PRO CT2690 instruction manual

RS PRO

RS PRO CT2690 instruction manual

Platinum Tools Cable Prowler TCB300 quick start guide

Platinum Tools

Platinum Tools Cable Prowler TCB300 quick start guide

Tripp Lite T020-001-PSF owner's manual

Tripp Lite

Tripp Lite T020-001-PSF owner's manual

Black Box LanXPLORER user manual

Black Box

Black Box LanXPLORER user manual

Silverline SD155 manual

Silverline

Silverline SD155 manual

Intellinet 780094 user manual

Intellinet

Intellinet 780094 user manual

Hobbes LANtest Pro 256652A user manual

Hobbes

Hobbes LANtest Pro 256652A user manual

SKYTRONIC 600.616 instruction manual

SKYTRONIC

SKYTRONIC 600.616 instruction manual

manuals.online logo
manuals.online logoBrands
  • About & Mission
  • Contact us
  • Privacy Policy
  • Terms and Conditions

Copyright 2025 Manuals.Online. All Rights Reserved.