IDS SMS Duo V2 Setup guide

IDS SMS Duo V2
Training Guide
Introduction
The IDS SMS Duo V2 offers powerful, versatile and highly configurable sms reporting and
control capabilities, which will keep you informed and in control of your 805 alarm system when
away from your premises. The SMS Duo V2 module works with the IDS 805 Alarm Panel, and
consists of an X-SMS module and an interface that connects it to the 805 panel. The SMS Duo
V2 can also work as a standalone device with two end of line zone inputs and two outputs.
In this training guide we will cover step by step how to install the IDS SMS Duo V2 module, we
will explain the concept of programming the unit and go through some of the main commands.

1.Installation
1.1. SMS Duo V2 Connection to an 805 Panel
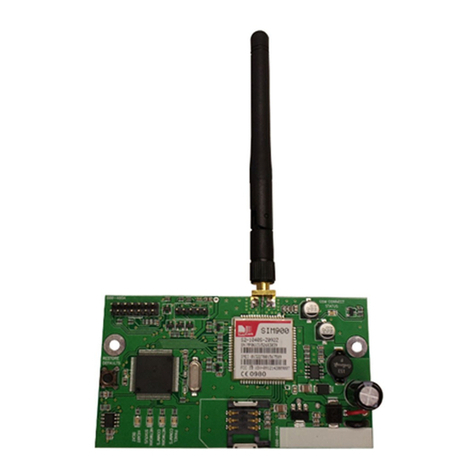
The X-SMS module connects to the 805 Interface via a serial cable, the Interface then connects
to the 805 panel via the keypad bus as a second keypad. The LED on the interface board, will
come on when the module has power and has received a valid clock pulse from the IDS805
alarm panel.
The serial connection between the SMS Duo V2 module and the 805 Alarm Panel is shown in
the image above.
1.2. Standalone Connection
The SMS Duo V2 in standalone operation only needs a 12V power supply. The zone inputs
monitor for an open or closed condition, 3k3 end of line resistors are required to supervise the
zones and will be sent as partition 2 zone 9 and 10 when triggered. The outputs on the
interface board are relay driven outputs and are controllable via sms.
All sms programming for standalone is the same except that the onboard zones are part of
partition 2. Remember to turn reporting on for partition 2 if you are using the onboard zones.

1.3. Defaulting the X-SMS Module
It is recommended to default the X-SMS module on a new installation. To default the
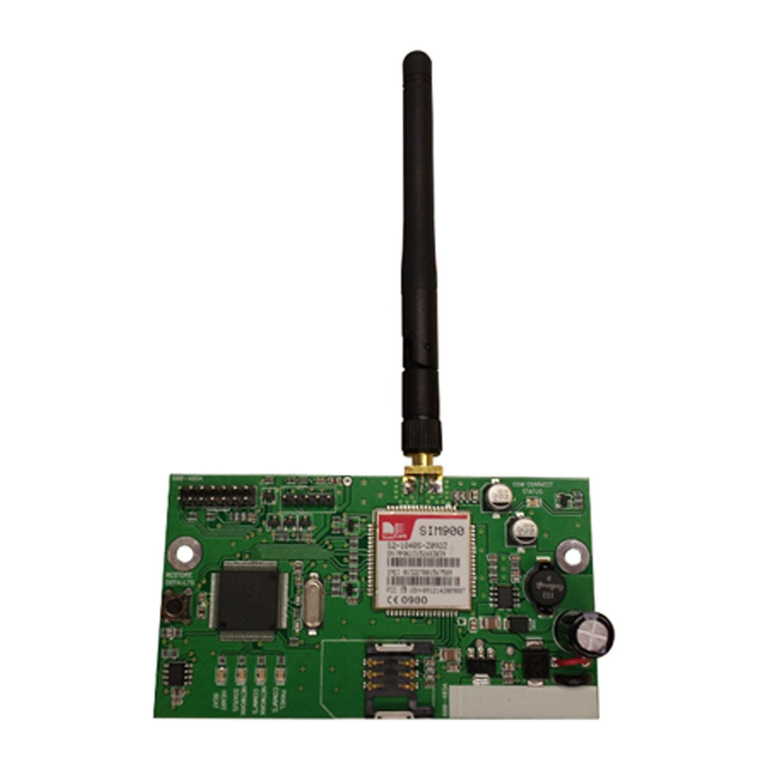
X-SMS module, hold the ‘Restore Defaults’button on power up until the ‘Heart Beat
LED’comes on, ± 3 seconds.
1.4. X-SMS Status LEDs
GSM Connect Status
LED flashes once per second if not connected and once every three seconds when connected
to the cell network and the signal strength is good enough to communicate.
Heart Beat
LED flashes slowly on power up and quickly once the module is running and the power up
sequence has completed.
Network Status
LED flashes when connected to the cell provider’s network and accepted by the service
provider.
Network Comms
LED on when communicating with the Cell network and off when no communication.
Panel Comms
LED on when communicating with the Duo Interface Board and flashes to confirm connection
to the interface board.
LEDs are a good way to troubleshoot if any problems arise.
For example: If the interface is not connected to the X-SMS v2 Module then only the Heart
Beat LED will flash continuously with the Network Status LED flashing occasionally.

1.5. Interface Board LED
The interface board LED indicates communication with the IDS 805 panel.
Slow Flash: An IDS805 has not been detected on power up and the unit is in standalone mode.
On: An IDS805 has been detected and is communicating with the SMS DUO V2.
Off: An IDS805 has been detected but is not communicating with the SMS DUO V2.
1.6. Interface Board Jumpers
The interface board has 3 jumpers to enable/disable certain hardware.
Jumper 1: Configures what device the interface is connected to. Keep off for SMS Duo V2.
Jumper 2: Enables zone 1 on the interface board.
(Reports as zone 9)
Jumper 3: Enables zone 2 on the interface board.
(Reports as zone 10)
Jumper 3 2 1

2.Basic Programming
In this next section we will discuss the basic programming needed to get started with the SMS
Duo V2.
2.1. Command structure
All commands follow the same command structure to make programming easy to remember.
The command structure goes as follows:
[CODE]
space
[COMMAND]
space
[EXTENDED COMMAND]
space
[DATA]
Where:
Code –A valid alarm user code stored in the 805 Alarm Panel.
Command –The function that you are wanting to access in the 805 Alarm Panel.
Extended Command –Supplementary information the command requires. (Not always used)
Data –The value/setting required of the command/extended command.
The cell networks limit the number of characters to 160 per SMS.
The SMS Duo V2 doesn’t store any user codes, it just sends them to the 805
Panel. Make sure the code you use has the appropriate permissions in the
805 Alarm Panel.
2.2. Adding Phone Numbers
In the default state any cell phone can be used to enter the first “Master Phone Number”, you
can only add another phone number to the SMS Duo V2 using a “Master Phone Number”.
There are types of categories a phone number can fall under:
Master Phone Number
Master phone numbers have the highest level of access to the SMS Module, they are allowed
access to all configuration data.
Arming phone Numbers
Arming phone numbers have permissions for all panel functions, arm/disarm, panel status,
bypass zone, PGM control and receive reports.
Reporting Phone Numbers
Reporting phone numbers are only permitted to receive reports from the SMS module, and to
temporarily turn off reporting to that number.
To add a Master Phone Number you will use the following information:
Code –1234 (a user code)
Command –Add
Extended Command –Master (category the number must be under)
Data –074 049 2481 (the number to be made master)
The SMS should look like this:
1234 add master 0740492481

You can also name the cell number when adding it to the SMS Duo V2.
The SMS should look like this:
1234 add master 0740492481:Sid
All phone number commands:
Action
Code
Command
Ext. Command
Data
Add phone number as a
Master number
1234
Add
Master
074 049 2481
Add phone number as
an Arm number
1234
Add
Arming
073 917 0759
Add phone number as a
Reporting number
1234
Add
Reporting
071 348 9467
Add and name phone
number as a Master
1234
Add
Master
074 049 2481:Sid
Deleting a phone
number
1234
Delete
074 049 2481
2.3. Reporting
Each phone number can turn reporting off, as well as choose how they want to receive
reporting messages.
On/Off –Enables/Disables reporting to the phone.
Global –All enabled global events. Eg. System Trouble.
P1 –Events that are alarm based. Eg. Arm/Disarm.
P2 –Reports SMS Duo v2 onboard zones 9 & 10.
Type –Enables the type of reporting that the phone number will receive.
There are three types to choose from:
Raw –A contact ID string is sent to the phone.
Full –All enabled events will be sent to the phone in English.
Reduced - Only the following will be reported: Arm/Disarm, Zone violations, Panics,
System Troubles. (This is the default)
Minimal - Only the following will be reported: Zone violations, Panics, System Troubles.
To turn on reporting for partition 1 and global you will use the following information:
Code –1234 (a user code)
Command –Report
Extended Command –On P1, global
Data –074 049 2481 (the number or cell name to receive the reporting SMSes)
The SMS should look like this:
1234 report on p1,global 0740492481
To change reporting to full you will use the following information:
Code –1234 (a user code)
Command –Report
Extended Command –Type
Data –Full Sid

The SMS should look like this:
1234 report type full 074 049 2481
All reporting commands:
Action
Code
Command
Ext. Command
Data
Turn on reporting for
partition events
1234
Report
On P1,P2
074 049 2481
Turn off reporting for
global events
1234
Report
Off Global
073 917 0759
Turn on reporting for
partition and global
events
1234
Report
On P1,P2,Global
071 348 9467
Turn on full reporting
1234
Report
Type
Full 074 049 2481
Turn on reduced
reporting
1234
Report
Type
Reduced Sid
Turn on minimal reporting
1234
Report
Type
Minimal John
Turn on raw data
reporting
1234
Report
Type
Raw 074 049 2481
Only a “Master Phone Number” can allocate partitions to a phone number.
2.4. SMS Threshold
By default there is a threshold of 20 SMSes per day to a single phone number. You can
increase or decrease this threshold by sending a threshold command. The threshold is reset
every day at midnight based on the SMS Duo V2 time.
To increase the threshold to 50 SMSes you will use the following information:
Code –1234 (a valid user code)
Command –Report
Extended Command –Threshold
Data –50 (Number of SMSes) 073 917 0759 (Number or cell name to adjust threshold)
The SMS should look like this:
1234 report threshold 50 0739170759
To decrease the threshold to 14 smses you will use the following information:
Code –1234 (a valid user code)
Command –Report
Extended Command –Threshold
Data –14 (Number of SMSes) Sid (Number or cell name to adjust threshold)
The SMS should look like this:
1234 report threshold 14 Sid

All threshold commands:
Action
Code
Command
Ext. Command
Data
Increase the reporting
threshold to 50 SMSes
1234
Report
Threshold
50 073 917 0759
Decrease the reporting
threshold to 14 SMSes
1234
Report
Threshold
14 Sid
2.5. Arm/Disarm
Master and Arming phone numbers are able to arm or disarm the 805 Alarm Panel. Arming the
panel requires a valid user code for the partition you want to arm/disarm.
To away arm partition 1 you will use the following information:
Code –1234 (a valid user code in partition 1)
Command –Arm
Extended Command –*
Not needed
Data –P1 (Partition number or name)
The SMS should look like this:
1234 arm p1
To stay arm partition 1 you will use the following information:
Code –1234 (a valid user code in partition 1)
Command –Arm
Extended Command –S2
Data –Flat (Partition number or name)
The SMS should look like this:
1234 arm s2 flat
All arm/disarm commands:
Action
Code
Command
Ext. Comm
Data
Away arm all partitions
1234
Arm
All
Away arm P1 & P2
1234
Arm
P1,P2
Stay arm ‘house’
1234
Arm
S1
house
Stay arm P1
1234
Arm
S2
P1
Disarm all partitions
1234
Disarm
All
Disarm beams
1234
Disarm
beams
Disarm P1 & P2
1234
Disarm
P1,P2
*Remember the SMS Duo v2 onboard zones are in partition 2 and needs to be armed to be
violated. Except when using the Duo in standalone mode zones 9 & 10 are 24 hour zones and
don’t need to be armed.

2.6. Bypass/Unbypass
When needed you are able to send a command to bypass or unbypass a specific zone/s. You
must specify which zones to bypass in the data field.
To bypass zone 3 you will use the following information:
Code –1234 (a valid user code)
Command –Bypass
Extended Command –*
Not needed
Data –3 (Zone number or name)
The SMS should look like this:
1234 bypass 3
To unbypass zones 4 and 8 you will use the following information:
Code –1234 (a valid user code)
Command –Unbypass
Extended Command –
* Not needed
Data –4,8 (Zone numbers or names)
The SMS should look like this:
1234 unbypass 4,8
All bypass/unbypass commands:
2.7. Panel Status
Using the SMS Duo V2 you are able to check the status of various parts of the panel, such as
Arm Status, Zone Status, Bypass Status, and PGM Status.
To check the arm status of partition 1 you will use the following information:
Code –1234 (a valid user code in partition 1)
Command –Arm
Extended Command –Status
Data –P1 (Partition number or name)
The SMS should look like this:
1234 arm status p1
The SMS Duo V2 will reply as follows if the partition is disarmed and there are no alarms:
“IDS SMS. P1 disarmed.
P1 alarm status: No alarm”
Action
Code
Command
Ext. Comm
Data
Bypass zone 1
1234
Bypass
1
Bypass zone 3,4,8
1234
Bypass
3,4,8
Bypass named zone “Passage”
1234
Bypass
Passage
Bypass named zone “Lounge” &
“Kitchen”
1234
Bypass
Lounge,
Kitchen
Unbypass Zone 5
1234
Unbypass
5
Unbypass “Kitchen”
1234
Unbypass
Kitchen

To check the zone status of partition 3 you will use the following information:
Code –1234 (a valid user code in partition 1)
Command –Zone
Extended Command –Status
Data –P1 (Partition number or name)
The SMS should look like this:
1234 zone status p1
The SMS Duo V2 will reply as follows if zone 3 is bypassed and zone 6 is violated:
“IDS SMS. P1 disarmed.
Z03: bypassed.
Z06: violated.”
To check the bypass status of zone 1 you will use the following information:
Code –1234 (a valid user code in partition 1)
Command –Bypass
Extended Command –Status
Data –1 (Zone number)
The SMS should look like this:
1234 bypass status 1
To check the PGM status of PGM 2 you will use the following information:
Code –1234 (a valid user code in partition 1)
Command –PGM
Extended Command –Status
Data –2 (PGM number)
The SMS should look like this:
1234 pgm status 4
All status commands:
Action
Code
Command
Ext. Comm
Data
Retrieve the status of all partitions
1234
Arm
Status
All
Retrieve the status of P1
1234
Arm
Status
P1
Retrieve the status of P1 & P2
1234
Arm
Status
P1,P2
Retrieve the status of zones in
partition 1
1234
Zone
Status
P1
Retrieve the status of zones in
partition 1 & 3
1234
Zone
Status
P1,P3
Get PGM 8’s status
1234
PGM
Status
8
Get PGM Gate’s status
1234
PGM
Status
Gate
Retrieve bypass status of zone 1
1234
Bypass
Status
1
Retrieve status of “Lounge”
1234
Bypass
Status
Lounge
*Remember you can only operate PGM 1 & 2 on the SMS Duo v2 Module. You cannot operate
the 805 PGMs.

2.8. Naming
With the SMS Duo V2 you are able to name users, codes, sites, partitions, PGMs, and zones to
better your reporting and to make sending commands easier.
To name partition 1 you will use the following information:
Code –1234 (a valid user code in partition 1)
Command –partition
Extended Command –name
Data –1:House (Partition number:Name)
The SMS should look like this:
1234 partition name 1:House
To name zones 2 & 3 you will use the following information:
Code –1234 (a valid user code in partition 1)
Command –zone
Extended Command –name
Data –2:kitchen,3:dining (Zone number:Name)
The SMS should look like this:
1234 zone name 2:kitchen,3:dining
To name a cellphone user you will use the following information:
Code –1234 (a valid user code in partition 1)
Command –cellnumber
Extended Command –name
Data –0740492481:Sid (Cell Number:Name)
The SMS should look like this:
1234 cellnumber name 0740492481:Sid
*You can also name a cellnumber when adding it by using the following command:
1234 add master 0740492481:Sid
To name a user code you will use the following information:
Code –1234 (a valid user code in partition 1)
Command –usercode
Extended Command –name
Data –1:Sid (User Code Slot:Name)
The SMS should look like this:
1234 usercode name 1:Sid
*The usercode name is only used for reporting purposes. You cannot arm/disarm a panel
using the name.

All naming commands:
Action
Code
Command
Ext. Comm
Data
Name a Site
1234
Site
Name
Office
Name a Partition
1234
Partition
Name
2:Beams
Name a Zone
1234
Zone
Name
2:kitchen,3:dining
Name a Cell Number
1234
Cellnumber
Name
0740492481:Sid
Name a PGM
1234
PGM
Name
5:Lights
Note: Names are all case sensitive.
2.9. Missed Call Command
The missed call feature allows you to set a single command on the SMS Duo V2 so that when
you miss call the SMS Duo V2 it will perform that command.
To set up this feature you must first set the command on the SMS Duo V2 and then enable it on
any numbers that you want to have access to this feature.
To set the missed call command to arm partition 1 you will use the following information:
Code –1234 (a valid user code)
Command –Missedcall
Extended Command –Set
Data –1234 arm p1 (Command string)
The SMS should look like this:
1234 missedcall set 1234 arm p1
To enable 071 348 9467 for the missed call function you will use the following information:
Code –1234 (a valid user code)
Command –missedcall
Extended Command –Enable
Data –0713489467 (Cell Number/Name)
The SMS should look like this:
1234 missedcall enable 0713489467
All missed call commands:
Action
Code
Command
Ext. Comm
Data
Set missed call command to arm p1
1234
Missedcall
Set
1234 arm p1
Enable Sid to use missed call function
1234
Missedcall
Enable
Sid
Disable missed call on 0713489467
1234
Missedcall
Disable
0713489467

2.10. List Numbers
You can list all numbers programmed on the SMS Duo V2 and see their permissions.
To list all number you will use the following information:
Code –1234 (a valid user code)
Command –List
Extended Command –Numbers
Data –
*Not Needed
The SMS should look like this:
1234 list numbers
All list numbers commands:
2.11. Hints
The SMS Duo V2 will send you a hint based on the command you send it. These hints are to
help you know what other related commands you can send. By default hints is turned on for
each user.
To enable hints you will use the following information:
Code –1234 (a valid user code)
Command –Hint
Extended Command –On
Data –0713489467 (Cell Number)
The SMS should look like this:
1234 hint on 0713489467
To disable hints you will use the following information:
Code –1234 (a valid user code)
Command –Hint
Extended Command –Off
Data –0713489467 (Cell Number)
The SMS should look like this:
1234 hint off 0713489467
All hint commands:
Action
Code
Command
Ext. Comm
Data
To list all numbers
1234
List
Numbers
Action
Code
Command
Ext. Comm
Data
Enable hints for Sid
1234
Hints
On
Sid
Disable hints for 0713489467
1234
Hints
Off
0713489467

Command Table
Action
Code
Command
Ext. Comm
Data
Phone Numbers
Add phone number as a Master
number
1234
Add
Master
074 049 2481
Add phone number as an Arm
number
1234
Add
Arming
073 917 0759
Add phone number as a Reporting
number
1234
Add
Reporting
071 348 9467
Deleting a phone number
1234
Delete
074 049 2481
Reporting
Turn on reporting for partition
events
1234
Report
On P1,P2
074 049 2481
Turn off reporting for global events
1234
Report
Off Global
073 917 0759
Turn on reporting for partition and
global events
1234
Report
On
P1,P2,Global
071 348 9467
Turn on full reporting
1234
Report
Type
Full 074 049 2481
Turn on reduced reporting
1234
Report
Type
Reduced 073 917
0759
Turn on minimal reporting
1234
Report
Type
Minimal 073 917 0759
Turn on raw data reporting
1234
Report
Type
Raw 071 348 9467
Increase the reporting threshold to
50 SMSes
1234
Report
Threshold
50 074 049 2481
Arm/Disarm
Away arm all partitions
1234
Arm
All
Away arm P1 & P2
1234
Arm
P1,P2
Stay arm P1
1234
Arm
S1
P1
Disarm all partitions
1234
Disarm
All
Disarm P2
1234
Disarm
P2
Disarm P1 & P2
1234
Disarm
P1,P2
Setting Time
Set the SMS Duo v2 to retrieve the
time once a week
1234
Add
Time
061 458 2504
Naming
Assigning a site name
1234
Site
Name
Home
Name partition 1 “Main House”
1234
Partition
Name
1:Main House
Name zone 2 “Lounge” & zone 5
“Patio”
1234
Zone
Name
2:Lounge, 5:Patio
Name cell 0614582504 “Sid”
1234
Cellnumber
Name
0614582504:Sid
Name PGM 2 Lights
1234
PGM
Name
2:Lights
Delete a name from a number
1234
Delete
Name
Sid
Bypass/Unbypass
Bypass zone 1
1234
Bypass
1
Bypass zone 3,4,8
1234
Bypass
3,4,8
Bypass named zone “Lounge” &
“Kitchen”
1234
Bypass
Lounge, Kitchen
Unbypass Zone 5
1234
Unbypass
5
Unbypass “Kitchen”
1234
Unbypass
Kitchen

Action
Code
Command
Ext. Comm
Data
Burglary/Restore Reporting Description
Make burglary description open
1234
Burglary
Name
6:Open
Make restore description close
1234
Restore
Name
6:Close
Missed Call Function
Set the missed call command to
‘1234 pgm pulseh 1’
1234
Missedcall
Set
‘1234 pgm pulseh 1’
Enable missed call function for
0740492481
1234
Missedcall
Enable
0740492481
Disable missed call function for
0740492481
1234
Missedcall
Disable
0740492481
Turn PGM’s On/Off
Turn PGM 1 on
1234
PGM
On
1
Turn PGM 1 & 2 off
1234
PGM
Off
1,2
Pulse PGM 2 Low
1234
PGM
PulseL
2
Pulse PGM 2 High
1234
PGM
PulseH
2
Panel Status
Retrieve the status of all partitions
1234
Arm
Status
All
Retrieve the status of P1
1234
Arm
Status
P1
Retrieve the status of P1 & P2
1234
Arm
Status
P1,P2
Retrieve the status of zones in
partition 1
1234
Zone
Status
P1
Retrieve the status of zones in
partition 1 & 2
1234
Zone
Status
P1,P2
Get PGM 2’s status
1234
PGM
Status
2
Get PGM Gate’s status
1234
PGM
Status
Gate
Retrieve bypass status of zone 1
1234
Bypass
Status
1
Retrieve status of “Lounge”
1234
Bypass
Status
Lounge
Lockout Phone Number
Temporarily disable a phone
number
1234
Lockout
On
074 049 2481
Enable a phone number after
being disabled
1234
Lockout
Off
074 049 2481
Manage Airtime
Save balance string in the SMS
module
1234
Airtime
Command
Enter the string
supplied
Query airtime balance
1234
Airtime
Balance
Add airtime
1234
Airtime
Network supplied
string
SMS Hints
Turn SMS hints On
1234
Hint
On
074 049 2481
Turn SMS hints Off
1234
Hint
Off
074 049 2481
List Number
List all numbers on the XSMS
1234
List
Numbers
Help
List commands
1234
Help
List extended commands for arm
1234
Help
Arm
List ext commands for disarm
1234
Help
Disarm
List ext commands for status
1234
Help
Status
P1
List ext commands for naming
1234
Help
Name
List ext commands for bypassing
1234
Help
Bypass

Action
Code
Command
Ext. Comm
Data
List ext commands for
unbypassing
1234
Help
Unbypass
List ext commands for airtime
1234
Help
Airtime
List ext commands for lockout
1234
Help
Lockout
List ext commands for PGMs
1234
Help
PGM
List ext commands for zones
1234
Help
Zone
List ext commands for reporting
1234
Help
Report
List ext commands for adding a
user
1234
Help
Add User
List ext commands for removing a
user
1234
Help
Remove
User
Other IDS Security System manuals
