IDS 400 User manual

User Manual


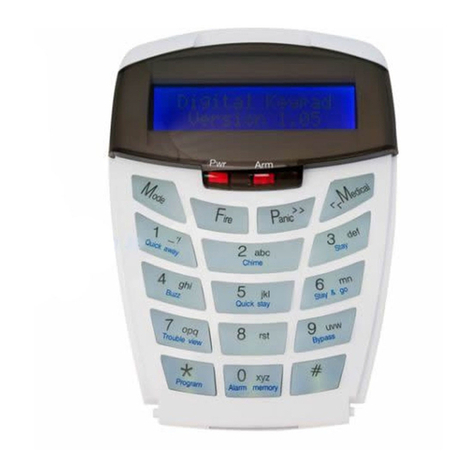
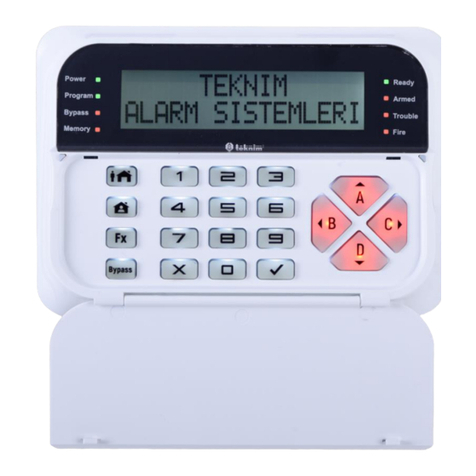
Users Guide to Keypad
Functions
MANUAL NO. 700-204-01A ISSUED NOV 2000 VERSION 1.01

4 IDS400 USER MANUAL NO. 700-204-01A ISSUED NOV 2000 VER 1.01
IDS400USERMANUAL
Summary of Operation
mrasid/mrA
]EDOCRESU[+]#[
yawA-mrAkciuQ
nwoddloH ]1[ dnoces1rof
yatS-mrAkciuQ
nwoddloH ]5[ dnoces1rof
oG&mrAyatSkciuQ
nwoddloH ]6[ dnoces1rof
cinaP
[nwoddloH ]P dnoces1rof
eriF
nwoddloH ]F[ dnoces1rof
ycnegremElacideM
nwoddloH ]M[ dnoces1rof
yromeMmralA
nwoddloH ]0[ dnoces1rof
enozassapyB
[-]+]REBMUNENOZ[
enozemihcmargorP
nwoddloH ]2[ +[-+]]REBMUNENOZ[
enozyatsmargorP
nwoddloH ]3[ +[-+]]REBMUNENOZ[
sseruD
]EDOCSSERUD[+]#[

IDS400 USER MANUAL NO. 700-204-01A ISSUED NOV 2000 VER 1.01 5
IDS400USERMANUAL
Contents
Glossary...................................................................... 7
1. Introduction to IDS400 .............................................. 8
1.1 Notes......................................................................................8
2. Understanding the Keypad Indicators .................... 9
3. Operation of the Keypad ........................................ 10
4. System Information.................................................. 10
4.1 ProgrammedFunctions ........................................................10
4.2 UserCodes .......................................................................... 11
4.3 ZoneInformation ................................................................... 11
5. Arming the System................................................... 12
5.1 AwayArming Procedure.......................................................12
5.2 Quick Away Arming .............................................................12
5.3 Stay Arming .........................................................................12
5.4 Quick Stay Arming...............................................................13
5.5 Stay Arm and Go .................................................................13
5.6 Arming from a Key-Switch or Remote Control ......................13
6. Zone Bypassing ....................................................... 14
6.1 To Bypass a Zone ................................................................14
6.2 ToUn-Bypass Zone .............................................................15
7. Disarming the System ............................................. 15
7.1 To Disarm with a Key-Switch or Remote Control..................16
8. Emergency Situations ............................................. 16
8.1 FireAlarm ............................................................................16
8.2 Medical Alarm ......................................................................16
8.3 Panic Alarm .........................................................................16
8.4 DuressCode ........................................................................17
9.0 Emergency Evacuation Plan .................................. 17

6 IDS400 USER MANUAL NO. 700-204-01A ISSUED NOV 2000 VER 1.01
IDS400USERMANUAL
10. AlarmMemory .......................................................... 18
10.1 To Display Alarm Memory: ...................................................18
11. User Codes .............................................................. 18
11.1 EnteringNew andChanging OldUser Codes. ......................18
11.2 DeletingUserCodes ............................................................19
12. Stay Zones................................................................ 19
12.1 ToProgram Stay Zones........................................................19
12.2 To Cancel the Stay Zones ....................................................20
13. Chime Zones ............................................................ 20
13.1 ToProgramthe ChimeZones ...............................................20
13.2 ToCancelthe ChimeZones .................................................21
14. Trouble-Shooting .................................................... 22
14.1 TroubleCondition..................................................................22
14.2 Problems When Arming the System....................................22
14.3 Problems when disarming the system .................................22
14.4 ForService ...........................................................................23

IDS400 USER MANUAL NO. 700-204-01A ISSUED NOV 2000 VER 1.01 7
IDS400USERMANUAL
Glossary
Alarm This is the history of the most recent violations that
Memory occurred the last time the system was armed.
Arm To set the system into the ARMED mode. In this mode,
violating a zone will activate an alarm condition and, if the
system is programmed accordingly, will cause a reporting
code to be sent to the monitoring company.
Bypass To deactivate a zone, so that it will not respond if
violated. When the panel is ARMED, violation of a by-
passed zone will be ignored.
Disarm To take the system out of the armed mode. In this mode,
only a violation of a PANIC zone will activate an alarm
condition. Fire and Medical functions remain active.
Entry/ Exit A zone with a programmable time delay, that allows the
Zone user to exit the premises after arming the system and
time to get to the keypad after entering the armed
premises.
Follower A zone that may be temporarily violated - only after an
Zone entry/exit zone is violated. This allows the user access to
disarm the system. A Follower zone will behave as per
an Instant zone if violated prior to the violation of an entry/
exit zone.
Instant When the system is armed, a violation of an instant zone
Zone will immediately cause an alarm condition to be
registered.
Stay Arm Arming that allows for certain preprogrammed, STAY
or bypassed zones to be violated while the system is
armed.
Stay Arm Arming that allows the user to stay arm and leave the
and Go premises.
Stay Zone Zones which are bypassed automatically when the
system is STAY ARMED.
Zone A specific area of your premises guarded by sensors
which detect violations of that area.

8 IDS400 USER MANUAL NO. 700-204-01A ISSUED NOV 2000 VER 1.01
IDS400USERMANUAL
1. Introduction to the IDS400
The IDS400 Control Panel is manufactured to the highest specification
and will provide many years of service if correctly installed and main-
tained. The unit is designed for simple operation yet provides the
maximum protection for you, your family or business. For trouble free
operation please follow the instructions contained in this User Manual.
Your security system consists of a control panel, one or more key-
pads and various sensors and detectors. A metal cabinet will contain
the control panel which includes the system electronics, fuses and
stand-by battery. There is normally no reason for anyone but the
installer or service professional to have access to the control panel.
1.1 Notes
LRead the entire manual carefully and keep it in an accessible
place.
LYour security system should be installed and serviced by a
qualified security professional who should instruct you on the
level of protection that has been provided and on systems
operations.
LIf you have any questions regarding the operation of the system,
contact your security company representative.
LYour system should be tested on a regular basis. Before testing
the system please notify your security company of your intention
to do so.
LNEVER disconnect the mains power as the back-up battery will
eventually discharge which will cause the control panel to
switch off.
LIt may be possible to arm the security system without the back-
up battery connected. Ideally, your periodic tests should be done
with AC power removed to verify the battery is connected and
adequatelycharged.ENSURE THATTHEBATTERY IS
RECONNECTED
LA security system cannot prevent emergencies. It is only
intended to alert you and - if included - your central station of an
emergency situation.
LWarningdevices will need tobe visible and loudenough, wired

IDS400 USER MANUAL NO. 700-204-01A ISSUED NOV 2000 VER 1.01 9
IDS400USERMANUAL
correctly, and properly placed to provide notification of an alarm
condition.
LSmoke and heat detectors may not detect all fire situations.
2. Understanding the Keypad Indicators
See illustration on inside front cover.
1. ARMED Indicator (Red)
detanimullIdemrAmetsyS
dehsiugnitxEdemrasiDmetsyS
gnihsalFyromeMronoitidnoCmralA
2. AWAY Indicator (Red)
detanimullIedoMyawAnidemrAmetsyS
dehsiugnitxE yawAniyatS/demrasiDmetsyS
edoM
3. POWER Indicator (Red)
detanimullItneserpsirewoPsniaM
gnihsalF rowolyrettab(noitidnoCelbuorT )tneserptonrewopsniam
4. READY Indicator (Green)
detanimullIdemraebotydaersimetsyS
5. ZONE Indicators(Yellow)
detanimullIdessapybenoZ
dehsiugnitxEraelcenoZ
gnihsalFdetaloivenoZ

10 IDS400 USER MANUAL NO. 700-204-01A ISSUED NOV 2000 VER 1.01
IDS400USERMANUAL
3. Operation of the Keypad
To ensure correct operation of your security system it is essential to
familiarize yourself with the use of the keypad.
LThe keypad has an audible indicator, command entry keys and
zone and system status lights.
LThe keypad is used to send commands to the system and to
display the current system status.
LThe keypad(s) will be mounted in a convenient location inside
the protected premises close to the entry/exit zones.
LA sensor which has registered an alarm condition will be
indicated on the keypad by the corresponding zone light flashing.
Theaudible indicatorwill sound underthe following conditions.
LWhen any key is pressed during the entry of codes.
LThree times if one or more of the zones are violated when
attempting to arm the system.
LDuring entry/exit delay.
LWill sound 5 times when a chime zone is violated.
4. System Information
4.1 Programmed Functions
Check with your installer which of the following functions have been
enabled.
GQuick Arm
GStay Arm
GStay Arm and Go
GSiren Sound on Arm/Disarm (long toot on arm/ short toot on disarm)
GPanic Alarm
GFireAlarm
GMedical Alarm
GChimeZones

IDS400 USER MANUAL NO. 700-204-01A ISSUED NOV 2000 VER 1.01 11
IDS400USERMANUAL
4.2 User Codes
resU
.oN edoCresU emaNresU
10:edoCWEN4321:edoCretsaMtluafeD
2030405060708090011121314151:edoCsseruD
4.3 Zone Information
-
noZ
eepyTenoZ tixE/yrtnE.g.e emaNenoZ roodnehctiK.g.e
1
2
3
4
siyaledyrtnEehT.sdnoces
siyaleDtixEehT.sdnoces

12 IDS400 USER MANUAL NO. 700-204-01A ISSUED NOV 2000 VER 1.01
IDS400USERMANUAL
5. Arming the System
Thereare various optionsfor arming the system
5.1 Away Arming Procedure
[#]+ [USER CODE]
1. Ensure that the READY indicator is illuminated; if not, check
that all protected doors and windows are closed and that motion
has ceased in areas covered by motion detectors.
2. If necessary, close the front door.
3. Press the [#] key to cancel any unintended key entries.
4. Enter a valid 4 digit [USER CODE]. If you make a mistake, press
the [#] key and re-enter the code.
5. The ARMED indicator will illuminate and the keypad’s audible
indicator will sound on and off for the duration of the exit delay.
Any bypassed zones will be shown by a steady illuminated zone
indicator.
6. Thearming processhas begun.Leave onlyvia thefollower and
entry/exit zones.
5.2 QuickAwayArming
[1] - Hold down the key until the keypad audible indicator sounds.
If this function is enabled, it is possible to AWAY arm by simply
holding down the [1] key until the audible indicator sounds and the
arming process begins.
5.3 StayArming
[#]+ [USER CODE]
This allows the user to arm the perimeter zones while disabling the
interior zones so that it is possible to remain on the premises.
1. Ensure that the READY indicator is illuminated; if not, check
that all protected doors and windows are closed and that motion
has ceased in the areas covered by motion detectors.

IDS400 USER MANUAL NO. 700-204-01A ISSUED NOV 2000 VER 1.01 13
IDS400USERMANUAL
2. If necessary, close the front door.
3. Press the [#] key to cancel any unintended entries.
4. Enteravalid [USERCODE].
5. DO NOT open the front door. If the front door is opened the
system will arm in AWAY mode.
6. The ARMED indicator will illuminate and the audible indicator
will sound on and off for the duration of the exit delay.
7. The AWAY indicator will remain extinguished.
8. Any STAY zones (shown by a steadily illuminated indicator) will
be automatically bypassed.
9. Ensure that you enter only those zones that are bypassed.
5.4 Quick Stay Arming
[5] - Hold down the key until the keypad audible indicator sounds.
It is possible to STAY arm by holding down the [5] key until the
keypad beeps. If the system is armed using the quick STAY arm key,
there is no exit delay.
5.5 Stay Arm and Go
[6] - Hold down the key until the keypad audible indicator sounds.
This is a quick function which allows the user to STAY arm and leave
the premises. This is useful if you have a guest or a pet moving around
on the property.
1. Hold down the [6] key until the audible indicator sounds.
2. The ARMED indicator will illuminate and the AWAY indicator will
remain extinguished. Any stay zones will be bypassed.
3. Be sure to leave only via the follower and entry/exit zones.
5.6 Arming from a Key-Switch or Remote Control
This option is not standard; check with your installer to verify
installation.
1. Ensure that the READY indicator is illuminated before leaving.
2. Leaveand closethe door(remembering to lock!).
3. Press the remote button or twist and release the key-switch.

14 IDS400 USER MANUAL NO. 700-204-01A ISSUED NOV 2000 VER 1.01
IDS400USERMANUAL
4. The alarm will arm immediately and the remote ARM indicator
will illuminate.
5. If programmed to do so, the siren will sound briefly - verify with
your installer.
NOTE:
If a remote control is used, it is advisable to have the siren sound on
armand disarmfunction enabled.
6. Zone Bypassing
LThe term BYPASS is used to describe a zone that has been de-
activated; i.e. violations in bypassed zones will not cause an
alarm.
LIt is used when:
Laccess is needed to part of the protected area while the
system is armed, e.g. you wish to leave a window open.
Lzones which are temporarily out of service due to damaged
wiring or a faulty sensor.
LZones cannot be bypassed once the system is armed.
LBypassed zones are automatically cancelled each time the
system is disarmed and must be re-bypassed before the next
arming.
6.1 To Bypass a Zone
[-]+[ZONE NUMBER]
1. Press the [-]key (while bypassing zones, violated zones will be
flashing).
2. Press the number corresponding to the zone you need to by-
pass e.g. the [2] key if you wish to bypass zone 2.
3. The relevant zone indicator will illuminate to indicate that the zone
is now bypassed.
4. Repeat steps 1 and 2 to bypass any other zones.
NOTE:
Some zones may be programmed to function in a manner which does
not permit bypassing e.g. Panic zones.

IDS400 USER MANUAL NO. 700-204-01A ISSUED NOV 2000 VER 1.01 15
IDS400USERMANUAL
6.2 To Un-Bypass Zone
[-]+[ZONE NUMBER]
1. Press the [-]key.
2. Press the number corresponding to the currently bypassed zone
3. The zone indicator will extinguish - the zone is now active.
7. Disarming the System
[#]+ [USER CODE]
To disarm the system, enter a valid [USER CODE]before the expiry of
the entry delay. Although not essential, it is recommended that the [#]
key be pressed before entering a user code as this clears any
unintended key entries.
LEnter the premises through a designated entry/exit door; enter-
ing by any other door will sound an immediate alarm.
LAs soon as the entry/exit zone is violated i.e. the door has been
opened, the entry delay begins.
LThe audible indicator will sound for the duration of the entry
period to indicate that a valid user code is required.
LIf the ARMED indicator remains illuminated, an error was made
while entering the user code, press the [#] key and re-enter the
code.
LOnce the system disarms, the ARMED indicator will extinguish
and the audible indicator will stop sounding.
LIf no valid user code has been entered by the end of the entry
delay period, an alarm condition will be registered.
LIf the entry period is too short, have your installer change the
entry delay period.
NOTE:
If the ARMED indicator is flashing upon entry, there has been a
violation. The intruder may still be inside! Call for assistance.
NOTE:
Enter a valid [USER CODE]to cancel the strobe (Where one has been
installed.

16 IDS400 USER MANUAL NO. 700-204-01A ISSUED NOV 2000 VER 1.01
IDS400USERMANUAL
7.1 To Disarm with a Key-Switch or Remote Control
This option is not standard; check with your installer to verify
installation.
1. Press the remote button or twist and release the key-switch.
2. The system will disarm and the remote indicator will extinguish.
3. If programmed to do so, the siren will sound briefly - verify with
your installer.
8. Emergency Situations
8.1 Fire Alarm
[F]- Hold down the key until the keypad audible indicator sounds.
LThis key will activate the FIRE ALARM CONDITION when held
down until the audible indicator sounds.
LThe FIRE ALARM CONDITION can also be triggered by an
installed smoke detector.
LThe siren will sound and the FIRE REPORTING CODE will be
transmitted to the monitoring company.
LTo stop the siren sounding enter a 4 digit [USER CODE].
8.2 Medical Alarm
[M] - Hold down the key until the keypad audible indicator sounds.
LThis key will activate the MEDICAL ALARM CONDITION when
held down until the audible indicator sounds.
LThe keypad’s audible indicator will sound rapidly for 5 seconds
to indicate that a medical alarm has been initiated.
8.3 PanicAlarm
[P] - Hold down the key until the keypad audible indicator sounds.
LThis key will activate the PANIC ALARM when held down until the

IDS400 USER MANUAL NO. 700-204-01A ISSUED NOV 2000 VER 1.01 17
IDS400USERMANUAL
keypad audible indicator sounds.
LA PANIC ALARM can also be activated by any FIXED PANIC or
REMOTE PANIC buttons which have been installed.
LIf audible panic option has been selected, the siren will sound,
and the PANIC REPORTING CODE will be transmitted to the
monitoringcompany.
LTo silence the siren, enter a valid 4 digit [USER CODE]. If the siren
is not cancelled, it will stop automatically after the programmed
SIREN TIME OUT period.
LEnsure that your installer has enabled this function if it is
required.
LPress this key only in an emergency situation that requires
responseby emergencypersonnel.
8.4 Duress Code
[#]+[DURESS CODE]
LThis is a special 4 digit user code which should only used in the
unique situation where an intruder forces one to disarm the
system “under duress”.
LWhen the [DURESS CODE]isentered, the control panel disarms
normally - however a DURESS REPORTING CODE is trans-
mitted to the monitoring company to inform them that you have
been forced to disarm the control panel by an intruder.
LIt is advisable to choose a code that can be easily remembered
by all family (or staff) members.
9.0 Emergency Evacuation Plan
An emergency evacuation plan should be established in case of a fire:
LDraw up a floor plan of your premises showing windows, doors,
stairs and rooftops that can be used for escape.
LIndicate a suitable escape route for each room; and always
keep these routes free of obstruction.
LSet a meeting place outdoors for a headcount of the building
occupants.
LPractice escape procedures.

18 IDS400 USER MANUAL NO. 700-204-01A ISSUED NOV 2000 VER 1.01
IDS400USERMANUAL
10. Alarm Memory
The Alarm Memory displays any zones which were violated or
bypassed the last time the system was armed.
10.1 To Display Alarm Memory:
[0] - Hold down the key until the keypad audible indicator sounds.
If the ARMED indicator is flashing before you disarm the
system, a violation has occurred. To view which zone was violated:
1. Disarm the panel.
2. Hold down [0] until the audible indicator sounds.
4. The READY indicator will extinguish and the audible indicator
will sound briefly.
5. Flashing zone indicators show which zones were violated
during the last armed period.
6. The bypassed zones will have constantly illuminated indicators.
7. The memory status will be displayed for five seconds, or until the
[#] is pressed.
8. The alarm memory will be erased the next time the system is
armed.
11. User Codes
The IDS400 Alarm Panel has 15 programmable user codes.
Code1 :Master UserCode
Code 2 - 14 :GeneralUser Codes
Code15 :DuressCode
11.1 Entering New and Changing Old User Codes.
Summary: [-] + [MASTER USER CODE] + [-] + [CODE NUMBER] + [-] + [NEW
CODE] + [-]
1. Hold down the [-]key until the audible indicator sounds.
2. The ARMED and READY indicators will flash alternately,
indicating that the system is ready to program user codes.
3. Enterthe [MASTER USER CODE](thefactorydefault is1234)

IDS400 USER MANUAL NO. 700-204-01A ISSUED NOV 2000 VER 1.01 19
IDS400USERMANUAL
followed by the [-]key.
4. The ARMED and READY indicators will begin to flash
simultaneously indicating that the correct master code was
entered. If an invalid code was entered the keypad will beep three
times.
5. Enterthe [USER CODE NUMBER]youwishto change(1-15)
followed by the [-]key.
6. Enter the new 4 digit [USER CODE]and press the [-]key.
7. Repeat steps 6-8 to enter or change other user codes.
8. Once all the codes are programmed, press the [#] key to exit.
11.2 Deleting User Codes
Follow steps 1-6 of the previous procedure but only press the [-]key
in step 7. That particular code will be deleted.
12. Stay Zones
Stay zones are those zones which are bypassed automatically when
the system is STAY ARMED. To avoid triggering the alarm, zones
such as the bedroom, or other areas which require access, must be
bypassed - this is done automatically when you stay arm. These
zones must be programmed before you STAY ARM and need only be
programmedonce.
12.1 To Program Stay Zones
Summary: [3] + [-] + [ZONE NUMBER] + [#]
1. Hold down the [3] key until the audible indicator sounds.
2. Press the [-]key followed by the [NUMBER]corresponding to
the zone you wish to be a STAY zone.
3. Therelevant zoneindicator willilluminate.
4. Press the [#] key to exit the stay zone programming mode.

20 IDS400 USER MANUAL NO. 700-204-01A ISSUED NOV 2000 VER 1.01
IDS400USERMANUAL
12.2 To Cancel the Stay Zones
Summary: [3] + [-] + [ZONE NUMBER] + [#]
If an area programmed as a STAY zone will no longer be violated
during STAY arming, then the STAY status of such a zone should be
cancelled. This will allow the system to protect that area during a stay
arm cycle.
1. Ensure that the READY indicator is illuminated.
2. Hold down the [3] key until the audible indicator sounds.
3. Press the [-]key followed by the [NUMBER]corresponding to
the STAY zone you wish to cancel.
4. Therelevant zoneindicator willextinguish.
5. Press the [#] key to exit the stay zone programming mode.
NOTE:
The system will automatically exit this mode after 60 seconds.
13. Chime Zones
The chime mode allows the user to monitor nominated zones while the
system is disarmed. The audible indicator will sound briefly when the
nominated zone is violated - the siren will NOT sound.
EXAMPLE:
You wish to know when someone enters or exits the front door, the
keypad will beep each time the door is opened if that zone is a chime
zone.
13.1 To Program the Chime Zones
Summary: [2] + [-] + [ZONE NUMBER] + [#]
1. Hold down the [2] key until the audible indicator sounds.
2. The AWAY indicator will flash to show that the panel is on the
chimeprogrammingmode.
3. To monitor any zone, press the key corresponding to that zone.
The zone indicator will illuminate.
4. Repeat steps 1 - 3 to program any other zones to the chime
Other manuals for 400
1
This manual suits for next models
1
Table of contents
Other IDS Security System manuals
Popular Security System manuals by other brands

Burg Wächter
Burg Wächter secuENTRY Home ENTRY 5000 CYL operating instructions

OnQ Technologies
OnQ Technologies HMS 1100 owner's manual
Acroprint
Acroprint Time Q +Plus quick start guide
DA Systems
DA Systems Abacus 64 Operator instructions

AliMed
AliMed 74836 manual

Honeywell
Honeywell ADEMCO VISTA-40 Installation and setup guide
