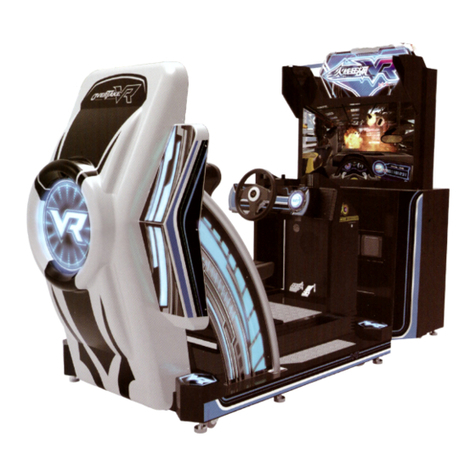
IGS Speed Rider 3 User manual

Important
●Before installing and using this machine, please read this user manual carefully.
●Please follow all instructions in this user manual and pay attention to all descriptions to
ensure that the machine is installed correctly.
●Please carefully store this user manual at where it can be easily accessed and read.
●The cabinet and parts of this machine are subject to change for further improvement.
User’s Manual
●Before installing and using this machine, please read this use
r manual carefully.

About this manual
About this manual
1
About this manual
This User Manual describes how to install, set up, use and maintain this product. The
purpose is to instruct
machine operators and maintenance personnel to use this product correctly and safely.
Please follow all safety and warning indications to prevent people from harm or machine
from damage.
People who are not trained technicians shall not repair this product personally. Technicians
are defined as people who obtained diploma from high schools or schools above junior
high in the subjects of mechanical
engineering, electrical engineering, or schooling of the equivalent level and have game
machine maintenance, management, and servicing as their daily work.
Disclaimer
IGS makes no warranty, expressed or implied, including but not limited to any implied
warranties of the correctness and completeness of this document. IGS also makes no
warranty to any merchantability or fitness for a particular purpose. IGS reserves the right
to revise and improve this manual as it sees fit. Information in this document is subject to
change without notice.
Trademarks
IGS® is a registered trademark of International Games System Co., Ltd.
© Copyright owned 2020, International Games System Co., Ltd.
No part of this document may be reproduced or transmitted in any form or by any means
without the express written permission of IGS.

Safety Precautions
Safety Precautions
2
Safety Precautions
Ordinary
■
■Without the permission from our designated personnel, do not disassemble, change
or remodel our products.
■
■Be sure to operate this product according to the instructions of this manual. Any
inappropriate operation would damage this product and threaten the personal safety
of players as well as onlookers.
■
■Routinely check, maintain and repair this product.
■
■Keep each warning label on this product clean in order to make sure the descriptions
are readable. If the filthiness on the label could not be got rid of or descriptions are
indistinct, immediately replace the labels.
Installation location
■
■This cabinet is designed for indoor use, and do not place it outdoors or the following
locations:
■
●Places under direct sunlight, are leaking, moist or of high temperature.
■
●Places near flammable, highly volatile or dangerous objects.
■
●Places where the surface is tilted, unstable or frequently shaking.
■
● Places around emergency exits, fire extinguishers or any other extinguishing
equipment.
■
■The vent located in the bottom of this product is for the cabinet and monitor to emit
warm air, and do not place any item close to the vent, or malfunction might occur.
■
■A distance of 30 cm or more should be kept between the cabinet and walls, another
cabinet or the hallway.
Power
■
■ Before plugging in the cabinet, first make sure the voltage is 110V or 220V, or fires
and electric shocks might occur.
■
■When plugging in the cabinet, use an earthing socket.
■
■Do not expose electrical cords and earthing wires on the hallway,or damage, electric
shocks and short circuit might occur.
■
■Do not place flammable items near electrical cords to avoid fires.
■
■If electrical cords are damaged, replace new ones with your local distributor.
■
■Do not use fuses and parts other than those designated by IGS.
■
■To avoid electric shocks or short circuits:
■
●Before repair or maintenance, power must be turned off.
■
●Do not touch plugs with wet hands.
■
●Do not immediately unplug or plug in the cabinet.
■
●When unplugging the electric cord, tightly hold the plug and avoid pulling the
electric cord.
CAUTION
WARNING
WARNING

Safety Precautions
Safety Precautions
3
Transportation
■
■When transporting this product with a forklift, make sure to exert the force point to
avoid accidents or damages to the cabinet.
■
■When moving this product with a vehicle, make sure to fasten the caster rather than
the leg leveler, or damages might be brought to the cabinet.
■
■The LCD monitor of the cabinet is rather fragile, and should avoid severe shaking or
being hit by outer forces.
Moving
■
■Before moving the cabinet, first unplug it to avoid accidents.
■
■When moving the cabinet, pay attention to the obstacles ahead and check if the
surface of the ground is flat to avoid accidents and damages to the cabinet.
■
■When moving the cabinet, at least two personnel should work together to avoid
accidents.
During a game
■
■To prevent customers from being injured or encountering accidents, people in the
following categories should avoid using this product:
■
●People with unsatisfactory health conditions such as patients of hypertension or
heart disease.
■
●People with injuries or are physically disabled.
■
●People wearing slippery shoes or high heels.
■
●People who are unable to step on the pedal when sitting.
■
●People who are pregnant, drunk or would easily feel dizzy.
■
■Each motorcycle is designed for one person, and two or more people are prohibited
from sitting together.
■
■If customers feel uncomfortable during their play, remind them to pause
ordiscontinue their play.
■
■Remind customers to carefully read the warning labels as well as other reminding
descriptions, and operate according to instructions to avoid electric shocks or short
circuits, etc.
CAUTION
CAUTION
CAUTION

Table of contents
Table of contents
4
Table of contents
About this manual.........................................1
Safety Precautions.........................................2
Table of contents............................................4
Quick installation 5
Connection and power .....................................5
Basic settings ...................................................6
I/O Adjustments ........................................................7
1.Introduction of the Cabinet 8
1.1 List of the accessories ........................................8
1.2 An overview of the cabinet.................................. 9
1.3 Name of the parts ............................................. 11
1.4 Specification of the cabinet...............................15
2.Machine Installation 16
2.1 Transporting or moving the cabinet ..................16
2.2 Machine Installation .......................................... 17
2.3 Fastening the cabinet .......................................22
2.4 Connection and Power .....................................23
2.5 Setting the group number and ID of the
cabinets ............................................................24
3.Instructions of the game 26
3.1 Game introduction ............................................26
3.2 Distinctive plays ................................................ 26
3.3 Game control ....................................................26
3.4 Instruction of the game display ......................... 30
4.Using the Operator Settings 31
4.1 Menu Structure .................................................31
4.2 Using the Operator Settings .............................33
4.3 Hardware Test...................................................34
4.3.1 I/O Test .............................................................34
4.3.2 Screen Test.......................................................35
4.3.3 Sound Test........................................................36
4.3.4 Lamp Test .........................................................37
4.3.5 Connection Test................................................38
4.3.6 Camera Test .....................................................39
4.3.7 Counter Test .....................................................39
4.3.8 Vibration Test....................................................40
4.3.9 Fan Speed Test ................................................40
4.4 System Settings................................................41
4.4.1 Time Settings....................................................41
4.4.2 Connection Settings .........................................44
4.4.3 Country Settings...............................................46
4.4.4 Store Settings...................................................47
4.4.5 Password Settings............................................47
4.4.6 I/O Adjustments ................................................49
4.5 Game Settings .................................................. 50
4.5.1 Coin Rate Settings............................................51
4.5.2 Sound Settings .................................................51
4.5.3 Difculty Settings..............................................52
4.5.4 Number Of Laps ...............................................53
4.5.5 Multiplayer Settings ..........................................53
4.5.6 Flow Time Settings ...........................................54
4.5.7 Promotional QR Code ......................................55
4.6 Income Data .....................................................57
4.6.1 Daily Income.....................................................57
4.6.2 Monthly Income ................................................58
4.6.3 Total Income .....................................................58
4.7 System Reset ...................................................59
4.7.1 Income Data Reset...........................................59
4.7.2 Restore Default Dettings ..................................61
4.7.3 Ranking Board Reset .......................................62
4.7.4 Reset Player Photo...........................................63
4.7.5 Update Progress...............................................64
5.Maintenance and Repair 65
5.1 Daily inspection.................................................65
5.2 Cleaning and Maintenance ............................... 65
5.3 Replacing Parts ................................................66
5.3.1 Replace plate of the light box LED-PART1.......66
5.3.1 Replace plate of the light box LED-PART2.......66
5.3.2 Replace Camera...............................................68
5.3.3 Replace screen decorative LED.......................69
5.3.4 Replace the screen LCD ..................................70
5.3.5 Replace the Fan ...............................................71
5.3.6 Replace speaker light panel .............................72
5.3.7 Replace left and right screen light guide LED ..73
5.3.8 Replace left and right vehicle decorative LED..74
5.3.9 Replace left and right LED of side cover ..........75
5.3.10 Replace left and right light panels of tire rim ..76
5.3.11 Replace tire LED.............................................77
5.3.12 Replace vehicle tail light panel .......................78
5.3.13 Replace fuel tank lid button light
and micro-switch.............................................79
5.3.14 Replace infrared sensor circuit board.............80
5.3.15 Replace I/O circuit board................................81
5.3.16 Replace VR sensor.........................................82
6.Troubleshooting 83
Appendix 1: Warning labels of the cabinet
85
Appendix 2: Wiring diagram of the cabinet
86

Quick installation
Quick installation
5
Quick installation
Connection and power
Setting up 2 cabinets
1. Remove the 2 M4 screws on the maintenance door in the back of the cabinet, and use a
key to open the door.
2. Plug in the included Internet wire to the port of the first cabinet (viewed from the back).
1P
2P
Setting up 4 cabinets
1. Remove the 2 M4 screws on the maintenance door in the back of the cabinet, and use a
key to open the door.
2. Plug in the included Internet wire to the port of the first cabinet (viewed from the back).
1P
2P
3P
4P

Quick installation
Quick installation
6
■Basic settings
Open the coin box under the standby mode, and press the [TEST] button to enter
[Operator Settings].
A. Set up the group number and ID of the cabinet
Enter [Operator Settings] > [System Settings] > [Connection Settings], and appoint
all cabinets in connection into the same group, but provide each cabinet a different ID.
•Example of connecting 2 cabinets (viewed from the front of the cabinet):
Cabinet(L) Cabinet(R)
Please setup the connection here. Please setup the connection here.
•Example of connecting 4 cabinets (viewed from the front of the cabinet):
Cabinet(L) Cabinet(R)
Please setup the connection here. Please setup the connection here.
Cabinet(L) Cabinet(R)
Please setup the connection here. Please setup the connection here.

Quick installation
Quick installation
7
B. Coin Rate Settings
•Enter [Operator Settings] > [Game Settings] > [Coin Rate Settings], and start to
set the number of coins to be inserted for starting and continuing the game.
C. Setting other related items (recommended)
•
Enter [Operator Settings] > [System Settings] > [Time Settings], and set the
cabinets to be connected to be the same time.
•Enter [Operator Settings] > [System Settings] to set up the location and name of
the store.
•Enter [Operator Settings] > [Game Settings] > [Sound Settings] to set up [Day
Time Volume] and [Night Time Volume].
■I/O Adjustments
Enter [Operator Settings] > [System Settings] > [I/O Adjustments] to run adjustment.
•After clicking [Start Adjustments], the options will stop at [Base parameters
adjustments]. Place the vehicle in the center, release the brakes and throttle, click on the
key to reset the motorcycle mid-point and reset the throttle, press down all the way on
the left brake, press down all the way on the right brake, press down the motorcycle to the
maximum point on the left-hand side, press down the motorcycle to the maximum point on
the right-hand side, then save and exit.

Introduction of the Cabinet
8
1.
Introduction of the Cabinet
1.1 List of the accessories
After your purchase of this product, check if the following parts are all included. If any part
is missing or damaged, contact your local distributor.
Accessories Picture Quantity checking column
Operator's manual 1
Controlling panel
key 2
Coin slot key 1
AC cord 2
Internet wire 2
List of the accessories

Introduction of the Cabinet
9
1.2 An overview of the cabinet
■Viewed from the front and side
2485 /mm
2282/mm
An overview of the cabinet

Introduction of the Cabinet
10
An overview of the cabinet
■Viewed from the Top and back
2121/mm

Introduction of the Cabinet
11
1.3 Name of the parts
■Name of the exterior cabinet
Cardboard ( No.1)
Vent
Instructions
8'' Speaker
Light box
Middle
Cardboard
QR code
Cardboard
Cardboard ( No.2)
Machine name board
Camera
42"LCD
Acrylic board
4'' Speaker
4'' Speaker
Name of the parts

Introduction of the Cabinet
12
Wheel
Leg Level
Billboard
Maintenance
Door
Fan
Maintenance
Door ( up )
Maintenance
Door ( down )
Power Inlet
Break ( right )
Oil Tank Cove
Handle
Seat
S/Boost
Break ( left )
Handle
Arrow Keys
Sensor
Break ( right )
Break ( right )
Handle
Name of the parts

Introduction of the Cabinet
13
Etched panel
Chassis decorative
lights
Body Cover Left Side
and Right Side light
I/O Board
Break Light
Tire
Light
Coin Box
Back Door
Middle
Cardboard
QR code
Cardboard
Coin Insert
Machine
Coin Box
Door
Name of the parts

Introduction of the Cabinet
14
■Name of the interior parts
Vibration speaker AMP
Terminal block
HUB
S3000
transformer
I/O board
AMP
Power supply
POWER
測試
服務
Coin Box
Control
panel
1P Test 2P Test
1P
Power
Switch
2P
Power
Switch
1P Service 2P Service
1P Volume VR 2P Volume VR
1P
Counter
2P
Counter
Name of the parts

Introduction of the Cabinet
15
1.4 Specification of the cabinet
Category Items Specification
Concrete item
Size of the cabinet ( W )2485mmX( D )2121mmX( H )2282mm
Weight Supplied by distributor
Power
Power 110V/220V(To conform to local voltage )
Standby Power 400W(1 Cabinet) / 800W(2 Cabinet)
Maximum power 550W(1 Cabinet) / 1100W(2 Cabinet)
Main cabinet
Platform S3000
I/O Board Screen:NF-#-0,Vehicle body:NI-#-0
Power amplifier full-range AMP
Buttons and
control
Game console
Buttons: UP, DOWN, LEFT, RIGHT, S/BOOST
Left brake, right brake, throttle, and the Non-contact sensor
Camera Unit
TURBO Fan
Vibrator unit
Control panel services, test, counter, power, volume
Lights
Machine light box light white light bar
Screen frame backlight controllable RGB light bar
Instructions guide light controllable RGB light bar
Left and right guide lights controllable RGB light bar
Bass top and bottom guide
lights LED light panel
Rear brake light LED light panel
Tire rim lights LED light panel
Tire lights controllable RGB light bar
Fan Power 110V/220V(To conform to local voltage )
Screen
Type LCD
Size 42 inches
Power AC 100~240V
Loudspeaker Size/Resistance/Power Mid to high sound: 4 inches /4Ω/25W
Bass: 8 inches /4Ω/100W
Internet Internet router
Environment
Operating temperature 0˚C ~ 40˚C
Storing temperature -10˚C ~ 80˚C
Relative moisture <85% none coagulation status
Specification of the cabinet

Machine Installation
16
2.
Machine Installation
2.1 Transporting or moving the cabinet
After your purchase of this product, first move the cabinet to the location for installation and
then connect the wires. When you transport, move and choose where to install make sure
the following guidelines are followed:
CAUTION
CAUTION
CAUTION
Reminders for transporting
■When transporting this product with a forklift, make sure you exert the
point of application to avoid accidents or damages to the cabinets.
■When transporting this product with vehicles, fasten the casters, but
do not use a leg leveler as to avoid damages to the cabinets.
■The LCD monitor of the cabinet is fragile, so avoid fierce vibrations
or being hit by strong forces.
Reminders for moving
■Before moving the machine, please remove the plug so as to
prevent Before moving the cabinet, unplug the electric cord to avoid
accidents.
■When moving this product, be aware of the obstacles and the surface
of the ground to avoid accidents and damages to the cabinet.
■When moving this product, at least two personnel should work
together so asto avoid accidents or injuries.
Reminders for installation
■This product should be placed indoors. Do not place it outdoors, or
the following locations:
●Places under direct sunlight, are leaking, damp and of high
temperature.
● Around inflammable, volatile and dangerous objects .
●Places with uneven, unstable surface or frequent vibration.
● Around the exit or public facilities such as fire extinguisher.
■The vent located in the bottom of this product is for the cabinet and
monitor to emit warm air, and do not place any item close to the vent,
or malfunction might occur.
■The cabinet should stay away from the walls, other cabinets and
passageway for at least 30 cm.
Transporting or moving the cabinet

Machine Installation
17
2.2 Machine Installation
List of the accessories
1Middle Cardboard BH1707-SJ1400-00 1pcs Coin
box
2 QR code Cardboard BH1707-SJ1500-00 1pcs Coin
box
3LOGO Acrylic BH1707-SJ1600-00 2pcs Light
box
4LOGO Front grid
acrylic(right) BH1707-SJ1700-00 2pcs Light
box
5LOGO Front grid
acrylic(left) BH1707-SJ1800-00 2pcs Light
box
6Cardboard (left) BH1707-SJ1900-00 1pcs Light
box
Machine Installation

Machine Installation
18
7Cardboard (right) BH1707-SJ2000-00 1pcs Light
box
8Machine name board
holder (right) BH1707- WJ9000-00 2PCS Light
box
9Machine name board
holder (left) BH1707WJ9100-00 2PCS Light
box
10 Machine name holder BH1707WJ9900-00 4PCS Light
box
11 Machine name board
holder B (right) BH1707-WJ10200-00 2PCS Light
box
12 Machine name board
holder B (left) BH1707-WJ10300-00 2PCS Light
box
13 Description card support
bracket BH1707-WJ8000-00 2PCS Coin
box
12 Maintenance
door strike plate BH902-WJ11500-00 4PCS Light
box
13 U-shaped hook BH1902-WG0100-00 4PCS Light
box
Machine Installation

Machine Installation
19
Lightbox acrylic board name of machine assembly:
❶Secure the machine name holder, machine
name holder B, LOGO front grid acrylic,
and machine name disc with 8 M4 screws.
❷Secure the assembled LOGO front grid
acrylic and LOGO acrylic with 10 M4
screws.
❸Secure the assembled LOGO acrylic and
screen holder with 2 M4 screws and 4 mirror
bead screws.
❹Secure the top decorative cardboard and
screen holder with 4 M4 screws.
Machine Installation
Table of contents
Other IGS Arcade Game Machine manuals