iiNet BizPhone Premium T48U User manual

Confidential
BizPhone
Small Business Phone System
Premium T48U IP Phone
User Guide

P a g e | 2
Confidential
Contents
Welcome...............................................................................................................................................4
Overview...............................................................................................................................................5
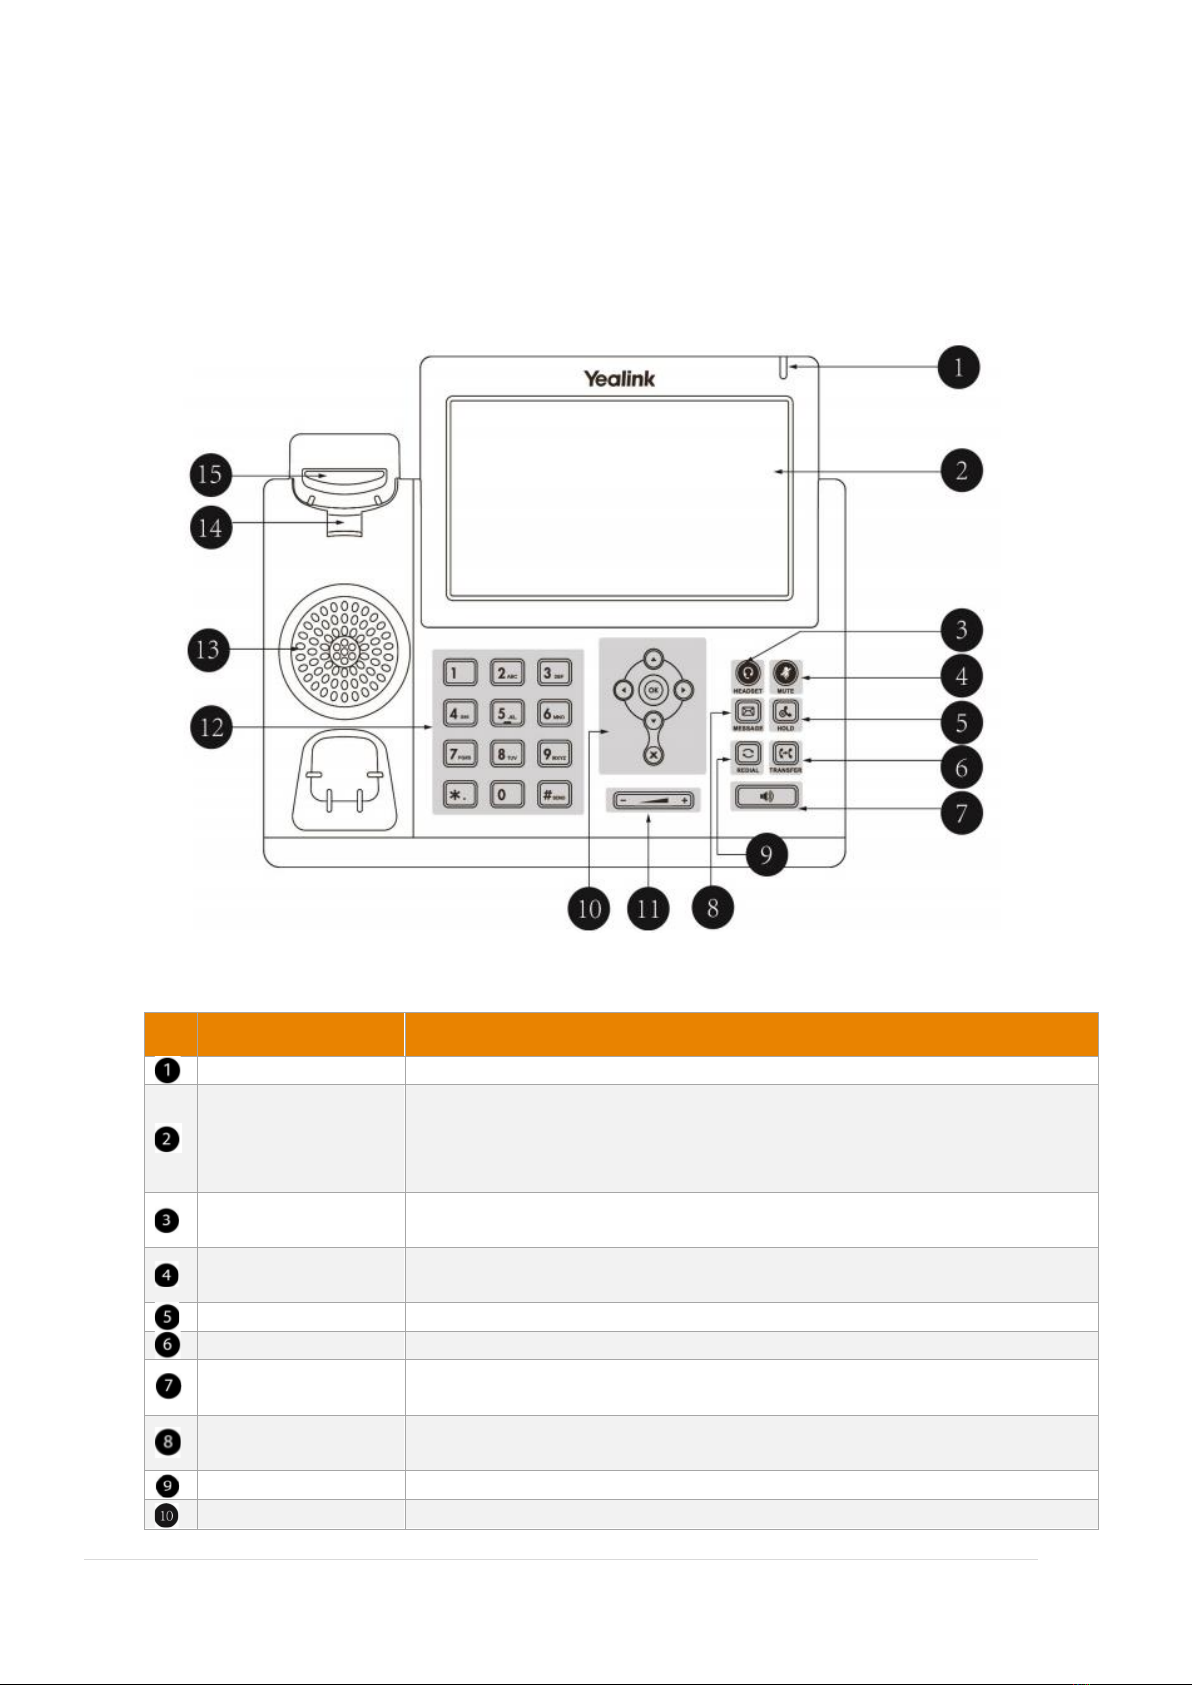
Hardware Component Instructions .................................................................................................5
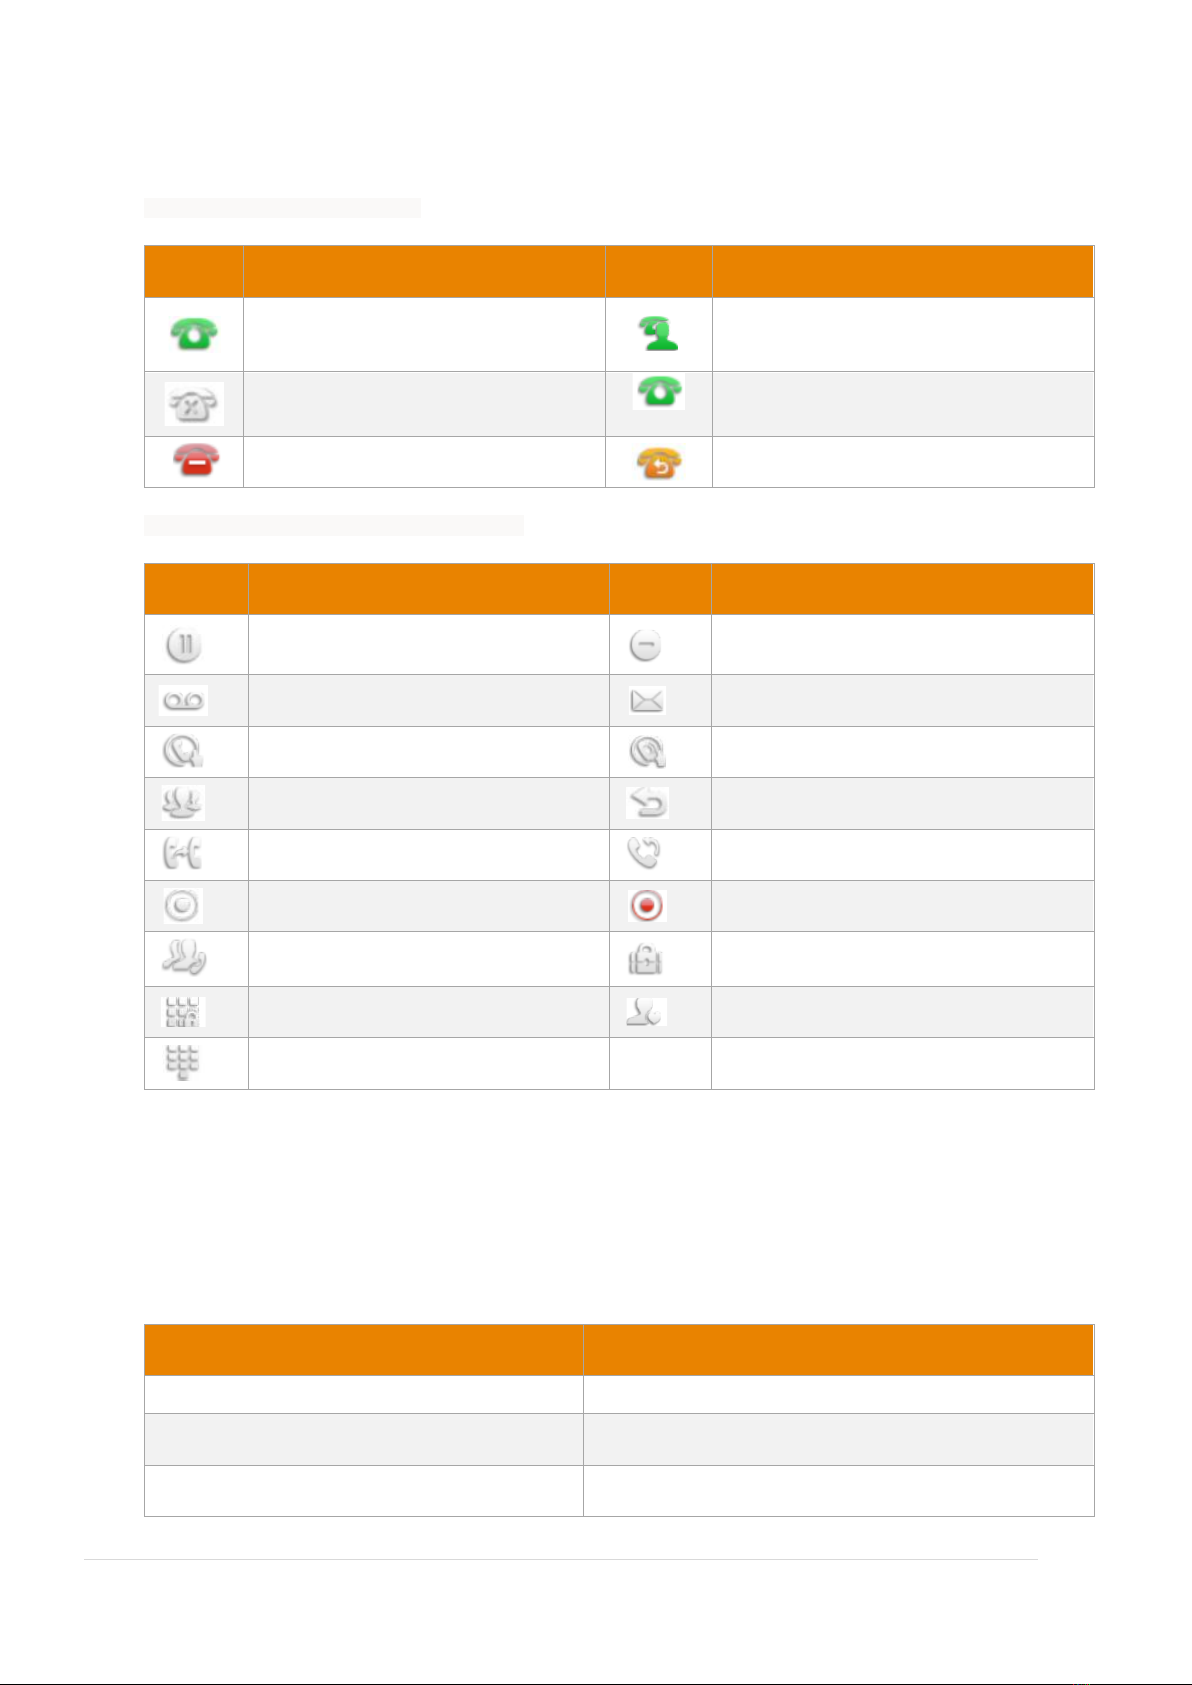
Icon Instructions...............................................................................................................................6
LED Instructions................................................................................................................................7
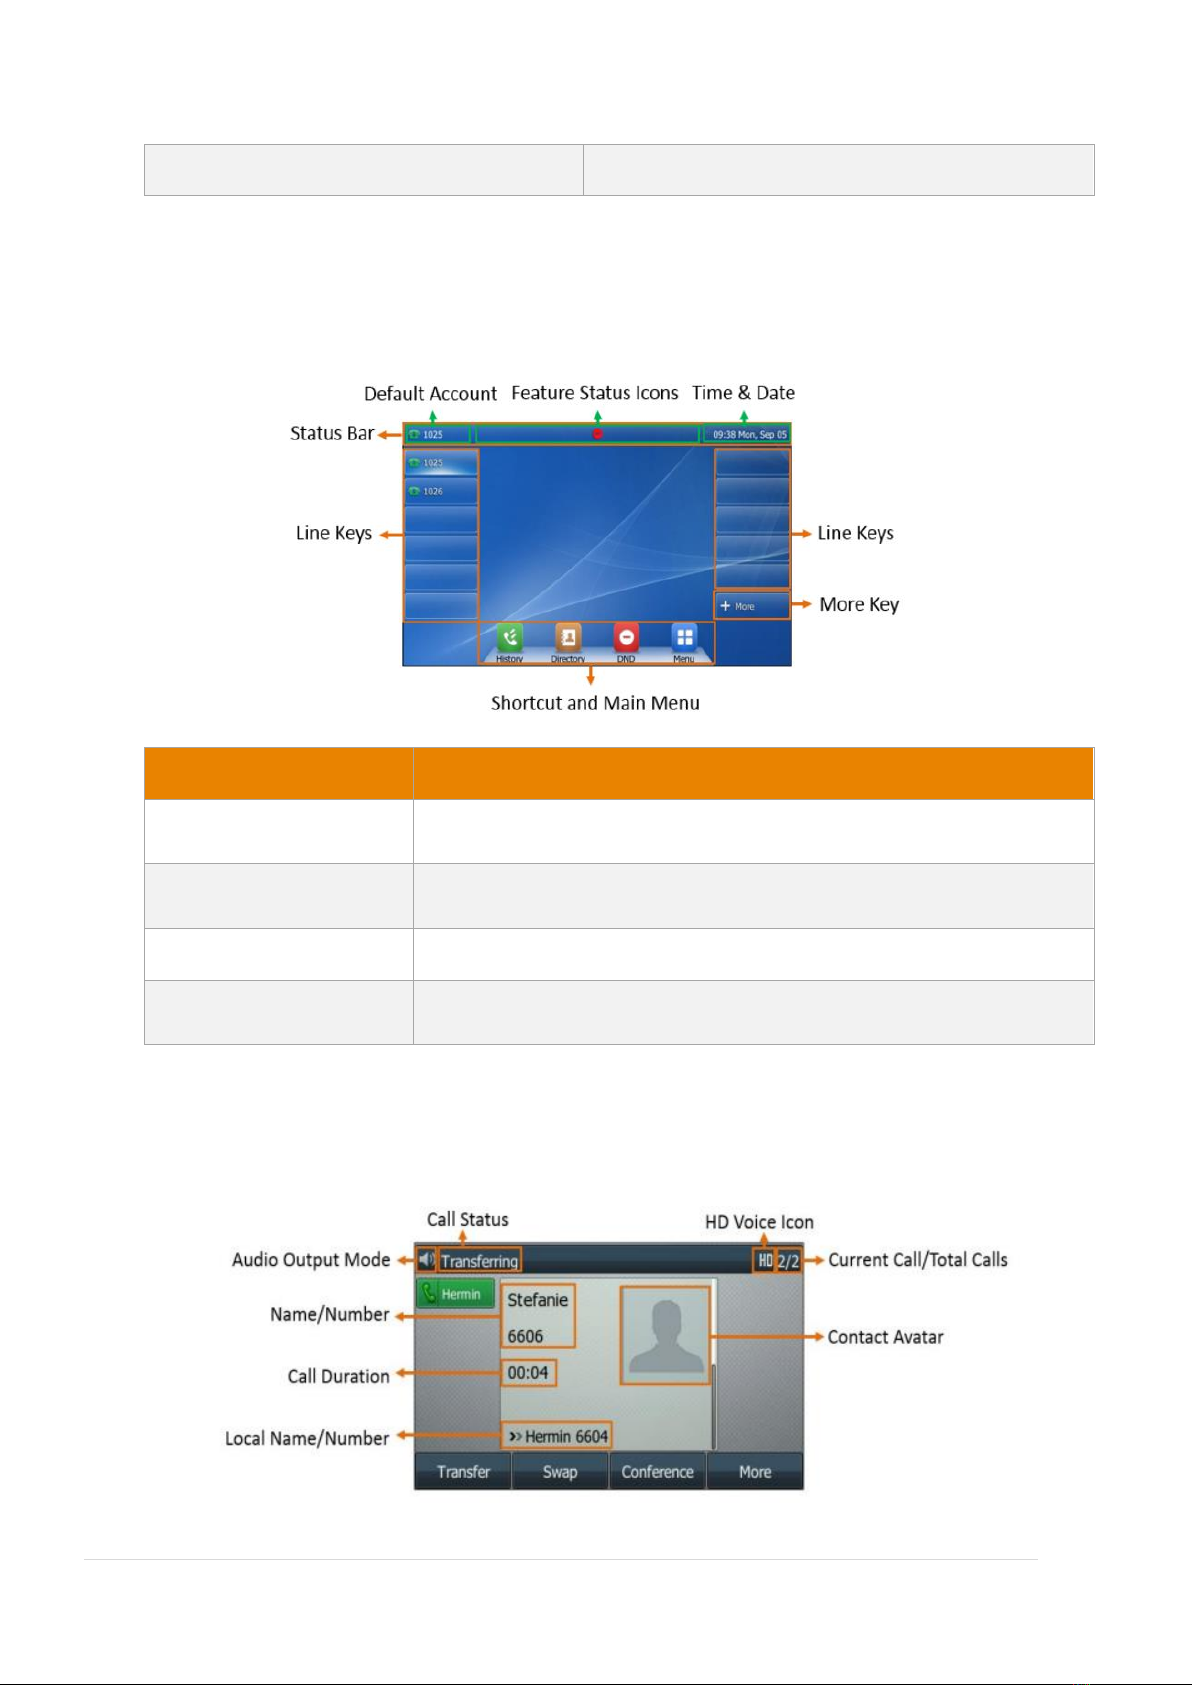
Screens..............................................................................................................................................8
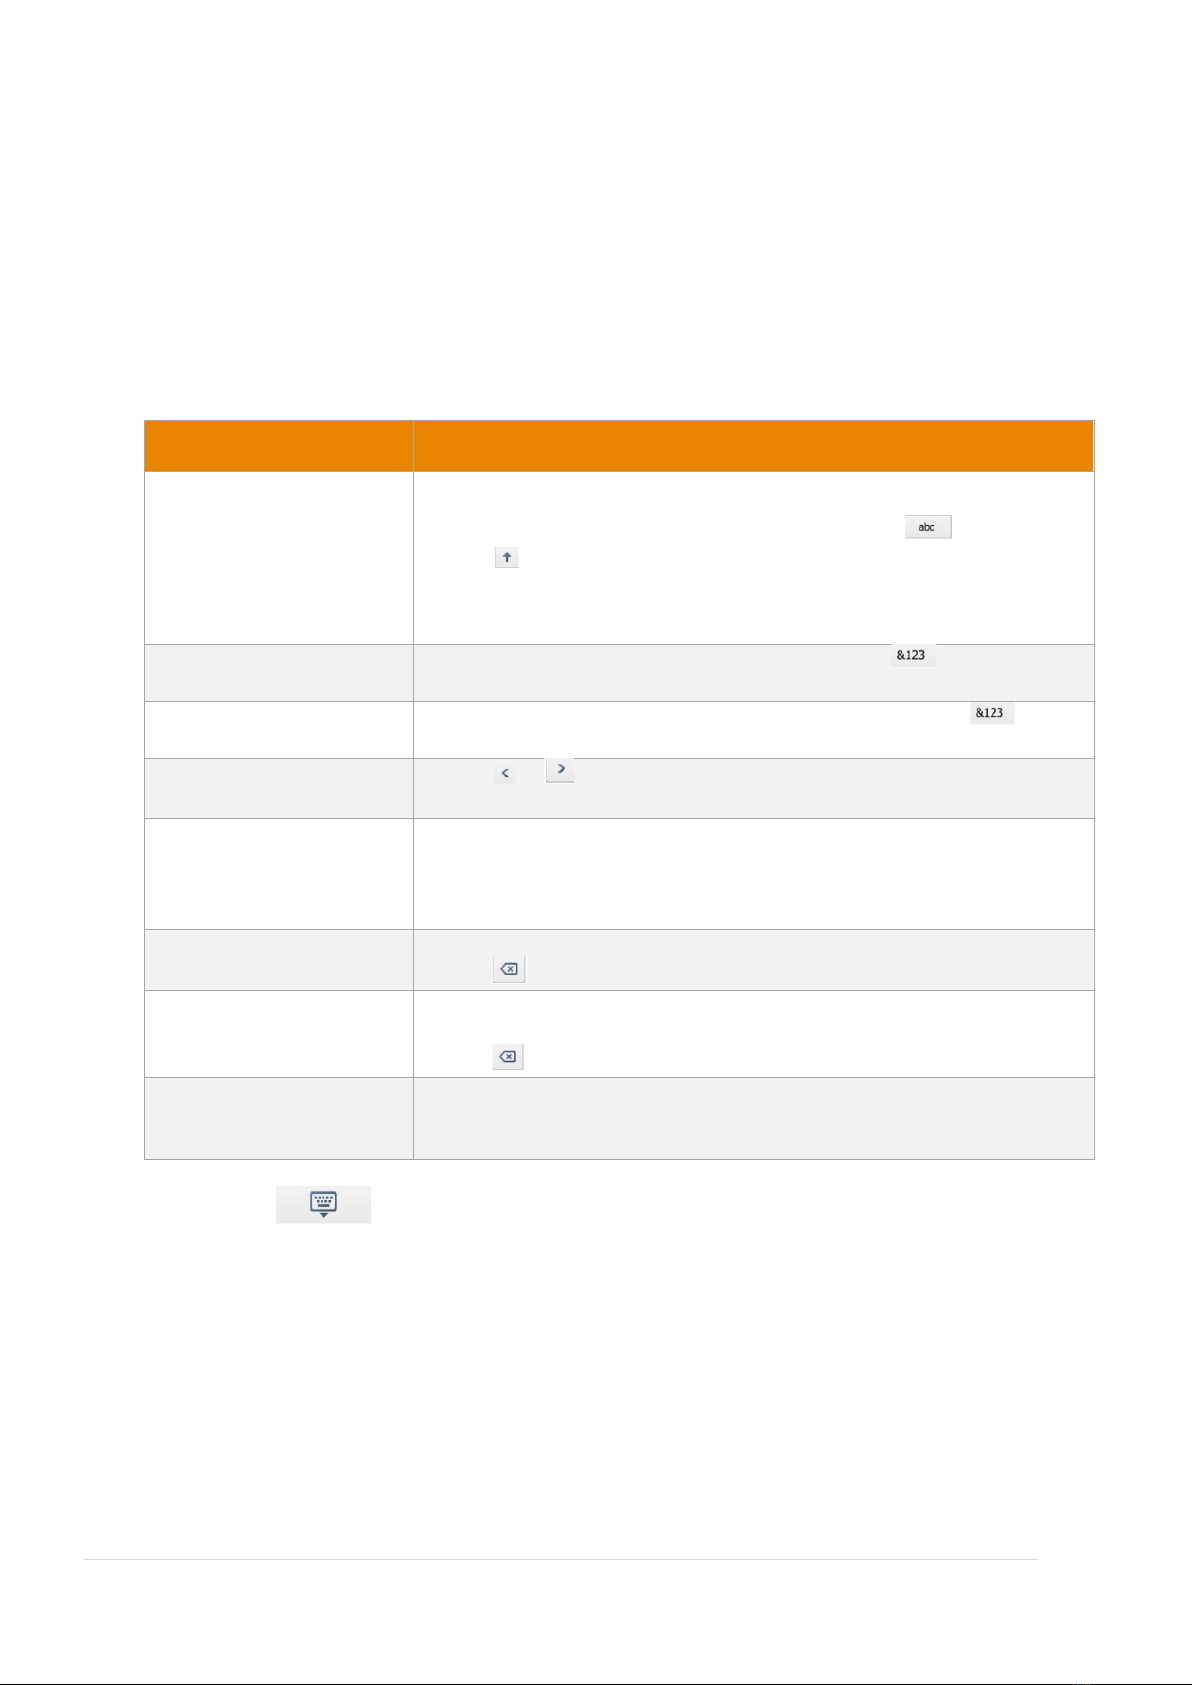
Entering Characters on T48U ...........................................................................................................9
General Settings .............................................................................................................................11
Language.....................................................................................................................................11
Time and Date ............................................................................................................................11
Audio Settings ................................................................................................................................12
Contact Management.....................................................................................................................12
Blacklist.......................................................................................................................................15
Call History Management ..............................................................................................................16
Basic Call Features ..............................................................................................................................18
Placing Calls ....................................................................................................................................18
Redialling a Number...................................................................................................................19
Placing a Call from the Call History............................................................................................19
Placing a Call from the Directory ...............................................................................................19
Answering Calls ..............................................................................................................................20
Answering a Call.........................................................................................................................20
Answering when in another call ................................................................................................20
Disabling Call Waiting.................................................................................................................20
Switching among the Handset, Speakerphone and Headset Modes .......................................21
Rejecting Incoming Calls ................................................................................................................21
Ending Calls.....................................................................................................................................21
Call Mute ........................................................................................................................................21
Call Hold/Resume...........................................................................................................................22
Holding a Call..............................................................................................................................22
Resuming a Held Call..................................................................................................................22
Do Not Disturb (DND).....................................................................................................................23
Deactivating DND .......................................................................................................................23
Call Forward....................................................................................................................................23
Deactivating Call Forward..........................................................................................................24

P a g e | 3
Confidential
Call Transfer ....................................................................................................................................24
Blind Transfer .............................................................................................................................24
Semi-Attended/Attended Transfer............................................................................................24
Three-Way Conference...................................................................................................................25
Holding or Resuming a Conference Call.....................................................................................25
Muting or Unmuting a Conference Call.....................................................................................25
Ending a Conference Call............................................................................................................25
Voice Mail .......................................................................................................................................25
Listen to Voice Mails ..................................................................................................................25

P a g e | 4
Confidential
Welcome
Welcome to your iiNet BizPhone service!
If this is the first time you are using the iiNet BizPhone Premium handset, please refer first to the
iiNet BizPhone T48U Quick Startup Guide to assemble and start up your handset. The BizPhone Quick
Startup Guide is available on the BizPhone Resources page at
www.iihelp.iinet.net.au/BizPhone_Support_Resources.
The topics covered in the Quick Startup Guide include:
•Packaging Contents
•Assembling the Phone
•Starting up the Phone
•Basic Handset Settings
•Basic Call Features
If you require additional assistance with your new handset, please contact your System
Administrator.

P a g e | 5
Confidential
Overview
Hardware Component Instructions
The main hardware of the BizPhone Premium T48UIP phone are the LCD screen and the Keypad.
Hardware component instructions of the BizPhone Premium T48U IP phone are:
Item
Description
Power LED Indicator
Indicates call status, message status, and phone’s system status.
Touch Screen
Allows you to select items and navigate menus on the touch-sensitive
screen. Tap to select and highlight screen items.
Shows information about call, messages, time, date and other relevant
data:
HEADSET Key
Toggles and indicates the headset mode. The key LED glows green when
the headset mode is activated.
MUTE Key
Toggles and indicates mute feature. The key LED glows red when the calls is
muted.
HOLD Key
Places a call on hold or resumes a held call.
Transfer Key
Transfer a call to another party.
Speakerphone Key
Toggles and indicates the hands-free (speakerphone) mode. They key LED
glows green when the hands-free (speakerphone) mode is activated.
MESSAGE Key
Accesses voice mails.
REDIAL Key
•Redials a previously dialled number.
Navigation Keys
•Scroll through information or options displayed on the screen.

P a g e | 6
Confidential
•Access History and Directory respectively.
OK Key
Confirms actions or answers incoming calls.
Cancel Key
Confirms actions or rejects incoming calls.
Volume Key
Adjusts the volume of the handset, headset, and speaker.
Keypad
Provides the digits, letters, and special characters in context-sensitive
applications.
Speaker
Provides ringer and speakerphone audio output.
Reversible Tab
Secures the handset in the handset cradle when the phone is mounted
vertically.
Hookswitch
•Picking up the handset from the cradle, the hookswitch bounces
and the phone connects to the line.
•Laying the handset down on the handset cradle, the phone
disconnects from the line.
Icon Instructions
Below is the description of the icons that might appear on the LCD Screen.
Icons in the Status Bar
Icons
Description
Icons
Description
Wired network is unavailable
Phone Lock
Wired network is unreachable
Missed Calls
Speakerphone (hands-free) mode
Always Forward
Busy Forward
No Answer Forward
Handset Mode
Recording starts successfully (Using a
USB flash drive)
Headset Mode
Recording is paused (Using a USB
flash drive)
Voice Mail
Bluetooth mode is on
Text Message
Bluetooth headset is both paired and
connected
Auto Answer
Bluetooth-enabled mobile phone is
both paired and connected
Do Not Disturb (DND)
Wi-Fi connection is successful
Phone Warning
Wi-Fi connection fails
Keep Mute
Wi-Fi connection is unreachable
Ring Volume is 0
USB flash drive detected

P a g e | 7
Confidential
Line Key Icons
Icon indicators associated with line
Icons
Description
Icons
Description
The private line is registered
successfully
The shared/bridged line is registered
successfully
Register failed
(Flashing)
Registering
DND is enabled on this line
Call forward is enabled on this line
Icon indicators associated with line key features
Icons
Description
Icons
Description
Hold
DND
Voice Mail
SMS
Direct Pickup
Group Pickup
Conference
Forward
Transfer
ReCall
Record
Recording in process
Multicast Paging
Paging List
Hot Desking
Phone Lock
Directory
Speed Dial
LED Instructions
Power Indicator LED
The power LED indicator indicates the call, message and phone’s system status.
LED Status
Description
Solid Red
The phone is initialising.
Fast Flashing Red (0.3S)
The phone is ringing.
Slow Flashing Red(1S)
The phone receives a voicemail.

P a g e | 8
Confidential
Solid red for 0.5s and off for 3s alternatively
The phone enters power-saving mode.
Screens
Idle Screen
Name
Description
Status Bar
Display the default account, feature status icons. And the time. The
status icons are displayed when features are activated.
Line Key
Display the information associated with the line keys and feature keys
on the phone.
More Key
Tap to display more line keys on the T48U phones.
Shortcut and Main Menu
Tap to access the shortcut or enter the main menu on the T48U
phones.
Calls Screen
All of your active and held calls are displayed on the calls screen. You can press up or down navigation key
to switch among calls.

P a g e | 9
Confidential
Entering Characters on T48U
The T48U phones provide an onscreen keyboard, phone keypad and dial pad to enter data. Keypad and dial
pad provide the standard key layout, which enables users to use existing or familiar key positions.
Using the Onscreen Keyboard
1. Tap the field you want to edit, the onscreen keyboard displays on the touch screen.
2. Enter the information. Do the following:
Task
Action
Enter uppercase (A)
characters, lowercase (a)
characters, or a
combination of
uppercase and
lowercase characters.
1. If a keyboard with characters does not display, tap .
2. Tap to toggle between uppercase or lowercase mode.
3. Tap the characters you want to enter.
Enter numbers.
1. If a keyboard with numbers does not display, tap .
2. Tap the numbers you want to enter.
Enter special characters.
1. If a keyboard with special characters does not display, tap .
2. Tap the special characters you want to enter.
Position the cursor.
•Tap or to position the cursor.
•Tap to position.
Confirm the settings/Go
to the next field.
•If there is only one field or the field you are editing is the last one of
the configuration, tap Done to confirm the setting.
•If the field you are editing is not the last one of the configuration,
tap Next to go to the next field.
Delete characters one by
one.
1. Position the cursor to the right side of the text you want to delete.
2. Tap .
Delete more characters
at a time.
1. Drag your finger across the characters to highlight the characters you
want to delete.
2. Tap .
Replace characters.
1. Drag you finger across the characters to highlight the characters
you want to replace.
2. Tap the characters you want.
3. Select to hide the onscreen keyboard.

P a g e | 10
Confidential
Using the Phone Keypad
You can use the keypad on your phone or dial pad to enter the data. The phone keypad only
provides digits keys, # key, and * key, and the dial pad provides digit keys and special characters.
You can tap to switch to the onscreen keyboard.

P a g e | 11
Confidential
Customising Your Phone
General Settings
Backlight
You can change the brightness of the phone screen during phone activity and inactivity. The
brightness automatically changes after the phone has been idle for a specific time.
You can change the screen backlight and time in the following settings:
Active Level: The brightness level of the phone screen when the phone is active. Digits 1 to 10
represent different brightness levels. 10 is the brightest level.
Inactive Level: The brightness of the phone screen when the phone is inactive. You can select a low
brightness or turn off the backlight.
Backlight Time: The delay time to change the brightness of the phone screen when the phone is
inactive. Backlight time includes the following settings:
•Always On: Backlight is on permanently.
•15s, 30s, 1min, 2min, 5min, 10min or 30min: Backlight is changed when the phone is
inactive after the designated time.
1. Navigate to Menu > Basic > Display > Backlight.
2. Select the desired level from the Inactive Level field.
3. Select the desired time from the Backlight Time field.
4. Select Save.
Note: If you have an expansion module attached to your T48Uphone, the backlight of the expansion
module connected to your phone will automatically changes to match the backlight intensity
settings on your T48U phone.
Language
Your phone supports several languages that you can choose to use on the phone. The default
language of the phone user interface is English.
1. Navigate to Menu > Basic > Language.
2. Select the desired language.
3. Select Save.
The phone language is changed to the selected one.
Time and Date
You can configure the date and time manually via the phone interface if your phone cannot obtain
the time and date automatically.
1. Navigate to Menu > Basic > Time & Date > General. And then select Manual Settings from
the Type drop-down menu.
2. Edit the date and time.
3. Select Save.
The time and date set on the phone will changed accordingly.

P a g e | 12
Confidential
Audio Settings
Volume
You can adjust the volume of the ringer, media, and audio during a call.
Press the Volume key .
.
Ring Tones
You can choose a ring tone for all incoming calls.
1. Navigate to Menu > Basic > Sound > Ring Tones > Common.
2. Select the desired ring tone.
3. Select Save.
Contact Management
Local Directory
You can store up to 1000 contacts and 48 groups in your local directory, you can search, add, edit
and delete a contact.
Local Directory Groups
Add Contact Groups
To organise your contacts and make them easier to find, you can add additional groups in the Local
Directory.
1. Select Directory or navigate to Menu > Directory.
2. Tap Settings > New Group.
3. Enter the desired group name.
4. Tap .
Editing Contact Groups
You can change or add the group’s information.
1. Select Directory or navigate to Menu > Directory.
2. Tap Settings, and select the desired group.
3. Tap after the group name.
4. Edit the group information.
5. Tap .

P a g e | 13
Confidential
Deleting Contact Groups
When you delete a contact group, the contacts in the group will not be deleted. You can view the
contacts in All Contacts list.
1. Select Directory or navigate to Menu > Directory.
2. Tap Settings and select the desired group.
3. Tap before the group name.
The phone prompts you to delete the group or not.
4. Select OK.
Local Directory Contacts
Adding Contacts
When you add a contact to your Local Directory, you can choose how much information you want to
enter for your contact. You are required to enter a contact name at least for each new contact.
1. Select Directory or navigate to Menu > Directory.
2. Select the desired contact group or All Contacts.
3. Select Add.
4. Enter your contact’s information.
5. Select the desired account from the Account field.
Viewing Contacts
You can view the local contacts from the Local Directory on your phone.
1. Select Directory or navigate to Menu > Directory.
2. Select the desired contact group or All Contacts.
The contact names are displayed in alphabetical order.
Editing Contacts
You can update your contact’s information.
1. Select Directory or navigate to Menu > Directory.
2. Select the desired contact group or All Contacts.
3. Tap after the desired entry.
4. Tap or to switch the contact you want to edit, and then edit the contact information.
5. Select Save.

P a g e | 14
Confidential
Deleting a Contact
You can delete any contact from the Local Directory.
1. Select Directory or navigate to Menu > Directory.
2. Select the desired contact group or All Contacts.
3. Tap > Delete.
The phone prompts you to delete the contact or not.
4. Select OK.
Deleting all Contacts
You can delete all contacts from the Local Directory.
1. Select Directory or navigate to Menu > Directory.
2. Select the desired contact group or All Contacts.
3. Tap Settings > Select All > Delete.
The phone prompts you to delete all contacts or not.
4. Select OK.
Moving a Local Directory Contact to Blacklist
You can move a contact in the Local Directory to blacklist. Incoming calls from this contact will be
rejected automatically.
1. Select Directory or navigate to Menu > Directory.
2. Select the desired contact group or All Contacts.
3. Tap > Blacklist.
The phone prompts you to move the blacklist or not.
4. Select OK.
Searching for Contacts
In the Local Directory, you can enter search criteria to find your desired contact quickly.
1. Tap Directory or navigate to Menu > Directory.
2. Select Search.
3. Enter your search criteria in the search field.

P a g e | 15
Confidential
Blacklist
Incoming calls from the Blacklist are rejected automatically. You can store up to 30 contacts in the
blacklist to block unwanted callers.
Adding a Blacklist Contact
You can add a blacklist contact on the phone to prevent someone from calling you.
1. Tap Directory > Blacklist.
2. Select Add.
3. Enter the blacklist contact’s information.
4. Select Save or Add.
Viewing Blacklist Contacts
You can view the blacklist contacts from the Blacklist on your phone.
Navigate to Menu > Directory > Blacklist or Tap Directory > Blacklist
Editing a Blacklist Contact
You can update your blacklist contact’s information.
1. Tap Directory > Blacklist.
2. Tap after the desired entry.
3. Select Save.
Deleting a Blacklist Contact
If you want to answer a call from a specific contact, you need to remove it from the Blacklist.
1. Tap Directory > Blacklist.
2. Tap after the desired blacklist contact.
3. Tap Delete.
The phone prompts you to delete the contact or not.
4. Select OK.
Deleting all Blacklist Contacts
You can delete all contacts from the Blacklist when you are ready to answer calls from them again.
1. Tap Directory > Blacklist.
2. Tap Settings > Select All > Delete.
The phone prompts you to delete the contacts or not.
3. Select OK.

P a g e | 16
Confidential
Moving a Blacklist Contact to the Local Directory
You can move a blacklist contact to a Local Directory. Incoming calls from this contact will not be
rejected automatically.
1. Tap Directory > Blacklist.
2. Tap after the desired entry.
3. Select All Contacts from the Group drop-down menu.
4. Select OK or Save.
Call History Management
Call History Icons
Each icon in the Call History indicates the corresponding call history status.
Icons
Description
Icons
Description
Received Call
Missed Call
Placed Call
Forwarded Call
Viewing History Records
The history record saves the call information such as the caller’s name and number, local time and
call duration.
1. Press History or navigate to Menu > History.
2. Select the desired list.
3. Select the desired entry.
4. Tap after the desired entry.
Saving a History Record to Local Directory
To identify someone’s call the next time, you can save a history record to the Local Directory.
1. Press History or navigate to Menu > History.
2. Select > Add.
3. Edit the contact information.
4. Select Save.
Saving a History Record to Blacklist
You can prevent someone from calling you again by saving a history record to Blacklist.
1. Press History or navigate to Menu > History.
2. Select the desired list.
3. Select > Blacklist.

P a g e | 17
Confidential
4. Edit the contact information.
5. Select Save.
Deleting History Records
Deleting a Call Record
You can delete any call record from the call history list.
1. Press History or navigate to Menu > History.
2. Select the desired list.
3. Tap > Delete.
The phone prompts you to delete the record or not.
4. Tap OK.
Deleting all Call Record
1. Press History or navigate to Menu > History.
2. Select the desired list.
3. Tap Settings > Select All > Delete.
The phone prompts you to delete all the records or not.
4. Select OK.
Disabling History Record
If you disable history record, you cannot save any call log on the phone.
1. Tap Menu > Features > General.
2. Select Disabled or Off from the History Record field.
3. Select Save.

P a g e | 18
Confidential
Basic Call Features
Placing Calls
You can user your phone to place calls in many ways easily.
Placing a Call from the Dialer
The Dialer enables you to enter a number to place a call, and it displays a list of previously place calls
or contacts in your directory.
You can also select the desired contact from the search list, the placed call list or Directory. You can
select the desired contact from the left sidebar, or select a contact from the Directory of History.
1. Do one of the following:
•Start typing a phone number.
•Select the desired line key.
•Pick up the handset, press the Speakerphone key or the HEADSET key.
2. Enter a number or highlight a contact.
3. Select Send.
Placing Multiple Calls
When you are in a call, you can hold your current call and place a new call.
1. Do one of the following:
•Select a line key. The active call is placed on hold.
•Press the HOLD key or select Hold to place the original call on hold.
Select New Call (NewCall).
2. Enter the desired number or select a contact.
3. Select Send.
Placing a Call with a Speed Dial Key
You can quickly dial a number by using a Speed Dial Key.
1. Navigate to Menu > Features > Dsskey.
2. Select the desired line key.
3. Select SpeedDial from the Type field.
4. Select the desired line from the Account ID field.
5. Do one of the following:
•Enter the contact number you want to dial out directly in the Value field.
You can also enter the contact number with the DTMF sequence that you want to
send in the Value field. The contact number and the DtMF sequence are separated
by commas. One comma stands for 500 miliseconds.
For example, 1234,, 123# means the phone dials out the number 1234 first, after
the call is set up for 1 second, it sends the DTMF sequence 123# to the remote
party.
•Select , and then select the desired contact.
6. Select Save.

P a g e | 19
Confidential
When the phone is idle, you can press the Speed Dial key to call a contact quickly.
Placing a Call Back to the Last Incoming Number
You can redial the last incoming number quickly by using a ReCall key.
1. Navigate to Menu > Features > Dsskey.
2. Select the desired line key.
3. Select Key Event from the Type field.
4. Select Recall from the Key Type field.
5. Select Save.
When the phone is idle, press the ReCall key to quickly redial the last incoming number.
Redialling a Number
The phone keeps a record of all the placed calls. You can call the contact you recently called.
1. Press the REDIAL key.
A record of Placed Calls is displayed on the phone screen.
2. Highlight the desired record, select Send.
Placing a Call from the Call History
You can place calls to contacts from the History list, which contains the calls that were recently
place, answered, missed, or forwarded.
1. Press History or navigate to Menu > History.
The phone screen displays all call records.
2. Select the desired call list.
3. Tap the desired contact.
Placing a Call from the Directory
You can place a call to a contact directly from your directory.
1. Select Directory or navigate to Menu > Directory.
2. Select the desired contact group or All Contacts.
3. Tap the desired contact.
If the selected contact has multiple numbers, highlighted the desired number, and select
Send.

P a g e | 20
Confidential
Answering Calls
Answering a Call
When you receive an incoming call, the phone rings and the screen displays the information of the
incoming call. You can choose to answer the incoming call.
Do one of the following:
•Pick up the handset.
•Press the Speakerphone key .
•Press the HEADSET key.
•Press Answer or the line key that has the flashing green LED indicator.
The call is answered in the speakerphone (hands-free) mode by default.
Answering when in another call
You can answer a call when there is already an active call on your phone.
When you are in an active call and an incoming call arrives on the phone, a call waiting tone beeps,
and the incoming call information is displayed.
Select Answer.
The active call is placed on hold, and the incoming call becomes active.
Note: You can disable the call waiting feature to reject the incoming call automatically during a call.
Disabling Call Waiting
If the Call Waiting feature is disabled, when there is already a call, the new incoming call will be
rejected automatically.
1. Navigate to Menu > Features > Call Waiting.
2. Select Disabled or Off from the Call Waiting field.
3. Select Save.
Table of contents
Other iiNet IP Phone manuals