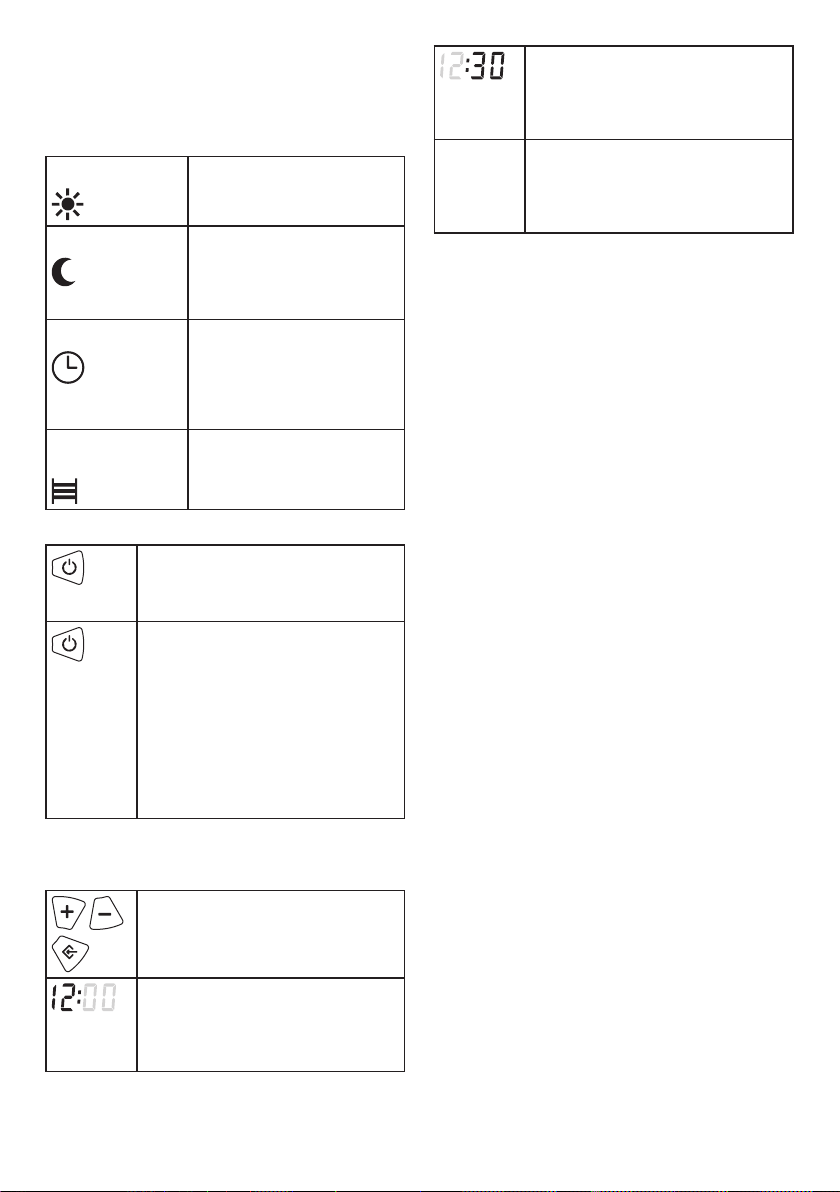
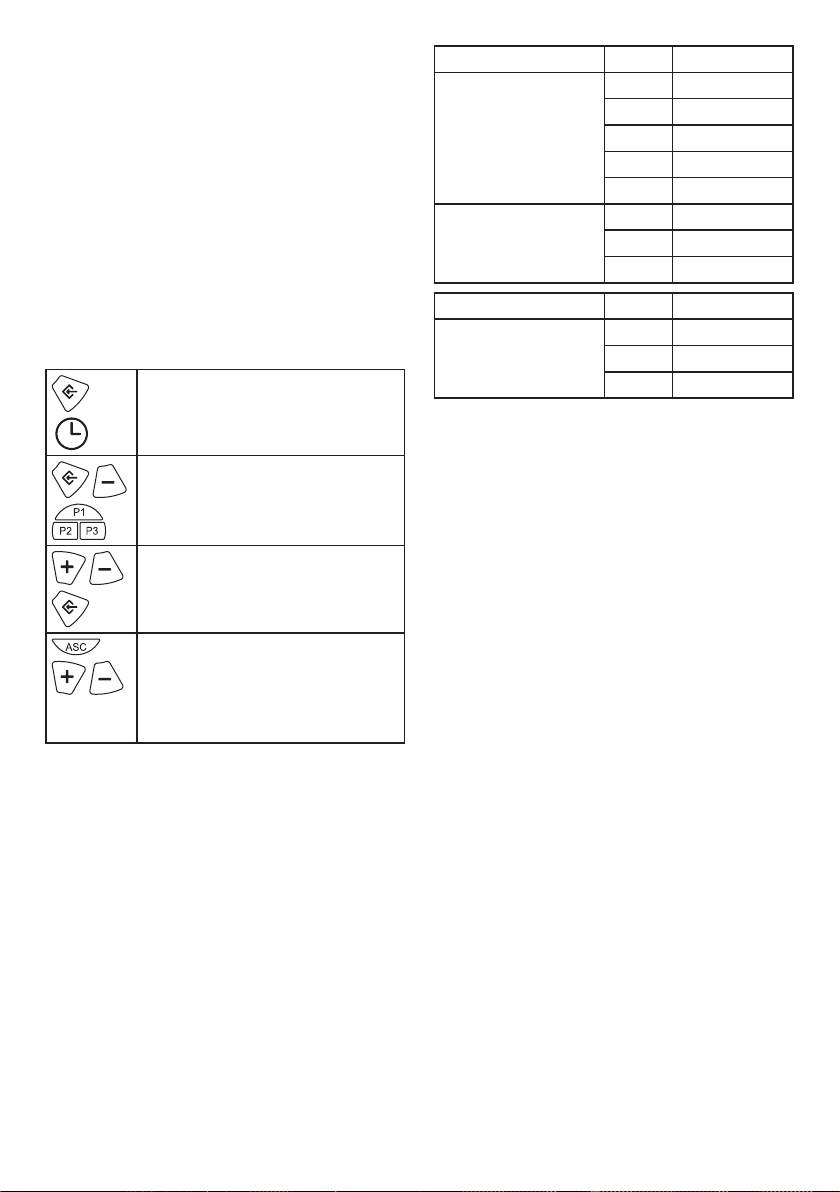
IKEA NUVARANDE User manual

NUVARANDE

600 mm
(23 5/8")
1
2
3
2250 mm
(88 9/16")
600 mm
(23 5/8")
Min. 50 mm
(1 15/16")
50 - 70 mm
(1 15/16" - 2 3/4")
Min. 150 mm
(5 7/8")
600 mm
(23 5/8")
600 mm
(23 5/8")
1
2 3
45
67

English 4
Deutsch 15
Français 26
Svenska 37
Español 47
Italiano 58
Portugues 69

4
English
Note
Modifying and/or removing or rotating the
control device or cutting the cord in any way is
expressly prohibited. (Fig.2)
Do not attempt to repair this product yourself,
since opening or removing screwed-on covers
may expose you to the risk of electric shock.
Modifying the features of the appliance and
removing any xed components including the
caps in any way is expressly prohibited. (Fig. 3)
Never cover the control device in any way so
as to avoid overheating the electronic part and
damaging the control device (Fig. 6).
Never install immediately below or in front of a
power socket or a junction (Fig 6).
To protect the electronic device and temperature
probe, the temperature of the right side shall be
lower than 50°C. (Fig.6)
Make sure the power cable cannot in any
way come into contact with the surface of the
appliance and doesn’t get twisted and tangled.
(Fig. 7).
Information requirement for electrical towel
dryer
Heat output TYPE VALUE UNIT
Nominal heat output (Pnom) 605.085.38 0.25 kw
Minimum heat output (indicative) (Pmin) 605.085.38 0.00 kw
Maximum continuous heat output (Pmax,c) 605.085.38 0.25 kw
Auxiliar power consumption TYPE VALUE UNIT
At nominal heat output (elmax) 605.085.38 0.00 kw
At minimum heat output (elmin) 605.085.38 0.00 kw
In “STANDBY” mode (eISB) 605.085.38 0.00 kw
This appliance complies with European
Directives:
2014/30/EU on electromagnetic compatibility
2014/35/EU on low voltage
2011/65/EU on restrictions of the use of certain
hazardous substances
2009/125/EC on ecodesign requirements
https://eur-lex.europa.eu/legal-content/it/
TXT/?uri=CELEX:32009L0125

5
Information requirements for electric local space
Type of heat output/room temperature control
Single stage heat output, no room
temperature control NO
Two or more manual stages, no room
temperature control NO
With mechanic thermostat room
temperature control NO
With electronic room temperature control NO
With electronic room temperature control
plus day timer NO
Electronic room temperature control plus
week timer YES
Other controls options
Room temperature control with presence
detection NO
Room temperature control with OPEN
WINDOW detection YES
With distance control option NO
With adaptive start control YES
With working time limitation NO
With black bulb sensor NO
Specications of the towel dryer
Voltage: 230 V ~ 50 Hz
Insulation class: II
Protection class: IP34
Power: 250 W
Rated Current: 1.1 A
Safety information
Before the installation and use
of the appliance, carefully read
the supplied instructions. The
manufacturer is not responsible
for any injuries or damage
that result from incorrect
installation or usage. Always
keep the instructions in a safe
and accessible location for
future reference.
Children and vulnerable
people – safety
Warning
CAUTION: Some parts of this
product can become very hot
and cause burns. Particular
attention has to be given where
children and vulnerable people
are present.
Children aged 3 or younger
should be kept away from the
towel dryer unless continuously
supervised. Children aged
3 - 8 shall only switch on/
o the appliance provided
that it has been placed or
installed in its intended normal
operating position and they
have been given supervision
or instruction concerning use
of the appliance in a safe way
and understand the hazards
involved. Children aged 3 - 8
must not disconnect, regulate
and clean the appliance or
perform maintenance. This
appliance can be used by
children aged 8 and above and
persons with reduced physical,
sensory or mental capabilities
or lack of experience and
knowledge if they have
been given supervision or
instruction concerning use of
the appliance in a safe way
and understand the hazards
involved. Children shall not play

6
with the appliance. Cleaning
and maintenance shall not be
performed by children without
supervision.
Warning
Respect the distances from
the side wall and from the
ceiling shown in gures 4 and
5. To avoid all risks for young
children, install the appliance
with the lowest heating
element at least 600 mm from
the oor. (Fig. 4).
General safety
Basic precautions must always
be followed when using
electrical equipment in order to
reduce the risk of re, electric
shocks and personal injury.
Warning
This appliance is designed
to heat domestic rooms or
similar and to dry towels. This
appliance is designed to dry
towels washed in water only.
It must not be used for other
purposes.
Warning
If the power supply cord is
damaged, do not use the towel
dryer. Never use the appliance
if the electronic controls are
damaged.
Do not attempt to repair
this product yourself, since
opening or removing screwed-
on covers may expose you
to the risk of electric shock.
Modifying the features of the
appliance and removing any
xed components including the
caps (Fig. 3) and/or removing
or rotating the control device
or cutting the cord (Fig. 2) in
any way is expressly prohibited.
Make sure the power cable
cannot in any way come into
contact with the surface of
the appliance and doesn’t get
twisted and tangled (Fig.7)
Warning
Never cover the control device
in any way so as to avoid
overheating the electronic
part and damaging the
control device (Fig. 6). To
protect the electronic device
and temperature probe, the
temperature of the right side
shall be lower than 50°C.
The towel dryer may reach
a temperature above 50°C,
which may feel too hot to
touch. It is equipped with
overheat protection so that it
automatically turns o if it gets
too hot. The towel dryer will
reactivate automatically once
the temperature has suciently
dropped.
Make sure the xed power line

7
is tted with a disconnecting
switch which allows the
appliance to be disconnected
completely from the household
mains.
Keep combustible or ammable
materials or pressure
vessels (e.g. spray cans, re
extinguishers) at least 50 cm
from the appliance. Do not
vaporise any type of substance
on the surface of the appliance.
Never touch the appliance with
wet or damp hands or feet.
Do not wet the electronic
control unit and cable with
water or other uids. If this
occurs, disconnect the main
power supply and allow the
appliance to dry completely.
Warning
Please keep in mind that
geographical areas with higher
altitudes mean that the air
can get hotter than the set
temperature.
Attention: when you turn the
towel dryer on for the rst time,
you may detect a smell. This
is not related to the presence
of harmful substances. It is
recommended to ventilate the
room.
General information
Storage and maintenance: avoid storing the
appliance in places where there is a risk of freezing
temperatures. Protect from frost. Unpack the
appliance carefully in order to avoid damage.
The package contains:
the appliance
mounting kit (plastic rings, plastic supports, screws
and hexagonal nuts)
user manual
The materials used for the packaging can be recycled.
You are therefore recommended to dispose of them in
designated waste collection containers.
Disposal of this appliance must be carried out in
accordance with applicable legislation regarding the
disposal and handling of waste.
Positioning and installing
Warning
Install and use the appliance as described in these
instructions only.
The towel dryer must be positioned according to the
relevant safety requirements for bathrooms. It must
be located in the correct zone with regard to the fact
that the product is of the type which is approved
according to IP34. The dryer shall be installed outside
“zone 1” and no part of the control device and the plug
shall touch zone 2. (Figure 1).
Respect the distance from the wall, the oor and the
ceiling as shown in Fig. 4 and Fig. 5.
Warning
The appliance must only be used when fully mounted
on a wall as described in the instructions. Install the
appliance with the control device positioned to the
right and the control keys towards the front as shown
in Fig. 1.
The appliance must be installed in such a way that the
electronic controls and other control devices may not
be at a distance which could be accidentally touched
by someone in the bath or shower.
Warning:
Never install the appliance:
• immediately below or in front of a power socket or
a junction box (Fig. 6)
• in contact with the wall or oor
• near curtains, ammable or combustible materials
or pressure vessels.
• Make sure there are no pipes or electric wires in
the wall which could be damaged while mounting
the appliance.
Wall mounting
Dierent walls require dierent types of wall ttings.
Always choose screws and plugs that are specially
suited to the material. It is recommended to use a
at head screw or alternatively to add a at washer.
During installation, make sure the power cable is
disconnected from the power line.
Electrical connections: read carefully
Warning
To be installed by a qualied person in accordance
with the applicable standards in the country
concerned.

8
The appliance requires a 230 V~ 50 Hz power supply.
Make sure the power line is appropriate for the data
given in table 1.
Make sure the xed power line is tted with a
disconnection switch which allows the appliance to be
disconnected completely from the household mains
in accordance with the wiring rules. If the appliance is
installed in a bathroom, the power line must be tted
with a 30 mA RCD (high sensitivity residual current
protection device). Permanently connected appliances
must be connected using a connector block placed
within a proper junction box.
Before plugging into the mains socket, make sure that
the voltage of your mains power supply matches the V
value reported on the rating plate of the appliance and
that the socket and power line are appropriate for the
required load (also stated on the rating plate).
Make sure that the power line is tted with a
disconnection switch which allows the appliance to be
disconnected completely from the household mains in
accordance with the regulation in force.
Operation and regulation of the control unit
Control panel
1. Leds
2. "+" key
3. Setting conrmation/Disable “OPEN WINDOW” key
4. “ON/STANDBY” key
5. “MODE” selection key
6. “-“ key
Display
1. Operating mode
2. Keypad lock
3. OPEN WINDOW
4. Children safety
5. Clock/Temperature set point
6. TOWEL DRYER function
7. CHRONO Presets
8. Days of the week
9. CHRONO programme time bar
10. Operating modes

9
Operating modes
The appliance provides four operating modes
(COMFORT; ECO NIGHT; CHRONO; TOWEL DRYER).
Each of these modes allows the user to heat the
environment in the most suitable way with respect to
their needs.
COMFORT mode The “COMFORT” temperature is
set by the user.
ECO NIGHT mode The “ECO NIGHT” temperature
is set by the user. The set
temperature must not be
higher than the “COMFORT”
one.
CHRONO mode In this mode, you can select
one of the three preset
“CHRONO”-thermostat
programmes (“P1” or “P2”) or
customise the programme “P3”
daily and weekly.
TOWEL DRYER
mode
This function reduces
consumption by focusing most
of the heat just on where the
towel is located.
Turning on/standby
To turn on the towel dryer, press the
on Key and you will hear a double
beep signal alert that the towel dryer
is on.
To turn o, press the same Key and the
“Stby” icon will appear on the display.
A prolonged beep signal alert will
sound that the towel dryer is o.
The “STANDBY” mode signals that all
the operating modes are suspended
but the appliance is powered and
waiting for command reception. This
implies that it is consuming extremely
low electricity (less than 0.5 W as
required by Ecodesign regulation).
Turning on for the rst time
When you turn the appliance on for the rst time, you
will be prompted to set the following parameters:
Days of the week: adjust the day of
the week by using the “+“and “-“keys
(1=MON, 2=TUE,…7=SUN), then conrm
by pressing the “MODE” selection key.
Hours: after selecting the days of the
week, the hour starts ashing. For the
days of the week, adjust the hours by
using the “+“and “-“keys and conrm
with the “MODE” selection key.
Minutes: after selecting the hours, the
minutes start ashing. For the hours,
adjust the minutes by using the “+“and
“-“ keys and conrm with the “MODE”
selection key.
By default, the temperature dierence
between “COMFORT” mode and “ECO
NIGHT” mode is 3°C. The dierence
can be varied from 2°C to 4°C by using
the “+” and “-“keys.
If there is a need to change the time or change the
temperature dierence between “COMFORT” mode
and “ECO NIGHT” mode:
Put the thermostat on “STANDBY” mode. Press
the “+”and “-“ buttons simultaneously for at least 5
seconds. The thermostat will go into day, hour and
“ECO NIGHT/COMFORT” oset mode.
Press the “+”and ”–“ keys to change day, hours,
minutes and nally the oset (the temperature
dierence between “ECO NIGHT” and “COMFORT”
mode). For each step, press “MODE” to conrm. At
the end of this procedure, the thermostat returns to
“STANDBY” mode. After turning on the thermostat,
you will notice the new settings.
Operating modes
Press the “MODE” key to select the desired operating
mode. The icon listed in the Table 1 on the LCD will
show the selected operating mode.
COMFORT (trac light colour led: red, yellow and
green)
The “COMFORT“ temperature set is the temperature
set by the user.
Press the “MODE” selection key until the “COMFORT”
icon appears on the LCD.
Choose the desired temperature set by using the “+“
or “-“ keys.
The temperature can be chosen within the interval
between 7°C and 30°C when the element is powered
and dierent LED coloured lights ash according to
the range temperature.
Selected temperature below 19°C: the green LED light
ashes. When the desired temperature of 19°C is
selected, the green LED light stop ashing and stays
green.
Selected temperature between 19°C and 24°C: the
yellow LED light ashes. When the temperature is
reached, the yellow LED light stop ashing and stays
yellow.
Selected temperature above 24°C the red LED light
ashes. When the temperature is reached, the red LED
stop ashing and stays red.
ECO NIGHT (Light-blue LED light)
In “ECO NIGHT“ mode the temperature set must not be
higher than the “COMFORT“ temperature set.
By default, the temperature dierence between
“COMFORT” and “ECO NIGHT” is 3°C. This dierence
can be changed from 2°C to 4°C as described in the
chapter Turning on for the rst time.

10
If the “COMFORT” temperature is set below the “ECO
NIGHT” temperature, the latter will be automatically
adjusted accordingly.
Press the “MODE“ selection key until the “ECO NIGHT”
icon appears on the LCD display.
Select the desired temperature by using the “+“ or “-“
keys.
The use of this operating mode is recommended for
night-time hours and when nobody is in the room for
more than 2 hours.
CHRONO (Pink LED light)
In “CHRONO” mode, you can select one of the three
preset “CHRONO”-thermostat programmes (“P1” or
“P2”) or the custom programme (“P3”).
The “P3” lets you set “COMFORT” or “ECO NIGHT” mode
over a 24 hour period for each day of the week.
Choice of programme (P1;P2;P3)
Press the “MODE” key until the
“CHRONO” icon is displayed.
Press the “MODE” and ”-” keys together
and hold them both down for at least
3 seconds. The programme code (“P1,”
“ P2” and “P3”) ashes.
Press the “+” or “-” keys to choose the
programme and press the “MODE” key
to conrm.
Once the desired programme is
selected, the “ASC” icon appears.
Press the “-“ key to deactivate or the
“+” key to activate the “ASC” function.
“ASC” functionality operates only in
“CHRONO” mode.
The “ASC” functionality enables you to adjust
from “ECO NIGHT” to “COMFORT” to reach the set
temperature by switching the appliance on in advance
to ensure that the “COMFORT” temperature is reached
by the set time. The adjustment time from “ECO
NIGHT” to “COMFORT” depends on dierent factors
such as dierence of temperature and room size. The
function can switch the appliance on up to 2 hours in
advance.
A number of days of data acquisition are required to
optimise the accuracy of the “ASC” function.
Preset Programme P1 Hours Mode
From Monday to Friday 0 - 6 ECO NIGHT
6 - 9 COMFORT
9 - 16 ECO NIGHT
16 - 23 COMFORT
23 - 0 ECO NIGHT
Saturday and Sunday 0 - 7 ECO NIGHT
7 - 23 COMFORT
23 - 0 ECO NIGHT
Preset programme P2 Hours Mode
From Monday to
Sunday
0 - 7 ECO NIGHT
7 - 23 COMFORT
23 - 0 ECO NIGHT

11
P3
The “P3” programme already has preset suggestions
for days and hours, but if you want to customise this
you can perform the changes according to your needs:
you can choose dierent temperatures (”COMFORT”
and ”ECO NIGHT”) over a 24 hour period for each day
of the week.
Customized
program P3
Suggested
hours
Suggested
mode
Personalised days and hours
From Monday to
Friday
0 – 6 ECO NIGHT Select your preferred mode and temperature.
6 - 9 COMFORT
9 - 13 ECO NIGHT
13 - 23 COMFORT
23 - 0 ECO NIGHT
Saturday and
Sunday
0 - 7 ECO NIGHT
7 - 23 COMFORT
23 - 0 ECO NIGHT
How to change a programme
Starting from the display that shows
the current programme, press “OK” for
5 seconds
The “CHRONO” mode icon starts to
ash
Press the “MODE” and “-“ keys together
for 5 seconds until the Programme
icon “P” start to ash
With the “+” or “-“ key, select the
desired new Programme
Press “MODE” to conrm
Once the new programme is selected,
the “ASC” icon appears. Press the “-“
key to deactivate or the “+” key to
activate the “ASC” function
Setting the P3 programme
Following the previous instructions, select the P3 icon
to customise the programme.
Once the “P3” programme is selected,
the “ASC” icon appears.
Press the “-“ key to deactivate or the
“+” key to activate the “ASC” function.
Press the “OK” key for 5 seconds.
The clock will show the time being
programmed.
Starting from day 1, select each
hour with the ‘+’ and ‘–‘ keys, and for
each programme choose between
“COMFORT” and “ECO NIGHT”
temperature by using the “MODE” key.
Once nished setting the operation
for the hours of the rst day, press the
“OK” key to conrm the choice. Repeat
this procedure for the other days.
After programming all the days, press
“OK” to submit nal conrmation. The
weekly programme is now set.
To modify or change the “P3” operating programme:
starting from the “P3” clock display, press “OK” for 5
seconds. The clock starts to ash and the week can be
programmed again as explained before.
Towel dryer
When the appliance works in “TOWEL DRYER” mode,
its functionality is to dry towels and it becomes hotter
where more heat is needed and this heat distribution
depends on where towels have been hung. This mode
is ideal when you do not want to heat the entire room.

12
Functions
The appliance has a number of special functions to
customise and optimise use.
OPEN
WINDOW
The “OPEN WINDOW“ function
automatically detects an open window
in the proximity of the towel dryer
(further information is stated below)
ASC “ASC” functionality enables you
to adjust from “ECO NIGHT” to
“COMFORT” to reach the set
temperature by switching the
appliance on in advance to ensure
that the “COMFORT” temperature is
reached by the set time
CHILDREN
SAFETY
“CHILDREN SAFETY” functionality
avoids the risk of burns caused by
brief accidental contact by lowering
the temperature compared with the
set temperature of active mode. You
can activate this functionality with any
mode and programmes at any time.
To activate the function, press the “+”
and “-” keys together and hold them
both down until the icon “CHILDREN
SAFETY” appears on the display. To
deactivate the function, repeat the
same operation.
IMPORTANT: When this function is
active, the appliance heats at reduced
power and therefore the room takes
longer to warm up.
Even when this function is active,
children should still be supervised to
make sure they do not put themselves
in danger.
Always avoid prolonged contact
between the appliance and the body.
If the appliance is already operating
or is still hot after recent use and
“CHILDREN SAFETY “ is activated,
it takes at least two hours for the
temperature to drop to the lower value
and the function to be operational.
KEYPAD
LOCK
It is possible to lock the keypad to
prevent accidental modications.
To activate the function, press the
“MODE” and “+” keys together and
hold them both down until the lock
icon appears on the display.
To unlock the keypad, press the same
two keys together as before. The
“KEYPAD LOCK“ icon will no longer
appear on the LCD.
IMPORTANT: The “KEYPAD LOCK”
function does not inhibit the
“STANDBY” key. This is therefore
always active, even when the “KEYPAD
LOCK” function is enabled.
Open window
The “OPEN WINDOW“ function automatically detects
an open window in the proximity of the towel dryer.
The “OPEN WINDOW” functionality can operate in all
the modes (“COMFORT”/”ECO NIGHT”/”CHRONO”).
When the appliance is turned on, the function is not
active by default. To activate the functionality, follow
these steps:
In “STANDBY” mode, press and hold
the “MODE” key and press the “+” key
three times.
Press the “MODE” key again to activate
the “OPEN WINDOW” function.
The next time you turn the appliance
on, the window function icon will
appear on the display.
When an “OPEN WINDOW” is detected,
the “OPEN WINDOW” icon starts to
ash and the blue LED light starts to
ash. In order to avoid unnecessary
heating and to save energy, the towel
dryer reduces the power.
Pressing the “OPEN WINDOW” key
cancels the “OPEN WINDOW“ action
until detection of the next “OPEN
WINDOW”. The “OPEN WINDOW” icon
stops ashing and the towel dryer
returns to operating in the previous
selected mode.
Regardless, the towel dryer returns to
the previous set mode after one hour.
Open window
For optimal operation of the function, it is
recommended to install the appliance near a window
(Fig.8 below).
1000 mm
(39 3/8")
600 mm
(23 5/8")
600 mm
(23 5/8")
8
The appliance’s reaction to windows opening
and closing depends on many factors, such as
the temperature set on the appliance, external
temperature, the degree of ventilation inside the
room, the towel dryer’s position and the presence of
other heat sources.

13
If the appliance has detected an open window, all the
operating modes can be selected, however they will
not be active until the window is detected as closed
or the “OPEN WINDOW“ function is cancelled. The
“CHILDREN SAFETY “ and “KEYPAD LOCK” functions
remain active and can be activated and deactivated
even when the appliance has detected an open
window.
Changing settings in standby
Changing day and time and ECO NIGHT
In standby, press the “+” and “-“ keys together. To
change the settings, see the chapter Turning on for
the rst time.
Changing the set point
It is up to you to decide to increase the appliance’s
temperature up to 2 degrees higher or decrease up
2 degrees lower if you want to secure a more even
temperature in the entire room.
For example, if the temperature set on the thermostat
is 24°C, but it stops heating the room when you
measure just 22°C, you can correct the setting by -2°C.
You can change the setting in “STANDBY” mode by
pressing and holding the “MODE” key and pressing the
“OK” key three times.
Reset
To reset to the default settings, press the “OK”
and “– “ key for 4 seconds, then conrm with “OK”.
ATTENTION: all the programmes and modications
you have made will be cancelled. IMPORTANT: In
case of power loss due to a power outage, all the
current operative modes settings (“COMFORT”, “ECO
NIGHT”, “CHRONO”, “TOWEL DRYER”) are kept in the
memory for about 4 hours. If power is recovered after
4 hours, the appliance goes to the previously selected
operating mode with exception of P3 because it
needs to be reset. You need to set the hours and days
of the week again and the temperature dierence
between “COMFORT” mode and “ECO NIGHT” mode
(as described in the chapter Turning on for the rst
time). IMPORTANT: In case of power loss while the
“ASC” function is enabled: when power is restored, the
function remains active but a few days will need to
pass before it becomes fully operational.
Cleaning
Before cleaning, make sure the appliance is turned o,
cold and disconnected from the household mains.
To clean, just wipe with a soft damp cloth and neutral
detergent. Never use abrasive or corrosive cleaning
products or solvents. To maintain eciency, remove
dust from all the surfaces, including the back side of
the appliance at least twice per year using a vacuum
cleaner.
Maintenance
Should any technical problems arise, contact a
qualied professional.
All maintenance of the appliance must be carried out
by a qualied professional who, before performing
maintenance, must make sure the appliance is turned
o, cold and disconnected from the household mains.

14
Troubleshooting
The appliance does not heat up. Check if the appliance is correctly connected to the
mains power source and powered.
Check the position of the mains switch of the
installation.
Increase the temperature set on the appliance
regulator.
Make sure there are no garments covering the control
device or temperature sensor.
The appliance heats continuously. Reduce the temperature set on the appliance
regulator.
Make sure there are no garments covering the control
device or temperature sensor.
The rooms stays cold. Make sure the power of the appliance is adequate for
the room to be heated.
If the appliance is being used for the rst time, the
room takes at least a couple of hours to heat to
the required temperature (setting the radiator to
maximum does not raise the temperature more
quickly).
The appliance keeps on heating despite a window
being open and the “OPEN WINDOW“ function is
active.
It may be necessary to wait a few minutes before the
function starts operating.
The dierence between the outside and inside
temperature may not be sucient to activate the
function.
Check that the positioning of the appliance complies
with the requirements referred to in gure 8 of this
booklet.
Check that the area around the appliance’s Command
panel is free of any obstacles.
The appliance does not resume heating after the
room’s window is closed and the “OPEN WINDOW“
function is active.
It may be necessary to wait a few minutes before the
sensor detects the closed window.
Check that the area around the appliance’s Command
panel is free of any obstacles.
Deactivate and activate the function again.Should the
response time of the function be too long, you can
always start the appliance manually.
The display shows “ALL“. The temperature sensor is malfunctioning.
Vertical bar connected to the thermostat is cooler than
the other parts of the appliance when operating.
It is perfectly ne if the bar connected to the
thermostat stays cooler than the other parts. In fact,
this part of the appliance has all the electronic devices
and sensors.
Disposal
Make sure the power cable is disconnected from the
power line before performing any removal. To remove
the appliance, follow the procedure for mounting to
the wall in reverse.
Disposal of this appliance must be carried out in
accordance with applicable legislation regarding the
disposal and handling of waste.
Important information regarding correct disposal of
the product in accordance with EC Directive 2012/19/
EC.
At the end of the product’s life, the product must not
be disposed of as urban waste. It must be taken to a
local authority’s waste collection centre or to a dealer
providing this service.
This appliance complies with European Directives:
2014/30/EU on electromagnetic compatibility, 2014/35/
EU on low voltage, 2011/65/EU on restriction of the use
of certain hazardous substances and 2009/125/EC on
eco-design requirements.

15
Deutsch
Bitte beachten
Es ist ausdrücklich untersagt, die Bedieneinheit zu
verändern und/oder zu entfernen oder zu drehen
oder das Kabel in irgendeiner Weise zu durchtrennen
(Abb. 2).
Auf keinen Fall versuchen, das Produkt selbst
zu reparieren, da beim Önen oder Entfernen
verschraubter Abdeckungen die Gefahr eines
Stromschlags besteht! Es ist ausdrücklich untersagt,
die äußeren Merkmale des Geräts zu verändern oder
fest xierte Komponenten einschließlich der Kappen
zu entfernen (Abb. 3).
Die Bedieneinheit niemals in irgendeiner Weise
abdecken, um eine Überhitzung der elektronischen
Komponenten und eine Beschädigung des Geräts zu
vermeiden (Abb. 6).
Das Gerät niemals unmittelbar unter oder vor einer
Steckdose oder einem Anschlusskasten installieren
(Abb. 6).
Zum Schutz der elektronischen Bauteile und des
Temperaturfühlers muss die Temperatur auf der
rechten Seite unter 50° C liegen (Abb.6).
Darauf achten, dass das Stromkabel nicht mit der
Oberäche des Geräts in Berührung kommt und sich
nicht verdreht oder verheddert (Abb. 7).
Pichtangaben für elektrische Handtuchheizkörper
Wärmeleistung TYP VALUE EINHEIT
Nennwärmeleistung (Pnom) 605.085.38 0.25 kw
Mindestwärmeleistung (Richtwert) (Pmin) 605.085.38 0.00 kw
Maximale kontinuierliche Wärmeleistung (Pmax,c) 605.085.38 0.25 kw
Hilfsstromverbrauch TYP VALUE EINHEIT
Bei Nennwärmeleistung (elmax) 605.085.38 0.00 kw
Bei Mindestwärmeleistung (elmin) 605.085.38 0.00 kw
Im „STANDBY“-Modus (elSB) 605.085.38 0.00 kw
Das Gerät erfüllt die Europäischen Richtlinien:
2014/30/EU über die elektromagnetische
Verträglichkeit
2014/35/EU Niederspannungsrichtlinie
2011/65/EU über Beschränkungen der Verwendung
bestimmter gefährlicher Stoe
2009/125/EG über Ökodesign-Anforderungen
https://eur-lex.europa.eu/legal-content/it/
TXT/?uri=CELEX:32009L0125

16
Pichtangaben für lokale Elektroheizgeräte
Art der Heizleistung/Raumtemperaturregelung
Einstuge Wärmeabgabe, keine
Raumtemperaturregelung NEIN
Zwei oder mehr manuelle Stufen, keine
Raumtemperaturregelung NEIN
Mit Raumtemperaturregelung über
mechanischen Thermostat NEIN
Mit elektronischer
Raumtemperaturregelung NEIN
Mit elektronischer
Raumtemperaturregelung plus Tageszeit-
Timer
NEIN
Elektronische Raumtemperaturregelung
plus Wochen-Timer JA
Andere Bedienoptionen
Raumtemperaturregelung mit
Anwesenheitserkennung NEIN
Raumtemperaturregelung mit OPEN
WINDOW-Funktion JA
Mit Fernsteueroption NEIN
Mit adaptiver Startsteuerung JA
Mit Betriebszeitbegrenzung NEIN
Mit Temperatursensor NEIN
Technische Daten des elektr. Handtuchheizkörpers
Spannung: 230 V ~ 50 Hz
Isolationsklasse: II
Schutzklasse: IP34
Leistung: 250 W
Nennstrom: 1,1 A
Sicherheitsinformation
Vor der Installation und
Nutzung des Geräts die
mitgelieferte Betriebsanleitung
sorgfältig durchlesen. Der
Hersteller haftet nicht für
Verletzungen oder Schäden, die
auf unsachgemäße Installation
oder Nutzung zurückzuführen
sind. Die Betriebsanleitung zur
späteren Verwendung an einem
sicheren und zugänglichen Ort
aufbewahren.
Kinder und gefährdete
Personen - Sicherheit
Warnhinweis
ACHTUNG: Bestimmte Teile
dieses Produkts können
sehr heiß werden und
Verbrennungen verursachen.
Besondere Vorsicht ist geboten,
wenn Kinder oder andere
gefährdete Personen anwesend
sind.
Kinder unter 3 Jahren sollten
sich nicht unbeaufsichtigt in
der Nähe des elektrischen
Handtuchheizkörpers
aufhalten. Kinder zwischen 3
und 8 Jahren dürfen das Gerät
nur dann ein- und ausschalten,
wenn es in der vorgesehenen
Betriebsposition aufgestellt
oder installiert wurde und sie
beaufsichtigt werden oder in
die Handhabung des Geräts
eingewiesen wurden und die
damit verbundenen Gefahren
verstehen. Kinder zwischen 3
und 8 Jahren dürfen das Gerät
nicht von der Stromversorgung
trennen, einstellen, reinigen
oder Wartungsarbeiten
vornehmen. Dieses Gerät kann
von Kindern ab 8 Jahren und
Personen mit eingeschränkten
körperlichen, sensorischen
oder geistigen Fähigkeiten oder
mit mangelnder Erfahrung
und mangelndem Wissen

17
verwendet werden, wenn
sie beaufsichtigt werden
oder in Bezug auf die sichere
Verwendung des Geräts
unterwiesen wurden und die
damit verbundenen Gefahren
verstehen. Kinder dürfen
keinesfalls mit dem Gerät
spielen. Reinigungs- und
Wartungsarbeiten dürfen
keinesfalls unbeaufsichtigt
durch Kinder vorgenommen
werden.
Warnhinweis
Bitte die Abstände zu Wand
und Decke einhalten wie in
den Abbildungen 4 und 5
dargestellt. Um jegliches Risiko
für Kleinkinder auszuschließen,
sollte das Gerät so installiert
werden, dass sich das unterste
Heizelement mindestens 60 cm
über dem Boden bendet (Abb.
4).
Allgemeine
Sicherheitshinweise
Bei der Verwendung
elektrischer Geräte müssen
stets einige grundlegende
Vorsichtsmaßnahmen beachtet
werden, um das Risiko von
Brand, Stromschlag und
Verletzungen zu verringern.
Warnhinweis
Dieses Gerät wurde für das
Beheizen von Wohn- und
Nebenräumen sowie zum
Trocknen von Handtüchern
entwickelt. Es ist allein
zum Trocknen von nassen
Handtüchern geeignet und
darf nicht für andere Zwecke
verwendet werden.
Warnhinweis
Den elektrischen
Handtuchheizkörper nicht
verwenden, wenn das
Stromkabel beschädigt ist.
Das Gerät nicht verwenden,
wenn die elektronischen
Bedienelemente beschädigt
sind.
Auf keinen Fall versuchen,
das Produkt selbst zu
reparieren, da beim Önen
oder Entfernen verschraubter
Abdeckungen die Gefahr
eines Stromschlags besteht!
Es ist ausdrücklich untersagt,
die äußeren Merkmale des
Geräts zu verändern oder
fest xierte Komponenten
einschließlich der Kappen (Abb.
3) zu entfernen und/oder die
Bedieneinheit zu entfernen
oder zu drehen oder das
Kabel in irgendeiner Weise zu
durchtrennen (Abb. 2). Darauf
achten, dass das Stromkabel
nicht mit der Oberäche des
Geräts in Berührung kommt
und sich nicht verdreht oder
verheddert (Abb. 7).

18
Warnhinweis
Die Bedieneinheit niemals in
irgendeiner Weise abdecken,
um eine Überhitzung der
elektronischen Komponenten
und eine Beschädigung
des Geräts zu vermeiden
(Abb. 6). Zum Schutz der
elektronischen Bauteile und
des Temperaturfühlers muss
die Temperatur auf der rechten
Seite unter 50° C liegen.
Der elektrische
Handtuchheizkörper kann
Temperaturen von über 50° C
erreichen und damit zu heiß
zum Anfassen werden. Er ist
mit einem Überhitzungsschutz
ausgestattet, der dafür
sorgt, dass das Gerät sich
bei Überhitzung automatisch
abschaltet. Der elektrische
Handtuchheizkörper schaltet
sich automatisch wieder ein,
sobald die Temperatur auf ein
angemessenes Maß gesunken
ist.
Sicherstellen, dass die
Hausstromleitung mit einem
Trennschalter ausgestattet ist,
der es ermöglicht, das Gerät
vollständig vom Stromnetz zu
trennen.
Brennbare oder entammbare
Materialien oder Druckbehälter
(z. B. Spraydosen, Feuerlöscher)
immer mindestens 50 cm
vom Gerät entfernt halten.
Auf der Oberäche des Geräts
dürfen keinerlei Substanzen
verdampfen.
Das Gerät niemals mit nassen
oder feuchten Händen oder
Füßen berühren.
Die elektronische Bedieneinheit
und das Kabel dürfen nicht
mit Wasser oder anderen
Flüssigkeiten in Berührung
kommen. Sollte dies passieren,
das Gerät vom Stromnetz
trennen und warten, bis es
vollständig getrocknet ist.
Warnhinweis
Bitte denke daran, dass in
geographischen Gegenden mit
höheren Lagen die Luft wärmer
als die eingestellte Temperatur
werden kann.
Achtung: Wenn du
den elektrischen
Handtuchheizkörper zum
ersten Mal einschaltest,
bemerkt du vielleicht einen
Geruch. Dies ist nicht auf
schädliche Substanzen
zurückzuführen. Wir
empfehlen, den Raum zu
lüften.
Allgemeine Informationen
Aufbewahrung und Pege: Das Gerät nicht an einem
Ort lagern, an dem die Temperaturen unter den
Gefrierpunkt sinken können. Das Gerät muss vor Frost
geschützt werden. Das Gerät vorsichtig auspacken,
um es nicht zu beschädigen.
Das Paket enthält:
Das Gerät

19
Montageset (Kunststoringe, Kunststostützen,
Schrauben und Sechskantmuttern)
Bedienungsanleitung
Das Verpackungsmaterial ist recycelbar. Entsorge es
daher in dafür vorgesehenen Abfallsammelbehältern.
Die Entsorgung dieses Geräts muss in
Übereinstimmung mit den geltenden gesetzlichen
Vorschriften bezüglich der Entsorgung und
Handhabung von Abfällen erfolgen.
Positionierung und Installation
Warnhinweis
Das Gerät ausschließlich wie hier beschrieben
installieren.
Der elektrische Handtuchheizkörper
muss entsprechend den einschlägigen
Sicherheitsanforderungen für Badezimmer
positioniert werden. Da das Produkt nach IP34
zugelassen ist, muss es in der entsprechenden Zone
montiert werden. Der elektrische Handtuchheizkörper
ist außerhalb der „Zone 1“ zu installieren und kein
Teil der Bedieneinheit und des Steckers darf „Zone 2“
berühren. (Abbildung 1).
Bitte die Abstände zu Wänden, Boden und Decke
einhalten, wie in den Abbildungen 4 und Abb. 5
dargestellt.
Warnhinweis
Das Gerät darf erst verwendet werden, wenn
es vollständig und der Anleitung entsprechend
installiert wurde. Das Gerät so installieren, dass die
Bedieneinheit rechts und die Bedientasten nach vorn
ausgerichtet sind, wie in Abb. 1 gezeigt.
Das Gerät muss so installiert werden, dass die
elektronischen Bedienelemente und andere
Bedienvorrichtungen nicht versehentlich von einer
Person berührt werden können, die sich in der
Badewanne oder Dusche aufhält.
Warnhinweis:
Das Gerät darf keinesfalls:
• unmittelbar unter oder vor einer Steckdose oder
einem Anschlusskasten installiert werden (Abb. 6)
• in direktem Kontakt mit dem Boden oder der Wand
installiert werden
• in der Nähe von Gardinen, entzündlichen oder
brennbaren Materialien oder Druckkesseln
installiert werden.
• Sicherstellen, dass in der Wand am Montageort
keine Rohre oder elektrischen Leitungen verlaufen,
die bei der Montage des Geräts beschädigt werden
könnten.
Wandmontage
Unterschiedliche Wandmaterialien erfordern
unterschiedliche Arten von Wandbefestigungen.
Immer Schrauben und Dübel wählen, die speziell
für das jeweilige Wandmaterial geeignet sind. Wir
empfehlen, Flachkopfschrauben zu verwenden oder
alternativ eine ache Unterlegscheibe zu benutzen.
Während der Installation muss das Gerät von
Stromnetz getrennt bleiben.
Elektroanschluss: Sorgfältig lesen
Warnhinweis
Das Gerät muss von einer qualizierten Person in
Übereinstimmung mit den nationalen gesetzlichen
Vorschriften installiert werden.
Das Gerät benötigt eine Stromversorgung von 230
V~ 50 Hz. Sicherstellen, dass die Stromleitung die in
Tabelle 1 genannten Spezikationen erfüllt.
Außerdem sicherstellen, dass die Hausstromleitung
mit einem Trennschalter ausgestattet ist, der
es ermöglicht, das Gerät gemäß den nationalen
Anschlussvorschriften vollständig vom Stromnetz
zu trennen. Wenn das Gerät in einem Badezimmer
installiert wird, muss die Stromleitung mit einem
hochempndlichen 30mA-Fehlerstromschutzschalter
ausgestattet sein. Fest installierte Geräte müssen über
einen Anschlussblock angeschlossen werden, der sich
in einer geeigneten Anschlussdose bendet.
Vor dem Einstecken des Netzsteckers in die
Steckdose sicherstellen, dass die Spannung der
Netzstromversorgung mit dem auf dem Typenschild
des Geräts angegebenen V-Wert übereinstimmt und
dass Steckdose und Netzleitung für die erforderliche
Belastung geeignet sind (ebenfalls auf dem
Typenschild angegeben).
Sicherstellen, dass die Hausstromleitung mit einem
Trennschalter ausgestattet ist, der es ermöglicht, das
Gerät gemäß den nationalen Anschlussvorschriften
vollständig vom Stromnetz zu trennen.
Betrieb und Handhabung der Bedieneinheit
Bedienfeld
1. LEDs
2. „+“-Taste
3. Einstellungsbestätigung/Taste zum Deaktivieren der
OPEN WINDOW-Funktion
4. ON/STANDBY-Taste
5. MODE-Auswahltaste
6. „-“-Taste

20
Anzeige
1. Betriebsmodi
2. Tastensperre
3. OPEN WINDOW
4. Kindersicherheit
5. Uhr/Temperatur-Sollwert
6. TOWEL DRYER-Funktion
7. CHRONO-Voreinstellungen
8. Wochentage
9. Zeitschaltuhr CHRONO-Programm
10. Betriebsmodi
Betriebsmodi
Das Gerät verfügt über vier Betriebsmodi (COMFORT;
ECO NIGHT; CHRONO; TOWEL DRYER). Mithilfe
dieser Modi können Benutzer die Umgebung ihren
Bedürfnissen entsprechend erwärmen.
COMFORT-Modus Die COMFORT-Temperatur wird
vom Benutzer eingestellt.
ECO NIGHT-Modus Die ECO NIGHT-Temperatur
wird vom Benutzer eingestellt.
Die eingestellte Temperatur
darf nicht höher als die
COMFORT-Temperatur sein.
CHRONO-Modus In diesem Modus können
Benutzer eines der beiden
voreingestellten CHRONO-
Thermostatprogramme („P1“
oder „P2“) wählen oder das
Programm „P3“ tage-oder
wochenweise individuell
anpassen.
TOWEL DRYER-
Modus
Diese Funktion reduziert den
Stromverbrauch, indem sie
den Großteil der Wärme auf
die Stelle konzentriert, an der
sich das Handtuch bendet.
Einschalten/Standby
Um den elektrischen
Handtuchheizkörper einzuschalten,
die ON-Taste drücken. Es ertönt ein
doppelter Piepton, der anzeigt, dass
der elektrische Handtuchheizkörper
eingeschaltet ist.
Zum Ausschalten die gleiche Taste
drücken, und das „Stby“-Symbol
erscheint in der Anzeige. Ein
längerer Piepton signalisiert, dass
der elektrische Handtuchheizkörper
abgeschaltet ist.
Der STANDBY-Modus zeigt an, dass
alle Betriebsmodi ausgeschaltet sind,
das Gerät aber an das Stromnetz
angeschlossen und betriebsbereit ist.
Der Stromverbrauch ist im Standby
besonders gering (weniger als 0,5
W, wie in der Ökodesign-Richtlinie
vorgeschrieben).
Erste Inbetriebnahme
Wenn du das Gerät zum ersten Mal einschaltest, wirst
du aufgefordert, folgende Parameter einzugeben:
Wochentage: Den Wochentag
einstellen, indem du die „+“- und
„-“-Taste betätigst (1 = MO, 2 = DI, …7 =
SO). Die Eingabe anschließend mit der
MODE-Auswahltaste bestätigen.
Uhrzeit/Stunde: Nach der Auswahl
des Wochentages beginnt die
Stundenanzeige zu blinken.
Die Uhrzeiten für die einzelnen
Wochentage einstellen, indem du die
„+“- und „-“-Taste betätigst. Danach
wieder mit der MODE-Auswahltaste
bestätigen.
Uhrzeit/Minute: Nach der
Einstellung der Stunde beginnt die
Minutenanzeige zu blinken. Die Minute
einstellen, indem du die „+“- und
„-“-Taste betätigst. Danach wieder mit
der MODE-Auswahltaste bestätigen.
Der Temperaturunterschied
zwischen dem COMFORT- und
ECO-NIGHT-Modus beträgt gemäß
Voreinstellungen 3° C. Die Dierenz
kann über die „+“- und „-“-Taste auf 2°
C oder 4° C angepasst werden.
Erste Inbetriebnahme
Wenn die Uhrzeit oder die Temperaturdierenz
zwischen COMFORT und ECO NIGHT geändert werden
soll:
Den Thermostat in den STANDBY-Modus schalten. Die
„+“- und „-“-Taste gleichzeitig mindestens 5 Sekunden
gedrückt halten. Der Thermostat schaltet in den ECO-
NIGHT-/COMFORT-Einstellungsmodus.
Über die „+“- und „-“-Taste Tag, Stunde, Minute
Table of contents
Languages:
Other IKEA Bathroom Fixture manuals

IKEA
IKEA GUTVIKEN User manual

IKEA
IKEA OXMYREN User manual

IKEA
IKEA BROGRUND User manual

IKEA
IKEA VOXNAN User manual

IKEA
IKEA BRAVIKEN User manual

IKEA
IKEA VOXHAN 203.426.15 User manual

IKEA
IKEA BROGRUND User manual

IKEA
IKEA VOXNAN 703.426.13 User manual

IKEA
IKEA VOXNAN 403.724.23 User manual

IKEA
IKEA BROGRUND User manual