manuals.online logo
Brands
  1. Home
  2. •
  3. Brands
  4. •
  5. IKEA
  6. •
  7. Indoor Furnishing
  8. •
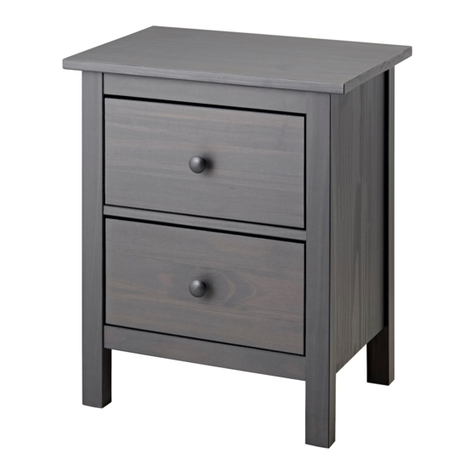
  9. IKEA HEMNES User manual

IKEA HEMNES User manual

HEMNES
2AA-1922724-5
Ø5/16"
(8 mm)
Ø 1/8"
(3 mm)
3
1
6
101343
6x
2
11
157876
157877
158570
158569
118331
112996
118331
112996
4AA-1922724-5
156500
5x
326454
ult
IKEA of
SE-343 81 Älmh
Sweden AB
IKEA
n
o
a
f
n
S
d
w
Q
e
u
d
a
e
li
n
ty
Desig
107967
100823
109048
121714
109049
1x
2x 1x
1x 1x
19
5
118331
112996
1
6AA-1922724-5
101343
7
101343
101343
6x
8AA-1922724-5
100347
100365
156500
156500
9
118331
112996
157876
157877
158570
158569
10 AA-1922724-5
2
118331
112996
157876
157877
158570
158569
11
12 AA-1922724-5
13
14 AA-1922724-5
118331
112996
15
16 AA-1922724-5
17
18 AA-1922724-5
ENGLISH FRANÇAIS
WALL ANCHORING GUIDE:
The hardware you should use
to secure your chest of drawers
to the wall depends on both the
type of chest of drawers you
have and your wall material.
ESPAÑOL
INSTRUCTIONS POUR
FIXATION AU MUR :
au mur dépend du type de
commode et du matériau du
mur.
INSTRUCCIONES PARA EL
MONTAJE A LA PARED:
Elige los accesorios necesarios
en función del tipo de mueble y
del material del que esté hecha
la pared.
ult
IKEA of
SE-343 81 Älmh
Sweden AB
IKEA
n
o
a
f
n
S
d
w
Q
e
u
d
a
e
li
n
ty
Desig
19
ENGLISH
Type of Wall Material: Using the
guide below, identify your wall
material and the appropriate steps to
take for that wall material.
Drywall or plaster with available wood
stud:
- Mark the attachment point(s) with a
pencil at the appropriate height and
positioned over wood stud(s).
- Drill 1/8-inch (3mm) diameter pilot
hole(s) into the wood stud(s), at the
height you marked with pencil.
- Following the appropriate pictogram
instructions on the following pages,
drive the screw(s) with washer(s)
through the textile strap and tighten
Drywall without available wood stud:
- Mark the attachment point(s) with a
pencil at the appropriate height.
- Drill 5/16-inch (8mm) diameter
hole(s) through the wall at the height
you marked with pencil.
- Drive the plastic plug(s) into the
hole(s), using a hammer if needed.
- Following the appropriate pictogram
instructions on the following pages,
drive the screw(s) with washer(s)
through the textile strap and tighten
in the wall. Do not over-tighten.
Masonry:
- Mark the attachment point(s) with a
pencil at the appropriate height.
- Drill 5/16-inch (8mm) diameter
hole(s) 2 and 3/4-inches (70mm)
deep into the wall at the height you
marked with pencil.
- Drive the plastic plug(s) into the
hole(s), using a hammer if needed.
- Following the appropriate pictogram
instructions on the following pages,
drive the screw(s) with washer(s)
through the textile strap and tighten
in the wall. Do not over-tighten.
If your wall material is not
listed here, or if you have any
questions, consult your local
hardware store.
FRANÇAIS
Matériau du mur : le guide ci-
matériau de votre mur pour savoir
comment procéder.
Cloison en plâtre avec montants en
bois :
l’aide d’un crayon à la hauteur désirée
sur le mur, en le(s) alignant sur le
montant.
- Percer un(des) trou(s) pilote(s) de
3 mm (1/8 inch) de diamètre dans
le(s) montant(s) en bois, à la hauteur
marquée au crayon.
- Suivre les instructions
correspondantes sous forme de
suivantes et insérer la(les) vis avec
la(les) rondelle(s) à travers la sangle,
puis serrer fermement la(les) vis dans
le montant en bois.
Cloison en plâtre sans montant en
bois :
à l’aide d’un crayon à la hauteur
désirée.
- Percer dans le mur un(des) trou(s)
de 8 mm (5/16 inch) de diamètre à la
hauteur marquée au crayon.
- Insérer la(les) cheville(s) en
plastique à l’intérieur du(des) trous.
Utiliser un marteau si nécessaire.
- Suivre les instructions
correspondantes sous forme de
suivantes et insérer la(les) vis avec
la(les) rondelle(s) à travers la sangle,
puis serrer fermement la(les) vis dans
la(les) cheville(s), dans le mur. Veiller
à ne pas serrer de manière excessive.
Mur en maçonnerie :
à l’aide d’un crayon à la hauteur
désirée.
- Percer un trou de 8 mm (5/16”) de
diamètre et de 70 mm (2 3/4’’) de
profondeur dans le mur à la hauteur
marquée au crayon.
- Insérer la(les) cheville(s) en
plastique à l’intérieur du(des) trous.
Utiliser un marteau si nécessaire.
- Suivre les instructions
correspondantes sous forme de
suivantes et insérer la(les) vis avec
la(les) rondelles à travers la sangle,
puis visser fermement dans la(les)
cheville(s) en plastique, dans le mur.
Veiller à ne pas serrer de manière
excessive.
Si le matériau de votre mur ne
ou si vous avez des questions,
adressez-vous à votre fournisseur
local.
ESPAÑOL
Material de la pared: consulta la
la pared y saber qué pasos seguir.
Pared de pladur con posibilidad de
montaje a la estructura de madera:
- Con un lápiz, marca el punto (o
los puntos) de montaje a la altura
adecuada de manera que coincidan
con los listones de madera de la
estructura interna del pladur.
- Con un taladro, haz un agujero
de 3 mm (1/8”) de diámetro en los
listones de madera, justo encima de
las marcas hechas con lápiz.
- Siguiendo las instrucciones que
se dan en las siguientes páginas,
introduce los tornillos con su
correspondiente arandela en la tira de
tela y apriétalos bien a la madera.
Pladur sin posibilidad de montaje a la
estructura de madera:
- Con un lápiz, marca el punto (o
los puntos) de montaje a la altura
adecuada.
- Con un taladro, haz un agujero de 8
mm (5/16”) de diámetro en la pared,
justo encima de cada marca de lápiz.
- Introduce los tacos de plástico en
los agujeros con la ayuda, si fuera
necesaria, de un martillo.
- Siguiendo las instrucciones que
se dan en las siguientes páginas,
introduce los tornillos con su
correspondiente arandela en la tira
de tela y apriétalos bien, pero sin
pasarte, a los tacos de la pared.
Paredes de albañilería:
- Con un lápiz, marca el punto (o
los puntos) de montaje a la altura
adecuada.
- Con un taladro, haz un agujero de
8 mm (5/16”) de diámetro y 70 mm
de profundidad (2 3/4”) en la pared,
justo encima de cada marca de lápiz.
- Introduce los tacos de plástico en
los agujeros con la ayuda, si fuera
necesaria, de un martillo.
- Siguiendo las instrucciones que
se dan en las siguientes páginas,
introduce los tornillos con su
correspondiente arandela en la tira
de tela y apriétalos bien, pero sin
pasarte, a los tacos de la pared.
Si el material de la pared no
duda, dirígete a una ferretería
cercana.
20 AA-1922724-5

Other manuals for HEMNES

9

Other IKEA Indoor Furnishing manuals

IKEA GURSKEN User manual

IKEA

IKEA GURSKEN User manual

IKEA ENGAN User manual

IKEA

IKEA ENGAN User manual

IKEA GLIMT AA-119706-1 User manual

IKEA

IKEA GLIMT AA-119706-1 User manual

IKEA AKERBY User manual

IKEA

IKEA AKERBY User manual

IKEA FREDEN User manual

IKEA

IKEA FREDEN User manual

IKEA BEKVAM KITCHEN CART 23 5/8X19 5/8" User manual

IKEA

IKEA BEKVAM KITCHEN CART 23 5/8X19 5/8" User manual

IKEA HEMNES User manual

IKEA

IKEA HEMNES User manual

IKEA GURSKEN 694.171.62 User manual

IKEA

IKEA GURSKEN 694.171.62 User manual

IKEA RIKLIG User manual

IKEA

IKEA RIKLIG User manual

IKEA Svinga User manual

IKEA

IKEA Svinga User manual

IKEA KALLBODA User manual

IKEA

IKEA KALLBODA User manual

IKEA PERFEKT User manual

IKEA

IKEA PERFEKT User manual

IKEA EKESKOG User manual

IKEA

IKEA EKESKOG User manual

IKEA KNOXHULT 203.342.53 User manual

IKEA

IKEA KNOXHULT 203.342.53 User manual

IKEA FREDRIK User manual

IKEA

IKEA FREDRIK User manual

IKEA FRAMSTA BASIC UNIT 47X12" User manual

IKEA

IKEA FRAMSTA BASIC UNIT 47X12" User manual

IKEA BESTA User manual

IKEA

IKEA BESTA User manual

IKEA FREDEN User manual

IKEA

IKEA FREDEN User manual

IKEA UNDVIKA User manual

IKEA

IKEA UNDVIKA User manual
IKEA MALSKAR 693.318.75 User manual

IKEA

IKEA MALSKAR 693.318.75 User manual

IKEA ENHET 304.765.05 User manual

IKEA

IKEA ENHET 304.765.05 User manual

IKEA CIRKUSTALT User manual

IKEA

IKEA CIRKUSTALT User manual

IKEA VAGLIG User manual

IKEA

IKEA VAGLIG User manual

IKEA UPPSPEL 794.301.58 User manual

IKEA

IKEA UPPSPEL 794.301.58 User manual

Popular Indoor Furnishing manuals by other brands

Elkay Sink SFL-10 brochure

Elkay

Elkay Sink SFL-10 brochure

Honey Can Do SHF-01867 manual

Honey Can Do

Honey Can Do SHF-01867 manual

Courtyard Creations RTS870P Assembly instructions

Courtyard Creations

Courtyard Creations RTS870P Assembly instructions

Purple Ascent Adjustable Base owner's manual

Purple

Purple Ascent Adjustable Base owner's manual

DREAMS MOORE BED Assembly instruction

DREAMS

DREAMS MOORE BED Assembly instruction

PHI VILLA THD-PV-321 Use and care guide

PHI VILLA

PHI VILLA THD-PV-321 Use and care guide

Furniture of America Calliope CM7751TV Assembly instructions

Furniture of America

Furniture of America Calliope CM7751TV Assembly instructions

JWA Marcellus 70901 Assembly instruction

JWA

JWA Marcellus 70901 Assembly instruction

Rapid Racking Heavy duty work station Assembly guide

Rapid Racking

Rapid Racking Heavy duty work station Assembly guide

BAND WOOD BW19-02T Assembly instructions

BAND WOOD

BAND WOOD BW19-02T Assembly instructions

Freedom LARSSON 23418271 Assembly instructions

Freedom

Freedom LARSSON 23418271 Assembly instructions

Furniture of America CM3790BN Assembly instructions

Furniture of America

Furniture of America CM3790BN Assembly instructions

Philips 207548 Specification sheet

Philips

Philips 207548 Specification sheet

Freedom 23741171 manual

Freedom

Freedom 23741171 manual

Southern Enterprises CK927000TX Assembly instructions

Southern Enterprises

Southern Enterprises CK927000TX Assembly instructions

OfficeSource PBP24 Assembly instructions

OfficeSource

OfficeSource PBP24 Assembly instructions

Flexispot Comhar Pro Q8 installation guide

Flexispot

Flexispot Comhar Pro Q8 installation guide

Argos TC NEW PAOLO 5554001 Assembly instructions

Argos

Argos TC NEW PAOLO 5554001 Assembly instructions

manuals.online logo
manuals.online logoBrands
  • About & Mission
  • Contact us
  • Privacy Policy
  • Terms and Conditions

Copyright 2025 Manuals.Online. All Rights Reserved.