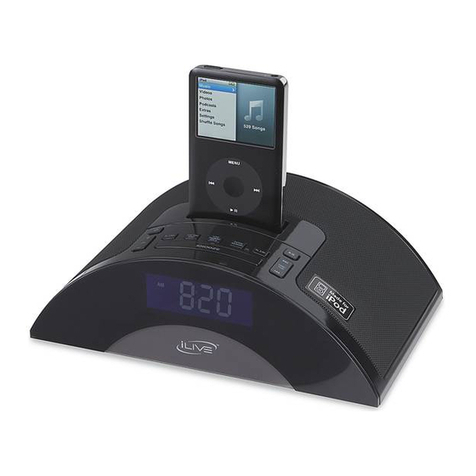
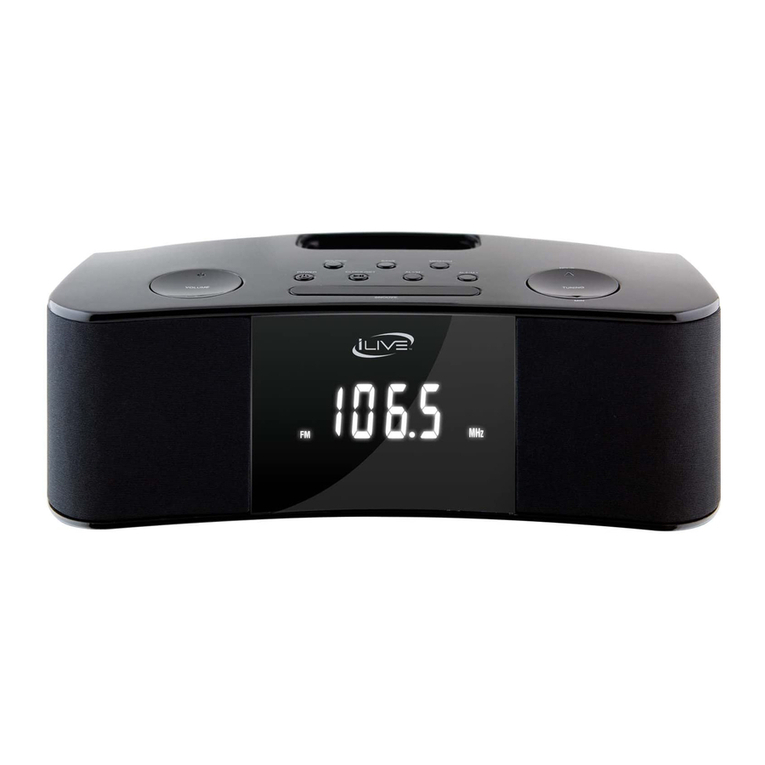
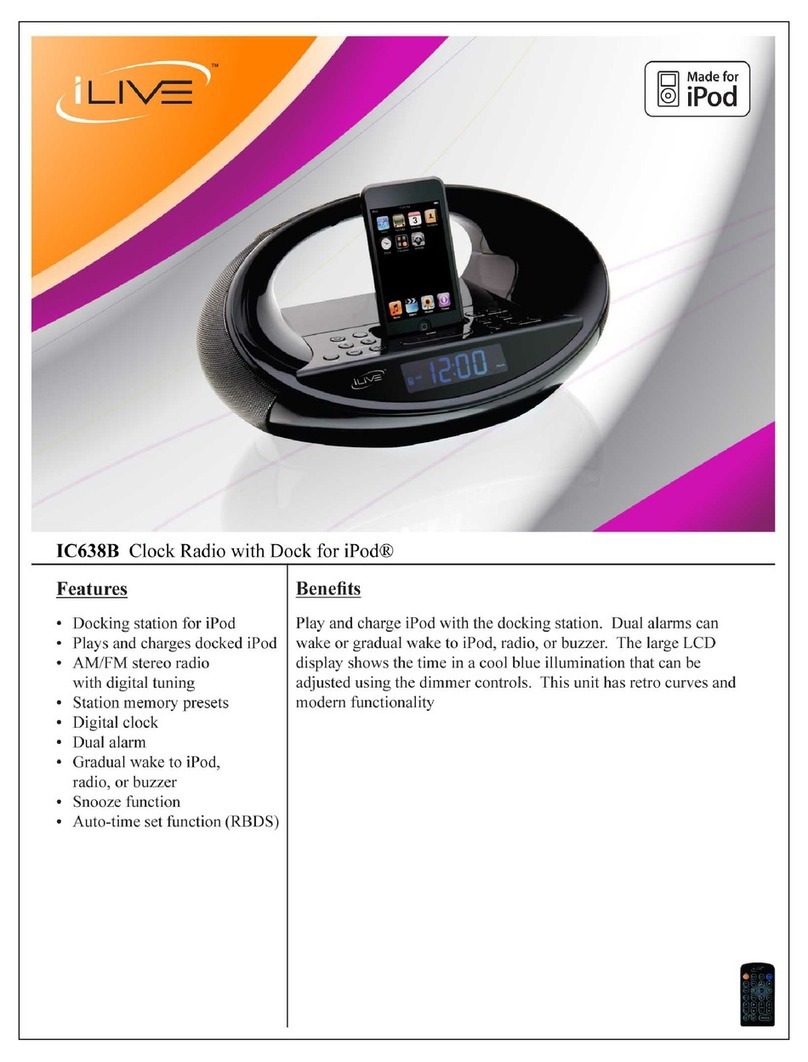
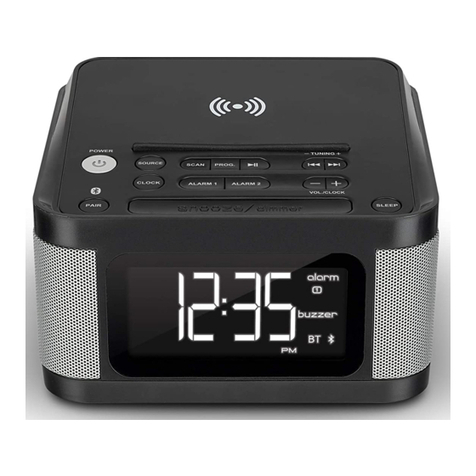
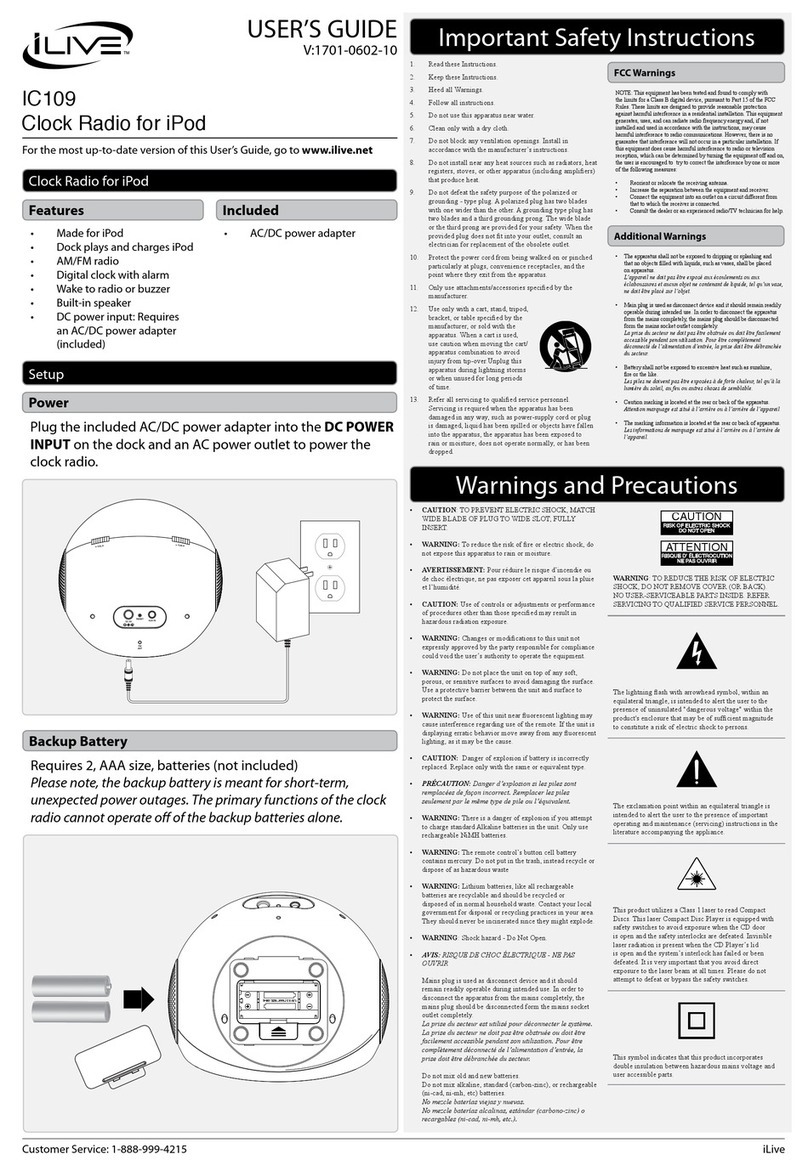
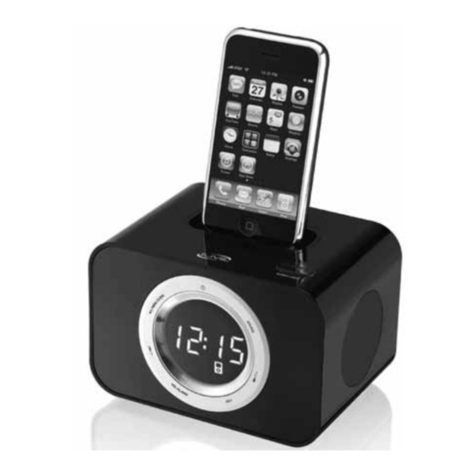
iLive IC609 User manual

USER'S GUIDE
V'2316-0218-09
IC609
Intelli
Set™
Clock Radio with Dock for iPod
ICONTENTS
WARNINGS AND PRECAUTIONS 2
IMPORTANT SAFETYINSTRUCTIONS 2
»QUICKSTART 3
PLAYING
ADOCKED
IPOD
3
TIJNING 11IE
AMJFM
RADIO 3
GENERALPRODUCTINFORMATION 4
IN
ruE
BOX
4
FEATURES
4
POWERING THE UNIT &REMOTE 5
UNIT POWER OPTIONS 5
REMOTE POWER OPTIONS 5
OPERATIONS 6
SETTING
ruE
CLOCK
USING INTELLI
SETTM
6
SETTING 11IE CLOCK
MANUALLY
6
SETTING
ruE
ALARM
7
USING
ruE
DAYLIGHT
SAVINGS
TIME
FEATURE
7
DOCKING
AN
IPOD
TO
THE
UNIT 8
PLAYING
ADOCKED
IPOD
8
TUNING 11IE
AMJFM
RADIO 9
SAVING
AN
AM
OR FM
STATION
AS
APRESET 9
USING THE AUXILIARY INPUT 9
UNIT CONTROLS &FEATURES 10
UNIT CONTROLGLOSSARY
11
REMOTE CONTROLS &FEATURES 12
REMOTE CONTROLGLOSSARY
13
REMOTE CONTROLS &FEATURES 14
REMOTE &LCD CONTROLGLOSSARY
15
COMPANY INFORMATION
16
GREEN
INITIATIVE
16
INTERNATIONAL
SUPPORT
16
SERVICE
INFORMATION
16
For the mostup-to-date version
of
this User sGuide, go to www.iLive.net

WARNINGS AND PRECAUTIONS .
-CAUTION:
USE
OF
ANY
CONTROLS,
ADmSTMENTS,
OR
PROCEDURES
OTHER
THAN
THOSE
SPECIFIED
HEREIN
MAY RESULT IN
HAZARDOUS
RADIATION EXPOSURE.
-CAUTION:
DANGER
OF
EXPLOSION
IF BATTERY IS
INCORRECTLY
REPLACED.
REPLACE
ONLY
WITH
THE
SAME
OR
EQUIVALENT
TYPE.
-
TO
PREVENT
FIRE
OR
SHOCK
HAZARD,
DO
NOT
USE
THIS
PLUG
WITH
AN
EXTENSION
CORD,
RECEPTACLE
OR
OTHER OUTLET
UNLESS
THE
BLADES
CAN
BE
FULLY INSERTED
TO
PREVENT
BLADE
EXPOSURE.
-WARNING:
TO
REDUCE
THE
RISK
OF
FIRE
OR
ELECTRIC
SHOCK,
DO
NOT
EXPOSE
THIS
APPLIANCE
TO
RAIN
OR
MOISTIJRE.
-WARNING:
THE
BATTERIES
SHALL
NOT
BE
EXPOSED
TO
EXCESSIVE
HEAT
SUCH
AS
SUNSHINE,
FIRE
OR
THE
LIKE.
The lightning flash with arrowhead
symbol, within an equilateral triangle,
is
intended
to
alert the user to the presence
of
uninsulated "dangerous voltage"
within the product's enclosure that may
be
of
sufficient magnitude to constitute
arisk
of
electric shock to persons.
WARNING: TO REDUCE THE RISK
OF ELECTRIC SHOCK, DO NOT
REMOVE COVER (OR BACK).
NO USER-SERVICEABLE PARTS
INSIDE. REFER SERVICING TO
QUALIFIED SERVICE PERSONNEL.
The exclamation point within an
equilateral triangle
is
intended to
alert the user to the presence
of
important operating and maintenance
(servicing) instructions in the literature
accompanying the appliance.
IMPORTANT SAFETY INSTRlJCTIONS
1.
Read
these instructions.
2.
Keep these instructions.
3.
Heed
all warnings.
4.
Follow all instructions.
5.
Do
not
use this apparatus
near
water.
6.
Clean
only with
dry
cloth.
7.
Do
not
block
any
ventilation openings. Install in
accordance with
the
manufacturer's instructions.
8.
Do
not
install
near
any
heat sources such as radiators,
heat registers, stoves,
or
other
apparatus (includihg
amplifiers)
that
produce
heat
9.
Do
not
defeat the safety purpose
of
the
polarized
or
grounding-type plug. Apolarized
plug
has
two
blades
with
one
wider
than
the
other. Agrounding type
plug
has
two
blades
and
athird grounding prong. The wide
blade
or
the
third
prong
are provided for
your
safety.
If
the provided
plug
does
not
fit into
your
outlet, consult
an electrician
for
replacement
of
the obsolete
outlet
10.
Protect the
power
cord
from
being
walked
on
or
pinch
particularly
at
plugs, convenience receptacles,
and
the
point where
they
exit
from
the
apparatus.
11.
Only
use attachments/accessories specified
by
the
manufacturer.
12.
Use
only
with
the
cart, stand,
tripod, bracket,
or
table specified
by
the
manufacturer,
or
sold
with
the apparatus.
When
a
cart
is used,
use caution
when
moving
the
cart/apparatus combination
to
avoid
injury from tip-over.
13.
Unplug
this apparatus during lightening storms
or
when
unused for long periods
of
time.
14.
Refer
all servicing to qualified service personneL
Servicing is required
when
the apparatus has
been
damaged
in
any
way, such as power-supply cord
or
plug
is damaged, liquid has been spilled
or
objects
have fallen into
the
apparatus,
the
apparatus has
been
exposed
to
rain
or
moisture, does not operate normally,
or
has
been
dropped.
15. This appliance shall not
be
exposed to dripping
or
splashing
water
and
that no object filled
with
liquid
such
as vases shall be placed
on
the
apparatus.
16.
CAUTION:
Visible and Invisible Laser Radiation
when
open
and
interlock defeated.
DO
NOT
STARE
INTO
BEAM.
17. Rating label is located at
the
bottom
of
enclosure.
18.
"CAUTION"
mark
is also located at
the
bottom
of
enclosure.

QUICK
START
1.
Plug the IC609 into
anAC
outlet.
---·~6·
(_)-=-.~
..
0'
00
~
-----,I
LI
_.l...-_~~
__
---===~
.--J
The Intelli
Set™
time feature automatically sets the unit's time to Eastern Standard.
2.
Press the
Power
Button to tum the unit off.
3.
Press and hold the ClockAdjust Button.
4.
While holding the ClockAdjust Button press the Time Zone Button to adjust the
time zone to your current Time Zone.
Use
the map on page 6tofind
your
time zone.
5.
Release the ClockAdjust Button to finish setting the clock.
IPLAYINGADOCKED IPOD ITUNING THE
AM/FM
RADIO
Connect the correct docking bracket onto the
1.
Press the
Power
Button
to turn the unit
Dockfor iPod, and dock the iPod. on.
2.
Press the Source Button to select
AM
or
FM
radio modes.
3.
Press the Thne +
or
Thne -Buttons to
tune the
AM
or
FM
radio.
~
,
lm
°
OO
__
,:,
- 0 0,
---
~ii
,d
j!'
---
!i
.
-:--
=-::::::-
'I·
\_~-~==------'
1.
Press the
Power
Button to turn the unit
on.
ALOFF
@
POWER
elK
ADJ
PRESET-
00
SOURCE
AL1
AL2
O.
t
~
-l
~
:
~II
2. Press the Source Button to switchthe
unit to
iPod
mode.
3.
Press the Play/Pause Button to begin
playing the docked iPod through the
speakers
of
the unit.
Extend the
FM
wire antenna to improve
FM
reception.
An
AM
antenna is built into the unit.
Adjust the position
of
the unit to
improve
AM
reception.
SNOOZE
SOURCE
AL1
CLK
ADJ
PRESET-
00
POWER
ALOFF
@
3

4
GENERAL
PRODUCT
INFORMATION
I
INTHEBOX
IC609 -Intelli
Set™
Clock Radio with
Dock for iPod
Remote Control
Docking Brackets for iPod (4)
User's
Guide &Warranty
•The apparatus shall not be exposed to dripping or splashing and that no
objects filled with liquids, such as vases, shall be placed
on
apparatus.
L'appareil
ne
doit
pas
etre expose aux ecoulements
ou
aux ec/abous-
sures
et
aucun objet
ne
contenant
de
liquide, tel qu'un vase, ne doit etre
place
sur
I'objet.
•Main plug is used as disconnect device and
it
should remain readily
operable during intended use. In order to disconnect the apparatus from
the mains completely, the mains plug should be disconnected fonn the
mains socket outlet completely.
La
prise
du secteur ne doit
pas
etre obstrUiie ou doit etre facilement
accessible
pendant
son utilisation.
Pour
etre completementdeconnecte
de
I'alimentation d'entree, la
prise
doit etre debranchee
du
secteur.
•Battery shall not be exposed to excessive heat such as sunshine, fire or
the like.
Les
piles
ne
doivent
pas
etre exposees 0
de
forte chaleur, tel
qu
'0
la
IWI/iere du soleil,
aufeu
ou
autres chases
de
semblable.
•Caution marking is located at the bottom
of
apparatus.
Les
precautions d'emploi
sont
inscrites en bas de I'appareil.
•The marking infonnationislocated at the bottom
of
apparatus.
Les
marquages
sont
inscrits en
bas
de
I'appareil.
NOTE: This equipment has been tested and found to comply with the
limits for aClass Bdigital device, pursuant to Part
15
of
the FCC Rules.
These limits are designed to provide reasonable protection against harmful
interference
in
aresidential installation. This equipment generates, uses,
and can radiate radio frequency energy and,
if
not installed and used
in
accordance with the instructions, may cause harmful interference to radio
communications. However, there is no guarantee that interference will not
occur
in
aparticular installation.
If
this equipment does cause harmful
interference to radio or television reception, which can be detennined by
turning the equipment offand on, the user
is
encouraged to try to correct
the interference
by
one or more
of
the following measures:
•Reorient or relocate the receiving antenna.
•Increase the separation betweenthe equipment and receiver.
•Connect the equipment into
an
outlet
on
acircuit different from that to
which the receiver is connected.
•Consult the dealer or
an
experienced radiorrV technician for help.
IFEATURES
Dock plays
and
charges iPod
Intelli
Set™
auto clock set
AMlFM radio with digital
tuning
Auxiliary input for iPod shuffle and
other audio devices
Dual alarm with gradual wake
Remote
Station memory presets (20 AM, 20
PM)
Last station memory
Mute function
Volume &function last user setting
Stereo headphone
jack
Digital clock
Wake to iPod, radio,
or
buzzer
Snooze &sleep function
Battery backup
Time zone button
Daylight savings time switch
0.8" LCD display with white backlight
Display dimmer control
Two integrated speakers
AC power: AC cord built-in
POWERING
THE
UNIT &
REMOTE
IUNIT
POWER
OPTIONS
ACPower
Attached AC Cord (included)
r-:=
.
,.
0::::::0
:.
---
I
i
i
I •
i •
~mmum.
.
:l
I
I
oD
c
oD
c
_._
....
_--_._.
---------.
DC Power-Backup Battery
Requires 1CR2025 battery (pre-installed)
The backup battery is for saving the time during briefpower outages. The unit cannot
prefonn
any
of
its normal functions whenpowered
off
of
the backup battery alone.
IREMOTE
POWER
OPTIONS
DC Power
Requires 1CR2025 battery (pre-installed)
,,-"C::.=::.::::.:.r""
•
OPEN
tPUSH
5

OPERATIONS
I
SETTING
THE
CLOCK
USING
INTELLI
SETI'M I
SETTING
THE
CLOCK
MANUALLY
The Intelli
Set™
time feature automatically
sets the unit's time to Eastern Standard.
I,,.,,-
•C·.:•
.:.
Follow the "Setting the Clock Using Intelli
Set™'' instructions before attempting to set
the clock manually.
1.
Press and hold the Clock
Adjust
Button.
1.
Press the
Power
Button
to
tum
the unit
off.
2.
Press and hold the
Clock
Adjust
Button.
AlOFF
@
POWER
ClK
ADJ
PRESET-
00
SOURCE
All
Use the map below to find your time
zone.
While holding the
Clock
Adjust
Button
press the Time
Zone
Button
to
adjust the time zone.
I<\EMIOST
P!.AV/PAlfif:-
AL2tO-"-l
\;
~II
2.
While holding the Clock
Adjust
Button
press the Tune -
Button
to
adjust the hour and the Tune +
Button
to adjust the minute
of
the time.
3.
Release the
Clock
Adjust
Button
to
finish setting the clock.
)
(
SOURCE Al1
ClK
ADJ
PRESET-
00
)
TIME
ZONE
DIMMER
POWER
AlOFF
@
(
3.
4.
Release the
Clock
Adjust
Button
to
finish setting the clock.
6

I
SETTINGTHEALARM
1.
Press and hold the Alarm 1
or
Alarm 2
Button.
2.
While holding the Alarm 1
or
Alarm
2Button press the Thne -Button to
adjust the hour and the Tune +Button
to adjust the minute
of
the alarm.
3.
While holding the Alarm 1
or
Alarm
2Button press the Source Button to
adjust the alarm source.
Buzz-
Wake
to
Buzzer.
OPERATIONS
",0
"",.,
"
o
~
~ ~
IL
·~I
LI
LCD
Display
After
Alarms
are
Set
The above image shows alarm 1set to sound
to the buzzer, andalarm 2
set
to soundto a
docked iPod.
AM
EST
p.
,-.
-,
,-,
o
--
, " . "
'KH'
-
--
LCD
Display
During
Setting
of
Alarm
The above image shows alarm 2is being set
to sound
to
the
AM
radio. The time will blink
during the setting
of
the alarm.
Tune FM-
Wake
to
FM
radio.
Tune
AM-
Wake
to
AM
radio.
iPod-
Wake
to
adocked iPod.
4.
Release the Alarm 1
or
Alarm 2
Button to finish setting the alarm.
To
cancel the alarm, press and hold the
Alarm
1
or
Alarm 2Button, and press the
Source Button repeatedly until the alarm
source icon
on
the display disappears.
PRESET-
aPRESET +
M1
0
AU
SNOOZE
IUSING THE DAYLIGHT SAVINGS TIME
FEATURE
The Daylight Savings Time Feature is meant to
be
activated in the Spring at the time
of
the Summer
Solstice, and deactivated in the Autumn at the time
of
the Winter Solstice.
1.
At the time
of
the Summer Solstice, press the
PowerButton to
tum
the unit off.
2.
Press and hold the ClockAdjust Button.
3.
While holding the ClockAdjust Button, press
the Daylight Savings Time Button to activate the
Daylight Savings Time Feature.
4. At the time
of
the Winter Solstice, repeat steps
1-3
to deactivate the Daylight Savings Time Feature.
OST
EST
PM'
,.,
,,
~
~
~
IL·
IL
DST
Activated
The
DST
shouldbe activated
during the Summer Solstice.
-, -
ES'
""
,.
, ,
~ ~
~
IL·
IL
DST
Deactivated
The
DST
shouldbe deactivated
during the Winter Solstice.
7

8
OPERATIONS
I
DOCKING
AN
IPOD
TO
THE
UNIT
1.
Locate the numbered bracket that fits
the iPod modelthat will be docked.
Each includedbrackethas anumber
on
it,
indicating which iPodmodel that
bracket is compatible with. See the
separate bracket chartpage to identify
which bracket is needed.
2.
Snap the bracket into place over the
iPod connector in the dock.
3.
Connect the iPod to the iPod connector
inside the dock.
TVhen
the unit is plugged
in,
it
will
charge the docked iPod.
IPLAYINGA
DOCKED
IPOD
Follow the directions for Docking
an
iPod to
the Unit.
1.
Press the Source
Button
to switch the
unit to iPodmode.
ClKADJ
PRESET-
~~F
0 0 PRESET +
@
SOU~
~1
0
2.
Press the PlaylPause
Button
to begin
playing the docked iPod through the
speakers
of
the unit.
3.
Press the Rewind and
Fast
Forward
Buttons to skip between tracks on a
docked iPod.
Press and hold the Rewind and
Fast
Forward
Buttons to search through
individual songs
on
adocked iPod.
4.
Press the PlaylPause
Button
to pause
an iPod during play.

OPERATIONS
ITUNING
THE
AM/FM RADIO
1.
Press the
Power
Button to
tum
the unit
on.
IUSING THE AUXILIARYINPUT
1.
Press the Source Button to switch to
AuxMode.
3.
Use the connected device's controls
to play, pause, stop, and skip between
tracks
on
the connected device.
Connect
an
MP3 Player
or
other audio
source to the Auxiliary Input.
Connecting an audio source to the
AuxiliaryInput requires acordwith a
3.5 mm mini-phono plug.
eLK
AOJ
PRESET-
AlOFF
0 0 PRESET +
@SOURCE
All
0
AL2
POWER
2.
2.
Press the Source Button to selectAM
or
FM
radio modes.
3.
Press the Tune +or Thne -Buttons to
tune the AM
or
FM radio.
Extend the FM wire antenna to improve
FM reception.
An
AM antenna is built into the unit.
Adjust the position
of
the unit to
improve AM reception.
Follow the directions for Tuning the AM/FM
Radio.
1.
After tuning the AM
or
FM radio to
the desired station, press the Memory
Button.
ISAVINGAN AM
OR
FM
STATION
AS
A
PRESET
Pres:.!t
numbers will blinkon the LCD
display
2.
Press the Thne +
or
Thne -Buttons
to select apreset number to save the
current radio station to.
POWER
SNOOZE
3.
Press the Memory Button to save the
current radio station to the selected
preset number.
4.
Press the Preset +and Preset -Buttons
to cycle through the saved presets.
9

UNIT
CONTROLS
&FEATURES
01
02
03
06
07
08
09
10
POWER
SNOOZE
11
::::::::::-
@
...:::::::::::
12
@@
I'
))
((
J)
~
TIME ZONE DIMMER
10

01.
MemorylDST Button
Press the Memory Buttonto save an
AM
or
FM
radio station as apreset.
Press the DST Buttonto activate
or
deactivate Daylight Savings Time.
02. Preset +/Alarm 2Button
Press the Preset +Buttonto cycle
through
AM
and
FM
radio presets.
Press and hold the Alarm 2Buttonto
set alarm
2.
03.
Preset -/Alarm 1Button
Press the Preset -Buttonto cycle
through
AM
and
FM
radio presets.
Press and hold the Alarm 1Buttonto
set alarm
1.
04. ClockAdjust/Source Button
Press and hold the ClockAdjust Button
to set the time
on
the unit.
Press the Source Button to switch
between iFod, Aux, AM, FM, and
Alarm
Off
modes.
05.
Power/Alarm OffButton
Press the PowerButtonto turn the unit
on
and off.
Press the Alarm
Off
Buttonto
tum
the
alarm
off
after it sounds.
06. Volume Button
Press the Volume Buttonto adjust the
volume
of
the unit.
07. Snooze Button
Press the Snooze Buttonto delay the
alann
for an additional 9minutes after
it sounds.
Ll'lIT
CONTROL
GLOSSARY
08. Rewind/Tune -Button
Fast Forward/Tune +Button
Press the Rewindffune- Button
or
Fast
Forwardffune +Buttonto skip from
one track to the next
on
adocked iFod.
Press and hold the RewindITune-
Button
or
Fast ForwardITune +Button
to search through
an
individual track
on
adocked iFod.
Press the Rewindffune- Button
or
Fast
Forwardffune +Buttonto tune the
AM
orFM
radio.
09. Play/Pause Button
Press the Play/Pause Button to play
or
pause adocked iFod.
10. Dock for iPod
11.
Dimmer Button
Press the DimmerButton to adjust the
brightness
of
the LCD display,
or
to
tum
the display off.
12. Time Zone Button
Press the Time Zone Buttonto adjust
the Time Zone
of
the unit.
13. Backup Battery Compartment
Requires 1CR2025 battery (pre-
installed)
14. Reset Button
Press the Reset Buttonusing apaper
clip
or
like object to restore the unit to
the manufacturer's default settings.
15. Auxiliary
Input
Use the Auxiliary Input to connect
an
MP3 player
or
other audio source to the
unit.
16. Headphone
Jack
Use the Headphone Jack to connect a
set
of
headphones
or
earbuds to the unit.
11

REMOTE
CONTROLS
&FEATURES
17
18
.;
'~:~
..
-.;
'«'-'
POWER
19
E3
M+
20
21
22
23
e
M-
24
25
+
CHAPTER
ALBUM
PLAYLIST
VOL
--
BASS
TREBLE
26
-+-+
27
12

17. Mute Button
Press the Mute Button to mute the unit's
volume.
18. Display Button
Press the Display Button to view the set
alarm times.
19. PowerButton
Press the PowerButton to
tum
the unit
off
and on.
20.
Repeat Button
Press the Repeat Button once to repeat
the current track
on
adocked iPod.
Press the Repeat Button twice to repeat
an
entire album
or
playlist
on
adocked
iPod.
21. M+/M- Button
Press the M+/M- Button to cycle
through menuitems
on
adocked iPod.
Press the M+/M- Button to cycle
through presetAM and
FM
radio
stations.
22.
Select Button
Press the Select Button to make
selections
in
the menus
of
adocked
iPod.
23.
ShufOe Button
Press the Shuffle Button to activate the
shuffle feature
on
adocked iPod.
24.
Chapter
Buttons
Press the ChapterButtons to cycle
through chapters
on
adocked iPod.
25.
Album Buttons
Press the Album Buttons to cycle
through albums
on
adocked iPod.
REMOTE
CONTROL
GLOSSARY
26.
Bass Buttons
Press the Bass Buttons to adjust the
levels
of
bass
on
the unit.
27.
Treble Buttons
Press the Treble Buttons to adjust the
level
of
treble
on
the unit.
13

REMOTE
CONTROLS
&
FEATURES
29
30
28
E~'
31
32
33
34
M-
ST/MO
++
35
CHAPTER
ALBUM
PLAYLIST
VOL
36
- -
BASS
TREBLE
(-
+)
(-
+)
14

REMOTE
&LCD
CONTROL
GLOSSARY
32. Memory Button
Press the Memory Button save
an
AM
or
FM
radio station as apreset.
33. Play/Pause Button
Press the Play!Pause Button to play
or
pause adocked iPod.
34. Dimmer Button
Press the DimmerButton to adjust the
brightness
of
the LCD display.
35. Playlist Buttons
Press the Playlist Buttons to cycle
through playlists
on
adocked iPod.
Press the Snooze Buttonto delay the
alann for
an
additional 9minutes after it 36. Volume Buttons
has sounded. Press the Volume Buttons to adjust the
volume
of
the unit.
28.
Source Button
Press the Source Buttonto switch
between iPod, Aux, AM, and
FM
modes.
29. Menu Button
Press the Menu Buttonto move to the
previous menu
on
adocked iPod.
30. Sleep/Snooze Button
Press the Sleep Button consecutively
to set the sleep timerbetween 1and
90
minutes.
31. Skip -/Skip+ Button
Press the Skip-/Skip+ Button to skip
through tracks
on
adocked iPod.
Press and hold the Skip-/Skip+ Button
to search through
an
individual track on
adocked iPod.
Press the Skip-/Skip+ Buttonto tune the
AM
or
FM
radio.
Daylight Savings
Time I I .
Time Zones
DST
SNOOZE
SLEEP
iPod
AUX
AM
FM
ST
MEM
AST
S.
~I
'--I
'~I
'~I
VOLUME
EST
~~~~
1
PM
_
TREBLE
CST
iPod
BASS
MST
~
~ ~
~
~
MUTE
PST
\:.)21
'I
'-I
'I
,
AKST
BUll
KHz
HST
rpUo~E
~
~
~
-
~
MHz
--
Memory
Alarm 1and 2
15

COMPANY
INFORMATION
IGREEN INITIATIVE
Environmental Commitment to 'Protect for Today and Sustain for Tomorrow'
2009 marks the official launch
of
DPI, Inc.'s corporate campaignfor agreener and
cleaner world. DPI and its four brands, iLive, WeatherX, Capri, and GPX, are building
upon environmental initiatives introduced at all
of
theirfacilities to help formulate and
sustain significant and important conservation efforts within its manufacturing and
marketing communities.
In
addition to targeting and selecting energy efficient product
features, and structuring 'green office' procedures, other initial program efforts include:
•Reduction
of
all packaging sizes
•Recyclable plastics for clamshell packages, with aplan to
eventually replace plastic with recyclable paper
•Recycled fiber board inplace
of
the polyfoam inpacking boxes
•Recycled plastics inplace
of
the virgin material in product construction
IINTERNATIONAL SUPPORT
To
download this User's Guide inEnglish, Spanish,
or
French, visit the support section
at www.ilive.net.
Para transferir esta guia de usuario en ingles, espafiol, 0frances, visite la secci6n de la
ayuda
en
www.ilive.net.
Pourtelecharger ce guide de l'utilisateur en anglais, espagnol, ou franl;ais, visitez la
section de soutien chez www.ilive.net.
ISERVICE INFORMATION
Address: 2116 Carr Street,
St.
Louis MO, 63106
Phone: 1-314-621-2881
Fax: 1-314-588-1805
Email: [email protected]
Parts Email: [email protected]
Website: www.ilive.net
©2009 Digital Products International (DPI, Inc.) IAll other trademarks appearing herein are the property
of
their
respective owners. Specifications are subject to change without notice

Compatibility information and Chart IC609
Please note: For additional iPod brackets, please contact customer service. Contact information for customer
service can be found on the back page
of
the instruction manual.
iPod Model Play &Charge
Compatibility Included
Bracket
~
IPodmlnl
e
4GB
6GB
[iJ
IPod e
~
4th
generation
20GB
[iJ
iPod e
~
o
4th
generation
40GB
;iPod e
~
4th generation (color display)
20GB
30GB
;iPod e
4th generation (color display)
40GB
60GB
~
iPod shuffle
1st generation
512MB
1GB
;iPod nanG e0
1st generation
1GB
2GB
4GB
~
iPod e
~
5th generation (video)
30GB
~
iPod e
~
5th generation (video)
60GB
80GB
;IPod nanG e0
@2nd generation (aluminum)
2GB
4GB
8GB
iPod shuffle
~
2nd generation
1GB
~
iPod classic e
~
®
80GB
~
IPod classic e
~
®160GB
~
IPod nanG eG)
3rd generation (video)
4GB
8GB
0
iPodtouch
e
~
1st generation
8GB
16GB
32GB
DIPhone Airplane
Mode
Only
4GB
8GB
16GB
D
iPhone3G
Airplane Mode Only
8GB
16GB
~
iPod nanG e0
4th
generation (video)
8GB
16GB
Fl
iPodtouch
e~
2nd generation
l'---o-'J
8GB
16GB
32GB

Infonnations et tableau de compatibilite des adaptateufs IC609
Anoter :pour plus d'adaptateurs iPod, contactez notre service client. Les coordonnees de notre service client
se situent
ala
derniere page du manuel d'utilisation.
Modele d'iPod
Compatiblite
de
lecture
&
mise
en
charge
Adaptateur
foumi
~
iPodmini
e
@
4Go
6Go
[iJ
iPod e
~
o4eme generation
20Go
[iJ
iPod e
~
o4eme generation
40Go
I~I
iPod e~
o4eme generation (couleur)
20Go
30Go
[~I
iPod e
o4eme generation (couleur)
40Go
60Go
~
iPod
shuffle
1
ere
generation
512Mo
lGo
;
iPodnano
e0
1
ere
generation
lGo
2Go
4Go
[i]
iPod e
~
o5eme generation (video)
30Go
[i]
iPod e
~
o5eme generation (video)
60Go
80Go
~
iPodnano
e0
@2eme generation (aluminum)
2Go
4Go
8Go
iPod shuffle
rnJ
2eme generation
lGo
1~liPod
classic e
~
@
80Go
!~]
iPod classic e~
@160Go
ijlPodnano
ee
~
3eme generation (video)
4Go
8Go
[01
iPod
touch
e
~
1
ere
generation
8Go
16Go
32Go
0iPhone
o
4Go
8Go
16Go
Airplane
Mode
Only
D;Pho
••
,.
Airplane
Mode
Only
8Go
16Go
~
iPodnano
e0
4eme generation (video)
8Go
16Go
[01
iPod
touch
e
~
2eme generation
8Go
16Go
32Go

Garantia
Limitada
90 Dias
El
rabrlc~lI\c
~aranliza
CSIC
produclo
31
comprador initial contra lodo defecto de material y
de
fabricatIon.
baJo
condiciones
nannales.
pOl'
UII
pcnodo
de
90 dias apartir de
la
fecha
de
compra inidal.
Un
aJ'o
en
partes comenzando del dia
de
tompra.
EI
fabncanlC
Ie
proporcionani partes
sOlo
alos productos rcparados
en
(:1
Dcpart<lnlCnlO
de Ser
....
icios de
iLI\"C
en
51.
Louis.
MO
y
costas
de
envlO
tlcncn que
seT
pagados pol'
eI
cheme
en
anticipo
despues
de
90
dillS.
El
fabncanlc acepta. a
su
dlscrcclon duralltc
el
pcriodo de vigencia
de
(sta garanlia. reparar lodo defcclo
de
material 0
de
fabn-
caclon 0rcempla7.ar
cl
produclo defectuoso
pol'
eI
mismo produclo sin
costO
adicional. Esla reparation 6reemplazo
(Sla
sujctal
a
13
vcnficaclon
del
dcfecto 0
del
mal funciOllaJmento
del
aparata yprucba moslrando
eI
numero de modelo de
iLi\"e
en el recibo
on~1nal
de compras con
la
fccha
Par;l
oblencr CSIC SCI"\·ICIO. cn"ic su unjdad
ascb'Urada
Ycon
el
Iranspone PAGADO POR ADELANTADO
a·
Consumer Sen'ice
2116
CARR
STREET.
ST,
LOUIS.
/\to
63106
•Embale I
..
ullldad en una caJa de
cartOn
resislenle. con
reUello
proleclor
•AdJunlc una copla de su recibo de venia para
\enticar
la
fecha de
comprol
del
produclo.
•Ineluya su llombre, dirc.ccion ynwnero de lelifono
EI
f"bncanle dccldlra
reparg
0reemplazar
eI
produclo garantizado sm COSiO achclonal
NOTA
Esl.1
guamia
no
cubf"e
rungtin
produclO
daiUdo
por
caUS3S
de
fucl7..1
mayor,
mala
utilizaciOn, negligencla, accldentc. abuso,
uso
comerclal 0modification
de
0acwlquier pane
del
producto, incluyendo
la
antena.
ESIa
garantia
no
cuhre
tampoco
los
danos causados
amedlos cxlemos como DVD. discos
oompaclOS.
diSCOS
de
larga
duration. cinlas
y/o
aparatos
de
memoria
ni
l.1mpoco
eI
COSla
de
en\ 10
del
produclo
para
su
reparatiOn.
EI
fabncarHe
no
nresponsable,
baJo
runguna
clrcU1lSlancia.
de
pirdidas (diretlas. indirtttas,
sccund:l.Tlas.
prc\
ISI3$.
ImprtvlSUS.
esp«ialesl 0
de
danos
que
rnullen
de
0
pot
el
uso
de
eSle
produclo.
IPods
no
son
cubleno por esta garanlia.
Esta garanlla
no
cubre:
los
dal\oS
que resulten de
la
utilizacion 0
del
manlelllmienlo
illCOtreClO.
de
la
conexlon auna fuenle de
\01(3)C lIIaproplada 0
de
un
rnlemo de reparaclon realizado por personal
no
aUlorizado por
el
fabricante ,Sl. Louis. MO
ESla
garanlla no cubre las
urtldade:s
fabncadas nue\·amente, los productos vendidos
TAL
CVAL 0produclos de IiquidaclOn.
Estil
gilrantia
e:s
valida
ull!cilrtle:nle
en
Estados Unidos yconflerc derechos
le~ales
espedficos. Usted puede tener
Olros
derechos
que
\·aTlaJl
de
ESlado aEstado
NOTA
Para los produclos que conlienen memoria inlema para almacenar musica, infonnacion, etc
..
la
canlidad
de
memoria que
su
slSlema opc:rall\'o
re:pona
puede "ariar scgtin
la
memoria
que:
cste aparalo indica.
IMPORTANTE:
NO
ENViE ESTE PRODUCTO AL NEGOCIO EN QUE LO COMPRO PARA REPARACION. CON-
SULTE
E$T,-\
GARANTiA
PARA
OBTENER
lNFORMACIONES
AL
RESPECTO.
Garantie
Limitee 90
Jours
Lc
construcleur garanlll
ce
prodUlI
al"acheleur initial contre lout de(aut
de
materiel ct
de:
fabrication.
en
conditions nonnates. pour
une
pCTlode
de
9fl
JOllrs
~
compler
de
la
dale d'achal initial
du
produit.
Un
an
sur des panics
de
JOur
d'achal,
Le
constructeur foumira
des
pieces sculement pour
tJ!lle
cenlre commercial service
par
produils
de
iLive a
St
Louis, MOIS.
Le
travail clles honoraires
de
S&H
dOI\'enl
ctre
P<lyes
IXIr
Ie
clienl
ilpres
l}(l-dilys,
aI'a\-ance,
Lc
cOllslrucleur
acccplC
a
son
chols, pendant
la
duree
de
cette:
~arantie,
de
reparer
toul
dUaut
de
materiel
ct
de
fabrication
ou
de
rempl<lcer
Ie
produll
dCfeclueuK
par
Ie
meme
produit sans frais. Cetle reparalioll
ou
ce
remplacement sera
efTeclu,:
moyelUlant
la
\enJicallon
du
ciCfalll
ou
du
maU"ais
fonclionnemenl
de
I'appareil et
la
presentation
d'WlC
preu\"e
d'achat dans
la
fonne
d'un
re~u
de
\'eme
oflgmal date elllllontranlie
llUmerO
de
lype
de
iLive.
Pour obtelllr
ce
SCf\'lce.
em'oyez
Ie
produit assure.
3\·ec
frel
PA
YE
D'
AVANCE
a.
Consumer
Stn·kt
2116
CARR
S11tEET,
ST,
LOUIS.
MO
63106
•
Emballe1.
\OlTe
prodwt dans
une
boile
de
canon rembourree,
•Joigllel
une
cople
de
,'olte
re~u
de
"elltes
poW"
virification
de
la
dale d'achal
du
produil.
•Indlquez "otre
nOnl,
adresse el numero
de
lelephone.
Le
conSIl\lcteur coolslra
de
rcparer ou
de
remplacer
toul
produit garanti. sans frals
REMARQUE' Celte
~aranlie
ne
coune
pas
les
produits endommages par cause
de
force
majeure. mau\"aisc utilisation, negligence,
accldenl. mauvais
lTaltemellt.
utilisauon conunerdale
ou
modification
de
ou
iquelque pan
que
ee soit
de
ees produits, ycompris
l"antenne Celte
~ar.mtle
ne
COU\TC
pas
non
plus les dommages causes
au.
.. medias exterieurs leis
que
des
DVD, disques compacts,
albwns. cassenes ellou appardls
de
memoire oi
Ie
cOUt
d'ell\"oi
du
produil pour
sa
reparallon.
En
aucun cas,
Ie
conslrucleurlle sera
pas lenu responsable des penes (direetes, indircctes, secondalres. pri\"\Ies. impre\"\les. speeiales)
ou
des dommages
qui
d6:oulent
de
ou
en
raison
de
I'ullhsalloll
de
ce
pcoduit.
IPods
ne
sont
pas
oou,"Cnure
par
celte garantie
Sam exelus de
ceUe
garantie les defauts
POU\"3inl.
sur'\"enir
par
la
sUlle
de
I'utllisatlon et
de
rel\tretien anonnaux.
du
raccordement a
WlC
source
de
tenSIon
ll1adeqU;tle
au des reparations effecluees par
do
persoMCI
non
autorise
par
Ie
constnlcteur,
51.
Louis, MO
CeUe
garalltle
nc
COU\Te
pas
les
pcodui15
fabri"",es anouveau ou les
produI15
\"Cndus
TEL QUELS
OU
produits liquides.
Ceue garanlle n'esl valable qu'aux Etats-Unis
et
"ous confere des droits lcgaux spkifiques.
Yous
POU"ez
a,'oir d'aultes droits
en
venu
des
lOIS
etallqucs
REMARQUE. Pour
les
pcoduits
""'I
conlielVlent memoirc interne pour stocker
de
la
musique. informalion. etc
..
la
quanlile
de
memo
ire
que
\'Olre
s)'stcme d' exploitation rappone peut '·arier scion
la
l1lI!moire
que
eet appareil indique.
IMPORTANT: N'ENVOYEZ
PAS
CE PRODUIT
AU
DETAIUANT
POUR RtPARATlON. LISEZ
CElTE
GARANTIE
POUR OBTENlR
DES
INFORMATIONS SUR LES SERVICES FOURNIS.
2116 CARR
STREET·
ST.
LOUIS,
MO
63106 •TEL: 314-621-2881'
FAX:
314-588-1805

,~'"
C
Lly=
Limited 90 Day Warranty
The
manufacturer warrants this product
to
the
original purchaser
to
be
free
from defects
in
material
and
workmanship, under
normal
conditions,
for
aperiod
of
90
days
from
date
of
original
purchase.
The
manufacturer agrees;
at
its
option during
the
warranty period,
to
repair
any
defect
in
material or workmanship
or
to
furnish
an
equal
product
in
exchange without charge.
Such
repair
or
replacement
is
subject
to
verification
of
the
defect
or
malfunction
and
proof
of
purchase
as
continned
by
showing iLive
Model
number
on
original
dated
sales receipt.
To
obtain service, return
the
unit insured
and
freight
PREPAID
to:
Consumer Service
2116 CARR STREET,
ST.
LOUIS,
MO
63106
-
Pack
the
unit
in
awell-padded, sturdy carton.
-Enclose a
copy
of
your sales receipt
to
verify
the
date
of
purchase.
-Include your name, address
and
phone
number.
The
manufacturer
will
elect
to
repair or replace properly warrantied product
free
of
charge.
NOTE:
This warranty
does
not
cover
any
product which
has
been subject
to
danlage
due
to
an
act
of
God,
misuse, neglect, accident, abuse, commercial
use,
or
modification
of,
or
to,
any
part
of
the
product, including
the
antenna. Damage
to
external media such
as
DVD,
CD,
LP,
tape
and/or
memory
devices
are
not
covered nor
is
the
cost incurred
in
shipping
the
unit
for
warranty
repair.
Under
no
circumstances shall
the
manufacturer
be
liable
for
any
loss
(direct, indirect, incidental, foreseen, unforeseen, special
or
consequential)
or
for
any
damage arising
out
of,
or
in
connection with,
the
use
of
this product.
iPods
are
not
covered under this
warranty.
This warranty
does
not
cover damage
due
to
improper operation or maintenance,
connection
to
improper voltage
supply,
or
attempted repair
by
anyone other than
the
manufacturer,
St.
Louis,
MO.
This warranty
does
not
cover re-manufactured units, product
sold
AS
IS
or
closeout
product.
This warranty
is
valid
only
in
the
United States
and
grants specific legal rights.
You
may
also
have
other rights which
vary
from
state
to
state.
NOTE:
For products that contain internal
memory
for
storage
of
music, data, etc.,
the
amount
of
memory
your operating system reports
may
vary
from
the
stated memory
of
this device.
IMPORTANT NOTICE: DO NOT RETURN
THIS
UNIT
TO
THE
RETAIL
STORE
FOR
SERVICE. INSTEAD,
FOLLOW
THE
ABOVE WARRANTY
SERVICE INSTRUCTIONS.
2116 CARR STREET -
ST.
LOUIS, MO 63106 -TEL: 314-621-2881-
FAX:
314-588-1805
iPod
is
atrademark
of
Apple Inc., registered
in
the U.S and other countries.
This manual suits for next models
1
Table of contents
Other iLive Clock Radio manuals

iLive
iLive ICP360 User manual

iLive
iLive ICP122W User manual

iLive
iLive ISBQ270 User manual

iLive
iLive ICP310B User manual

iLive
iLive INTELLI SET IC600B User manual

iLive
iLive ICP232B User manual

iLive
iLive ICP310B User manual

iLive
iLive ICP360 User manual

iLive
iLive ICQ988B User manual

iLive
iLive ICP200B User manual
Popular Clock Radio manuals by other brands

SOUNDMASTER
SOUNDMASTER URD480SW instruction manual

Panasonic
Panasonic RC-6088 operating instructions

Philips
Philips AJ3600/37 user manual

Sony
Sony DREAM MACHINE ICF-CD843V operating instructions

Philips/Magnavox
Philips/Magnavox AJ3925 - Cd Clock Radio instructivo de manejo

Philips
Philips AJB4300 user manual