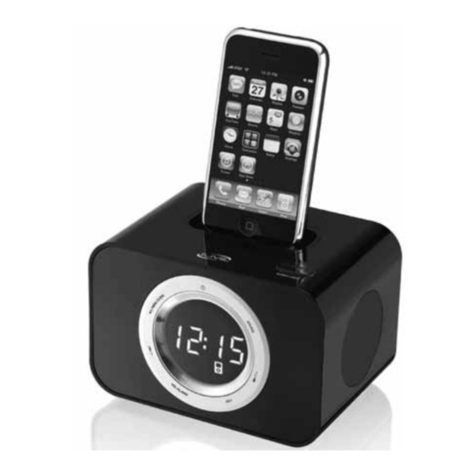
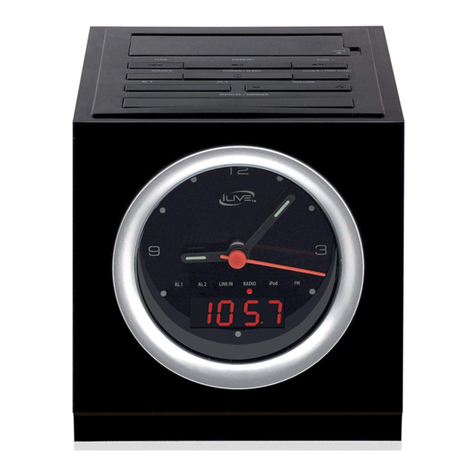
iLive ICP601B User manual

USER’S GUIDE
V:0958-0908-10
For the most up-to-date version of this User’s Guide, go to www.ilive.net
ICP601B
Clock Radio with Dock for iPod and iPhone

2 Customer Support: 1-888-999-4215 3
13. Unplugthisapparatusduringlightningstormsorwhen
unusedforlongperiodsoftime.
14. Referallservicingtoqualiedservicepersonnel.
Servicingisrequiredwhentheapparatushasbeen
damagedinanyway,suchaspower-supplycordor
plugisdamaged,liquidhasbeenspilledorobjects
havefallenintotheapparatus,theapparatushasbeen
exposedtorainormoisture,doesnotoperatenormally,
orhasbeendropped.
• WARNING:Lithiumbatteries,likeallrechargeable
batteriesarerecyclableandshouldberecycledor
disposedofinnormalhouseholdwaste.Contactyour
localgovernmentfordisposalorrecyclingpracticesin
yourarea.Theyshouldneverbeincineratedsincethey
mightexplode.
• WARNING:Shockhazard-DoNotOpen.
• AVIS: RISQUE DE CHOC ÉLECTRIQUE - NE PAS
OUVRIR
Mainsplugisusedasdisconnectdeviceanditshould
remainreadilyoperableduringintendeduse.Inorder
todisconnecttheapparatusfromthemainscompletely,
themainsplugshouldbedisconnectedfromthemains
socketoutletcompletely.
La prise du secteur est utilisé pour déconnecter le
système.
La prise du secteur ne doit pas être obstruée ou doit être
facilement accessible pendant son utilisation. Pour être
complètement déconnecté de l’alimentation d’entrée, la
prise doit être débranchée du secteur.
Donotmixoldandnewbatteries.
Donotmixalkaline,standard(carbon-zinc),or
rechargeable(ni-cad,ni-mh,etc)batteries.
No mezcle baterías viejas y nuevas.
No mezcle baterías alcalinas, estándar (carbono-zinc) o
recargables (ni-cad, ni-mh, etc.).
NOTE:Thisequipmenthasbeentestedandfoundtocomply
withthelimitsforaClassBdigitaldevice,pursuanttoPart
15oftheFCCRules.Theselimitsaredesignedtoprovide
reasonableprotectionagainstharmfulinterferenceinaresidential
installation.Thisequipmentgenerates,uses,andcanradiateradio
frequencyenergyand,ifnotinstalledandusedinaccordance
withtheinstructions,maycauseharmfulinterferencetoradio
communications.However,thereisnoguaranteethatinterference
willnotoccurinaparticularinstallation.Ifthisequipmentdoes
causeharmfulinterferencetoradioortelevisionreception,which
canbedeterminedbyturningtheequipmentoffandon,theuseris
encouragedtotrytocorrecttheinterferencebyoneormoreofthe
followingmeasures:
• Reorientorrelocatethereceivingantenna.
• Increasetheseparationbetweentheequipmentandreceiver.
• Connecttheequipmentintoanoutletonacircuitdifferentfrom
thattowhichthereceiverisconnected.
• Consultthedealeroranexperiencedradio/TVtechnicianfor
help.
• Theapparatusshallnotbeexposedtodrippingorsplashingand
thatnoobjectslledwithliquids,suchasvases,shallbeplaced
onapparatus.
L’appareil ne doit pas être exposé aux écoulements ou aux
éclaboussures et aucun objet ne contenant de liquide, tel qu’un
vase, ne doit être placé sur l’objet.
• Mainplugisusedasdisconnectdeviceanditshouldremain
readilyoperableduringintendeduse.Inordertodisconnectthe
apparatusfromthemainscompletely,themainsplugshouldbe
disconnectedformthemainssocketoutletcompletely.
La prise du secteur ne doit pas être obstruée ou doit être
facilement accessible pendant son utilisation. Pour être
complètement déconnecté de l’alimentation d’entrée, la prise doit
être débranchée du secteur.
• Batteryshallnotbeexposedtoexcessiveheatsuchassunshine,
reorthelike.
Les piles ne doivent pas être exposées à de forte chaleur, tel qu’à
la lumière du soleil, au feu ou autres choses de semblable.
• Cautionmarkingislocatedattherearorbackoftheapparatus.
Attention marquage est situé à l’arrière ou à l’arrière de
l’appareil
• Themarkinginformationislocatedattherearorbackof
apparatus.
Les informations de marquage est situé à l’arrière ou à l’arrière
de l’appareil.
FCC Warnings
Additional Warnings
• CAUTION:TOPREVENTELECTRICSHOCK,
MATCHWIDEBLADEOFPLUGTOWIDESLOT,
FULLYINSERT.
• WARNING:Toreducetheriskofreorelectricshock,
donotexposethisapparatustorainormoisture.
• AveRTIssemeNT:Pourréduirelerisqued’incendie
oudechocélectrique,nepasexposercetappareilsousla
pluieetl’humidité.
• CAUTION:Useofanycontrolsoradjustmentsor
performanceofproceduresotherthanthoseherein
speciedmayresultinhazardousradiationexposure.
• WARNING:Changesormodicationstothisunit
notexpresslyapprovedbythepartyresponsiblefor
compliancecouldvoidtheuser’sauthoritytooperatethe
equipment.
• WARNING:Donotplacetheunitontopofanysoft,
porous,orsensitivesurfacestoavoiddamagingthe
surface.Useaprotectivebarrierbetweentheunitand
surfacetoprotectthesurface.
• WARNING:Useofthisunitnearuorescentlighting
maycauseinterferenceregardinguseoftheremote.If
theunitisdisplayingerraticbehaviormoveawayfrom
anyuorescentlighting,asitmaybethecause.
• CAUTION:Dangerofexplosionifbatteryisincorrectly
replaced.Replaceonlywiththesameorequivalenttype.
• PRÉCAUTION: Danger d’explosion si les piles sont
remplacées de façon incorrect. Remplacer les piles
seulement par le même type de pile ou l’équivalent.
• WARNING:Thereisadangerofexplosionifyou
attempttochargestandardAlkalinebatteriesintheunit.
OnlyuserechargeableNiMHbatteries.
• WARNING:Theremotecontrol’sbuttoncellbattery
containsmercury.Donotputinthetrash,insteadrecycle
ordisposeofashazardouswaste
1. ReadtheseInstructions.
2. KeeptheseInstructions.
3. HeedallWarnings.
4. Followallinstructions.
5. Donotusethisapparatusnearwater.
6. Cleanonlywithadrycloth.
7. Donotblockanyventilationopenings.Installin
accordancewiththemanufacturer’sinstructions.
8. Donotinstallnearanyheatsourcessuchasradiators,
heatregisters,stoves,orotherapparatus(including
ampliers)thatproduceheat.
9. Donotdefeatthesafetypurposeofthepolarizedor
grounding-typeplug.Apolarizedplughastwoblades
withonewiderthantheother.Agroundingtypeplug
hastwobladesandathirdgroundingprong.Thewide
bladeorthethirdprongareprovidedforyoursafety.
Whentheprovidedplugdoesnottintoyouroutlet,
consultanelectricianforreplacementoftheobsolete
outlet.
10. Protectthepowercordfrombeingwalkedonor
pinchedparticularlyatplugs,conveniencereceptacles,
andthepointwheretheyexitfromtheapparatus.
11. Onlyuseattachments/accessoriesspeciedbythe
manufacturer.
12.
Warnings and Precautions Important Safety Instructions
Thelightningashwitharrowheadsymbol,within
anequilateraltriangle,isintendedtoalerttheuser
tothepresenceofuninsulated"dangerousvoltage"
withintheproduct'senclosurethatmaybeof
sufcientmagnitudetoconstituteariskofelectric
shocktopersons.
WARNING:TOREDUCETHERISKOF
ELECTRICSHOCK,DONOTREMOVE
COVER(ORBACK).NOUSER-
SERVICEABLEPARTSINSIDE.REFER
SERVICINGTOQUALIFIEDSERVICE
PERSONNEL.
ATTENTION
RISQUE D' ÉLECTROCUTION
NE PAS OUVRIR
CAUTION
RISK OF ELECTRIC SHOCK
DO NOT OPEN
Theexclamationpointwithinanequilateraltriangle
isintendedtoalerttheusertothepresenceof
importantoperatingandmaintenance(servicing)
instructionsintheliteratureaccompanyingthe
appliance.
Thissymbolindicatesthatthisproduct
incorporatesdoubleinsulationbetween
hazardousmainsvoltageanduser
accessibleparts.
Useonlywithacart,stand,tripod,
bracket,ortablespeciedbythe
manufacturer,orsoldwiththeapparatus.
Whenacartisused,usecautionwhen
movingthecart/apparatuscombinationto
avoidinjuryfromtip-over.

4 Customer Support: 1-888-999-4215 5
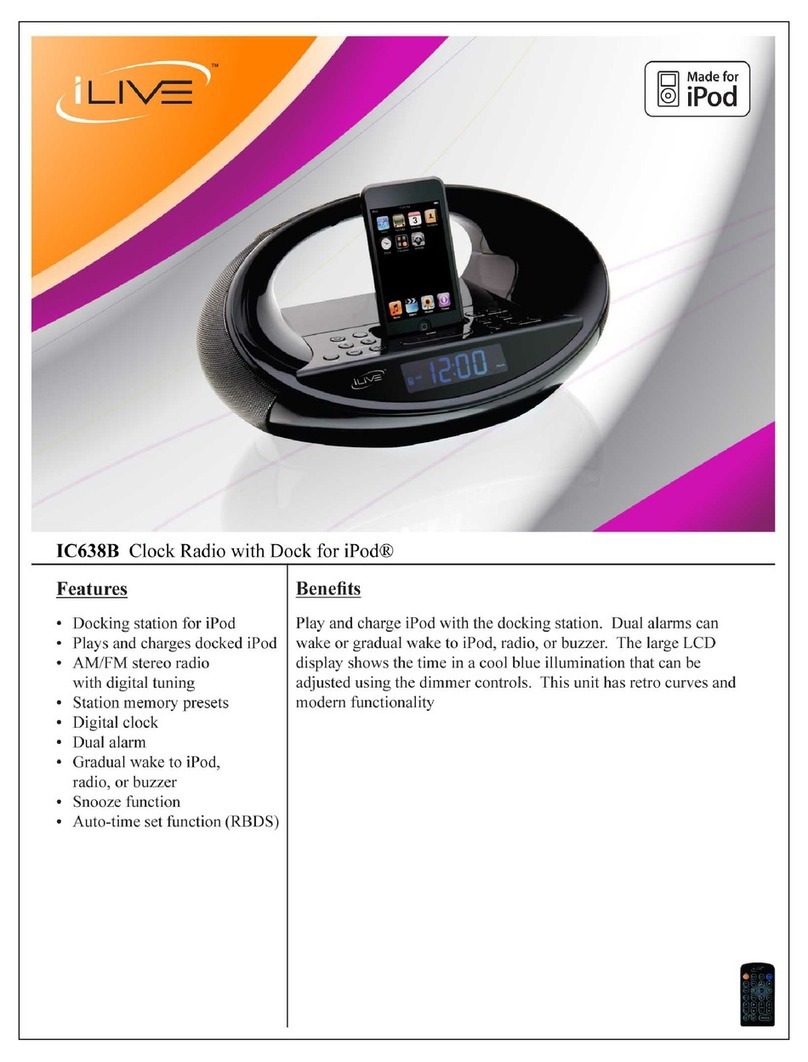
• Made for iPod and iPhone
• Plays and charges docked iPhone
and iPod
• Digital tune FM radio
• Station memory presets (20)
• Digital clock
• Dimmer control
• Dual alarm
• Gradual wake
• Wake to iPhone/iPod, radio, or
buzzer
• Sleep timer
• Snooze
• 3.5mm audio input
• Preset EQ
• Last channel memory
• Digital volume control
• Built-in speakers
• Wire FM antenna
• AC power: built-in AC power cable
• Docking brackets for iPhone/iPod
(5)
• Warranty card
• User’s guide
Clock Radio with Dock for iPod and iPhone TABLE OF CONTENTS
Features
Included
Warnings and Precautions . . . . . 2
Important Safety Instructions . . . . 3
• FCC Warnings
• Additional Warnings
Clock Radio with Dock for iPod and iPhone . 4
• Features
• Included
Introduction . . . . . . . . 6
Setup . . . . . . . . . . 8
• Power
Clock and Alarm . . . . . . . 9
• Setting the Alarms
• Cancelling the Alarm
• After the Alarm Sounds
• Setting the Clock
• Manually Setting the Clock
• Setting the Sleep Timer
iPod and iPhone . . . . . . . 10
• Docking an iPod or iPhone
• Playing a Docked iPod or iPhone
Radio and 3.5mm Audio Input . . . . 11
• Tuning the FM Radio
• Saving a Radio Station as a Preset
• Tuning to Preset Radio Stations
• Using the 3.5mm Audio Input
Company Information . . . . . . 12
• Green Initiative
• International Support
• Contact Information

6 Customer Support: 1-888-999-4215 7
Introduction
AL OFF/POWER
Press to turn the clock
radio o or on. Press to
turn the alarm o after
it has sounded.
VOLUME
Press to adjust the
volume.
PLAY/PAUSE/MEM
Press to play or pause a
docked iPod or iPhone.
Press to save the current
radio station as a preset.
LCD DISPLAY
DISPLAY
Press to view the time in
radio mode.
3.5MM AUDIO INPUT
DIMMER
Press repeatedly to
adjust the brightness of
the LCD display.
RESET
Press using a paperclip
or like object to reset
the clock radio to it’s
original settings.
FM WIRE ANTENNA
DOCK FOR iPod AND
iPhone
CLK ADJ/SOURCE
Press to set the time.
Press to adjust the
source mode.
SNOOZE
Press to delay the
alarm for an additional
9 minutes after it
has sounded. Press
repeatedly to set the
sleep timer.
PRESET ±/AL 1/AL 2
Press to cycle through
preset radio stations.
Press to set alarm 1 and
alarm 2.
REW/FWD/TUNE±/HR/
MIN
Press to skip between
tracks on a docked iPod
or iPhone. Press and
hold to search through
an individual track on a
docked iPod or iPhone.
Press to tune the radio.
Press to adjust the
hour and minute when
setting the time or
alarm.
EQ
Press to switch between
classic, rock, pop, jazz,
and normal EQ modes.

8 Customer Support: 1-888-999-4215 9
Plug the attached AC cord into a
standard AC power outlet to power the
unit.
Power
Setup Clock and Alarm
Manually Setting the Clock
Setting the Clock
Setting the Sleep Timer
Cancelling the Alarm
After the Alarm Sounds
Setting the Alarms
1. Press the POWER button to turn
the clock radio o.
2. Press and hold the CLK ADJ
button.
The time will begin to blink.
3. While holding the CLK ADJ button,
press the HR/MIN buttons to
adjust the hour and minute.
4. Release the CLK ADJ button to
nish setting the time.
1. Follow the instructions for Docking
an iPod or iPhone.
2. Press and hold the CLK ADJ button
for 3 seconds then release.
3. The time will automatically sync
with the set time on the docked
iPod or iPhone.
1. Press the POWER button to turn
the clock radio on.
2. Press the SNOOZE button
repeatedly to set the sleep timer.
The sleep timer will appear on the
display.
3. When the set sleep time expires,
the clock radio will automatically
power o.
1. Press the AL1 or AL2 buttons to
turn alarm 1 and alarm 2 o or on.
The AL1 or AL2 indicators on the LCD
display will appear when alarm 1 or
2 is active.
After the alarm sounds:
Press the AL OFF button to turn the
alarm o until the set alarm time is
reached again.
or
Press the SNOOZE button to delay the
alarm for an additional 9 minutes.
1. Press the POWER button to turn
the clock radio o.
2. Press and hold the AL1 or AL2
button.
3. While holding the AL1 or AL2
button, press the HR/MIN buttons
to adjust the hour and the minute.
4. While continuing to hold the AL1
or AL2 button, press the SOURCE
button to adjust the alarm source.
Buzz - Wake to Buzzer
Tune FM - Wake to the FM radio
iPod - Wake to a docked iPod
5. Release the AL1 or AL2 button to
nish setting the alarm.

10 Customer Support: 1-888-999-4215 11
iPod and iPhone Radio and 3.5mm Audio Input
Tuning the FM Radio Using the 3.5mm Audio Input
Tuning to Preset Radio Stations
Saving a Radio Station as a Preset
1. Press the POWER button to turn
the clock radio on.
2. Press the SOURCE button to
switch to FM radio mode.
3. Press the TUNE ± buttons to tune
the FM radio.
Requires a 3.5mm audio cable (not
included)
1. Press the POWER button to turn
the clock radio on.
2. Press the SOURCE button to
switch to AUX mode.
3. Connect an MP3 player or other
audio source to the 3.5MM AUDIO
INPUT using a 3.5mm audio cable.
4. Use the connected device’s native
controls to play, pause, and control
your music.
1. Follow the instructions for Tuning
the FM Radio and Saving a Radio
Station as a Preset.
2. Press the PRESET ± buttons to
cycle through saved radio stations.
1. Follow the instructions for Tuning
the FM Radio.
2. Press the PLAY/PAUSE/MEM
button.
The preset number will begin to blink
on the LCD display.
3. Press the PRESET ± buttons to
adjust the preset number.
4. Press the PLAY/PAUSE/MEM
button to save the current FM
radio station to the selected preset
number.
Docking an iPod or iPhone
1. Locate the numbered bracket that
ts the iPhone/iPod model that will
be docked.
Each included bracket has a number
on it, indicating which iPhone/iPod
model that bracket is compatible
with. See the separate bracket chart
page to identify which bracket is
needed.
2. Snap the bracket into place over
the iPhone/iPod connector in the
dock.
3. Connect the iPhone or iPod to
the connector inside the Dock for
iPhone/iPod.
4. When the dock is plugged in, using
AC power, the docked iPhone or
iPod will charge.
Playing a Docked iPod or iPhone
1. Follow the instructions for Docking
an iPod or iPhone.
2. Press the SOURCE button to
switch to iPod mode.
3. Press the PLAY/PAUSE button to
begin playing the docked iPod or
iPhone.

Copyright © 2010 Digital Products International (DPI, Inc.) | All other trademarks appearing herein are the property of their respective
owners. Specications are subject to change without notice
Environmental Commitment to ‘Protect
for Today and Sustain for Tomorrow’
2009 marked the ocial launch of DPI,
Inc.’s corporate campaign for a greener
and cleaner world. DPI is building upon
environmental initiatives introduced
at all of their facilities to help
formulate and sustain signicant and
important conservation eorts within
its manufacturing and marketing
communities. In addition to targeting
and selecting energy ecient product
features, and structuring ‘green oce’
procedures, other initial program
eorts include:
• Reduction of all packaging sizes
• Recyclable plastics for clamshell
packages, with a plan to eventually
replace plastic with recyclable
paper
• Recycled ber board in place of the
polyfoam in packing boxes
• Recycled plastics in place of
the virgin material in product
construction
To download this User’s Guide in
English, Spanish, or French, visit the
support section at www.gpx.com.
Para transferir esta guía de usuario
en inglés, español, o francés, visite la
sección de la ayuda en www.gpx.com.
Pour télécharger ce guide de
l’utilisateur en anglais, espagnol, ou
français, visitez la section de soutien
chez www.gpx.com.
Phone: 1-888-999-4215
Email: prodinf[email protected]
Parts Email: par[email protected]
Website: www.gpx.com
Green Initiative International Support
Contact Information
Company Information
Table of contents
Other iLive Clock Radio manuals

iLive
iLive ICQ988B User manual

iLive
iLive IC109 User manual

iLive
iLive ICP310B User manual

iLive
iLive ICP232B User manual

iLive
iLive ICP122W User manual

iLive
iLive ICP360 User manual

iLive
iLive ICQ988 User manual

iLive
iLive INTELLI SET IC600B User manual

iLive
iLive ICP200B User manual

iLive
iLive IKBC384S User manual
Popular Clock Radio manuals by other brands

Oregon Scientific
Oregon Scientific EasyPlus EC101 user manual

HoMedics
HoMedics SoundSpa Fusion SS-6500 Instruction manual and warranty information

Philips
Philips D 3540 Quick manual

Spectra
Spectra Hello Kitty KT2089 owner's manual

Jensen
Jensen JCR-332 instruction manual

Sony
Sony ICF-CD853V operating instructions