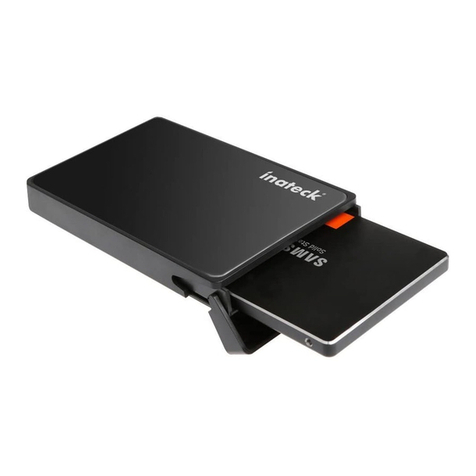
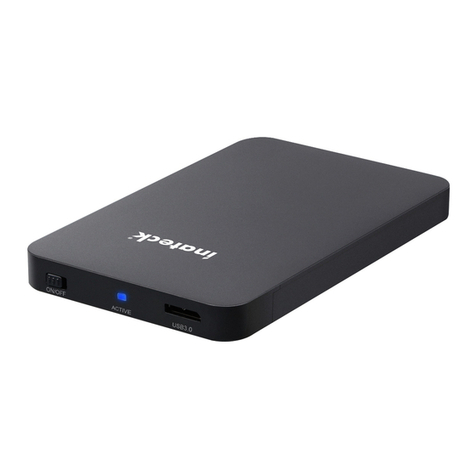
Inateck FE2013 User manual

Instruction Manual
FE2013 Ultra slim 2.5 Inch HDD Enclosure
English · Deutsch · 日本語 · Français · Italiano · Español

1
Scheme image of the enclosure
English
No. Name
AUSB3.0
BPower Switch with LED indicator
CSATA Interface
A
B
C
Hard Drive Installation
a. Open the enclosure by pushing the two parts in opposite
direction.

2
Product name Ultra slim 2.5 Inch HDD Enclosure
Product type Inateck FE2013
material ABS plastic
Weight 87g
Color black
UASP Supported
Supported drives interface SATAIII/II/I
Maximum height of drives Height of up to 9.5mm HDD/SSD supported
Product specications
b. Lay hard disk into enclosure with SATA interface aligned.
c. Close the enclosure as the picture displays.
d. Connect enclosure with computer by USB cable.
e. Switch on the enclosure and corresponding drive will
appear in le manager.
1
2

3
Hot plug,plug&play supported
Switch Yes
Licenses CE,FCC
Measurements 132.6x81.5x15.6mm
Supported OS Windows XP/7/8/10;Mac9.0 or above,Linux
Packing list
Inateck FE2013 × 1
USB 3.0 data cable × 1
Instruction manual × 1
Sponge Pad × 1
Note
a. Make sure data access and transfer are stopped when
remove the hard drive enclosure from computer, otherwise
data loss might happen.
b. To ensure normal work, please make sure the rated power of
hard drive complies with the output power of the USB port
on the hard drive enclosure.
c. Hard drive will automatically start sleep mode if idle state
lasts 30 minutes, when LED comes into breathing light state.
Data access to the drive will restore operational mode.
d. Normally a drive can be used with the enclosure directly,
which will be shown as "New Disk" on computer. If
"New Disk" does not appear, there might be something
wrong with your disk partition or format. In that case,
please use the partition and formatting program that
come with system to reformat the hard drive. (Right click
“Computer”>Management>Disk Management)
e. Due to dierent thickness of 2.5”hard drive, a sponge pad
was provided. Users are suggested to paste the pad on the
inner side of the enclosure shell, to avoid hard drive sliding
if it is too thin.

4
Produktübersicht
Deutsch
Nr. Name
AUSB 3.0 Anschluss
BNetzschalter mit LED-Anzeige
CSATA-Schnittstelle
A
B
C
HDD-Einbau und Betrieb
a. Öffnen Sie das Gehäuse, indem Sie die Hälften
gegeneinander verschieben.

5
Produktname Ultradünnes 2,5” HDD/ SSD Gehäuse
Typenbezeichnung Inateck FE2013
Material ABS-Kunststo
Gewicht 87g
Farbe Schwarz
UASP Unterstützt
Unterstützte Laufwerkschnittstelle SATA III/ II/ I
Maximale Bauhöhe der Laufwerke Bis zu 9,5 mm HDD/ SSD
Technische Daten
b. Führen Sie das Laufwerk vorsichtig ein, orientierend an der
SATA-Schnittstelle.
c. Schließen Sie das Gehäuse wieder wie abgebildet.
d. Verbinden Sie das Gehäuse mit dem Rechner über das USB-
Kabel.
e. Nach dem Einschalten des Gehäuses sollte das Laufwerk im
System auftauchen.
1
2

6
Hot Plug, Plug & Play Unterstützt
Netzschalter Ja
Zertikanzen CE, FCC
Maße 132.6x81.5x15.6mm
Unterstützte Betriebssysteme Windows XP/ 7/ 8/ 10; Mac 9.0 und höher; Linux
Lieferumfang
Inateck FE2013 × 1
USB 3.0 Datenkabel × 1
Bedienungsanleitung × 1
Schaumstoeinlage × 1
Bitte beachten
a. Bitte stellen Sie sicher, dass jeglicher Datentransfer und
Datenzugri vor dem Entfernen von Datenträgern gestoppt
wurde, um Datenverlust zu vermeiden.
b. Um einen stabilen Betrieb zu gewährleisten, stellen Sie
bitte sicher, dass der Stromabgriff der Laufwerke nicht
den bereitgestellten Maximalstrom der USB-Schnittstelle
überschreitet.
c. Bei Nichtzugriff geht das angeschlossene Laufwerk nach
30 Minuten automatisch in den Ruhemodus, die LED blinkt
dann alle drei Sekunden. Bei erneutem Zugriff wird das
Laufwerk wieder in den Betriebsmodus versetzt.
d. Im Normalfall kann ein Laufwerk direkt mit dem Gehäuse
verwendet werden, welches dass als „Neuer Datenträger“ im
System erscheint. Sollte der Datenträger nicht auftauchen,
ist eventuell eine Reinitialisierung und Neuformatierung
notwendig. Sie können die Datenträgerverwaltung des
Systems dafür verwenden (Rechtsklick “Computer” ->
Verwalten -> Datenträgerverwaltung).

7
e. Aufgrund verschiedener Bauhöhen von Laufwerken liegt
dem Produkt eine selbstklebende Schaumstoeinlage bei.
Es ist empfohlen, die Einlage bei dünneren Laufwerken an
der Innenseite des Gehäuses oder an der Oberseite des
Laufwerks zu befestigen, um ein Verrutschen des dünnen
Laufwerks zu vermeiden.

8
エンクロージャ構成図
日本語
番号 各部の名称
AUSB3.0
BLED インジケーター付き電源スイッチ
CSATA インターフェイス
A
B
C
ハードディスクインストールステップ
a. 2 つの部分を反対方向に押して、エンクロージャを開けます。

9
製品名 超薄型 2.5 インチ HDD エンクロージャ
製品番号 Inateck FE2013
材料 ABS プラスチック
重量 t 87g
製品色 ブラック
UASP サポート
インターフェイス SATAIII/II/I
最大対応可能ドライブ高さ 最大高さ 9.5mm の HDD/SSD 対応可能
製品仕様
b. SATA インターフェイスを揃えてハードディスクをエンクロ
ージャに押し込みます。
c. 図示のように、エンクロージャを閉じます。
d. USB ケーブル経由にてエンクロージャをコンピュータに接
続します。
e. エンクロージャのスイッチを入れると、対応ドライブがフ
ァイルマネージャーに表示されます。
1
2

10
ホットプラグ、プラグ&プレイ サポート
スイッチ サポート
ライセンス CE,FCC
外見寸法 132.6x81.5x15.6mm
対応可能 OS Windows XP/7/8/10;Mac9.0 及び以降、Linux
パッケージ内容
Inateck FE2013 × 1
USB 3.0 データケーブル × 1
取扱説明書 × 1
スポンジパッド × 1
ご注意
a. PC からエンクロージャを取り外す前に、データの読み取り
を停止してください。強制的に抜くと、メインデータが壊
れたり、無くしたりする可能性があります。
b. 正常に動作するように、ハードドライブの定格電力がハー
ドドライブエンクロージャ USB ポートの出力電力に適合し
ていることを確認してください。
c. アイドル状態が 30 分間持続すると、ハードドライブは自動
的にスリープモードに入り、LED がゆっくりと点滅になり
ます。ドライブへのデータアクセスによってスリープモー
ドから復元させます。
d. 通常は、ドライブをエンクロージャと直接使用することが
できます。エンクロージャは、コンピュータに「新しいデ
ィスク」として表示されます。 「新しいディスク」が表示
されない場合は、ディスクパーティションまたはフォーマ
ットに問題がある可能性があります。 その場合は、システ
ムに付属のパーティションとフォーマットプログラムを使
用して、ハードドライブを再フォーマットしてください。「コ
ンピュータ」を右クリック > 管理 > ディスク管理)(*フ
ォーマットする時に、事前に必ずバックアップを取ってく
ださい。)

11
e. 2.5 インチ HDD のサイズは、縦横の長さは全製品ほぼ同じ
ですが、製品によって厚さが異なります 。薄すぎる HDD
をエンクロージャに取り付ける時に揺れることを避けるた
めに、付属されたスポンジパッドをエンクロージャシェル
の内側に貼り付けることを推奨します。

12
Image du schéma du boîtier
Français
No. Désignation
AUSB3.0
BInterrupteur d'alimentation avec indicateur LED
CInterface SATA
A
B
C
Installation du disque dur
a. Ouvrez le boîtier en appuyant sur les deux parties en sens
inverse.

13
Désignation Boitier Disque dur 2.5 pouces ultra-n pour HDD/
SSD
Modèle Inateck FE2013
Matériau Plastique ABS
Poids 87g
Couleur Noir
UASP Support
Interfaces du disque supportés SATAIII/II/I
Hauteur maximale des disques Hauteur jusqu'à 9,5 mm HDD / SSD pris en charge
Spécications du produit
b. Collez le disque dur dans le boîtier avec l'interface SATA
alignée.
c. Fermez le boîtier lorsque l'image s'ache.
d. Connectez le boîtier à l'ordinateur par un câble USB.
e. Allumez le boîtier et le drive correspondant apparaîtra dans
le gestionnaire de chiers.
1
2

14
Hot plug,plug&play Support
commutateur Oui
Licences CE,FCC
Dimensions 132.6x81.5x15.6mm
OS supportés Windows XP/7/8/10;Mac9.0 ou supérieur ,Linux
Contenue d’emballage
Inateck FE2013 × 1
Câble de données USB 3.0 × 1
Manuel d'instructions × 1
éponge × 1
Note
a. Assurez-vous que l'accès et le transfert des données sont
arrêtés lorsque vous retirez l’adaptateur du disque dur de
l'ordinateur, sinon la perte de données pourrait se produire.
b. Pour assurer un travail normal, assurez-vous que la puissance
nominale du disque dur est conforme à la puissance de
sortie du port USB sur le boîtier du disque dur.
c. Le disque dur démarre automatiquement le mode veille
si l'état de repos dure 30 minutes, lorsque le voyant LED
clignote toutes les trois secondes. L'accès aux données à
l'adaptateur rétablira le mode opérationnel.
d. Normalement, un drive peut être utilisé avec le boîtier
directement, qui sera affiché comme «Nouveau disque»
sur l'ordinateur. Si "Nouveau disque" n'apparaît pas, il se
peut qu'il y ait une erreur dans votre partition ou format de
disque. Dans ce cas, utilisez le programme de partition et
de formatage avec système pour reformater le disque dur.
(Cliquez avec le bouton droit de la souris sur "Ordinateur">
Gestion> Gestion des disques)

15
e. Due to dierent thickness of 2.5”hard drive, a sponge pad
was provided.Les utilisateurs sont suggérés pour coller l’
éponge sur le côté intérieur de la coque du boîtier, pour
éviter les disque dur coulissant si elle est trop mince.

16
Panoramica del prodotto
Italiano
No. Nome
AUSB3.0
BInterruttore alimentazione con spia LED
CInterfaccia SATA
A
B
C
Installazione Hard Drive
a. Aprire la custodia spingendo le due parti in direzioni
opposte.

17
Tipo prodotto Box custodia Ultra slim per HDD 2.5 pollici
Nome prodotto Inateck FE2013
Materiale Plastica ABS
Peso 87g
Colore nero
UASP Supportato
Interfacce drive compatibili SATA III/II/I
Altezza massima drive HDD/SSD di altezza no a 9.5mm
Speciche prodotto
b. Collocare il disco rigido nella custodia facendo
corrispondere i connettori SATA.
c. Chiudere la custodia come illustrato nell’immagine.
d. Collegare la custodia al computer per mezzo del cavo USB
3.0 in dotazione
e. Accendere la custodia. Il disco rigido apparirà nel File
Manager.
1
2

18
Hot plug,plug&play supportati
Interruttore sì
Certicazioni CE,FCC
Dimensioni 132.6x81.5x15.6mm
Sistemi operativi supportati Windows XP/7/8/10;Mac9.0 o superiori,Linux
La confezione contiene
Inateck FE2013 × 1
Cavo dati USB 3.0 × 1
Manuale di istruzioni × 1
Cuscinetto in gommapiuma × 1
Note
a. Non rimuovere mai la box dal computer se l’hard drive disk
è in uso o attivo: si corre il rischio di danneggiarlo e di
perdere i dati in esso contenuti.
b. Assicurarsi che che l’alimentazione necessaria per l’hard disk
sia supportata dalla porta output USB della custodia.
c. La custodia attiverà la modalità sleep se la connessione
rimane inattiva per più di 30 minuti. La spia LED si illumina a
intermittenza. Se si accede ai dati, il drive ritorna in attività.
d. Normalmente un nuovo disco rigido viene riconosciuto
immediatamente e mostrato come “Nuovo disco” sul
computer. Se ciò non avviene, è possibile che ci siano
errori nella partizione o nella formattazione del disco. In
tal caso, è necessario usare il programma di partizione e
formattazione fornito dal sistema (Click sul pulsante destro
Computer”>Management>Disk Management).
e. A causa dei diversi spessori di alcuni hard disk da 2.5”, può
essere necessario utilizzare il cuscinetto in gommapiuma. Si
consiglia di attaccare il cuscinetto nella parte interna della
scocca della custodia, per evitare che il disco rigido scivoli
via se troppo sottile.

19
Diagrama del producto
Español
No. Nombre
AUSB3.0
BInterruptor de alimentación con luz testigo LED
CInterfaz SATA
A
B
C
Instalación disco duro
a. Abrir la carcasa haciendo deslizar las dos partes en
direcciones contrarias.
Table of contents
Languages:
Other Inateck Enclosure manuals

Inateck
Inateck FEU3NS-1 User manual

Inateck
Inateck FE2004C User manual

Inateck
Inateck FE3001 User manual

Inateck
Inateck FE2007 User manual

Inateck
Inateck SA01001 User manual

Inateck
Inateck FE2004 User manual

Inateck
Inateck FE2101 User manual

Inateck
Inateck FE2004 User manual

Inateck
Inateck FEU3NS-1E User manual

Inateck
Inateck FE2010 User manual

Inateck
Inateck FE2101 User manual

Inateck
Inateck FE2005 User manual

Inateck
Inateck FE2005C User manual

Inateck
Inateck FE3002 User manual

Inateck
Inateck FE2009 User manual
Inateck
Inateck FE2011 User manual

Inateck
Inateck ToolFree SA01003 User manual
Inateck
Inateck SA01004 User manual
Inateck
Inateck FE2012N User manual