INDRA Smart LUX User manual

IMAGE OF SMART LUX
Grey Background
Indra Smart LUX™
User Guide
Be at the forefront of EV charging with
Indra’s pioneering technology

Important Safety Notes
WARNING: Smart LUX™ charger installation must only be performed by a
certied electrician.
WARNING: Use the Smart LUX™ only as directed.
WARNING: Do not use the Smart LUX™ if it is defective, appears broken,
cracked or fails to operate or is otherwise damaged. In this case, you must
report the damage immediately to your original installation partner, quoting
the serial number as shown on the product label.
WARNING: Do not insert any foreign objects into the Smart LUX™
or its charging lead.
WARNING: Do not expose the Smart LUX™ or its components to open ames.
WARNING: Do not expose the Smart LUX™ to heating equipment.
WARNING: Do not immerse the Smart LUX™ or its components in
water or other uids.
WARNING: The Smart LUX™ is not to be used by persons (including children)
with reduced physical, sensory or mental capabilities, or lack of experience and
knowledge, unless they have been given supervision or instruction concerning
use of the device by a person responsible for their safety.
WARNING: Install the Smart LUX™ in a location that mitigates damage
from ooding.
WARNING: Operating or storing the Smart LUX™ in temperatures outside
its specied range may cause damage to the charger.
CAUTION: Ensure that no water sources are above or near the Smart LUX™,
such as taps or sprinklers.
CAUTION: Ensure that the charging lead is correctly and neatly stowed after
use, to prevent any inadvertent tripping hazards.
2 Indra Smart LUX™ User Guide

3

4 Indra Smart LUX™ User Guide
Specications
Key features
Solar
matching
Load
limiting
Load
curtailment
Ready-by
time
Unrivalled
durability
Electrical
Rated power 7.4kW
Charging current 6A-32A variable
Protection 6mA DC leakage detection
Standby consumption <5W
Compliance
CE Marked and UKCA
Standards and regulations The Electric Vehicles (Smart Charge
Points) Regulations 2021, BS EN 50581,
BS EN 60529, BS EN 61010-1, BS EN
61851-1, IEC 61851-21-2, IEC 61851-22,
BS 7671, BS 7671 Amendment 2, G100
Mechanical
Dimensions 201mm x 306mm x 78mm (WxHxD)
Weight 4.0kg (with 6m charging lead)
Operating Temperature -20°C to +50°C
Enclosure Polycarbonate, IP67 rated
Impact Rating IK10

Controls and Indicators
1
2
3
4
5
6
Primary Status LED
Multi-coloured, highlighting the operational state and mode
Charging Status Ascending LEDs
Four individual LEDs indicating whether the unit is disconnected from your EV,
connected but idle or charging
Turbine Indicator LEDs
A ‘halo’ of LEDs complimenting the Charging Status Ascending LEDs, providing
a unique lighting sequence for each charger interaction
Tethered Charging Lead
Your charger will come with a 6m or 10m charging lead attached
BOOST Button
If you need to override your pre-set schedule, press BOOST on the
unit or in the App to charge instantaneously at maximum rate
RFID scanner
Tap your RFID tag in the area of this icon to activate RFID functionality within
your Indra App
1
2
3
4
5
6
5

Welcome
Congratulations on your purchase of a Smart LUX™! The Indra team hope you’ll be
delighted with the features, quality and user experience of the Smart LUX™.
This guide covers how to get started with your Smart LUX™, explains key features,
troubleshooting tips and important safety and warranty information.
It is important that you read this guide carefully before using the Smart LUX™, so
you’re completely familiar with all features and safety advice and are able to get the
most from your Smart LUX™.
Overview
The Smart LUX™ is a permanently installed electric vehicle charger providing up to
32 Amps (7.4kW) at 230V, 50Hz. There are 8 Smart LUX™ variants:
• Smart LUX™, Type 2 Tethered, Symphony Black, 6m (SMNFGT2BL401)
• Smart LUX™, Type 2 Tethered, Symphony Black, 10m (SMNFGT2BL402)
• Smart LUX™, Type 2 Tethered, Indra White, 6m (SMNFGT2WH401)
• Smart LUX™, Type 2 Tethered, Indra White, 10m (SMNFGT2WH402)
• Smart LUX™, Type 2 Tethered, Elgar Grey, 6m (SMNFGT2GY402)
• Smart LUX™, Type 2 Tethered, Elgar Grey, 10m (SMNFGT2GY404)
• Smart LUX™, Type 2 Tethered, Malvern Stone, 6m (SMNFGT2GY401)
• Smart LUX™, Type 2 Tethered, Malvern Stone, 10m (SMNFGT2GY403)
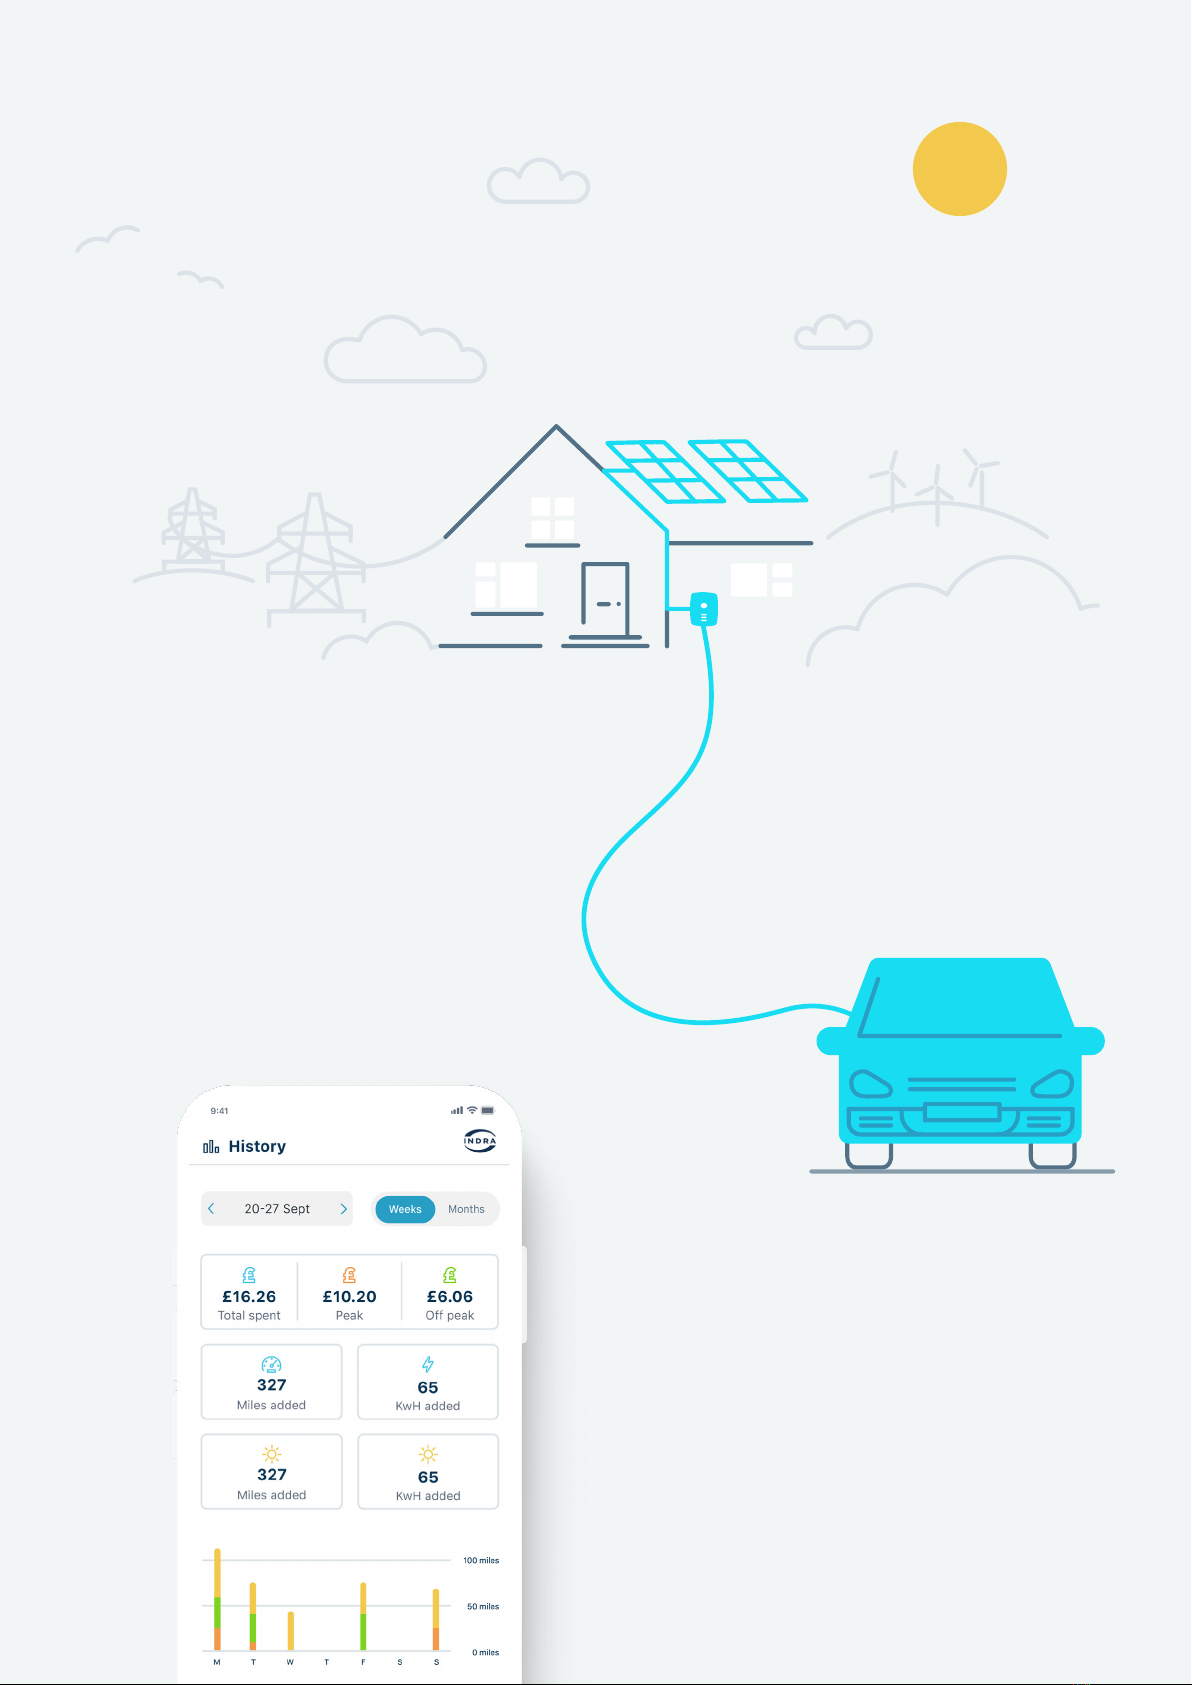
The Smart LUX™ works like conventional chargers, but also oers a range of smart
charging modes, designed to take advantage of local generation (e.g. solar PV),
variable rate taris (e.g. Time of Use). In all modes, the Smart LUX™ calculates the
best charging schedule that gets your EV ready when you need it.
6 Indra Smart LUX™ User Guide

Downloading the Indra App
Once your Smart LUX™ charger has been installed, you will need to download the Indra
App from your phone’s App store. Alternatively scan the QR code below and follow the
instructions.
When requested please scan or enter the MAC address via the QR code located on the left
hand side of the charger. Please note: in some instances it may take up to 48 hours for a
newly installed charger to pair with the Indra App. Should you experience any diculties,
please contact support@indra.co.uk.
Designed to assist you in getting the most out of your Smart LUX™, the Indra App is intuitive
to use and enables you to manage all the smart charging functionality of your Smart LUX™
from the palm of your hand. Creating an account takes minutes and once signed in you will
be guided through the initial set-up and details of the key smart features, including:
Smart Charging Solar Power
Using Boost
Use the Indra App to set up a recurring
charging schedule. Choose regular slots
throughout the week, and the charger will
automatically start charging during those
times, as long as your EV is plugged in of
course.
If you have solar panels installed at home,
your charger can be set up to receive power
from them. The charger will take any surplus
solar power that’s above 1.4kW not being
used by your home, to charge your EV.
Plans changed? The Smart LUX™ Boost
feature lets you temporarily override your
schedule to get your car fully charged as
soon as possible.
Charging History
View your charging history on the app,
review your usage and check if you’re
charging at the most ecient time.
7

Getting set up
The rst time you open the Indra App, you’ll be asked to set up your charger. This
should only take a few minutes to complete.
We’ll ask you for information about yourself, your EV and your electricity supplier
and tari. Having this information means we can calculate your charging times,
electricity usage and amount spent correctly, which will enable you to optimise your
smart charging. If you skip any steps in the set-up stage, you can do them later via the
settings section.
You can still charge your EV without going through the set-up process, but you won’t
be making the most of your charger’s advanced features.
Info we’ll need about your EV:
• Vehicle name (the nickname you want to call it in the app)
• Number plate (we’ll use this to nd out more about your vehicle, such as its make
and model)
8 Indra Smart LUX™ User Guide

Info we’ll need about your electricity supplier
Telling us about your electricity supplier and your tari means we can help you charge
at the most ecient times for you. By providing your electricity rate, we can not only
calculate and show you how much you’re spending, but you can also set the amount
of money you want to spend on a charging session (e.g. adding £5-worth of charge to
your car). We will ask you for details on:
• Who your supplier is
• Name of your tari
• What kind of tari you have
• What the unit (kWh) price is for your electricity
• Tari end date (if you have one)
9

Notications
We’d like to send you notications about your charging status. You can choose which
notications you want to receive as well as how and when you want to receive them.
This is something you have complete control over, and we promise to never send you
unwanted messages.
There are three types of notication:
• Push notications (which go direct to your phone)
• In-app notications (which pop up while you’re using the app)
• Emails
Notications you can choose to receive include:
• Vehicle plugged in
• Charging started
• Charging nished
• Charging error
• Charger error
10 Indra Smart LUX™ User Guide

Setting up scheduling and smart charging
Use the Indra App to set up a regular charging schedule. You can choose regular slots
throughout the week and the charger will automatically start charging during those
times, as long as your EV is plugged in.
The app enables you to set the times and days/nights you want to charge and also
how much energy to add (by miles, kWh or amount of money).
If you have more than one electricity tari rate (e.g. peak and o-peak), you can
set up smart charging to charge your vehicle as much as possible during your lower
rate period.
Default schedules
Your charger will come with a default charging schedule, as required by government
legislation. This schedule is designed to reduce power demand at peak times and
protect the national grid. But it might not be the best charging schedule for your
needs, so we recommend you set up your own schedule once your charger is installed.
11

Charging lead stowage
Tethered Variants
• We recommend that you use the charging lead hook provided with the charger
when stowing your charging lead.
• Depending on the layout of your charger, you may want to t the charging lead
hook below, above or to the side of your Smart LUX™ charger.
• You can also use the top lip of the Smart LUX™ charger to wrap and store the
charging lead, and it has been designed with this in mind.
NOTE: APPROPRIATE CHARGING LEAD STOWAGE IS ESSENTIAL TO PREVENT
INADVERTANT TRIPS/ FALLS OR DAMAGE TO THE EV CONNECTOR
Turbine lights
A unique light sequence provides a welcoming handshake and communicates the
charger’s status. These lights trace around the full circumference of the front panel
and are visable through the turbine of the charger.
The Turbine lights can be turned o via the Indra App at any time via the settings.
12 Indra Smart LUX™ User Guide

What do the LEDs on my charger’s front
panel mean?
There are two separate LED indicators on the Smart LUX™. The Primary LED indicates the
charger status, while the four panel LEDs highlight the charger’s current mode. Each of
these will illuminate a dierent colour and will emit a sequence of ashes that indicates the
charger’s current state.
Primary LED lit, white
A solid white LED indicates that the Smart LUX™ is set up and ready to go. The
charger is now in smart mode and will charge based on the schedule set up in the
Indra App.
Primary LED lit, blue
The Smart LUX™ is in Boost mode, which is activated using your Indra App or by
pressing the Boost button on the charger.
Primary LED lit, yellow
The Smart LUX™ is in Solar mode and is accessing energy generated from solar
panels to charge the EV. You can set this up under ‘Electricity Supplier’ in your
Settings menu within your Indra App. When selected, the charger will automatically
use energy from your solar panels when it’s available.
Primary LED ashing, white
The Smart LUX™ has successfully connected to the Internet and is almost ready to
start charging. If the unit has been switched o for a long period without being
connected to the Internet, then this process may take some time, please contact
Indra Customer Support for a more accurate timeframe.
LEDs relating to the primary LED light:
ALL LEDs are o
The Smart LUX™ is not receiving power. It may be disconnected from the mains.
Check all the switches in your consumer unit are correctly set.
13

Primary LED ashing, blue
The Smart LUX™ is processing a software update. Ensure the charger is online and
that no charging is taking place during this process.
Primary LED solid or ashing, red
Flashing – The charger has identied a potential fault in the supply network and
has stopped charging for safety reasons. If this state endures, power cycle the
charger by turning it o at the consumer unit then back on after a few minutes. If
the charger continues to ash red then call Indra Customer Support on (+44) 01684
770 631.
Solid Red – the charger has detected an error. Power cycle the charger by turning
it o at the consumer unit then back on after a few minutes. If the RED light
continues to display the call Indra Customer Support on (+44) 01684 770 631.
Primary LED ashing, purple
A ashing purple light on the Smart LUX™ indicates that it has lost
communication with the Internet or the Indra App.
14 Indra Smart LUX™ User Guide

4 panel LEDs are racing downwards
The Smart LUX™ is in charging mode and your EV is currently being charged.
Green when a charge is scheduled
The Smart LUX™ is not currently charging, but the EV is connected and a charging
session has been scheduled.
Flashing Green - Fixed Load Calibration
The installation engineer has triggered the Fixed Calibration Load function
as part of the charger’s set-up process. This will only be seen by the installer
during installation.
Charging Status Ascending LEDs:
4 panel LEDs are o
If the four panel LEDs below the primary LED are o, then the Smart LUX™ is
not connected to the EV.
4 panel LEDs are lit
With the four panel LEDs illuminated, the Smart LUX™ is connected to the
EV and is currently in ‘idle’ mode, waiting to charge.
4
4 panel LEDs ashing, white
The vehicle is no longer accepting charge. It is likely that the battery is fully charged.
4
15

For more information, please contact us;
Leave us a Trustpilot review:
Contact us
Email us
Call us:
(+44) 01684 770 631
Online support
www.indra.co.uk/
support
Table of contents
Other INDRA Batteries Charger manuals
Popular Batteries Charger manuals by other brands

Streetwize
Streetwize SWBCG4 manual

Associated Equipment
Associated Equipment 6015A Operator's manual

Sony
Sony AC-DN10A operating instructions

ANSMANN
ANSMANN POWERLINE 4 PRO user guide

DreamGEAR
DreamGEAR Power Base user guide

Alpitronic
Alpitronic Hypercharger HYC 150 Operation Instructions and Installation Guide