INDRA Smart PRO User manual

Indra Smart PRO
User Guide
Be at the forefront of EV charging with
Indra’s pioneering technology

Important Safety Notes
WARNING: Smart PRO charger installation must only be performed by a
certied electrician who has been trained in dealing with high
voltage electricity.
WARNING: Use the Smart PRO only as directed.
WARNING: Do not use the Smart PRO if it is defective, appears broken, cracked
or fails to operate or is otherwise damaged. In this case, you must report the
damage immediately to your original installation partner, quoting the serial
number as shown on the product label.
WARNING: Do not insert any foreign objects into the Smart PRO
or its charging cable.
WARNING: Do not expose the Smart PRO or its components to open ames.
WARNING: Do not expose the Smart PRO to heating equipment.
WARNING: Do not immerse the Smart PRO or its components in
water or other uids.
WARNING: The Smart PRO is not to be used by persons (including children)
with reduced physical, sensory or mental capabilities; or lack of experience and
knowledge, unless they have been given supervision or instruction concerning
use of the device by a person responsible for their safety.
Users with implanted cardiac pacemakers or implanted cardiac debrillators
should not stand close to the unit during charging.
WARNING: Install the Smart PRO in a location that mitigates damage
from ooding.
WARNING: Operating or storing the Smart PRO in temperatures outside
its specied range may cause damage to the charger.
CAUTION: Ensure that no water sources are above or near the Smart PRO,
such as taps or sprinklers.
CAUTION: Ensure that the charging cable is correctly and neatly stowed after
use, to prevent any inadvertent tripping hazards.
2 Indra Smart PRO User Guide

3

4 Indra Smart PRO User Guide
Specications
Key features
Solar
matching
Load
limiting
Load
curtailment
Ready-by
time
Earn
rewards
Electrical
Rated power 7.4kW
Charging current 6A-32A variable
Protection 6ma DC leakage detection
Standby consumption <5W
Compliance
CE Marked and UKCA
Standards and regulations The Electric Vehicles (Smart Charge
Points) Regulations 2021, BS EN 50581,
BS EN 60529, BS EN 61010-1, BS EN
61851-1, IEC 61851-21-2, IEC 61851-22,
BS 7671, BS 7671 Amendment 1, G100
Mechanical
Dimensions 200mm x 420mm x 130mm (WxHxD)
Weight 3.5kg
Operating Temperature -20°C to +50°C
Operating Humidity 5% - 95%
Enclosure Polycarbonate, IP66 rated
Protection IK10

Controls and Indicators
1
2
3
4
5
6
Primary Status LED
Multi-coloured, highlighting the operational state and mode
Charging Status Indication
Four individual LEDs indicating whether the unit is disconnected from your EV,
connected but idle or charging
Tethered Charging Cable
For tethered variants, a charging cable is attached
Charging Connector Holster
When not in use, and to prevent water ingress, the charging
connector should be pushed into the unit’s holster
BOOST Button
If you need to over-ride your pre-set schedule, press BOOST on the
unit or in the App to charge instantaneously at maximum rate
Integrated Cable Storage
When not in use, simply wrap the charging cable around the unit
1
2
3
4
5
6
5

Welcome
Congratulations on your purchase of a Smart PRO! The Indra team hope you’ll be
delighted with the features, quality and user experience of the Smart PRO.
This guide covers how to get started with your Smart PRO, explains key features,
troubleshooting tips and important safety and warranty information.
It is important that you read this guide carefully before using the Smart PRO, so
you’re completely familiar with all features and safety advice and are able to get the
most from your Smart PRO.
Overview
The Smart PRO is a permanently installed electric vehicle charger providing up to
32 Amps (7.2kW) at 230V, 50Hz. There are 3 Smart PRO variants:
• Smart PRO Type 2 (170915A105) has an IEC 62196 (Type 2) tethered charging
connector to be used with Type 2 socket tted EVs;
• Smart PRO Type 2 Socket (170915A106) can be used with multiple types of
charging cables, provided at least one end of the cable is tted with an
IEC 62196 male connector.
The Smart PRO works like conventional chargers, but also oers a range of smart
charging modes, designed to take advantage of local generation (e.g. solar PV),
variable rate taris (e.g. Time of Use), as well as schedule charging according to
live carbon intensity of grid power. In all modes, the Smart PRO calculates the
best charging schedule that gets your EV ready when you need it.
Key features
Solar
matching
Quick
Boost
House fuse
Protection
Over-the-air
updates
Charging
schedule
6 Indra Smart PRO User Guide

Downloading the Indra App
Once your Smart PRO charger has been installed, you will need to download the Indra
App from your phone’s App store. Alternatively scan the QR code below and follow the
instructions.
When requested please scan or enter the MAC address via the QR code located on the left
hand side of the charger. Please note: in some instances it may take up to 48 hours for a
newly installed charger to pair with the Indra App. Should you experience any diculties,
please contact support@indra.co.uk.
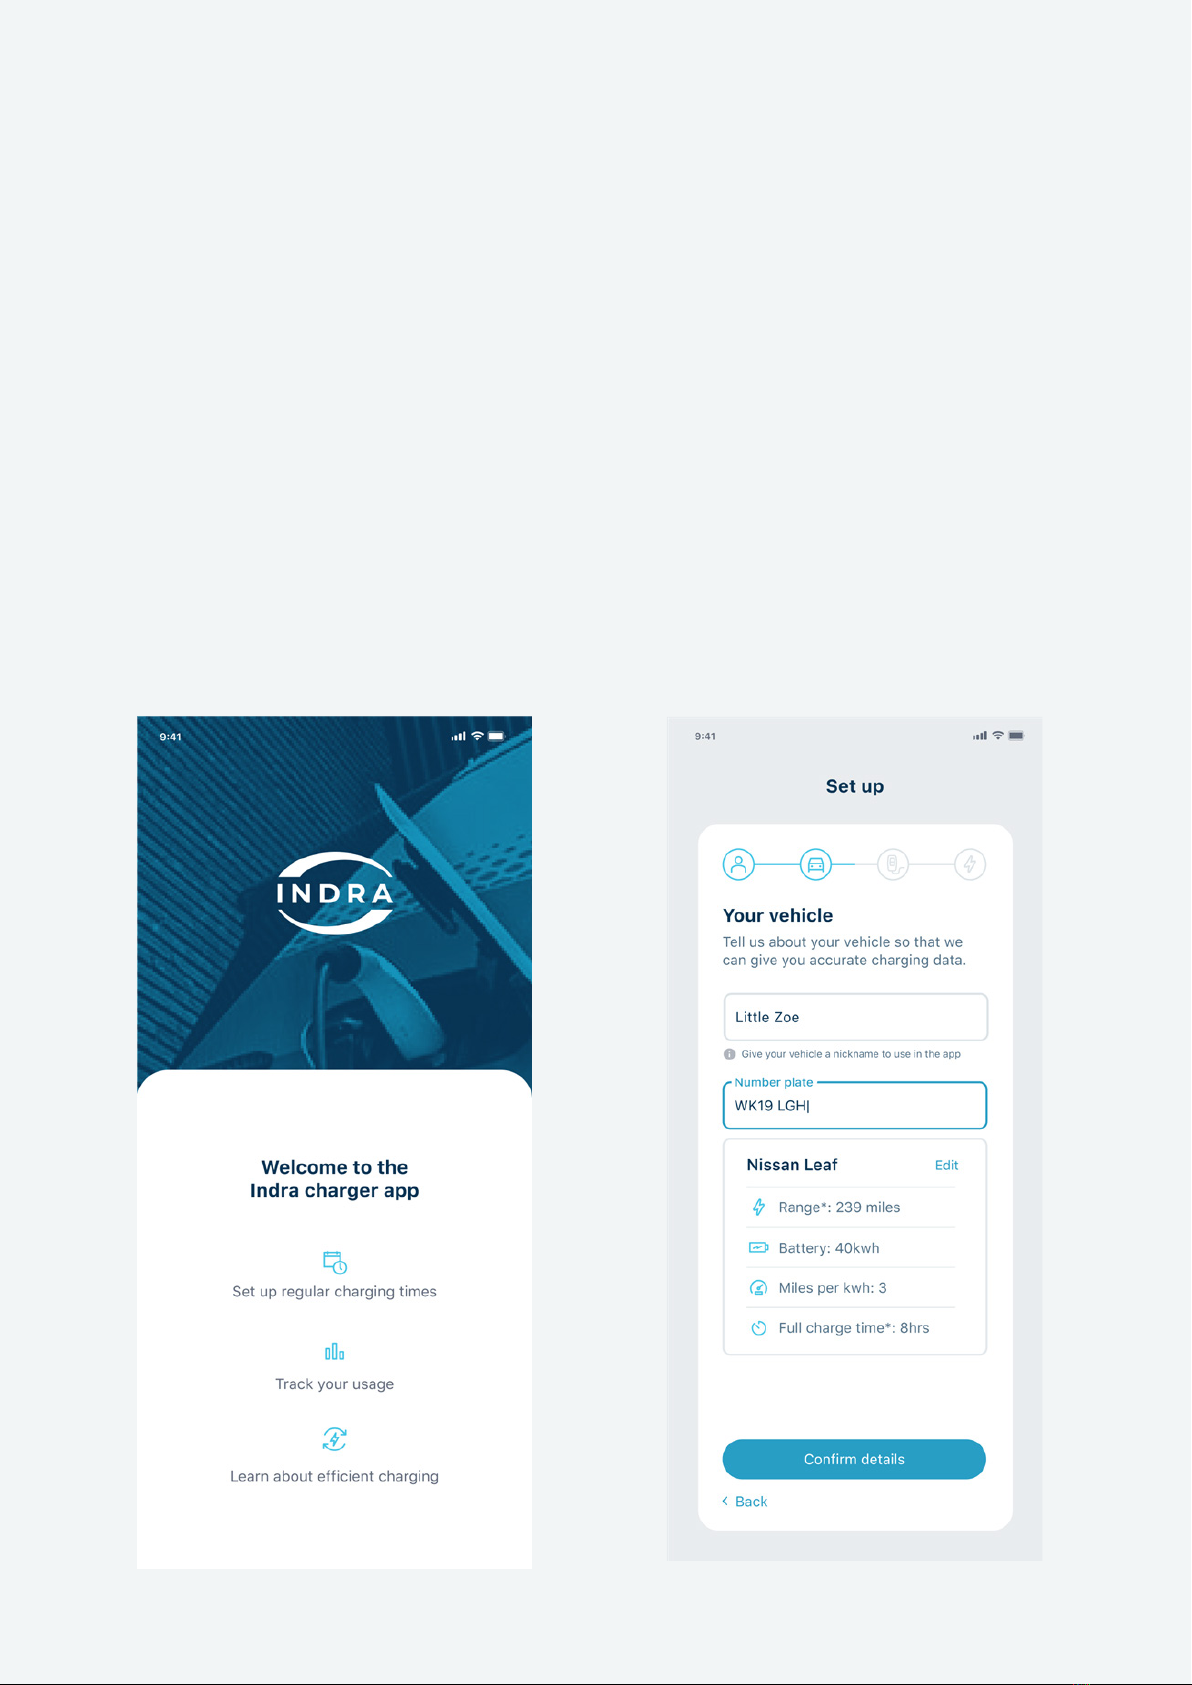
Designed to assist you in getting the most out of your Smart PRO, the Indra App is intuitive
to use and enables you to manage all the smart charging functionality of your PRO from the
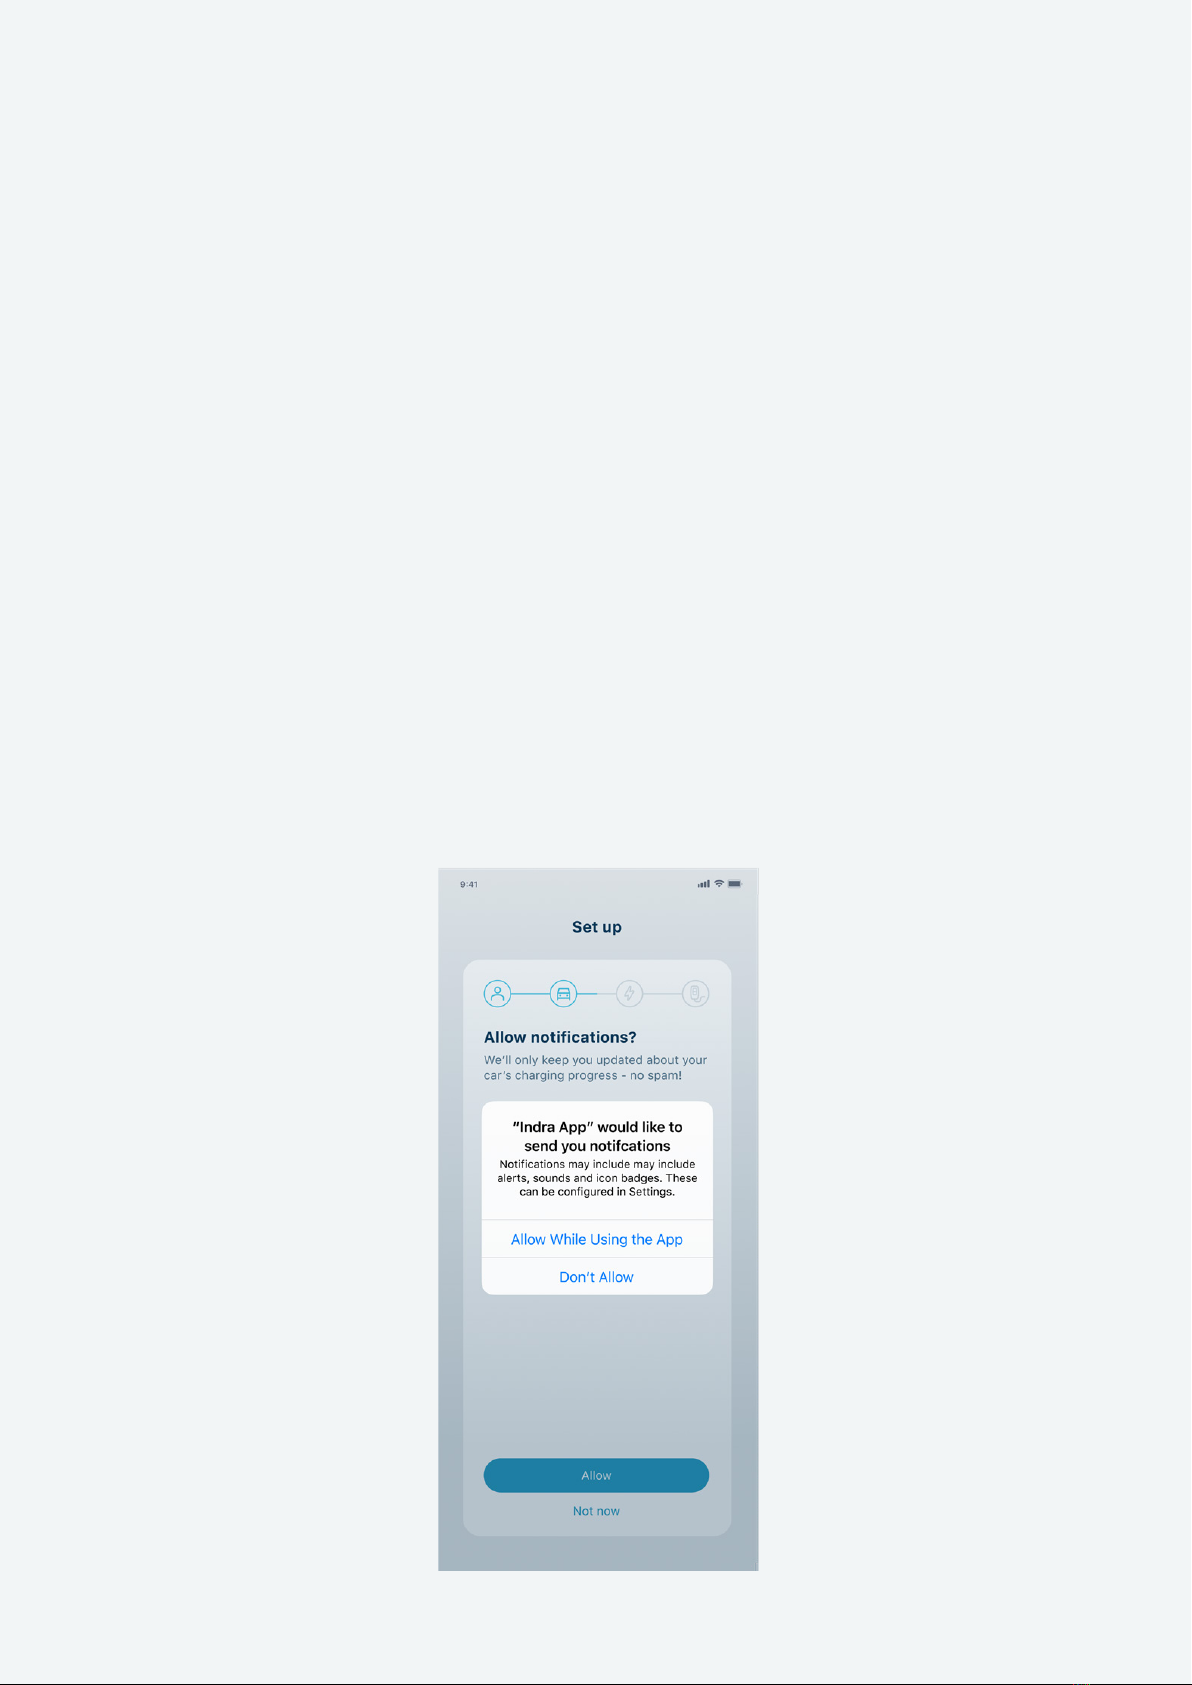
palm of your hand. Creating an account takes minutes and once signed in you will be guided
through the initial set-up and details of the key smart features, including:
Smart Charging Solar Power
Using Boost
Use the Indra App to set up a recurring
charging schedule. Choose regular slots
throughout the week, and the charger will
automatically start charging during those
times, as long as your EV is plugged in of
course.
If you have solar panels installed at home,
your charger can be set up to receive power
from them. The charger will take any surplus
solar power that’s above 1.4kW not being
used by your home, to charge your EV.
Plans changed? The Smart PRO Boost
feature lets you temporarily override your
schedule to get your car fully charged as
soon as possible.
Charging History
View your charging history on the app,
review your usage and check if you’re
charging at the most ecient time.
7

Getting set up
The rst time you open the Indra App, you’ll be asked to set up your charger. This
should only take a few minutes to complete.
We’ll ask you information about yourself, your EV and your electricity supplier and
tari. Having this information means we can calculate your charging times, electricity
usage and spend correctly, which will enable you to optimise your smart charging. If
you skip any steps in the set-up stage, you can do them later via the settings section.
You can still charge your EV without going through the set-up process, but you won’t
be making the most of your charger’s advanced features.
Info we’ll need about your EV:
• Vehicle name (the nickname you want to call it in the app)
• Numberplate (we’ll use this to nd out more about your vehicle, such as its make
and model)
8 Indra Smart PRO User Guide

Info we’ll need about your electricity supplier
Telling us about your electricity supplier and your tari means we can help you charge
at the most ecient times for you. By providing your electricity rate, we can not only
calculate and show you how much you’re spending, but you can also set the amount
of money you want to spend on a charging session (e.g. adding £5-worth of charge to
your car). We will ask you for details on:
• Who your supplier is
• Name of your tari
• What kind of tari you have
• What the unit (kWh) price is for your electricity
• Tari end date (if you have one)
9

Notications
We’d like to send you notications about your charging status. You can choose which
notications you want to receive as well as how and when you want to receive them.
This is something you have complete control over, and we promise to never send you
unwanted messages.
There are three types of notication:
• push notications (which go direct to your phone)
• in-app notications (which pop up while you’re using the app)
• emails
Notications you can choose to receive include:
• Vehicle plugged in
• Charging started
• Charging nished
• Charging error
• Charger error
10 Indra Smart PRO User Guide

Setting up scheduling and smart charging
Use the Indra App to set up a regular charging schedule. You can choose regular slots
throughout the week and the charger will automatically start charging during those
times, as long as your EV is plugged in.
The app enables you to set the times and days/nights you want to charge and also
how much energy to add (by miles, kWh or amount of money).
If you have more than one electricity tari rate (e.g. peak and o-peak), you can
set up smart charging to charge your vehicle as much as possible during your lower
rate period.
Default schedules
Your charger will come with a default charging schedule, as required by government
legislation. This schedule is designed to reduce power demand at peak times and
protect the national grid. But it might not be the best charging schedule for your
needs, so we recommend you set up your own schedule once your charger is installed.
11

Charging Cable Stowage
Tethered Variants (190105A101 & 190105A102)
• Disconnect the Smart PRO’s connector from your EV.
Seek car manufacturer guidance on how to do so, as this is often EV specic
(Nissan Leaf disconnection is via the EV’s key fob for example)
• Coil the long charging cable around the circumference of the Smart PRO
enclosure, several times, leaving a very short tail.
• Push the male charging connector into the blank holster recess of the
Smart PRO unit, so that it clips/ latches into position and is held.
• Ensure that no part of the coiled charging lead is trailing on or close to
the ground.
Socketed Variant (190105A103)
• Disconnect the Smart PRO from your EV.
Seek car manufacturer guidance on how to do so, as this is often EV specic
(Nissan Leaf disconnection is via the EV’s key fob for example)
• Remove your charging cable connector from the EV socket FIRST.
• Completely detach your charging cable from the Smart PRO unit by rst
pushing gently inwards towards the rear of the charger unit (this removes any
pressure from the locking pin, allowing it to retract fully).
• Secondly, carefully pull downwards on your charging cable connector to remove
it from the Smart PRO device.
• Coil and stow this loose cable somewhere secure, and where it won’t
create a trip hazard.
NOTE: APPROPRIATE CHARGING CABLE STOWAGE IS ESSENTIAL TO PREVENT
INADVERTANT TRIPS/ FALLS OR DAMAGE TO THE EV CONNECTOR
12 Indra Smart PRO User Guide

What do the LEDs on my charger mean?
There are two separate LED indicators on the Smart PRO. The Primary LED indicates the
charger status, while the four panel LEDs highlight the charger’s current mode. Each of
these will illuminate a dierent colour and will emit a sequence of ashes that indicates the
charger’s current state.
Primary LED lit, white
A solid white LED indicates that the Smart PRO is set up and ready to go. The
charger is now in smart mode and will charge based on the schedule set up in the
Indra App.
Primary LED lit, blue
The Smart PRO is in Boost mode, which is activated using your Indra App or by
pressing the Boost button on the charger.
Primary LED lit, yellow
The Smart PRO is in Solar mode and is accessing energy generated from solar
panels to charge the EV. You can set this up under ‘Electricity Supplier’ in your
Settings menu within your Indra App. When selected, the charger will automatically
use energy from your solar panels when it’s available.
Primary LED ashing, white
The Smart PRO has successfully connected to the Internet and is almost ready to
start charging. If the unit has been switched o for a long period without being
connected to the Internet, then this process may take some time, please contact
customer support for a more accurate timeframe.
LEDs relating to the primary LED light:
ALL LEDs are o
The Smart PRO is not receiving power. It may be disconnected from the mains. Check
all the switches in your (RCD) consumer unit are correctly set.
13

Primary LED ashing, blue
The Smart PRO is processing a software update. Ensure the charger is not
disconnected from the Internet or that power is removed from the unit during this
process.
Primary LED lit or ashing, red
The Smart PRO has encountered an error or a fault. Reset the charger by
turning the rotary isolator switch to the ‘o’ position, or by resetting the main
power switch in your (RCD) consumer unit. If the red light persists, then contact
Customer Support.
Primary LED ashing, purple
A ashing purple light on the Smart PRO indicates that it has lost communication
with the Internet or the Indra App.
14 Indra Smart PRO User Guide

4 panel LEDs are racing downwards
The Smart PRO is in charging mode and your EV is currently being charged.
Green when a charge is scheduled
The Smart PRO is not currently charging, but the EV is connected and a charging
session has been scheduled.
Flashing Green - Fixed Load Calibration
The installation engineer has triggered the Fixed Calibration Load function as part of
the charger’s set-up process. This will only be seen by the installer during installation.
LEDs relating to the primary LED light:
4 panel LEDs are o
If the four panel LEDs below the primary LED are o, then the Smart PRO is not
connected to the EV.
4 panel LEDs are lit
With the four panel LEDs illuminated, the Smart PRO is connected to the EV
and is currently in ‘idle’ mode, waiting to charge.
4
4 panel LEDs ashing, white
The vehicle is no longer accepting charge. It is likely that the battery is fully charged.
4
15

For more information, please contact us;
Leave us a Trustpilot review:
Contact us
Email us
Call us:
(+44) 01684 770 631
Online support
www.indra.co.uk/
support
Other manuals for Smart PRO
5
Table of contents
Other INDRA Batteries Charger manuals
Popular Batteries Charger manuals by other brands

Dometic
Dometic MCA1225 Installation and operating manual

Duracell
Duracell DRCHDIG user manual

GYS
GYS GYSFLASH 8.12 Translation of the original instructions

Dynamite
Dynamite Prophet Sport Plus instruction manual

Schwaiger
Schwaiger LSET300 513 user guide

Midtronics
Midtronics ChargeXpress PRO 15 instruction manual