manuals.online logo
Brands
  1. Home
  2. •
  3. Brands
  4. •
  5. iNels
  6. •
  7. Switch
  8. •
  9. iNels RFSOU-1 User manual

iNels RFSOU-1 User manual

RFSOU-1
Wireless twilight switch
EN
02-53/2015 Rev.3
Made in Czech Republic
Characteristics /
• The wireless twilight dimmer measures the light intensity and based on a set value, it sends the
command to switch on the lights or pull the blinds up or down.
• It can be combined with multifunctional switching units and blind switches.
• The increased IP65 protection is suited to mounting on the wall or in harsh environments.
• Integrated sensor for measuring illumination, settable in 3 ranges 1 - 100.000 lx.
• Selection of function:
a)twilight switch - automatically switches on upon a decrease in ambient light intensity, switches
off upon an increase (appropriate for garden lights, advertisements, public lighting, etc.).
b) light switch - automatically switches on upon an increase in ambient light intensity, switches
off upon a decrease (appropriate for offices, restaurants, rooms, etc.).
• Settable delay up to 2 minutes to eliminate unwanted switching caused by surrounding influences.
• The twilight switch may control up to 32 units in the installation.
• The programming button on the regulator is used for:
a) setting a function with a switching or blind unit.
b) ascertaining battery status.
c) ascertaining signal quality between the unit and dimmer.
• Battery power (1.5 V / 2x AAA - included in supply) with battery life of around 2 years based on
the number of controlled units.
• Range up to 160 m (in open space), if the signal is insufficient between the controller and unit,
use the signal repeater RFRP-20 or protocol component RFIO2 that support this feature.
• Communication frequency with bidirectional protocol iNELS RF Control.
Radio frequency signal penetration through various construction materials /
1/7
Control options /
• the twilight / light switch RFSOU-1 can control:
switches:
RFSA-11B/61B/62B, RFSA-61M/66M, RFSAI-61B, RFSC-11/61, RFUS-11/61, RFJA-12B
dimmers:
RFDA-11B/71B, RFDA-73M/RGB (mode WHITE), RFDEL-71B, RFDSC-11/71 (switches light
on /off, cannot set lighting intensity)
•option of operating with RF Touch
•option of operating with signal repeater RFRP-20
mounting in harsh environments
Assembly /
Place the twilight / light switch so
that it is not close to any light sources
and devices that could inuence the
ambient light sensor.
RFSOU-1
RFSOU-1





RFRP-20

60 - 90 % 80 - 95 % 20 - 60 % 0 - 10 % 80- 90 %
brick walls wooden structures
with plaster boards reinforced
concrete metal partitions common glass
Detektor sumraka
RS
www.elkoep.rs
U-Energister, d.o.o.| Noveških interniraca 1V | 31000 Užice | Serbia | e-mail: o[email protected]
U-Energister, d.o.o. | Norveških interniraca 1V | 31000 Užice | Republika Srbija | e-mail: o[email protected]
EN Support: +381 63 479 880 | RS Tehnička podrška +381 63 479 880
Karakteristike
• Bežični prekidač za sumrak meri intenzitet svetlosti i na osnovu postavljene vrednosti šalje
naredbu za uključivanje svetla ili za otvaranje / zatvaranje zavesa.
• Može se kombinovati sa multifunkcionalnim preklopnim elementima i preklopnim
otvorima.
• Poveana zaštita IP65 pogodna je za zidnu ugradnju čak i u zahtevnim okruženjima.
• Integrisani senzor za merenje svetlosti, podesiv u 3 opsega 1 - 100 000 lx.
• Izbor funkcije:
a) prekidač za sumrak - automatski se uključuje kada se intenzitet ambijentalne svetlosti
smanji, otvara se kada se povea (pogodno za osvetljenje bašte, oglašavanje, javno
osvetljenje ...).
b) prekidač za svetlo - automatski se uključuje kada se intenzitet ambijentalnog svetla
povea, otvori kada se smanji (pogodno za kancelarije, restorane, sobe ...).
• Podesivo kašnjenje do 2 minuta kako bi se eliminisalo neželjeno prebacivanje uticajima
okoline.
• Prekidač za sumrak može kontrolisati do 32 elementa u instalaciji.
• Taster za programiranje na kontroleru služi za:
a) podešavanje funkcije sa preklopnim elementom ili elementom žaluzine.
b) provera statusa baterije.
v) određivanje kvaliteta signala između elementa i dimera.
• Napajanje iz baterije (1,5 V / 2x AAA - uključeno u paket) sa životnim vekom od oko 2
godine, u zavisnosti od broja kontrolisanih elemenata.
• Domet do 160 m (na otvorenom), u slučaju nedovoljnog signala između kontrolera
i elementa, koristite RFRP-20 repetitor signala ili elemente sa RFIO2 protokolom koji
podržavaju ovu funkciju.
• Frekvencija komunikacije sa dvosmernim iNELS RF Control protokolom.
Kontrolna opcija
• prekidač za sumračno svetlo RFSOU-1 može da kontroliše:
prekidači:
RFSA-11B / 61B / 62B, RFSA-61M / 66M, RFSAI-61B, RFSC-11/61, RFUS-11/61, RFJA-12B
dimmers:
RFDA-11B / 71B, RFDA-73M / RGB (u BELOM režimu), RFDEL-71B, RFDSC-11/71 (svetla se
uključuju / isključuju, intenzitet osvetljenja nije mogue podesiti)
• mogunost dodeljivanja RF Touch-u
• mogunost upravljanja putem RFRP-20
Montaža
ugradnja u zahtevna okruženja
Postavite prekidač za sumrak tako da
se ne nalazi u blizini izvora svetlosti i
uređaja koji mogu uticati na senzor
ambijentalnog osvetljenja.
Prenos radio frekvencijskih signala preko različitih građevinskih materijala
zid od
cigle
drvena konstuk-
cija sa gipsanim
pločama
armirani beton metalne
pregrade staklo
RFSOU-1
Wireless twilight switch
EN
02-53/2015 Rev.3
Made in Czech Republic
Indication, settings /
battery holders / Prior to programming or setting the unit, use a screwdriver to open
the cover.
Indication and control units are located inside the box.
• Red LED - indication of communication and modes.
• Green LED - indication of communication.
• By pressing Prog for < 1s, the RFSOU-1 unit communicates with
programmed units according to the selected function.
Lux Fine
MIN MAX PROG
100 - 1.000
1.000 - 10.000
10.000 - 100.000
1 - 10
10 - 100
100 - 1.000
Range
( I x )
Function
light switch
twilight switch
5 6
4 7
3 8
2 9
1
red /
green /
button /
a m bi e nt li g h t s en s o r /
Lux Fine
Range (Ix)
Function
Lux Fine
MIN MAX
Function
5 6
4 7
3 8
2 9
1
RF actuators / function / delay / description of function /
RFSA / RFJA /
RFDA
1 0 min RFSOU-1 upon assessing a change performs an action at all assigned actuators. It does not send
the light intensity to RF Touch. /
2 1 min
3 2 min
RF Touch 4 0 min RFSOU-1 when assessing it sends an information packet to RF Touch, according to the
programming, RF Touch assesses and performs an action. /
5 1 min
6 2 min
RFSA / RFJA /
RFDA
- cycle
7 0 min RFSOU-1 upon assessing a change performs an action at all assigned actuators. It cyclically sends
commands ON to actuators, RFJA excluded, with 10 minutes interval. /
8 1 min
9 2 min
Selection of unit type /
table 1 /
123456
RFSA *
RFJA *
RFDA *
RFSA / RFRP-20 *
RFJA / RFRP-20 *
RFDA / RFRP-20 *
type /
setting /
Function setting /
table 2 /
• Setting the potentiometer Lux Fine:
- fine adjustment of light intensity within the range.
• Setting the switch Range (lx):
- selection or range.
- within range light / twilight switch.
• Setting of switch Function:
- selection of unit type.
- function setting.
Note: each change in the settings of the potentiometer and rotating switches must be confirmed
by pressing the Prog button.
2/7
100 - 1.000
1.000 - 10.000
10.000 - 100.000
1 - 10
10 - 100
100 - 1.000
Range
( I x )
Before starting the programming / manual control, open the
actuator housing using a screwdriver.
After completing programming / manual control, snap the housing
closed again.
Detektor sumraka
RS
www.elkoep.rs
U-Energister, d.o.o.| Noveških interniraca 1V | 31000 Užice | Serbia | e-mail: o[email protected]
U-Energister, d.o.o. | Norveških interniraca 1V | 31000 Užice | Republika Srbija | e-mail: o[email protected]
EN Support: +381 63 479 880 | RS Tehnička podrška +381 63 479 880
Indikacija, podešavanja
Pre početka programiranja / ručnog rada, otvorite poklopac
elementa odvijačem.
Kada završite sa programiranjem / ručnim radom, pritisnite
poklopac.
ambijentalni svetlosni
senzor
držač baterije
taster PROG
crvena LED
zelena LED
Pre programiranja ili podešavanja elementa, otvorite poklopac
odvijačem.
Indikacije i kontrole nalaze se unutar kutije.
• Crvena LED - indikacija komunikacije i načina rada
• Zelena LED - indikacija komunikacije.
• Pritiskom na dugme Prog <1s, element RFSOU-1 komunicira sa
programiranim elementima u skladu sa izabranom funkcijom.
• Podešavanje potenciometra Lux Fine:
- fino podešavanje intenziteta svetlosti unutar opsega.
• Podešavanje obrtnog prekidača opsega (lx):
- izbor dometa.
- u opsegu podešavanja prekidača za svetlo / sumrak.
• Funkcija rotacionog prekidača:
- izbor tipa elementa.
- izbor funkcije
tabela 1
Izbor vrste elementa
tabela 2
Izbor funkcije
tip
podešavanja RF elementi funkcija odlaganje opis funkcije
RFSOU-1 izvršava radnju na svim dodeljenim elementima prilikom procene promene. Ne šalje
intenzitet svetlosti RF dodiru.
Tokom procene, RFSOU-1 šalje paket informacija RF Touch-u, procenjuje RF Touch u skladu sa
programiranjem i izvodi radnju.
RFSOU-1 izvršava radnju na svim dodeljenim elementima prilikom procene promene. Ciklično
šalje ON komande za elemente, osim RFJA u intervalu od 10 min.
Napomena: svaka promena podešavanja potenciometra i rotacionog prekidača mora biti
potvrđena pritiskom na dugme Prog.
RFSOU-1
Wireless twilight switch
EN
02-53/2015 Rev.3
Made in Czech Republic
Programming with RF actuators /
On the rotating switch
Function, set the type of unit
t h a t y o u w a n t to a ss i gn (t a b l e 1) .
While pressing Prog on the
RFSOU-1, insert the batteries.
Observe the polarity. This
activates the programming
mode. Red LED is ashing in
1s interval. After inserting the
batteries, release the button.
Programming RFSA and RFDA /
Pressing Prog on the assigned
RF unit (must be connected
to the power supply) sends a
signal. The RFSOU-1 indicates
signal receipt by a red LED
that illuminates for 1s.
3
PROG < 1s
1 x
On the rotating switch
Function, set the type
a c c o r d i n g t o t h e d e s i r e d d e l a y
(table 2). Conrm the settings
by pressing the Prog button
< 1s.
Press of programming button
on actuator RFSOU-1 shorter
then 1 second will nish
programming mode.
You can program the next RF
unit after a 6-second delay
- the red LED ashes once
again.
LuxFine
MIN MAX PROG
100- 1.000
1.000- 10.000
10.000- 100.000
1- 10
10- 100
100- 1.000
Range
(I x )
Function
lightswitch
twilightswitch
5 6
4 7
3 8
2 9
1
+
-
+
-
4
PROG < 1s
1 x
1
PROG
1 x
LuxFine
MIN MAX PROG
100- 1.000
1.000- 10.000
10.000- 100.000
1- 10
10- 100
100- 1.000
Range
(I x )
Function
lightswitch
twilightswitch
5 6
4 7
3 8
2 9
1
+
-
+
-
2
LuxFine
MIN MAX PROG
100- 1.000
1.000- 10.000
10.000- 100.000
1- 10
10- 100
100- 1.000
Range
(I x )
Function
lightswitch
twilightswitch
5 6
4 7
3 8
2 9
1
+
-
+
-
5
PROG <1s
1 x
LuxFine
MIN MAX PROG
100- 1.000
1.000- 10.000
10.000- 100.000
1- 10
10- 100
100- 1.000
Range
(I x )
Function
lightswitch
twilightswitch
5 6
4 7
3 8
2 9
1
+
-
+
-
6
LuxFine
MIN MAX PROG
100- 1.000
1.000- 10.000
10.000- 100.000
1- 10
10- 100
100- 1.000
Range
(I x )
Function
lightswitch
twilightswitch
5 6
4 7
3 8
2 9
1
+
-
+
-



On the rotating switch
Function, set type 2 (RFJA).
While pressing Prog on the
RFSOU-1, insert the batteries.
Observe the polarity. This
activates the programming
mode. Red LED is ashing in
1s interval. After inserting the
batteries, release the button.
Programming RFJA /
By pressing the button > 3s
on the RF controller (to which
the RFJA is programmed),
start the blinds moving so
they move to one of the
extreme end positions. At
the moment when the relay
opens, the RFJA unit sends a
s i gn a l . T h e R F SO U -1 i n d i c a t e s
signal receipt by a red LED
that illuminates for 1s.
3
>3s1 x
1
PROG
1 x
LuxFine
MIN MAX PROG
100- 1.000
1.000- 10.000
10.000- 100.000
1- 10
10- 100
100- 1.000
Range
(I x )
Function
lightswitch
twilightswitch
5 6
4 7
3 8
2 9
1
+
-
+
-
2
LuxFine
MIN MAX PROG
100- 1.000
1.000- 10.000
10.000- 100.000
1- 10
10- 100
100- 1.000
Range
(I x )
Function
lightswitch
twilightswitch
5 6
4 7
3 8
2 9
1
+
-
+
-


On the rotating switch
Function, set the type
a c c o r d i n g t o t h e d e s i r e d d e l a y
(table 2). Conrm the settings
by pressing the Prog button
< 1s.
Press of programming button
on actuator RFSOU-1 shorter
then 1 second will nish
programming mode.
You can program the next RF
unit after a 6-second delay
- the red LED ashes once
again.
5
PROG <1s
1 x
LuxFine
MIN MAX PROG
100- 1.000
1.000- 10.000
10.000- 100.000
1- 10
10- 100
100- 1.000
Range
(I x )
Function
lightswitch
twilightswitch
5 6
4 7
3 8
2 9
1
+
-
+
-
6
LuxFine
MIN MAX PROG
100- 1.000
1.000- 10.000
10.000- 100.000
1- 10
10- 100
100- 1.000
Range
(I x )
Function
lightswitch
twilightswitch
5 6
4 7
3 8
2 9
1
+
-
+
-
LuxFine
MIN MAX PROG
100- 1.000
1.000- 10.000
10.000- 100.000
1- 10
10- 100
100- 1.000
Range
(I x )
Function
lightswitch
twilightswitch
5 6
4 7
3 8
2 9
1
+
-
+
-
4
PROG < 1s
1 x




3/7
Programming RF units with communication via RFRP-20 /
Steps 1-6 are
the same as
Programming
the RF units (see
above).
17 8
When inserting the RFRP-20
into an electrical socket (upon
power-up), the programming
button must be pressed.
The green LED ashes. Then
when the red LED button
illuminates, release the button.
By one short press of the
programming button on
the RFRP-20, you move
to the position for input into
the additional learning mode.
The red LED ashes - after
5s the RFRP-20 enters the
additional learning mode.
The LED stops ashing.

PROG < 1s
1 x

23456
LuxFine
MIN MAX PROG
100- 1.000
1.000- 10.000
10.000- 100.000
1- 10
10- 100
100- 1.000
Range
(I x )
Function
lightswitch
twilightswitch
5 6
4 7
3 8
2 9
1
+
-
+
-

Programming /
Detektor sumraka
RS
www.elkoep.rs
U-Energister, d.o.o.| Noveških interniraca 1V | 31000 Užice | Serbia | e-mail: o[email protected]
U-Energister, d.o.o. | Norveških interniraca 1V | 31000 Užice | Republika Srbija | e-mail: o[email protected]
EN Support: +381 63 479 880 | RS Tehnička podrška +381 63 479 880
Programiranje sa RF elementima
Programiranje RFSA i RFDA
Pritiskom na taster Prog
na RFSOU-1, ubacite
baterije. Obratite pažnju na
polaritet. Ovo aktivira režim
programiranja. Crvena LED
lampica trepe u intervalu
od 1 sekunde. Otupustite
taster nakon postavljanja
baterija.
Na okretnom prekidaču
Funkcija, podesite tip
elementa koji želite da
dodelite (Tabela 1). Pritiskom na taster Prog na
dodeljenom RF elementu
(mora biti povezan na mrežni
napon) šalje se signal. Prijem
signala RFSOU-1 označava
crvenom LED lampicom koja
svetli 1 s.
Možete da programirate
još jedan RF element nakon
kašnjenja od 6 sekundi -
crveni LED ponovo trepe.
Da biste završili
programiranje, pritisnite
taster Prog <1s na RFSOU-1. Podesite tip funkcije
rotacionog prekidača
u skladu sa potrebnim
kašnjenjem (tabela 2).
Postavku potvrdite
pritiskom na taster Prog <1s.
Programiranje RFJA
Dok pritiskate taster
Prog na RFSOU-1, ubacite
baterije. Obratite pažnju
na polaritet. Ovo aktivira
režim programiranja. Crvena
LED lampica trepe svake 1
sekunde. Otvorite dugme
nakon umetanja baterija.
Podesite tip 2 (RFJA) na
rotacionom prekidaču
Function.
Pritisnite taster> 3s na RF
kontroleru (za koji je RFJA
programiran) da pomerite
roletne tako da se pomeraju
u jedan od krajnjih krajnjih
položaja. RFJA šalje signal
kada se relej otvori. Prijem
signala RFSOU-1 označava
crvenom LED lampicom koja
svetli 1 s.
Možete da programirate
još jedan RF element nakon
kašnjenja od 6 sekundi -
crveni LED ponovo trepe.
Možete da programirate
jedan RF element na kraju
kašlja od 6 sekundi - crvena
LED e se zatresti. Podesite tip funkcije
rotacionog prekidača
u skladu sa potrebnim
kašnjenjem (tabela 2).
Postavku potvrdite
pritiskom na dugme Prog
<1s.
Programiranje sa RF elementima uz komunikaciju putem RFRP-20
Programiranje
Koraci 1-6 su
isti kao i pro-
gramiranje sa
RF elementima
(vidi gore).
Prilikom postavljanja RFRP-
20 u el. utičnica (napajanje)
mora biti pritisnut taster za
programiranje. Zelena LED
lampica trepe. Nakon što se
upali crvena LED, otpustite
taster.
Kratkim pritiskom na taster
za programiranje na RFRP-20
pomeriete se na mesto za
ulazak u režim podučavanja.
Crvena LED lampica trepe
- nakon 5 s RFRP-20 prelazi
u režim podučavanja. LED
prestaje da treperi.
RFSOU-1
Wireless twilight switch
EN
02-53/2015 Rev.3
Made in Czech Republic
4/7
End learning mode by a short
press of the programming
button on the RFRP-20. By
doing so, the programmed
RFSOU-1 address is stored
in the memory. The red LED
will ash for 1 second, then
the green LED will remain
illuminated.
By pressing Prog on the
RFSOU-1 for less than a
1 second, the signal is sent.
A ashing green LED on the
RFRP-20 indicates that the
RFSOU-1 has been recorded
in the RFRP-20 memory.
10
PROG <1s
1 x
LuxFine
MIN MAX PROG
100- 1.000
1.000- 10.000
10.000- 100.000
1- 10
10- 100
100- 1.000
Range
(I x )
Function
lightswitch
twilightswitch
5 6
4 7
3 8
2 9
1
+
-
+
-
9
PROG < 1s
1 x


Programming with the RF control unit RF Touch /
On the rotating switch
Function, set type 4 ... 9
according to the required
delay (table 2). Conrm the
settings by pressing the Prog
button < 1s.
1 2
LuxFine
MIN MAX PROG
100- 1.000
1.000- 10.000
10.000- 100.000
1- 10
10- 100
100- 1.000
Range
(I x )
Function
lightswitch
twilightswitch
5 6
4 7
3 8
2 9
1
+
-
+
-
On the RF system unit, the
address of the RFSOU-1 is
entered (see the manual of
the RF system unit).

xxxxxx
address /

The address listed on the side of the actuator is used for programming and
controlling actuators by RF control units.
Delete actuator /
Deleting one position of the transmitter (RFSA, RFDA) /
According to tab. 1, using the
rotary switch Function, select
the type of actuator that you
want to remove from the
memory.
While pressing Prog on the
RFSOU-1, insert the batteries.
Observe the polarity. This
activates the programming
mode. Red LED is ashing in
1s interval. After inserting the
batteries, release the button.
On the RFSOU-1, press the
PROG button for longer than
ve seconds. The red LED
ashes 4x per second.
3
PROG > 5s
1 x
RFSOU-1 automatically
returns to the assessment
mode. On the rotating
switch Function, set the type
a c c o r d i n g t o t h e d e s i r e d d e l a y
(table 2). Conrm the settings
by pressing the Prog button
< 1s.
Pressing Prog on the assigned
RF unit (must be connected
to the power supply) sends a
signal. The RFSOU-1 indicates
signal receipt by a red LED that
illuminates for 1s - thereby the
given unit is deleted from the
memory of the RFSOU-1.
LuxFine
MIN MAX PROG
100- 1.000
1.000- 10.000
10.000- 100.000
1- 10
10- 100
100- 1.000
Range
(I x )
Function
lightswitch
twilightswitch
5 6
4 7
3 8
2 9
1
+
-
+
-
4
PROG < 1s
1 x
1
PROG
1 x
LuxFine
MIN MAX PROG
100- 1.000
1.000- 10.000
10.000- 100.000
1- 10
10- 100
100- 1.000
Range
(I x )
Function
lightswitch
twilightswitch
5 6
4 7
3 8
2 9
1
+
-
+
-
2
LuxFine
MIN MAX PROG
100- 1.000
1.000- 10.000
10.000- 100.000
1- 10
10- 100
100- 1.000
Range
(I x )
Function
lightswitch
twilightswitch
5 6
4 7
3 8
2 9
1
+
-
+
-
5
LuxFine
MIN MAX PROG
100- 1.000
1.000- 10.000
10.000- 100.000
1- 10
10- 100
100- 1.000
Range
(I x )
Function
lightswitch
twilightswitch
5 6
4 7
3 8
2 9
1
+
-
+
-



Detektor sumraka
RS
www.elkoep.rs
U-Energister, d.o.o.| Noveških interniraca 1V | 31000 Užice | Serbia | e-mail: o[email protected]
U-Energister, d.o.o. | Norveških interniraca 1V | 31000 Užice | Republika Srbija | e-mail: o[email protected]
EN Support: +381 63 479 880 | RS Tehnička podrška +381 63 479 880
Pritiskom na taster Prog
na RFSOU-1 kraem od 1
sekunde šalje se signal. Trep-
tanje zelene LED na RFRP-20
ukazuje da je RFSOU-1 up-
isan u RFRP-20 memoriju.
Da biste izašli iz režima
obučavanja, kratko pritisnite
taster za programiranje na
RFRP-20. Ovo sladišti pro-
gramiranu RFSOU-1 adresu u
memoriju. Crveni LED trepe
1 sekundu, a zatim zeleni
LED trajno svetli.
Programiranje sa RF sistemskim elementom RF Touch
adresa
Adresa navedena na bočnoj strani elementa koristi se za programiranje i
kontrolu RF elemenata od strane sistemskih elemenata.
Podesite tip 4 ... 9 na funkciji
rotacionog prekidača
u skladu sa potrebnim
kašnjenjem (tabela 2).
Postavku potvrdite
pritiskom na taster Prog <1s.
Unesite RFSOU-1 adresu na
element RF sistema (pogle-
dajte priručnik za element RF
sistema).
Brisanje elementa
Brisanje jedne memorijske pozicije (RFSA, RFDA)
Dok pritiskate taster
Prog na RFSOU-1, ubacite
baterije. Obratite pažnju
na polaritet. Ovo aktivira
režim programiranja. Crvena
LED lampica trepe svake
1 sekunde. Otpustite taster
nakon postavljanja baterija.
Na okretnom prekidaču
Funkcija podesite tip RFJA-
2 elementa koji želite da
izbrišete (Tabela 1).
Na RFSOU-1 pritisnite taster
PROG duže od 5 sekundi.
Crvena LED lampica trepe
4 puta u intervalima od 1
sekunde.
Pritiskom na taster Prog na
dodeljenom RF elementu
(mora biti povezan na mrežni
napon) šalje se signal. Prijem
signala označava RFSOU-1
paljenjem crvene LED tokom
1 s - ovo briše dati element iz
memorije RFSOU-1.
RFSOU-1 se automatski
vraa u režim procene.
Podesite tip funkcije
rotacionog prekidača
u skladu sa potrebnim
kašnjenjem (tabela 2).
Postavku potvrdite
pritiskom na taster Prog <1s.
RFSOU-1
Wireless twilight switch
EN
02-53/2015 Rev.3
Made in Czech Republic
5/7
On the RFSOU-1, press the
PROG button for longer than
ve seconds. The red LED
ashes 4x per second.
Deleting one position of the transmitter (RFJA) /
According to tab. 1, using the
rotary switch Function, select
the type of actuator RFJA-2
that you want to remove from
the memory.
While pressing Prog on the
RFSOU-1, insert the batteries.
Observe the polarity. This
activates the programming
mode. Red LED is ashing in
1s interval. After inserting the
batteries, release the button.
3
PROG >5s
1 x
RFSOU-1 automatically
returns to the assessment
mode. On the rotating
switch Function, set the type
a c c o r d i n g t o t h e d e s i r e d d e l a y
(table 2). Conrm the settings
by pressing the Prog button
< 1s.
By pressing the button > 3s on
the RF controller (to which the
RFJA is programmed), start
the blinds moving so they
move to one of the extreme
end positions. At the moment
when the relay opens, the
RFJA unit sends a signal. The
RFSOU-1 indicates receipt
of the signal by the red LED
illuminating for 1s - thereby
the given unit is deleted from
the memory of the RFSOU-1.
LuxFine
MIN MAX PROG
100- 1.000
1.000- 10.000
10.000- 100.000
1- 10
10- 100
100- 1.000
Range
(I x )
Function
lightswitch
twilightswitch
5 6
4 7
3 8
2 9
1
+
-
+
-
1
PROG
1 x
LuxFine
MIN MAX PROG
100- 1.000
1.000- 10.000
10.000- 100.000
1- 10
10- 100
100- 1.000
Range
(I x )
Function
lightswitch
twilightswitch
5 6
4 7
3 8
2 9
1
+
-
+
-
2
LuxFine
MIN MAX PROG
100- 1.000
1.000- 10.000
10.000- 100.000
1- 10
10- 100
100- 1.000
Range
(I x )
Function
lightswitch
twilightswitch
5 6
4 7
3 8
2 9
1
+
-
+
-
5
LuxFine
MIN MAX PROG
100- 1.000
1.000- 10.000
10.000- 100.000
1- 10
10- 100
100- 1.000
Range
(I x )
Function
lightswitch
twilightswitch
5 6
4 7
3 8
2 9
1
+
-
+
-



4
>3s1 x



LuxFine
MIN MAX PROG
100- 1.000
1.000- 10.000
10.000- 100.000
1- 10
10- 100
100- 1.000
Range
(I x )
Function
lightswitch
twilightswitch
5 6
4 7
3 8
2 9
1
+
-
+
-

By pressing the Prog button < 1s, the RFSOU-1 communicates with the
programmed units according to the selected function and then indicates the
battery status and successful connection to the programmed units.
Indicating the battery status
After terminating communication, the red LED ashes according to the battery
status:
- 1x - battery OK.
- 2x - weak battery.
Indication of successful connection
If RF units are programmed in the RFSOU-1 and one of the functions 1, 2, 3, 7, 8
or 9 is selected, 2s after battery indication, successful connection is indicated:
- 2x red LED ashes in a 1-second interval - not possible to connect with any of
the programmed units.
- 1x green LED ashes - connection was successful with at least one of the
programmed units.
- 2x green LED ashes in a 1-second interval - connection with all programmed
RF units.
Note: When setting functions 4, 5 and 6 (with RF Touch), RFSOU-1 does not
indicate connection.
Function /
Deleting the entire memory /
On the RFSOU-1, press the
PROG button for longer
than eight seconds. The
LED ashes 5x in an interval
of once per second, then
ashes for three seconds in
an interval of two ashes per
second. After releasing the
button, the RFSOU-1 remains
in programming mode.
While pressing Prog on the
RFSOU-1, insert the batteries.
Observe the polarity. This
activates the programming
mode. Red LED is ashing in
1s interval. After inserting the
batteries, release the button.
Return to the assessment
mode by pressing the button
PROG for < 1s.
1
PROG
1 x
LuxFine
MIN MAX PROG
100- 1.000
1.000- 10.000
10.000- 100.000
1- 10
10- 100
100- 1.000
Range
(I x )
Function
lightswitch
twilightswitch
5 6
4 7
3 8
2 9
1
+
-
+
-

3
PROG < 1s
1 x
LuxFine
MIN MAX PROG
100- 1.000
1.000- 10.000
10.000- 100.000
1- 10
10- 100
100- 1.000
Range
(I x )
Function
lightswitch
twilightswitch
5 6
4 7
3 8
2 9
1
+
-
+
-

2
PROG >8s
1 x
LuxFine
MIN MAX PROG
100- 1.000
1.000- 10.000
10.000- 100.000
1- 10
10- 100
100- 1.000
Range
(I x )
Function
lightswitch
twilightswitch
5 6
4 7
3 8
2 9
1
+
-
+
-

Detektor sumraka
RS
www.elkoep.rs
U-Energister, d.o.o.| Noveških interniraca 1V | 31000 Užice | Serbia | e-mail: o[email protected]
U-Energister, d.o.o. | Norveških interniraca 1V | 31000 Užice | Republika Srbija | e-mail: o[email protected]
EN Support: +381 63 479 880 | RS Tehnička podrška +381 63 479 880
Brisanje jednog memorijskog priključka (RFJA)
Dok pritiskate taster
Prog na RFSOU-1, ubacite
baterije. Obratite pažnju
na polaritet. Ovo aktivira
režim programiranja. Crvena
LED lampica trepe svake
1 sekunde. Otpustite taster
nakon postavljanja baterija.
Na okretnom prekidaču
Funkcija podesite tip RFJA-
2 elementa koji želite da
izbrišete (Tabela 1).
Na RFSOU-1 pritisnite taster
PROG duže od 5 sekundi.
Crvena LED lampica trepe
4 puta u intervalima od 1
sekunde.
Pritisnite taster > 3s na RF
kontroleru (za koji je RFJA
programiran) da pomerite
roletne tako da se pomeraju
u jedan od krajnjih položaja.
RFJA šalje signal kada
se relej otvori. Prijem
signala označava RFSOU-1
paljenjem crvene LED tokom
1 s - ovo briše dati element iz
memorije RFSOU-1.
RFSOU-1 se automatski
vraa u režim procene.
Podesite tip funkcije
rotacionog prekidača
u skladu sa potrebnim
kašnjenjem (tabela 2).
Postavku potvrdite
pritiskom na taster Prog <1s.
Brisanje cele memorije
Dok pritiskate taster
Prog na RFSOU-1, ubacite
baterije. Obratite pažnju na
polaritet. Ovo aktivira režim
programiranja. Crvena LED
lampica trepe u intervalu
od 1 sekunde. Otpustite
taster nakon umetanja
baterija.
Na RFSOU-1 pritisnite tast-
eru Prog više od 8 sekundi.
Crveni LED trepe 5 puta u
intervalima od 1 sekunde,
a zatim trepe 3 sekunde sa
2 intervala blica u roku od
1 sekunde. Kada se taster
otpusti, RFSOU-1 ostaje u
režimu programiranja.
Da biste se vratili u režim
procene, pritisnite taster
PROG <1s.
Funkcija
Pritiskom na taster Prog <1s, element RFSOU-1 komunicira sa programi-
ranim elementima u skladu sa izabranom funkcijom, a zatim ukazuje na
status baterije i uspeh veze sa programiranim elementima.
Prikaz stanja baterije
Kada je komunikacija završena, crveni LED trepe u skladu sa statusom
baterije:
- 1x - baterija u redu.
- 2x - prazne baterije.
Naznaka uspeha veze
Ako su RF elementi programirani u RFSOU-1 i ako je izabrana jedna od
funkcija 1, 2, 3, 7, 8 ili 9, uspeh veze signalizira se nakon 2 s iz indikatora
baterije:
- crvena LED lampica 2x trepe u drugom intervalu - nije mogue povezati
se ni sa jednom od programiranih jedinica.
- zeleni LED trepe 1x - bilo je mogue povezati se sa najmanje jednom od
programiranih jedinica.
- Zelena LED lampica 2x trepe u drugom intervalu - veza sa svim pro-
gramiranim RF elementima.
Napomena: Pri podešavanju funkcija 4, 5 i 6 (sa RF dodirom), RFSOU-1 ne
označava vezu.
RFSOU-1
Wireless twilight switch
EN
02-53/2015 Rev.3
Made in Czech Republic
6/7
1
Replacement of a battery /
2
Open the actuator housing
using a screwdriver.
Remove the original batteries
and insert new batteries into
the battery holder (do not
use new and used batteries
together). Observe the
polarity.
After inserting the batteries,
t h e u n i t m e a s u r e s a n d a s s e s s e s
the ambient light intensity,
performs communication
with programmed units, and
indicates battery status and
successful connection (see
Functions).
Snap on the cover.
3
LuxFine
MIN MAX PROG
100- 1.000
1.000- 10.000
10.000- 100.000
1- 10
10- 100
100- 1.000
Range
(I x )
Function
lightswitch
twilightswitch
5 6
4 7
3 8
2 9
1
+
-
+
-
LuxFine
MIN MAX PROG
100- 1.000
1.000- 10.000
10.000- 100.000
1- 10
10- 100
100- 1.000
Range
(I x )
Function
lightswitch
twilightswitch
5 6
4 7
3 8
2 9
1
+
-
+
-
Safe handling /
When handling a device unboxed it is important to avoid contact with liquids. Avoid contact
with the components of the device.
Technical parameters /
* pay attention to the operating temperature of batteries
Supply terminals:
Battery life:
Setting lighting level range
Function (twilight switch)
- range 1:
- range 2:
- range 3:
Function (light switch)
- range 1:
- range 2:
- range 3:
Setting function:
Fine-tuned lighting level:
Fine adjustment of lighting level:
Time delay t:
Setting time delay t:
Output
Sending communication RF packet:
Range in open area:
Other data
Operating temperature:
Storage temperature:
Operating position:
Protection degree:
Pollution level:
Dimensions:
Weight:
Applicable standards:
Attention:
When you instal iNELS RF Control system, you have to keep minimal
distance 1 cm between each units.
Between the individual commands must be an interval of at least 1s.
Detektor sumraka
RS
www.elkoep.rs
U-Energister, d.o.o.| Noveških interniraca 1V | 31000 Užice | Serbia | e-mail: o[email protected]
U-Energister, d.o.o. | Norveških interniraca 1V | 31000 Užice | Republika Srbija | e-mail: o[email protected]
EN Support: +381 63 479 880 | RS Tehnička podrška +381 63 479 880
Zamena baterija
Otvorite poklopac elementa
pomou odvijača.
Uklonite originalne baterije
i umetnite nove u držač
(nikada ne kombinujte stare
i nove baterije). Obratite
pažnju na polaritet.
Nakon umetanja baterija,
element meri i procenjuje
intenzitet ambijentalnog
svetla, komunicira sa
programiranim elementima
i ukazuje na status baterija
i uspeh veze (vidi Funkcije).
Zatvorite poklopac.
Bezbednost rukovanja uređajem
Kada rukujete uređajem koji je van kutije, važno je izbegavati kontakt sa tečnostima.
Nikada ne postavljajte uređaj na provodne jastučie ili predmete, izbegavajte nepotreban
kontakt sa komponentama uređaja.
Tehnički podaci
2x1.5 baterry / baterije AAA
around 2 years (according to number of controlled units) /
oko 2 godine, u zavisnosti od učestalosti upotrebe
1 ... 10 lx
10 ... 100 lx
100 ... 1 000 lx
100 ... 1 000 lx
1 000 ... 10 000 lx
10 000 ... 100 000 lx
rotary switch / rotacioni prekidač
0.1 ... 1 x range / opseg
potentiometer / potenciometar
0 / 1 min. / 2 min.
rotary switch / rotacioni prekidač
866 MHz, 868 MHz, 916 MHz
up to / do 160 m
-20.. +50°C *
-30 .. +70°C
sensor for down or to the sides / senzor prema dole
IP65
2
72 x 62 x 34 mm
104 g
EN 60730-1, EN 300 220, EN 301 489 R&TTE Directive,Order. No 426/2000 Coll. (Directive
1999/EC
Napon napajanja:
Trajanje baterije:
Podešavanje opsega nivoa
Funkcija ((prekidač sumraka)
-Opseg 1:
-Opseg 2:
-Opseg 3:
Funkcija (svetlosni prekidač)
-Opseg 1:
-Opseg 2:
-Opseg 3:
Podešavanje funkcije:
Nežni nivo osvetljenja:
Fino podešavanje osvetljenja nivoa:
Vremensko kašnjenje (t):
Podešavanje vremenskog kašnjenja (t):
Izlaz
Frekvencija:
Domet na otvorenom prostoru:
Ostali podaci
Radna temperatura:
Temperatura skladištenja:
Pozicija rada:
Stepen zaštite:
Stepen zagađenja:
Dimenzije:
Težina:
Standardi;
* pazite na radnu temperaturu baterija
Upozorenje:
Kada instalirate iNELS RF Control sistem, mora se poštovati mi-
nimalno rastojanje od 1cm između pojedinih elemenata.
Između pojedinačnih komandi potrebno je da prođe interval
od 1s.
RFSOU-1
Wireless twilight switch
EN
02-53/2015 Rev.3
Made in Czech Republic
Instruction manual is designated for mounting and also for user of the device. It is always a part of its packing.
Installation and connection can be carried out only by a person with adequate professional qualication upon
understanding this instruction manual and functions of the device, and while observing all valid regulations.
Trouble-free function of the device also depends on transportation, storing and handling. In case you notice any
sign of damage, deformation, malfunction or missing part, do not install this device and return it to its seller. It
is necessary to treat this product and its parts as electronic waste after its lifetime is terminated. Before starting
installation, make sure that all wires, connected parts or terminals are de-energized. While mounting and servicing
observe safety regulations, norms, directives and professional, and export regulations for working with electrical
devices. Do not touch parts of the device that are energized – life threat. Due to transmissivity of RF signal, observe
correct location of RF components in a building where the installation is taking place. RF Control is designated only
for mounting in interiors. Devices are not designated for installation into exteriors and humid spaces. The must not
be installed into metal switchboards and into plastic switchboards with metal door – transmissivity of RF signal is
then impossible. RF Control is not recommended for pulleys etc. – radiofrequency signal can be shielded by an
obstruction, interfered, battery of the transceiver can get at etc. and thus disable remote control.
Warning
7/7
Detektor sumraka
RS
www.elkoep.rs
U-Energister, d.o.o.| Noveških interniraca 1V | 31000 Užice | Serbia | e-mail: o[email protected]
U-Energister, d.o.o. | Norveških interniraca 1V | 31000 Užice | Republika Srbija | e-mail: o[email protected]
EN Support: +381 63 479 880 | RS Tehnička podrška +381 63 479 880
Uputstva za upotrebu su namenjena za ugradnju kao i za korisnike proizvoda. Uputstva se uvek dobijaju uz
proizvod. Instalaciju i povezivanje smeju da obavljaju samo kvalikovane osobe, u skladu sa svim važeim
propisima, koja je detaljno upoznata sa ovim uputstvom i funkcijama komponenti. Funkcija elemenata takođe
zavisi od prethodnog načina transporta, skladištenja i rukovanja. Ako u bilo kom slučaju primetite nekakve
znakove ošteenja, deformacije, kvara ili ako neki deo nedostaje, nemojte ugrađivati uređaj, prijavite to pro-
davcu. Nakon što kopmonenti istekle životni vek, potrebno je tretirati je kao elektronski otpad. Pre započinja-
nja instalacije potrebno je prvo se uveriti da su žice, povezani delovi ili terminali bez napona. Tokom instalacije
i održavanja moraju se poštovati sigurnosni propisi, standardi, direktive i profesionalne odredbe za rad sa
električnom opremom. Ne dodirujte elemente pod naponom golim rukama, zbog mogunosti stujnog udara i
rizika od smrti. Zbog propustljivosti RF signala, obratiti pažnju na pravilno postavljanje RF elemenata u zgradi-
gde e se izvoditi ugradnja. RF kontrola je namenjena samo za unutrašnju ugradnju. Elementi nisu namenjeni
za spoljašnju ugradnju kao i za ugradnju u vlažne prostorije, ne smeju se ugraditi u metalne ormane kao ni
u plastične ormane sa metalnim vratima iz razloga što e to sprečiti prenos radio frekvencijskog signala. RF
konrola se ne prepuručuje za kontrolu uređaja koji pružaju životne funkcije kao i za kontrolu opasne opreme
kao što su pumpe, električni grejači bez termostata, liftova, dizalica itd. iz razloga što prenos radio frekvencije
može biti preklopnjen, ometen, baterija predajnika se može isprazniti i na taj način daljinski upravljač može
biti onemoguen.
Upozorenje

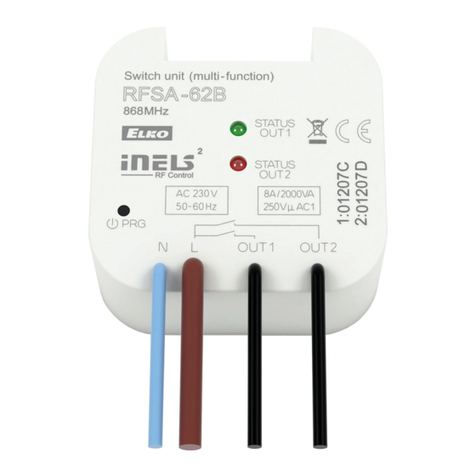
Other iNels Switch manuals

iNels RFSA-61M User manual

iNels

iNels RFSA-61M User manual

iNels RFSA-61M/MI User manual

iNels

iNels RFSA-61M/MI User manual

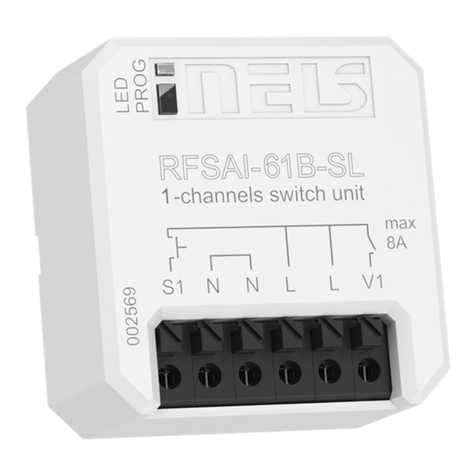
iNels RFSAI-61B User manual

iNels

iNels RFSAI-61B User manual

iNels RFSA-66MI User manual

iNels

iNels RFSA-66MI User manual

iNels RFSAI-62B User manual

iNels

iNels RFSAI-62B User manual

iNels RFSAI-61B User manual

iNels

iNels RFSAI-61B User manual

iNels RFSA-11B User manual

iNels

iNels RFSA-11B User manual

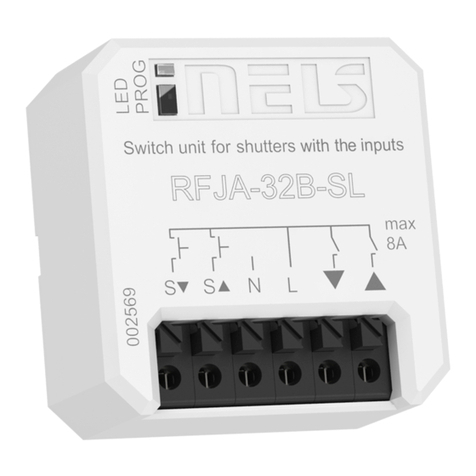
iNels RFJA-32B-SL User manual

iNels

iNels RFJA-32B-SL User manual

iNels WSB3-40 User manual

iNels

iNels WSB3-40 User manual

iNels RFSAI-61B User manual

iNels

iNels RFSAI-61B User manual

iNels RFSAI-61B Series User manual

iNels

iNels RFSAI-61B Series User manual

iNels RFSA-61M User manual

iNels

iNels RFSA-61M User manual

iNels RF KEY-40/W User manual

iNels

iNels RF KEY-40/W User manual

iNels RFSA-61MI User manual

iNels

iNels RFSA-61MI User manual

iNels RFSTI-11B-SL User manual

iNels

iNels RFSTI-11B-SL User manual

iNels RFSAI-11B-SL User manual

iNels

iNels RFSAI-11B-SL User manual

iNels WSB3-20 User manual

iNels

iNels WSB3-20 User manual

iNels RFUS-61 User manual

iNels

iNels RFUS-61 User manual

iNels RFSA-62B User manual

iNels

iNels RFSA-62B User manual

iNels RFSAI-11B-SL User manual

iNels

iNels RFSAI-11B-SL User manual

iNels RFSA-11B User manual

iNels

iNels RFSA-11B User manual

iNels RFSA-61M User manual

iNels

iNels RFSA-61M User manual

iNels RFSA-61B User manual

iNels

iNels RFSA-61B User manual

iNels RFSA-61M User manual

iNels

iNels RFSA-61M User manual

Popular Switch manuals by other brands

RuggedCom RSG2488 installation guide

RuggedCom

RuggedCom RSG2488 installation guide

Zte ZXR10 5900E Series user manual

Zte

Zte ZXR10 5900E Series user manual

SY MFT62 installation guide

SY

SY MFT62 installation guide

Belkin OmniView F1DE108C Quick installation guide

Belkin

Belkin OmniView F1DE108C Quick installation guide

KinAn KM0104 manual

KinAn

KinAn KM0104 manual

Nitrous Express 18959M quick start guide

Nitrous Express

Nitrous Express 18959M quick start guide

Racktivity ES2000 Seriesl user manual

Racktivity

Racktivity ES2000 Seriesl user manual

Toa N-8000RS installation manual

Toa

Toa N-8000RS installation manual

Aruba Networks PowerConnect W Clearpass 100 Software manual

Aruba Networks

Aruba Networks PowerConnect W Clearpass 100 Software manual

IBM TotalStorage L10 quick reference

IBM

IBM TotalStorage L10 quick reference

HPE Aruba Networking CX 6200 Series Installation and getting started guide

HPE

HPE Aruba Networking CX 6200 Series Installation and getting started guide

Dell PowerConnect 7048 Getting started guide

Dell

Dell PowerConnect 7048 Getting started guide

Kathrein EXD 1524 manual

Kathrein

Kathrein EXD 1524 manual

Versitron S72450 installation guide

Versitron

Versitron S72450 installation guide

Korg Krossfour KF4 quick start guide

Korg

Korg Krossfour KF4 quick start guide

DIGITAL LINX DL-S22 installation guide

DIGITAL LINX

DIGITAL LINX DL-S22 installation guide

Moxa Technologies NE-4100 Series user guide

Moxa Technologies

Moxa Technologies NE-4100 Series user guide

Cisco 4503 - Catalyst Switch How-to guide

Cisco

Cisco 4503 - Catalyst Switch How-to guide

manuals.online logo
manuals.online logoBrands
  • About & Mission
  • Contact us
  • Privacy Policy
  • Terms and Conditions

Copyright 2025 Manuals.Online. All Rights Reserved.