manuals.online logo
Brands
  1. Home
  2. •
  3. Brands
  4. •
  5. iNels
  6. •
  7. Switch
  8. •
  9. iNels RFSAI-11B-SL User manual

iNels RFSAI-11B-SL User manual

02-53/2021 Rev.0
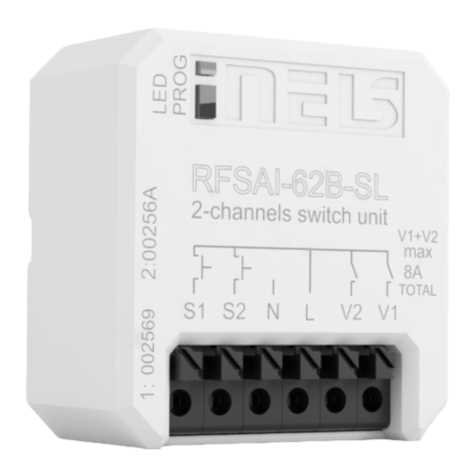
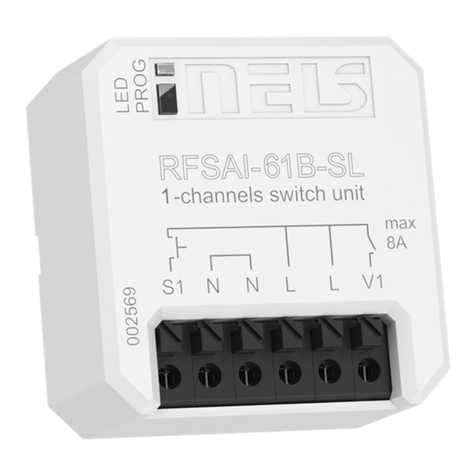
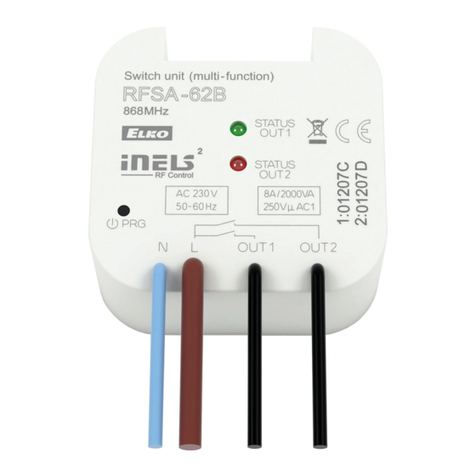
RFSAI-62B-SL, RFSAI-61B-SL, RFSAI-11B-SL
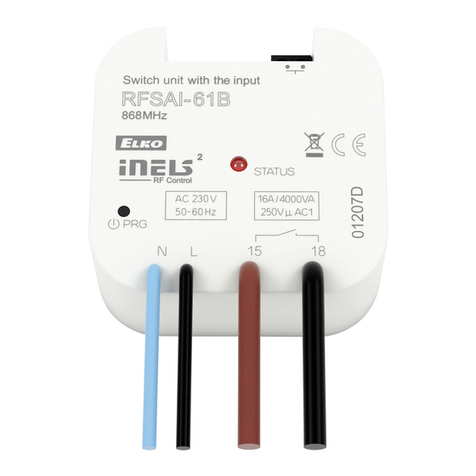
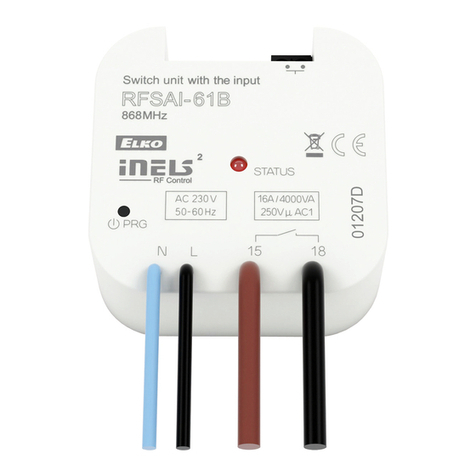
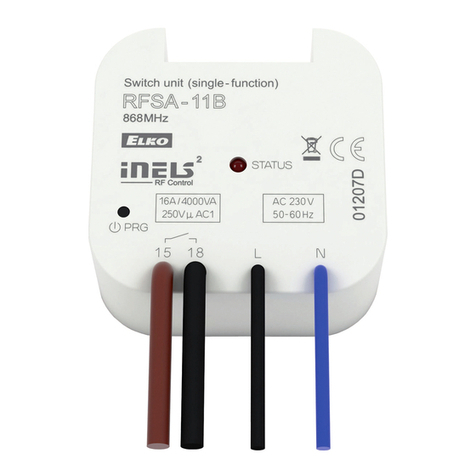
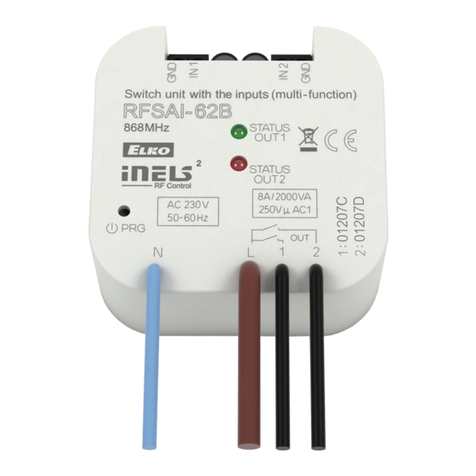
Switch unit with input for external button
EN
Made in Czech Republic
Characteristics /
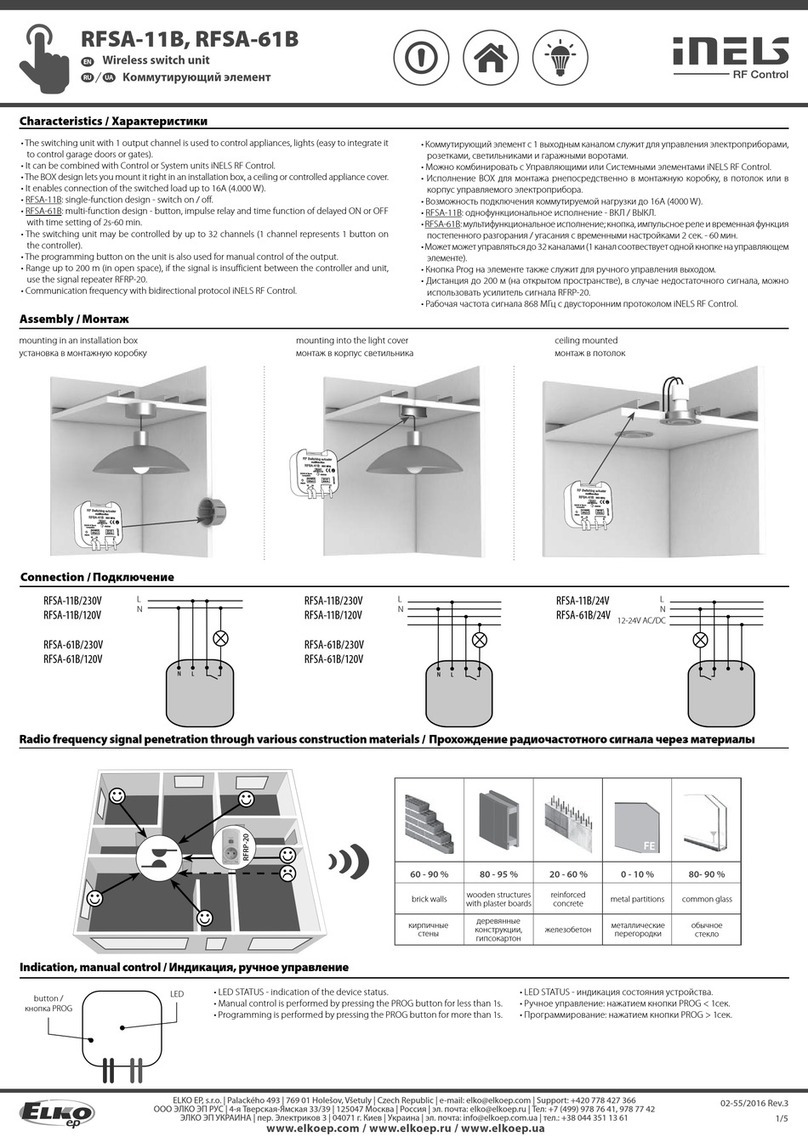
• The switching component with one/two output relays is used to control appliances and lights.
Switches/buttons connected to the wiring can be used for control.
• They can be combined with Detectors, Controllers or iNELS RF Control System Components.
• The BOX version offers installation directly in the installation box, ceiling or cover of the controlled
appliance. Easy installation thanks to screwless terminals.
• It allows the connection of switched loads with a total sum of 8 A (2000 W).
• Functions: for RFSAI 61B-SL and RFSAI 62B-SL - pushbutton, impulse relay and time functions of
delayed start or return with time setting 2 s-60 min. Any function can be assigned to each output
relay. For RFSAI-11B-SL, the button has a fixed function - ON / OFF.
• The external button is assigned in the same way as the wireless one.
• Each of the outputs can be controlled by up to 12/12 channels (1-channel represents one button
on the controller). Up to 25 channels for RFSAI-61B-SL and RFSAI-11B-SL.
• The programming button on the component also serves as a manual output control.
• Possibility to set the output status memory in case of failure and subsequent power recovery.
• The elements of the repeater can be set for the components via the RFAF / USB service device,
PC, application.
• Range up to 200 m (outdoors), in case of insufficient signal between the controller and the device,
use the RFRP-20 signal repeater or component with the RFIO2 protocol that support this function.
• Communication with bidirectional RFIO2 protocol.
• The contact material of the AgSnO2relay enables switching of light ballasts.
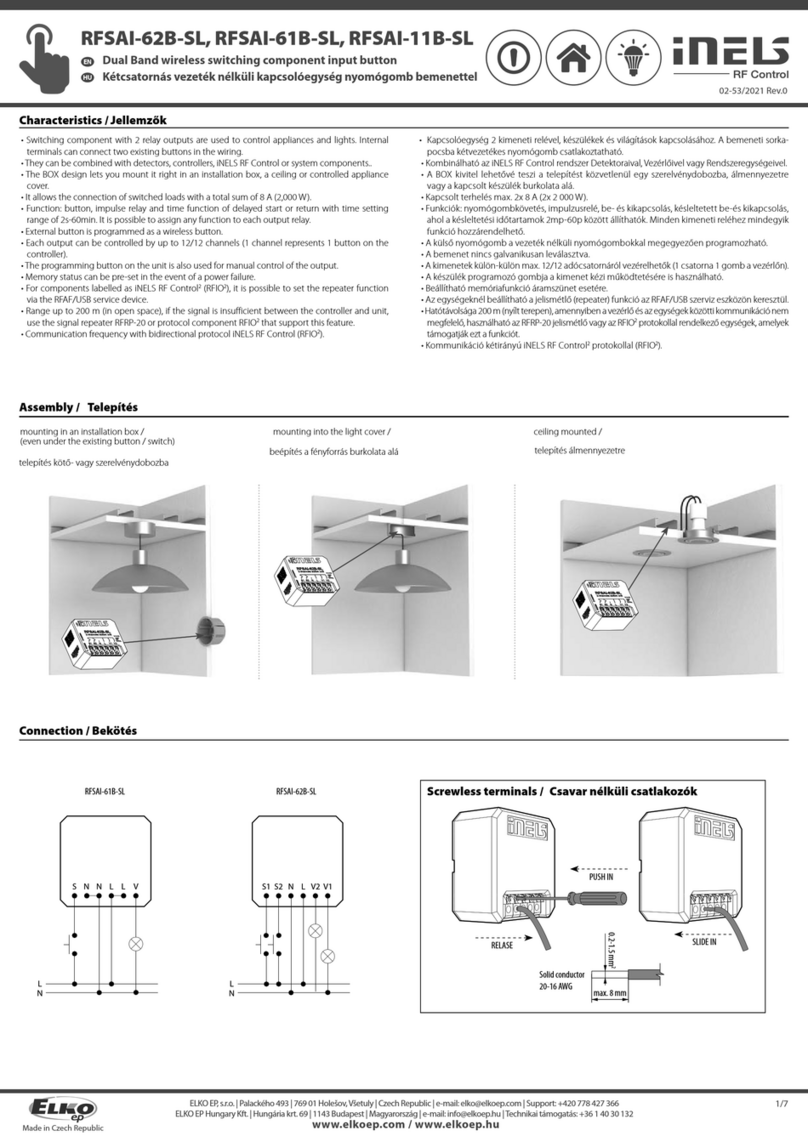
Assembly /
Connection /
Screwless terminals /
mounting in an installation box /
(even under the existing button / switch)
mounting into the light cover / ceiling mounted /
1/7
RFSAI-62B-SLRFSAI-61B-SL
Solid conductor
SLIDE IN
PUSH IN
RELASE
20-16 AWG
0.2-1.5 mm2
max. 8 mm
Elemento de activación con entradas para los botones externos
ES
ELKO EP, s.r.o. | Palackého 493 | 769 01 Holešov, Všetuly | Czech Republic | e-mail: [email protected]om | Support: +420 778 427 366
ELKO EP ESPAÑA, S.L. | C/ Josep Martinez 15a, bj | 07007 Palma de Mallorca | e-mail: [email protected] | Tel.: +34 971 751 425 | Fax: +34 971 428 076
www.elkoep.com / www.elkoep.es
Característica
• Schaltelement mit ein/zwei Ausgangsrelais wird zur Steuerung von Geräten und Leuchten ein-
gesetzt. Zur Steuerung können Schalter/Taster in der Elektroinstallation verwendet werden.
• Sie können mit Detektoren, Controllern oder Systemelementen iNELS RF Control kombiniert
werden.
• Die BOX-Version ermöglicht den Einbau direkt in die Installationsdose, die Decke oder das
Gehäuse des gesteuerten Geräts. Einfache Montage dank schraubenloser Klemmen.
• Ermöglicht den Anschluss von Schaltlasten mit insgesamt 8 A (2000 W).
• Funktionen: für RFSAI 61B-SL und RFSAI 62B-SL - Taster, Impulsrelais und Zeitfunktionen für ver-
zögerten Anlauf oder Rücklauf mit Zeiteinstellung 2 s-60 min. Jedem Ausgangsrelais kann eine
beliebige Funktion zugewiesen werden. Bei RFSAI-11B-SL hat die Taste eine feste Funktion - EIN/
AUS.
• Die externe Taste wird auf die gleiche Weise zugewiesen wie die Funktaste.
• Jeder der Ausgänge kann über bis zu 12/12 Kanäle gesteuert werden (1 Kanal entspricht einer
Taste auf dem Bediengerät). Bei RFSAI-61B-SL und RFSAI-11B-SL bis zu 25 Kanäle.
• Die Programmiertaste auf dem Element dient gleichzeitig als manuelle Ausgangskontrolle.
• Option zur Speicherung des Ausgangsstatus bei Stromausfall und anschließender Wiederhers-
tellung der Stromversorgung
• Die Repeaterfunktion der Elemente kann über RFAF/USB-Servicegerät, PC oder App eingestellt
werden.
• Reichweite bis zu 200 m (in offenen Bereichen), im Falle eines unzureichenden Signals zwischen
der Steuerung und dem Element, verwenden Sie den Signalverstärker RFRP-20 oder Elemente
mit RFIO2-Protokoll, die diese Funktion unterstützen.
• Kommunikation mit bidirektionalem Protokoll RFIO2.
• Das Relaiskontaktmaterial AgSnO2 ermöglicht das Schalten von Lichtvorschaltgeräten.
Montaje
Conexión
montaje en caja universal
(también detrás del pulsador existente)
montaje a la cubierta de la lampara montaje al falso techo
Terminales sin tornillos
02-53/2021 Rev.0
RFSAI-62B-SL, RFSAI-61B-SL, RFSAI-11B-SL
Switch unit with input for external button
EN
Made in Czech Republic
x
RFRP-20
Radio frequency signal penetration through various construction materials /
60 - 90 % 80 - 95 % 20 - 60 % 0 - 10 % 80- 90 %
brick walls wooden structures
with plaster boards
reinforced
concrete metal partitions common glass
Indication, manual control /
1. LED / PROG button
• LED green V1 - device status indication for output 1
• LED red V2 - device status indication for output 2.
Indicators of memory function:
On - LED blinks x 3.
Off - The LED lights up once for a long time.
• Manual control is performed by pressing the PROG
button for<1s.
• Programming is performed by pressing the PROG button
for 3-5s.
2. Terminal block - connection for external button
3. Terminal block - connecting the neutral conductor
4. Terminal block - load connection with the sum of the total
current 8A (eg V1=6A, V2=2A)
5. Terminal block for connecting the phase conductor
In the programming and operating mode, the LED on the
component lights up at the same time each time the button is
pressed - this indicates the incoming command.
* RFSAI-61B-SL: one output contact, status indication by red LED
Compatibility /
The device can be combined with all system components, controls and devices
of iNELS RF Control and iNELS RF Control2.
The detector can be assigned an iNELS RF Control2(RFIO2) communication pro-
tocol.
Channel selection /
Channel selection (RFSAI-62B-SL) is done by pressing the PROG buttons for 1-3s.
RFSAI-61B-SL: press for more than 1 second.
After button release, LED is flashing indicating the output channel: red (1) or
green (2). All other signals are indicated by corresponding color of LED for each
channel.
2/7
PROG <3s1 x

1
2
3
4
5
Use a suitable tool (pa-
per clip, screwdriver)
to push on the control
pin. The batteries
are raised and the
programming button is
released.
After removing
the control flaps,
the programming
button is accessible.
The programming
button is operated
with a suitable thin
tool.
Elemento de activación con entradas para los botones externos
ES
ELKO EP, s.r.o. | Palackého 493 | 769 01 Holešov, Všetuly | Czech Republic | e-mail: [email protected]om | Support: +420 778 427 366
ELKO EP ESPAÑA, S.L. | C/ Josep Martinez 15a, bj | 07007 Palma de Mallorca | e-mail: [email protected] | Tel.: +34 971 751 425 | Fax: +34 971 428 076
www.elkoep.com / www.elkoep.es
Transmisión de señales de radiofrecuencia en varios materiales de la construcción
pared de ladrillo estructuras de
madera con placas
de yeso
hormigón armado chapas
metálicas vidrio normal
Indicación, control manual
Compatibilidad
El elemento se puede combinar con todas las unidades del sistema, controladores
y unidades del sistema iNELS RF Control e iNELS RF Control2.
A la unidad tambien se pueden agregar los detectores denominados con protó-
colo iNELS RF Control2(RFIO2).
Elección del canal
La elección del canal se realiza mediante la pulsación del botón PROG a 1-3s.
RFSAI-11B-SL: presione durante más de 1 segundo.
Después de soltar el botón el LED parpadeará en rojo o verde para indicar el ca-
nal de salida. Todo lo demás se indica mediante el color de LED correspondiente.
1. LED / botón PROG
• LED verde V1 - indicación del estado del dispositivo
para salida 1
• LED rojo V2 - indicación del estado del dispositivo para salida 2.
Indicación de la función de memoria:
activada - LED parpadea 3x.
desactivada - LED ilumina largo1x.
• Control manual se realiza mediante el botón PROG < 1s.
• Programación se realiza mediante el botón PROG 3-5s.
2. Terminales - para la conexión del pulsador externo
3. Terminal para conectar el conductor neutro
4. Terminales para conexión de carga con la suma de la corrien-
te total 8A
(e.j. V1=6A, V2=2A)
5. Terminales para conectar el conductor de fase
En modo de programación y eliminación con cada pulsación
del botón de controlador al mismo tiempo ilumina el LED en la
unidad - así se indica la recepción de orden.
* RFSAI-11B-SL: un contacto de salida, indicación de estado mediante
LED rojo
Utilice una herramienta
adecuada (clip, destor-
nillador) para empujar el
pasador de control. Las
pilas se elevan y el botón de
programación se suelta. Después de quitar
las aletas de control,
se puede acceder
al botón de progra-
mación.
El botón de
programación se
opera con una
herramienta delga-
da adecuada.
02-53/2021 Rev.0
RFSAI-62B-SL, RFSAI-61B-SL, RFSAI-11B-SL
Switch unit with input for external button
EN
Made in Czech Republic

1 x

1 x
Functions and programming with RF transmitters /
Function button /
Description of button /
The output contact will be closed by pressing the button and opened by releasing
the button.
For the correct execution of individual commands (press = closing / releasing the
button = opening), the time delay between these commands must be a min of .
1s (press - delay 1s - release).
Programming /
Press of programming button
on receiver RFSAI-62B for 3-5 s
(RFSAI-61B-SL: press for more than
1 s) will activate receiver RFSAI-62B
into programming mode. LED is
flashing in 1s interval.
Press of programming button on
receiver RFSAI-62B for 3-5 s (RF-
SAI-11B-SL: press for more than 1s)
will activate receiver RFSAI-62B
into programming mode. LED is
flashing in 1s interval.
Press of programming button on
receiver RFSAI-62B for 3-5 s (RF-
SAI-61B-SL: press for more than 1
s) will activate receiver RFSAI-62B
into programming mode. LED is
flashing in 1s interval.
Select and press one button
on wireless switch, to this but-
ton will be assigned function
Button.
Press of programming button
on receiver RFSAI-62B shorter
then 1 second will finish pro-
gramming mode. The LED
lights up according to the pre-
set memory function.
Function switch on /
Description of switch on /
The output contact will be closed by pressing the button.
Programming /
Two presses of your selected
button on the RF transmitter
assigns the function switch on
(must be a lapse of 1s between
individual presses).
Press of programming button
on receiver RFSAI-62B shorter
then 1 second will finish pro-
gramming mode. The LED
lights up according to the pre-
set memory function.
3/7

1 x
Function switch off /
Description of switch o /
The output contact will be opened by pressing the button.
Programming /
Three presses of your selected
button on the RF transmitter
assigns the function switch off
(must be a lapse of 1s between
individual presses).
Press of programming button
on receiver RFSAI-62B shorter
then 1 second will finish pro-
gramming mode. The LED
lights up according to the pre-
set memory function.
2

1 x
2

2 x
2

3 x
PROG <1s1 x
3
PROG <1s1 x
3
1
PROG <5s1 x
3
PROG <1s1 x
1
PROG <5s1 x
1
PROG <5s1 x






Elemento de activación con entradas para los botones externos
ES
ELKO EP, s.r.o. | Palackého 493 | 769 01 Holešov, Všetuly | Czech Republic | e-mail: [email protected]om | Support: +420 778 427 366
ELKO EP ESPAÑA, S.L. | C/ Josep Martinez 15a, bj | 07007 Palma de Mallorca | e-mail: [email protected] | Tel.: +34 971 751 425 | Fax: +34 971 428 076
www.elkoep.com / www.elkoep.es
Funciones y programación con RF controlador
Función botón
Descripción de función botón
Pulsando un botón del pulsador el contacto de salida se activa, al soltar el botón
la salida se desactiva.
Para la correcta ejecución de las órdenes (pulso = conexión / suelto del botón =
desconexión), el tiempo de demora entre estas órdenes debe ser min. 1s (pulso
- demora 1s - suelto).
Programación
Pulsando el botón de programa-
ción de la unidad RFSAI-62B du-
rante más de 3-5 segundos (RFS-
AI-11B-SL: presione durante más
de 1 segundo), entra al modo de
la programación. LED parpadea
en intervalo de 1 segundo.
Pulsación al botón seleccionado
del RF controlador se asigna la
función botón. Pulsando el botón de progra-
mación de la unidad RFSAI-
62B durante menos de 1 se-
gundo, terminará el modo de
programación. LED se ilumina
según la función de memoria
ajustada.
Función encender
Descripción de función encender
Pulsando el botón del pulsador el contacto de salida se activa.
Programación
Pulsando el botón de programa-
ción de la unidad RFSAI-62B du-
rante más de 3-5 segundos (RFS-
AI-11B-SL: presione durante más
de 1 segundo), entra al modo de
la programación. LED parpadea
en intervalo de 1 segundo.
2x pulsaciones al botón selec-
cionado del RF controlador asig-
na la función encender, entre los
pulsos hay que cumplir retardo
de 1s.
Pulsando el botón de progra-
mación de la unidad RFSAI-
62B durante menos de 1 se-
gundo, terminará el modo de
programación. LED se ilumina
según la función de memoria
ajustada.
Función apagar
Descripción de función apagar
Pulsando el botón del pulsador el contacto de salida se desactiva.
Programación
Pulsando el botón de programa-
ción de la unidad RFSAI-62B du-
rante más de 3-5 segundos (RFS-
AI-11B-SL: presione durante más
de 1 segundo), entra al modo de
la programación. LED parpadea
en intervalo de 1 segundo.
3x pulsaciones al botón selec-
cionado del RF controlador
asigna la función apagar, entre
los pulsos hay que cumplir re-
tardo de 1s.
Pulsando el botón de progra-
mación de la unidad RFSAI-
62B durante menos de 1 se-
gundo, terminará el modo de
programación. LED se ilumina
según la función de memoria
ajustada.
02-53/2021 Rev.0
RFSAI-62B-SL, RFSAI-61B-SL, RFSAI-11B-SL
Switch unit with input for external button
EN
Made in Czech Republic

1 x

1 x
Function impulse relay /
Description of impulse relay /
The output contact will be switched to the opposite position by each press of the
button. If the contact was closed, it will be opened and vice versa.
Programming /
Four presses of your selected
button on the RF transmitter as-
signs the function impulse relay
(must be a lapse of 1s between
individual presses).
Press of programming button
on receiver RFSAI-62B shorter
then 1 second will finish pro-
gramming mode. The LED
lights up according to the pre-
set memory function.
Funcion delayed off /
Description of delayed o /
The output contact will be closed by pressing the button and opened after the set
time interval has elapsed.
Programming /
Assignment of the delayed off
function is performed by five
presses of the selected button
on the RF transmitter (must be
a lapse of 1s between individual
presses).
Press of programming button
longer then 5 seconds, will
activate actuator into timing
mode. LED flashs 2x in each
1s interval. Upon releasing the
button, the delayed return
time starts counting.
4/7
t = 2s . . . 60min.

After the desired time has
elapsed (range of 2s...60min),
the timing mode ends by
pressing the button on the
RF transmitter, to which the
delayed return function is
assigned. This stores the set
time interval into the actuator
memory.
Press of programming button
on receiver RFSAI-62B shorter
then 1 second will finish pro-
gramming mode. The LED lights
up according to the pre-set
memory function.
2

4 x
2

5 x
4

1 x
PROG <1s1 x
31
PROG <5s1 x

1
PROG <5s1 x
1
PROG <5s1 x


3
PROG > 5s1 x

5
PROG <1s1 x PROG <1 x

Press of programming button
on receiver RFSAI-62B for 3-5 s
(RFSAI-61B-SL: press for more than
1 s) will activate receiver RFSAI-62B
into programming mode. LED is
flashing in 1s interval.
Press of programming button on
receiver RFSAI-62B for 3-5 s (RF-
SAI-61B-SL: press for more than 1
s) will activate receiver RFSAI-62B
into programming mode. LED is
flashing in 1s interval.
Elemento de activación con entradas para los botones externos
ES
ELKO EP, s.r.o. | Palackého 493 | 769 01 Holešov, Všetuly | Czech Republic | e-mail: [email protected]om | Support: +420 778 427 366
ELKO EP ESPAÑA, S.L. | C/ Josep Martinez 15a, bj | 07007 Palma de Mallorca | e-mail: [email protected] | Tel.: +34 971 751 425 | Fax: +34 971 428 076
www.elkoep.com / www.elkoep.es
Función relé de impulso-telerruptor
Descripción de función telerruptor
Con cada pulsación del botón el contacto de salida cambia la posición. Si estaba
cerrado - se abre, si estaba abierto - se cierra.
Programación
Pulsando el botón de programa-
ción de la unidad RFSAI-62B du-
rante más de 3-5 segundos (RFS-
AI-11B-SL: presione durante más
de 1 segundo), entra al modo de
la programación. LED parpadea
en intervalo de 1 segundo.
4x pulsaciones al botón selec-
cionado del RF controlador
asigna la función telerruptor,
entre los pulsos hay que cumplir
retardo de 1s.
Pulsando el botón de progra-
mación de la unidad RFSAI-
62B durante menos de 1 se-
gundo, terminará el modo de
programación. LED se ilumina
según la función de memoria
ajustada.
Función retardo a la desconexión
Descripción de función retardo en OFF
Pulsando un botón el contacto de salida se enciende y se apaga después de un
período de tiempo determinado.
Programación
Pulsando el botón de pro-
gramación de la unidad
RFSAI-62B durante más de
3-5 segundos (RFSAI-11B-SL:
presione durante más de 1
segundo), entra al modo de la
programación. LED parpadea
en intervalo de 1 segundo.
5x pulsaciones al botón selec-
cionado del RF controlador
asigna la función retardo en OFF,
entre los pulsos hay que cumplir
retardo de 1s.
Pulsación al botón de progra-
mación a más de 5 segundos,
activará modo temporizador.
LED parpadea 2x en intervalos
de 1 segundo. Después de
soltar el botón comienza el
tiempo de retardo en OFF.
Después del tiempo deseado
(a menos de 2s...a 60min) el
modo de temporizador se ter-
mina pulsando el botón del
controlador RF, donde está
asignada la función retardo
en OFF. Tiempo establecido
se guarda en la memoria del
actuador.
Pulsando el botón de progra-
mación de la unidad RFSAI-62B
durante menos de 1 segundo,
terminará el modo de progra-
mación. LED se ilumina según
la función de memoria ajustada.
02-53/2021 Rev.0
RFSAI-62B-SL, RFSAI-61B-SL, RFSAI-11B-SL
Switch unit with input for external button
EN
Made in Czech Republic

1 x
t = 2s . . . 60min.

Function delayed on /
Description of delayed on /
The output contact will be opened by pressing the button and closed after the set
time interval has elapsed.
Programming /
Assignment of the delayed on
function is performed by six
presses of the selected button
on the RF transmitter (must be
a lapse of 1s between individual
presses).
Press of programming button
longer then 5 seconds, will
activate actuator into timing
mode. LED flashs 2x in each
1s interval. Upon releasing the
button, the delayed return
time starts counting.
After the desired time has
elapsed (range of 2s...60min),
the timing mode ends by
pressing the button on the
RF transmitter, to which the
delayed return function is
assigned. This stores the set
time interval into the actuator
memory.
Press of programming button
on receiver RFSAI-62B shorter
then 1 second will finish pro-
gramming mode. The LED lights
up according to the pre-set
memory function.
Programming with RF control units /
5/7
Addresses listed on the front side of the actuator are used for programming
and controlling the actuator and individual RF channels by control units.
addresses for
individual relays
(channels) /
2

6 x
4

1 x
1
PROG <5s1 x
1
PROG <5s1 x

3
PROG <5s1 x

5
PROG <1s1 x PROG <1 x

Press of programming button on
receiver RFSAI-62B for 3-5 s (RF-
SAI-61B-SL: press for more than
1s) will activate receiver RFSAI-
62B into programming mode.
LED is flashing in 1s interval.
Elemento de activación con entradas para los botones externos
ES
ELKO EP, s.r.o. | Palackého 493 | 769 01 Holešov, Všetuly | Czech Republic | e-mail: [email protected]om | Support: +420 778 427 366
ELKO EP ESPAÑA, S.L. | C/ Josep Martinez 15a, bj | 07007 Palma de Mallorca | e-mail: [email protected] | Tel.: +34 971 751 425 | Fax: +34 971 428 076
www.elkoep.com / www.elkoep.es
Función retardo a la conexión
Descripción del retardo en ON
Pulsando un botón el contacto de salida se apaga y vuelve encenderse después
de un período de tiempo determinado.
Programación
Pulsando el botón de pro-
gramación de la unidad
RFSAI-62B durante más de
3-5 segundos (RFSAI-11B-SL:
presione durante más de 1
segundo), entra al modo de la
programación. LED parpadea
en intervalo de 1 segundo.
6x pulsaciones al botón selec-
cionado del RF controlador
asigna la función retardo en ON,
entre los pulsos hay que cumplir
retardo de 1s.
Pulsación al botón de progra-
mación a más de 5 segundos,
activará modo temporizador.
LED parpadea 2x en intervalos
de 1 segundo. Después de
soltar el botón comienza el
tiempo de retardo en ON.
Después del tiempo deseado
(a menos de 2s...a 60min) el
modo de temporizador se ter-
mina pulsando el botón del
controlador RF, donde está
asignada la función retardo
en ON. Tiempo establecido
se guarda en la memoria del
actuador.
Pulsando el botón de progra-
mación de la unidad RFSAI-62B
durante menos de 1 segundo,
terminará el modo de progra-
mación. LED se ilumina según
la función de memoria ajustada.
Programación con Unidades del sistema RF
Para la programación y el control de cada canal se utilizan direcciones en la
parte frontal de la unidad.
dirección de cada
relé (canal)
02-53/2021 Rev.0
RFSAI-62B-SL, RFSAI-61B-SL, RFSAI-11B-SL
Switch unit with input for external button
EN
Made in Czech Republic
Delete actuator /
Deleting one position of the transmitter /
By pressing the programming button on the actuator for 8 sec-
onds (RFSAI-61B-SL: press for 5 second), deletion of one transmitter
activates. LED flashs 4x in each 1s interval.
Pressing the required button on the transmitter deletes it from
the actuator's memory.
To confirm deletion, the LED will confirm with a flash long and
the component returns to the operating mode. The memory
status is not indicated.
Deletion does not affect the pre-set memory function.
Deleting the entire memory /
By pressing the programming button on the actuator for 11 sec-
onds (RFSAI-61B-SL: press for more than 8 second), deletion occurs
of the actuator's entire memory. LED flashs 4x in each 1s interval.
The actuator goes into the programming mode, the LED flashes
in 0.5s intervals (max. 4 min.).
You can return to the operating mode by pressing the Prog button
for less than 1s. The LED lights up according to the pre-set memory
function and the component returns to the operating mode.
Deletion does not affect the pre-set memory function.
Selecting the memory function /
• Memory function on:
- For functions 1-4, these are used to store the last state of the relay output before the supply
voltage drops, the change of state of the output to the memory is recorded 15 seconds after
the change.
- For functions 5-6, the target state of the relay is immediately entered into the memory after
the delay, after re-connecting the power, the relay is set to the target state.
• Memory function off:
When the power supply is reconnected, the relay remains off.
Press of programming button on receiver RFSAI-62B for 3-5 sec-
ond (RFSAI-61B-SL: press for 1 second) will activate receiver RFSAI-
62B into programming mode. LED is flashing in 1s interval.
Pressing the programming button on the RFSAI-62B receiver for
less than 1 second will finish the programming mode, this will re-
verse the memory function. The LED lights up according to the
current pre-set memory function. The set memory function is
saved.
Every other change is made in the same way.
6/7
PROG
1 x PROG
<
1 x

PROG 11s1 x PROG
<
1 x

1
PROG <5s1 x PROG <1 x

2
PROG <1s1 x PROG <1 x

The external button RFSAI-62B-SL is programmed in the same way as for wireless.
RFSAI-11B-SL it is not programmed, it has a fixed function.
8s
Elemento de activación con entradas para los botones externos
ES
ELKO EP, s.r.o. | Palackého 493 | 769 01 Holešov, Všetuly | Czech Republic | e-mail: [email protected]om | Support: +420 778 427 366
ELKO EP ESPAÑA, S.L. | C/ Josep Martinez 15a, bj | 07007 Palma de Mallorca | e-mail: [email protected] | Tel.: +34 971 751 425 | Fax: +34 971 428 076
www.elkoep.com / www.elkoep.es
Borrar la unidad
Borrar una posición del controlador
Con un largo pulso al botón de programación de la unidad RF
por un período de 8 segundos (RFSAI-11B-SL: presione durante
1 segundo) se activará modo "borrar" un solo transmisor. LED 4x
parpadeará en intervalo de un segundo.
Al pulsar el botón del controlador se elimina de memoria de
la unidad.
Para confirmar la eliminación, el LED parpadeará durante un
momento largo y la unidad volverá al modo de funcionamien-
to. El estado de la memoria no está indicado.
Borrar no afecta a la función de memoria ajustada.
Borrar toda memoria
Con un largo pulso del botón de programación de la unidad du-
rante 11 segundos (RFSAI-11B-SL: presione durante 8 segundo)
se borrará toda memoria de la unidad. LED 4x parpadeará en
intervalo de un segundo.
Unidad entra al modo de programación, el LED parpadea en
intervalos de 0.5s (máx. 4 min.).
Para volver al modo operativo, pulse el botón Prog por menos
de 1 segundo. LED se enciende de acuerdo con la función de
memoria de ajuste y la unidad vuelve al modo de funciona-
miento. Borrar no afecta a la función de memoria ajustada.
Elegir función de memoria
Pulsando el botón de programación de la unidad RFSAI-62B
durante más de 3-5 segundo (RFSAI-11B-SL: presione durante 1
segundo), entra al modo de la programación. LED parpadea en
intervalo de 1 segundo. Presionando el botón de programación en la unidad RFSAI-62B a
menos de 1s se finaliza el modo de programación, esto cambiará
la función de memoria al contrario. El LED se enciende de acuerdo
con la función de memoria actualmente configurada. Se guarda
la función de memoria ajustada. Cada otro cambio de la progra-
mación se hace de la misma manera.
• Función de memoria activada:
- Para las funciones 1-4, se utiliza para almacenar el último estado de la salida de relé antes de
perder la tensión de alimentación, el cambio de estado de la salida se memorizará después de
15 segundos del cambio.
- En la función 5-6, inmediatamente se introduce a la memoria del relé su estado que debe tener
después de la temporización, después de volver la tensión de alimentación, el relé se establece
al último estado ajustado.
• Función de memoria desactivada:
Cuando vuelve la conexión de la fuente de alimentación, el relé permanece apagado.
02-53/2021 Rev.0
RFSAI-62B-SL, RFSAI-61B-SL, RFSAI-11B-SL
Switch unit with input for external button
EN
Made in Czech Republic
↯
Technical parameters /
* Control button input is at the supply voltage potential.
Warning
Instruction manual is designated for mounting and also for user of the device. It is always a part of its packing. Instal-
lation and connection can be carried out only by a person with adequate professional qualification upon under-
standing this instruction manual and functions of the device, and while observing all valid regulations. Trouble-free
function of the device also depends on transportation, storing and handling. In case you notice any sign of damage,
deformation, malfunction or missing part, do not install this device and return it to its seller. It is necessary to treat
this product and its parts as electronic waste after its lifetime is terminated. Before starting installation, make sure
that all wires, connected parts or terminals are de-energized. While mounting and servicing observe safety regula-
tions, norms, directives and professional, and export regulations for working with electrical devices. Do not touch
parts of the device that are energized – life threat. Due to transmissivity of RF signal, observe correct location of
RF components in a building where the installation is taking place. RF Control is designated only for mounting in
interiors. Devices are not designated for installation into exteriors and humid spaces. The must not be installed into
metal switchboards and into plastic switchboards with metal door – transmissivity of RF signal is then impossible.
RF Control is not recommended for pulleys etc. – radiofrequency signal can be shielded by an obstruction, inter-
fered, battery of the transceiver can get flat etc. and thus disable remote control.
↯
Attention:
When you instal iNELS RF Control system, you have to keep minimal distance 1 cm between each units.
Between the individual commands must be an interval of at least 1s.
7/7
RFSAI-11B-SL RFSAI-61B-SL RFSAI-62B-SL
1x switching / 2xswitching/
25-channels/ 2 x 12-channels/
866–922 MHz (for more information see p. 74)/
yes/
button PROG (ON/OFF)/
yes/
in open space up to 200 m/
any/
free at lead-in wires/
screwless terminals/
0.2-1.5 mm2solid/exible/
Supply voltage:
Supply voltage frequency:
Apparent input:
Dissipated power:
Supply voltage tolerance:
Output
Number of contacts:
Rated current:
Switching power:
Peak current:
Switching voltage:
Mechanical service life:
Electrical service life (AC1):
Control
Wireless:
Number of functions:
Communication protocol:
Frequency:
Repeater function:
Manual control:
External button / switch: Range:
Other data
Operating temperature:
Operating position:
Operating position:
Mounting:
Protection:
Overvoltage category:
Contamination degree:
Connection:
Connecting conductor:
Dimensions:
Weight:
Related standards:
ELKO EP declares that the RFSAI-xxB-SL type of equipment complies with Directives 2014/53/EU, 2011/65/EU, 2015/863/EU and 2014/35/EU. The full EU
Declaration of Conformity is at:
https://www.elkoep.com/switching-units-with-inputs-for-external-buttons----rfsai-11b-sl
https://www.elkoep.com/switching-units-with-inputs-for-external-buttons----rfsai-61b-sl
https://www.elkoep.com/switching-units-with-inputs-for-external-buttons---rfsai-62b-sl
ELKO EP, s.r.o., Palackého 493, 769 01 Holešov, Všetuly, Czech Republic
Tel.: +420 573 514 211, e-mail: elko@elkoep.com, www.elkoep.com
Elemento de activación con entradas para los botones externos
ES
ELKO EP, s.r.o. | Palackého 493 | 769 01 Holešov, Všetuly | Czech Republic | e-mail: [email protected]om | Support: +420 778 427 366
ELKO EP ESPAÑA, S.L. | C/ Josep Martinez 15a, bj | 07007 Palma de Mallorca | e-mail: [email protected] | Tel.: +34 971 751 425 | Fax: +34 971 428 076
www.elkoep.com / www.elkoep.es
Especificaciones técnicas
* Entrada del pulsador de control está en el potencial de la tensión de red.
Advertencia
El manual de uso está dirigido para la instalación y el usuario del dispositivo. Manual siempre está incluido en
embalaje. La instalación y conexión puede realizar sólo personal con adecuadas cualificaciones profesionales, de
conformidad con todas las regulaciones aplicadas, y que está perfectamente familiarizado con estas instrucciones
y funciones del dispositivo. Función del dispositivo también depende del transporte, almacenamiento y la manipu-
lación. Si se observa cualquier signo de daño, deformación, mal funcionamiento o pieza que falta, no instale este
producto y devolvelo al vendedor. Con el producto y sus componentes debe ser tratado después de su vida útil
como con residuos electrónicos. Antes de iniciar la instalación, asegúrese de que todos los cables, partes o termi-
nales conectados están sin la conexión a la red. En el montaje y el mantenimiento se deben observar las normas de
seguridad, normas, directivas y reglamentos para trabajar con equipos eléctricos. No toque las partes del dispositivo
que están conectadas en la red - puede producir peligro de vida. Debido a la transmisibilidad de la señal RF, observe
la correcta ubicación de los componentes RF en un edificio donde la instalación se lleva a cabo. RF Control está
diseñado para montaje en interiores, las unidades no están diseñados para la instalación en exteriores y espacios
húmedos, no se pueden instalar en cuadros eléctricos de metal y en cuadros eléctricos plásticos con puerta de
metal - lo que empeora transmisividad de la señal RF. RF Control no se recomienda para el control de dispositivos
que ofrecen funciones vitales o para controlar dispositivos tales como bombas, el. calentadores sin termostato,
ascensores, montacargas, etc. - Señal de radiofrecuencia puede estar bloqueado por una obstrucción, interferida,
la batería del controlador puede estar ya sin energía, etc. y por lo tanto el control remoto puede ser incapacitado.
Advertencia:
En la instalación de iNELS RF Control debe haber una distancia mínima entre las diferentes unidades
de un centímetro.
Entre los diferentes ordenes debe pasar al menos 1s.
Tensión de alimentación:
Frecuencia de la tensión de alimentación:
Consumo aparente:
Consumo de perdida:
Tolerancia de alimentación:
Salida
Número de contactos:
Corriente nominal:
Potencia de conmutación:
Pico de corriente:
Tensión de conmutación:
Vida mecánica:
Vida eléctrica (AC1):
Control
Inalámbrico:
Número de funciones:
Protocolo de comunicación:
Frecuencia:
Función repeater:
Control manual:
Botón externo:
Rango:
Más información
Temperatura de funcionamiento:
Posición de funcionamiento:
Montaje:
Protección:
Categoría de sobretensión:
Grado de contaminación:
Conexión:
Salida (hilos CY, sección):
Dimensiones:
Peso:
Normas conexas:
230 V AC
50-60 Hz
7 VA / cos φ = 0.1
0.7 W
+10 %; -15 %
1x interruptor 2xinterruptor
8 A / AC1
2000 VA / AC1
10 A / <3 s
250 V AC1
1x10⁷
1x10⁵
25 canales 2x12 canales
1 6 6
RFIO2
866–922 MHz (ver página 74)
Sí
botón PROG (ON/OFF)
Sí
en espacio abierto hasta 200 m
-15 až + 50 °C
ningún
suelto en los cables de alimentación
IP40
III.
2
abrazaderas sin tornillos
0.2-1.5 mm2rme/exible
43 x 44 x 22 mm
31g 45 g
EN 60730, EN 63044, EN 300 220, EN 301 489

Other manuals for RFSAI-11B-SL

4

This manual suits for next models

2

Other iNels Switch manuals

iNels RFSA-11B User manual

iNels

iNels RFSA-11B User manual

iNels RFSA-62B User manual

iNels

iNels RFSA-62B User manual

iNels RFSA-61MI User manual

iNels

iNels RFSA-61MI User manual

iNels RFSA-61M/MI User manual

iNels

iNels RFSA-61M/MI User manual

iNels RFSA-61M User manual

iNels

iNels RFSA-61M User manual

iNels RFSTI-11 User manual

iNels

iNels RFSTI-11 User manual

iNels RFSTI-11B-SL User manual

iNels

iNels RFSTI-11B-SL User manual

iNels RFSA-11B User manual

iNels

iNels RFSA-11B User manual

iNels RFSAI-62B User manual

iNels

iNels RFSAI-62B User manual

iNels RFSA-61M User manual

iNels

iNels RFSA-61M User manual

iNels RFSA-61M User manual

iNels

iNels RFSA-61M User manual

iNels RFSOU-1 User manual

iNels

iNels RFSOU-1 User manual

iNels RFSA-61M User manual

iNels

iNels RFSA-61M User manual

iNels RFSA-11B User manual

iNels

iNels RFSA-11B User manual

iNels RFSA-61B User manual

iNels

iNels RFSA-61B User manual

iNels RFSA-61M User manual

iNels

iNels RFSA-61M User manual

iNels RFJA-32B-SL User manual

iNels

iNels RFJA-32B-SL User manual

iNels RFSAI-11B-SL User manual

iNels

iNels RFSAI-11B-SL User manual

iNels RFSA-11B User manual

iNels

iNels RFSA-11B User manual

iNels RFUS-61 User manual

iNels

iNels RFUS-61 User manual

iNels RFUS-11 User manual

iNels

iNels RFUS-11 User manual

iNels RFSAI-61B User manual

iNels

iNels RFSAI-61B User manual

iNels RFSAI-11B-SL User manual

iNels

iNels RFSAI-11B-SL User manual

iNels RFSA-11B User manual

iNels

iNels RFSA-11B User manual

Popular Switch manuals by other brands

Newport MS-1315TT-12 Operation manual

Newport

Newport MS-1315TT-12 Operation manual

CAMBRIONIX SS15 user manual

CAMBRIONIX

CAMBRIONIX SS15 user manual

UniControl Cleveland Controls RSS-495-011 manual

UniControl

UniControl Cleveland Controls RSS-495-011 manual

ITT NEO-DYN 122P Installation and Operation Manua

ITT

ITT NEO-DYN 122P Installation and Operation Manua

SignaMax 065-7532 user guide

SignaMax

SignaMax 065-7532 user guide

AVMATRIX VS0601U quick start guide

AVMATRIX

AVMATRIX VS0601U quick start guide

LEGRAND green power ZLGP18 manual

LEGRAND

LEGRAND green power ZLGP18 manual

Analog way Ascender 32-4K quick start guide

Analog way

Analog way Ascender 32-4K quick start guide

TP-Link DS108GE installation guide

TP-Link

TP-Link DS108GE installation guide

HPE FlexFabric 5930 Series Network management and monitoring command reference

HPE

HPE FlexFabric 5930 Series Network management and monitoring command reference

HP StorageWorks 2/8-EL - SAN Switch release note

HP

HP StorageWorks 2/8-EL - SAN Switch release note

ANTAIRA LNP-0800G-M12-67-24 user manual

ANTAIRA

ANTAIRA LNP-0800G-M12-67-24 user manual

Goobay MS-512PQ-N quick start guide

Goobay

Goobay MS-512PQ-N quick start guide

Sima SVS-4D user manual

Sima

Sima SVS-4D user manual

Zte MF28B user manual

Zte

Zte MF28B user manual

NVT NV-FLX-024 Quick install guide

NVT

NVT NV-FLX-024 Quick install guide

Mercoid DS-7000 Series Installation and operating instructions

Mercoid

Mercoid DS-7000 Series Installation and operating instructions

Wise P941 instruction manual

Wise

Wise P941 instruction manual

manuals.online logo
manuals.online logoBrands
  • About & Mission
  • Contact us
  • Privacy Policy
  • Terms and Conditions

Copyright 2025 Manuals.Online. All Rights Reserved.