manuals.online logo
Brands
  1. Home
  2. •
  3. Brands
  4. •
  5. Ingersoll-Rand
  6. •
  7. Power Tools
  8. •
  9. Ingersoll-Rand 2903P Setup guide

Ingersoll-Rand 2903P Setup guide

Form 04584249
Edition 1
October 2004
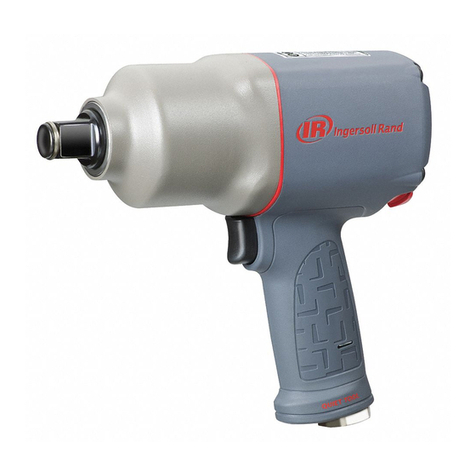
Air Impactool
2903P
Maintenance Information
Save These Instructions
2 Form 04584249-Edition 1
WARNING
Always wear eye protection when operating or performing maintenance on this tool. Always turn off the air supply and disconnect hose before
installing, removing or adjusting any accessory on this tool, or before performing any maintenance on this tool.
Lubrication
Each time a Series 2903P Air Impact Wrench is disassembled for
maintenance, and repair or replacement of parts, lubricate the tools as
follows:
1. Work approximately 6 to 8 cc of Ingersoll-Rand No. 100 Grease into
the impact mechanism. Coat the Anvil (46) or (49) lightly with grease
around the Hammer Case Bushing (41). Inject approximately 1 to 2
cc of grease into the Grease Fitting (23).
2. Use Ingersoll-Rand No.50 Oil for lubricating the motor. Inject
approximately 1 to 2 cc of oil into the air inlet before attaching the air
hose. Remove the Oil Chamber Plug (4) and fill the oil chamber.
Disassembly
General Instructions
1. Do not disassemble the tool any further than necessary to replace or
repair damaged parts.
2. Whenever grasping a tool or part in a vise, always use leather-
covered or copper-covered vise jaws to protect the surface of the
part and help prevent distortion. This is particularly true of threaded
members and housings.
3. Do not remove any part which is a press fit in or on a subassembly
unless the removal of that part is necessary for repairs or
replacement.
4. Do not disassemble the tool unless you have a complete set of new
gaskets and O-rings for replacement.
Disassembly of the Air Impact Wrench
1. Clamp the handle of the Air Impact Wrench in a vise with the square
drive upward.
2. Unscrew and remove the four Hammer Case Cap Screws(45).
3. While lightly tapping on the end of the Anvil (46 or 49) with a plastic
hammer, lift off the Hammer Case (40).
4. Grasp the Hammer Frame (36) and carefully lift off the entire impact
mechanism, making certain not to drop the two Hammer Pins (37).
5. Lift the Rear Hammer Frame Washer (38) and the two Motor Clamp
Washers(35) from the front of the motor.
6. Grasp the splined end of the Rotor (28) and pull the assembled
motor from the Motor Housing (1).
Disassembly of Impact Mechanism
1. With the Impact Mechanism on a workbench, driver end up, grasp
the Anvil (46) or (49) and lift it from the mechanism.
2. Remove the two Hammer Pins (37).
3. Slide the Hammer (39) from the Hammer Frame (36).
Disassembly of the Motor
1. Lift the Front End Plate (33) and Front Rotor Bearing (34) from
splined end of Rotor.
2. Remove Cylinder (30) and Vanes (29).
3. Remove Rear Rotor Bearing Retainer (25).
4. Lift the Rear End Plate (27) and Rear Rotor Bearing (26) from Rotor.
Disassembly of the Reverse Valve
NOTICE
The Reverse Valve Screw (22) is installed with a thread locking
compound.
1. Unscrew the Reverse Valve Knob Screw and remove the Reverse
Valve Knob (21).
NOTICE
Be careful you do not lose the Reverse Valve Detent Ball (19) and
Spring (20) from the hole in the side of the Reverse Valve.
2. While slowly rotating the Reverse Valve (18), withdraw it from the
Reverse Valve Bushing(16).
Disassembly of the Throttle
1. Unscrew and remove the Air Inlet (15).
2. Lift off the Exhaust Deflector (14) and withdraw the Exhaust Silencer
(13).
3. Remove the Oiler Retaining Ring (12) from inside the handle.
4. Withdraw the Oiler Body Assembly (9), Throttle Valve Spring (8) and
Throttle Valve (7).
5. Withdraw Trigger Assembly (2).
NOTICE
Do not remove the Throttle Valve Seat (6) unless you have a new
Throttle Valve Seat on hand for installation.
6. If the Throttle Valve Seat (6) must be replaced, thread a long 3/8’’
cap screw into it and withdraw it from the handle.
Assembly
General Instructions
1. Always press on the inner ring of a ball–type bearing when installing
the bearing on a shaft.
2. Always press on the outer ring of a ball–type bearing when pressing
the bearing into a bearing recess.
3. Whenever grasping a tool or part in a vise, always use leather–
covered or copper–covered vise jaws. Take extra care with threaded
parts and housings.
4. Always clean every part and wipe every part with a thin film of oil
before installation.
5. Apply a film of O-ring lubricant to all O-ring before final assembly.
Assembly of the Throttle Mechanism
1. If the Throttle Valve Seat (6) was removed from the handle, install a
new Throttle Valve Seat by pushing it into place with a 1/2’’ (13 mm)
diameter dowel.
2. Wipe the trigger pin with some light grease and insert the Trigger
Assembly (2) into the trigger bushing.
3. Insert the Throttle Valve (7), long stem end first, into the bottom of the
handle so the end of the valve stem engages the hole in the Trigger
pin.
4. Install the Throttle Valve Spring (8), small end first, into the handle of
the Motor Housing Assembly (1).
5. Make certain the two Oiler Body Seals (11) are positioned in the
annular grooves on the Oiler (9) and install the Oiler counterbored
end first into the handle. The large end of the Throttle Valve Spring
should seat in the counterbore in the Oiler.
6. Install the Oiler Retaining Ring (12) in the groove in the handle.
7. Grasp the Exhaust Silencer (13) by the long edge and rolling it into a
tight cylindrical shape, insert the Silencer into the handle flush with
the recess.
8. Position the Exhaust Deflector (14) on the bottom of the handle and
retain it with the Air Inlet (15). Tighten the Air Inlet to 30 to 50 ft-lb
(40.5 to 47.5 Nm) torque.
Assembly of the Reverse Valve
1. Make certain the Reverse Valve Bushing Seals (17) are properly
located in undercuts in the Reverse Valve Bushing (16).
2. Dampen the Reverse Valve (18) with light oil. Install the Reverse
Valve Detent Spring (20) followed by the Reverse Valve Detent Ball
(19) in the Hole in the Reverse Valve. With the Air Impact Wrench in
an upright position, and while facing the handle end of the Air Impact
Wrench, slowly rotate the Reverse Valve and insert it from left to right
in the splined end of the Reverse Valve Bushing.
Form 04584249-Edition 1 3
3. Attach the Reverse Valve Knob (21) to the Reverse Valve with the
Reverse Valve Knob Screw (22)and tighten the Screw to 40 to 50 in-
lbs (4.5 to 5.6 Nm) torque.
Assembly of the Motor
1. Using a sleeve that will contact only the outer ring of the bearing,
press the Front Rotor Bearing (34) into the Front End Plate (33) and
the Rear Rotor Bearing (26) into the Rear End Plate (27).
2. Slip the Front End Plate and Bearing over the splined hub of the
Rotor.
3. Grasp the splined hub of the Rotor in leather-covered or copper-
covered vise jaws so the Rotor is in a vertical position.
4. Dampen each Vane (29) with light oil and insert a Vane into each
vane slot.
5. Set the Cylinder (30) over the Rotor and onto the Front End Plate.
6. Slide the Rear End Plate and Bearing onto the rotor hub and against
the Cylinder.
7. Install the Rear Rotor Bearing Retainer (25) in the groove on the rotor
hub.
8. Wipe a thin film of light grease on the End Plate Gasket (24) and
press the Gasket firmly against the Rear End Plate.
9. Align the dowel hole in both End Plates with the one through the
Cylinder and insert a guide rod 5/32’’ (4.0 mm) diameter x 6’’ (152
mm) long. Allow the rod to protrude from the Rear End Plate and End
Plate Gasket.
10. Grasp the handle of the Motor Housing (1) in leather-covered or
copper-covered vise jaws so the bore of the Motor Housing is
horizontal.
11. Insert the protruding end of the guide rod into the dowel hole in the
bore of the Motor Housing and slide the motor along the rod until it is
completely seated.
12. Remove the guide rod and replace it with the Cylinder Dowel (31).
13. Reposition the Motor Housing in the vise so the open face of the
Motor Housing is upward.
14. Place the two Motor Clamp Washers (35), convex side first, against
the Front End Plate so the inner rim of the leading Washer contacts
the End Plate and the outer rim of the trailing Washer contacts the
Hammer Case Pilot (43).
15. Place the Rear Hammer Frame Washer (38) over the hub of the
Rotor and against the Front Rotor Bearing.
Assembly of the Impact Mechanism
1. Coat the spline and pin holes of the Hammer Frame (36) with a light
film of Ingersoll-Rand No.100 Grease. Position the Hammer Frame
on a workbench, splined end down.
2. Coat the Hammer (39) with a light film of Ingersoll-Rand No.100
Grease and slide the Hammer into the Hammer Frame.
3. Coat the two Hammer Pins (37) with a light film of Ingersoll-Rand
No.100 Grease and insert the Pins into the two pin holes of the
Hammer Frame so they engage the notches on the Hammer.
4. Coat the Anvil (46) or (49) with a light film of Ingersoll-Rand No.100
Grease. Slide the Anvil into the Hammer Frame and through the
Hammer until it seats.
5. Set the assembled impact mechanism down over the splined hub of
the Rotor.
Assembly of the Air Impact Wrench
1. Position the Hammer Case Gasket (42) against the face of the Motor
Housing.
2. Smear a thin film of Ingersoll-Rand No.100 Grease on the inside
surface of the Hammer Case Bushing (41) and place the Hammer
Case (40) down over the Anvil (46) or (49) and against the Motor
Housing.
3. Install the Hammer Case Cap Screws (45). Tighten the Hammer
Case Cap Screws to 60 to 70 in-lb (7.0 to 8.0 Nm) torque.
Troubleshooting Guide
Related Documentation
For additional information refer to:
Air Impact Wrench Product Safety Information Manual Form 04580916,
Air Impact Wrench Product Information Manual Form 04584777,
Air Impact Wrench Parts List Manual Form 04584397.
Manuals can be downloaded from www.irtools.com.
Troubleshooting Guide
Trouble Probable Cause Solution
Low power Dirty Inlet Bushing or Air Strainer Screen and/or
Exhaust Silencer.
Using a clean, suitable, cleaning solution in a well ventilated
area, clean Air Strainer Screen, Inlet Bushing Exhaust
Silencer.
Worn or broken Vanes. Replace complete set of Vanes.
Worn or broken Cylinder and/or scored End Plates. Examine Cylinder and replace it if it is worn or broken or if
bore is scored or wavy. Replace End Plates if they are
scored.
Dirty motor parts. Disassemble tool and clean all parts with a suitable cleaning
solution, in a well ventilated area. Reassemble tool as
instructed in this manual.
Improper positioning of the Reverse Valve. Make certain that the Reverse Valve is fully engaged to the
left or right.
Motor will not run Incorrect assembly of motor. Disassemble motor and replace worn or broken parts and
reassemble as instructed.
Insufficient lubricant in the impact mechanism. Remove Hammer Case Assembly and lubricate impact
mechanism.
Tool will not impact Broken or worn impact mechanism parts. Remove Hammer Case and examine impact mechanism
parts. Replace any worn or broken parts.
Impact Mechanism not assembled correctly. Refer to Assembly of the Impact Mechanism.
www.irtools.com
© 2004 Ingersoll-Rand Company

Other Ingersoll-Rand Power Tools manuals

Ingersoll-Rand QS50P3 User manual

Ingersoll-Rand

Ingersoll-Rand QS50P3 User manual

Ingersoll-Rand QE Series User manual

Ingersoll-Rand

Ingersoll-Rand QE Series User manual

Ingersoll-Rand DEP Series User manual

Ingersoll-Rand

Ingersoll-Rand DEP Series User manual

Ingersoll-Rand W5001 Series User manual

Ingersoll-Rand

Ingersoll-Rand W5001 Series User manual

Ingersoll-Rand R1000 Series User manual

Ingersoll-Rand

Ingersoll-Rand R1000 Series User manual

Ingersoll-Rand 8RSL32 User manual

Ingersoll-Rand

Ingersoll-Rand 8RSL32 User manual

Ingersoll-Rand 380P User manual

Ingersoll-Rand

Ingersoll-Rand 380P User manual

Ingersoll-Rand 325B User manual

Ingersoll-Rand

Ingersoll-Rand 325B User manual

Ingersoll-Rand 1107 User manual

Ingersoll-Rand

Ingersoll-Rand 1107 User manual

Ingersoll-Rand DB9-EU Series User manual

Ingersoll-Rand

Ingersoll-Rand DB9-EU Series User manual

Ingersoll-Rand 100PQ1 Setup guide

Ingersoll-Rand

Ingersoll-Rand 100PQ1 Setup guide

Ingersoll-Rand 7RL Series Setup guide

Ingersoll-Rand

Ingersoll-Rand 7RL Series Setup guide

Ingersoll-Rand LA158 User manual

Ingersoll-Rand

Ingersoll-Rand LA158 User manual

Ingersoll-Rand 1100PS4 Series User manual

Ingersoll-Rand

Ingersoll-Rand 1100PS4 Series User manual

Ingersoll-Rand 46PQ1 User manual

Ingersoll-Rand

Ingersoll-Rand 46PQ1 User manual

Ingersoll-Rand QM3 Series Setup guide

Ingersoll-Rand

Ingersoll-Rand QM3 Series Setup guide

Ingersoll-Rand Manual Torque Wrench User manual

Ingersoll-Rand

Ingersoll-Rand Manual Torque Wrench User manual

Ingersoll-Rand 293S User manual

Ingersoll-Rand

Ingersoll-Rand 293S User manual

Ingersoll-Rand DAA40 Series Guide

Ingersoll-Rand

Ingersoll-Rand DAA40 Series Guide

Ingersoll-Rand PowerForce PF850 User manual

Ingersoll-Rand

Ingersoll-Rand PowerForce PF850 User manual

Ingersoll-Rand 236G User manual

Ingersoll-Rand

Ingersoll-Rand 236G User manual

Ingersoll-Rand 7LR series User manual

Ingersoll-Rand

Ingersoll-Rand 7LR series User manual

Ingersoll-Rand IR2PS Manual

Ingersoll-Rand

Ingersoll-Rand IR2PS Manual

Ingersoll-Rand 1712 Series User manual

Ingersoll-Rand

Ingersoll-Rand 1712 Series User manual

Popular Power Tools manuals by other brands

Gage Bilt GB2628 Original instruction

Gage Bilt

Gage Bilt GB2628 Original instruction

Power Craft PKW-160N user manual

Power Craft

Power Craft PKW-160N user manual

Petzl Lim'Ice-1 quick start guide

Petzl

Petzl Lim'Ice-1 quick start guide

Earlex HG 1600K manual

Earlex

Earlex HG 1600K manual

Munsch GMAK-420 operating instructions

Munsch

Munsch GMAK-420 operating instructions

Digital Combo DC16 manual

Digital Combo

Digital Combo DC16 manual

Promac JD-32120 manual

Promac

Promac JD-32120 manual

Bomag BPH 80/65 Operating instructions, maintenance instructions

Bomag

Bomag BPH 80/65 Operating instructions, maintenance instructions

Yokota TKA800 manual

Yokota

Yokota TKA800 manual

Villager VWB 1920 Original instruction manual

Villager

Villager VWB 1920 Original instruction manual

DeWalt DWE315 Original instructions

DeWalt

DeWalt DWE315 Original instructions

FOREDOM H Series Assembly, operation and service manual

FOREDOM

FOREDOM H Series Assembly, operation and service manual

VONROC WC501AC Original instructions

VONROC

VONROC WC501AC Original instructions

Prebena 11-L64 Original operating manual

Prebena

Prebena 11-L64 Original operating manual

Bosch MX30E Operating/safety instructions

Bosch

Bosch MX30E Operating/safety instructions

Baileigh SH-8003HD Maintenance and parts manual

Baileigh

Baileigh SH-8003HD Maintenance and parts manual

EINHELL TC-JS 85 Original operating instructions

EINHELL

EINHELL TC-JS 85 Original operating instructions

Stocker Magma E-100 user manual

Stocker

Stocker Magma E-100 user manual

manuals.online logo
manuals.online logoBrands
  • About & Mission
  • Contact us
  • Privacy Policy
  • Terms and Conditions

Copyright 2025 Manuals.Online. All Rights Reserved.