manuals.online logo
Brands
  1. Home
  2. •
  3. Brands
  4. •
  5. Insignia
  6. •
  7. Receiver
  8. •
  9. Insignia NS-CAHBTAD User manual

Insignia NS-CAHBTAD User manual

Before using your new product, please read these instructions to prevent any damage.
PACKAGE CONTENTS
• Bluetooth receiver
• Micro USB cable
• Foam spacer
• Quick Setup Guide
FEATURES
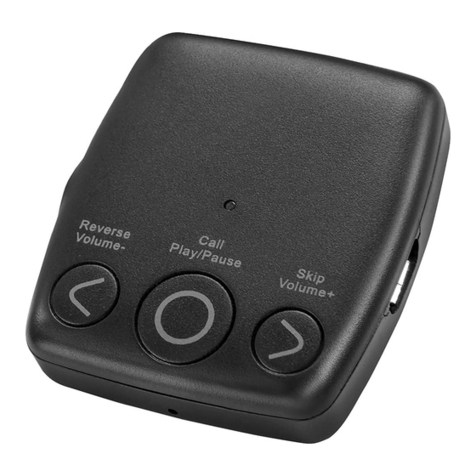
Inside view Outside view
13.5 mm headphone plug
2Microphone
3Micro USB charging port
4Volume up/Next
5Multi-function button (MFB): Power on/o,
play, pause, call
6Volume down/Previous
7LED indicator
CHARGING YOUR RECEIVER
Fully charge your receiver before you use it for
the rst time. When the red LED starts to blink
during use, the battery is low and needs
charging.
1Plug the micro USB end (small plug) on the
USB cable into the micro USB port on your
receiver.
2Plug the USB end (large plug) on the cable
into an active USB port or any USB charger.
The LED lights red while charging. When fully
charged, the LED turns o. Charging may take
up to three hours.
3When charging is complete, unplug the USB
cable from your receiver. Your receiver is
ready to use.
QUICK SETUP GUIDE
Bluetooth
Receiver
NS-CAHBTAD
PAIRING YOUR RECEIVER
To get started, you need to pair your receiver
with your phone or device.
1With your receiver turned o, press and hold
the MFB until the LED starts ashing blue
(about three to ve seconds). Your receiver
turns on and enters pairing mode.
2Turn on the Bluetooth feature on your phone
or device, then search for and click your
receiver (NS-CAHBTAD). See the instructions
that came with your Bluetooth device for
information about pairing.
3If you are asked for a password, enter 0000.
When pairing is complete, the LED lights solid
blue.
RECONNECTING TO A PAIRED DEVICE
1Turn on your receiver. It automatically
connects to the last connected device.
2If your receiver does not automatically
reconnect, reselect NS-CAHBTAD on your
Bluetooth device.
If you want to pair with another device, turn o
the Bluetooth feature on the connected device,
then repeat the pairing procedure to connect to
a new device.
Note: If your receiver is not paired to a Bluetooth
device for three minutes, it automatically turns o.
USING YOUR RECEIVER
1Press and hold the MFB for three to ve
seconds to turn on your receiver. The LED
lights solid blue when your receiver is
connected to a Bluetooth device (for
example, your phone).
2Insert the 3.5 mm headphone plug into the
3.5 mm audio jack on your headphones.
Make sure that the plug is fully inserted.
3To turn o your receiver, press and hold the
MFB for two seconds.
Headphones not included
Designed for use with Beats Studio and Solo.
LISTENING TO MUSIC
• To play or pause audio, press the MFB
once.
• To increase the volume, press the button
once.
• To reduce the volume, press the button
once.
• To skip to the next track, press and hold .
• To skip to the previous track, press and hold
.
MAKING A PHONE CALL
• To make a call, use your phone’s controls, then
select your receiver as the audio source.
• To answer an incoming call, press the MFB .
• To reject an incoming call, press and hold the
MFB .
• To end a call, press the MFB once.
V4 ENGLISH 17-0052
PROBLEM
No sound or low
volume
Cannot connect
with Bluetooth
Bluetooth device
keeps unpairing
NS-CAHBTAD does
not appear on my
Bluetooth device
No power
SOLUTION
• Make sure that your Bluetooth device is turned on, the
Bluetooth feature is turned on, and NS-CAHBTAD is
selected.
• Turn up the volume on your receiver and Bluetooth
device.
• Make sure that your Bluetooth device is not muted.
• Make sure that your receiver and Bluetooth device are
not paired to other devices.
• Shorten the distance between your receiver and
Bluetooth device.
• Turn your receiver and device o, then back on. Re-pair
your receiver and Bluetooth device.
• Make sure that your receiver and Bluetooth device are
not paired to other devices.
• Make sure that you have selected NS-CAHBTAD on your
Bluetooth device.
• Make sure that your Bluetooth device supports the HSP,
HFP, A2DP, or AVRCP Bluetooth protocol.
• Shorten the distance between your receiver and
Bluetooth device.
• Recharge the batteries in your receiver and Bluetooth
device.
• Shorten the distance between your receiver and
Bluetooth device.
• Put your receiver into pairing mode (see PAIRING YOUR
RECEIVER), then, on your Bluetooth device, refresh the list
of Bluetooth devices. (See the documentation that came
with your Bluetooth device.)
• Make sure that your receiver’s battery is charged. See
CHARGING YOUR RECEIVER.
• Make sure that your receiver is turned on. See USING
YOUR RECEIVER.
ADJUSTING THE FIT
If there is a large gap between your receiver
and headphones when you plug in your
receiver, use the provided foam spacer to ll
the gap.
1If your receiver is plugged into headphones,
unplug it.
2Peel o the adhesive lm on the foam
spacer, then attach the foam spacer to your
receiver.
3Plug your receiver back to the headphones.
TROUBLESHOOTING LEGAL NOTICES
FCC Statement:
This equipment has been tested and found to comply with
the limits for a Class B digital device, pursuant to part 15
of the FCC Rules. These limits are designed to provide
reasonable protection against harmful interference in a
residential installation. This equipment generates, uses and
can radiate radio frequency energy and, if not installed and
used in accordance with the instructions, may cause harmful
interference to radio communications. However, there is no
guarantee that interference will not occur in a particular
installation. If this equipment does cause harmful
interference to radio or television reception, which can be
determined by turning the equipment o and on, the user is
encouraged to try to correct the interference by one or more
of the following measures:
—Reorient or relocate the receiving antenna.
—Increase the separation between the equipment and
receiver.
—Connect the equipment into an outlet on a circuit dierent
from that to which the receiver is connected.
—Consult the dealer or an experienced radio/TV technician
for help.
This device complies with part 15 of the FCC Rules. Operation
is subject to the following two conditions: (1) This device
may not cause harmful interference, and (2) this device must
accept any interference received, including interference that
may cause undesired operation.
Caution: Changes or modications not expressly approved
by the party responsible for compliance could void the user's
authority to operate the equipment.
RSS-Gen & RSS-247 statement:
This device complies with Industry Canada licence-exempt
RSS standard(s).
Operation is subject to the following two conditions: (1) this
device may not cause interference, and (2) this device must
accept any interference, including interference that may
cause undesired operation of the device.
Le présent appareil est conforme aux CNR d'Industrie
Canada applicables aux appareils radio exempts de licence.
L'exploitation est autorisée aux deux conditions suivantes :
(1) l'appareil ne doit pas produire de brouillage, et (2)
l'utilisateur de l'appareil doit accepter tout brouillage
radioélectrique subi, même si le brouillage est susceptible
d'en compromettre le fonctionnement.
RSS-102 Statement:
This equipment complies with Industry Canada radiation
exposure limits set forth for an uncontrolled environment.
Cet équipement est conforme à l'exposition aux
rayonnements Industry Canada limites établies pour un
environnement non contrôlé.
ONEYEAR LIMITED WARRANTY
Visit www.insigniaproducts.com for details.
CONTACT INSIGNIA:
For customer service, call 877-467-4289
www.insigniaproducts.com
INSIGNIA is a trademark of Best Buy and its aliated companies
Distributed by Best Buy Purchasing, LLC
7601 Penn Ave South, Richeld, MN 55423 U.S.A.
©2017 Best Buy. All rights reserved
Made in China
Foam spacer
Adhesive lm

Other Insignia Receiver manuals

Insignia NS-R5101AHD-A Installation and operation manual

Insignia

Insignia NS-R5101AHD-A Installation and operation manual

Insignia NS-AV511 Quick start guide

Insignia

Insignia NS-AV511 Quick start guide

Insignia NS-MBTK35 User manual

Insignia

Insignia NS-MBTK35 User manual

Insignia NS-R5101AHD-A Parts list manual

Insignia

Insignia NS-R5101AHD-A Parts list manual

Insignia NS-R5101AHD-A User manual

Insignia

Insignia NS-R5101AHD-A User manual

Insignia NS-AV511 Quick start guide

Insignia

Insignia NS-AV511 Quick start guide

Insignia NS-R5101AHD-A Quick start guide

Insignia

Insignia NS-R5101AHD-A Quick start guide

Insignia IS-HTIB102731 User manual

Insignia

Insignia IS-HTIB102731 User manual

Insignia NS-R5101AHD-A Quick start guide

Insignia

Insignia NS-R5101AHD-A Quick start guide

Insignia NS-R5101 User manual

Insignia

Insignia NS-R5101 User manual

Insignia IS-HTIB102732 User manual

Insignia

Insignia IS-HTIB102732 User manual

Popular Receiver manuals by other brands

Xantech EN85K Ensemble installation instructions

Xantech

Xantech EN85K Ensemble installation instructions

Heatmiser RC2-WTS1 manual

Heatmiser

Heatmiser RC2-WTS1 manual

Marantz Slim-line NR1402 Specifications

Marantz

Marantz Slim-line NR1402 Specifications

Pioneer XV-DV505 Setting up

Pioneer

Pioneer XV-DV505 Setting up

Marantz SR8002 Specifications

Marantz

Marantz SR8002 Specifications

Sony ICF-7600D operating instructions

Sony

Sony ICF-7600D operating instructions

Vishay TSOP373 Series manual

Vishay

Vishay TSOP373 Series manual

Sennheiser EK 2013 Instructions for use

Sennheiser

Sennheiser EK 2013 Instructions for use

Onkyo TX-NR7100 instruction manual

Onkyo

Onkyo TX-NR7100 instruction manual

Pioneer QX-8000A Service manual

Pioneer

Pioneer QX-8000A Service manual

Navilock u-blox 8 NL-8004U Operation manual

Navilock

Navilock u-blox 8 NL-8004U Operation manual

Ferguson Ariva 4k user manual

Ferguson

Ferguson Ariva 4k user manual

PIKO 35040 manual

PIKO

PIKO 35040 manual

Integra DTR-4.9 instruction manual

Integra

Integra DTR-4.9 instruction manual

Panasonic RF-B65D Service manual

Panasonic

Panasonic RF-B65D Service manual

Golzer GBAR-30 user manual

Golzer

Golzer GBAR-30 user manual

Cross Country Wireless SDR-4+ quick start guide

Cross Country Wireless

Cross Country Wireless SDR-4+ quick start guide

JVC rx-555bk Service manual

JVC

JVC rx-555bk Service manual

manuals.online logo
manuals.online logoBrands
  • About & Mission
  • Contact us
  • Privacy Policy
  • Terms and Conditions

Copyright 2025 Manuals.Online. All Rights Reserved.