manuals.online logo
Brands
  1. Home
  2. •
  3. Brands
  4. •
  5. Integra
  6. •
  7. Medical Equipment
  8. •
  9. Integra RAY-180 Product manual

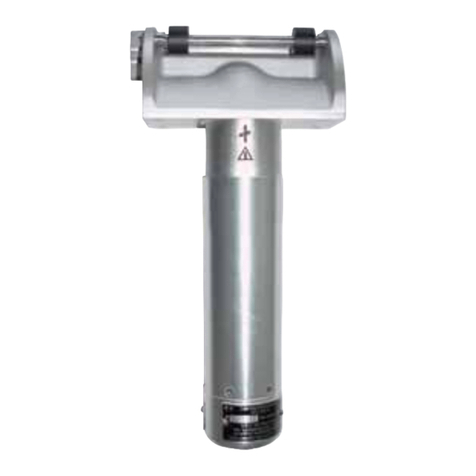
Integra RAY-180 Product manual

Other Integra Medical Equipment manuals

Integra CRW BiopsyPlus Kit User manual

Integra

Integra CRW BiopsyPlus Kit User manual

Integra 3214 User manual

Integra

Integra 3214 User manual

Integra VIAFLO User manual

Integra

Integra VIAFLO User manual

Integra A2012 User manual

Integra

Integra A2012 User manual

Integra MAYFIELD A2101 User manual

Integra

Integra MAYFIELD A2101 User manual

Integra MAYFIELD A1109 User manual

Integra

Integra MAYFIELD A1109 User manual

Integra CUSA Clarity Installation and user guide

Integra

Integra CUSA Clarity Installation and user guide

Integra MAYFIELD User manual

Integra

Integra MAYFIELD User manual

Integra 90520 Operation manual

Integra

Integra 90520 Operation manual

Integra Padgett SB User manual

Integra

Integra Padgett SB User manual

Integra Luxtec MLX Operation manual

Integra

Integra Luxtec MLX Operation manual

Integra CODMAN CERTAS Plus User manual

Integra

Integra CODMAN CERTAS Plus User manual

Integra Miltex Integrator User manual

Integra

Integra Miltex Integrator User manual

Integra Luxtec UltraLite Pro Operation manual

Integra

Integra Luxtec UltraLite Pro Operation manual

Integra CUSA Clarity Configuration guide

Integra

Integra CUSA Clarity Configuration guide

Integra Cusa Excel User manual

Integra

Integra Cusa Excel User manual

Integra CODMAN CERTAS Plus User manual

Integra

Integra CODMAN CERTAS Plus User manual

Integra Codman VPV System User manual

Integra

Integra Codman VPV System User manual

Integra MAYFIELD Head Clamp A2079 User manual

Integra

Integra MAYFIELD Head Clamp A2079 User manual

Integra MAYFIELD A1051 User manual

Integra

Integra MAYFIELD A1051 User manual

Integra Total Foot System 2 User manual

Integra

Integra Total Foot System 2 User manual

Integra Luxtec UltraLite Plus Operation manual

Integra

Integra Luxtec UltraLite Plus Operation manual

Integra Omni-Tract User manual

Integra

Integra Omni-Tract User manual

Integra MAYFIELD A1108 User manual

Integra

Integra MAYFIELD A1108 User manual

Popular Medical Equipment manuals by other brands

Itamar Medical WatchPAT Operation manual

Itamar Medical

Itamar Medical WatchPAT Operation manual

PROTEOR 1P650 KNEE Assembling and adjustment instructions

PROTEOR

PROTEOR 1P650 KNEE Assembling and adjustment instructions

Liberate Medical VentFree user manual

Liberate Medical

Liberate Medical VentFree user manual

Dicarre DA20 user guide

Dicarre

Dicarre DA20 user guide

Stryker Medical M Series Operation manual

Stryker Medical

Stryker Medical M Series Operation manual

Invacare ScanBed 750 user manual

Invacare

Invacare ScanBed 750 user manual

Getinge Arjohuntleigh Nimbus 3 Professional Instructions for use

Getinge

Getinge Arjohuntleigh Nimbus 3 Professional Instructions for use

Mettler Electronics Sonicator 730 Maintenance manual

Mettler Electronics

Mettler Electronics Sonicator 730 Maintenance manual

Pressalit Care R1100 Mounting instruction

Pressalit Care

Pressalit Care R1100 Mounting instruction

Denas MS DENAS-T operating manual

Denas MS

Denas MS DENAS-T operating manual

bort medical ActiveColor quick guide

bort medical

bort medical ActiveColor quick guide

AccuVein AV400 user manual

AccuVein

AccuVein AV400 user manual

agiliti NP Trio user manual

agiliti

agiliti NP Trio user manual

Rocket Medical Rocket Digital Oocyte Aspiration Pump Service manual

Rocket Medical

Rocket Medical Rocket Digital Oocyte Aspiration Pump Service manual

Monteris Medical Neuroblate Instructions for use

Monteris Medical

Monteris Medical Neuroblate Instructions for use

Otto Block 8E33 7 manual

Otto Block

Otto Block 8E33 7 manual

ADVANCED HOME CARE Helios Guide

ADVANCED HOME CARE

ADVANCED HOME CARE Helios Guide

NeuLog NUL-208 Guide

NeuLog

NeuLog NUL-208 Guide

manuals.online logo
manuals.online logoBrands
  • About & Mission
  • Contact us
  • Privacy Policy
  • Terms and Conditions

Copyright 2025 Manuals.Online. All Rights Reserved.

Fotodispositivo infrarosso regolabile 180° nuova generazione
Adjustable infrared photocell 180° new generation
Photocellule avec rotation 180° de nouvelle génération
RAY-180_010415_VXX01_IT-GB-FR
RAY-180
Istruzioni ed avvertenze
Instructions and warnings
Instructions et notices d’emploi
12 / 24 Vac/dc
12 Vdc
12 / 24 Vac/dc
_
+
+
1 2 3 1 2 3 4
12 / 24 Vac/dc
12 / 24 Vac/dc
_
+
NC
LED-C
TX RX
2 3 4
NA
12 Vac/dc 24 Vac/dc
dove previsto
where expected
quand il est prévu
*
ON
1 2
ON
1 2
Micro switch
1 ON
abilita sincronismo solo 12/24Vac
activate the synchronisation only 12/24Vac
active la synchronisation 12/24Vac
1 OFF
disabilita sincronismo
deactivate the synchronisation
désactive la synchronisation
2 ON
massima potenza (consigliato)
maximum power
maximale puissance(recommandée)
2 OFF
minima potenza (evita possibili ri essioni)
minimum power (avoid re ections)
minimale puissance (éviter ré exion)
1 ON
abilita sincronismo
activate the synchronisation
active la synchronisation
1 OFF
disabilita sincronismo
deactivate the synchronisation
désactive la synchronisation
2 ON
disabilita il ritardo e consente il sincronismo
deactivate the planing intervention time and you can use the synchro-
nisation.
désactive temp d’intervention et permet la synchronisation
1 OFF
2 OFF
ritarda di circa 300mS l’intervento del relè, “neve”.
planning intervention time of 300mS relè, “snow”.
temp d’intervention du relais de 300 ms, “neige”.
Micro switch
allineamento OK
alignment OK
alignement OK
LED-C ON
1
J2
J1
J2
J1
2002/95/EC
Dichiarazione CE conformità / EC declaration of con rmity /
Déclaration CE de conformité
RAY-180
folgenden einschlagigen Bestimmungen entspricht: complies with thefollowing
relevantprovisions: correspondaux dispositions pertinentes suivantes:
2004/108/CE, 2006/95/CE
100%
ITALY
Alimentazione
Power supply
Alimentation
Vac/dc * 13,5 / 24
12 / 24
Limiti alimentazione
Limit power supply
Limites d’alimentation
18-35 Vdc
15-28 Vac
Portata
Max range up
Portée
m20
Temperatura di funzionamento
Operating temperature
Température de fonctionnement
- 10 °C
+ 60 °C
Assorbimento TX
TX power absorption
Consommation TX
mA 25
Assorbimento RX
RX power absorption
Consommation RX
mA 35
Contatto relè di uscita
Output relay contact
Type de relais
max
500mA e
48Vac/dc
Grado di protezione
Protection degree
Degré de protection
IP 55
EN 60529
Caratteristiche tecniche / Technical features /
Caractéristiques techniques
• IT Si consiglia: Porre TX Micro switch 2-OFF minima potenza e applicare l’adesivo all’interno
del ricevitore, in particolar modo nei casi in cui si possono veri care problemi dovuti a fenomeni
di ri essione (pavimenti, muri, super ci lucide o particolarmente ri ettenti). In caso di utilizzo
contemporaneo di più coppie di fotocellule, ad esempio interne ed esterne ad un cancello scorrevole,
fare molta attenzione al loro parallelismo per evitare eventuali fenomeni di ri essione non desiderati.
• GB It is recommended: TX Micro switch 2-OFF minimum power and apply the adhesive inside the
container of the RX photocell, in particular in cases of reection (oors, walls, and shiny or particularly
reecting surfaces, etc). If using two pairs of photocells simultaneously, for example inside and
outside a sliding gate, pay attention on theparallelism to prevent any undesired reection phenomen.
• FR Il est conseillé: TX Micro switch 2-OFF minimale puissance et appliquer la membrane adhèsive
à l’intèrieur du boitier du rècepteur de le cellule photo-èlectrique, en particulier lorsqu’il pourrait y
avoir des problèmes dus à des phénomenès de réexion (planchers, murs ou surfaces polies ou
trèsrééchissantes....) En cas d’utilisation simultanée de plusieurs paires de photo-électriques, par
exemple des cellules situées à l’intérieur ou à l’extérieur d’une grille coulissante, il faudra faire très
attention à leur parallélisme an d’éviter tout phénomenés de réexion indésirable.
Adesivo riduzione potenza RX / Adhe-
sive power Reduction RX / Adhésif
pour la réduction de la puissance du
recepteur
1 2 3 41 2 3
TX 1 RX 1
1 2 3 41 2 3
TX 2 RX 2
ON
1 2
ON
1 2
ON
1 2
ON
1 2
! 12 / 24 Vac
• abilitare sincronismo solo 12/24Vac
• activate the synchronisation only 12/24Vac
• active la synchronisation 12/24Vac
sincronismo
synchronisation
synchronisation
• In corrente alternata e a sincronizzazione abilitata, il led sul RX rimane parzialmente acceso.
• When you use in AC and the synchronisation is activated, the light receiver remains partially lit.
• Si la courant est alterné et si la synchronisation est activée, la LED sur le recepteur est par-
tiellement allumée.
• Per aprire la fotocellula fare leva con un cacciavite tra il coperchio e la parete, aiutandosi
con una protezione per non intaccare l’eventuale intonaco.
• Open the photocell with a screwdriver between the botton and the wall.
• Ouvrir la photocellule avec un tournevis entre le couvercle et le mur.
Afondo bottom fond
Bviti ssaggio a
parete
wallmount xing
screws
vis de xation
murale
Cfori passaggio li
collegamento
holes passage
spin connection
trous pour le
branchement
Dcircuito stampato circuit circuit imprimé
Esupporto a sfera sphere support support
Fblocco di rotazione rotating block blocage rotation
Gviti ssaggio
blocco di rotazione
xing screws
rotating block
vis de xation
pour le
blocage rotation
Hcoperchio cover couvercle
1
1
1
1
8
8
8
8
8
8
8
0
0
0
0
0
0
8
8
°
°
°
°
°
0
0
0
B
F
A
D
E
G
-5
+5
0
C
B
H