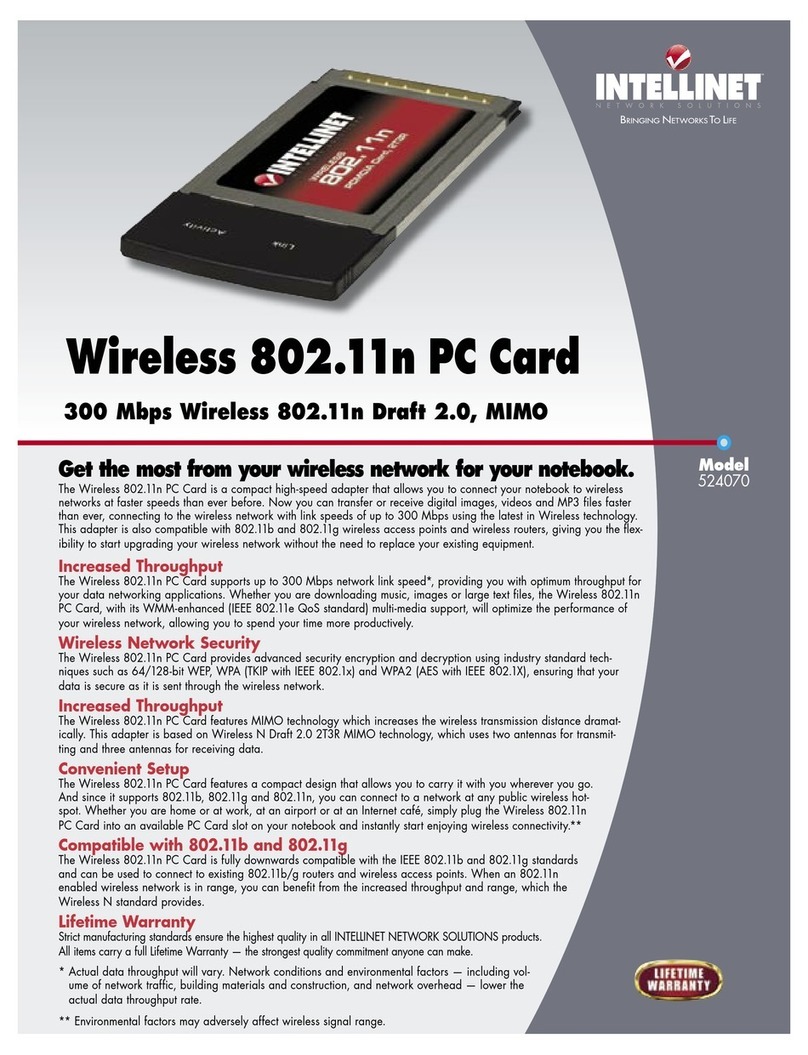
Intellinet 524070 User manual

WIRELESS
802.11n
PC CARD
USER MANUAL
MODEL 524070
INT-524070-UM-0208-01


Thank you for purchasing the INTELLINET NETWORK SOLUTIONS
™
Wireless 802.11n PC Card, Model 524070.
Connecting your notebook PC to a wireless network, this handy card
supports Wi-Fi Multimedia for increased data throughput and Software
AP to turn your wireless client into a wireless access point. And with the
easy-to-follow instructions in this manual, you’ll soon be able to enjoy
the benets of these additional features:
• Up to 300 Mbps network link speed
• Advanced 2T3R MIMO technology with 3 internal antennas for enhanced
throughput and coverage
• Compliance with 2.4 GHz Draft IEEE 802.11n standard; backward
compatible with IEEE 802.11g/b standards
• Lifetime Warranty
FCC CertiFiCations
This equipment has been tested and found to comply with the limits for a
Class B digital device, pursuant to Part 15 of the FCC Rules. These limits
are designed to provide reasonable protection against harmful interference
in a residential installation. This equipment generates, uses and can radiate
radio frequency energy and, if not installed and used in accordance with the
instructions, may cause harmful interference to radio communications.
However, there is no guarantee that interference will not occur in a particular
installation. If this equipment does cause harmful interference to radio or
television reception, which can be determined by turning the equipment off
and on, the user is encouraged to try to correct the interference by one or
more of the following measures:
• Reorient or relocate the receiving antenna.
• Increase the separation between the equipment and the receiver.
• Connect the equipment to an outlet on a circuit different from that to
which the receiver is connected.
• Consult the dealer or an experienced radio/TV technician for help.
CAUTION: This device and its antennas must not be co-located or operated
in conjunction with any other antenna or transmitter. Any changes or
modications not expressly approved by the party responsible for compliance
could void the user’s authority to operate the equipment. This device
3

complies with Part 15 of the FCC Rules. Operation is subject to the following
two conditions: (1) This device may not cause harmful interference; and
(2) this device must accept any interference received, including interference
that may cause undesired operation.
FCC rF radiation exposure statement
This equipment complies with FCC RF radiation exposure limits set forth
for an uncontrolled environment, and should be installed and operated with
a minimum distance of 20 cm (8 in.) between the radiator and your body
during normal operation. The antenna(s) used for this transmitter must
not be co-located or operated in conjunction with any other antenna or
transmitter.
r&tte ComplianCe statement
This equipment complies with all the requirements of Directive 1999/5/EC
of the European Parliament and the Council of March 9, 1999, on radio
equipment and telecommunication terminal equipment (R&TTE) and the
mutual recognition of their conformity. The R&TTE directive repeals and
replaces Directive 98/13/EEC (Telecommunications Terminal Equipment
and Satellite Earth Station Equipment) as of April 8, 2000.
eu Countries intended For use
The ETSI version of this device is intended for home/ofce use in Austria,
Belgium, Denmark, Finland, France, Germany, Greece, Ireland, Italy,
Luxembourg, the Netherlands, Portugal, Spain, Sweden and the U.K., and
is also authorized for use in EFTA member states Iceland, Liechtenstein,
Norway and Switzerland. (EU countries not intended for use: none.).
saFety
• This card can become hot during extended periods of use. This is
normal and is not a malfunction. Upon removal from your computer, do
not place the card on paper, cloth or other ammable objects.
• Keep this device out of the reach of children.
• Do not expose this device to direct sunlight, moisture or conditions of
excessive heat or humidity.
4
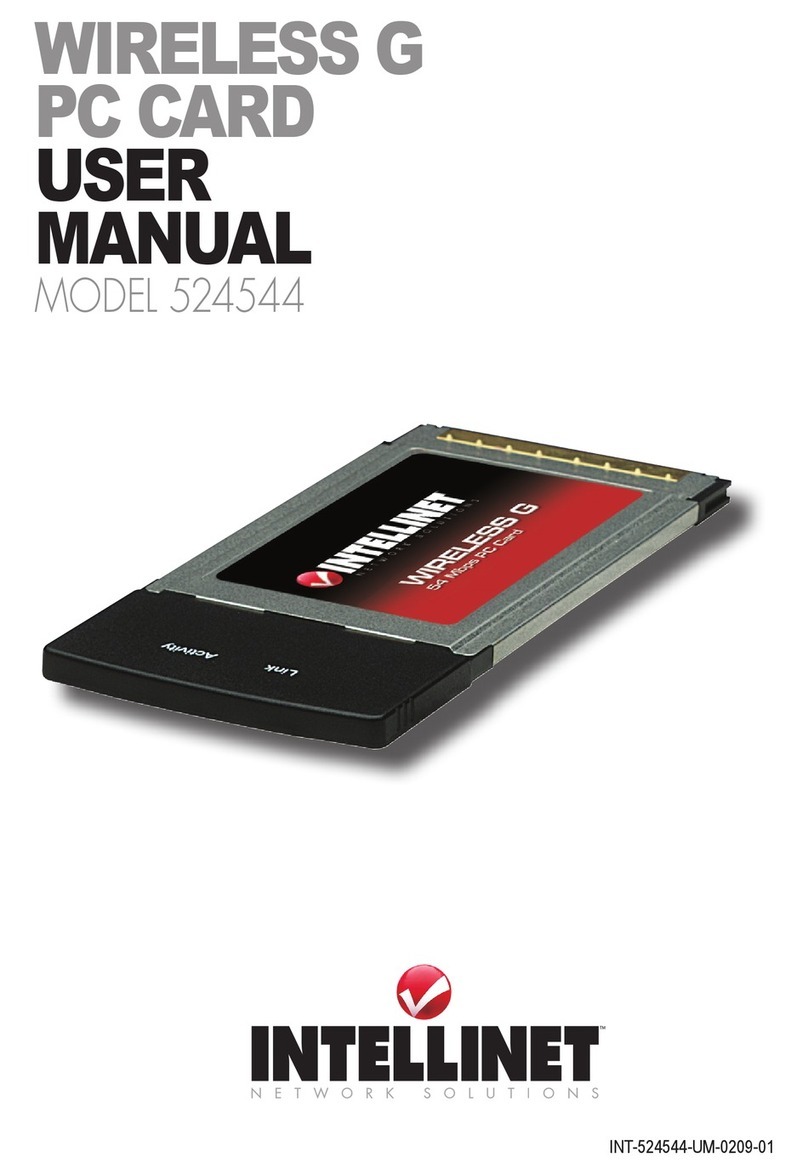
TABLE OF CONTENTS
Installation ..........................................................................................6
Hardware ..................................................................................... 6
Software....................................................................................... 7
....................................................................................8
Connecting to a Wireless Access Point....................................... 9
Connection Prole Management ...................................................17
View Network Statistics and Link Status ................................... 24
Advanced Settings..................................................................... 26
QoS Settings.............................................................................. 29
About..........................................................................................35
.................................................................................................... 36
Switch to AP Mode and Basic Conguration............................. 36
Security Settings........................................................................ 38
Access Control .......................................................................... 40
MAC (Connection) Table............................................................ 41
Event Log................................................................................... 42
Statistics ....................................................................................43
...............................................................................44
...................................................................................45
NOTE: Some screen-shot images have been modied to t the format
of this user manual.
CONTENTS
section page
5

INSTALLATION
CAUTION: Before installing the card, discharge any static electricity
from your body by touching any other metal object rst; otherwise, static
electricity could damage the card or computer components.
1. Insert the Wireless 802.11n PC Card logo-side up into an empty
PCMCIA slot of your notebook computer. You can insert the card
when the computer is on or off. NOTE: Don’t force the card into the
slot. If the card doesn’t slide into the slot
smoothly, remove it and try inserting it
again.
6
INSTALLATION
Link On Linked to a wireless access point.
Off Not linked to any wireless access point.
Activity On Data is being transmitted or received.
Off No data is being transmitted or received.

1. With the Wireless 802.11n
PC Card inserted and the
computer on, the Found New
Hardware Wizard displays a
welcome screen. Click
“Cancel” to proceed with the
driver installation.
2. Insert the enclosed driver CD in the CD-ROM drive and run the “Setup.
exe” program in the “Driver” folder. When the license agreement screen
displays, select “I accept the terms of the license agreement,” then click
“Next” to continue with the adapter’s software installation.
3. When the rst
Setup Type screen
displays, the Select
Conguration Tool
panel presents two
options: “Ralink
Conguration Tool”
is recommended
because it provides
full access to all the
functions available
with this Wireless
802.11n PC Card;
“Microsoft Zero Conguration Tool” can be selected if you prefer using
the option provided by Windows XP or Vista. Once either of the Select
Conguration Tool options has been chosen, click “Next” to continue
with the software installation.
7
INSTALLATION

4. The second Setup
Type screen gives
you two options.
To enhance wireless
performance (the
data transfer rate,
specically), you
can select “Optimize
for performance
mode.” Wireless
compatibility is not
guaranteed in this mode, however: You may not be able to communicate
with older wireless devices or wireless access points (such as 802.11b
devices). NOTE: Select this mode when you plan to communicate
only with 802.11 Draft-N devices.
To maintain compatibility and communicate with older devices, select
“Optimize for WiFi mode.”
Once either mode has been selected, click “Next.” NOTE: If the Found
New Hardware screen displays again, ignore it while the installation
procedure continues and wait for the next screen.
5. When the InstallShield Wizard Complete screen displays, click “Finish.”
CONFIGURATION
With the driver installation complete, a new icon
appears in the desktop menu tray, presenting
the status of the card when moused over.
To begin conguring the wireless connection, right-click on the icon and
click “Launch Cong
Utilities” from the pop-up
menu. (The full procedure
is presented in the next
subsection of this manual.)
CONFIGURATION
8

To close the
conguration
utility, click “Exit.”
NOTE: Clicking
“Exit” to stop the
conguration utility
prevents you from
maintaining the
wireless link to
the access point
you wish to use.
In this case, you
can re-start the
conguration utility
by clicking the
Wireless Utility
icon as shown
(Start ‡All
Programs ‡
Ralink Wireless).
Once the driver is correctly installed, it will try to connect to any unencrypted
wireless access point automatically. If you want to connect to a specic
wireless access point, or the access point you wish to connect to uses
encryption, you need to congure the PC card and input the required
parameters.
There are two ways you can congure the Wireless 802.11n PC Card to
connect to a wireless access point: using the conguration utility that
comes with the wireless adapter driver and using the built-in Windows
zero conguration utility.
1. Right-click the conguration utility icon in lower-right corner of the
CONFIGURATION
9

desktop, then click “Launch Cong Utilities” in the pop-up menu (as
shown above).
2. The conguration utility will automatically scan for wireless access
points, and all those found will be displayed. If the wireless access
point (WAP) you want to connect to doesn’t show here, click “Rescan”
until it displays. NOTE: You may need to click “Rescan” repeatedly to
display the WAP you want. If it doesn’t appear after clicking “Rescan”
ve times, move your computer closer to the wireless access point or
refer to the Troubleshooting section at the back of this manual.
The service set identier is the name of the wireless access point
or other wireless device.
The basic service set identier is the MAC address of a wireless
access point or other network device. Unlike an SSID, the BSSID of
every access point is unique; if multiple devices share an SSID, each
can be identied by its BSSID.
This shows the signal strength of an access point (AP) or
wireless device. The larger the number, the better the radio strength,
which often means you’re not too far from that AP or wireless device.
10
CONFIGURATION

This shows the channel number used by the corresponding
AP or wireless device.
This shows the encryption method the AP or other
wireless device uses. If the WAP doesn’t enable encryption, “None”
will be displayed here.
This shows the authentication mode used. If the WAP
doesn’t require authentication,”Unknown” will be displayed here.
This shows the type of wireless connection. If it’s a WAP,
“Infrastructure” will be displayed here; if it’s a computer or network
device, “Ad Hoc” will be displayed here. NOTE: WAP/Infrastructure acts
as a bridge to let wired and wireless network devices communicate
with each other. Ad Hoc establishes a direct wireless link between
computers and/or network devices without the use of a WAP.
3. Click to highlight the wireless access point or network device you want
to connect; then click “Connect.”
If the selected AP doesn’t enable encryption (the Encryption eld of
the selected AP reads “None”), connection to this WAP will occur within
a minute; proceed to Step 6. If the selected AP does enable encryption,
proceed to the next step.
CONFIGURATION
11

4. If the selected WAP already
has an SSID, proceed to the
next step; otherwise, this
prompt displays. Obtain the
exact SSID of the wireless
access point and enter it in
the prompt eld, then click
“OK.” NOTE: If the SSID entered here is wrong, you won’t be able to
connect to this access point.
5. If the wireless access point uses encryption, a WEP password or WPA
preshared key needs to be entered; if not, skip this step. (Obtain
whichever is needed from the owner of the WAP you want to connect to.)
Once the correct entry is made, click “OK.” If the value entered here is
wrong, you won’t be able to connect to the wireless access point.
NOTE: Authentication Type is automatically selected and should not
be changed.
6. “Connected <–> SSID” (where “SSID” represents the actual SSID of
the wireless access point or wireless device you connected to) displays
at the lower-left corner of conguration utility, indicating a successful
connection to the selected access point or wireless device.
CONFIGURATION
12

Windows XP and Vista have a built-in wireless network conguration
utility called Windows Zero Conguration (WZC), providing an alternative
for conguring your wireless network parameters.
1. Right-click the
conguration utility icon
in the lower-right corner
of the desktop, then click
“Use Zero Conguration
as Conguration utility” in the pop-up menu.
2. Click “Start” (it should be in the bottom-left corner of the Windows
desktop); go to Control Panel”; then click “Network and Internet
Connections.”
13
CONFIGURATION

3. Click “Network Connections” (below), then click “Connect to a network.”
CONFIGURATION
14

4. Right-click “Wireless Network Connection.” NOTE: This option may
have a numerical sufx (as shown) if you have more than one wireless
network card, so make sure you’re selecting this device; then click
“View Available Wireless Networks.”
5. All wireless access points in proximity will be displayed. If the access
point you want to use is not displayed, move your computer closer to
the access point or click “Refresh network list” to re-scan for access
points. Click the access point you want to use if it’s shown, then click
“Connect.”
CONFIGURATION
15

6. If the access point is protected by encryption, enter its security key or
passphrase
here. It must
match the
encryption
setting on the
access point.
If the selected
access point
doesn’t use
encryption, this prompt screen won’t display.
7. When the Wireless Network Connectin screen shows “Connected,” the
connection between your computer and the wireless access point has
been successfully established.
16
CONFIGURATION

If you need to connect to different wireless access points at different
times — at home, the ofce or a cybercafe, for example — you can store
the connection parameters (encryption, passphrase, security and so forth)
as a prole for every access point so you don’t have in enter them every
time you want to connect to a specic wireless access point.
1. Right-click the
conguration
utility icon in the
lower-right corner
of the desktop, then
click “Launch Cong
Utilities” in the pop-up menu.
2. Choose one of the two options available for adding a connection prole
to your Prole List: create a new one or add an existing one.
• To create and add a new prole, click the Prole tab to display the
current Prole List, then click “Add.”
• To simply add a prole already established, click the Site Survey tab
(shown below), highlight the connection(s) you want to add to the
current Prole List, then click “Add to Prole.”
CONFIGURATION
17

3. On the Add Prole screen, set or re-set the parameters for the newly
created/added prole.
18
CONFIGURATION

Enter up to 32 alphanumerical characters and/or
symbols (but no spaces).
If available, the SSID of the selected WAP or other wireless device
will display here; otherwise, it needs to be entered manually.
CAM (Constantly Awake Mode) keeps the
wireless radio active even when not transferring data); PSM (Power
Saving Mode) switches the radio off when not transferring data.
NOTE: PSM is recommended to help the battery live longer if you’re
using the adapter with a notebook computer.
Select “Ad Hoc” or “Infrastructure.” If you’re adding a
prole from an existing access point or other wireless device, it’s
automatically selected and you don’t have to change it.
This option is only available when the network type is “Ad
Hoc.” Select “Auto” or “Long Preamble.” (Select “Auto” if you’re unsure.)
Check the box to manually set it here. NOTE: Do not
modify the default setting unless you know what it is.
Check the box to manually set it here. NOTE: Do
not modify the default setting unless you know what it is.
4. Click the Authentication and Security tab to display and enter the
encryption and authentication settings.
CONFIGURATION
19

Select the authentication type of the WAP or
other wireless device you wish to connect. If adding a prole from an
existing access point or wireless device, this is automatically entered:
Do not modify it. NOTE: If you select “LEAP” (Lightweight Extensible
Authentication Protocol), an additional screen displays for entering/
selecting the LEAP identity, password, domain name and encryption
type. Check the “Show Password” box to display the password entered
instead of asterisks.
Select the encryption type of the WAP or other wireless
device you wish to connect. If adding a prole from an existing access
point or wireless device, this is automatically entered: Do not modify it.
Enter your values here. If encryption is not
enabled or if “WEP” is selected as the encryption type, this eld will
be disabled and grayed out.
Select the key type (Hex or ASCII) and input the WEP key
here. If encryption is not enabled or if “WPA” is selected as the
encryption type, this eld will be disabled and grayed out.
If you check this box, all passphrases or security
20
CONFIGURATION
Other manuals for 524070
2
Table of contents
Other Intellinet Computer Hardware manuals

Intellinet
Intellinet 524544 User manual

Intellinet
Intellinet 524070 User manual

Intellinet
Intellinet 524056 User manual

Intellinet
Intellinet 524056 User manual

Intellinet
Intellinet 550512 User manual

Intellinet
Intellinet 150057 User manual

Intellinet
Intellinet 505314 User manual

Intellinet
Intellinet 524056 User manual
Popular Computer Hardware manuals by other brands

Supermicro
Supermicro X11SDC-4C user manual

Texas Instruments
Texas Instruments SimpleLink Wi-Fi BoosterPack CC3120 Programmer's guide

IOtech
IOtech ADAC/5500 Series installation guide

Cypress Semiconductor
Cypress Semiconductor CY7C68300C datasheet

Kontron
Kontron AdvancedMC AM4211 user guide

Intel
Intel SRCSASJV - RAID Controller Hardware user's guide