With mounting bracket
1. Mount the base of mounting bracket on the
selected position. Lead the cable through the
cable access tunnel of mounting bracket.
2. Open the front cover and carefully remove the
PCB from the bottom case. Lead the cable into
the case and assemble the mounting bracket with
it (as shown on previous page).
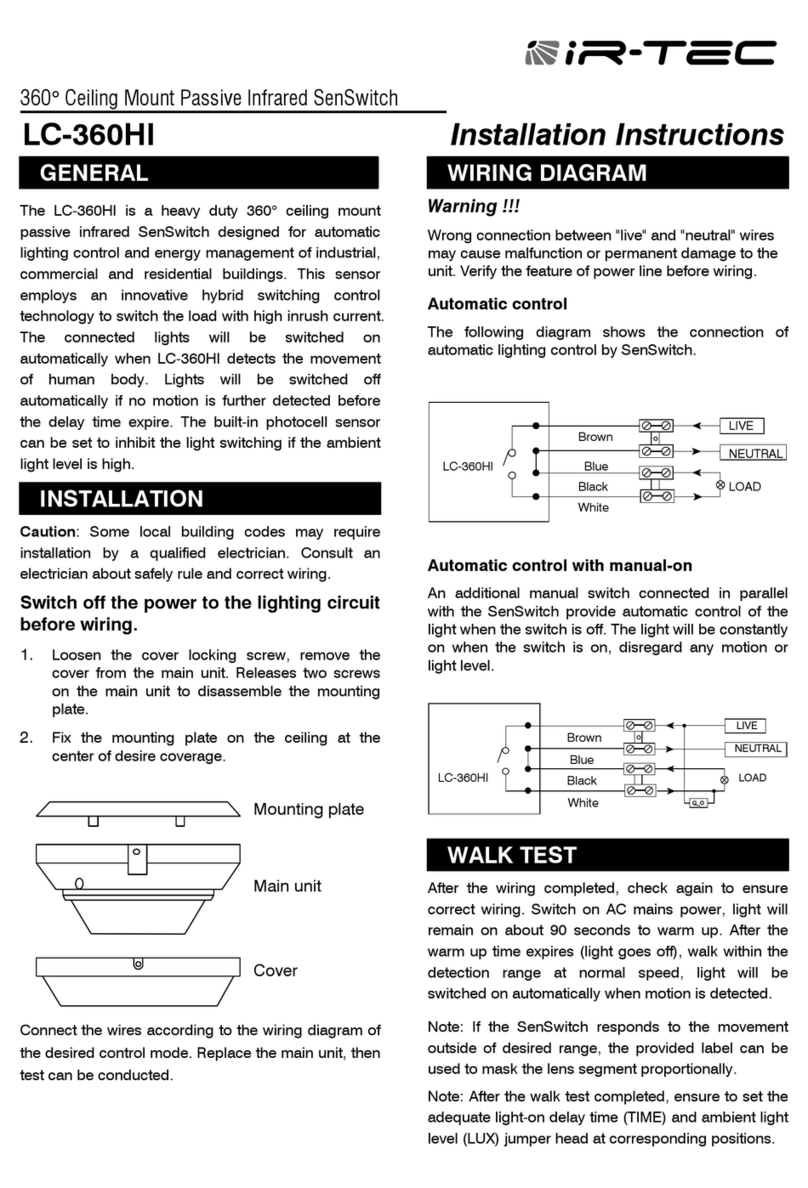
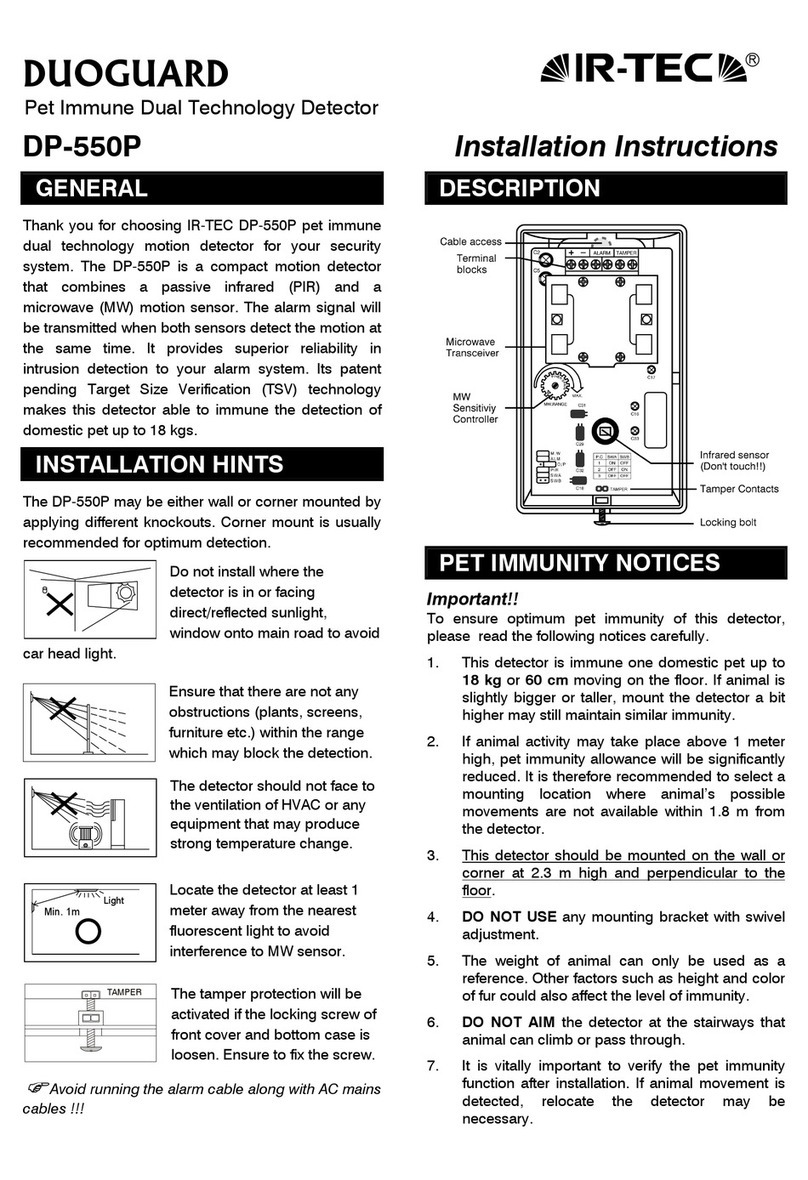
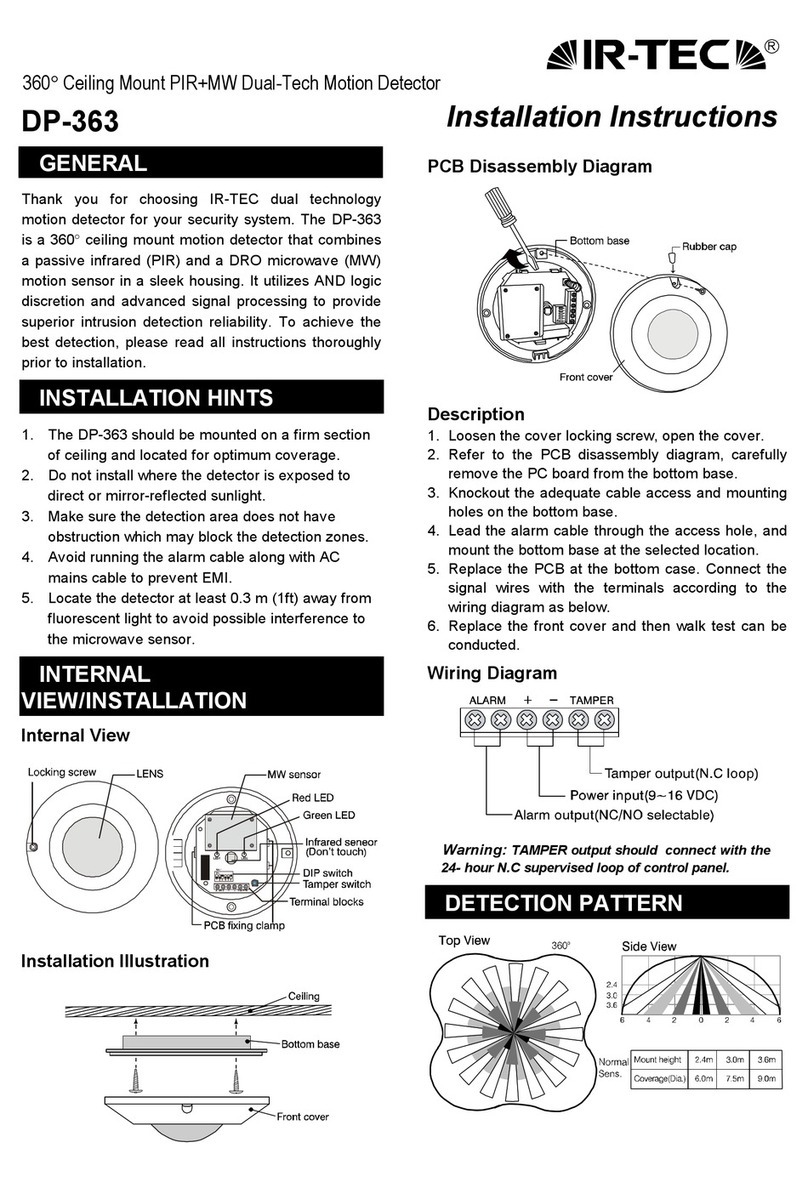
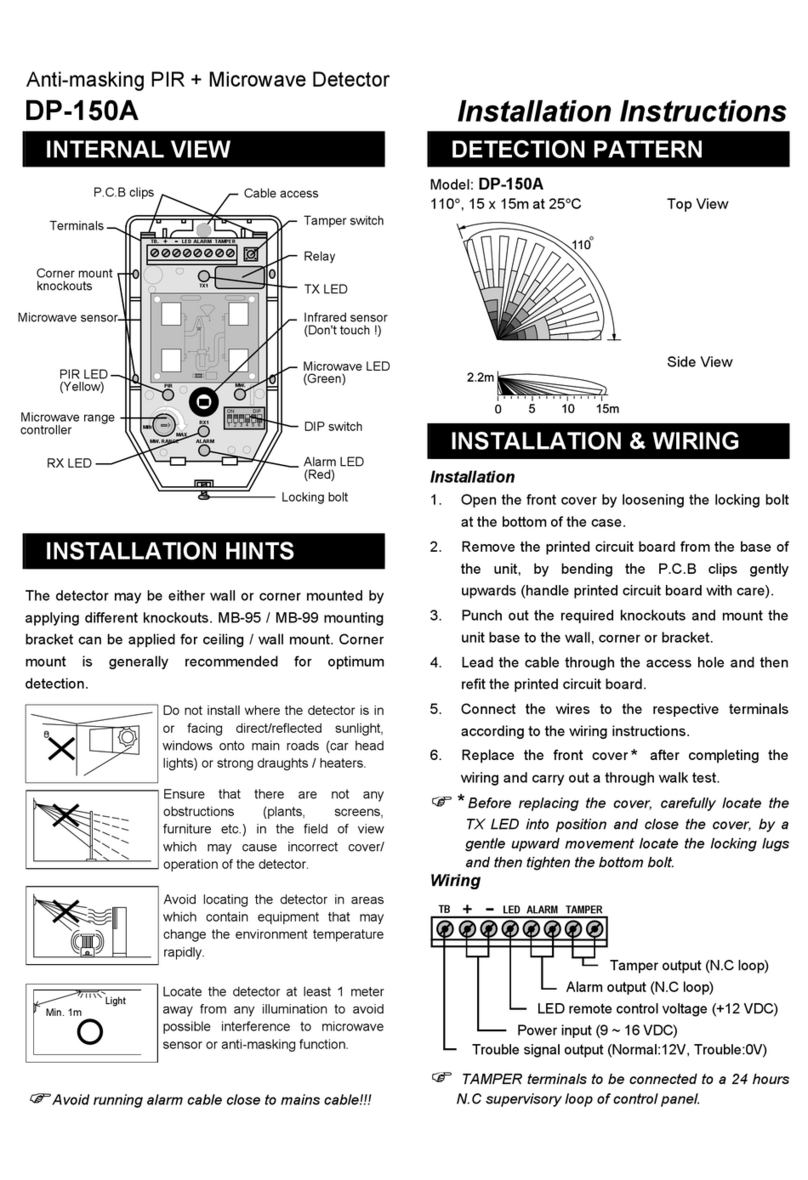
3. Connect the cable to the corresponding terminals
according to the following instructions. Replace
the PCB on the bottom case and fix it. Replace
the front cover and then walk test can be
conducted.
Without mounting bracket
1. Open the front cover and carefully remove the
PCB from the bottom case. Select the adequate
knockouts and mount the case on the position.
2. Connect the cable to the corresponding terminals
according to the following instructions. Replace
the PCB on the bottom case and fix it. Replace
the front cover and then walk test can be
conducted.
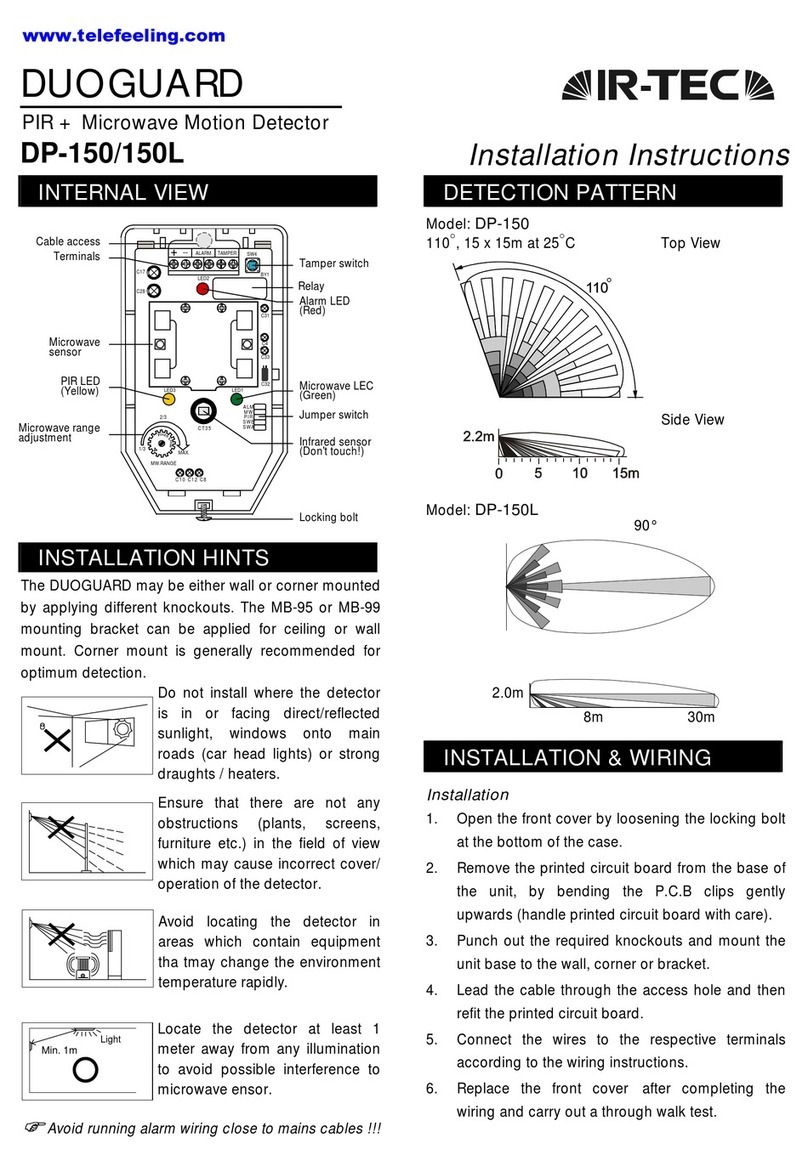
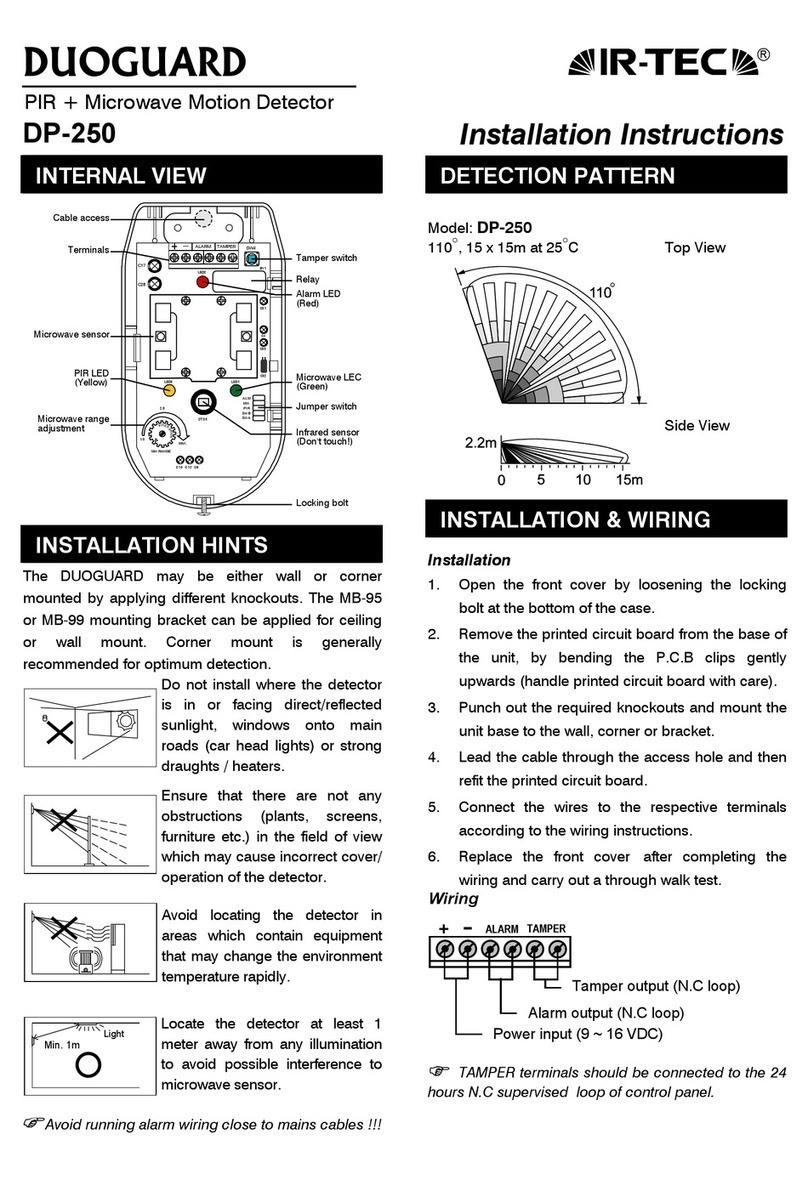
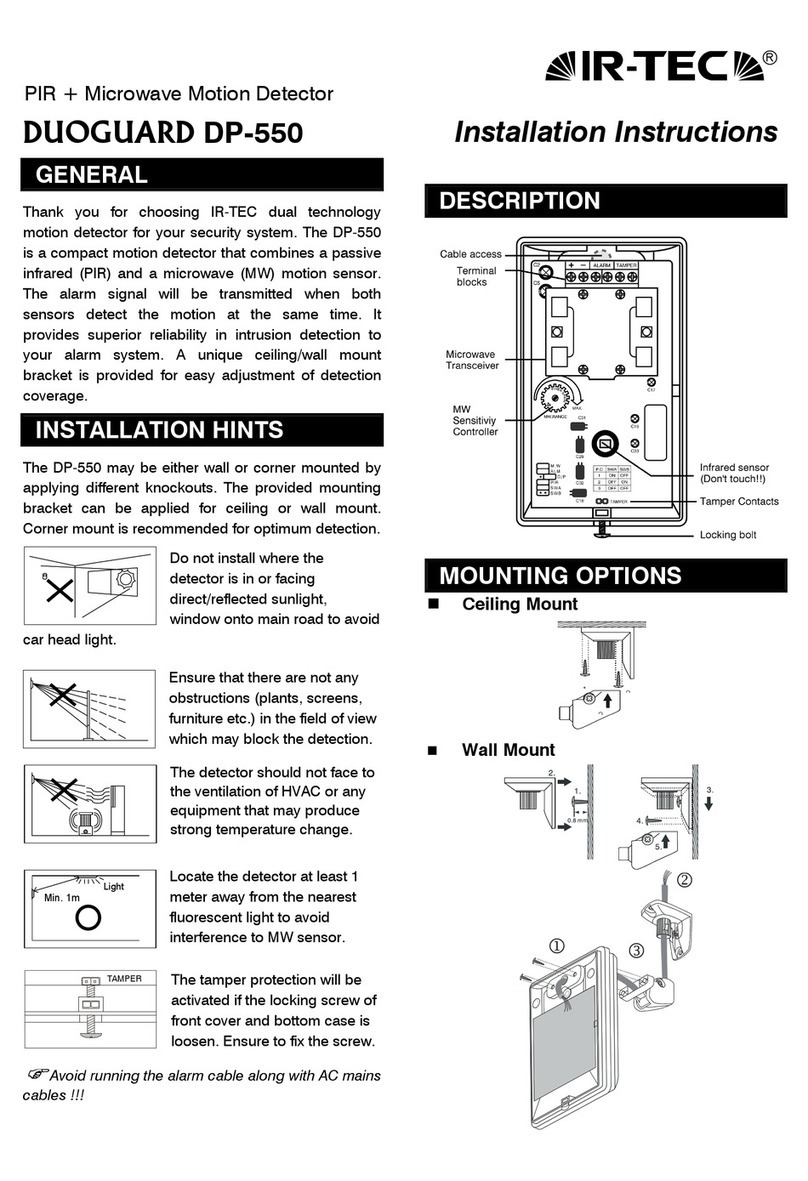
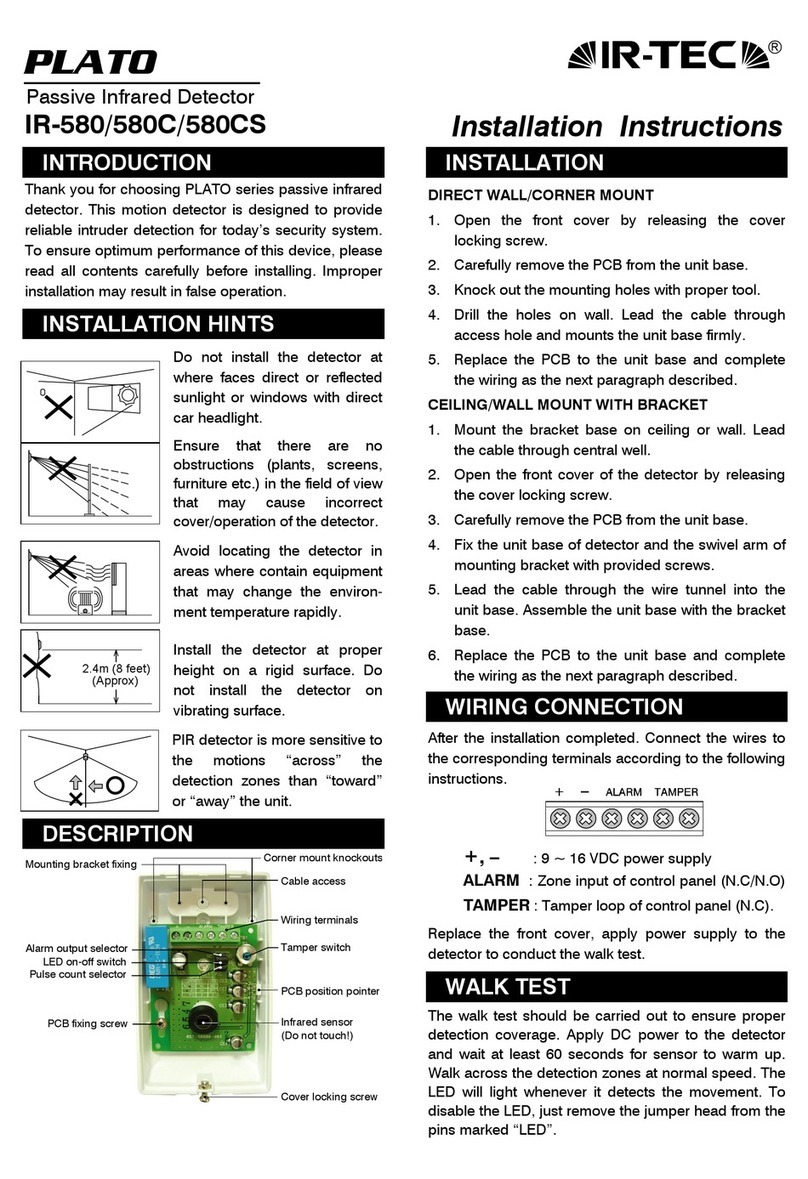
Wiring Diagram
+
ALARM
TAMPER -
Tamper output (N.C loop)
Alarm output (N.C loop)
Power in
ut
9 ~ 16 VDC
TAMPER: Connect to the tamper protection loop.
ALARM: Alarm output, connect to the alarm loop
of control panel.
–: Ground of DC power input.
+: Positive of DC power input.
WALK TEST
It is necessary to carry out a thorough walk test of the
detector to ensure that the correct coverage is being
achieved. Also to ensure that both PIR & microwave
are sensors working to the same detection area.
1. Apply the DC power supply and give
approximately 60 seconds for sensor to warm up.
After the warm up time expires, walk across the
detection zones at normal speed. The red LED
will lit when it detects the motion.
2. If microwave sensor is too sensitive (green LED
remains on), then carefully adjust of the thumb
wheel of MW sensitivity controller in
counterclockwise until the detection is
satisfactory.
DIP SWITCH FUNCTIONS
There is a 5-pole dip switch on the PCB which controls
various functions.
Switch
Function
Alarm
output
Alarm
LED
PIR
LED
MW
LED
Pulse
count
SW # 1 2 3 4 5
ON NC ON ON ON 2
OFF NO OFF OFF OFF 4
DETECTION PATTERN
Model: DP-550
110°, 15 x 15m at 25°C Top View
Side View
SPECIFICATIONS
Power supply ............9 ~ 16 VDC
Current drain.............24 mA @ 12 VDC
Infrared sensor..........Dual element, pyroelectric
