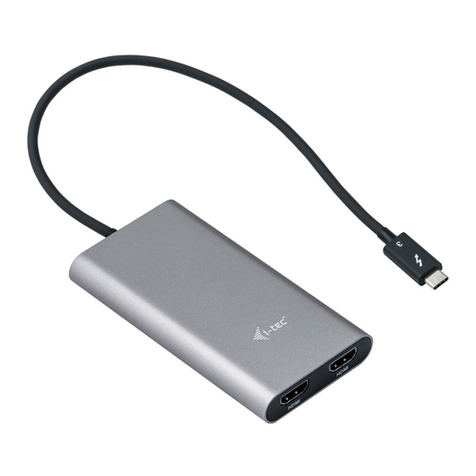
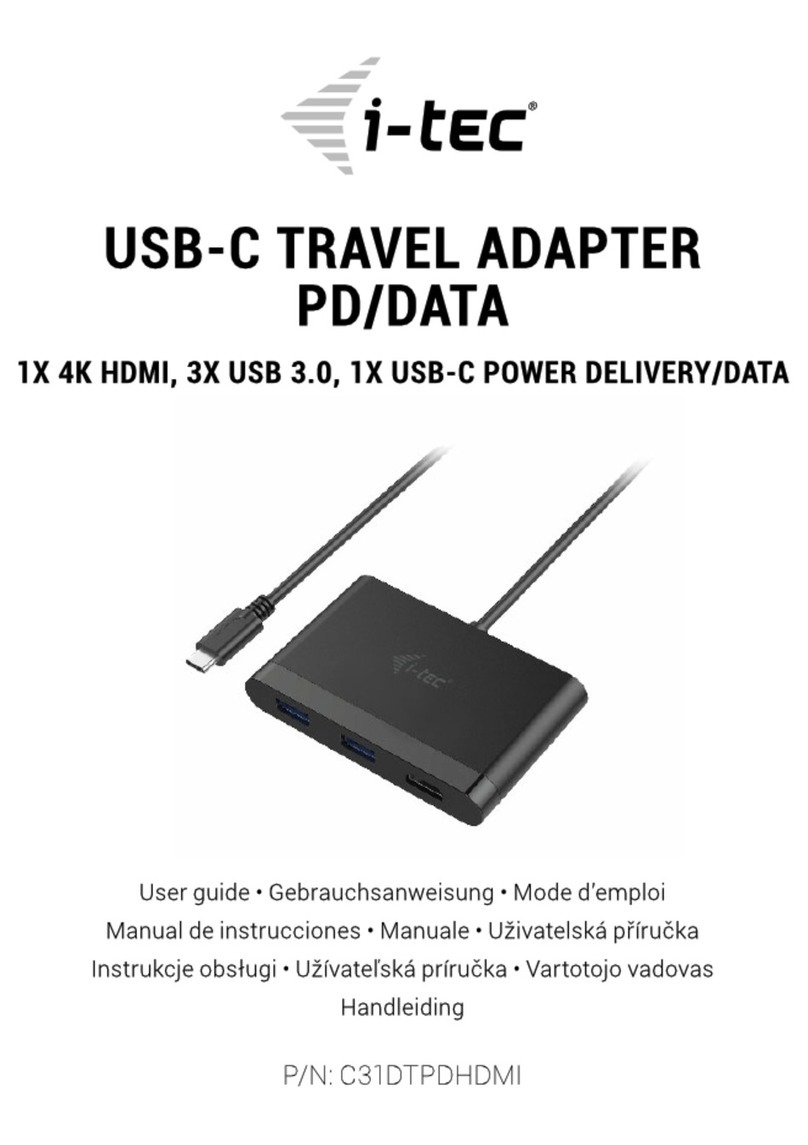
Itec C31AHDMIPD User manual

i-tec USB 3.1 Type-C HDMI and USB Adapter
with Power Delivery
(GB) User's manual
(DE) Gebrauchsanweisung
(CZ) Manuál
(PL) Instrukcja
(SK) Manuál
(LT) Vadovas

ENGLISH
INTRODUCTION
Thank you for purchasing the i-tec USB Type-C adapter that will allow you to connect your favorite devices
to a notebook, a tablet, a PC or a smartphone with a USB Type-C port using a single USB Type-C connector.
It offers 1x HDMI 4K port, 1x USB 3.0 port and 1x USB Type-C Power Delivery port. Thanks to its compact
dimensions, low weight and application without a power adaptor it is also convenient for travelling.
Please, read the entire user manual carefully before you start using the adapter.
TERMINOLOGY
Interface / port / connector / input / slot –a place where two devices are physically connected.
Chipset –a semiconductor device in a notebook, tablet, PC, controlling the function of a port.
USB Type-C –is a new symmetric connector and standard, introduced by USB-IF in their
specification USB 3.1. Windows 10 (Microsoft), Mac OS X (Apple) and Chrome OS and Android
(Google) have introduced native support for this connector. It allows faster charging, energizing,
double-function (a host but also a guest), support for alternative modes (DisplayPort, MHL,
Thunderbolt) and error messaging using Billboard equipment.
Alternative modes (Alt modes) –special modes for USB Type-C connector, which can be
supported. Currently the most popular ones include DisplayPort / DockPort, MHL, Thunderbolt.
Devices with this feature of the connector and the cable allow transmission of images and at the
same time preserve other functions of a connector (for data transfers and charging).
DisplayPort /DockPort Alt mode –this mode allows transmission of images over USB Type-C
connector and a cable.
USB Power Delivery (USB PD) –optional property of the USB Type-C connector. A connector with
this support can charge and be charged at the same time and it supports loads from 10W to 100W
(depending on profiles 1-5). In Windows 10 USB PD cannot be applied to older USB A, B and micro B
ports.
USB 3.1 / 3.0 / 2.0 –a standard for USB interface / port for connection of various USB devices.
Various USB devices can be connected to the docking station or adapter using the USB interface
type A. USB type B is used for connecting the docking station or adapter to notebook, tablet, PC.
HDMI –a standard for digital graphical interface / port for connection of monitors and other
graphical display devices.
Audio –designation for audio input (microphone) or output (earphones / loudspeakers) devices.
PACKAGE CONTENTS
i-tec USB Type-C adapter with cable (20 cm)
Quick Start
SPECIFICATION
Interface USB Type-C (3.1) and USB 3.0, compatible with USB 2.0
1x USB Power Delivery with profile 4 (max. 60W)
1x USB 3.0 port, transfer rate up to 5 Gbps
Graphic interface: 1x HDMI (spec. 2.0a)
Resolution: 640x480, 800x600, 1024x768, 1280x720, 1280x768, 1280x800, 1280x1024, 1360x768,
1366x768, 1368x768, 1400x1050, 1600x1200, 1680x1050, 1920x1080, 1920x1200, 2048x1152
2048x1280 2048x1536 2560x1440 2560x1600 3840x2160
Mode: Extend, Mirror and Primary Display
Supported colors 16 / 32 bit
Powered through USB bus (no power adapter is needed)
Chipset: VL100 & VL813 & PS176
OS Windows 10 32/64bit, Mac OS X, Chrome OS (Google), Android 6
Product dimensions: 62 x 48 x 14 mm
Product weight: 46 g

DESCRIPTION OF THE ADAPTER
1. USB Type-C Power Delivery port –for powering devices connected via USB Type-C
2. HDMI port –for connecting a monitor
3. USB 3.0 port Type-A –pro connecting USB devices
4. Connecting cable with USB Type-C connector –for connecting to a notebook, tablet, PC or smartphone
SYSTEM REQUIREMENTS
Hardware requirements: notebook, tablet, PC, smartphone with OS Windows, Mac or Google with a free
port USB Type-C
Operating system: Windows 10, Mac OS X, Google (Chrome OS and Android 6)
After connecting, the drivers for the adapter are installed automatically from the
system.
CAUTION!
Before installation make sure that your system has installed the latest drivers for your devices.
CONNECTING AN HDMI MONITOR
The adapter is equipped with 1x HDMI UHD 4K port for connection of an external monitor or beamer with
an HDMI interface. For displaying your images you can use modern plazma or LCD monitors and TVs. The
graphic chip, which is the heart of the adapter, supports resolution up to 4K (UHD) 3840 x 2160 pixels.
Connect the monitor to the adapter using a high-quality HDMI cable. During installation of an additional
monitor the screen of the notebook, tablet or PC can flicker which is a standard condition.
CHARGING AND ENERGIZING
Apple New MacBook, Windows 10 devices with a USB Type-C port or Chromebook Pixels etc.
The adapter offers 1x USB Type-C Power Delivery port, designed for energizing of the connected “parent”
device using the original power adapter and for charging of devices connected through the USB 3.0 port.
CONNECTING USB DEVICES
You can use the USB 3.0 port for connecting your keyboard, mouse, external hard drive, printer and other
devices or you can use it for connection of an USB HUB by which you will gain some more free USB ports. In
this case we recommend using a HUB with an external power source. If the device is not charged or does
not work, connect the original USB Type-C power adapter to the USB Type-C port of the adapter for support
of charging.

The majority of problems with the adapter and the connected peripheral devices can be solved by
disconnecting the USB Type-C cable of the adapter from the USB Type-C port of the PC / Mac / smartphone
and reconnecting after approximately 10 s.
USING THE ADAPTER IN WINDOWS OS
Advanced configuration for the graphics –after connecting the monitor and after clicking on the settings
for “Image Resolution” in Windows you can select the monitor you want to use.
Note: By clicking on the second monitor and moving it you can position this monitor as required relative to
the original monitor of your notebook / tablet / PC.
Now you can set Extend and Mirror mode:
a) for the Mirror mode: on the monitor select the 2nd Monitor, select Several monitors → Mirror
this display → OK.
b) for the Extend mode: on the monitor select the 2nd Monitor, select Several monitors → Extend
this display → OK.

Audio settings –this will allow audio settings in the Control Panels → Audio.
Notes on using:
The Standby / Hibernate mode and the Video port –after the activation of the notebook / tablet / PC from
the Standby / Hibernate mode the primary (original) monitor is displayed, for this reason we recommend
using the monitor that is integrated with the notebook / tablet / PC as the primary monitor so that you can
log on to the system again.
The Mirror mode –the additional monitor takes on the parameters of the original monitor in the system,
i.e., if you select the Mirror mode and the original monitor resolution is 1280x1024 then the screen will be
displayed on the additional monitor with a resolution of max. 1280x1024 (even if you set a higher
resolution).
Use and set the monitors in accordance with the user manual, i.e., using a monitor with the resolution
lower than the settings on the HDMI port can damage the monitor (e.g., for a monitor with max. resolution
1024x768 do not set the resolution value 1280x960 and higher on the HDMI port)!
Pressing the keys „Windows“ + P you can also easily control the monitors –for using a monitor in Win 10
you can select: Computer screen only, Mirror, Extend, Second screen only.

USING THE ADAPTER IN MAC OS X
Installation of the drivers in Mac OS X is automatic.
A: After connecting the monitor the screen on your Mac will glimmer, which is a standard condition, and
after stabilization it is possible to perform standard setting of the monitor here: System Preferences-
Displays.
Click on Arrangement and in the default mode (Expanded desktop) click on the new monitor and drag it as
necessary vis-à-vis the Mac monitor. If you select Mirror displays the mode will change to Mirror (the
resolution of the monitors will be automatically adjusted according to their parameters and the highest
possible resolution will be set on both monitors). By cancelling the Mirror displays option you will return to
the Expanded desktop mode.
Expanded desktop mode: The arrow indicates the possible position of the connected monitor vis-à-vis the
Mac monitor.

In the Expanded desktop mode you can choose the Main monitor by dragging the Menu Bar.
Mirror mode: This mode can only be used if supported by the Mac.

Click on Gather Windows: using this option you can choose the settings of the corresponding monitor –
Scaled (offers available resolutions), Rotation (Standard, 90°, 180° and 270°) and Refresh rate (if offered).
Notes for using the adapter with monitors:
Working on the connected monitor when the Mac monitor is closed is possible with the power
supply from the grid (there are some limitations when using a HDMI monitor on older versions of
Mac). When the power supply is from the battery, the use of a HDMI monitor is limited by the Mac
(in some situations in case of problems with displaying it is possible to use the method described in
the following paragraph).
Most problems with renewing the screen on the connected monitor after hibernation of the Mac,
after using screensaver, after restarting the Mac, after turning the Mac OFF / ON can be solved by
disconnecting the USB Type-C cable of the adapter from the USB Type-C port on the Mac and
reconnecting it after approximately 10 s. Please wait for completion of connection of all
peripherals.
B: After connecting other USB devices to the USB 3.0 port of adapter (e.g. USB external HDD, USB keyboard,
USB mouse, USB Hub, USB graphic adapter) these devices are used in a standard way. If the device is not
charged or does not work, connect the original USB Type-C power adaptor to the USB Type-C port of the
adaptor for support of charging.
Most problems with the adapter and the connected peripherals can be solved by disconnecting the USB
Type-C cable of the adapter from the USB Type-C port on the Mac and reconnecting it after
approximately 10 s.

CHARGING
The adapter supports charging of the connected USB mobile devices such as smart phones, e-book readers,
multimedia players, navigation devices, and tablets. Simply connect the device that you want to charge
using the original cable to the USB port of the adapter. If the device is not charged or does not work,
connect the original USB Type-C power adapter to the USB Type-C port of the adapter for support of
charging.
AUDIO
Audio output devices, for listening through HDMI, need to be set / verified here: System
Preferences-Sound-Output –select HDMI Audio Device.
Setting the audio output device to both the earphones and the monitor simultaneously can be
done in Open-Applications-Utilities-Audio settings MIDI.app –click on „+“ on the left at the
bottom –Create device with multiple outputs and select the desired outputs from the offered
options on the Device with multiple outputs.
SAFETY INSTRUCTIONS
Do not expose to extreme temperatures and air humidity
Use the device on flat surfaces –you will prevent it from slipping and falling to the ground.
Save the user manual for a possible use later.
In cooperation with the service department:
Check functionality after falling to water or to the ground.
Check functionality when the cover is broken.
Send the device back if it does not work in accordance with the user manual.
FREQUENTLY ASKED QUESTIONS
Question: What are the requirements for the primary graphic cards to be used with the graphic chipsets in
the i-tech graphic adapters and docking stations?
Answer: Graphic chipsets are secondary (additional) graphic cards in the PC. For their function they need to
have an installed primary graphic card. Windows 10 and later: In these operating system the graphic
controller works only in connection with the primary graphic cards: Intel, NVidia, ATI/AMD, VIA. It cannot
work with the SiS or Matrox graphic cards.
Question: Can I get more detailed information on the problems related to the USB Type-C adapter?
Answer: Of course, you can contact our technical help.
Question: The device does not charge an Apple / Samsung tablet.
Answer: If the device connected to the USB 3.0 port is not charged or does not work, connect the original
USB Type-C power adapter to the USB Type-C port of the adapter for support of charging. Unfortunately
despite the European standard on unification of the power supply devices some companies protect their
products by allowing charging these products only with the original / licensed power adapter through the
USB Type-C port.

DEUTSCH
EINLEITUNG
Wir bedanken uns für den Kauf von i-tec USB Type-C Adapter, der es Ihnen ermöglicht, mit Hilfe von einem
USB Typ-C Anschluss Ihre Lieblingsgeräte mit USB Type-C Port an Notebook, Tablet-PC oder Smartphone
einfach und schnell anzuschließen. Vorhandene Anschlüsse: 1x HDMI 4K Port, 1x USB 3.0 Port und 1x USB
Typ-C Power Delivery Port. Dank seiner kompakten Maße, niedrigem Gewicht und Verwendung ohne
Versorgungsadapter ist er auch für die Benutzung unterwegs geeignet.
Lesen Sie bitte vor Beginn der Arbeit mit dem Adapter sorgfältig die gesamte Gebrauchsanweisung.
BEGRIFFSWÖRTERBUCH
Schnittstelle / Port / Anschluss / Eingang / Steckplatz –Stelle, an der zwei Geräte physisch
verbunden werden.
Kontroller –Halbleiterbestandteil (s.g. Chipsatz) in Notebook, Tablet-PC, der die Arbeit eines der
Ports sichert.
USB Type-C –ist ein neuer symmetrischer Anschluss und Standard, den USB-IF in ihrer Spezifikation
USB 3.1 angab. Windows 10 (Microsoft), Mac OS X (Apple) und Chrome OS und Android (Google)
stellten die native Unterstützung dieses Anschlusses vor. Er ermöglicht eine schnellere Aufladung,
Versorgung, s. g. Zweirolle (nicht nur Host, sondern auch Gast), Unterstützung von alternativen
Modi (DisplayPort, MHL, Thunderbolt) und Fehleranzeige über Billboard Gerät.
Alternative Modi (Alt Mode) –spezielle Modi für USB Type-C Anschluss, die unterstützt werden
können. In der Gegenwart gehören DisplayPort / DockPort, MHL, Thunderbolt zu den populärsten
Modi. Geräte mit dieser Anschluss- und Kabeleigenschaft ermöglichen die Bildübertragung und
gleichzeitig bewahren andere Anschlussfunktionen (Datenübertragung und Aufladung).
DisplayPort /DockPort Alt Mode –dieser Modus ermöglicht die Bildübertragung über USB Type-C
Anschluss und Kabel.
USB Power Delivery (USB PD) –wählbare Eigenschaft von USB Type-C Anschluss. Anschluss mit
dieser Unterstützung kann sowohl aufladen, als auch aufgeladen werden und unterstützt die Last
von 10W bis zu 100W (nach Profilen 1-5). Unter Windows 10 USB PD kann auf ehemalige USB A, B
und micro B Ports nicht angewandt werden.
USB 3.1 / 3.0 / 2.0 –Standard für USB Schnittstelle / Port für den Anschluss von verschiedenen USB
Geräten. An Docking Station oder Adapter ist es möglich, verschiedene USB Geräte mit Hilfe von
USB Schnittstelle Type A anzuschließen. Port USB Type B dient zum Anschluss von Docking Station
oder Adapter an Notebook, Tablet-PC, PC.
HDMI –Standard für digitale Grafikschnittstelle / Port, die zum Anschluss von Bildschirmen und
anderen Grafikbildschirmgeräten dient.
Audio –Bezeichnung für Toneigangs- (Mikrophon) oder Ausgangsgeräte (Kopfhörer /
Lautsprecher).
LIEFERUMFANG
i-tec USB Type-C Adapter mit Kabel (20 cm)
Quick Start
SPEZIFIKATION
Schnittstelle USB Type-C (3.1) und USB 3.0, rückwärts kompatibel zu USB 2.0
1x USB Power Delivery mit Profil 4 (max 60W)
1x USB 3.0 Port, Datenübertragungsgeschwindigkeit bis zu 5 Gbps
Grafische Schnittstelle: 1x HDMI (Spez. 2.0.a)
Mögliche Schnittstellen: 640x480, 800x600, 1024x768, 1280x720, 1280x768, 1280x800, 1280x1024,
1360x768, 1366x768, 1368x768, 1400x1050, 1600x1200, 1680x1050, 1920x1080, 1920x1200,
2048x1152 2048x1280 2048x1536 2560x1440 2560x1600 3840x2160
Einstellungen: Erweitern, Spiegeln und Primärmonitor
Unterstützte Farben 16 / 32 bit
Die Stromversorgung findet über den USB statt (kein Stromadapter notwendig)
Chipset: VL100 & VL813 & PS176
OS Windows 10 32/64bit, Mac OS X, Chrome OS (Google), Android 6
Produktabmessungen: 62 x 48 x 14 mm
Produktgewicht: 46 g
ADAPTERBESCHREIBUNG
1. USB Type-C Power Delivery Port –für die Versorgung der über USB Type-C angeschlossenen Geräte
2. HDMI Port –für den Anschluss von Bildschirm
3. USB 3.0 Port Type-A –für den Anschluss von USB Geräten
4. Anschlusskabel mit USB Type-C Anschluss –für den Anschluss des Adapters an Notebook, Tablet-PC oder
Smartphone
SYSTEMANFORDERUNGEN
Hardware-Anforderungen: Notebook, Tablet-PC, PC, Smartphone mit BS Windows, Mac oder Google mit
einem freien Port USB Type-C
Betriebssystem: Windows 10, Mac OS X, Google (Chrome OS und Android 6)
Nach Anschluss werden die Adaptertreiber automatisch vom System installiert.
HINWEIS!
Vergewissern Sie sich vor der Installation, dass Sie im System die neuesten Treiber für Ihr Gerät installiert
haben.
ANSCHLUSS VON HDMI-BILDSCHIRM
Der Adapter verfügt über 1x HDMI UHD 4K Port für den Anschluss eines externen Bildschirms oder
Projektors mit HDMI Schnittstelle. Als Abbildungsgerät können Sie moderne Plasma- oder LCD-Bildschirme
und Fernseher nutzen. Der grafische Chipsatz, der „das Herz“ des Adapters darstellt, unterstützt bis zu 4K
(UHD) Auflösung 3840 x 2160 Pixel. Für den Anschluss des Bildschirms an den Adapter ist ein hochwertiges
HDMI Kabel zu verwenden. Während der Installation des Zusatzbildschirms kann das Display von Notebook,
Tablet-PC oder PC blinken, was ein Standardzustand ist.
AUFLADUNG UND VERSORGUNG
Apple New MacBook, Windows 10 Gerät mit USB Type-C Port oder Chromebook Pixels und andere.
Der Adapter bietet 1x USB Type C Power Delivery Port an, der zur Versorgung des angeschlossenen
“Muttergeräts” mittels Originalnetzadapter und zur Aufladung der über USB 3.0 Port angeschlossenen
Geräte bestimmt ist.

ANSCHLUSS VON USB-GERÄTEN
Der USB 3.0 Port kann entweder für den Anschluss von Tastatur, Maus, externer Festplatte, Drucker und
anderen Peripherien oder für den Anschluss von USB-HUB genutzt werden, wodurch weitere freie USB
Ports gewonnen werden. In diesem Fall empfehlen wir, einen HUB mit externer Versorgung zu verwenden.
Falls das Gerät nicht geladen wird oder nicht arbeitet, dann schließen Sie um das Laden zu unterstützen den
Original USB Type-C Versorgungsadapter an USB Type-C Port des Adapters an.
Der überwiegende Teil von Problemen mit dem Adapter und den angeschlossenen Peripherien kann durch
Trennung des USB Type-C Adapterkabels vom USB Type C Port des PCs / Macs / Smartphones und sein
wiederholter Anschluss nach ca. 10 Sekunden gelöst werden.
ADAPTERVERWENDUNG UNTER OS WINDOWS
Fortgeschrittene Konfiguration für Grafik –nach dem Anschluss an Bildschirm und Klicken auf
Einstellungen für „Abbildungsauflösung“ vom Windows System kann die Bildschirmbenutzung gewählt
werden.
Bemerkung: Nach dem Klicken auf den zweiten Bildschirm und nach seinem Verschieben können Sie ihn
nach Bedarf gegenüber dem primären Bildschirm von Ihrem Notebook / Tablet-PC / PC plazieren.

Es ist möglich Erweitern (Extend) und Spiegeln / Duplizieren (Mirror) einzustellen):
a) für den Modus Spiegeln / Duplizieren (Mirror): auf dem Bildschirm wählen Sie 2. Bildschirm, bei
mehreren Bildschirmen → diese Abbildung duplizieren → OK.
b) Für den Modus Erweitern (Extend): auf dem Bildschirm wählen Sie 2. Bildschirm, bei mehreren
Bildschirmen → diese Abbildung erweitern → OK.
Toneinstellung –ermöglicht Toneinstellung unter Gerätemanager → Ton.
Bemerkungen zur Verwendung:
Standby / Hibernate Betrieb und Video Port –nach der Aktivierung des Notebooks / Tablet-PCs / Computers
aus dem Standby / Hibernate Betrieb wird das bestehende Display (Primärdisplay) angezeigt, deswegen
empfehlen wir, den Notebook- / Tablet-PC- / Computermonitor als Primärdisplay zu verwenden, um sich
wieder im System anmelden zu können.
Mirror Betrieb –das Zusatzdisplay richtet sich nach den Parametern des Gerätedisplays, d.h. falls Sie den
Mirror Betrieb einstellen und das integrierte Display über die Auflösung von 1280x1024 verfügt, wird der
Bildschirm mit der maximalen Auflösung von 1280x1024 übertragen (auch wenn eine höhere Auflösung
eingestellt wird).

Benutzen und stellen Sie die Bildschirme gemäß Gebrauchsanweisung ein, denn der Bildschirm mit einer
niedrigeren Auflösung als die Einstellung am HDMI Port kann eine Bildschirmbeschädigung verursachen
(z.B. stellen Sie beim Bildschirm mit max. Auflösung von 1024x768 Pixel den Wert 1280x960 und höher
nicht am HDMI Port ein).
Mit Hilfe der Tastenkombination „Windows“ + P ist es auch möglich, beide Displays einfach zu bedienen –
zur Verwendung von Display unter Win 10 können Sie Folgendes wählen: Nur PC-Bildschirm, Duplizieren,
Erweitern, Nur zweiter Bildschirm.
VERWENDUNG DER ADAPTER UNTER MAC OS X
Die Treiberinstallation unter Mac OS X erfolgt automatisch.
A: Nach dem Anschluss von Bildschirm wird das Display auf Ihrem Mac blinken, was ein Standardzustand
ist, und nach der Stabilisierung kann die Standardeinstellung hier durchgeführt werden:
Systemeinstellungen-Bildschirme.

Klicken Sie auf Anordnen und im erweiterten Modus klicken Sie auf den neuen Bildschirm und ziehen ihn
nach Bedarf hin zum Mac Bildschirm. Durch die Wahl „Bildschirme spiegeln“ wird der Modus auf
„Spiegeln“ (die Auflösung der Bildschirme wird automatisch nach ihren Parametern geändert und auf die
möglichst höchste Auflösung auf beiden Bildschirmen eingestellt) eingestellt. Durch Rücknahme der Wahl
„Bildschirme spiegeln“ erneuern Sie den Modus „Erweitern“.
Modus „Erweitern“: Der Pfeil zeigt die mögliche Position des angeschlossenen Bildschirms zu Mac
Bildschirm an.
Unter Modus „Erweitern“ können Sie den Hauptbildschirm durch Bewegen der Leiste Menu Bar wählen.
Modus „Spiegeln“: Kann verwendet werden, wenn er von Mac angeboten wird.

Klicken Sie auf „Fenster sammeln“: durch diese Wahl können Sie die Einstellung des entsprechenden
Bildschirms wählen – Auflösung (zeigt verwendbare Auflösungen an), Drehung (Standard, 90°, 180° und
270°) und Wiederholrate (falls angeboten wird).
Bemerkungen zur Verwendung der Adapter mit Bildschirmen:
Die Arbeit auf angeschlossenem Bildschirm, wenn der Mac Bildschirm zugeklappt ist, ist bei der
Versorgung vom Netz (eine teilweise Beschränkung besteht bei der Verwendung von HDMI
Bildschirm unter älteren Versionen von Mac) möglich. Bei der Versorgung von Akku ist die
Verwendung von HDMI Bildschirm durch Mac beschränkt (in einigen Fällen kann der Vorgang im
folgenden Punkt bei Anzeigeproblemen benutzt werden).
Der überwiegende Teil von Problemen mit Displayerneuerung auf angeschlossenem Bildschirm
nach Standby von Mac, nach Verwendung von Bildschirmschoner, nach Neustart von Mac, nach der
Ausschaltung / Einschaltung von Mac kann durch die Trennung des USB Type-C Kabels der Adapter
von USB Type-C Port von Mac und seinem erneuten Anschluss nach etwa 10 Sekunden gelöst
werden. Warten Sie bis alle Peripherien angeschlossen sind.
B: Nach dem Anschluss weiterer USB Geräte an USB 3.0 Port des Adapters (z.B. USB externe Festplatte, USB
Tastatur, USB Maus, USB Hub, USB grafischer Adapter) werden diese Geräte standartmäßig verwendet.
Falls das Gerät nicht aufgeladen wird oder nicht arbeitet, schließen Sie den Original USB Type-C
Versorgungsadapter an USB Type-C Port des Adapters zur Ladeunterstützung an.
Der überwiegende Teil von Problemen mit der Adapter und den angeschlossenen Peripherien kann durch
die Trennung des USB Type-C Kabels der Adapter von USB Type-C Port von Mac und seinem erneuten
Anschluss nach etwa 10 Sekunden gelöst werden.
AUFLADUNG
Der Adapter unterstützt die Aufladung angeschlossener USB Mobilgeräte, wie zum Beispiel Smartphones, e-
books-Lesegeräte, Multimediaplayer, Navigationsgeräte und Tablet-PCs. Aufgeladene Geräte sind mit dem

Originalkabel an den USB Port des Adapters anzuschließen. Falls das Gerät nicht aufgeladen wird oder nicht
arbeitet, schließen Sie den Original USB Type-C Versorgungsadapter an den USB Type-C Port des Adapters
zur Ladeunterstützung an.
AUDIO
Toneinstellungen, für Hören über HDMI, ist einzustellen / zu überprüfen unter:
Systemeinstellungen-Ton-Ausgang –wählen Sie HDMI Audio Device.
Toneinstellungen für Kopfhörer und Bildschirm können unter Öffnen-Applikationen-Utilities-
Einstellung von Audio MIDI.app gewählt werden – klicken Sie auf „+“ links unten – Gerät mit
mehreren Ausgängen herstellen und wählen Sie unter Gerät mit mehreren Ausgängen die
benötigten Ausgänge aus der Liste aus.
SICHERHEITSHINWEISE
Extremen Temperaturen und Luftfeuchtigkeit nicht ausstellen.
Gerät auf flachen Unterlagen nutzen – so vermeiden Sie Abrutschen und Sturz auf den Boden.
Bewahren Sie das Benutzerhandbuch für spätere Verwendung auf.
In Zusammenarbeit mit der Serviceabteilung:
Überprüfen Sie die Funktionsfähigkeit nach einem Sturz ins Wasser oder auf den Boden.
Überprüfen Sie die Funktionsfähigkeit bei Bruch des Deckels.
Reklamieren Sie das Gerät, wenn es nicht so funktioniert, wie im Benutzerhandbuch beschrieben.
OFT GESTELLTE FRAGEN
Frage: Welche Anforderungen müssen primäre Grafikkarten für die Verwendung mit Chipsätzen in i-tec
grafischen Adaptern und Docking Stationen erfüllen?
Antwort: Grafische Chipsätze sind sekundäre (weitere) Karten im PC. Für ihre Funktion brauchen sie eine
installierte primäre grafische Karte. Windows 10 und höher: Unter diesen Betriebssystemen funktioniert
der grafische Treiber nur in der Abhängigkeit von primären grafischen Karten: Intel, NVidia, ATI/AMD, VIA.
Er funktioniert mit SiS oder Matrox grafischen Karten nicht.
Frage: Kann ich nähere Informationen über die Probleme mit USB Type-C Adapter bekommen?
Antwort: Natürlich, Sie können sich an unsere technische Unterstützung wenden.
Frage: Apple / Samsung Tablet-PC wird durch das Gerät nicht aufgeladen
Antwort: Falls das Gerät über USB 3.0 Port nicht aufgeladen wird oder nicht arbeitet, dann schließen Sie
den Original USB Type-C Versorgungsadapter an den USB Type-C Port des Adapter zur Ladeunterstützung
an. Leider schützen einige Firmen ihre Markenprodukte auch trotzt europäischer Norm über den
Zusammenschluss von Versorgungsgeräten, so dass sie nur mit Hilfe von Original- / lizenziertem
Versorgungsadapter über USB Type-C Port aufgeladen werden können.

ČESKY
ÚVOD
Děkujeme za zakoupení i-tec USB Type-C adaptéru, který Vám umožní snadno a rychle připojit k notebooku,
tabletu, PC, smartphonu s USB Type-C portem Vaše oblíbená zařízení jediným USB Type-C konektorem.
Nabízí 1x HDMI 4K port, 1x USB 3.0 port a 1x USB Type-C Power Delivery port. Díky svým kompaktním
rozměrům, nízké hmotnosti a použití bez napájecího adaptéru je vhodný také pro použití během cest.
Prosíme o pečlivé přečtení celého manuálu před zahájením práce s adaptérem.
SLOVNÍK POJMŮ
Rozhraní / port / konektor / vstup / slot –místo, kde se fyzicky propojují dvě zařízení.
Řadič –polovodičová součástka (tzv. chipset) v notebooku, tabletu, PC, zajišťující činnost některého
z portů.
USB Type-C –je nový symetrický konektor a standard, který uvedla USB-IF ve své specifikaci USB
3.1. Windows 10 (Microsoft), Mac OS X (Apple) a Chrome OS a Android (Google) představil nativní
podporu tohoto konektoru. Umožňuje rychlejší nabíjení, napájení, tzv. dvojroli (nejen hostitel, ale i
host), podporu alternativních režimů (DisplayPort, MHL, Thunderbolt) a oznamování chyb přes
Billboard zařízení.
Alternativní režimy (Alt mody) –speciální režimy pro USB Type-C konektor, které mohou být
podporovány. V současnosti nejpopulárnějšími jsou DisplayPort / DockPort, MHL, Thunderbolt.
Zařízení s touto vlastností konektoru a kabelu umožňují přenos obrazu a současně zachovávají
ostatní funkce konektoru (pro přenos dat a nabíjení).
DisplayPort /DockPort Alt mod –tento režim umožňuje přenos obrazu přes USB Type-C konektor a
kabel.
USB Power Delivery (USB PD) –volitelná vlastnost USB Type-C konektoru. Konektor s touto
podporou umí jak nabíjet, tak být nabíjen a podporuje zátěž 10W až 100W (podle profilů 1-5). Ve
Windows 10 USB PD nelze aplikovat na dřívější USB A, B a micro B porty.
USB 3.1 / 3.0 / 2.0 –standard pro USB rozhraní / port pro připojení různých USB zařízení. K
dokovací stanici nebo adaptéru lze připojovat různá USB zařízení pomocí USB rozhraní typu A. Port
USB typu B slouží pro připojení dokovací stanice nebo adaptéru k notebooku, tabletu, PC.
HDMI –standard pro digitální grafické rozhraní / port sloužící k připojení monitorů a jiných
grafických zobrazovacích zařízení.
Audio –označení pro zvukové vstupní (mikrofon) nebo výstupní zařízení (sluchátka / reproduktory).
OBSAH BALENÍ
i-tec USB Type-C adaptér s kabelem (20 cm)
Quick Start
SPECIFIKACE
Rozhraní USB Type-C (3.1) a USB 3.0, zpětně kompatibilní s USB 2.0
1x USB Power Delivery s profilem 4 (max. 60W)
1x USB 3.0 port, přenosová rychlost až 5 Gbps
Grafickérozhraní: 1x HDMI (spec. 2.0a)
Možná rozlišení: 640x480, 800x600, 1024x768, 1280x720, 1280x768, 1280x800, 1280x1024,
1360x768, 1366x768, 1368x768, 1400x1050, 1600x1200, 1680x1050, 1920x1080, 1920x1200,
2048x1152 2048x1280 2048x1536 2560x1440 2560x1600 3840x2160
Režimy: Rozšířit, Zrcadlit a Primární monitor
Podporované barvy 16 / 32 bitů
Napájení ze sběrnice USB, není potřeba externí napájecí adaptér
Chipset: VL100 & VL813 & PS176
OS Windows 10 32/64bit, Mac OS X, Chrome OS (Google), Android 6
Rozměry produktu: 62 x 48 x 14 mm
Hmotnost produktu: 46 g

POPIS ADAPTÉRU
1. USB Type-C Power Delivery port –pro napájení zařízení připojených přes USB Type-C
2. HDMI port –pro připojení monitoru
3. USB 3.0 port Typ-A –pro připojení USB zařízení
4. Připojovací kabel s USB Typ-C konektorem –pro připojení adaptéru k notebooku, tabletu, PC nebo
smartphonu
SYSTÉMOVÉ POŽADAVKY
Hardwarové požadavky: notebook, tablet, PC, smartphone s OS Windows, Mac nebo Google s volným
portem USB Type-C
Operační systém: Windows 10, Mac OS X, Google (Chrome OS a Android 6)
Po připojení se ovladače pro adaptér instalují automaticky ze systému.
UPOZORNĚNÍ!
Před samotnou instalací se ujistěte, že máte v systému nainstalovány nejnovější ovladače pro vaše zařízení.
PŘIPOJENÍ HDMI MONITORU
Adaptér je vybaven 1x HDMI UHD 4K portem pro připojení externího monitoru nebo projektoru s HDMI
rozhraním. Jako zobrazovací zařízení můžete využít moderní plazmové nebo LCD monitory a televizory.
Grafický čip, který je „srdcem“ adaptéru, podporuje až 4K (UHD) rozlišení 3840 x 2160 pixelů. Pro připojení
monitoru k adaptéru použijte kvalitní HDMI kabel. Během instalace přídavného monitoru může obrazovka
notebooku, tabletu nebo PC problikávat, což je standardní stav.
NABÍJENÍ A NAPÁJENÍ
Apple New MacBook, Windows 10 zařízení s USB Type-C portem nebo Chromebook Pixels a jiné.
Adaptér nabízí 1x USB Type-C Power Delivery port, který je určen pro napájení připojeného „mateřského“
zařízení pomocí originálního síťového adaptéru a pro nabíjení zařízení připojených přes USB 3.0 port.
PŘIPOJENÍ USB ZAŘÍZENÍ
USB 3.0 port využijete k připojení klávesnice, myši, externího disku, tiskárny a dalších periférií nebo je
můžete využít k připojení USB HUBu, čímž získáte další volné USB porty. V takovém případě doporučujeme
použít HUB s externím napájením. V případě, že se zařízení nenabíjí nebo nepracuje, pak připojte originální
USB Type-C napájecí adaptér do USB Type-C portu adaptéru pro podporu napájení.

Převážnou část problémů s adaptérem a připojenými perifériemi lze vyřešit odpojením USB Type-C kabelu
adaptéru od USB Type-C portu PC / Macu / smartphonu a jeho opětovným připojením asi po 10 s.
POUŽITÍ ADAPTÉRU V OS WINDOWS
Pokročilá konfigurace pro grafiku –po připojení monitoru a po kliknutí na nastavení pro „Rozlišení
zobrazení“ ze systému Windows lze volit použití monitoru.
Poznámka: Po kliknutí na druhý monitor a jeho přetažením si jej podle potřeby umístíte vůči původnímu
monitoru vašeho notebooku / tabletu / PC.
Lze provádět nastavení Rozšířit (Extend) a Zrcadlit / Duplikovat (Mirror):
c) pro režim Zrcadlit / Duplikovat (Mirror): na obrazovce zvolte 2. Monitor, u Více monitorů →
Duplikovat toto zobrazení → OK.
d) pro režim Rozšířit (Extend): na obrazovce zvolte 2. Monitor, u Více monitorů → Rozšířit toto
zobrazení → OK.
Other manuals for C31AHDMIPD
2
Table of contents
Languages:
Other Itec Adapter manuals

Itec
Itec U3CEXTEND22 User manual

Itec
Itec C31HUBMETAL403 User manual

Itec
Itec U2LAN User manual

Itec
Itec USB 2.0 Fast Ethernet Adapter User manual

Itec
Itec ADUANCE Series User manual

Itec
Itec C31GLAN User manual

Itec
Itec C31DTPDHDMI User manual

Itec
Itec SLPA90W User manual

Itec
Itec U3DP4K User manual

Itec
Itec USB-C 3.1 Display Port Adapter User manual

Itec
Itec C31VGAHDMIADA User manual

Itec
Itec TB3DUAL4KDP User manual

Itec
Itec USB3HDMI User manual

Itec
Itec C31METALG3HUB User manual

Itec
Itec U3GL3SLIM User manual

Itec
Itec C31METALGLAN User manual

Itec
Itec U2AMETAL User manual

Itec
Itec USB2HDTRIO User manual

Itec
Itec U3DUAL4KHDMI User manual

Itec
Itec USB2VGA User manual