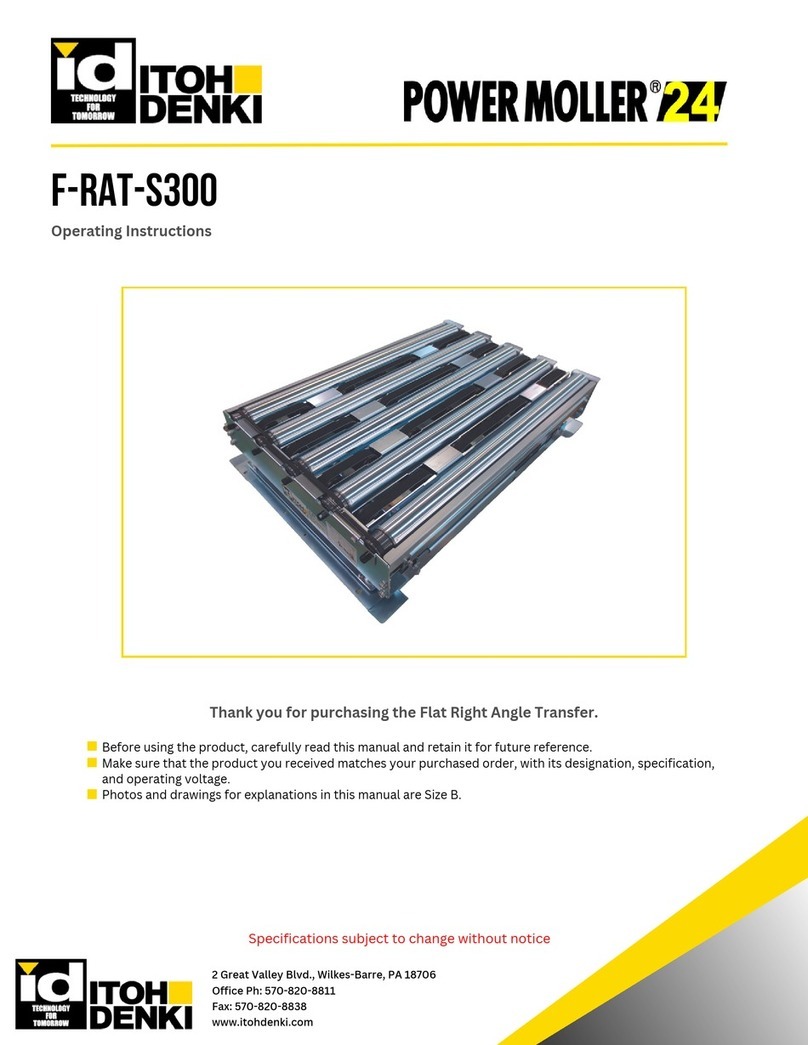
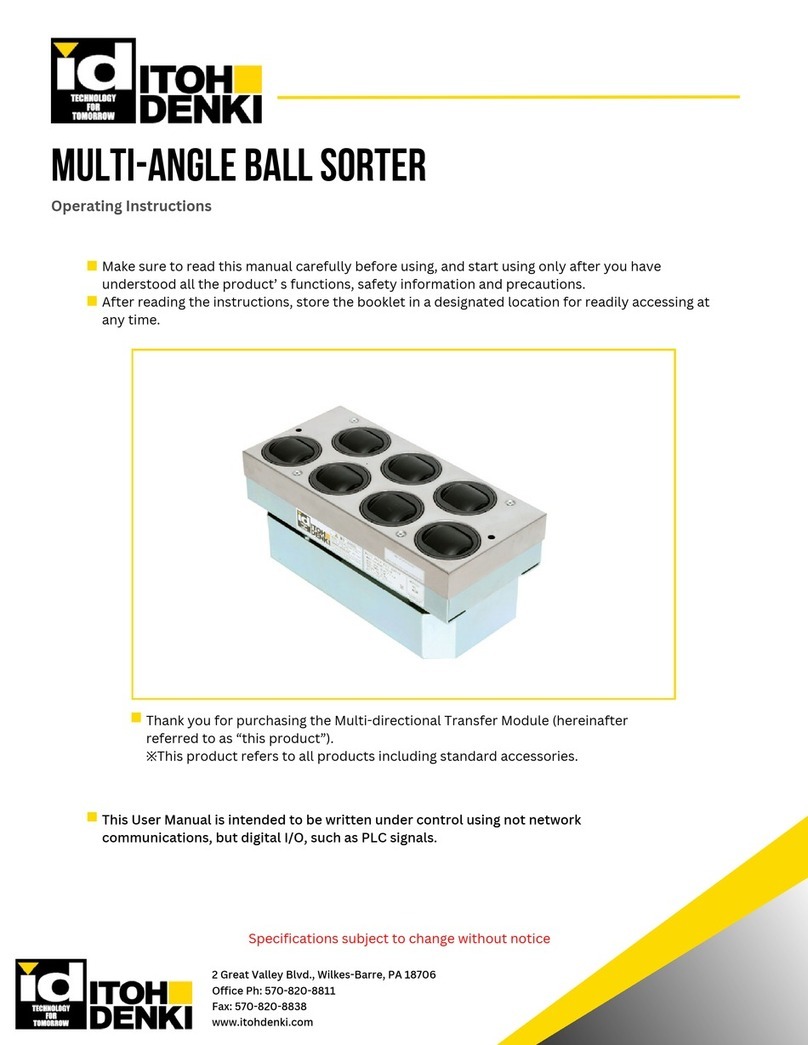
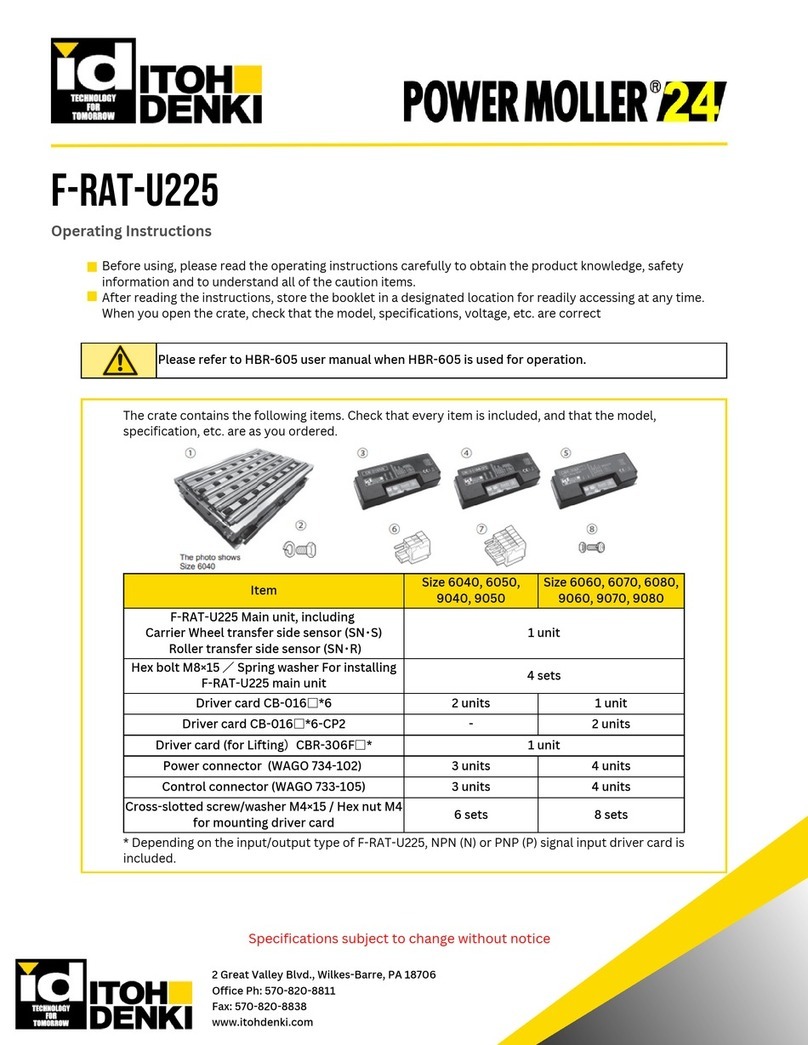
ITOH DENKI F-RAT-U225 Series User manual

Driver card (for Lifting)CBR-306F□
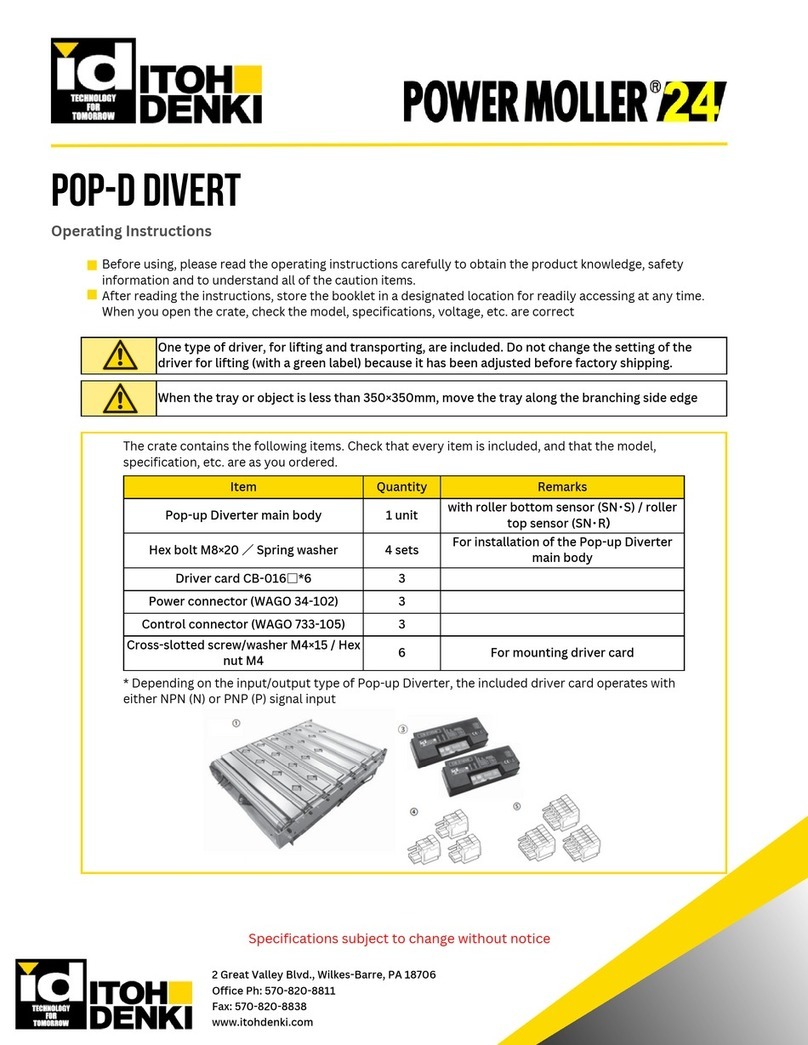
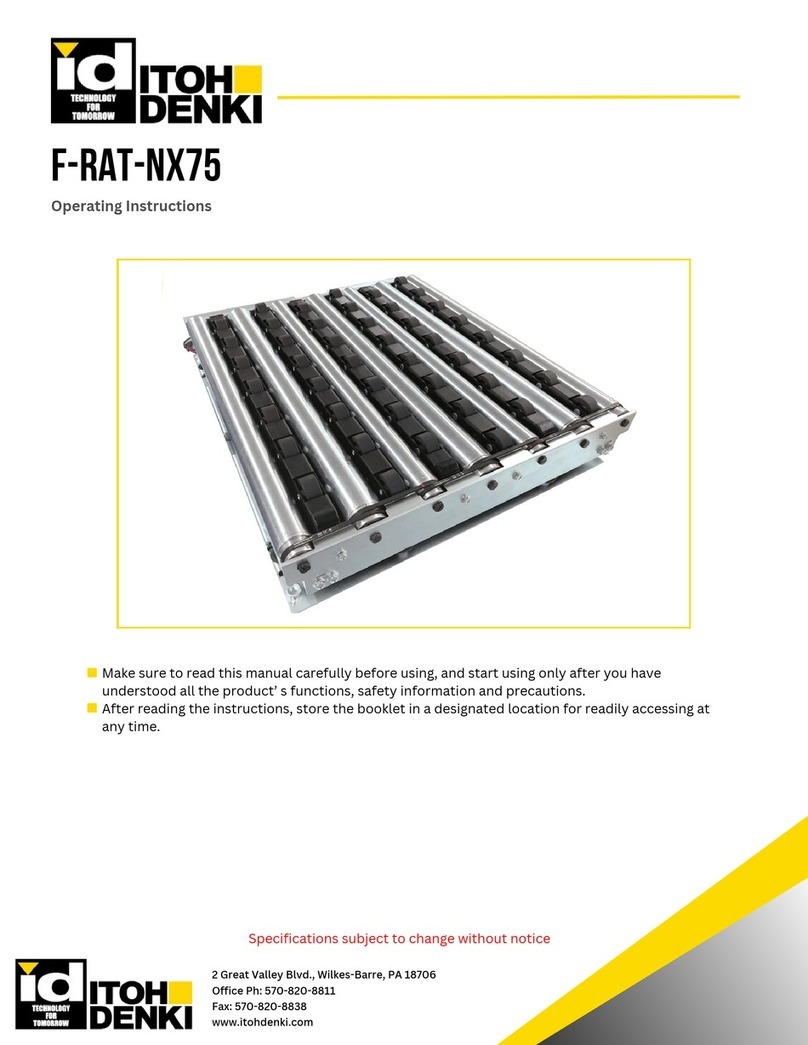
F-RAT-U225
Flat-Right Angle Transfer
No.519
- 1 -
Operating Instructions
①③
②
④⑤
⑥⑦ ⑧
Item 6040
/
6050
9040
/
9050
Size 6060
/
6070
/
6080
6060
/
9070
/
9080
Size
①F-RAT-U225 Main unit, including
Carrier Wheel transfer side sensor (SN・S)
Roller transfer side sensor(SN・R )
②Hex bolt M8×15 /Spring washer
For installing F-RAT-U225 main unit
1 unit
4 sets
⑧
Cross-slotted screw/washer M4×15 / Hex nut M4
for mounting driver card 6 sets 8 sets
③Driver card CB-016□62 unit 1 unit
④Driver card CB-016□6-CP2 ―2 unit
⑤1 unit
Power connector 734-102 (WAGO)
⑥3 unit 4 unit
Control connector 733-105 (WAGO)
⑦3 unit 4 unit
Thank you for purchasing F-RAT-U225
●Before using, please read the operating instructions carefully to obtain the product knowledge, safety
information and to understand all of the caution items.
●After reading the instructions, store the booklet in a designated location for readily accessing at any time.
When you open the crate, check the model, specifications, voltage, etc. are correct.
The crate contains the following items. Check that every item is included.
Also, check if the model, specification, etc. are as you ordered.
When opening the crate…
The photo shows
Size 6040
ITOH DENKI CO.,LTD.
Note)Depending on the input/output type of F-RAT-U225, NPN (N) or PNP (P) signal input driver card is included.
Note)
Note)
Note)
Please refer to HBR-605 user manual when HBR-605 is used for operation.

- 2 -
1.
2.
3.
4.
5.
6.
7.
8.
9.
Appendix1.
Appendix2.
Appendix3.
General Cautions
Product designation
Structure
Power Supply
Dimensions
Installation / Operation
Repair / Replacement
Specifications
When Questioning a Failure
CBR-306F□Detail
Maintenance
Remaining Risks List / MAP
1 - 1.
1 - 2.
1 - 3.
6 - 1.
6 - 2.
6 - 3.
6 - 4.
6 - 5.
6 - 6.
7 - 1.
7 - 2.
7 - 3.
Basic Warnings
Basic Cautions
About the Risk Category of the System
Cautions during Transportation
Cautions during Uncrating
Cautions during Installation…Electrical
Cautions during Installation…Main Unit
Installation
Precautions for Trial Run
Carrier Wheel Belt Tension Adjustment
Carrier Wheel Replacement
Replacement of a Idler, Roller Drive Belt, Roller MDR
P3
P3
P3
P3
P4
P4
P4
P5
P10
P10
P10
P11
P11
P12
P18
P19
P19
P21
P23
P24
P26
P28
P30
P31
・・・・・・・・・・・・・・・・・・・・・・
・・・・・・・・・・・・・・・・・・・・・・
・・・・・・・・・・・・・・・・・・・・・・
・・・・・・・・・・・・
・・・・・・・・・・・・・・・・・・・・
・・・・・・・・・・・・・・・・・・・・・・・・・・
・・・・・・・・・・・・・・・・・・・・・・・・
・・・・・・・・・・・・・・・・・・・・・・・・・
・・・・・・・・・・・・・・・・・・・
・・・・・・・・・・・・・・・
・・・・・・・・・・・・・・・・・・
・・・・・・・・・・・・
・・・・・・・・・・・・
・・・・・・・・・・・・・・・・・・・・・・・・
・・・・・・・・・・・・・・・・・・
・・・・・・・・・・・・・・・・・・・
・・・・・・・・・・・・
・・・・・・・・・・・・・・・・・
・・・・・・
・・・・・・・・・・・・・・・・・・・・・・・・
・・・・・・・・・・・・・・・・
・・・・・・・・・・・・・・・・
・・・・・・・・・・・・・・・・・・・
・・・・・・・・・・・
INDEX

- 3 -
1.General Cautions
Do not step on the product or apply a load. It may lead to a failure or unexpected accident.
Do not touch the mechanism by hand during operation. The hand may be caught by the mechanism and injured.
Do not absolutely modify the F-RAT or the driver card. Serious injury may be caused.
Do not forcibly bend or pull the wire. Do not put a heavy item on the wire or pinch the wire. The cord may break and cause fire or
electrical shock.
To avoid a failure or electrical shock, ground the DC power supply or driver card to the conveyor frame.
Do not touch the equipment immediately after stopping. It may cause kin burn.
Do not splash water on the equipment. Electrical shock or failure may be caused.
Do not apply a strong impact or excessive force such as hitting the equipment or dropping an object. Do not use the equipment
after it is impacted or deformed. It may cause a failure.
When abnormal sound is heard during motion, stop the operation. Continued operation may cause an accident or failure.
Do not use the equipment by exceeding the specification. It may cause a failure, fire or injury.
Do not carry out operation of transfer, connection, maintenance inspection (except maintenance inspection to be performed
during operation). Switch off the power before operation.
Comply with the safety rules required for the location and equipment to be used.
Some type of driver card failure may make the input/output ON condition or OFF condition. Apply an external monitoring circuit for the
input/output signal that may lead to an injury or property damage.
Connect or disconnect a connector when the power is shut off. Do not perform wiring with the connector inserted in the driver card.
Securely attach the connector of each connecting cable to the connection point.
Incorrect wiring may cause a failure. Carefully check the wiring.
Do apply excessive force for operating the DIP switch.
Do not perform on/off operation of a relay or connector near the power line, signal line, or driver card. That may cause malfunction by
noise.
When LED circuit or Pull-up/Pull-down circuit is connected to the output circuit, unexpected operation may occur.
Apply power ON in the order of external controller→driver card. Perform power OFF in the order of driver card→External controller.
Incorrect order may cause malfunction.
Cutting the power disables electrical braking control, and the roller becomes easy to be rotated.
Do not pull out a cable during operation. It may cause a failure.
Do not forcibly rotate MDR except during maintenance inspection. That may cause driver card breakage or make the operation life
extremely short.
Do not shut off the power during MDR rotation. It may cause a failure.
Do not apply power while riding on the conveyor or while a tray is unstable condition. MDR rotation immediately after power ON
may cause injury, accident or breakage.
When error occurs frequently, remove the cause.
When disposing the equipment, make a consignment contract with an authorized industrial waste processing company for disposal.
Incorrect work or use may lead to light or medium-level injuries and/or property damages.
Comply with the following warning and perform the work correctly.
●
●
●
●
●
●
●
●
●
●
●
●
●
●
●
●
●
●
●
●
●
●
●
●
●
●
●
Warning & Caution
1 - 3.About Risk Category of this System
1 - 1.Basic Warning
Shown below are the caution items for using the product safely and avoiding danger and damage to the user.
Caution items can be classified into danger, warning and caution as described below.
Danger
Warning
Caution
The most serious danger with possibility of death or serious injury.
Incorrect handling may lead to death or serious injury, indicating potential danger.
Possible danger of light or medium injury, or only a material damage.
Warning
Warning
Incorrect handling may lead to death or serious injury, indicating potential danger.
Comply with the following warning and perform the work correctly.
About Risk Category of this System
……For your safety, please comply with them.
●
●
●
This equipment intends to comply with risk category 2 or below in EN 954-1. It does not comply with risk category 3
or higher.
●
1 - 2.Basic Cautions
Caution
Be sure to comply with all of the caution items and instructions contained in this safety manual.
To avoid functional deterioration, unexpected accident or product failure, check the operation according to this manual.
Do not use the product in an explosive, flammable or corrosive atmosphere, or near flammable material.
It may cause explosion, fire, electrical shock or injury.
Label detail
3.Structure
4.Power Supply
2.Product designation
F-RAT-U225-- -
① ② ③ ④
①Speed
17 …17m/min Low speed type (Carrier Wheel / Roller transfer : 17m/min)
60 …60m/min standard type (Carrier Wheel / Roller transfer : 60m/min)
②Signal type selection
③Size
④Type
6040…L595mm×W395mm
6050…L595mm×W495mm
6060…L595mm×W595mm
6070…L595mm×W695mm
6080…L595mm×W795mm
9040…L895mm×W395mm
9050…L895mm×W495mm
9060…L895mm×W595mm
9070…L895mm×W695mm
9080…L895mm×W795mm
V1
L
W
①Transport speed,②Input/output type,
③Size, ④Type
⑤Rated current of transport MDR,
⑥Available load weight
⑦Year (last 2 digits) ⑧Month ⑨Day
⑩Lot No (3 digits )
- 4 -
・
24VDC Battery
●
Switching power supply(24VDC・5A 120W)
●
Rectified power(With a rectifying capacitor, ripple rate 10% or below)
●
FLAT RIGHT ANGLE TRANSFER
F-RAT-U225- - -
RATED INPUT:DC24V, A
PAYLOAD:max kg
SERIAL No.
ITOH DENKI CO.,LTD
MADE IN JAPAN
①② ③④
⑤
⑥
⑦⑧⑨⑩
※1
Carrier Wheel
FLAT RIGHT ANGLE TRANSFER
F-RAT-U225- - -
RATED INPUT:DC24V, A
PAYLOAD:max kg
SERIAL No.
ITOH DENKI CO.,LTD
MADE IN JAPAN
Carrier Wheel MDR
Lifting MDR
■Main Unit
Model Example:
F-RAT-U225-60N-6050-V1
Transport speed 60m/min, NPN input/output type, Size 6050(
L595mm×W495mm
), Type
V1
Roller drive belt
Roller MDR
Product label
Idler
Product model
Transport capacity
Serial No.(YY.MM.DD Lot No)
Supplied power must be a stabilized power supply of 24VDC, 5A or higher(Size 6060, 6070, 6080, 9060, 9070, 9080operates with 10A
or higher)without fluctuation by load.
In addition, the power supply should not activate protection with peak current 20A, 1ms or below.
※1 Size 6060, 6070, 6080, 9060, 9070, 9080 operates with DC24V・10A 240W
Carrier Wheel transfer
Roller transfer
N …NPN input/output
(NPN input/output driver card /Roller transfer side sensor・
Carrier Wheel transfer side sensor included)
P …PNP input/output
(PNP input/output driver card /Roller transfer side sensor・
Carrier Wheel transfer side sensor included)

- 5 -
5.Dimensions
●Size6040 …L595mm×W395mm
●Size6050 …L595mm×W495mm
- 5 -
595
95
125
498.4=P71.2×7
22.5
48.3
595
495
172.5
17
71.2
498.4=P71.2×7
48.3
22.5
76.275.676.2 83.5
50(Mountingholepitch)150(Mountingholepitch)
395
172.5
17
4-M8六角ナット
47.5300=P75×447.5
75
75
450=P75×6 22.522.5
58.57576.275.676.275
RollerMDR(M2)
RollerMDR(M2)
※Cablelength (mm)
M1:CarrierWheelMDR
M2:RollerMDR
M3:LiftingMDR
Rollertransfersidesensor(SN・R)
CarrierWheeltransfersidesensor(SN・S)
71.2
84 ※
1000
1100
1300
1000
600
※Cablelength (mm)
M1:CarrierWheelMDR
M2:RollerMDR
M3:LiftingMDR
Rollertransfersidesensor(SN・R)
CarrierWheeltransfersidesensor(SN・S)
1000
1000
1300
1000
600
550(Mountingholepitch)
84 ※
■Main Unit
Cable
RollerMDRpipedimension:529
(Excludingprotrusions)
Rollertransfersidesensor(SN・R) LiftingMDR(M3) CarrierWheelMDR(M1) CarrierWheeltransfersidesensor(SN・S)
95
125
Cable
RollerMDRpipedimension:529
(Excludingprotrusions)
Rollertransfersidesensor(SN・R) LiftingMDR(M3) CarrierWheelMDR(M1) CarrierWheeltransfersidesensor(SN・S)
4-M8Hexnut

- 6 -
●Size6060 …L595mm×W595mm
●Size6070 …L595mm×W695mm
- 6 -
48.3
75
47.5600=P75×8
595
71.2
498.4=P71.2×7
48.3
22.5
17
172.5
595
71757576.275.676.275
35
75
525=P75×735
595
71.2
498.4=P71.2×7
22.5
695
172.5
17
※Cablelength (mm)
M1:CarrierWheelMDR
M2:RollerMDR
M3:LiftingMDR
M1:CarrierWheelMDR
Rollertransfersidesensor(SN・R)
CarrierWheeltransfersidesensor(SN・S)
1000
900
1300
1200
1000
600
※Cablelength (mm)
M1:CarrierWheelMDR
M2:RollerMDR
M3:LiftingMDR
M4:CarrierWheelMDR
Rollertransfersidesensor(SN・R)
CarrierWheeltransfersidesensor(SN・S)
83.5757576.27575 75.676.2
250(Mountingholepitch)
RollerMDR(M2)
550(Mountingholepitch)
350(Mountingholepitch)
RollerMDR(M2)
550(Mountingholepitch)
1000
800
1300
1100
1000
600
84 ※
84 ※
95
125
Cable
RollerMDRpipedimension:529
(Excludingprotrusions)
Rollertransfersidesensor(SN・R) LiftingMDR(M3)
CarrierWheelMDR(M1/M4)
CarrierWheeltransfersidesensor(SN・S)
95
125
Cable
RollerMDRpipedimension:529
(Excludingprotrusions)
Rollertransfersidesensor(SN・R) LiftingMDR(M3)
CarrierWheelMDR(M1/M4)
CarrierWheeltransfersidesensor(SN・S)
4-M8Hexnut
4-M8Hexnut

- 7 -
※Cablelength (mm)
M1:CarrierWheelMDR
M2:RollerMDR
M3:LiftingMDR
Rollertransfersidesensor(SN・R)
CarrierWheeltransfersidesensor(SN・S)
700
1100
1100
1000
300
75
22.5
750=P75×10
95
※Cablelength (mm)
M1:CarrierWheelMDR
M2:RollerMDR
M3:LiftingMDR
M4:CarrierWheelMDR
Rollertransfersidesensor(SN・R)
CarrierWheeltransfersidesensor(SN・S)
●Size 6080 …L595mm×W795mm
●Size 9040 …L895mm×W395mm
795
172.5
17
58.575757576.275.676.2757575
850(Mountingholepitch)
895
RollerMDRpipedimension:829
798.6=P72.6×11
22.5
50(Mountingholepitch))
395
172.5
17
4-M8Hexnut
47.5300=P75×447.5
75
RollerMDR(M2)
72.6
48.2
76.275.676.2 83.5
48.3
595
71.2
498.4=P71.2×7
22.5
1000
700
1300
1000
1000
600
84 ※
Cable
84.5 ※
95
125
Cable
RollerMDRpipedimension:529
(Excludingprotrusions)
Rollertransfersidesensor(SN・R) LiftingMDR(M3)
CarrierWheelMDR(M1/M4)
CarrierWheeltransfersidesensor(SN・S)
95
95
125
(Excludingprotrusions)
Rollertransfersidesensor(SN・R) LiftingMDR(M3) CarrierWheelMDR(M1)
CarrierWheeltransfersidesensor(SN・S)
450(Mountingholepitch)
RollerMDR(M2)
550(Mountingholepitch)
4-M8Hexnut

- 8 -
75
450=P75×6 22.522.5
RollerMDR(M2)
35
75
525=P75×735
RollerMDR(M2)
※Cablelength (mm)
M1:CarrierWheelMDR
M2:RollerMDR
M3:LiftingMDR
Rollertransfersidesensor(SN・R)
CarrierWheeltransfersidesensor(SN・S)
700
1000
1100
1000
300
※Cablelength (mm)
M1:CarrierWheelMDR
M2:RollerMDR
M3:LiftingMDR
M4:CarrierWheelMDR
Rollertransfersidesensor(SN・R)
CarrierWheeltransfersidesensor(SN・S)
700
900
1700
900
1000
300
850(Mountingholepitch)
RollerMDRpipedimension:829
●Size 9050 …L895mm×W495mm
●Size 9060 …L895mm×W595mm
RollerMDRpipedimension:829
495
150(Mountingholepitch) 172.5
17
4-M8Hexnut
895
798.6=P72.6×11
22.5
72.6
48.2
58.57576.275.676.275
4-M8Hexnut
17
172.5
250(Mountingholepitch)
595
71757576.275.676.275
895
798.6=P72.6×11
22.5
72.6
48.2
Cable
84.5 ※
Cable
84.5 ※
9595
125
(Excludingprotrusions)
Rollertransfersidesensor(SN・R) LiftingMDR(M3) CarrierWheelMDR(M1)
CarrierWheeltransfersidesensor(SN・S)
9595
125
(Excludingprotrusions)
Rollertransfersidesensor(SN・R) LiftingMDR(M3)
CarrierWheelMDR(M1/M4)
CarrierWheeltransfersidesensor(SN・S)

- 9 -
75
22.5
750=P75×10
RollerMDR(M2)
850(Mountingholepitch)
●Size 9070 …L895mm×W695mm
●Size 9080 …L895mm×W795mm
RollerMDRpipedimension:829
75
47.5600=P75×8
4-M8Hexnut
695
350(Mountingholepitch) 172.5
RollerMDR(M2)
895
798.6=P72.6×11
22.5
72.6
48.2
83.5757576.27575 75.676.2
17
895
798.6=P72.6×11
22.5
72.6
48.2
4-M8Hexnut
795
450(Mountingholepitch) 172.5
17
58.575757576.275.676.2757575
※Cablelength (mm)
M1:CarrierWheelMDR
M2:RollerMDR
M3:LiftingMDR
M4:CarrierWheelMDR
Rollertransfersidesensor(SN・R)
CarrierWheeltransfersidesensor(SN・S)
700
800
1100
800
1000
300
700
700
1100
700
1000
300
Cable
84.5 ※
Cable
84.5 ※
9595
125
(Excludingprotrusions)
Rollertransfersidesensor(SN・R) LiftingMDR(M3)
CarrierWheelMDR(M1/M4)
CarrierWheeltransfersidesensor(SN・S)
9595
125
(Excludingprotrusions)
Rollertransfersidesensor(SN・R) LiftingMDR(M3)
CarrierWheelMDR(M1/M4)
CarrierWheeltransfersidesensor(SN・S)
※Cablelength (mm)
M1:CarrierpulleyMDR
M2:RollerMDR
M3:LifterMDR
M4:CarrierpulleyMDR
Rollertransfersidesenso(r(SN・R)
Carrierpulleytransfersidesensor(SN・S)

5
6
7
8
9
0
1
2
3
4
STATUS/ERR/PWR
6
5
4
0
1
9
8
7
2
3
24V
0V
1.RUN
3.N.A
2.DIR
4.ERR
5.PLS
MODULE
5. MDL/TEST
1. AUTO/MANU
3. DIRECTION
2. INT-TIME
4. E/N-OUT
N.A
N.A
CBR-306F□
M3:Lifting MDR
●CB-016□6
5
6
7
8
9
0
1
2
3
4
4.5
52
4738.5
40
4.5
120
129
VR1-ACC
VR2-DEC
STATUS/ERR/PWR
5. L/H
SPEED
6
5
4
0
1
9
8
7
2
3
1. AUTO/MANU
3. DIRECTION
2. INT/EXT
4. E/N-OUT
24V
1.RUN
3.V-IN
2.DIR
4.ERR
5.PLS
0V
CB-016□6
18
23
3
●CBR-306F□
4.5
52
4738.5
40
4.5
120
129
18
23
3
●CB-016□6-CP2
(For Size6060, 6070, 6080, 9060, 9070, 9080)
5
6
7
8
9
0
1
2
3
4
4.5
52
4738.5
40
4.5
120
129
VR1-ACC
VR2-DEC
STATUS/ERR/PWR
5. L/H
SPEED
6
5
4
0
1
9
8
7
2
3
1. AUTO/MANU
3. DIRECTION
2. INT/EXT
4. E/N-OUT
24V
1.RUN
3.V-IN
2.DIR
4.ERR
5.PLS
0V
CB-016□6-CP2
18
23
3
6.Installation / Operation
- 10 -
Caution
Caution
■Accessory
※□=N(NPN input/output)
or P(PNP input/output)
※□=N(NPN input/output)
or P(PNP input/output)
※□=N(NPN input/output)
or P(PNP input/output)
6 - 1.Cautions during Transportation
6 - 2.Cautions during Uncrating
Prohibiting Impacts
・This product contains precision components such as bearing and microchip. Use caution for avoiding impacts by droppingor
collision during transportation as impacts may cause damage of such components.
●
Appearance Check
・Check the following when opening the crate.
①Abnormality on the unit such as dent, concave mark, smear, corrosion (rust), etc.
②Loose or missing screw.
Please report to the supplier when you find abnormality.
●
Avoiding injuries
●
Majority of this product is made from metal and careless handling may cause injury of hands.
Be sure to wear protective means such as gloves to avoid injury.
Avoiding injuries
●
Majority of this product is made from metal and careless handling may cause injury of hands.
Be sure to wear protective means such as gloves to avoid injury.
Handle the heavy item by two persons as a rule
●
Some product type weighs over 50kg. To protect the operators, transport the unit by two or more
persons as a rule of handling a heavy item.
Please refer to HBR-605 user manual when HBR-605 is used for operation.

・Perform mounting operations always by 2 persons or more.
Hold the bottom surface of F-RAT main unit.
(F-RAT mass Size 6040 approx 32kg) ※Varies by size.
・Use caution for motor cable or sensor cable not to be pinched by
other object.
・Do not attach the driver card on the F-RAT unit.
It may cause loose screws or other failure by vibration.
・Securely attach the unit on the frame by considering the product
weight, tray weight, and vibration.
●
- 11 -
6 - 3.Caution during Installation…Electrical
Checking the Circuit breaker
For the facility equipment using this product, check that a power breaker with appropriate capacity has been installed. In
case the product generates abnormal motions, protection by the breaker is sometimes effective.
If the earth leakage breaker is planned for use as a breaker, select a type compatible with inverter. Certain type of incompatible
ground fault interrupter causes malfunction by sensing high frequency component of switching power supply as leak current.
●
Checking the DC Power Supply
DC power supply must be an insulation type switching power supply certified by the safety standard ( IEC60950-1 or
UL60950-1 )for ensuring safety. Do not use non-insulation type series power supply for safety as well as conforming to
radiation noise restriction.
Current capacity of the DC power supply should have sufficient capacity to accommodate this product.
Current capacity of the wiring material should also provide sufficient margin to the specified current value.
●
・
・
・
Caution
6 - 4.Caution during Installation…Main Unit
●Installation environment
・This product is not equipped with a special dust or water proof measures, and is intended for use in "pollution level 2"
defined by IEC60664-1. For this reason, when the product is installed in the environment requiring dust or water proof
measures, the user needs to provide additional protection and check the performance.
●Main unit installation
・Vibration level of the environment in which this product is used must be 0.5G or below.
・Install this product with the tilt of 5/1000 or below.
・Comply with the safety rules required for the place of installation or equipment to be used.
・Secure a work space around this product for maintenance purpose.
DC power
supply
Breaker
Emergency stop switch Check if 24VDC input is surely turned
OFF/ON by using a circuit tester, etc.
Single phase
100V/200V
PE
When the DC power supply is integrated, check if the equipment breaker and emergency stop switch correctly operate.
Test operation and any further procedure should be performed after finishing this checking.
① ON/OFF operation of the breaker reliably turns ON/OFF of the input (single phase 100V, 200V) to the DC power supply unit.
② ON/OFF operation of the emergency switch reliably turns OFF/ON of the input (24VDC) to this product.
・Carefully check if these wiring would not contact any moving parts of this product.
Checking the Wiring
●
●During installation, use caution for installing direction (orientation). Be sure to use the specified
mounting holes. (Refer to 5. Dimension P.5, P.6).
Incorrect direction (orientation) or using non-specified securing holes may cause unexpected accident.
・
This product
(Not yet connected)
Hold the underside of the unit

F-RAT
- 12 -
2×4-M8
4-φ9
●Reference example for the mounting: In case of using a mounting stay (option).
14.1 19.8
48
35
24
130
108.7
95
14.119.8
598
14.1 19.8
W+5 = X
L
4-M8nuts
●Install the mounting stay by using F-RAT mounting holes (Refer to 5. Dimensions)
For mounting on the frame, use the mounting holes of the mounting stay shown below.
Mounting without using the mounting holes may lead to unexpected accident or failure.
※
※
※Refer to 8. Specifications (P.25)
Warning
Caution
Caution
●Safety assurance
・If the warning label becomes hidden by installing the product,
reattach the warning label in a visible place.
・When performing maintenance operation, make sure the main power
is completely shut off.
●Operator should not come close to any moving
part that may hook or roll-in objects.
Provide a means for not permitting the operator
to touch the moving part with a safety fence.
●To prevent any object from popping out of the
area by collision, and to avoid injury by such
object, install a safety fence around the
equipment.
Use caution for finger
being caught on both sides
Use caution for roll-in by each belt and roller
6 - 5.Installation
Attach the F-RAT by using the mounting holes.
(Refer to 5. Dimension)
When using mounting stays, refer to the attachment
example shown below.
●
●
(F-RAT mounting holes)
F-RAT
mounting holes
(Mounting stay
securing holes)
Mounting stay
Mounting stay
C/V frame

M1
M1
M3
M3
M2
M2
Roller MDR
Lifting MDR
Carrier Wheel MDR
Roller MDR
Lifting MDR
Carrier Wheel MDR
For roller
For Carrier Wheel
●Carrier Wheel transfer side sensor
●Roller transfer side sensor
SN・R
SN・S
BROWN:24V
PLC etc.
BLUE:0V
BLACK:out
For lifting
For Carrier Wheel
For roller
For Carrier Wheel
For lifting
Install MDR connector on each driver card.
※Connector attachment and detachment must be made after shutting off the power and by holding the connector.
※Securely attach each connector to the contact part.
PLC etc.
- 13 -
※
BROWN:24V
BLUE:0V
BLACK:out
●Carrier Wheel transfer side sensor
●Roller transfer side sensor
※
BROWN:24V
PLC etc.
BLUE:0V
BLACK:out
PLC etc.
※
BROWN:24V
BLUE:0V
BLACK:out ※
※F-RAT zone sensor is not included. To be prepared by the user.
●For sizes 6040 /6050 /9040 /9050
M1 M4
M3
M2
●For sizes6060 /6070 /6080 /9060 /9070 /9080
CB-016□6
CBR-306F□
CB-016□6
M3
Lifting
SN・R
Roller
M2
Roller
M1
M3
M2 SN・R
SN・S
CB-016□6-CP2
M4
CB-016□6-CP2
CBR-306F□
CB-016□6
M3
Lifting
SN・R
Roller
M2
Roller
■Connection
※ON at position detection,Output current max 100mA
M1
Belt・
CRR.Wheel
SN・S
Belt・
CRR.Wheel
SN・S
Belt・
CRR.Wheel
M1
Belt・
CRR.Wheel
M4
Belt・
CRR.Wheel

24VDC24VDC
24VDC
24VDC
24VDC
①Connect 24V DC / 0V wires to the power connector < CN1(2 contacts)>.
※Do not connect any branching wire. It may cause electrical shock,
short-circuit or failure due to over capacity of the connector.
(Connector capacity:4A)
※Do not wire in reverse polarity.
※Wiring should be made before inserting the connector into the driver card.
0V
*For detail of CBR-306, refer to Appendix 1.
CBR-306F Detail (P.28)
CN1
(Power)
CN1
(Power)
−−
3mA
CN2
(Control)
CN2
(Control)
- 14 -
M1
MDR
6040
6050
9040
9050
6060
6070
6080
9060
9070
9080
Size M1/M4:For Carrier Wheel
CB-016□6
0V
CN2
CN1
IN NPN:0V
PNP:24V
}
( )
24V
1.RUN
3.V-IN
2.DIR
4.ERR
5.PLS
0V
21 54321
CB-016□6
0V
CN2
CN1
IN NPN:0V
PNP:24V
}
( )
24V
1.RUN
3.V-IN
2.DIR
4.ERR
5.PLS
0V
21 54321
CBR-306F□
0V
CN2
CN1
IN NPN:0V
PNP:24V
}
( )
24V
1.RUN
2.DIR
3.N.A
4.ERR
5.PLS
0V
21 54321
M1
CB-016□6-CP2
0V
CN2
CN1
24V
1.RUN
3.V-IN
2.DIR
4.ERR
5.PLS
0V
21 54321
M4
0V
CN2
CN1
IN NPN:0V
PNP:24V
}
( )
24V
1.RUN
3.V-IN
2.DIR
4.ERR
5.PLS
0V
21 54321
5
4
3
2
1
2
1
0V
24VDC
3mA
5
4
3
2
1
2
1
0V
24VDC
■Connector Wiring
③Plug the power connector < CN1(2 contacts)>, control connector < CN2
(5 contacts)>, MDR connector <CN3> to the driver card.
※Connector attachment/detachment must be made after shutting off the
power and by holding the connector.
※Securely insert the connector to the contact part.
(Common to CB-016/CBR-306)
■Wiring
Max 2mA
Motion in/out current
24VDC
For the detailed specification of CB-016□6, please download the driver card operating instruction
manual from our company HP.
Home > Download / Support > User Manual > CB-016□6
※
※Attach a protection resistor
※
※Attach a protection resistor
Motor pulse output
Error signal output
MDR ext speed setting
MDR rotation dir change
MDR run/stop
Motor pulse output
Error signal output
MDR rotation dir change
MDR run/stop
Use 25mA
or below
Use 25mA
or below
Power connector (CN1)
Connector
Control connector (CN2)
②Connect wires to control connector < CN2(5 contacts)>.
※Input voltage supplied to CN2#1(MDR run/stop ), CN2#2(MDR rotation
direction change) must be common to the power supply voltage.
( Connector capacity :4A)
※□=N(NPN input/output)
or P(PNP input/output)
※□=N(NPN input/output)
or P(PNP input/output)
※□=N(NPN input/output)
or P(PNP input/output)※□
=N(NPN input/output)
or P(PNP input/output)
M2:For roller M3:For lifting
Please refer to HBR-605 user manual when HBR-605 is used for operation.
7mm
(
AWG:28
〜
20
)
7mm 0.08〜0.5mm2
0.50〜1.5mm2(AWG:20〜14)

※1:Rotation direction setting. When changing the setting, refer P.16 [□Rotation direction setting]
※2:Speed setting. When changing the setting, refer P.16 [□Speed setting]
5
6
7
8
9
0
1
2
3
4
VR1-ACC
VR2-DEC
STATUS/ERR/PWR
5. L/H
SPEED
6
5
4
0
1
9
8
7
2
3
1. AUTO/MANU
3. DIRECTION
2. INT/EXT
4. E/N-OUT
24V
1.RUN
3.V-IN
2.DIR
4.ERR
5.PLS
0V
CB-016
××××
①M3:
Set the driver card for lifting.
②Set M1:Driver card for Carrier Wheel, M4:Driver card for Carrier Wheel ( In the case of size 6060, 6070, 6080, 9060, 9070, 9080 )
and M2:Driver card for roller.
- 15 -
6040
6050
9040
9050
6060
6070
6080
9060
9070
9080
Size
Size
※1 ※2 ※2
※1 ※2 ※2 ※1 ※2 ※2
CB-016□6CB-016□6
※1 ※2 ※2
CBR-306F□
CB-016□6-CP2 CB-016□6-CP2
1
2
VR1 VR2 SW1 SW5
5
6
7
8
9
0
1
2
3
4
12345
ON
VR1 VR2 SW1 SW5
5
6
7
8
9
0
1
2
3
4
12345
ON
SW1
SW5
3
5
OFF
VR1 VR2 SW1 SW5
5
6
7
8
9
0
1
2
3
4
12345
ON
VR1 VR2 SW1 SW5
5
6
7
8
9
0
1
2
3
4
12345
ON
・
・
Caution
SW1#3 is for setting rotation direction.
Always set to reverse rotation to M1.
Otherwise, failure would occur.
・
SW1#5 and SW5 are for setting
speed. Aways set to the same as M1.
Always perform a settin change when
the Carrier Wheel (M1 and M4) are in
stopped condition.
Otherwise, failure may occur.
・
5
6
7
8
9
0
1
2
3
4
SW1 SW5
5
6
7
8
9
0
1
2
3
4
STATUS/ERR/PWR
6
5
4
0
1
9
8
7
2
3
24V
0V
1.RUN
3.N.A
2.DIR
4.ERR
5.PLS
MODULE
5. MDL/TEST
1. AUTO/MANU
3. DIRECTION
2. INT-TIME
4. E/N-OUT
N.A
N.A
CBR-306F□
M3:Lifting MDR
5
6
7
8
9
0
1
2
3
4
SW1VR1 VR2 SW5
■Driver Card Setting
Caution
Make sure to turn OFF SW1#5.
ON state does not allow external signal input and may lead to a failure.
SW5 must be set to "3" when using F-RAT-U225.
Using with other than "3" may lead to a failure.
M3:For lifting
※For detail, refer to Appendix 1. CBR-306F□Detail ( P.28) .
M1:For Carrier Wheel M4:For Carrier Wheel
(For size 6060, 6070, 6080, 9060, 9070, 9080)M2:For roller
Set reverse rotation
to M1. Set the same as M1
min
min
min min
min
min min
min
min
min
min
min min
min
min
min
min
min

- 16 -
M1
M4
M2 VG pulley
VG pulley
VG pulley
CCW CW
CW CCW
CW
CW
CCW
CCW
1
2
ON
SW1#3
OFF
DIR
DIR
CW CCW
CCW CW
12345 12345
ERR
V-IN
RUN
DIR
1234
ERR
V-IN
RUN
DIR
1234
SW1#5:ON
(m/min)
9SW5
16.9
8
15.5
7
14.8
6
14.1
5
13.4
4
12.7
3
11.2
2
10.5
1
9.8
0
9.1
SW1#5:OFF
9
8.4
8
7.7
7
7.0
6
6.3
5
5.6
4
4.9
3
4.2
2
3.5
1
2.8
0
2.1
14.6 14.6 14.6 14.1 13.4 12.7 11.2 10.5 9.8 9.1 8.4 7.7 7.0 6.3 5.6 4.9 4.2 3.5 2.8 2.1
52.0 52.0 52.0 50.0 47.5 45.0 40.0 37.5 35.0 32.5 30.0 27.5 25.0 22.5 20.0 17.5 15.0 12.5 10.0 7.5
60.0 55.0 52.5 50.0 47.5 45.0 40.0 37.5 35.0 32.5 30.0 27.5 25.0 22.5 20.0 17.5 15.0 12.5 10.0 7.5
SW1#3 OFF OFF
OFF OFF
ON ON
CCW CCW
#2
#1
CN2
M1 M4
SW1#3 ON ON
OFF OFF
ON ON
OFF
OFF
ON
#2
#1
CN2
※
※
CW CW CCW
M3
※
Rotation Direction Setting
Not
connected
Connected
・MDR rotation (F-RAT transfer) direction can be changed byusing
the switch on the driver card or external switch.
(Or can be used in parallel)
・MDR rotation direction is defined as CW or clockwise direction
when viewed from the cable side, and CCW or counter-clockwise
direction.
【F-RAT Transfer Direction 】
M4:Carrier Wheel direction
M2:Roller direction
M1:Carrier Wheel direction
Roller MDR
cable
Lifting MDR
cable
Carrier Wheel MDR
cable
Carrier Wheel MDR
cable
※For Size 6060, 6070, 6080,
9060, 9070, 9080
Carrier Wheel transfer side
Roller transfer side M3:Lifting
Transfer Setting
Example①
Transfer Setting
Example②
For size 6040, 6050
9040, 9050
Out
In
Out
In
For size 6060, 6070, 6080, 9060, 9070, 9080
Carrier Wheel
MDR
Cable side
(M1)
Carrier Wheel
MDR
Cable side
(M4)
Roller MDR
cable side
(M2)
Carrier Wheel MDR Cable side
(M1)
Carrier Wheel MDR
M1
Roller MDR cable side
(M2)
Roller MDR
M2
Carrier Wheel MDR
Roller MDR
M2
Carry In Carry Out Carry In Carry Out
R. direc. R. direc.
Speed accuracy:±3%
Speed Setting
17m/min
Low speed type
60m/min
Standard type
Set
Rated
Set
Rated
During operation, the rising time to the setting speed may vary depending on ambient temperature. Perform running operation thoroughly.
Values described above may differ from the actual transfer speed depending on the weight, material, bottom surface, and/or shape of trays, as well as ambient
temperature.
・
・

- 17 -
3
5
21
F-RAT
・Driver card switch is assumed to be set in the initialsetting.
・Use control equipment with its response timeless than 20ms.Otherwise,abnormal operation may occur.
PLC
CB-016□6 or
CB-016□6-CP2
CN2#1
M1(+M4)
CB-016□6
M2
CBR-306F□
M3
SN・R
SN・S
CN2#1
CN2#1
CN2#2
Connector wiring example by using a PLC
OUT
OUT
4
Carrier Wheel MDR
M1(+M4)
Carrier Wheel transfer side
sensor SN・S
Roller transfer side
sensor SN・R
Carrier Wheel transfer side sensor
Roller transfer side sensor
Roller MDR
M2
Lifting MDR
M3
Carrier Wheel MDR
Roller MDR
Lifting MDR
ON
OFF
ON
OFF
ON
OFF
ON
OFF
ON
OFF
ON
OFF
ON
OFF
RUN
DIR
RUN
STOP
RUN
STOP
ON
OFF
Note1)Controlthe lfting MDR(M3)to stop in less than 20ms after detectingSN・S and SN・R.
Note2)Supply the MDR rotation direction change(DIR)signal always before entering MDR starting(RUN)signal.
PLC
input
PLC
input
PLC
input
PLC
input
PLC
input
PLC
input
PLC
output
PLC
output
PLC
output
Note1)Less than 20ms Note1)Less than 20ms
※
※
Output Input
■Control
Carry-out C/V
drive signal
Carry-in C/V
drive signal
ON to Roller transfer
ON to Carrier Wheel transfer
Carry-out boundary sensor
(Carrier Wheel transfer direction)
Carrier Wheel transfer direction C/V zone sensor
Roller transfer direction C/V zone sensor
Carry-out boundary sensor
(Roller transfer direction)
F-RAT zone sensor
Carry-in boundary sensor
Upstream zone sensor
When moving in at Carrier
Wheel level and moving out at
roller level
Roller moving direction C/V
Carry-in C/V
Carrier Wheel transfer
direction C/V
Roller transfer direction C/V
zone sensor
Carry-out boundary sensor
(Roller transfer direction)
Carry-out boundary sensor
(Roller transfer direction)
Upstream zone sensor
Carry-in boundary sensor
F-RAT zone sensor
F-RAT zone sensor
Carrier Wheel transfer direction C/V zone sensor
Carry-out boundary sensor(Carrier Wheel transfer direction)
Roller MDR
Lifting MDR Carrier Wheel MDR
Time Chart Example
Work position
For Size 6060, 6070, 6080,
9060, 9070, 9080
1 2 3 4 5
Note 2)

Trial run should be performed without trays and make sure no abnormal operation occurs.
At such time, check the following points.
①No error LED blinks on the driver card.
②No abnormal sound or high temperature is detected.
- 18 -
1. 1. Before starting a trial run, check the following.
①Is the wiring correct? Did you check that no loose connector or wire breakage exist?(⇒P13 〜15)
2.
②Is the driver card setting correct?(⇒ P15)
・M3:In the lifting driver card (CBR-306), is SW1#5 OFF and SW5 "3"?
■Checking the Carrier Wheel transfer side sensor ( SN・S) and roller transfer side sensor ( SN・R)
●When a load is on the Carrier Wheel, do not forcibly move the load.
Carrier Wheel may break or cause a failure.
●Before a trial run, make sure the wiring and driver card setting have been correctly made.
Insufficient check may lead to a damage and failure.
Checking the environment for permitting trial run
●
【Condition of the transfer surface】
Carrier Wheel transfer side
sensor(SN・S)Transfer surface
ON
OFF
OFF
Roller transfer side
sensor(SN・R)
OFF
ON
OFF
Carrier Wheel
Roller
#5
ON
ON
OFF
SW1
SW1
#5
ON
OFF
OFF
SW5
3
1
2
3
5
6
7
8
9
0
1
2
3
4
STATUS/ERR/PWR
6
5
4
0
1
9
8
7
2
3
24V
0V
1.RUN
3.N.A
2.DIR
4.ERR
5.PLS
MODULE
5. MDL/TEST
1. AUTO/MANU
3. DIRECTION
2. INT-TIME
4. E/N-OUT
N.A
N.A
CBR-306F□
M3:Lifting MDR
5
6
7
8
9
0
1
2
3
4
SW1 SW5
6 - 6.Precautions for Trial Run
●Make sure other devices in the system do not run.
In the case of a conveyor line integrated in a system, starting signal would cause a tray to flow
down the conveyor and cause danger. Before trial run, make sure that other elements of the
system does not operate.
Caution
・Confirm that Carrier Wheel transfer side sensor (SN・S) ON makes the Carrier Wheel lifted up, or roller transfer
side sensor (SN・R) ON makes the roller lifted up.
・When both the Carrier Wheel transfer side sensor (SN・S) and roller transfer side sensor (SN・R) are OFF, then
perform the following operation and, confirm that roller transfer side sensor (SN・R) ON makes the roller lifted up.
M3:Set SW5 of lifting
driver card CBR-306 to
"3"
Change SW1#5 to
OFF→ON.
When SN・R is turned
ON, turn OFF SW1#5.
Carrier Wheel is
lifted up
Roller is lifted up
Both Carrier
Wheel and roller
are lifted up

7 - 1.Carrier Wheel Belt Tension Adjustment
- 19 -
7.Repair / Replacement
①Remove the hold cover.
Starting from the end of the module,
remove a Idler or roller MDR until the
target Carrier Wheel for adjustment is
easily adjustable.
②
Tools to be used
3mm Hex wrench 8mm
・19mm Spanners Snap ring plier (for shaft ) Flat-tip screw-driver
・A roller without a power cable is Idler.
・To remove a roller MDR, loosen the cable retainer
at the power cable side, and remove the cable tie
which secures the cable.
1
4
2
3
8
19
3mm
In order to avoid accident or damage during operations, confirm safety.
・
・
When a damaged component is discovered, promptly replace with a new component.
・
Do not perform disassembly other than in a designated place. Unexpected accident may occur.
・
Repair/replacement operation sometimes requires turning or lifting a component. Use caution for being caught or
pinched by other parts and injured.
Safety check before repairing or replacing a part.
・
When component repair and replacement is completed, check the following before starting trial run.
(a)Roller link belt are attached in the right groove.
(b)The removed cover is securely closed.
(c)All removed components and parts are attached.
●
Part repair and replacement
●
Component repair and confirmation after replacement
●
●In order to avoid interference by power circuit and signals, turn off the power of all connected devices.
(a)
After turning off the power switch, leave for more than 3 minutes for discharging the DC power supply.
(b)
Indicate warning to prevent other people from turning the power.
●Perform repair or replacement operations by wearing protective means such as gloves.
Working without protective means results in hand injury such as cut by metal part.
Warning
Warning
Hold cover VG pulley
Idler removal procedure Roller MDR removal procedure
Spring-loaded
shaft

・Adjust the belt tension to the degree that Carrier Wheel cannot
easily be rotated by hand.
・Do not hold the belt under the pulley when lifting the tension
adjustment pulley.
- 20 -
③Loosen the adjustment bolt of the tension adjustment pulley.
④While lifting the tension adjustment pulley,
fasten the adjustment bolt.
⑤Reinstall the Idler / roller MDR.
⑥Attach the hold cover.
⑤-1.
⑤-2.
Install a link belt on all rollers.
Refer to the figure below for attachment groove position of link belt.
Assemble Idlers one by one in the order of "shaft opposite from the VG roller " →"VG pulley side shaft".
12
●
●
Linking of a roller MDR and Idler
●
●
Linking between Idlers
・・・・PJ256(2PJ256)
・・・・・・・・PJ246(2PJ246)
30N・m
Install the roller MDR and then install Idlers from the roller MDR toward the edge of the module.
After installation, secure the roller MDR cable by using an ordinary cable tie.
14
2
3
Side view Carrier Wheel
Carrier Wheel
Tension adjustment pulley
(Fastening torque 11N・m)
Roller MDR attachment procedure
Use 2 grooves from the left edge Leave 1 groove and then use 2 grooves
VG pulley
Spring-loaded shaft
While pressing the
D-cut surface of the
shaft against the
plate, drop the shaft
into the groove as
shown.
This manual suits for next models
37
Table of contents
Other ITOH DENKI Industrial Equipment manuals

ITOH DENKI
ITOH DENKI POWER MOLLER 24 F-RAT-U225 User manual

ITOH DENKI
ITOH DENKI MABS User manual

ITOH DENKI
ITOH DENKI F-RAT-NX75 User manual

ITOH DENKI
ITOH DENKI POWER MOLLER IB-P03 Guide

ITOH DENKI
ITOH DENKI PM605KT Guide

ITOH DENKI
ITOH DENKI MABS User manual

ITOH DENKI
ITOH DENKI F-RAT-NX75 User manual

ITOH DENKI
ITOH DENKI F-RAT-S300 Series User manual

ITOH DENKI
ITOH DENKI POWER MOLLER 24 F-RAT-S300 User manual

ITOH DENKI
ITOH DENKI POWER MOLLER 24 Pop-D Divert User manual