manuals.online logo
Brands
  1. Home
  2. •
  3. Brands
  4. •
  5. iwc
  6. •
  7. Watch
  8. •
  9. iwc 3723 User manual

iwc 3723 User manual

www.iwc.com
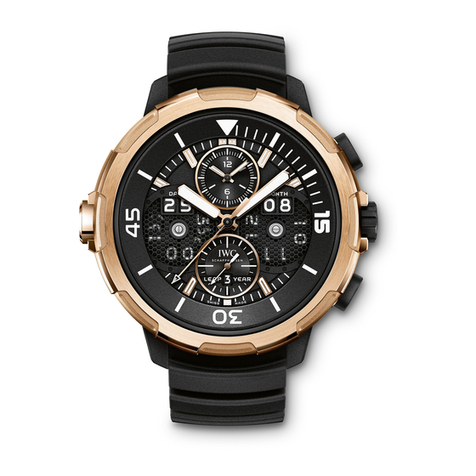
AQUATIMER SPLIT MINUTE CHRONOGRAPH
REF. 3723
OPERATING INSTRUCTIONS
REF. 3723
IWA20853/02.09/0.1
Operating instructions
English
03
17
31
45
2 | 3
Welcome to the small ci cle of individuals who, if we a e to be
absolutely p ecise, demand slightly mo e of a watch than absolute p ecision.
App eciation of a watch is mo e than me e app eciation of the co ect time.
It is enthusiasm fo an ingenious idea. Fo the inte play between p ecision
and imagination. Between time and timelessness. Between bounda ies and
infinity. Between laws to which the enti e wo ld is subject, and taste, which
cannot be dictated to anyone. That is why, since 1868, we have been devoting
athe mo e of ou time to watches that must not only un with absolute
p ecision but which also, with eve y passing second, exe t a fascination with
the g eat achievements of maste c aftsmanship: a fascination with new
inventions of a technical, mate ial o fo mal natu e, even if they a e concealed
in minute details that a e pe haps not even visible. You a e now the owne of
a beautiful new example of this IWC t adition. We would like to cong atulate
you on you choice and send you ou best wishes fo the time you will spend
with you watch, which pe haps cannot be desc ibed with any g eate accu acy
than it is he e.
IWC Management
Technical refinements of the
Aquatimer Split Minute Chronograph
Your IWC watch shows you the time in hours, minutes and seconds as well
as the date. With the integral chronograph, you can measure any period
up to 12 hours in seconds, minutes and hours. The duration of a dive can
be read on the bezel inside the case, which can be adjusted in an anti-
clockwise direction by turning the reset button. You can use the Split
inute function to mark the start of a decompression stop. The self-
winding mechanical movement has 30 jewels (synthetic rubies) and a power
reserve of at least 44 hours when fully wound. Your Aquatimer Split inute
Chronograph is shockproof, water-resistant 12 bar and is protected by a
sapphire glass of hardness grade 9 on oh’s scale. To ensure that this
extra ordinary watch continues to perform its tasks in the future, it is
absolutely essential to observe a few important operating notes.
4
1
3
2
5
8
6
10
9
12
11
7
13
4 | 5
Key to the Aquatimer Split Minute Chronograph
1Hour hand
2inute hand
3Seconds hand
4Date indicator
5Screw-in crown
6Split inute hand
7Rocker switch
Split inute function
8Seconds stop hand
9inutes counter
10 Hours counter
11 Start-stop button
12 Reset button
13 Rotating inner bezel
with time graduation
Functions of the crown
XNormal position (screwed in)
0Winding position
1Date setting
2Time setting
Normal position
This watch has a screw-in crown. The screw-in connection (normal position,
position X) prevents unintentional adjustment of the time or the date, and the
watch case has double protection against penetrating water. To release the
secure crown, unscrew it by rotating it to the left, where it automatically
assumes position 0, the winding position. By depressing the crown in position X
and rotating it to the right at the same time, it is screwed down firmly again
and secured.
Winding position
In the winding position (position 0), you can also wind the automatic move-
ment by hand. The movement will start after only a few revolutions of the
crown. However, it is better to wind the movement fully with about 30 revolu-
tions of the crown, as maximum accuracy and a power reserve of about
44 hours will then be assured, even after taking off the watch.
X012
6 | 7
Setting the date
If a month has fewer than 31 days, you must set the date by hand to the first
day of the following month. To do this, release the screw-in crown and pull it
to position 1. You can now change the date by rotating the crown to the right
(quick setting).
Setting the time
Pull the crown to position 2. This will stop the movement. To ensure that the
set time is accurate to the second, it is best to stop the movement as the
seconds hand reaches 60. You can now position the minute hand exactly on
the minute line. To start the seconds hand, push the crown back to position 0.
When setting the time, please be aware that the date change always
takes place at midnight (24.00). If this change has already taken place at
12.00 (noon), you must move the hands forwards by 12 hours.
Setting your watch correctly
Set your watch correctly as follows:
•Release the crown by rotating it to the left.
•Wind the movement until it is fully wound (about 30 revolutions of
the crown).
•Pull the crown to position 1.
•Rotating the crown to the right causes the date indicator to change in
steps. Set yesterday’s date.
•Pull the crown to position 2, and this will stop the movement.
•Turn the hands forwards until the date indicator changes to today’s date.
The hands will now be positioned between 0.00 and 1.00 in the morning.
•Now set the precise time by turning the hands forwards; in the afternoon,
the hands must be turned past 12.00 (noon) once again.
•Push the crown back to position 0 to start the watch movement.
•Now push the crown to position X and secure it by rotating it to the right
at the same time.
Important: Although the watch is water-resistant in positions 0, 1 and 2,
the crown must nevertheless always be screwed down again for normal use
(position X).
Reading the time in the dark
The dial, the hour and minute hands as well as the marking on the rotating
inner bezel of your watch are provided with luminous elements which
permit the time to be read without problem, even in total darkness. The
luminous point at 12.00 serves as a reference point.
8 | 9
Marking the start of a dive
Rotation of the reset button in a clockwise direction causes the bezel to
rotate in the case, enabling the triangle on the bezel to be aligned with the
minute hand. The desired point in time (e.g. the time of entering the water
at the start of the dive) can be set in this way. You can read off the elapsed
time (e.g. the duration of the dive) on the bezel. For safety reasons, the
bezel can only be rotated in an anti-clockwise direction. The audible and
perceptible indexing of the bezel takes place in steps of one minute, and
it is also legible in the dark thanks to its luminous markings.
The use of the watch as a timer when diving requires an appropriate
diving sport training and regular inspection of the water-resistance of
the watch.
Operating the Split Minute function
The Split inute function permits the measurement of a time to the nearest
minute (for example the duration of a decompression stop during a dive)
and is operated by the rocker switch on the case. The position of the rocker
switch indicates whether the Split inute hand is running synchronously
with the minute hand (0) or has been stopped (I).
Split Minute function – Off (0)
inute measurement is disengaged, and the Split inute
hand runs synchronously with the minute hand.
Split Minute function – On (I)
Setting the rocker switch to position (I) engages the Split
inute function and causes the Split inute hand to
stop, while the minute hand continues to run. You can
read the duration since activation as the difference
between the two hands. Setting the rocker switch to
position (0) causes the Split inute hand to fly back
to a position below the minute hand. The watch is now
once again ready for minute measurement.
Operating the chronograph
Start: Start the chronograph by pressing the start-stop button.
Stop: Stop the chronograph by pressing the start-stop button again.
Resetting: Press the reset button. This will cause all the chronograph hands
to fly back to the zero position.
Aggregate time recording: You can add the stop times together by press-
ing the start-stop button again, instead of the reset button, after taking the
first measurement.
Seconds counter: The graduation for the central seconds stop hand is
situated at the edge of the dial.
Minutes counter: The 30-minute graduation with a slow jumping hand is
situated at 12.00 on the measurement indicator. This hand makes two
complete revolutions in one hour.
Hours counter: The 12-hour graduation with short lines for the 1⁄2-hour
indication with a continuous hand is situated at 6.00 on the measurement
indicator.
10 | 11
Cleaning the watch after diving
After diving – especially after diving in seawater – you should rinse your
watch under flowing mains water. This will prevent salt encrustation on the
case, bracelet and clasp.
Water-resistance
The water-resistance of IWC watches is stated in bar and not in metres.
etres, which are often used elsewhere in the watch industry to indicate
water-resistance, cannot be equated with dive depth because of the test
procedures that are frequently used. Water-resistance shown in metres
provides no indication as to actual use of the watch in the presence of moisture
and wetness, and in or under water. Recommendations for use in connection
with the water-resistance of your watch can be found on the Internet at
www.iwc.com/water-resistance. Your authorised IWC Official Agent will also be
pleased to provide you with information.
To ensure that your watch continues to function perfectly, you should have it
checked by an IWC service centre at least once a year. Your watch should also
be tested after exposure to unusually harsh conditions. If the tests are not
carried out as stipulated, or if the watch is opened by unauthorised persons,
IWC will accept no warranty or liability claims.
Recommendation: Your authorised IWC Official Agent must carry out a
water-resistance test whenever your IWC watch is opened and serviced.
Servicing your Aquatimer Split Minute Chronograph
Although the parts in this watch are all manufactured from top-quality
materials, a number of components are subject to natural wear and tear.
It is particularly important to ensure that the points at which wear occurs
are always well-lubricated and that oil contaminated by metal abrasion is
regularly removed. For this reason, we recommend that you have your
watch serviced approximately every five years. Please contact an
authorized IWC Official Agent or send your watch directly to the IWC
Customer Service Department in Schaffhausen.
12 | 13
Adjusting the metal racelet
If you have decided on a metal bracelet, you can easily adjust it to the size
of your wrist. You can make this adjustment yourself by removing or adding
individual bracelet links.
Taking the racelet apart and removing individual links
Open the push-button release safety clasp by pressing
the button on the side. Lay the bracelet with its top
surface on a firm base. Using the special tools provided,
you can now push down the securing pin (1) at the
desired point of separation and, at the same time,
displace the pivot pin laterally by about 3 mm (2) with
the second special tool.
Now pull the protruding pivot pin from the bracelet (3).
The metal bracelet is now separated, and you can
adjust the length of the bracelet by removing or adding
individual links.
Determining racelet length
Place the watch with the bracelet open around your
wrist and estimate the number of surplus bracelet
links that you can now remove from the bracelet
(as described above).
If you need to shorten the bracelet by several links, you
should remove the same number of links from each half
of the bracelet, if possible, to ensure that the clasp can
be worn more or less at the centre of the wrist. To enable
you to adapt the bracelet as accurately as possible to
the size of your wrist, we have included an extra-long
bracelet link in the clasp. Your bracelet is shortened by
an intermediate amount by omitting this bracelet link,
and finer adjustment to the length of the bracelet can
be made in this way.
Keep the surplus links and the separating tools safely
for use in subsequent adjustments.
14 | 15
Attaching the racelet
Attach the component parts of the bracelet link to
the connection point, and push the pivot pin into the
bracelet from the side (1).
Using the special tool provided, now press the securing
pin downwards (2) and, at the same time, slide the
pivot pin back into the bracelet until it lies flush (3). The
securing pin must be brought up flush with the upper
edge of the securing link. Please be sure to check the
correct seating of the pivot pin.
Removing and fitting the ru er strap
The identical attachment for the rubber strap lets you use the same strap
replacement procedure as when handling the metal bracelet. To remove
the rubber strap, push down the securing pin situated on the case and slide
the pivot pin from the case at the same time. Pull the protruding pivot pin
from the case. The strap is now separated from the case. Fit the strap using
the same procedure as when joining the metal bracelet. When fitting the
strap, make sure that the pivot pins are secure to prevent the watch from
being lost.
Effective from ay 2004.
Technical specifications subject to change.
16 | 17

Other manuals for 3723

1

Other iwc Watch manuals

iwc IW5111 User manual

iwc

iwc IW5111 User manual

iwc FLIEGERUHR User manual

iwc

iwc FLIEGERUHR User manual

iwc ingenieur dual time titanum reference 3264 User manual

iwc

iwc ingenieur dual time titanum reference 3264 User manual

iwc Top gun User manual

iwc

iwc Top gun User manual

iwc IW397203 User manual

iwc

iwc IW397203 User manual

iwc portuguese chronograph classic reference... User manual

iwc

iwc portuguese chronograph classic reference... User manual

iwc PORTUGIESER PERPETUAL CALENDAR 42 User manual

iwc

iwc PORTUGIESER PERPETUAL CALENDAR 42 User manual

iwc COUSTEAU DIVERS User manual

iwc

iwc COUSTEAU DIVERS User manual

iwc IW3795 User manual

iwc

iwc IW3795 User manual

iwc PORTOFINO AUTOMATIC MOON PHASE 37 User manual

iwc

iwc PORTOFINO AUTOMATIC MOON PHASE 37 User manual

iwc IW3903 User manual

iwc

iwc IW3903 User manual

iwc PORTOFINO MIDSIZE AUTOMATIC DAY & NIGHT User manual

iwc

iwc PORTOFINO MIDSIZE AUTOMATIC DAY & NIGHT User manual

iwc 3723 User manual

iwc

iwc 3723 User manual

iwc Portugieser JAHRESKALENDER User manual

iwc

iwc Portugieser JAHRESKALENDER User manual

iwc Portugieser 5102 User manual

iwc

iwc Portugieser 5102 User manual

iwc IW5101 User manual

iwc

iwc IW5101 User manual

iwc portuguese 3714 User manual

iwc

iwc portuguese 3714 User manual

iwc IW4593 User manual

iwc

iwc IW4593 User manual

iwc PORTUGIESER AUTOMATIC User manual

iwc

iwc PORTUGIESER AUTOMATIC User manual

iwc PILOT'S WATCH CHRONOGRAPH User manual

iwc

iwc PILOT'S WATCH CHRONOGRAPH User manual

iwc BIG PILOT'S WATCH BIG DATE User manual

iwc

iwc BIG PILOT'S WATCH BIG DATE User manual

iwc INGENIEUR PERPETUAL CALENDAR DIGITAL... User manual

iwc

iwc INGENIEUR PERPETUAL CALENDAR DIGITAL... User manual

iwc 3784 User manual

iwc

iwc 3784 User manual

iwc Ingenieur Constant-Force Tourbillon User manual

iwc

iwc Ingenieur Constant-Force Tourbillon User manual

Popular Watch manuals by other brands

Abyx fit Air user manual

Abyx

Abyx fit Air user manual

Casio 5445 Quick operation guide

Casio

Casio 5445 Quick operation guide

Casio QW-693 manual

Casio

Casio QW-693 manual

Mouawad GRANDE ELLIPSE CHRONO MONOPOUSSOIR... Instruction manual / International Guarantee

Mouawad

Mouawad GRANDE ELLIPSE CHRONO MONOPOUSSOIR... Instruction manual / International Guarantee

Seiko 2A22A Technical guide

Seiko

Seiko 2A22A Technical guide

Freestyle 779 SHARK CLASSIC instructions

Freestyle

Freestyle 779 SHARK CLASSIC instructions

Zeon IN6106 CALIBRE 887 Operation manual

Zeon

Zeon IN6106 CALIBRE 887 Operation manual

Stuhrling Q instruction manual

Stuhrling

Stuhrling Q instruction manual

Casio 701 Operation chart

Casio

Casio 701 Operation chart

eta E64.041 Technical Communication

eta

eta E64.041 Technical Communication

Timex i-Control quick start guide

Timex

Timex i-Control quick start guide

Hyco W563 user manual

Hyco

Hyco W563 user manual

Radio Shack 63-5086 owner's manual

Radio Shack

Radio Shack 63-5086 owner's manual

Casio 5363 Operation guide

Casio

Casio 5363 Operation guide

Garmin 4 0 5 C X Benutzerhandbuch

Garmin

Garmin 4 0 5 C X Benutzerhandbuch

Oakley Jury II manual

Oakley

Oakley Jury II manual

DETOMASO SIENA DIGITAL manual

DETOMASO

DETOMASO SIENA DIGITAL manual

Casio 3558 Operation guide

Casio

Casio 3558 Operation guide

manuals.online logo
manuals.online logoBrands
  • About & Mission
  • Contact us
  • Privacy Policy
  • Terms and Conditions

Copyright 2025 Manuals.Online. All Rights Reserved.