manuals.online logo
Brands
  1. Home
  2. •
  3. Brands
  4. •
  5. Jack Wolfskin
  6. •
  7. Tent
  8. •
  9. Jack Wolfskin mesa grande User manual

Jack Wolfskin mesa grande User manual

Gebrauchsanleitung · Tent Manual
Livret d’instructions de montage
mesa grande
monte Vista
JACK WOLFSKIN entwickelt seine Produkte ständig weiter. Wir behalten uns vor, einzelne Komponenten zu verändern.
Abbildungen der Aufbauanleitung können vom aktuellen Produkt abweichen.
At JACK WOLFSKIN we are continually improving and upgrading our products. We therefore reserve the right to make
changes to individual components. Diagrams used for the pitching instructions may differ slightly from the actual product.
JACK WOLFSKIN développe et améliore ses produits en permanence. De ce fait nous nous réservons la possibilité de modi-
fier certains composants. Les illustrations du mode de montage peuvent différer légèrement de celles du produit actuel.
ZeLtPaCKsaCKinHaLt
· 1 Innenzelt/Außenzelt-
Kombination/Bodenschutzwanne
· 21 Heringe, Reparaturmaterialien
& Nahtabdichter im Heringspack-
beutel
· 1 Stangenpackbeutel mit:
3 vorgebogene Stahlstangen
1 Reparaturhülse
ContenU dU saC de tente
· 1 tente intérieure/ensemble double
toit bâche de sol supplémentaire
· 21 piquets, matériel de
réparation & mastic d’étanchéité
dans le sac de piquets
· 1 sac d’armatures
· 3 Armatures en acier
· 1 douille de réparation
Contents oF tent PaCK saCK
· 1 inner tent/ flysheet combination/
additional groundsheet tarp
· 21 pegs, repair materials & seam
sealant in peg bag
· 1 pole bag containing:
3 pre-bent steel poles
1 pole repair sleeve
2
MESA GRANDE MONTE VISTA
mesa grande /
monte Vista
3
BeLÜFtUng
Ihr Zelt ist mit ausreichenden Belüftungsmög-
lichkeiten ausgestattet. Sorgen Sie immer für
eine gute Luftzirkulation um die Gefahr der
Kondenswasserbildung zu vermindern. Den-
noch ist Kondenswasserbildung unvermeidbar.
Verwechseln Sie Kondenswasser bitte nicht mit
eindringender Feuchtigkeit.
PFLege
Reinigen Sie Ihr Zelt in aufgebautem Zustand
ausschließlich mit Wasser und wenig Seife. Be-
freien Sie vor allem die Reißverschlüsse regel-
mäßig von Schmutz und Sand. Auf keinen Fall
in die Waschmaschine oder Reinigung geben,
da hier die Beschichtung irreversibel zerstört
werden kann. Geeignete Silikonschmiermittel
schützen Stangen vor Korrosion und Reißver-
schlüsse vor dem Einfrieren.
FeUer
Offenes Feuer und Flammen sind eine Gefahr
für Zeltgewebe. Vermeiden Sie offenes Feuer
in unmittelbarer Nähe des Zeltes.
VentiLation
Votre tente est suffisamment équipée
d’options pour une bonne ventilation. Assurez-
vous de toujours avoir une bonne circulation
d’air dans la tente pour réduire la condensa-
tion. Malgré tout il est impossible de prévenir
totalement la formation d’eau de conden-
sation. Ne confondez pas cependant eau de
condensation et pénétration d’eau au travers
de la toile de tente.
entretien
Nettoyez votre tente montée, uniquement
à l’eau un peu savonneuse. Les fermetures à
glissière doivent être nettoyées régulièrement
pour les débarrasser de la saleté et du sable.
Ne surtout pas laver la tente à la machine, ne
pas faire à nettoyer à sec, ces types de nettoy-
age causeraient une altération irréversible de
l’enduit protecteur de la toile. Des lubrifiants
appropriés à base de silicone, protègent les
arceaux de la corrosion et les fermetures à
glissière du gel.
FeU
Le feu confiné et toute flamme en général
représentent un risque pour la toile. Évitez
d’approcher toute flamme nue de la toile.
VentiLaton
Your tent is equipped with sufficient ventilati-
on options. Try to ensure that there is always
a good flow of air through the tent to reduce
the risk of condensation build-up. However,
condensation cannot completely be avoided.
Please do not confuse condensation with
actual water penetration through the fabric of
the tent.
Care and maintenanCe
Clean your tent when pitched, using only a litt-
le soap and water. Zips in particular should be
cleaned regularly to remove dirt and grit. On
no account should the tent be machine washed
or dry cleaned, since this could cause irrever-
sible damage to the protective coating on the
tent fabric. Suitable silicone-based lubricants
protect poles from corrosion and prevent zips
freezing.
Fire PreVention
Open fires and flames are a hazard for tent
materials. Avoid naked flames in the immedia-
te vicinity of the tent.
PHase 1
4
Beim ersten Aufbau: Sie sollten Ihr
neues Zelt erst einmal probeweise
aufbauen, und sich vor Antritt der
ersten Reise mit allen Aufbauschritten
vertraut machen.
Wählen Sie zunächst einen geeigneten
Standort für Ihr Zelt aus (1) und entfer-
nen Sie dort alle spitzen Gegenstände,
die den Zeltboden beschädigen könn-
ten. Breiten Sie Ihr Zelt flach auf dem
Boden aus und fügen Sie die Segmente
der Stahlstangen sorgfältig zusammen,
so dass diese fest ineinander sitzen (2).
Achten Sie darauf, dass während des
Aufbaus alle Reißverschlüsse geschlos-
sen sind.
Pitching your tent for the first time:
We recommend you to do a dry run
pitching your new tent, in order to
become familiar with all the pitching
instructions before your first trip.
Choose a suitable pitching site (1),
removing all sharp objects which may
damage the groundsheet. Spread out
the tent on the ground and carefully
connect all pole sections, ensuring a
tight fit (2).
Ensure that all zips are closed when
pitching the tent.
5
Le premier montage de votre tente:
Afin de vous familiariser avec les
instruc-tions de montage nous vous
conseillons de faire un essai de mon-
tage de votre tente neuve avant de
partir en voyage.
Choisissez d’abord un emplacement
approprié pour dresser votre tente
(1), en prenant soin d’enlever tous les
objets pointus pouvant endommager
le tapis de sol de la tente. Étalez votre
tente à plat sur le sol et assemblez
soigneuse-ment tous les arceaux, de
manière à ce qu’ils soient bien emboî-
tés les uns dans les autres (2). Assurez à
ce que toutes les fermetures à glissière
soient bien fermées pendant le monta-
ge de la tente.
PHase 2
6
Führen Sie die Stangen nun vorsichtig
in die entsprechenden außen liegen-
den Stangenkanäle ein (1). Wenden
Sie keine Gewalt an. Wenn Sie auf
Widerstand stoßen während Sie die
Stangen einführen oder spannen,
machen Sie das Problem ausfindig und
beheben Sie es. Setzen Sie die Stangen
unter Spannung, indem Sie die Stan-
genenden in die RING & PIN – Vorrich-
tung am verstellbaren Bodengurtband
einstecken (2). Spannen Sie nun das
Gurtband für eine straffe Stangenfixie-
rung (3). Befestigen Sie nun final die
Kunststoff-Clips an den Stangen (4).
Carefully insert the poles into their
respective external pole channels (1).
Do not use force. If resistance is met
when the poles are inserted or tensi-
oned, check and remedy the problem.
Tension the poles by inserting the
RING & PIN pole pins into the open
ends of the pole channels (2) and
tightening the guying tape at ground
level (3).
Fix the plastic clips to the bare pole
parts (4).
7
Introduisez les arceaux d’armature
dans leurs fourreaux extérieures cor-
respon-dants avec précaution (1). Ne
forcez pas. Si vous vous heurtez à de la
résistance pendant que vous introdui-
sez les arceaux ou que vous les tendez,
cherchez-en la cause et éliminez-la.
Tendez les arceaux, afin de mettre les
extrémités des mâts dans le mécanisme
„RING & PIN“ aux sangles de bande
du sol (2). Tendez ensuite la sangle de
bande pour obtenir une bonne fixati-
on des armatures (3). Enfin, fixez les
clips en plastique aux armatures (4).
PHase 3
8
Stellen Sie sicher, dass alle Reißver-
schlüsse geschlossen sind und fixieren
Sie Ihr Zelt am Fußende (1).
Nehmen Sie dann die beiden vorderen
Apsidenbefestigungen in die Hand
und ziehen Sie das Zelt nach vorne hin
wie eine Ziehharmonika auseinander.
Richten Sie das Zelt gerade aus und
spannen Sie die vordere und hintere
Apsis an den Abspannpunkten mit
Heringen.
Achten Sie darauf, dass die Boden-
spannbänder des Außenzeltes gleich-
mäßig gespannt sind und das Zelt in
einer Linie steht (2).
Making sure all zips are closed, an-
chor your tent at the rear end (1).
Next, take hold of the two front
porch anchor points and pull the tent
forward, opening it up like a concer-
tina.
Straighten the tent and peg out the
front and rear porches. Make sure
that the flysheet guying tapes at
ground level are equally tensioned
and that the tent is positioned in a
straight line (2).
45°
9
Après que vous vous êtes assuré que
toutes les fermetures à glissière soient
fermées,fixez l’arrière de votre tente
avec un piquet. Puis saisissez les deux
boucles de tension de l’abside d’entrée
et déployez votre tente en la tirant
vers l’avant comme un accordéon. Ten-
dez la tente jusqu’à ce qu’elle soit bien
droite en fixant les piquets de l’abside
frontal et arrière (1).
Assurez-vous que les fixations des
hau-bans du double toit au niveau du
sol soient tendues de manière égale et
que le positionnement de la tente soit
en ligne droite (2).
PHase 4
10
Bodenplane
Fixieren und straffen Sie die vorderen
Schlaufen der Bodenplane an den
Heringen der vorderen Überzeltschlau-
fen.
Groundsheet tarp
Attach the front loops of the ground-
sheet tarp to the pegs anchoring the
front loops of the flysheet and tensi-
on them to pull the groundsheet flat.
11
Bâche de sol
Utilisez les piquets pour fixer et tendre
les tirants avant de la bâche de sol aux
tirants de la tente extérieure.
PHase 5
Fixieren und straffen Sie nachfolgend
alle übrigen Befestigungsschlaufen (1).
Spannen Sie Ihr Zelt anschließend mit
Hilfe der dafür vorgesehenen Ab-
spannleinen und der restlichen Herin-
ge sturmstabil aus (2).
Bei Nässe kann sich das Zeltmaterial
dehnen. Es muss dann etwas nachge-
spannt werden (1).
Continue to tension the tent by peg-
ging out the remaining anchor points
(1).
Peg out the remaining guy lines to
make the tent wind stable (2).
When wet, the polyester flysheet
material may stretch slightly. Re-guy
where necessary .
12
45°
Fixez et tendez ensuite tous les tirants
de fixation restants. (1).
Tendez ensuite votre tente à l’aide
des haubans et piquets prévus à cet
effet, de manière à ce qu’elle résiste
aux intempéries (2).
Par temps humide il est possible que
le tissu se dilate. Il faudra alors re-
tendre la tente.
13
reParatUren
Reparatur-
materialien für
kleine Repa-
raturen un-
terwegs liegen
bei. Produktionsfehler werden im Rahmen der
Garantieleistungen repariert. Andere Repara-
turen führen wir gegen eine Gebühr gerne
aus. Schicken Sie das gereinigte Zelt mit klarer
Reparaturkennzeichnung/-anweisung und Ihrem
Kaufbeleg über Ihren Fachhändler ein.
LagerUng
Bevor Sie Ihr Zelt längere Zeit lagern, muss es
vollkommen durchgetrocknet sein, sonst besteht
Gefahr von Schimmel- und Stockfleckenbildung.
UV straHLUng
Ultraviolette (UV) Strahlung zerstört mit der Zeit
alle modernen Zeltmaterialien. Das spezielle
Polyester-Zeltmaterial erhöht die Lebensdauer
gegenüber herkömmlichen Nylon-Zeltmaterialien,
kann aber auch auf Dauer der Natur nicht trotzen.
Bitte vermeiden Sie deshalb dauerhafte intensive
Sonneneinwirkung. Jack Wolfskin übernimmt
keine Garantie für Schäden durch UV Strahlung.
rePairs
Repair materials for minor repairs during usage
are provided. Production faults will be repaired
under the terms of our guarantee. Our service
department will be pleased to perform other
repairs for a small charge. Please send in your
cleaned tent via your nearest dealer, enclosing
clear repair instructions and proof of purchase.
storage
Allow your tent to dry thoroughly while still
assembled before storing it for any longer
period. This will prevent mildew and damp
stains forming.
UV LigHt
Ultraviolet (UV) radiation reduces the tear-
strength of all tent materials in the course of
time. The special polyester tent material increa-
ses the service life in comparison with conven-
tional nylon materials. Tent materials, however,
cannot permanently defy the effects of nature.
Therefore, please avoid subjecting the tent to
intensive sunlight for extended periods of time.
JACK WOLFSKIN will not assume any liability for
damage caused by ultraviolet light.
rÉParations
Le matériel pour les petites réparations en cours
de voyage est fourni avec la tente. Tout défaut
de fabrication est couvert par la garantie. Nous
effectuons volontiers les autres réparations
contre paiement à un tarif raisonnable. Veuillez
nous envoyer la tente nettoyée, en joignant
le ticket de caisse, par l’intermédiaire de votre
magasin spécialisé le plus proche, avec de claires
instructions de réparation.
stoCKage
Avant d’être stockée pendant une durée prolon-
gée, la tente doit être entièrement sèche, afin
de prévenir la formation de moisissures et de
tâches d‘humidité.
raYonnement ULtraVioLet
Avec le temps, les rayons ultraviolets réduisent la
résistance de toutes les toiles de tente. La toile
spéciale en polyester accroît la longévité de la
tente par rapport à celles en Nylon tradition-
nelles, mais à la longue, elle ne peut résister de
manière permanente aux effets de la nature.
De ce fait nous vous prions donc d’éviter toute
exposition intensive de longue durée au soleil.
JACK WOLSKIN n’assume aucune garantie pour
les dommages causés par les rayons ultraviolets.
inFo
14
15
Weitere tiPPs
Ihr MESA GRANDE / MONTE VISTA hat unter-
schiedlich lange Stahlstangen. MONTE VISTA:
Die lange Stange kommt in die Mitte, die bei-
den kürzeren Stangen bilden die Zeltfront und
das Fußende. MESA GRANDE: Die beiden langen
Stangen bildenden Zelteingangsbereich – die
kurze das Fußende. Farbliche Markierungen
helfen beim Einfädeln in die richtigen Stangen-
kanäle. Überprüfen Sie die verstellbaren Gurt-
bänder an den Ring & Pin Stangenfixierungen:
Nur die stramme Grundspannung der Stangen
ist die Vorraussetzung für besten Stand und
Sturmstabilität Ihres Zeltes. Ihr Zelt ist zusätzlich
mit einer kompletten, herausnehmbaren Bo-
denplane ausgestattet. Achten Sie beim Aufbau
peinlich darauf, dass die Bodenplane nicht unter
dem Überzelt hervorsteht, damit kein Wasser
ins Zeltinnere dringen kann.
naHtdiCHter
Die wichtigsten Nähte sind mit einer speziellen
Nahtbandversiegelung versehen. Es empfiehlt
sich Nahtstellen, in die Bänder oder Gummilit-
zen mit eingefasst sind und die so die Bandab-
klebung unterbrechen, von innen und außen
zusätzlich mit beiliegendem PU Nahtdichter
abzudichten. Eine Garantie für die Verklebung
ist ausgeschlossen.
FUrtHer tiPs
Your MESA GRANDE/ MONTE VISTA has steel
poles of different lengths. On the MONTE
VISTA the long pole goes in the middle. On the
MESA GRANDE the two long poles form the
entrance area. Colour coded marks help in lo-
cating the correct pole channel. Check to ensu-
re that the poles are positioned and tensioned
correctly. This is the prerequisite for a secure,
wind stable pitch. Your tent is equipped with
an additional removable groundsheet tarp.
When pitching the tent, ensure that the
groundsheet tarp does not protrude from
beneath the flysheet to prevent water penetra-
ting through into the inside of the tent.
seam seaLant
The important seams are specially tape sealed.
However we do recommend additional sealing
with the PU seam sealant provided, particularly
at those points of the seam where tapes or
rubber tensioning loops are integrated into
seam and thus interrupt the continuity of the
tape seal. We offer no guarantee on the seam
taping of the seams.
aUtres ConseiLs
Votre MESA GRANDE / MONTE VISTA a des
armatures en acier de différentes longueurs.
MONTE VISTA: Le long mât est pour le centre,
les deux mâts plus courts constituent le devant
et le fond de la tente.
MESA GRANDE: Les deux longs mâts constituent
l’entrée de la tente – le court constitue le fond
de la tente. Le marquage en couleur aide à
passer les mâts dans les glissières prévues.
Vérifiez les sangles de la bande réglable du sys-
tème de fixation d‘armatures „Ring & Pin“. Seu-
le une forte tension de base des arceaux peut
garantir une bonne stabilité et une meilleure
résistance aux intempéries de votre tente.
CoLLe imPermeaBiLisante
Les coutures importantes ont été recouver-
tes d’une bande scellée spéciale. Nous vous
recommandons toutefois de traiter, à l’intérieur
comme à l’extérieur, avec la colle imperméabi-
lisante PU fournie avec la tente, les endroits où
des bandes et des cordons en caoutchouc sont
insérés dans la couture et interrompent donc la
continuité de collage des bandes. Le collage des
bandes scellées n’est pas couvert par la garantie.
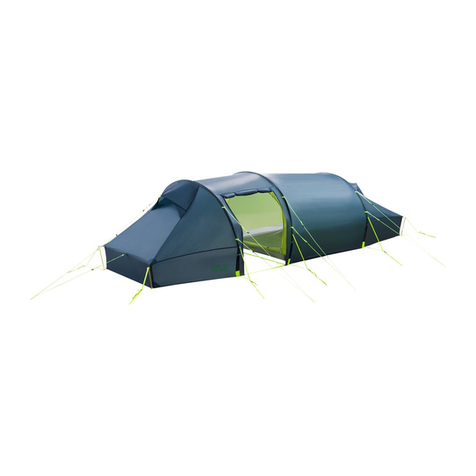
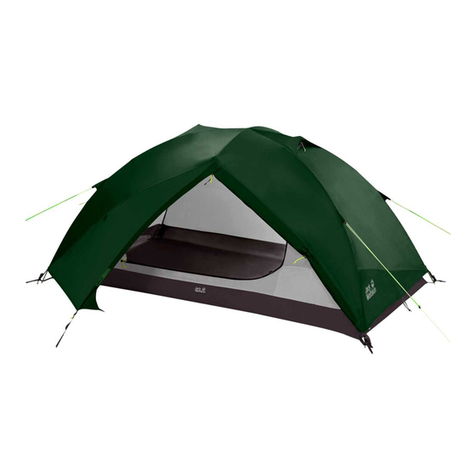
Ample 3 hoop tunnel tents with room to
stand and featuring two separate sleeping
areas.
The configuration can be varied by dis-
pensing with the smaller sleeping cabin to
create a huge porch area. A special pole
configuration optimizes the headroom in
the inner tent and improves the overall
stability of the construction.
Ventilation ducts provide a pleasant interior
climate. Useful additional features include
curtained windows, a removable ground-
sheet, mesh pockets and drying line loops
inside, aluminium pegs and a roomy com-
pression packsack.
Diese großzügigen 3-Bogen-Tunnelzelte mit
2 getrennten Schlafkabinen bieten Platz für
die ganze Familie.
Variabel: Bei ausgehängter kleiner Schlafka-
bine entsteht eine aufstellbare Riesenapsis.
Das vorgebogene Stahlgestänge optimiert
die Kopffreiheit im Innenraum und sorgt
für die Gesamtstabilität des Großraumzel-
tes.
Die großen Lüfter sorgen für optima-
les Innenraumklima. Herausnehmbare
Bodenschutzwanne, abdeckbare Fenster,
Netztaschen und Wäscheleinenschlaufen in
den Innenräumen, stabile Alunägel und der
geräumige Kompressionspacksack bieten
zusätzlichen Nutzen und Komfort.
Cette grande - 3 arceaux- tente-tunnel
avec ses 2 chambrées séparées offre un
espace pour toute la famille.
Variable: En détachant la petite chambre
se forme une très grande pièce .Les ar-
ceaux spéciaux optimisent la hauteur inté-
rieure et accroissent la stabilité de la ten-
te. Les grands dispositifs d’aération offrent
une température agréable à l’intérieur. La
bâche de sol supplémentaire pouvant être
retirée, les fenêtres obstruées, les poches
intérieures et les tirants pour une corde à
ligne ainsi que les arceaux en aluminium et
le sac de compression, offrent un confort
et une fonctionnalité supplémentaire.
08/11
mesa grande /
monte Vista

This manual suits for next models

1

Other Jack Wolfskin Tent manuals

Jack Wolfskin YELLOWSTONE VENT II User manual

Jack Wolfskin

Jack Wolfskin YELLOWSTONE VENT II User manual

Jack Wolfskin MOONSHADOW User manual

Jack Wolfskin

Jack Wolfskin MOONSHADOW User manual

Jack Wolfskin STARLIGHT User manual

Jack Wolfskin

Jack Wolfskin STARLIGHT User manual

Jack Wolfskin Front Porch 3001381 User manual

Jack Wolfskin

Jack Wolfskin Front Porch 3001381 User manual

Jack Wolfskin TRAVEL LODGE RT User manual

Jack Wolfskin

Jack Wolfskin TRAVEL LODGE RT User manual

Jack Wolfskin beach club User manual

Jack Wolfskin

Jack Wolfskin beach club User manual

Jack Wolfskin SKYROCKET II DOME User manual

Jack Wolfskin

Jack Wolfskin SKYROCKET II DOME User manual

Jack Wolfskin grand illusion ii/ grand illusion iv User manual

Jack Wolfskin

Jack Wolfskin grand illusion ii/ grand illusion iv User manual

Jack Wolfskin Front Porch User manual

Jack Wolfskin

Jack Wolfskin Front Porch User manual

Jack Wolfskin YELLOWSTONE VENT II User manual

Jack Wolfskin

Jack Wolfskin YELLOWSTONE VENT II User manual

Jack Wolfskin time tunnel ii Rt User manual

Jack Wolfskin

Jack Wolfskin time tunnel ii Rt User manual

Jack Wolfskin Termite II User manual

Jack Wolfskin

Jack Wolfskin Termite II User manual

Jack Wolfskin GRAND ILLUSION IV User manual

Jack Wolfskin

Jack Wolfskin GRAND ILLUSION IV User manual

Jack Wolfskin Beach Shelter III User manual

Jack Wolfskin

Jack Wolfskin Beach Shelter III User manual

Jack Wolfskin NORTH BAY II User manual

Jack Wolfskin

Jack Wolfskin NORTH BAY II User manual

Jack Wolfskin gossamer User manual

Jack Wolfskin

Jack Wolfskin gossamer User manual

Jack Wolfskin skylight User manual

Jack Wolfskin

Jack Wolfskin skylight User manual

Jack Wolfskin ELLOWSTONE VENT II User manual

Jack Wolfskin

Jack Wolfskin ELLOWSTONE VENT II User manual

Jack Wolfskin MOONSHADOW User manual

Jack Wolfskin

Jack Wolfskin MOONSHADOW User manual

Jack Wolfskin Termite II User manual

Jack Wolfskin

Jack Wolfskin Termite II User manual

Jack Wolfskin diamond tarp xt User manual

Jack Wolfskin

Jack Wolfskin diamond tarp xt User manual

Jack Wolfskin ECLiPSE II User manual

Jack Wolfskin

Jack Wolfskin ECLiPSE II User manual

Jack Wolfskin Exolight II User manual

Jack Wolfskin

Jack Wolfskin Exolight II User manual

Jack Wolfskin TRAVEL LODGE RT User manual

Jack Wolfskin

Jack Wolfskin TRAVEL LODGE RT User manual

Popular Tent manuals by other brands

Inventini PASCAL user manual

Inventini

Inventini PASCAL user manual

gaviota Gemini Assembly instructions

gaviota

gaviota Gemini Assembly instructions

OZtrail Highlander owner's manual

OZtrail

OZtrail Highlander owner's manual

Lone Rider ADV user guide

Lone Rider

Lone Rider ADV user guide

Treasure Garden AG28 Series Assembly and operation guide

Treasure Garden

Treasure Garden AG28 Series Assembly and operation guide

Ardisam TERRITORY TENTS JET SET CT400DB Assembly and use instructions

Ardisam

Ardisam TERRITORY TENTS JET SET CT400DB Assembly and use instructions

Profizelt24 PVC-Tent 6x12 m Assembly instruction

Profizelt24

Profizelt24 PVC-Tent 6x12 m Assembly instruction

Ameristep BONE COLLECTOR BLIND 3297 Instruction and safety manual

Ameristep

Ameristep BONE COLLECTOR BLIND 3297 Instruction and safety manual

SunnyTent Oval M manual

SunnyTent

SunnyTent Oval M manual

Outdoor Connection Easy Up 2 instructions

Outdoor Connection

Outdoor Connection Easy Up 2 instructions

Coleman 2000004410 Setup instructions

Coleman

Coleman 2000004410 Setup instructions

Hesperide ROSARIO 149887 manual

Hesperide

Hesperide ROSARIO 149887 manual

Glatz CASTELLO Pro Installation and operating instructions

Glatz

Glatz CASTELLO Pro Installation and operating instructions

MSR FAST & LIGHT owner's manual

MSR

MSR FAST & LIGHT owner's manual

Outwell TOURING CANOPY L MAINTENANCE AND USE

Outwell

Outwell TOURING CANOPY L MAINTENANCE AND USE

Trigano Olympe instructions

Trigano

Trigano Olympe instructions

Tentsile UNA owner's manual

Tentsile

Tentsile UNA owner's manual

Smittybilt Annex Install instructions

Smittybilt

Smittybilt Annex Install instructions

manuals.online logo
manuals.online logoBrands
  • About & Mission
  • Contact us
  • Privacy Policy
  • Terms and Conditions

Copyright 2025 Manuals.Online. All Rights Reserved.