manuals.online logo
Brands
  1. Home
  2. •
  3. Brands
  4. •
  5. Jamara
  6. •
  7. Motorized Toy Car
  8. •
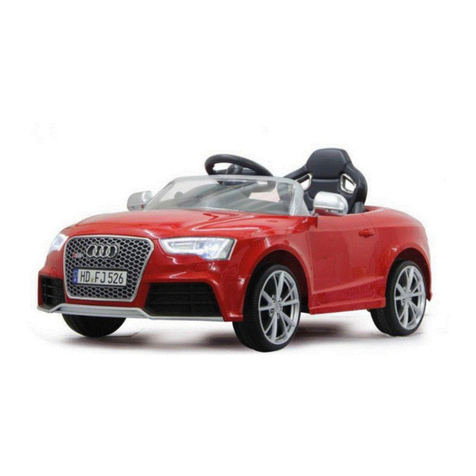
  9. Jamara Audi TT RS User manual

Jamara Audi TT RS User manual

This manual suits for next models

4

Other Jamara Motorized Toy Car manuals

Jamara Myron Monstertruck BL User manual

Jamara

Jamara Myron Monstertruck BL User manual

Jamara Mercedes-AMG GT R User manual

Jamara

Jamara Mercedes-AMG GT R User manual

Jamara Mercedes Benz SL65 AMG User manual

Jamara

Jamara Mercedes Benz SL65 AMG User manual

Jamara Myron Monstertruck BL User manual

Jamara

Jamara Myron Monstertruck BL User manual

Jamara J-ROCK User manual

Jamara

Jamara J-ROCK User manual

Jamara Jeep Wrangler Rubicon 2,4 GHz User manual

Jamara

Jamara Jeep Wrangler Rubicon 2,4 GHz User manual

Jamara Ice Tiger EP 2,4 GHz User manual

Jamara

Jamara Ice Tiger EP 2,4 GHz User manual

Jamara Mini Countryman 2,4GHz User manual

Jamara

Jamara Mini Countryman 2,4GHz User manual

Jamara Mercedes-Benz Antos 460657 User manual

Jamara

Jamara Mercedes-Benz Antos 460657 User manual

Jamara Bentley EXP12 User manual

Jamara

Jamara Bentley EXP12 User manual

Jamara Ferrari LaFerrari 2,4GHz User manual

Jamara

Jamara Ferrari LaFerrari 2,4GHz User manual

Jamara Lamborghini Urus User manual

Jamara

Jamara Lamborghini Urus User manual

Jamara Power Drag Ride-On Traktor 12V User manual

Jamara

Jamara Power Drag Ride-On Traktor 12V User manual

Jamara 460274 User manual

Jamara

Jamara 460274 User manual

Jamara Ferrari User manual

Jamara

Jamara Ferrari User manual

Jamara VW Beetle User manual

Jamara

Jamara VW Beetle User manual

Jamara Liebherr R 936 Destruction-Set 2,4 GHz User manual

Jamara

Jamara Liebherr R 936 Destruction-Set 2,4 GHz User manual

Jamara 405057 User manual

Jamara

Jamara 405057 User manual

Jamara VW T1 Bus User manual

Jamara

Jamara VW T1 Bus User manual

Jamara 460226 User manual

Jamara

Jamara 460226 User manual

Jamara Lamborghini Murcielago LP 640-4 Roadster User manual

Jamara

Jamara Lamborghini Murcielago LP 640-4 Roadster User manual

Jamara 405170 User manual

Jamara

Jamara 405170 User manual

Jamara BMW I8 2,4GHz UV Photochromic Series User manual

Jamara

Jamara BMW I8 2,4GHz UV Photochromic Series User manual

Jamara Ferrari FXX K Evo User manual

Jamara

Jamara Ferrari FXX K Evo User manual

Popular Motorized Toy Car manuals by other brands

Reely Dune Fighter 3S operating instructions

Reely

Reely Dune Fighter 3S operating instructions

REVELL 1970 Chevelle SS 454 manual

REVELL

REVELL 1970 Chevelle SS 454 manual

Team Losi Micro Rally Car Operation guide

Team Losi

Team Losi Micro Rally Car Operation guide

Eduard Humber Scout Car Mk.I exterior quick start guide

Eduard

Eduard Humber Scout Car Mk.I exterior quick start guide

REVELL 68 CHEVY CHEVELLE SS 396 manual

REVELL

REVELL 68 CHEVY CHEVELLE SS 396 manual

Schumacher Pro Cat instruction manual

Schumacher

Schumacher Pro Cat instruction manual

Tamiya TT-01 TYPE E instruction manual

Tamiya

Tamiya TT-01 TYPE E instruction manual

Eduard Krupp Protze 6x4 1/48 quick start guide

Eduard

Eduard Krupp Protze 6x4 1/48 quick start guide

New Bright 61072UEP quick start guide

New Bright

New Bright 61072UEP quick start guide

Team Durango DEX410v5 manual

Team Durango

Team Durango DEX410v5 manual

PLAYMOBIL 9536 manual

PLAYMOBIL

PLAYMOBIL 9536 manual

Atomic BZ3 instruction manual

Atomic

Atomic BZ3 instruction manual

Aiyaplay 370-290V00 user manual

Aiyaplay

Aiyaplay 370-290V00 user manual

ZEROTRIBE Zetricks ZT1144 instruction manual

ZEROTRIBE

ZEROTRIBE Zetricks ZT1144 instruction manual

INJUSA 412 Assembly instructions

INJUSA

INJUSA 412 Assembly instructions

Maverick MSC-30BR-WP instruction manual

Maverick

Maverick MSC-30BR-WP instruction manual

Land of B. Rollin' Riders quick start guide

Land of B.

Land of B. Rollin' Riders quick start guide

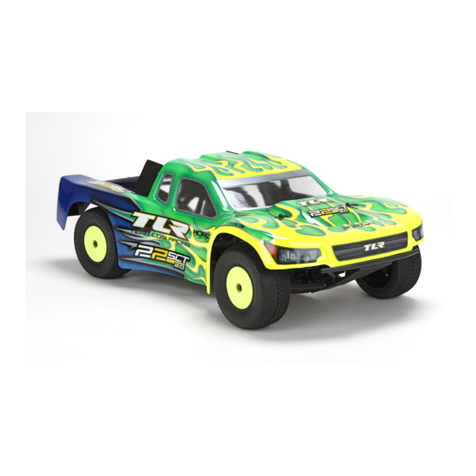
TLR 22SCT 2.0 user manual

TLR

TLR 22SCT 2.0 user manual

manuals.online logo
manuals.online logoBrands
  • About & Mission
  • Contact us
  • Privacy Policy
  • Terms and Conditions

Copyright 2025 Manuals.Online. All Rights Reserved.

??/15
Audi TT RS
No. 460277, rot / red
No. 460278, weiß / white
No. 460279, blau / blue
No. 460681, schwarz / black
DE - Gebrauchsanleitung
GB - Instruction
FR - Notice
IT - Istruzione
ES - Instrucción
NL - Gebruiksaanwijzing
CZ - Návod k použití
PL - Instrukcja użytkowania
DE - Allgemeine Hinweise
Jamara e. K. übernimmt keine Haftung für Schäden, die an dem Produkt selbst oder durch dieses
entstehen, sofern diese auf falsche Bedienung oder Handhabungsfehler zurückzuführen sind. Der
Kunde allein trägt die volle Verantwortung für die richtige Bedienung und Handhabung; dies umfasst
insbesondere die Montage, den Ladevorgang, die Verwendung bis hin zur Wahl des Einsatzberei-
ches. Bitte beachten Sie hierzu die Bedienungs- und Gebrauchsanleitung, diese enthält wichtige
Informationen und Warnhinweise.
GB - General information
Jamara e.K. is not liable for any damage caused to the product itself or through this, provided this
is due to improper operation or handling errors. The Customer alone bears the full responsibility for
the proper use and handling, including without limitation, the assembly, the charging process, the
use and choice of the operation area. Please refer to the operating and user instructions, it contains
important information and warnings.
FR - Remarques générales
La société Jamara e. K. n’est pas responsable de dommages, que ce soit au niveau du modèle ou
causé par celui-ci, résultant d’une utilisation non appropriée. Seul le client est responsable con-
cernant la mise en oeuvre et l’utilisation conforme du matériel; cela va de l’assemblage, en passant
par la charge des accus et allant jusqu’au domaine d’utilisation. Pour cela, veillez lire attentivement
la notice d’assemblage et d’utilisation, celle-ci contient d’importantes informations ainsi que les con-
signes de sécurités.
IT - Informazioni generali
Jamara e. K. non e´responsabile per danni, sostenute al prodotto stesso o attraverso questo, dovuti
ad una gestione non corretta del articolo. Solo il cliente si assume la piena responsabilità per la
manutenzione e l´utilizzo corretto dello stesso; questo include il montaggio, la ricarica, l´utilizzo,
no alla scelta della aerea di applicazione. Si prega di notare e rispettare le istruzioni d´uso, questi
contengono informazioni e avvertimenti molto importanti.
ES - Uitsluiting van de aansprakelijkheid
Jamara K. no se hace responsable de los daños causados al producto en sí o por medio de esto,
a menos que esto se debe al mal funcionamiento o errores de manejo. El cliente solo tiene la re-
sponsabilidad completa para el uso y manejo adecuado, incluyendo, sin limitaciones, el montaje,
el proceso de carga, el uso de hasta la elección de la zona de aplicación. Por favor, consulte las
instrucciones de uso y funcionamiento, contiene información y avisos importantes.
NL - Vyloučení odpovědnosti
De rma Jamara e. K. is niet aansprakelijk voor schade ontstaan aan het product zelf of door gebruik
ervan indien deze schade voortvloeit van onjuiste bediening of foutief gebruik van het product. De
klant zelf is uitsluitend aansprakelijk voor de correcte bediening en juist gebruik van het product:
het omvat met name de montage, het ladingproces, het gebruik en de keuze van het toepassings-
gebied. Wij vragen gaarne kennis te nemen van de bedienings- en gebruiksaanwijzing die cruciale
gegevens en waarschuwing omvat.
CZ - Vyloučení odpovědnosti
Firma Jamara e. K. nenese žádnou odpovědnost za škody, které vzniknou na výrobku nebo jeho
prostřednictvím, pokud tyto škody vzniknou nesprávnou obsluhou nebo nesprávným používáním
výrobku. Odpovědnost za správnou obsluhu a správné používání výrobku nese výhradně zákazník.
Toto se týká hlavně montáže, procesu nabíjení, používání až k výběru oblasti použití. Za tímto
účelem se prosím seznamte s návodem na použití, který obsahuje důležité informace a upozornění.
ile uyarıları içeren kullanım ve işletme kılavuzunu dikkatlice okuyunuz.
PL - Wykluczenie odpowiedzialności
Firma Jamara e. K. nie ponosi żadnej odpowiedzialności za szkody powstałe na samym produkcie
bądź za jego pośrednictwem jeżeli szkody te wynikają z nieprawidłowej obsługi bądź z niepoprawn-
ego posługiwania się produktem. Wyłącznie klient ponosi całkowitą odpowiedzialność za poprawną
obsługę i poprawne posługiwanie się produktem: obejmuje to w szczególności montaż, proces
ładowania, użytkowanie aż po wybór obszaru zastosowania. Prosimy zapoznać się w tym celu z
instrukcją obsługi i użytkowania, która zawiera ważne informacje oraz wskazówki ostrzegawcze.
DE - Geeignet für Kinder ab 3 Jahren.
Achtung: Für Kinder unter 36 Monaten nicht geeignet.
ERSTICKUNGSGEFAHR. Enthält verschluckbare Kleinteile.
Von Kleinkindern unbedingt fernhalten
•Entfernen Sie vor dem Spielbetrieb alle Schutzfolien von sämtlichen Teilen (z.B.
an Spiegeln, Logos.......)
• Dieses Gerät ist nicht dafür bestimmt, durch Personen (einschließlich Kinder) mit
eingeschränkten physischen, sensorischen oder geistigen Fähigkeiten oder
mangels Erfahrung und/oder mangels Wissen benutzt zu werden.
• Dieses Spielzeug ist aufgrund seiner Höchstgeschwindigkeit nicht für
Kinder unter 3 Jahren geeignet!
•Mindestalter: 3 (Alters und Entwicklungsbedingt kann ein Mindestalter von
4 Jahren angebracht sein), Max. Gewicht: < 30 kg
Vor der Montage
•Die Montage darf nur von einem Erwachsenen vorgenommen werden. Halten
Sie während der Montage Kinder fern.
•Für die Montage benötigen Sie folgende Werkzeuge (nicht enthalten):
Kreuzschlitzschraubendreher
GB - Suitable for children over 3 years.
Warning: Not suitable for children under 36 months. RISK OF SUFFOCATION.
Contains small parts which can be swallowed. Keep away necessarily from children
•Before playing, remove all protective lms from all parts (e.g. mirrors, logos.........)
•This product is not intended for use by individuals (including children) with reduced physical,
sensory or mental capabilities or lack of experience and / or knowledge.
•Due to its top speed this toy is not suitable for children under 3 years!
•Minimum age: 3 years (Depending on development, a minimum age of 4 years could be
appropriate), Maximum weight: <30 kg
Before assembly
•Adult required for assembly. Keep children away while assembling.
• Tools (not included) needed for assembly: screwdriver.
FR - Produit à utiliser par les enfants de plus de 3 ans.
Attention: Ne convient pas aux enfants de moins de 36 mois. DANGER D‘ETOUFFEMENT!
Contient des pièces petites qui peuvent être avalées.
Ne pas laisser à la portée de petits enfants.
• Retirez tous les lms de protection de toutes les parties (par ex. rétroviseurs, logos....)
• Ce dispositif n‘est pas destiné à être utilisé par des personnes (y compris les enfants) dont les
capacités physiques, sensorielles ou mentales ou manque d‘expérience et / ou les connais
sances pour être.
•Du fait de la vitesse élevée que ce modèle peut avoir il est inad apté pour des enfants de
moins de 3 ans!
•Age mini.: 3 ans (en fonction du développement ou de l‘âge on peut également considérer 4 ans),
•Poids max. <30 Kg
Avant le montage
•L’assemblage ne doit être effectué que par un adulte. Il est conseillé d’éloigner les enfants lors de
l’assemblage
• Pour l’assemblage vous avez besoin du matériel suivant (pas contenu dans le kit):
tournevis cruciforme.
IT - Adatto ai bambini dal 3° anno di vita.
Attenzione: Non adatto a bambini di età inferiore a 36 mesi. RISCHIO DI SOFFOCAMENTO!
Contiene piccoli pezzi che possono essere ingeriti.
Tenere sempre fuori dalla portata dei bambini.
•Prima di giocare, rimuovere tutte le pellicole protettive presenti su tutte le parti (ad es. specchi,
loghi, ecc...)
•Questo prodotto non è destinato ad essere utilizzato da persone (bambini compresi) con capacità
siche limitate, con limitazioni sensoriale o mentali oppure mancanza di esperienza e/o di
conoscenza.
•A causa della velocità, la vettura non è adatto ai bambini sotto i 3 anni.
•Età minima: 3 anni (dipende del sviluppo del bimbo), Peso massimo: <30 Kg
Prima del montaggio
•Il montaggio deve essere eseguito solo da un adulto. Tenere lontano i bambini dal montaggio.
• Per il montaggio sono necessari i seguenti attrezzi (no incluso): Cacciavite.
ES - Apto para niños mayores de 3 años.
Atención: No es recomendable para los niños menores de 36 meses. RIESGO DE ASFIXIA!
Contiene piezas pequeñas. Mantenga necesariamente lejosde los niños.
•Antes de jugar, quite todas las películas protectoras de todas las partes (por ejemplo, espejos,
logotipos, etc.).
•Es producto no es para personas (incluidos niños) con discapacidad física, mental y sensonriais.
O ninguna experiencia ni conocimiento.
•Este juguete no es adecuado para menores de 3 años, por su velocidad máxima!
•Edad mínima: 3 años (Edad y desarrollo puede ser una edad minima de 4 años)
• Peso máximo: <30 Kg
Antes del montaje
•El Montaje debe ser realizado por un adulto. Mantener los niños alejado durante el montaje.
• Para el montaje se necesitan las siguientes herramientas (no incluido): Destornillador.
NL - Geschikt voor kinderen vanaf 3 jaar.
Opgelet: Niet bestemd voor kinderen jinger dan 3jaar. GEVAAR VOOR VERTIKKING.
Bevat kleine elementen, die geslikt kunnen worden.
Buiten bereik houden van kleine kinderen.
• Voordat het wordt gespeld, moet de beschermfolie van alle onderdelen (bv. spiegels, logo‘s ....)
worden verwijderd.
• Dit toestel is niet bestemd voor gebruik door personen (inclusief kinderen) met beperkte fysische,
sensorische, cognitieve, onbekwame vaardigheden
• Vanwege de maximale snelheid die wordt ontwikkeld, is dit speelgoed niet voor kinderen onder
3 jaar geschikt!
• Minimumleeftijd: 3 (afhankelijk van leeftijd en ontwikkeling is de minimale leeftijd voor het spelen
met dit speelgoed 4 jaar), Max. gewicht: < 30 kg
Vóór de installatie
• De installatie mag enkel door een volwassene worden uitgevoerd. Tijdens de installatie mogen de
kinderen niet in de buurt van het speelgoed verblijven.
• Het bij de installatie vereiste gereedschap (niet meegeleverd) :
Kruiskopschroevendraaier en tang.
CZ - Určeno pro děti od 3 let.
VAROVÁNÍ: Nevhodné pro děti do 36 let. NEBEZPEČÍ UDUŠENÍ!
Obsahuje malé části. Bezpodmínečně udržujte z dosahu malých dětí.
• Před použitím odstraňte ochranné fólie ze všech částí (např. Na zrcátkách, logotypy ....)
• Tento přístroj není určen k tomu, aby jej užívali osoby s omezenými fyzickými, smyslový mi či
duševními schopnostmi (včetně dětí) a nedostatečnými zkušenostmi a/nebo znalostmi,
• Vzhledem k maximální rychlosti, kterou vyvíjí, není hračka vhodná pro děti do 3 let.
• Minimální věk: 3 (V závislosti na věku a vývoji může být vyžadován minimální věk 4 let)
• Maximální hmotnost: < 30 kg
Před montáží
• Montáž může provádět pouze dospělá osoba.
Během montáže není povoleno, aby se děti pohybovaly poblíž hračky.
• K montáži jsou vyžadovány následující nástroje (nejsou součástí dodávky)
Křížový šroubovák a kleště.
PL - Wolno używać osobom od 3 lat!
Uwaga! Nie nadaje się dla dzieci poniżej 36 miesięcy. MOŻNA SIĘ ZADŁAWIĆ!
Zawiera małe połykalne części. Absolutnie nie należy udostępniać małym dzieciom.
• Przed rozpoczęciem zabawy należy usunąć folie ochronne ze wszystkich części (np. Na
lusterkach, logotypy....)
• Niniejsze urządzenie nie jest przeznaczone do użytku przez osoby (wraz z dziećmi)
zograniczonymi umiejętnościami  zycznymi, sensorycznymi lub umysłowymi bądź nie
posiadające wystarczającego doświadczenia lub wystarczającej wiedzy do obsługi urządzenia
• Z powodu maksymalnej, rozwijanej prędkości ta zabawka nie nadaje się dla dzieci w wieku
poniżej 3 lat.
• Minimalny wiek: 3 (W zależności od wieku i stopnia rozwoju może być wymagany minimalny wiek
4 lat) •Maks. waga: < 30 kg
Przed montażem
• Montaż może wykonywać tylko osoba dorosła.
Podczas montażu dzieci nie mogą przebywać w pobliżu zabawki.
• Do montażu potrzebne są następujące narzędzia (nie znajdują się w zestawie)
Wkrętak krzyżakowy i szczypce.
max. kg
30
29/20
2
DE - Konformitätserklärung
Hiermit erklärt JAMARA e.K., dass die Produkte‚ “Audi TT RS, No. 460277,
No. 460278, No. 460279, 460681“ den Richtlinien 2014/30/EU, 2014/35/EU,
2011/65/EU und 2009/48/EG entsprechen.
Der vollständige Text der EU-Konformitätserklärung ist unter der folgenden
Internetadresse verfügbar: www.jamara-shop.com/Konformitaet
GB - Certicate of Conformity
Hereby JAMARA e.K. declares that the products “Audi TT RS, No. 460277,
No. 460278, No. 460279, 460681“ comply with Directives 2014/30/EU, 2014/35/EU, 2011/65/EU
and 2009/48/EC.
The full text of the EU Declaration of Conformity is available at the following Internet address:
www.jamara-shop.com/Conformity
FR - Déclaration de conformité
Par la présente, JAMARA e.K. déclare que les produits “Audi TT RS, No. 460277,
No. 460278, No. 460279, 460681“ sont conformes aux Directives 2014/30/UE, 2014/35/UE,
2011/65/UE et 2009/48/CE.
Le texte intégral de la déclaration de conformité CE est disponible via l‘adresse suivante
Adresse Internet disponible: www.jamara-shop.com/Conformity
IT - Dichiarazione di conformità
Con la presente JAMARA e.K. dichiara che i prodotti “Audi TT RS, No. 460277,
No. 460278, No. 460279, 460681“ sono conformi alle Direttive 2014/30/UE, 2014/35/UE,
2011/65/UE e 2009/48/CE.
Il testo integrale della dichiarazione di conformità UE è disponibile al seguente indirizzo Internet:
www.jamara-shop.com/Conformity
ES - Declaración de conformidad
Por la presente JAMARA e.K. declara que los productos “Audi TT RS, No. 460277,
No. 460278, No. 460279, 460681“ cumplen con las Directivas 2014/30/UE, 2014/35/UE,
2011/65/UE y 2009/48/CE.
El texto completo de la declaración de conformidad de la UE está disponible en la siguiente direcci-
ón de Internet: www.jamara-shop.com/Conformity
NL - Conformiteitsverklaring
De rma JAMARA e.K. verklaart hiermee dat de producten „Audi TT RS, No. 460277,
No. 460278, No. 460279, 460681“ aan de richtlijnen 2014/35/EU, 2014/30/EU, 2011/65/EU en
2009/48/EG voldoen.
De volledige tekst van de EU-conformiteitsverklaring is beschikbaar op het volgende internetadres:
www.jamara-shop.com/Conformity
CZ - Prohlášení o shodě
Společnost JAMARA e.K. tímto prohlašuje, že produkty „Audi TT RS, No. 460277,
No. 460278, No. 460279, 460681„ odpovídají směrnicím 2014/35/EU, 2014/30/EU, 2011/65/EU a
2009/48/ES.
Úplné znění EU prohlášení o shodě je k dispozici na následující internetové adrese:
www.jamara-shop.com/Conformity
PL - Deklaracja zgodności z dyrektywami Unii Europejskiej
Firma JAMARA e.K. oświadcza niniejszym, że model, “Audi TT RS, No. 460277,
No. 460278, No. 460279, 460681“ jest zgodny z zasadniczymi wymaganiami oraz pozostałymi istot-
nymi przepisami dyrektywy 2014/30/UE, 2014/35/UE, 2011/65/UE oraz 2009/48/WE
Dalsze informacje znajdą Państwo także pod:
www.jamara-shop.com/Conformity (Oświadczenie o zgodności z wymogami)
No Brake
DE - Lesen Sie die komplette Bedienungsanleitung und Sicherheitshinweise sorgfältig
durch bevor Sie das Modell in Betrieb nehmen.
GB -Read the complete instructions and security instructions carefully before using the
model.
FR -Veuillez lire attentivement et entièrement la notice et les consignes de sécurités
avant tout utilisation de ce produit!
IT -Vi preghiamo di leggere attentamente la istruzione completa e Istruzoni per la
sicurezza prima di usare il modello.
ES -Lea atentamente la instruccion completa y seguridad antes de poner el modelo en
funcionamiento
NL - Lees zorgvuldig de volledige handleiding en de veiligheidsinstructie voordat het
model wordt gestart.
CZ - Před spuštěním modelu si pečlivě přečtěte celý návod k obsluze a bezpečnostní
pokyny.
PL - Przed uruchomieniem modelu prosimy o staranne przeczytanie całej instrukcji
obsługi i informacji dotyczących bezpieczeństwa.
DE - Um Unfälle und Verletzungen zu vermeiden lassen Sie Ihr Kind NIE unbeaufsichtigt
das Fahrzeug betreiben. Lassen Sie Ihr Kind während es mit dem Modell fährt nicht
aus den Augen.
GB -To prevent accidents and injuries, DO NOT leave your Child unattended during
operation of the vehicle. Never let your Child out of your sight while the driving a
vehicle .
FR -Pour prévenir les accidents et les blessures ne laissez JAMAIS votre enfant conduire
sans surveillance. Ne laissez pas votre enfant conduire le model hors de votre vue.
IT -Per evitare incidenti e infortuni, non lasciare MAI il suo bambino incustodito usare
il veicolo. Non lasciate il suo bambino durante la guida del Modello fuori dalla sua
vista.
ES -Para evitar accidentes y lesiones NUNCA deje su niño desantendido a operar el
vehículo. No deje su niño mienteras conduce con el vehículo de su vista.
NL - Om ongevallen en letsels te voorkomen, mag het kind het voertuig NOOIT zonder
toezicht besturen. Verlies het kind nooit uit het oog wanneer het aan het spelen met
een model is.
CZ - Aby se předešlo nehodám a zraněním, Vaše dítě NIKDY nesmí provozovat vozidlo
bez dozoru. Pokud si dítě hraje s modelem, nikdy je neztrácejte z dohledu.
PL - Aby uniknąć wypadków i obrażeń, NIGDY nie pozwól dziecku obsługiwać pojazdu
bez nadzoru. Nie spuszczaj dziecka z oczu podczas jazdy modelem.
DE - Mit dem Modell darf NICHT auf öffentlichen Straßen oder Plätzen oder sonstigen
gefährlichen Stellen gefahren werden. Betreiben Sie das Modell nur an Orten wie
z. B. private Parkplätze, Privatgrundstücke oder an sonstigen ungefährlichen
Plätzen. Achten Sie darauf, das keine Menschen oder Tiere gefährdet sind.
GB - DO NOT use the vehicle on public roads or places or other dangerous locations.
ONLY operate the Ride On Car in places such as private parking, private land or
other safe locations. Make sure that no person or animal is endangered.
FR -Il n’est pas autorisé avec le véhicule de se déplacer sue les voies ou des places pu
bliques, des pentes ou autres endroits dangereux. Manoeuvrez le véhicule que dans
des endroits tels que des parkings ou terrains privés ou autre emplacement pas
dangereux. Assurez-vous qu’aucune personne ou animal soient menacés.
IT -È proibito guidare il modello su strade pubbliche, aere pubbliche, in discesa o altri
luoghi pericolosi. Usare il modello solo in posti come parcheggio privato, terreno
privato oppure luoghi non pericolosi. Fare attenzion e di non mettere in pericolo viti
umane oppure animali.
ES -No usar el modelo en las vías pública o sitios, declive o sitios peligrosos. Usar el
modelo solo en puestos como aparcamiento privados, terreno privado o otros sitios
no peligrosos. Asegúrese, de no poner en riesgo personas o animales.
NL - Het model mag NIET op wegen of op openbare plaatsen of op andere gevaarlijke
plaatsen worden gebruikt. Het is enkel toegestaan het model op plaatsen zoals
privéparkeerterreinen, privépercelen of andere beveiligde plekken te gebruiken.
Zorg ervoor dat mensen of dieren niet in gevaar komen.
CZ - Model nesmí být používán na silnicích nebo na veřejných místech nebo na jiných
nebezpečných místech. Model by měl být používán pouze v místech, jako jsou
soukromá parkoviště, soukromé pozemky nebo na jiných bezpečných místech.
Dávejte pozor, aby nedošlo k ohrožení jiných osob nebo zvířat.
PL - Nie wolno jeździć modelem po drogach publicznych, placach i innych
niebezpiecznych miejscach. Model należy obsługiwać tylko w miejscach takich jak
prywatne parkingi, posesje prywatne lub inne bezpieczne miejsca. Upewnij się, że
żaden człowiek ani zwierzę nie jest narażone na niebezpieczeństwo.
DE - Das Modell hält nach dem loslassen des Gaspedals, auf einer waagrechten Fläche
selbstständig an. Das Fahrzeug besitzt keine zusätzliche Bremse, oder
Feststellbremse. Betreiben Sie das Fahrzeug deshalb nicht an Steigungen oder
Gefällen und sichern Sie es beim Abstellen gegen selbstständiges Wegrollen.
GB - The model stops after releasing the accelerator, independently on a horizontal
surface. The vehicle has no brake or parking brake. Do not operate the vehicle uphill
or downhill, and secure it when parking.
FR -Après avoir lâché la pédale des gaz (radiocommande), le modèle s’arrête par
lui-même sur une surface horizontale. La voiture n’est pas équipée de freins ou frein
à main. De ce fait n’utilisez pas ce modèle aux endroits pentus, ascendant ou
descendant, et assurez-vous que une fois votre voiture parquée, celle-ci ne peut pas
roulée par elle-même.
IT -Il modello frena automaticamente appena il bimbo lascia il pedale, posto che si trovi
su una un´area piana. La vettura non è dotata né di freno manuale né freno di
sicurezza. Non usare il modello in salita oppure discesa, si rischia di perdere e/o
danneggiare sia il veicolo che altre cose/persone. Inoltre, assicurarsi che non possa
muoversi o scivolare mentre è fermo.
ES -El modelo frena automáticamente cuando el niño deja el pedal. El vehículo no tiene
frenos separados. No usar el modelo en subidas o declive, riesgo de perder o dañar
el modelo. Asegurarse de que el vehículo no se mueve.
NL - Nadat de voet van het pedaal wordt genomen, stopt het model automatisch op een
horizontaal oppervlak. Het model is voorzien van geen aanvullende remmen of
parkeerrem. Het voertuig mag dus niet op hellingen worden gebruikt en moet het
tijdens het parkeren tegen wegrollen worden beveiligd.
CZ - Po sundání nohy z plynového pedálu se model automaticky zastaví na vodorovném
povrchu. Model nemá žádnou přídavnou brzdu nebo parkovací brzdu. Proto nesmí
být vozidlo používáno na svazích nebo srázích a musí být zajištěno proti
samovolnému rozjetí při parkování.
PL - Pojazd nie ma hamulców ani hamulca postojowego. Dlatego też nie należy
obsługiwać pojazdu na stokach pod górę lub w dół i zabezpieczać go przed
samoczynnym stoczeniem się podczas parkowania.
3
DE - ACHTUNG.
●Für ein sicheres Fahren stellen Sie zunächst sicher, dass Kinder
zusätzlich die folgenden Regeln begreifen und befolgen:
- Immer fest aufsitzen, nicht während der Fahrt aufstehen.
- Niemals andere Kinder mitnehmen. (nur für 1 Person geeignet)
- Immer gut festhalten.
- Niemals ohne Schuhe fahren.
- Niemals bei Dunkelheit fahren.
● Hände, Haare, lose Kleidung und Gegenstände von drehenden Teile entfernt
halten.
●Das Modell nicht in Räumen oder Hallen mit hoher Luftfeuchtigkeit (z.B.
Garagen), im Regen oder auf nassen Flächen betreiben, es besteht die Gefahr
von Fehlfunktionen oder Schäden an Elektronik und Gehäuse.
●Das Modell ist nicht wasserdicht und nicht spritzwassergeschützt. Betreiben Sie
es nur auf asphaltierten Flächen (z.B. Pastersteinen). Das Modell ist nicht für
Wiesen oder sonstige verschmutzte Untergründe geeignet.
GB - DANGER.
●For safe driving, you should make sure that your Child understand and adheres
to the following rules:
- Always sit tight, do not get up during the ride.
- Never take additional Children for a ride. (The vehicle is only suitable for
1 person)
- Hold tight.
- Never drive without shoes.
- Never drive in the dark.
● Keep hands, hair, loose clothing and any other item away from any rotating parts.
●The Model should not be used in rooms or halls with high humidity (for instance
garages), in the rain or on wet surfaces. Risk of malfunction or damage to
electronics and housing.
● The model is not water- or splash-proof. Only operate on asphalted surfaces
(such as paving stones). The model is not suitable to be operated in grass or
loose soil.
FR - ATTENTION.
● Pour une utilisation sécurisée, vériez que l’enfant ai bien compris les règles
suivantes et les respectera:
- Toujours s’asseoir correctement, ne pas se lever pendant l’utilisation du
véhicule.
- Ne jamais emmener d’autres enfants. (que pour une personne)
- Toujours bien se tenir.
- Ne jamais rouler sans chaussures.
- Ne jamais rouler la nuit.
● Gardez à distance les mains, cheveux, parties ottantes des habiles et pièces
libres.
●Ne pas faire fonctionner le modèle dans des salles ou locaus à forte humidité
(ex. garages) , sous la pluie ou des surfaces mouillées sinon il y a le risque de
dysfonctionnement ou de dommage pour l’électronique et la carapace.
●Ce modèle n‘est pas étanche et non protégé contre les aspersions. Fonctionne
uniquement sur des surfaces asphaltées ( par ex. Pavés). Ce modèle ne
convient pas pour une circualti on sur les prairies ou d´autres surfaces, sols
poluées.
IT - ATTENZIONE.
●Per una guida sicura si dovrebbe fare in modo che il bambino comprende e
segue queste regole:
- Sempre stare seduto, non alzarsi mentre la guida.
- Non trasportare altri bambini. (Il veicolo é adatto solo per 1 persona)
- Sempre tenersi bene.
- Non guidare mai senza scarpe.
- Non guidare mai al buio.
●Tenete mani, capelli e parti svolazzanti lontane da parti rotabili.
●Non usare il modello in ambiente umido (ad esempio garage), sotto la pioggia
oppure aeree bagnate. Rischio di malfunzionamento e danni.
● Il modello non e impermeabile e non e protetto da spruzzi d’acqua. Operare solo
su superci pavimentate (ad esempio, pietre da pavimentazione). Il modello non
è adatto per i prati o altre superci sporche.
ES - Atención.
●Para una conducion segura debe asegurarse de que los niños entienden y
obedezcan a las siguintes reglas:
- Siempre estar asentado, no levantar mientre se conduce.
- Nunca llevarse otros niños. (El vehículo sólo es adecuado para 1 persona)
- Siempre tener bien.
- Nunca conduzca sin zapatos.
- Nunca conducir en la oscuridad
●Mantenga las manos, cabello, la ropa lejos de los artículos de la rotación.
●No usar el modelo en habitaciones o salas con alta humedad (por ejemplo
garajes), en la lluvia o en superci cies mojadas, hay riesgo de mal
funcionamento o se puede dañar la electrónica o en la caja.
● El modelo no es impermeable y no está protegido de salpicaduras. Usar
solamente en supercies pavimentadas (por ejemplo, piedras de pavimento). El
modelo es adecuado para prados o otras supercies impuros.
NL - LET OP!
● Om veilig te rijden, zorg ervoor dat kinderen de volgende beginselen begrijpen en
dat ze worden nageleefd:
- blijf altijd rustig zitten, sta niet op tijdens het rijden.
- neem nooit andere kinderen mee. (het model is geschikt voor slechts één
persoon)
- houd altijd vast.
- rijd nooit zonder schoenen.
- rijd nooit in het donker.
● Houd handen, haar, losse kleding en voorwerpen uit de buurt van draaiende
delen
● Gebruik het model niet in kamers of hallen met hoge luchtvochtigheid (bv.
garages), in regen of op natte oppervlakken omdat het gevaar bestaat dat het
model niet juist zal werken of dat de elektronica of de behuizing schade oploopt.
● Het model is niet waterdicht en is niet tegen spatwater beschermd. Gebruik het
model op asfaltoppervlakken (bv. op straatsteen). Het model is niet geschikt voor
gebruik op weilanden of andere vervuilde oppervlakken.
CZ - Pozor
● Pro zajištění bezpečné jízdy se nejprve ujistěte, že děti navíc pochopili
následující zásady a budou je dodržovat:
- sedáme vždy stabilně, během jízdy nevstáváme.
- nikdy s sebou nebereme jiné děti. (model je určen pouze pro 1 osobu)
- vždy se pevně držíme.
- nikdy nejezdíme bez bot.
- nikdy nejezdíme po setmění.
● Ruce, vlasy, volný oděv a předměty uchovávejte mimo dosah otáčejících se
částí.
● Model by neměl být používán v místnostech nebo halách s vysokou vlhkostí
(např. garáže), v dešti nebo na mokrých površích, protože hrozí nebezpečí, že
model nebude správně fungovat nebo že bude poškozena elektronika nebo
korpus auta.
● Model není vodotěsný a nemá ochranu proti stříkající vodě. Model by měl být
používán na tvrdých površích (např. na dlažebních kostkách). Model není vhodný
pro použití na loukách nebo na jiných znečištěných plochách.
PL - UWAGA
● W celu zapewnienia bezpiecznej jazdy należy najpierw upewnić się, że dzieci
rozumieją poniższe zasady i że je przestrzegają:
- Siadamy zawsze stabilnie, nie wstajemy podczas jazdy.
- Nigdy nie zabieramy ze sobą innych dzieci. (w pojeździe może znajdować się
tylko 1 osoba).
- Zawsze trzymaj się mocno.
- Nigdy nie jeździmy bez butów..
- Nigdy nie jeździmy po zmroku.
● Trzymać ręce, włosy, luźne ubrania i przedmioty z dala od obracających się
części.
● Nie używać modelu w pomieszczeniach lub halach o wysokiej wilgotności, w
deszczu lub na mokrych powierzchniach, ponieważ istnieje ryzyko awarii lub
uszkodzenia elektroniki i obudowy.
● Model nie jest wodoodporny i nie posiada ochrony pred wodą rozpryskową.
Używać tylko na nawierzchniach asfaltowych (np. na kostkach brukowych).
Model nie nadaje się do użytku na łąkach czy innych zabrudzonych
powierzchniach.
4
1
Chassis
Chassis
Chassie
Chassis
Chásis
Chassis
Podvozek
Podwozie
1x 9
Mutter
Nut
Ecrou
Dado
Tuerca
Moer
Matice
Nakrętka
4x 17
Sitz
Seat
Siège
Sedile
Asiento
Stekker
Zásuvka
Gniazdo
1x
2
Getriebe
Gearbox
Transmission
Ingranaggio
Engranaje
Versnelling
Převodovka
Przekładnia
2x 10
Abdeckung
Hubcap
Cache moyeu
Coprimozzo
Tapa del cubo
Beschermingskap
Ochrana
Osłona
4x 18
Zylinderschraube M5 x 16 mm
Machine screw M5 x 16 mm
Vis à machine M5 x 16 mm
Macchina a vite M5 x 16 mm
Máquina tornillo M5 x 16 mm
Machine schroef M5 x 16 mm
Šroub s válcovou hlavou M5 x 16 mm
Śruba z łbem cylindrycznym M5 x 16 mm
2x
3
Antriebsrad
Driving wheels
Roue d‘entraînement
Ruota motrice
Rueda motriz
Aandrijvingswiel
Hnací kolo
Koło napędowe
2x 11
Lenksäule
Steering column
Arbre de direction
Albero dello sterzo
Del eje de dirección
Stuurkolom
Sloup řízení
Kolumna kierownicy
1x 19
Kunststoffschutz
Plastic protection
Protecteur en plastique
Protezione in plastica
Protección de plástico
Kunststof beschermingskap
Plastová ochrana
Ochrona z tworzywa sztucznego
1x
4
Vorderrad
Front wheel
Roue avant
Ruote anteriori
Ruedas delanteras
Voorwiel
Přední kolo
Koło przednie
2x 12
Windschutzscheibe
Windshield
Pare-brise
Parabrezza
Parabrisas
Voorruit
Čelní sklo
Szyba przednia
1x 20
Heckspoiler
Rear Spoiler
Aileron arrière
Spoiler posteriore
Alerón trasero
Spoiler
Spoiler
Spojler
1x
5
Lagerbuchse
Bushing
Coussinet
Bronzina
Casquillo de cojinete
Lagerbus
Pouzdro ložiska
Tuleja łożyskowa
3x 13
Rückspiegel
Rearview mirror
Rétroviseur
Specchietto
Retrovisore
Achteruitkijkspiegel
Zpětné zrcátko
Lusterko wsteczne
2x 21
Splint
Split pin
Goupille
Spalato spina
Pasador
Pen
Závlačka
Zawleczka
1x
6
U-Scheibe Ø 10 mm
Washer Ø 10 mm
Rondelles Ø 10 mm
Rondella Ø 10 mm
Arandela Ø 10 mm
Sluitring U Ø 10 mm
Podložka U Ø 10 mm
Podkładka U
10x 14
Lenkrad
Steering wheel
Volant directionnel
Sterzo
Volante
Stuurwiel
Volant
Kierownica
1x 22
Ladegerät
Charger
Chargeur
Caricatore
Cargador
Oplader
Nabíječka
Ładowarka
1x
7
Motorhalterung
Motor hood
Support de moteur
Supporto motore
Soporte del motor
Motorhoude
Držák motoru
Uchwyt silnika
2x 15
Sicherungsstift M5 x 35
Safety pin M5 x 35
Téton de sécurité M5 x 35
Perno di sicurezza M5 x 35
Pasador de Seguridad M5 x 35
Grendelbout M5 x 35
Bezpečnostní šroub M5 x 35
Sworzeń zabezpieczający M5 x 35
1x 23
Schraubenschlüssel
Spanner
Clé plate
Chiave inglese
Llave inglesa
Platte sleutel
Plochý klíč
Klucz płaski
1x
8
Schraube Ø 4 X 12 mm
Screw Ø 4 X 12 mm
Vis Ø 4 X 12 mm
Vite Ø 4 X 12 mm
Tornillo Ø 4 X 12 mm
Schroef Ø 4 X 12 mm
Šroub Ø 4 x 12 mm
Śruba Ø 4 X 12 mm
8x 16
Mutter Ø 5 mm
Nut Ø 5 mm
Ecrou Ø 5 mm
Dado Ø 5 mm
Tuerca Ø 5 mm
Moer Ø 5mm
Matice Ø 5 mm
Nakrętka Ø 5 mm
1x
DE - Die Lenksäule bendet sich unter dem Fahrzeug.
GB - The steering column is located under the vehicle.
FR - La colonne de direction est située sous le véhicule.
IT - Il colonna dello sterzo si trova sotto il veicolo.
ES - La columna de dirección está situada debajo del vehículo.
NL - De stuurkolom bevindt zich onder het voertuig.
CZ - Sloupek řízení se nachází pod vozidlem.
PL - Kolumna kierownicy znajduje się pod pojazdem.
??/1542/17_1
Audi TT RS
No.460277, rot / red
No.460278, weiß / white
No.460278, blau / blue
DE - Gebrauchsanleitung
GB - Instruction
FR - Notice
IT - Istruzione
ES - Instrucción
DE-Allgemeine Hinweise
Jamarae.K. übernimmt keine Haftung für Schäden, die an dem Produkt selbst oder durch dieses
entstehen,soferndiese auf falsche Bedienung oder Handhabungsfehler zurückzuführen sind. Der
Kundealleinträgt die volle Verantwortung für die richtige Bedienung und Handhabung; dies umfasst
insbesonderedieMontage, den Ladevorgang, die Verwendung bis hin zur Wahl des Einsatzberei-
ches.Bitte beachten Sie hierzu die Bedienungs- und Gebrauchsanleitung, diese enthält wichtige
InformationenundWarnhinweise.
GB-General information
Jamarae.K.is not liable for any damage caused to the product itself or through this, provided this
isdueto improper operation or handling errors. The Customer alone bears the full responsibility for
theproper use and handling, including without limitation, the assembly,the charging process, the
useandchoice of the operation area. Please refer to the operating and user instructions, it contains
importantinformationand warnings.
FR-Remarques générales
LasociétéJamara e. K. n’est pas responsable de dommages, que ce soit au niveau du modèle ou
causépar celui-ci, résultant d’une utilisation non appropriée. Seul le client est responsable con-
cernantlamise en oeuvre et l’utilisation conforme du matériel; cela va de l’assemblage, en passant
parlacharge des accus et allant jusqu’au domaine d’utilisation. Pour cela, veillez lire attentivement
lanoticed’assemblage et d’utilisation, celle-ci contient d’importantes informations ainsi que les con-
signesdesécurités.
IT-Informazioni generali
Jamarae.K. non e´responsabile per danni, sostenute al prodotto stesso o attraverso questo, dovuti
aduna gestione non corretta del articolo. Solo il cliente si assume la piena responsabilità per la
manutenzionee l´utilizzo corretto dello stesso; questo include il montaggio, la ricarica, l´utilizzo,
no alla scelta della aerea di applicazione. Si prega di notare e rispettare le istruzioni d´uso, questi
contengonoinformazionie avvertimenti molto importanti.
ES-Información general
JamaraK.no se hace responsable de los daños causados al producto en sí o por medio de esto,
amenos que esto se debe al mal funcionamiento o errores de manejo. El cliente solo tiene la re-
sponsabilidadcompleta para el uso y manejo adecuado, incluyendo, sin limitaciones, el montaje,
elproceso de carga, el uso de hasta la elección de la zona de aplicación. Por favor,consulte las
instruccionesdeuso y funcionamiento, contiene información y avisos importantes.
DE-Konformitätserklärung
HiermiterklärtJAMARA e.K., dass sich das Modell‚ “Audi TT RS, No. 460277,
No.460287;No. 460279“ in Übereinstimmung mit den grundlegenden Anforderun-
genundden anderen relevanten Vorschriften der Richtlinien 2014/30/EU, 2011/65/
EU und 2009/48/EG bendet.
Weitere Informationen nden Sie auch unter: www.jamara-shop.com/Konformitaet
GB - Certicate of Conformity
JAMARAe.K.hereb “AudiTT RS, No. 460277, No. 460287; No. 460279“ follow the regulations and
requirementsaswell as any ther relivant directives of the EEC directive 2014/30/EU,
2011/65/EUand2009/48/EC.
Further information can also be found at: www.jamara-shop.com/Conformity
FR-Déclaration de conformité
Parlaprésente, la société Jamara e.K. déclare que ce modèle “Audi TT RS, No. 460277,
No.460287; No. 460279“ est conforme en tous points avec les textes de la directive de l’union
européennesousles directives 2014/30/EU, 2011/65/EU et 2009/48/CE.
Vos pourrez également trouver des informations sur notre site Internet:
www.jamara-shop.com/Conformity
IT-Dichiarazione di conformita’
Jamarae.K. dichiara qui di seguito che il modello “Audi TT RS, No. 460277, No. 460287,
No.460279“ è in linea con le norme ed altre rilevanti disposizioni comunitarie 2014/30/EU,
2011/65/EUe2009/48/CE.
Piu informazioni: www.jamara-shop.com/Conformity
ES-Declaración de conformidad
Pormediode la presente, la empresa Jamara e. K. declara que el modelo “Audi TT RS,
No.460277,No. 460287, No. 460279“de conformidad con los requisitos esenciales y otras disposi-
cionespertinentesde la Directiva 2014/30/EU, 2011/65/EU y 2009/48/CE se encuentra.
Encontrará más información en: www.jamara-shop.com/Conformity
DE-Geeignet für Kinder von 3 - 6 Jahren.
Achtung:Für Kinder unter 36 Monaten nicht geeignet.
ERSTICKUNGSGEFAHR.Enthältverschluckbare Kleinteile.
VonKleinkindernunbedingt fernhalten.
• Dieses Gerät ist nicht dafür bestimmt, durch Personen (einschließlich Kinder)
miteingeschränktenphysischen,sensorischen oder geistigen Fähigkeiten
odermangelsErfahrungund/oder mangels Wissen benutzt zu werden.
• Dieses Spielzeug ist aufgrund seiner Höchstgeschwindigkeit nicht für
Kinderunter3Jahren geeignet!
• Mindestalter: 3 (Alters und Entwicklungsbedingt kann ein Mindestalter von
4 Jahren angebracht sein)
• Höchstalter: 6
• Max. Gewicht: < 30 kg
GB - Suitable for children from 3 - 6 years.
Warning: Notsuitablefor children under 36 months. RISK OF SUFFOCATION.
Containssmall parts which can be swallowed. Keep away necessarily
fromchildren
• This product is not intended for use by individuals (including children) with reduced physical,
sensory or mental capabilities or lack of experience and / or knowledge.
• Due to its top speed this toy is not suitable for children under 3 years!
• Minimum age: 3 years (Depending on development, a minimum age of 4 years could be
appropriate) • Maximum age: 6 years • Maximum weight: <30 kg
FR-Adapté pour des enfants entre 3 - 6 ans.
Attention: Neconvientpas aux enfants de moins de 36 mois.
DANGERD’ÉTOUFFEMENT. Contient de petites pièces facilement avalables.
Garderloin nécessairement enfants.
• Ce dispositif n‘est pas destiné à être utilisé par des personnes (y compris les enfants) dont les
capacités physiques, sensorielles ou mentales ou manque d‘expérience et / ou les connais
sances pour être.
• Dufaitde la vitesse élevée que ce modèle peut avoir il est inad apté pour des enfants de
moins de 3 ans!
• Age mini.: 3 ans (en fonction du développement ou de l‘âge on peut également considérer
4 ans) • Age maxi.: 6 ans • Poids max. <30 Kg
IT-Consigliato per bambini dai 3 - 6 anni!
Attenzione: Nonadattatoai bambini inferiori ai 36 mesi.
PERICOLODI SAFFOGAMENTO. Contiene pezzi piccoli.
Tenerelontano assolutamente dei bambini.
• Questo prodotto non è destinato ad essere utilizzato da persone (bambini compresi) con
capacità siche limitate, con limitazioni sensoriale o mentali oppure mancanza di esperienza
e/o di conoscenza.
• A causa della velocità, la vettura non è adatto ai bambini sotto i 3 anni.
• Età minima: 3 anni (dipende del sviluppo del bimbo) • Età massima: 6 anni
• Peso massimo: <30 Kg
ES-Apto para niños de 3 - 6 años.
Atención: Noesrecomendable para los niños menores de 36 meses. ASFIXIA.
Contienepiezas pequeñas. Mantenga necesariamente lejos de los niños.
• Es producto no es para personas (incluidos niños) con discapacidad física, mental y
sensonriais. O ninguna experiencia ni conocimiento.
• Estejuguete no es adecuado para menores de 3 años, por su velocidad máxima!
• Edad mínima: 3 años (Edad y desarrollo puede ser una edad minima de 4 años)
• Límite de edad: 6 años • Peso máximo: <30 Kg
LED
DE- Bitte lesen Sie die komplette Bedienungsanleitung und Sicherheitshinweise sorg-
fältig durch bevor Sie das Modell in Betrieb nehmen.
Achtung! Warnhinweise/ Sicherheitshinweise unbedingt komplett lesen.
Diese dienen Ihrer Sicherheit und können Unfälle / Verletzungenvermeiden.
GB- Readthe complete instructions and security instructions carefully before using
the model.
Caution! Please fully and carefully read warnings/ safety instructions. These
are for our own security and can avoid accidents/injuries.
FR- Veuillez lire attentivement et entièrement la notice et les consignes de sécurités
avant tout utilisation de ce produit!
Attention! La mise en garde et les consignes de sécurités sont à lire
entièrement pour votre sécurité et éviter tout accidents et blessures.
IT- Vipreghiamodileggere attentamente la istruzione completa e Istruzioni per la
sicurezza prima di usare il modello.
Attenzione! Leggere completamente le avvertenze / istruzioni di sicurezza,
questi sono per la vostra sicurezza può prevenire incidenti / infortuni.
ES- Lea atentamente la instruccion completa y seguridad antes de poner el modelo
en funcionamiento
Atención! Leer completamente las notas de advertencia / instrucciones de
seguridad estos son para su seguridad y puede evitar accidentes / lesiones
24
DE - Teile
GB - Parts
FR - Pièces
IT - Parti
ES - Partes
NL - Onderdelen
CZ - Části
PL - Części
5
DE - Montage
GB - Assembly
FR - Montage
IT - Montaggio
ES - Montaje
NL - Montage
CZ - Montáž
PL - Montaż
1 2
DE
1. Montage der Hinterräder.
•Stellen Sie die Karosserie mit der Unterseite nach oben.
•Achten Sie darauf, dass das Vierkantteil der Hinterachse genau im Ausschnitt der Karosserie
platziert ist (Bild unten)
•Das Getriebe (1) wird auf die Hinterachse aufgesteckt das linke Getriebe ist mit einem “L”
gekennzeichnet, das rechte Getriebe mit einem “R” ).
• Stecken Sie jetzt ein Antriebsrad (2) auf das Getriebe.
• Schieben Sie eine Unterlegscheibe (Ø10) (3) auf die Hinterachse.
• Fixieren Sie das Ganze mit einer Sicherungsmutter (4). Ziehen Sie die Mutter mit dem
Schraubenschlüssel an.
•Stecken Sie zum Schluss eine Abdeckung (10) auf die Muttern auf.
• Wiederholen Sie dies auf der anderen Seite.
2. Montage der Vorderräder
• Für die Montage der Vorderräder schieben Sie eine Ø 10 Unterlegscheibe (1) auf die
Vorderachse.
• Schieben Sie die Lagerbuchse (2) auf die Achse,
• Ziehen Sie ein Rad (3) auf und schieben Sie eine Unterlegscheibe (Ø10) (4) auf die Achse.
• Fixieren Sie das Ganze mit einer Sicherungsmutter (5). Ziehen Sie die Mutter mit dem
Schraubenschlüssel an.
• Stecken Sie zum Schluss eine Abdeckung (6) auf. Wiederholen Sie die Schritte um das
andere Rad zu montieren.
GB
1. Attach the left Rear Wheel
•Turn the body over
• Make sure that the square part of the rear axle ts exactly in the cutout of the bodywork.
(picture below)
• Slide the gear box (1) onto the rear axle (Left Side). (The left-hand transmission is marked
„L“, the right-hand transmission is marked „R“).
• Slide the driving wheel (2) onto the rear axle. And keep the driving wheel match with the gear
box.
• Slide the Ø10 Washer (3) onto the rear axle.
• Tighten a Ø10 Locknut (4) to the end of the rear axle with a spanner.
• Fit the hubcaps (10) to the wheel cover. Repeat for the other side.
2. Attach the Front Wheels
• Slide a Ø10 washer (1) onto the front axle.
• Slide a bushing (2) onto the front axle.
• Slide the normal wheel (3) onto the front axle and slide a Ø10 washer (4) onto the front axle.
• Tight a Ø10 Locknut (5) to the end of the front axle with a spanner.
• “Snap” the hubcap (6) to the wheel cover. Repeat this step for the other side.
FR
1. Montage des roues arrière
• Placez la carrosserie avec le dessous vers le haut.
• Assurez-vous que la partie carrée de l‘essieu arrière soit positionnée exactement dans la
découpe de la carrosserie (image ci-dessous).
• La boîte de vitesses (1) est montée sur l‘essieu arrière (la boîte de vitesses gauche est
marquée d‘un „L“, la boîte de vitesses droite d‘un „R“).
• Montez maintenant sur la boîte de vitesses une roue motrice (2).
• Glissez une rondelle (Ø10) (3) sur l‘essieu arrière.
• Fixez le tout à l‘aide d‘un contre-écrou (4). Serrez l‘écrou à l‘aide d‘une clé.
• Enn, xez un recouvrement (10) aux écrous
• Répétez l‘opération de l‘autre côté.
2. Montage des roues avant
• Pour monter les roues avant, glisser une rondelle Ø 10 (1) sur l‘essieu avant.
• Glissez le roulement (2) sur l‘axe,
• Posez une roue (3) et glissez une rondelle (Ø10) (4) sur l‘essieu.
• Fixez le tout à l‘aide d‘un contre-écrou (5). Serrer l‘écrou à l‘aide d‘une clé.
• Enn, xez un couvercle (6). Répétez les étapes pour monter l‘autre roue.
IT
1. Montaggio delle ruote posteriori
•Posizionare la carrozzeria con la parte inferiore rivolta verso l‘alto.
•Assicurarsi che la parte quadrata dell’asse posteriore si inserisca perfettamente nella
carrozzeria (figura sotto).
•Inserire la trazione motore (1) sull’asse posteriore. (L’ingranaggio di sinistra é indicato da una
“L”, l’ingranaggio destro con una “R”).
•Fissare una ruota motrice (2) sulla trazione motore.
•Spingere una rondella (Ø10) (3) sull´asse posteriore.
•Fissare con un dado autobloccante (Ø10) (4) e serrare il dado con una chiave.
•Infine, applicare il coperchio (10) sui dadi.
• Ripetere l’operazione per l´altro lato.
2. Montaggio delle ruote anteriori
•Per il montaggio delle ruote anteriori spingete una rondella (1) sull´asse anteriore.
•Spingere il cuscinetto (2) sull’asse,
•Tirare una ruota (3) e far scorrere una rondella (Ø10) (4) sull‘asse.
•Fissare il tutto con un dado di bloccaggio (5). Serrare il dado con una chiave.
•Infine, applicare il coperchio (6). Ripetere l’operazione per montare l‘altra ruota.
ES
1. Montaje de la ruedas trasera
• Posicionar la carrocería con la parte inferior hacia arriba
• Asegúrese de que la parte cuadrada del eje trasero se encaja a la perfección el la carrocería
(Imagen debajo)
• Poner el accionamiento de motor (1) en el eje trasero. (el engranaje izquierdo está marcado
con una “L”, el engranaje derecho con una “R”).
• Fijar una rueda motriz (2) en el accionamiento de motor. Adaptarlo en la grabación de
engranajes.
• Deslizar una arandela (Ø10) (3) en el eje trasero.
• Fijar las tuercas (Ø10) (4) y apretar la tuerca con la llave.
• Inserir en ambos lados una cobertura (10) en las tuercas.
• Repetir la operación para el otro lado.
ES
2. Montaje de las ruedas delanteras
• Para el montaje de las ruedas delanteras, deslizar una arandela (1) en el eje delanter.
• Deslizar el cojinete (2) en el eje,
• Inserir la rueda (3) y desliczar una arandela (Ø10) (4) en el eje.
• Fijar con una tuerca de bloqueo (5). Apriete la tuerca con a llave.
• Enchufe una cobertura (6). Repetir la operación para montar la otra rueda.
NL
1. Achterwielen monteren.
•Plaats het chassis met de onderkant naar boven.
• Zorg ervoor dat het vierkante deel van de achteras precies in de uitsparing van de
carrosserie zit geplaatst (foto hieronder)
• De versnelling (1) is op de achteras gemonteerd (linker versnelling is met de letter „L“ en
rechter met de letter „R“ gemarkeerd).
• Installeer het aandrijvingswiel (2) op de versnelling.
• Schuif de sluitring (Ø10) (3) op de achteras.
•Draai alles met de borgmoer vast (5). Draai de moer met een sleutel vast.
•Bescherm tenslotte de moeren met de doppen (6).
•Herhaal deze stappen aan de andere zijde.
2. Voorwielen monteren
• Om de voorwielen te monteren: schuif op het vooras de sluitring Ø 10 (1).
•Schuif de lagerbuis (2) op de as.
• Zet het wiel (3) en schuif de sluitring (Ø10) (4) op de as.
•Draai alles met de borgmoer vast (5). Draai de moer met een sleutel vast.
•Bescherm tenslotte de moeren met een dop (6). Herhaal omschreven werkzaamheden om
een ander wiel te monteren.
CZ
1. Montáž zadních kol.
• Položte karoserii dolní stranou nahoru (obrázek níže).
• Převodovka (1) je namontována na zadní nápravě (levá převodovka je označena písmenem
„L“, a pravá převodovka s písmenem „R“)
• Namontujte hnací kolo (2) na převodovku
• Vložte podložku (Ø10) (3) na zadní nápravu..
• Zajistěte vše pojistnou maticí (4). Utáhněte matici klíčem.
• Nakonec zajistěte matice čepičkami (10).
• Opakujte tyto kroky na druhé straně.
2. Montáž předních kol
• K montáži předních kol na přední nápravu je nutné vložit podložku Ø 10 (1).
• Nasunout ložiskové pouzdro (2) na nápravu.
• Vložte kolo (3) a vložte podložku (Ø10) (4) na nápravu
• Zajistěte vše pojistnou maticí (5). Utáhněte matici klíčem.
• Nakonec zajistěte matice čepičkami (6). Opakujte popsané kroky při montáži druhého kola
PL
1. Montaż kół przednich
• Ustawić karosię dolną stroną w górę.
• Upewnij się, że kwadratowa część tylnej osi jest umieszczona dokładnie w wycięciu
nadwozia (zdjęcie poniżej).
• Przekładnia (1) jest zamontowana na osi tylnej (przekładnia lewa jest oznaczona literą „L“, a
przekładnia prawa literą „R“ ).
• Zamontować koło napędowe (2) na przekładni..
• Wsunąć podkładkę (Ø10) (3) na tylną oś.
• Przykręcić całość nakrętką zabezpieczającą (4). Dokręcić nakrętkę kluczem.
• Na koniec zabezpieczyć nakrętki kapturkami (10).
• Powtórzyć opisane czynności z drugiej strony.
2. Montaż kół tylnych.
• W celu zamontowania przednich kół na poś przednią należy wsunąć podkładkę Ø 10 (1).
• Nasunąć tuleję łożyskową (2) na oś.
• Założyć koło (3) i wsunąć podkładkę (Ø10) (4) na oś.
• Przykręcić całość nakrętką zabezpieczającą (5). Dokręcić nakrętkę kluczem.
• Na koniec zabezpieczyć nakrętki kapturkiem (6). Powtórzyć opisane czynności aby
zamontować drugie koło.
6
4
5
DE
3. Montage der Lenksäule
1. Schieben Sie eine Unterlegscheibe auf die Achse.
2. Schieben Sie das gerade Stück der Lenkachse nach oben durch das Loch der Lenkplatte,
der Karosserie und der Armaturen
3. Schieben Sie das gebogene Ende der Lenkachse durch das Loch in der vorderen
Achsplatte
4. Jetzt eine Unterlegscheibe (Ø10) auf die Achse schieben
5. Setzen Sie einen Splint in das Loch der Lenkachse ein und verbiegen die Enden des Splints
mit Hilfe einer Zange
4. Einlegen der Batterie in das Lenkrad
• Öffnen Sie den Batteriefachdeckel an der Vorderseite des Lenkrades.
• Legen 2 AA Batterien ein. Achten Sie auf die richtige Polung. Schließen Sie das
Batteriefach.
5. Montage Lenkrad
• Setzen Sie das Lenkrad auf die dafür vorher gesehene Stelle (5). Schrauben Sie Mutter (7)
und Schraube (6) fest
GB
3. Attach the Steering Column
1. Fit a washer to the steering column
2. Insert the straight end of steering column up through the hole in the hole in the steering gear
box from the bottom side, and out through the hole in the dash
3. Insert the bent end of steering column through the hole in the front axle linkage.
4. Fit a Ø10 washer to the steering column.
5. Insert a split pin into the hole in the steering column, bend the ends of split pin back using a
long nose pliers.
4. Placing the battery in the steering wheel
• Open the battery cover on the front of the steering wheel.
• Put 2 AA batteries making sure that it is corectly put in. Then close the cover.
5. Steering wheel assembly
• Please install the steering wheel to the specic place
• Use Screw (7) and Hexnut (6) to screw it tightly after you make sure the steering wheel is in
the right place (5).
FR
3. Montage de la console de direction
1. Placez maintenant une rondelle sur l’axe.
2. Engagez la partie droite de l’axe directionnel vers le haut dans le trou a de et de la
carrosserie.
3. Engagez la partie courbée de l’axe directionnel dans le trou de la platine d’axe avant.
4. Placez maintenant une rondelle (Ø10) sur l’axe.
5. Puis mettez une goupille dans le trou de l’axe directionnel. A l’aide d’une pince tordez le bout
de la goupille.
4. Place de la batterie dans le volant
• Enlevez le couvercle du compartiment de pile au dos de volant
• Placez 2 piles AA dans celui-ci, en vériant toujours la polarité. Refermez le couvercle du
compartiment.
5. Montage du volant
• Placez le volant sur ce site imprévu (5). Vissez l‘écrou (7) et la vis (6) .
IT
3. Montaggio della colonna di guida
1. Spingere una rondella sull asse.
2. Spingere il pezzo diritto del asse volante sul alto nel buco della piastra di sterzo e
della carrozzeria.
3. Spingere la parte nale piegato della asse volante nell buco della piastra asse anteriore.
4. Spingere una rondella (Ø10) sull asse.
5. Un coppiglia nel buco dell’ asse volante. Con l´aiuto di una pinza puo piegare la coppiaglia.
4. Montaggio delle pile nel volante
• Aprite il coperchio del vano batterie sul fronte del volante.
• Introducete 2 pile AA facendo attenzione alla polarità. Chiudere il vano batterie.
5. Montaggio volante
• Posizionare il volante nella posizione prevista (5). Fissare il dado (7) e la vite (6).
ES
3. Montaje de la columna de dirección
1. Ahora deslice una arandela en el eje.
2. Deslice la pieza recta del eje de dirección hacia arriba a través del agujero en la placa de
dirección y en la carrocería.
3. Deslice la parte nal acodado del eje de dirección a través del agujero en la placa de eje
delantero.
4. Ahora deslice una arandela (Ø10) en el eje.
5. Deslice pasador en agujero en el eje de dirección. Con el ayudo de una pinza deformar el
nal del pasador.
4. Colocar las pilas en el volante
• Abra la tapa de las baterías ubicada en la parte delantera del volante
• Introduzca 2 pilas AA, prestando atención a la polaridad. Vuelva a ponerla tapa del
compartimiento de las pilas.
5. Montaje del volante
• Coloque el volante en el sitio previsto (5). Atornille la tuerca (7) y el tornillo (6).
NL
3. Stuurkolom monteren
• Schuif de sluitring op de as.
• Schuif het rechte gedeelte van de stuurwielas naar boven door de opening in het
stuurpaneel, de carrosserie en de instrumenten.
• Schuif het gebogen uiteinde van de stuurwielas door de opening in de voorplaat.
• Zet nu op de as de sluitring Ø10.
• Plaats nu de pen in de opening van de stuurwielas en buig de uiteinden met de tang.
4. De batterij in het stuurwiel plaatsen
• Open het deksel van het batterijvak aan de voorzijde van het stuurwiel.
• Plaats twee batterijen type 2 AA. Zorg ervoor dat de polen niet worden vergist. Sluit het
batterijvak.
5. Stuurwiel monteren
• Plaats het stuurwiel op aangegeven plaats (5). Draai de schroef (6) en de moer (7) vast.
CZ
3. Montáž sloupku řízení
1. Nasuňte podložku na nápravu.
2. Nasuňte rovnou část osy volantu nahoru otvorem v ovládacím panelu, karoserii a nástrojích.
3. Vysuňte ohnutý konec osy volantu do otvoru v přední desce.
4. Nyní umístěte na osu podložku Ø10.
5. Vložte závlačku do otvoru v řídicí ose a ohněte její konce pomocí kleští.
4. Umístění baterie do volantu
• Otevřete kryt prostoru pro baterie umístěný na přední straně volantu.
• Vložte dvě baterie typu 2 AA. Ujistěte se, že nejsou obráceny póly. Zavřete prostor pro
aterie.
5. Montáž volantu
• Umístěte volant na jeho místo (5). Utáhněte matici (7) a šroub (8).
PL
3. Montaż kolumny kierownicy
1. Nasunąć podkładkę na oś.
2. Wsunąć prostą część osi kierownicy do góry przez otwór w płycie sterującej, karoserii i
instrumentach.
3. Wsunąć wygięty koniec osi kierownicy przez otwór w przedniej płycie.
4. Teraz na oś nałożyć podkładkę Ø10.
5. Włożyć zawleczkę do otworu w osi kierującej i zagiąć szczypcami jej końcówki.
4. Umieszcanie baterii w kierownicy
• Otworzyć pokrywę komory baterii znajdującą się po przedniej stronie kierownicy.
• Włożyć dwie baterie typu 2 AA. Upewnić się, że nie zostały zamienione bieguny.
Zamknąć komorę baterii.
5. Montaż kierownicy
• Umieścić kierownicę w wyznaczonym miejscu. Dokręcić nakrętkę (7) i śrubę (6).
7
DE - Batteriehinweis:
Nicht wiederauadbare Batterien dürfen nicht aufgeladen werden!
Nicht öffnen!
Nicht ins Feuer werfen!
Alte und neue Batterien nicht mischen!
Keine alkalischen, Standard-(Kohlenstoff-Zink) oder wiederauadbare Batterien mischen!
Auadbare Batterien sind aus dem Spielzeug herauszunehmen,
bevor sie geladen werden!
Auadbare Batterien dürfen nur unter Aufsicht Erwachsener geladen werden!
Die Anschlussklemmen dürfen nicht kurzgeschlossen werden!
GB - Battery warning:
Non-rechargeable batteries are not to be recharged!
Do not open!
Do not dispose of in re!
Do not mix old and new batteries!
Do not mix alkaline batteries, standard (carbon-zinc) or rechargeable batteries!
Rechargeable batteries are to be removed from the toy before being charged!
Rechargeable batteries are only to be charged under adult supervision!
The supply terminals are not to be short-circuited!
FR - Informations concernant l‘accumulateur:
Les batteries non rechargeables ne doivent pas être rechargées!
Ne pas ouvrir!
Ne pas jeter au feu!
Ne pas utiliser des piles neuves et usées à la fois!
Ne pas utiliser en même temps des piles alcalines, standard (zinc-charbon) et des accumulateurs!
Les piles rechargeables doivent être retirées du jouet!
Les batteries rechargeables ne peuvent être rechargées que sous la surveillance d‘un adulte!
Les connexions ne doivent pas être court-circuitées!
IT - Informazioni relative alle pile:
Le batterie non ricaricabili non devono essere caricate!
Non aprire!
Non gettare nel fuoco!
Non usare contemporaneamente pile nuove e pile usate!
Non usare contemporaneamente pile alcaline, standard (zinco-carbone) e ricaricabili!
Le batterie ricaricabili devono essere rimosse dal giocattolo!
Le batterie ricaricabili possono essere ricaricate solo sotto la supervisione di un adulto!
I morsetti di collegamento don devono essere cortocircuitati!
ES - Advertencia sobre las baterías:
Las baterías no recargables no se pueden cargar!
No abrir!
No arrojar al fuego!
No mezcle baterías nueva y viejas!
No mezcle baterías alcalinas, estándar (carbono-zinc) o baterías recargables!
Las baterías recargables deben retirarse del juguete!
Las baterías recargables sólo pueden cargarse bajo la supervisión de un adulto!
Los conectores de conexión no deben estar en cortocircuito!
NL - Informatie over de batterij:
Laad geen wegwerpbatterij op!
Niet openen!
Gooi niet op het vuur!
Gebruik geen oude en nieuwe batterijen tegelijk!
Gebruik geen alkaline, standaard (zink-koolstof) batterijen tegelijk!
Verwijder de batterijen uit het speelgoed voordat het wordt opgeladen!
Laad de batterijen op enkel onder toezicht van een volwassene!
Voorkom kortsluiting van de aansluitingsklemmen!
CZ - Informace o akumulátoru:
Nenabíjejte jednorázové baterie!
Neotvírejte!
Nevhazujte do ohně!
Nepoužívejte staré a nové baterie současně!
Nepoužívejte alkalické, standardní (zinkovo-uhlíkové) baterie a akumulátory současně!
Před nabíjením vyjměte nabíjecí baterie z hračky!
Nabíjecí baterie lze nabíjet pouze pod dohledem dospělé osoby!
Nezkratujte připojovací svorky!
PL - Informacja dotycząca akumulatora:
Nie ładować baterii jednorazowego użytku!
Nie otwierać!
Nie wrzucać do ognia!
Nie mieszać starych i nowych baterii.
Nie mieszać baterii alkalicznych, zwykłych (węglowo-cynkowych) lub akumulatorowych/
ładowalnych – używać baterii jednego rodzaju.
Przed rozpoczęciem ładowania należy wyjąć akumulatorki z zabawki!
Akumulatorki można ładować tylko pod nadzorem osoby dorosłej!
Nie wolno zwierać zacisków przyłączeniowych!
6
DE
6. Akku anschließen
•Verbinden Sie den Akku mit den Stecverbindungen wie abgebildet.
•Die Stecker müssen sich ohne großen Kraftaufwand zusammen stecken lassen. Verbinden
Sie nur ineinanderpassende Steckverbindungen (A zu A, B zu B, usw.) und achten Sie
darauf nichts zu verpolen.
•Der Motor ist mit einer aktiven Sicherung versehen. Bei einer Überlastung stellt die
Sicherung den Strom ab. In dem Fall schalten Sie das Fahrzeug ab und warten für ca.
5-20 Sekunden die Sicherung stellt den Strom wieder an.
Achtung: Die Sicherung darf nicht überbrückt werden. Feuergefahr!
7. Montage der Motorhalterung
•Positionieren Sie die Motorhalterungen am Getriebe und schrauben sie mit je vier Ø4 x 12
Schrauben fest.
GB
6. Connect the Power Supply
•Plug the block connector on the end of battery leads in to the corresponding block connector
on the car wiring.
• The plugs must be put together without much effort. Only connect mating connectors (A to
A, B to B, etc.), being careful not to reverse polarity.
•The engine is equipped with an active protection. In case of a voltage overload the engine
is switched off. In this case switch off the vehicle, wait for about 5-20 seconds and the fuse
should switch the electricity supply on.
Attention! The fuse must not be bridged. Fire hazard!
7. Attach the Motor Hood
•Fit the Motor hood on the motor. Tighten four Ø4 x 12 screws to secure it. Reapeat the
abouve for the other motor hood.
FR
6. Branchement de l’accu
•Branchez l’accu sur la prise comme indiqué sur l’illustration
•Les connecteurs doivent se mettre en place sans avoir à forcer. Veillez à ne pas inverser la
polarité en branchant les différentes prises (A à A, B à B, etc.).
•Le moteur est équipé d’une sécurité active. Lors d’une surcharge celle-ci coupe le courant.
Dans ce cas éteignez votre véhicule et attendez environ 5-20 secondes an que la sécurité
permette à nouveau le passage de courant.
Attention: La sécurité ne doit pas être écrasée. Danger d’incendie!
7. Montage des Support de moteur
•Positionner les supports du moteur sur sur le boitier et visser chacun de 4 vis Ø4 x 12mm.
IT
6. Collegare la batteria
•Collegare la batteria con i connettori come indicato.
•Le spine si devono facilmente senza sforzo collegare tra loro. Collegare solo spine adatte
tra loro (da A ad A, da B a B, ecc.) e fare attenzione di non invertire la polarità.
•Il motore è predisposto con una sicurezza. In caso di sovratensione, la protezione spegne
la vettura. In questo caso, spegnere la vettura e aspettare ca. 5-20 secondi.
Attenzione! È proibito di cortocircuitare la batteria. Pericolo di fuoco.
7. Montaggio dei Supporto motore
•Posizionare i supporti motore sul ingranaggio e avvitare con quattro viti Ø4 x 12.
ES
6. Montaje de la batería
•Conectar la batería con los conectores como se muestra.
•Los enchufes se deben conectar sin mucho esfuerzo. Conecte sólo conectores adaptado
(A a A, B a B, etc.) y asegúrese de que no se inverte la polaridad.
•El motor cuenta con un fusible activo. En el caso de sobre tensión, este fusible corta la
corriente. En este caso, apague el vehículo y espere unos 5-20 segundos, el mismo fusible
vuelve a conectar la corriente.
Atención! No se debe puentear el fusible. Peligro de incendio
7. Montaje del soporte motor
•Posiciónar los soportes del motor en el engranaje y atornillarlo con cuatro tornillos Ø4 x 12.
NL
6. Accu aansluiten
•Sluit de batterij met de aansluitstekkers aan zoals op de afbeelding.
•De stekkers moeten bij elkaar passen zonder te veel kracht te gebruiken. Sluit alleen stek
kers aan die bij elkaar passen (A tot A, B tot B, etc.) en wees voorzichtig om de polariteit niet
om te keren.
•De motor is voorzien van een actieve beveiliging. Bij overbelasting schakelt de zekering de
stroom uit. Schakel in dit geval het voertuig uit en wacht ca. 5-20 seconden tot de zekering
de stroom weer inschakelt.
Let op: De zekering mag niet worden overbrugd. Brandgevaar!
7. Motorhouder monteren
•Plaats de motorhouder op de versnelling en draai met vier schroeven Ø4 x 12 vast.
CZ
6. Připojte akumulátor
• Připojte akumulátor pomocí zástrčných konektorů tak,jak je znázorněno na obrázku.
• Zástrčky musí do sebe pasovat bez použití přílišné síly. Připojujte pouze konektory, které do
sebe pasují (A do A, B do B, atd.) a dávejte pozor, abyste nezměnili polaritu.
• Motor je vybaven aktivní ochranou. V případě přetížení pojistka vypne proud. V takovém
případě vypněte vozidlo a počkejte cca. 5-20 vteřin, dokud pojistka znovu nezapne
napájení.
Upozornění: Pojistka nemůže být přemostěna. Hrozí nebezpečí požáru!
7. Montáž držáku motoru
• Umístěte držáky motoru na převodovku a přišroubujte jej čtyřmi šrouby Ø4 x 12.
PL
6. Podłączanie akumulatora
• Podłączyć akumulator za pomocą złączy wtykowych w sposób pokazany na ilustracji.
• Wtyczki muszą pasować do siebie bez używania zbyt dużej siły. Podłączać tylko złącza
pasujące do siebie i uważać, aby nie zamienić biegunów.
• Silnik jest wyposażony w aktywne zabezpieczenie. W przypadku przeciążenia bezpiecznik
wyłącza prąd. W takim przypadku należy wyłączyć pojazd i odczekać ok. 5-20 sekund do
momentu, aż bezpiecznik ponownie włączy zasilanie.
Uwaga: Bezpiecznik nie może zostać zmostkowany. Niebezpieczeństwo pożaru!
7. Montaż uchwytu silnika
• Umieścić uchwyty silnika na przekładni i przykręcić je czterema śrubami Ø4 x 12.
7
8
8
10
9
11
DE
8. Montage Sitz
• Positionieren Sie den Sitz auf der Karosserie, indem Sie die Zapfen am Sitz in die
Karosserie einführen (1).
• Schrauben Sie ihn mit zwei M5 x 16 Schrauben (2) fest.
9. Montage der Windschutzscheibe
•Bringen Sie die Windschutzscheibe (3) in die vorgesehene Position. Drücken Sie die Zapfen
der Windschutzscheibe in die Nuten bis sie einrastet.
10. Montage der Rückspiegel
•Drücken Sie die Rückspiegel (1) in die vorgesehene Position bis sie einrasten.
11. Montage des Kunststoffschutz und Heckspoiler
• Drücken Sie die Zapfen des Kunststoffschutz (2) und des Heckspoilers (3) in die Nuten
hinten an der Karosserie bis sie einrasten.
GB
8. Attach Seat
• Position the seat over the vehicle body, by inserting the pins on the seat into the body (1).
• Tighten two M5 x 16 machine screws (2) with a screwdriver.
9. Attach the Windshield
•Insert the tabs on the windshield (3) in the slots on the vehicle body, push until you hear it
click into place.
10. Attach the view mirrors
•Install wing mirror (1) to the designated position, and fasten it.
11. Attach the plastic protection and rear Spoiler
• Press the pins of the Plastic protection (2) and the rear Spoiler (3) into the grooves at the
rear of the body.
FR
8. Montage du siège
• Positionner le siège sur la carrosserie en insérant les goupilles sur le calibre dans la
carrosserie de la voiture (1)
• Visser le siège avec 2 vis M5 x 16 (2)
9. Montage du pare-brise
•Mettez en place le pare-brise (3) dans la position indiquée. Appuyez les pins dans les
rainures de la pare-brise ce que ces derniers n’enclenchent.
10. Montage du rétroviseur
•Mettez en place le rétroviseur (1) dans la position indiquée et ils fixent.
11. Assemblage de Protecteur en plastique et Heckspoiler
• Appuyer les tenons de la Protecteur en plastique (2) et aieron arrière (3) dans les rainures
à l’arrière de la carrosserie.
IT
8. Montaggio del sedile
• Posizionare il sedile sulla carrozzeria, inserendo i perni al sedile nella carrozzeria (1).
• Avvitare con due vite M5 x 16 (2).
9. Montaggio Parabrezza
•Inserire il parabrezza (3) nella posizione predisposto. Premere il perno del parabrezza nelle
scanalature e farlo scorrerein avanti e in basso fino a farlo incas-trare.
10. Montaggio del specchietto retrovisore
•Inserire il specchietto retrovisore (1) nella posizione prevista e fissano .
11. Montaggio della protezione in plastica e dello spoiler posteriore
•Premere i perni della protezione in plastica (2) e del spoiler posteriore (3) nelle scanalature
nella parte posteriore della carrozzeria nché si incastrano.
ES
8. Montaje del asiento
• Posicionar el asiento en la carrocería, insertando los pernos en el asiento en la carrocería
(1).
• Fijar con dos tornillos M5 x 16 (2).
9. Montaje del parabrisas
•Coloque el parabrisas (3) en su posición prevista. Presione el pasador del parabrisas en las
ranuras y deslice hacia adelante y hacia abajo hasta que se encaja.
10. Montaje del espejo retrovisor
•Coloque el espejo retrovisor (1) en la posición deseada y lo arreglan.
11. Montaje de la protección de plástico y del alerón trasero
• Empuje los pernos de la protección de plástico (2) y del alerón trasero (3) en las ranuras de
la parte posterior de la carrocería hasta que encajen.
NL
8. Zetel monteren
• Plaats de zetel op de carrosserie. Plaats hiervoor een spie in de zetel op de juiste plaats in
de carrosserie (1).
• Draai met twee schroeven M5 x 16 vast.
9. Voorruit monteren
• Plaats de voorruit in de gewenste positie. Duw de pinnen tot ze in de groeven sluiten.
10. Achteruitkijkspiegel monteren
• Plaats de achteruitkijkspiegel in de gewenste positie. Duw de pinnen tot ze in de groeven
sluiten.
11. Kunststof beschermingskap en achterspoiler
• Druk de pinnen van de kunststof beschermingskap en achterspoiler in de groeven van de
carrosserie tot ze sluiten.
CZ
8. Montáž sedadla
• Umístěte sedadlo na karoserii. Za tím účelem, vložte čep sedadla do správného místa v
karosérii (1).
• Utáhněte dvěma šrouby M5 x 16 (2).
9. Montáž čelního skla
• Umístěte čelní sklo (3) do požadované polohy. Zatlačte kolíky, dokud nezaklapnou v
drážkách.
10. Montáž zpětného zrcátka
• Umístěte zpětného zrcátka do požadované polohy. Zatlačte kolíky, dokud nezaklapnou v
drážkách.
11. Montáž plastového krytu a zadního spoileru
• Zatlačte plastový kryt (2) a zátky zadního spoileru (3) do drážek v karosérii, dokud neza
klapnou.
PL
8. Montaż siedzenia
• Umieścić siedzenie na karoserii. W tym celu należy wprowadzić czop znajdujący się w
siedzeniu w odpowiednim miejsci w karoserii (1).
• Dokręcić dwoma śrubami M5 x 16 (2).
9. Montaż szyby przedniej Montaż szyby przedniej
• Ustawić szybę przednią (3) na wymaganej pozycji. Wcikać czopy do momentu, aż zablokują
się w rowkach.
10. Montaż lusterka wstecznego
• Ustawić lusterko wsteczn (1) na wymaganej pozycji. Wcikać czopy do momentu, aż
zablokują się w rowkach.
11. Montaż osłony z tworzywa sztucznego i tylnego spojlera
• Wciskać czopy osłony z tworzywa sztucznego (2) i tylnego spojlera (3) do rowków w
karoserii do momentu, aż się zablokują.
9
DE - Funktionen
1 ON/OFF-Schalter
Mit dem ON/OFF-Schalter starten Sie das Fahrzeug.
2 Hupe
3 Gaspedal
4 Schaltknopf:
Vorwärts: Stellen Sie den „Forward-Backward“ Knopf in die „Forward“ Position. Drücken Sie
das Gaspedal damit das Modell vorwärts fährt.
Stopp: Das Modell stoppt sobald der Fuß vom Gaspedal gehoben wird. Stellen Sie den
„Forward-Backward“ Knopf in die Neutralstellung.
Rückwärts: Stellen Sie den „Forward-Backward“ Knopf in die „Backward“ Position. Drücken Sie
das Gaspedal damit das Modell rückwärts fährt.
5 Geschwindigkeit
High speed Geschwindigkeit erhöht
Low speed Geschwindigkeit niedrig
Wichtig!
Vor dem Ändern der Fahrtrichtung oder Geschwindigkeit muss das Fahrzeug stehen. An-
sonsten könnte das Getriebe und/ oder der Motor beschädigt werden.
Wichtiger Bedienungshinweis:
Im 1. Gang wird die Motorleistung reduziert und die Hinterräder können Lastabhängig unterschied-
lich schnell drehen. Das ermöglicht langsameres Fahren und vor allem einen niedrigen Wendekreis.
D.h. aber auch das im Ersten Gang, beim Anfahren, oder beim einseitigen überfahren eines kleinen
Hindernisses das belastete Rad stehen bleiben kann und sich die Antriebskraft auf das unbelastete
Rad überträgt. Um die volle Motorleistung zu erzielen und die Antriebskraft gleichmäßig auf beide
Räder zu verteilen muß in den 2. Gang geschalten werden. Achtung! Im 2. Gang erhöht sich nicht
nur die Geschwindigkeit sondern es wird auch ein größerer Wendekreis erzielt.
6 Soundboard
6.1 Lautstärke erhöhen (gedrückt halten)
6.2 Lautstärke verringern (gedrückt halten)
6.3 USB
6.4 Micro SD
6.5 Line In
Nach dem einstecken einer Micro SD Karte oder USB-Sticks beginnt das Soundboard die Titel der
Reihe nach abzuspielen. Es können nur Dateien mit der Endung .mp3 wiedergegeben werden. Ein
vor bzw. zurückspulen ist nicht möglich.
7 Spannungsanzeige
Achtung!
Ihr Fahrzeug zeigt direkt nach dem Einschalten die Gesamtspannung der beiden Akkus in Volt an.
Die Vollgeladenen Akkus werden in der Regel unbelastet eine Gesamtspannung von ca. 12,6-13
Volt anzeigen. Die Anzeige ist Lastabhängig. D.h. die angezeigte Spannung wird unter Last absin-
ken. Sollte im unbelasteten Zustand eine Spannung von unter ca. 11,8V angezeigt werden sollten
Sie das Rideon ausschalten und den Akku laden (siehe Ladevorgang). Andernfalls kann der Akku
tiefenentladen werden und unwiederbringlich zerstört werden.
GB - Functions
1 ON/Off switch
With the ON / OFF switch you start the vehicle.
2 Horn
3 Foot pedal
Applies power (speed) to the vehicle.
4 Shift Lever:
Forward: Press the “Forward-backward switch” on the “Forward” position. Press the “Foot
pedal”, the model drives forward.
Stop: The model will brake automatically, when your child’s foot remove from the “Foot
pedal”. Press the “Forward-backward switch” in the middle.
Reverse: Press the “Forward-backward switch” on the “Backward” position. Press the “Foot
pedal”, the model drives backward.
5 Speed
High speed Fast speed
Low speed Slow speed
Important!
The vehicle must be stationary before changing direction or speed. Otherwise the gear unit
and/or the motor could be damaged.
Important operating information:
In 1st gear the engine power is reduced and the rear wheels can turn at different speeds depending
on the load. This allows slower driving and, above all, a small turning circle. This also means that
in rst gear, when starting off, or when driving over a small obstacle on one side, the loaded wheel
can stop and the driving force is transferred to the unloaded wheel. In order to achieve full engine
power and to distribute the driving force evenly over both wheels, it is necessary to shift into 2nd
gear. Attention! In 2nd gear not only the speed increases but also a larger turning circle is achieved.
6 Soundboard
6.1 Increase volume (hold down)
6.2 Decrease volume (hold down)
6.3 USB
6.4 Micro SD
6.5 Line In
After inserting a Micro SD card or USB stick, the soundboard starts playing the tracks one after
the other. Only les with the extension .mp3 can be played back. It is not possible to fast-forward
or rewind.
7 Voltage display
Attention!
Your vehicle displays the total voltage of the two batteries in volts immediately after switching on.
The fully charged batteries will usually display a total voltage of approx. 12.6-13 volts unloaded. The
display is load dependent. This means that the displayed voltage will drop under load. If a voltage
of less than approx. 11.8V is displayed in the unloaded state, you should switch off the Ride-on and
charge the battery (see charging procedure). Otherwise the battery may be deeply discharged and
irretrievably damaged.
FR - Fonctions
1 Interrupteur Marche / Arrêt
Avec la Interrupteur marche/arrêt vous mettez en marche
votre véhicule.
2 Klaxon
3 Pédale des gaz
4 Bouton du changement:
En avant: Placez le commutateur „avant-arrière“ en position „avant“. Appuyez sur la pédale
des gaz an que votre voiture avance.
Stop: La voiture s’arrête dès que vous lâchez la pédale des gaz. Placez le commutateur
„avant-arrière“ en position „Stop“.
En arrière: Placez le commutateur „avant-arrière“ en position „arrière“. Appuyez sur la pédale
des gaz an que votre voiture recule.
5 Vitesse
High speed Grande vitesse
Low speed Vitesse plus petite
Important !
Le véhicule doit être à l‘arrêt avant de changer de direction ou de vitesse. au cas contraire la
boîte de vitesses et/ou le moteur risquent d‘être endommagés.
Remarques importantes concernant le fonctionnement:
En 1ère vitesse, la puissance du moteur est réduite et les roues arrière peuvent tourner à des
régimes différents en fonction de la charge. Ceci permet une conduite plus lente et surtout un
faible angle de braquage. Cela signie également qu‘en première vitesse, au démarrage ou lors du
franchissement d‘un petit obstacle d‘un côté, la roue chargée peut s‘arrêter et la force motrice est
transmise à la roue non chargée. Pour obtenir la pleine puissance du moteur et répartir uniformé-
ment la force motrice sur les deux roues, il est nécessaire de passer en 2ème vitesse. Attention ! En
2ème vitesse, non seulement la vitesse augmente, mais l´angle de braquage augmente également.
6 Soundboard
6.1 Augmenter le volume (maintenir enfoncé)
6.2 Diminuer le volume (maintenir enfoncé)
6.3 USB
6.4 Micro SD
6.5 Line In
Après avoir inséré une carte Micro SD ou une clé USB, la sonorisation commence à jouer les pistes
l‘une après l‘autre. Seuls les chiers portant l‘extension.mp3 peuvent être lus. Il n‘est pas possible
d‘avancer ou de reculer rapidement.
7 Afchage de la tension
Attention!
Votre véhicule afche la tension totale des deux batteries en volts immédiatement après la mise
sous tension. Les batteries complètement chargées afchent généralement une tension totale
d‘environ 12,6-13 volts à vide. L‘afchage dépend de la charge. Cela signie que la tension afchée
chute sous charge. Si une tension inférieure à 11,8 V environ est afchée à l‘état déchargé, vous
devez éteindre le Rideon et charger la batterie (voir procédure de charge). Sinon, la batterie risque
d‘être profondément déchargée et irrémédiablement détruite.
IT - Funzioni
1 Interruttore ON/OFF
Con la interruttore ON/OFF si accende la macchina.
2 Clacson
3 Pedale del gas
4 Leva del cambio:
Avanti: Impostare il pulsante „Forward-Backward“ nella posizione “Forward”. Premere il
pedale del gas in modo che il veicolo si muove in avanti.
Stop: Il veicolo si ferma quando si solleva il piede del gas. Impostare il pulsante „Forward-
Backward“ nella posizione “Stop”
Indietro: Impostare il pulsante „Forward-Backward“ nella posizione “Backward”. Premere il
pedale del gas in modo che il veicolo va retromarcia.
5 Velocità
High speed alta velocità - Low speed bassa velocità
Importante!
Il veicolo deve essere fermo prima di cambiare direzione o velocità. In caso contrario
l´ingranaggio e/o il motore potrebbero subire danni.
Importanti informazioni operative:
In 1a marcia la potenza del motore è ridotta e le ruote posteriori possono girare a velocità diverse a
seconda del carico. Questo consente una guida più lenta e, soprattutto, un raggio di sterzata basso.
Questo signica anche che in prima marcia, alla partenza o quando si supera un piccolo ostacolo
da un lato, la ruota caricata può fermarsi e la forza motrice viene trasferita alla ruota scarica. Per
ottenere la massima potenza del motore e distribuire uniformemente la forza motrice su entrambe le
ruote, è necessario passare alla seconda marcia. Attenzione! In seconda marcia non solo la velocità
aumenta, ma si ottiene anche un raggio di sterzata maggiore.
6 Scheda audio
6.1 Aumentare il volume (tenere premuto)
6.2 Ridurre il volume (tenere premuto)
6.3 USB
6.4 Micro SD
6.5 Ingresso linea
Dopo aver inserito una scheda Micro SD o una chiavetta USB, la scheda audio inizia a riprodurre
i brani uno dopo l‘altro. Solo i le con estensione .mp3 possono essere riprodotti. Non è possibile
avanzare velocemente o riavvolgere.
7 Visualizzazione della tensione
Attenzione!
Il veicolo visualizza la tensione totale delle due batterie in volt subito dopo l‘accensione. Le batterie
completamente cariche di solito mostrano una tensione totale di circa 12,6-13 volt in stato scarico.
Il display dipende dal carico. Ciò signica che la tensione visualizzata scenderà sotto carico. Se
viene visualizzata una tensione inferiore a circa 11,8V nello stato di scarico, è necessario spegnere
il Rideon e caricare la batteria (vedi procedura di carica). In caso contrario, la batteria potrebbe
scaricarsi profondamente e distruggersi irrimediabilmente.
2
5
1
4
3
7
66.1 6.2
6.3
6.5 6.4
10
2
5
1
4
3
7
66.1 6.2
6.3
6.5 6.4
ES - Funciones
1 Interruptor ON/OFF
Con el interruptor ON/OFF para encender el vehículo.
2 Claxon
4 Pedal de gas
2 La palanca de cambios:
Adelante: Primir el botón „Forward-Backward“ en la posición „Forward“. Presione el pedal de
gas de modo que el vehículo se mueve hacia adelante.
Stop: El vehículo se frena cuando se levante el pie del gas. Primir el botón „Forward-
Backward“ en la posición „Stop“
Atras: Primir el botón „Forward-Backward“ en la posición „Backward“. Presione el pedal
de gas de modo que el vehículo se mueve hacia atras.
5 Velocidad
High speed alta velocidad
Low speed baja velocidad
Importante!
El vehículo debe estar parado antes de cambiar de dirección o de velocidad. De lo contrario,
el engranaje y/o el motor podrían resultar dañados.
Información importante de funcionamiento:
En 1ª marcha, la potencia del motor se reduce y las ruedas traseras pueden girar a diferentes ve-
locidades dependiendo de la carga. Esto permite una conducción más lenta y, sobre todo, un radio
de giro bajo. Esto también signica que en primera velocidad, al arrancar o al pasar por encima de
un pequeño obstáculo en un lado, la rueda cargada puede detenerse y la fuerza motriz se transere
a la rueda descargada. Para alcanzar la potencia máxima del motor y distribuir la fuerza motriz
uniformemente sobre ambas ruedas, es necesario cambiar a la segunda marcha. Atención! En la
2ª marcha no sólo aumenta la velocidad, sino que también se consigue un mayor radio de giro.
6 Tarjeta de audio
6.1 Subir el volumen (mantener pulsado)
6.2 Bajar el volumen (mantener pulsado)
6.3 USB
6.4 Micro SD
6.5 Entrada de línea
Después de insertar una tarjeta Micro SD o una llave USB, la tarjeta de audio empieza a reproducir
las canciones una tras otra. Sólo se pueden reproducir archivos con la extensión.mp3. No es posi-
ble avanzar o retroceder.
7 Indicación de la tensión
Atención!
Su vehículo muestra el voltaje total de las dos baterías en voltios inmediatamente después de en-
cenderlo. Las baterías completamente cargadas normalmente muestran un voltaje total de aprox.
12,6-13 voltios en estado descargado. La pantalla depende de la carga. Esto signica que la tensión
visualizada caerá bajo carga. Si se muestra una tensión inferior a aprox. 11,8 V en estado descar-
gado, desconecte el Rideon y cargue la batería (véase el procedimiento de carga). De lo contrario,
la batería puede descargarse profundamente y destruirse de forma irreparable.
NL - Functies
1 Aan/uit schakelaar (ON/OFF)
Met de aan/uit schakelaar (ON/OFF) is het mogelijk het voertuig aan- en uitzetten.
2 Hoorn
3 Gaspedaal
4 Schakelaar
Vooruit: Stel de knop „Forward-Backward“ in de stand „Forward“. Nadat het gaspedaal
wordt ingedrukt gaat het model vooruit.
Stoppen: Het model stopt nadat de voet van het gaspedaal wordt genomen. Stel de knop
„Forward-Backward“ in de neutrale stand.
Achteruit: Stel de knop „Forward-Backward“ in de stand „Backward“. Nadat het gaspedaal
wordt ingedrukt, gaat het model achteruit.
5 Snelheid
High speed hoge snelheid
Low speed lage snelheid
Belangrijk!
Het voertuig moet stilstaan voordat de richting of snelheid wordt gewijzigd. Anders kan de
versnelling of/en motor schade oplopen.
Belangrijke informatie over het gebruik:
Bij inschakeling van de 1e versnelling neemt het motorvermogen af en de achterwielen kunnen met
verschillende snelheden draaien, afhankelijk van de belasting. Hierdoor kan het voertuig langzamer
rijden en met minder draai. Dit betekent echter ook dat in de eerste versnelling, bij het starten of
rijden door een klein obstakel aan een kant het belaste wiel kan stoppen en de aandrijfkracht zal
naar het onbelaste wiel worden overgebracht. Om volledig vermogen van de motor en een gelijk-
matige verdeling van de aandrijfkracht op beide wielen te bereiken, moet de 2e versnelling worden
ingeschakeld. Let op! Na het inschakelen van de 2e versnelling wordt niet alleen de snelheid hoger
maar ook de draaicirkel groter
6 Soundboard
6.1 Volume verhogen (houd de knop ingedrukt)
6.2 Volume verlagen (houd de knop ingedrukt)
6.3 USB
6.4 Micro SD
6.5 Line In
Na het plaatsen van een Micro SD-kaart of het aansluiten van een USB-geheugenstick start sound-
board de titels één voor één af te spelen. Er kunnen alleen bestanden met de extensie .mp3
worden afgespeeld. Vooruit- of terug scrollen is niet mogelijk.
7 Voedingsspanning indicator
Let op!
Onmiddellijk na het inschakelen geeft het voertuig de totale spanning van beide batterijen in volt
aan. Volledig opgeladen batterijen zonder belasting wijzen op een spanning van 12,6-13 V. De
aangegeven waarde is afhankelijk van de belasting. Dit betekent dat de weergegeven spanning
daalt onder belasting. Wanneer in onbelaste toestand de spanning lager dan ca. 11,8 V is, moet dan
Rideon worden uitgeschakeld en de batterij opgeladen (zie opladen). Anders kan de batterij volledig
ontladen en onherstelbare schade oplopen.
CZ - Funkce
1 Spínač zapnutí / vypnutí (ON / OFF)
Spínač zapnutí / vypnutí (ON / OFF) umožňuje zapnutí a vypnutí vozidla.
2 Klakson
3 Plynový pedál
4 Přepínač:
Dopředu: Nastavte tlačítko „Forward-Backward“ do polohy „Forward“. Po stisknutí plynového
pedálu se začne model pohybovat vpřed.
Zastavení: Model se zastaví po sundání nohy z plynového pedálu. Nastavte tlačítko „Forward-
Backward“ do neutrální polohy.
Dozadu: Nastavte tlačítko „Forward-Backward“ na „Backward“. Po stisknutí plynového
pedálu se začne model pohybovat vzad.
5 Rychlost
High speed vysoká rychlost
Low speed nízká rychlost
Důležité!
Před změnou směru nebo rychlosti musí vozidlo stát v místě. V opačném případě může dojít
k poškození převodovky a / nebo motoru.
Důležité informace na téma obsluhy:
Po zařazení 1. převodového stupeň se snižuje výkon motoru a zadní kola se mohou otáčet různými
rychlostmi v závislosti na zatížení. Umožňuje to pomalejší jízdu a především menší zatáčení. To
však také znamená, že se na prvním stupni, při pohybu nebo přejíždění přes malou překážku na
jedné straně, může zatížené kolo zastavit a hnací síla se přenese na nezatížené kolo. Pro dosažení
plného výkonu motoru a rovnoměrného rozložení hnací síly na obou kolech zapněte 2 rychlostní
stupeň. Upozornění! Po zapnutí 2 rychlostního stupně se zvyšuje nejen rychlost, ale také poloměr
zatáčení.
6 Soundboard
6.1 Zvýšení hlasitosti (přidržte tlačítko)
6.2 Snížení hlasitosti (přidržte tlačítko)
6.3 USB
6.4 Micro SD
6.5 Line In
Po vložení karty Micro SD nebo připojení USB paměti soundboard začne přehrávat tituly jeden po
druhém. Lze přehrávat pouze soubory s příponou .mp3. Rychlé převíjení vpřed nebo vzad není
možné.
7 Indikátor napájení
Upozornění!
Ihned po zapnutí vozidlo indikuje celkové napětí obou akumulátorů ve voltech. Plně nabité akumu-
látory bez zátěže obvykle ukazují napětí 12,6-13 V. Uvedená hodnota závisí na zatížení. Znamená
to, že zobrazené napětí klesá pod zatížením. Pokud je v nezatíženém stavu napětí menší než cca.
11,8 V, pak vypněte Rideon a nabijte akumulátor (viz Nabíjení). V opačném případě může dojít k
úplnému vybití a nenávratnému poškození akumulátoru.
PL - Funkcje
1 Włącznik/wyłącznik (ON/OFF)
Włącznik/wyłącznik (ON/OFF) umożliwia włączanie i wyłączanie pojazdu.
2 Klakson
3 Pedał gazu
4 Przełącznik:
Do przodu: Ustawić przycisk „Forward-Backward“ na pozycji „Forward“. Po
naciśnięciu pedału gazu model ruszy do przodu.
Zatrzymanie: Model zatrzymuje się po zdjęciu stopy z pedału gazu. Ustawić przycisk
„Forward-Backward“ na pozycji neutralnej.
Do tyłu: Ustawić przycisk „Forward-Backward“ na pozycji „Backward“. Po
naciśnięciu pedału gazu model prosuza się do tyłu.
5 Prędkość
High speed duża prędkość
Low speed niska prędkość
Ważne!
Przed zmianą kierunku lub prędkości pojazd musi stać w miejscu. W przeciwnym razie może
dojść do uszkodzenia przekładni i/lub silnika.
Ważna wskazówka dotycząca obsługi:
Na pierwszym biegu moc silnika jest zredukowana, a tylne koła mogą się obracać z różnymi
prędkościami w zależności od obciążenia. Pozwala to na wolniejszą jazdę, a przede wszys-
tkim mały promień zawracania. Oznacza to również, że na pierwszym biegu, przy rusza-
niu z miejsca lub podczas przejeżdżania przez niewielką przeszkodę po jednej ze stron,
załadowane koło może się zatrzymać, a siła napędowa zostaje przeniesiona na nieobciążone
koło. W celu osiągnięcia pełnej mocy silnika i równomiernego rozłożenia siły napędowej
na oba koła, konieczne jest przełączenie na drugi bieg. Uwaga! Na drugim biegu nie tylko
zwiększa się prędkość obrotowa, ale także uzyskuje się większy promień skrętu
6 Soundboard
6.1 Zwiększenie objętości (zachować wciśnięty)
6.2 Zmniejszenie objętości (zachować wciśnięty)
6.3 USB
6.4 Micro SD
6.5 Wejście na linię
Po włożeniu karty Micro SD lub pamięci USB, Soundboard rozpoczyna odtwarzanie utworów w
kolejności. Odtwarzane mogą być tylko pliki z rozszerzeniem .mp3. Nie jest możliwe przewijanie do
tyłu ani szybkie przewijanie do przodu.
7 Wskaźnik napięcia
Uwaga!
Bezpośrednio po włączeniu pojazdu wyświetla się całkowite napięcie obu akumulatorów w wol-
tach. W pełni naładowane akumulatory wyświetlają zazwyczaj łączne napięcie ok. 12,6-13 Volt.
Wskaźnik aktualny jest zależny od obciążenia. Oznacza to, że wyświetlane napięcie spadnie
pod obciążeniem. Jeśli po rozładowaniu wyświetlane jest napięcie mniejsze niż ok. 11,8V, należy
wyłączyć pojazd i naładować akumulator (patrz procedura ładowania). W przeciwnym razie bateria
może zostać głęboko rozładowana i nieodwracalnie zniszczona.