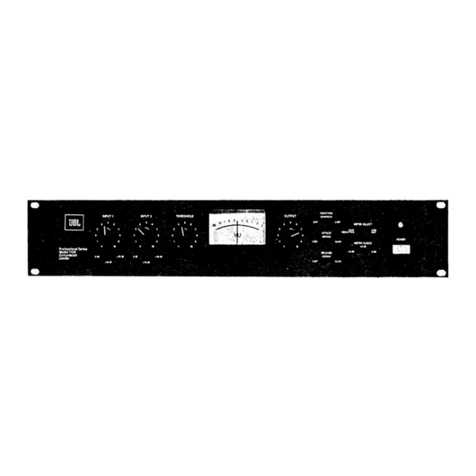
JBL Synthesis SDP-1 User manual

SYNTHESIS
OWNERS
MANUAL-
—
SDP

TABLE
OF
CONTENTS.
SECTION
PAGE
7.0
BASIC
OPERATIONS
1.1
Powering
Up
4
=
1.2
Basic
Remote
Control
Operations
=
4-5
1.3
The
Various
Cinema
and
Music
Modes
6-7
1.4
Turning
the
System
Off
8
2.0
FRONT
PANEL
CONTROLS
3.0
SERVICE
AND
MAINTENANCE
3.1
General
Service
Policy
10
3.2
Audio
and
Video
Service
10
JBL
Synthesis
System
Owner's
Manual
©1994
Harman
Consumer
Group
JBL
and
Synthesis
are
registered
trademarks
of
JBL
lncorporaied.
All
Rights
Reserved
Manual
Designed
by
Harman
Consumer
Group,
Marketing
Services
¢
Woodbury
JBL
Consumer
Products,
tne.
80
Crossways
Park
West,
Woodbury,
NY
11797
(818)
496-3400
8500
Balboa
Boulevard,
Northridge,
CA
91329
HA
Harman
international
Company

CONGRATULATIONS.
Your
Synthesis
Home
Media
System
is
a
wonderful
investment
in
a
lifetime
of
quality-home
entertainment.
Only
JBL
can
provide
a
system
of
this
caliber.
Since
the
“JAZZ
SINGER
”
brought
sound
to
films
in
1929,
the
letters
J-B-L
have
~
been
intimately
linked
to
the
production.of
the
world’s
finest
films.
Our
50
year
devotion
to
the
art
of
sound
reproduction
has
made
JBL
an
integral
part
of
the
musical
experience.
Now
your
Synthesis
Home
Media
System
has
placed
the
best
seat
in
the
house,
in
your
home.
We
invite
you
to
sit
back,
and
enjoy
the
perfection
of
this
state-of-the-art
sight
and
sound
system.
System
Installed
for:
.
(Owner)
At
(Adaress)
On:
(Date)
Installed
By:
(installer)
From:
(Dealership)
For
Service
,
Call:
=
(Dealers
Phone
Number)
For
JBL
Customer
Support
and
Satisfaction,
Call:
|
|
JBL
Synthesis
Service
Manager
|
1-(800)
645-7484,
extension
233
On
Long
Island
call
(516)
496-3400,
extension
233

1.0
BASIC
OPERATIONS
1.7
Powering
Up
The
system
can
easily
and
quickly
be
turned
on
using
the
Remote
Controller,
pictured
on
this
page.
Simply
push
the
button
marked
ON/OFF
and
the
Surround
Processor,
Amplifiers,
Equalizers,
Crossovers,
and
‘Speakers
will
all
automatically
power
up,
in
sequence.
Alternatively,
the
front
pane!
ON/OFF
button
on
the
surround
processor
may
be
used.
If
you
have
difficulty,
make
sure
the
Master
Power
switch
on
the
rear
of
the
processor
is
On.
Next,
turn
on
the
Source
Devices
you
want
to
use
—
VCR,
Laser
Disc
player,
CD,
Television/Video,
Audio
Cassette
Player.
You
can
turn
these
on
in
any
order.
1.2
Basic
Remote
Control
Operations
Your
JBL
Synthesis
Remote
Controller
unit
handles
virtually
all
of
the
functions
of
the
system.
Basic
Operations
include
Selecting
Source
Devices,
and
Adjusting
the
Master
Volume,
Muting
the
System,
and
Adjusting
the
Audio
Balance.
1.21
Selecting
Source
Devices
Examine
the
lower
half
of
the
Remote
Controller
and
locate
the
four
buttons
with
INPUT
labeled
below
them.
Your
Installer,
with
your
consultation,
has
determined
the
sources
available
for
use
in
your
system,
and
has
assigned
them
to
individual
buttons.
He
or
she
will
tell
you
what
the
button
assignments
are.
To
select
a
source
device,
simply
press
the
corresponding
button.
The
surround
processor
will
engage
that
source.
1.2.2
Adjusting
the
Master
Volume
The
Master
Volume
buttons
on
the
right
hand
side
of
the
Remote
Controller
are
used
to
adjust
the
Output
Levels
of
the
system.
Press
the
&
button
to
make
things
Louder,
and
the
W
button
to
make
things
Softer.
These
buttons
do
not
adjust
the
input
Levels
of
the
Source
Devices.
Infact,
we
recommend
that
you
do
net
do
so.
They
have been
set
and
calibrated
to
mesh
flawlessly
with
the
system,
and
adjusting
them
directly
can
fhrow
the
system
out
of
balance.
4
-
hi
pittirist
onorr
||
ei
:
:f
EFX
MUTE
[MAIN
MUTE
co
a
INPUT

|
|
|
~
yazz
(_]
)
:
crassica.
[_]
reevision
[™
]
¥
HOME
i
CEA
BASIC
OPERATO
NOTE:
(f,
over
time,
you
notice
that
one
Source
Device
consistently
sounds
too
loud
or
too
soft,
call
your
Certified
Dealer.
He
or
she
will
adjust
the
levels
and
reset
the
new
levels
as
your
“Reference
Levels”
to
which
you
can
return
if
the
system's
sound
goes
awry.
1.2.3
Muting
the
System
There
may
be
situations
where
you
quickly
want
to
cut
all
of
the
audio
output,
for
example,
when
you
are
answering
the
phone
or
having
a
conversation.
fo
do
so,
press
the
button
labeled
MAIN
MUTE,
located
near
the
bottom
right
hand
corner
of
the
Remote
Controller.
All
of
the
audio
output
will
cut
out
immediately
while
keeping
the
system
on.
On
the
front
panel
of
the
surround
processor,
both
MAIN
and
EFX
MUTE
lights
will
be
turned
on,
and
the
front
pane!
display
will
read
“SYSTEM
MUTED".
Pressing
the
MAIN
MUTE
button
~
once
again
will
re-enable
the
audio
to
come
out
ofthe
Speakers.
:
in
generating
the
various
surround
modes,
the
SDP-1
adds
additional
synthesized
audio
information
to
the
incoming
signal.
To
mute
these
signals
only,
press
EFX
MUTE,
located
next
to
MAIN
MUTE.
Pressing
this
button
will
light
up
the
EFX
MUTE
light
on
the
front
panel
and
the
display
will
read
“EFFECTS
MUTED".
Pressing
this
button
again
will
restore
the
processor
to
its
previous
mode
of
operation.
This
is
the
simplest
way
to
play
“normal”
two
channel
stereo.
1.2.4
Adjusting
the
Audio
Balance
Use
the
balance
controls
to
adjust
for
out
of
the
ordinary
listener
position.
To
adjust
the
audio
balance
of
the
system,
locate
the
four
buttons
in
the
middie
of
the
remote
controller
labeled
BALANCE.
Pressing
the
&
key
will
increase
the
levels
of
the
front
channels
relative
fo
the
rear,
and
pressing
the
W
key
will
increase
the
_.fevels
of
the
rear
channels
relative
to
the
front.
Pressing
.
the
&
button
will
increase
the
left
channel
sounds
relative
to
the
right,
and
pressing
the
©
button
wilf
increase
the
right
channel
sounds
relative
to
the
left
5

1.3
The
Various
Cinema
and
Music
Modes
Your
Synthesis
SDP-1
Surround
Processor
is
a
highly
_
advanced
unit
that
has
the
ability
to
electronically
recreate
various
listening
environments,
such
as
nightclubs,
jazz
clubs,
concert
halls,
and
stadiums.
Furthermore,
it
can
take
information
from
monaural
sources
and
create
a
synthesized
stereo
sound
that
will
definitely
enhance
your
listening
experience.
Finally,
it
has
a
Home
THX
mode,
which
when
used
in
conjunction
with
Surround
Sound
encoded
software,
will
provide
you
with
the
same
experience
that
the
movie
director
felt
when
mixing
the
soundtrack
in
the
dubbing
studio.
The
SDP-1
has
45
different
operating
modes
to
choose
from.
Based
on
our
experience
with
different
listening
environments
and
various
soundtracks,
we
have
selected
five
standard
modes
that
we
think
are
best
suited
towards
reproducing
the
widest
variety
of
software.
They
have
been
carefully
chosen
to
give
you
an
awesome
sensory
experience,
and
are
directly
accessible
from
the
Remote
Controller.
Feel
free
to
play
with
the
five
modes
using
various
-
pieces
of
software.
If
you
would
like
to
try
the
other
modes
available,
your
JBL
Certified
installer
can
demonstrate
them
te
you
and
can
reprogram
your
Remote
Controller
with
your
favorites.
¢
Rock/Pop
The
Rock
Mode
allows
you
to
have
the
best
of
all
possible
worlds,
with
enhanced
localization
of
sounds
on
the
front
channels,
plus
a
high
degree
of
ambience
as
well.
This
mode
does
an
excellent
job
af
putting
vocals
in
the
center,
and
the
effects
to
the
left
or
right,
where
they
should
be.
The
ambience
effects
that
are
added
will
“surround”
you
and
make
you
feel
like
you
are
in
the
middle
of
the
performance.
This
mode
works
well
with
Rock,
Popular,
and
most
electronic
and
New
Age
recordings
as
well.
Experiment
with
this
mode
on
non-
surround
encoded
films
or
television
shows,
you
might
like
what
you
hear.
To
engage
this
mode,
simply
press
the
ROGK/POP
bution.
Pstrratsis

rrberaeradgd
BASIC
OPERA
©
JaZZ
The
operative
word
here
is
“live”,
as
the
Jazz
mode
makes
most
music
sources
sound
engagingly
present.
This
mode
gives
the
best
re-creation
of
the
original
—
recording
venue,
but
covers
a
somewhat
limited
seating
area,
such
as
in
a
jazz
club
or
bar.
Select
this
mode
for.
the
intimate
listening
of
any
type
of
music.
To
engage
this
mode,
simply
press
the
JAZZ
button.
¢
Classical
The
Classical
mode
brings
you
the
experience
of
being
in
some
of
the
world’s
greatest
concert
halls,
with
your
seat
in
the
third
row.
This
mode
has
been
designed
for
works
on
a
broader
acoustic
canvas,
like
orchestral
and
operatic
works,
and
covers
a
very
large
listening
area.
To
engage
this
mode,
simply
press
the
CLASSICAL
button.
Television
The
Television
mode
provides
surround
effects
for
television
viewing
of
monaural,
Stereo,
and
stereo
-
synthesized
programs.
Use
this
mode
to
make
your
TV
viewing
experience
‘multi-dimensional”
and
spacious.
To
engage
this
mode,
simply
press
the
TELEVISION
button.
¢
Movies
The
Movies
or
Home
THX
Cinema
mode
has
been
designed
to
work
with
any
surround
sound
encoded
movie,
music,
or
television
program.
This
mode
incorporates
the
cinema
Dolby
Surround
technology
and
provides
a
performance
virtually
identical
toa
THX
or
Dolby
theatre
experience.
In
this
mode,
when
using
Dotby
Surround
encoded
software,
you
will
experience
exactly
what
the
director
heard
during
the
mixing
of
the
soundtrack,
7
°
=
To
engage
this
mode,
simply
press
the
MOVIES
button.
7

Oeste
td
Pte
in
A
1.4
Turning
the
System
Off
There
is
no
preferred
order
of
components
when
turning
the
system
off.
However,
there
is
one
caution
you
should
follow;
NOTE:
Do
not
turn
the
system
off
while
any
Source
Device
is
running
and
producing
sound.
Always
make
sure
all
Source
Devices
are
in
“Idle”
before
pressing
the
main
ON/OFF
button.
Failure
to
do
this
can
produce
a
noticeable
“pop”,
and
can,
over
time,
damage
your
components.
if
you
need
to
turn
off
the
sound
to
the
system
suddenly,
for
example,
fo
take
a
phone
call
or
to
reply
to
someone,
press
the
MAIN
MUTE
button.
Notes
gpk
totaal
:
rock/pop
[|
tf
y
F
i}
crassa.
[__]
TELEVISION
CL]
po.
:
MOVIES
=
CL]
eae

20
FRONT
PANEL
FAO
CONTROLS
—
All the
necessary
functions
needed
to
operate
the
SDP-1
Surround
Processor
are
located
on
the
Remote
Controller.
if
necessary,
most
of
these
functions
can
be
accessed
on
the
front
panel
of
the
unit
as
well.
MODE
These
buttons
are
used
to
step
through
the
surround
modes
that
have been
programmed
into
the
unit.
Press
&
to
move
up
through
the
mode
list,
and
press
W
to
move
down.
In
the
normal
or
default
mode,
the
five
modes
available
will
be
ROCK/POP.
JAZZ,
CLASSICAL,
TELEVISION,
and
MOVIES.
For
your
particular
system,
your
JBL
Certified
Installer
may
substitute
different
surround
modes
and
will
show
you
+
how
to
access
them.
;
BANK
The
SDP-1
incorporates
three
memory
banks
of
15
modes
each,
labeled
“PRESET,”
“USER
BANK
A”
and
“USER
BANK
B”
that
are
capable
of
storing
up
to
45
different
surround
modes
for
you
fo
access.
In
the
normal
or
default
mode,
five
that
we
consider
to
be
most
useful
for
audio
presentation
have
been
pre-
—
programmed
into
the
unit.
When
used
in
the
default
mode,
the
BANK
button
is
inoperative.
For
customized
installations,
your
JBL
Certified
Installer
may
program
various
modes
into
these
three
memory
banks.
Use
of
the
BANK
button
in
these
installations
will
allow
you
fo
select
the
memory
bank
that
you
desire.
The
balance
of
these
buttons
perform
the
identical
—
. .
function
as
the
remote,
so
please
refer
to
the
Remote
&
|
Controfler
instructions
for
their
functionality.

30
SERVICE
Once
the
system
is
in
place,
it
should
need
little
or
no
attention.
The
components
are
of
the
highest
quality,
and
are
built
to
withstand
the
rigors
of
professional
use.
This
Section
outlines
service
policies
and
warranties.
3.1
General
Service
Policy
The
JBL
Synthesis
System
is
backed
by
our
exclusive
“48—hour
(no-down-time)
Service
Policy”.
*
Any
time
within
a
component's
warranty
period
that
you
report
trouble
to
your
certified
JBL
Synthesis
Dealer,
he
will
determine
the
nature
of
the
problem
and
contact
JBL
within
24
hours.
ifa
damaged
component
is
within
the
first
30
days
of
its
warranty
period
JBL
will
send
your
JBL
Synthesis
Dealer
a
replacement
unit,
to
be
installed
in
your
system,
within
the
specified
24
hour
period,
after
JBL
has
been
contacted.
:
ff
more
than
30
days
of
your
component's
warranty
period
has
lapsed,
and
the
damaged
component
is
still
covered
under
warranty,
JBL
wil!
provide
your
JBL
Synthesis
Dealer
with
a
/oaner
unit
within
the
same
24
hour
period
to
be
installed
in
your
system,
and
your
unit
will
be
sent
to
JBL
for
repair.
This
policy
applies
to
systems
purchased
in
the
USA
only.
Outside
the
USA
please
contact
the
local
distributor
for
warranty
service.
*Weekends
and
holidays
are
excluded
from
this
policy.
10
SERVI
ya
3.2
Audio
Service
«
Electrical
components
All
Electronic
components
are
fully
warranted
for
two
years,
including
parts
and
labor.
Any
problems
occurring
within
the
two
year
warranty
period
will
be
covered
by
the JBL
Synthesis
exclusive
“48-hour
no-
down-time”
Service
Policy.
¢
Loudspeakers
All
Loudspeakers
are
fully
warranted
for
five
years,
including
parts
and
labor.
Any
problems
occurring
within
the
five
year
warranty
period
will
be
covered
by
the
JBL
Synthesis
exclusive
“48-hour
no-down-time’
Service
Policy.
7
The
vast
majority
of
service
calls
for
Audio
will
simply
require
resetting
the
system.
Call
your
certified
JBL
Synthesis
Dealer.
.
An
Installer
will
make
an
appointment
to
reset
the
system.
On
arrival,
he
or
she
will
refer
fo
the
Templates
in
the
last
section
of
your
Manual,
and
will
reset
any
components
which
require
it
Calf
your
certified
JBL
Synthesis
Dealer
for
a
.
replacement
unit,
or
to
initiate
the
use
of
a
loaner.
If
for
any
reason
you
are
dissatistied
or
need
adaitiona
assistance,
call:
JBL
Synthesis
Client
Service
Manager
(800)
645-7484,
extension
233
On
Long
Island
call
|
(516)
496-3400,
extension
233
Other JBL Recording Equipment manuals

JBL
JBL SDR-35 User manual
JBL
JBL Synthesis SDEC-3500 User manual
JBL
JBL Synthesis SDEC-3000 User guide
JBL
JBL Performance BASSQ User manual
JBL
JBL SYNTHESIS SDEC-4500 User guide
JBL
JBL Nano Patch+ User manual
JBL
JBL Active-1 User manual
JBL
JBL Synthesis SDP-25 User manual
JBL
JBL Synthesis SDEC-3500 User manual

JBL
JBL KX200 User manual

