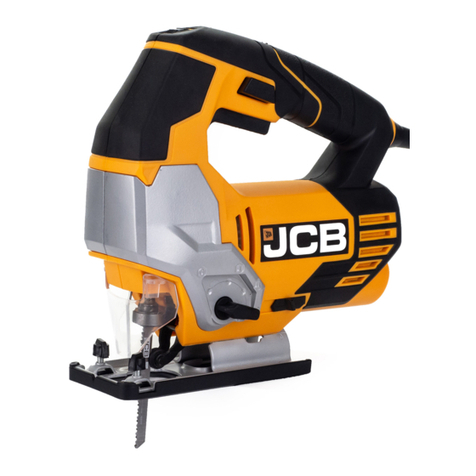
jcb JCB-20JS Planning guide

POWER TOOL
INSTRUCTION & USER MANUAL
EN
IM-20JS-EN
JCB-20JS
Original Instructions

2JCB-20JS
Instruction & User Manual
GENERAL WARNINGS & DISPOSAL
To reduce the risk of injury, the user must read the instruction manual.
The device must not be exposed to rain or immersed in water.
Do not allow any part of the device to come into contact with flames, or to
catch fire.
Do not dispose of batteries in household waste. Return exhausted batteries
to a local collection or recycling point.
This product has been marked with a symbol relating to removing electric and
electronic waste. The product should not be discarded with household waste
but must be returned to a collection system which conforms to the European
Directive 2012/19/EU. It will then be recycled or dismantled in order to
reduce the impact on the environment. Electric and electronic equipment can
be hazardous for the environment and for human health since they contain
hazardous substances.
This symbol is used throughout this manual to warn the user about potential
risks. Please read & understand these sections before using the device.
Personal Protective Equipment (P.P.E.), such as ear defenders, eye protection,
safety gloves and a dust mask, must be worn during the operation of the
device.
Do not expose battery pack or tool to fire or excessive temperatures.

3
JCB-20JS
Instruction & User Manual
WARNING: Lithium-ion batteries and products that contain lithium-ion batteries can expose you
to chemicals including cobalt lithium nickel oxide, and nickel, which are known to the State of
California to cause cancer and birth defects or other reproductive harm. For more information, go
to www.P65Warnings.ca.gov.
WARNING: Drilling, sawing, sanding or machining wood products can expose you to wood
dust, a substance known to the State of California to cause cancer. Avoid inhaling wood dust or
use a dust mask or other safeguards for personal protection. For more information go to www.
P65Warnings.ca.gov/wood.
The month and year of manufacture can be found within the product serial number e.g.
MMYYPPPAXXXXX. Where production month (MM) and production year (YY) are included.

4JCB-20JS
Instruction & User Manual
Contents
GENERAL POWER TOOL SAFETY WARNINGS 5
1. Work area safety 5
2. Electrical safety 5
3. Personal safety 5
4. Power tool use and care 6
5. Battery tool use and care 6
6. Service 7
TOOL SPECIFIC SAFETY WARNINGS 8
Safety instructions for all operations 8
Kickback Causes And Related Warnings 8
CHARGER SAFETY 10
COMPONENT LIST 11
TOOL TECHNICAL DATA 12
BATTERY TECHNICAL DATA 12
CHARGER TECHNICAL DATA 12
NOISE INFORMATION 12
VIBRATION INFORMATION 13
OPERATING INSTRUCTIONS 14
Intended Use 14
Battery 14
Inserting Saw Blade 15
Power Switch 15
Startup 15
Mitre Cutting 15
Use of hex key on base plate adjustment 15
Adjusting the Pendulum Stroke 15
Dust Removal and Dust Collection 16
Parallel Stop 16
Maintenance 17
Transport and Storage 17
WARRANTY STATEMENT 19
GENERAL CERTIFICATE OF CONFORMITY 21

5
JCB-20JS
Instruction & User Manual
Read all safety warnings, instructions and
specifications provided with this power
tool. Failure to follow all instructions listed below
may result in electric shock, fire and/or serious
injury. Save all warnings and instructions for
future reference.
WARNING!
The term “power tool” in the warnings refers to
your mains operated (corded) power tool or battery
operated (cordless) power tool.
1. Work area safety
m Keep work area clean and well lit.
Cluttered or dark areas invite accidents.
m Do not operate power tools in explosive
atmospheres, such as in the presence of
flammable liquids, gases or dust. Power
tools create sparks which may ignite the dust or
fumes.
m Keep children and bystanders away while
operating a power tool. Distractions can
cause you to lose control.
2. Electrical safety
m Power tool plugs must match the outlet.
Never modify the plug in any way. Do
not use any adapter plugs with earthed
(grounded) power tools. Unmodified plugs
and matching outlets will reduce risk of electric
shock.
m Avoid body contact with earthed or
grounded surfaces, such as pipes,
radiators, ranges and refrigerators. There
is an increased risk of electric shock if your body
is earthed or grounded.
m Do not expose power tools to rain or wet
conditions. Water entering a power tool will
increase the risk of electric shock.
m Do not abuse the cord. Never use the
cord for carrying, pulling or unplugging
the power tool. Keep the cord away from
heat, oil, sharp edges or moving parts.
Damaged or entangled cords increase the risk of
electric shock.
m When operating a power tool outdoors,
use an extension cord suitable for
outdoor use. Use of a cord suitable for
outdoor use reduces the risk of electric shock.
m If operating a power tool in a damp
location is unavoidable, use a residual
current device (RCD) protected supply.
Use of an RCD reduces the risk of electric shock.
3. Personal safety
m Stay alert, watch what you are doing
and use common sense when operating
a power tool. Do not use a power tool
while you are tired or under the influence
of drugs, alcohol or medication. A moment
of inattention while operating power tools may
result in serious personal injury.
m Use personal protective equipment.
Always wear eye protection. Protective
equipment such as a dust mask, non-skid safety
shoes, hard hat or hearing protection used for
appropriate conditions will reduce personal
injuries.
m Prevent unintentional starting. Ensure
the switch is in the off position before
connecting to power source and/or
battery pack, picking up or carrying the
tool. Carrying power tools with your finger on
the switch or energising power tools that have
the switch on invites accidents.
GENERAL POWER TOOL SAFETY WARNINGS

6JCB-20JS
Instruction & User Manual
m Remove any adjusting key or wrench
before turning the power tool on. A
wrench or a key left attached to a rotating part of
the power tool may result in personal injury.
m Do not overreach. Keep proper footing
and balance at all times. This enables
better control of the power tool in unexpected
situations.
m Dress properly. Do not wear loose
clothing or jewellery. Keep your hair and
clothing away from moving parts. Loose
clothes, jewellery or long hair can be caught in
moving parts.
m If devices are provided for the connection
of dust extraction and collection facilities,
ensure these are connected and properly
used. Use of dust collection can reduce dust-
related hazards.
m Do not let familiarity gained from
frequent use of tools allow you to become
complacent and ignore tool safety
principles. A careless action can cause severe
injury within a fraction of a second.
4. Power tool use and care
m Do not force the power tool. Use the
correct power tool for your application.
The correct power tool will do the job better
and safer at the rate for which it was designed.
m Do not use the power tool if the switch
does not turn it on and off. Any power
tool that cannot be controlled with the switch is
dangerous and must be repaired.
m Disconnect the plug from the power
source and/or remove the battery pack,
if detachable, from the power tool before
making any adjustments, changing
accessories, or storing power tools. Such
preventive safety measures reduce the risk of
starting the power tool accidentally.
m Store idle power tools out of the reach
of children and do not allow persons
unfamiliar with the power tool or these
instructions to operate the power tool.
Power tools are dangerous in the hands of
untrained users.
m Maintain power tools and accessories.
Check for misalignment or binding of
moving parts, breakage of parts and any
other condition that may affect the power
tool’s operation. If damaged, have the
power tool repaired before use. Many
accidents are caused by poorly maintained power
tools.
m Keep cutting tools sharp and clean.
Properly maintained cutting tools with sharp
cutting edges are less likely to bind and are easier
to control.
m Use the power tool, accessories and
tool bits etc. in accordance with these
instructions, taking into account the
working conditions and the work to
be performed. Use of the power tool for
operations different from those intended could
result in a hazardous situation.
m Keep handles and grasping surfaces
dry, clean and free from oil and grease.
Slippery handles and grasping surfaces do not
allow for safe handling and control of the tool in
unexpected situations.
5. Battery tool use and care
m Recharge only with the charger specified
by the manufacturer. A charger that is suitable
for one type of battery pack may create a risk of
fire when used with another battery pack.
m Use power tools only with specifically
designated battery packs. Use of any other
battery packs may create a risk of injury and fire.
7
JCB-20JS
Instruction & User Manual
m When the battery pack is not in use, keep
it away from other metal objects, like
paper clips, coins, keys, nails, screws or
other small metal objects that can make a
connection from one terminal to another.
Shorting the battery terminals together may
cause burns or a fire.
m Under abusive conditions, liquid may be
ejected from the battery; avoid contact.
If contact accidentally occurs, flush with
water. If liquid contacts eyes, additionally
seek medical help. Liquid ejected from the
battery may cause irritation or burns.
m Do not use a battery pack or tool that is
damaged or modified. Damaged or modified
batteries may exhibit unpredictable behaviour
resulting in fire, an explosion or risk of injury.
m Do not expose a battery pack or tool to
fire or excessive temperature. Exposure
to fire or temperature above 130 °C may cause
explosion.
m Follow all charging instructions and do
not charge the battery pack or tool
outside the temperature range specified
in the instructions. Charging improperly or
at temperatures outside the specified range may
damage the battery and increase the risk of fire.
6. Service
m Have your power tool serviced by a
qualified repair person using only identical
replacement parts. This will ensure that the
safety of the power tool is maintained.
m Never service damaged battery packs.
Service of battery packs should only be
performed by the manufacturer or authorized
service providers.

8JCB-20JS
Instruction & User Manual
TOOL SPECIFIC SAFETY WARNINGS
m Wear ear protectors. Exposure to noise
can cause hearing loss.
m Wear eye protection. Wear goggles
to prevent eyes from exposure to flying
particles.
m Wear dust mask. Take protective
measures against inhalation of dust. Some
materials can contain toxic materials. Also
work with dust/ chip extraction when
connectable.
Additional Safety Rules For Saw
Tools
m Keep hands away from cutting area
and the blade. Keep your second
hand on auxiliary handle, or motor
housing. If both hands are holding the saw,
they cannot be cut by the blade.
m Do not reach underneath the
workpiece. The guard cannot protect you
from the blade below the workpiece.
m Adjust the cutting depth to the
thickness of the workpiece. Less than a
full tooth of the blade teeth should be visible
below the workpiece.
m Hold the power tool by insulated
gripping surfaces, when performing
an operation where the cutting
accessory may contact hidden wiring.
Cutting accessory contacting a “live”
wire may make exposed metal parts of
the power tool “live” and could give the
operator an electric shock.
m Use clamps or another practical way
to secure and support the workpiece
to a stable platform. Holding the
workpiece by hand or against your body
leaves it unstable and may lead to loss of
control.
m When ripping, always use a rip fence
or straight edge guide. This improves
the accuracy of cut and reduces the chance
of blade binding.
m Never use damaged or incorrect
blade washers or bolt. The blade
washers and bolt were specially designed
for your saw, for optimum performance and
safety of operation.
Kickback Causes And Related
Warnings
m Kickback is a sudden reaction to a pinched,
jammed or misaligned saw blade, causing
an uncontrolled saw to lift up and out of the
workpiece toward the operator
m When the blade is pinched or jammed
tightly by the kerf closing down, the blade
stalls and the motor reaction drives the unit
rapidly back toward the operator
m If the blade becomes twisted or misaligned
in the cut, the teeth at the back edge of the
blade can dig into the top surface of the
wood causing the blade to climb out of the
kerf and jump back toward the operator.
Kickback is the result of saw misuse and/or
incorrect operating procedures or conditions
and can be avoided by taking proper
precautions as given below.

9
JCB-20JS
Instruction & User Manual
m Maintain a firm grip with both
hands on the saw and position your
arms to resist kickback forces.
Position your body to either side of
the blade, but not in line with the
blade. Kickback could cause the saw to
jump backwards, but kickback forces can
be controlled by the operator, if proper
precautions are taken.
m When blade is binding, or when
interrupting a cut for any reason,
release the trigger and hold the
saw motionless in the material until
the blade comes to a complete
stop. Never attempt to remove
the saw from the work or pull the
saw backward while the blade is
in motion or kickback may occur.
Investigate and take corrective actions to
eliminate the cause of blade binding.
m When restarting a saw in the
workpiece, centre the saw blade
in the kerf so that the saw teeth
are not engaged into the material.
If a saw blade binds, it may walk up or
kickback from the workpiece as the saw is
restarted.
m Support large panels to minimise
the risk of blade pinching and
kickback. Large panels tend to sag
under their own weight. Supports must
be placed under the panel on both sides,
near the line of cut and near the edge of
the panel.
m Do not use dull or damaged blades.
Unsharpened or improperly set blades
produce narrow kerf causing excessive
friction, blade binding and kickback.
m Blade depth and bevel adjusting
locking levers must be tight and
secure before making the cut. If
blade adjustment shifts while cutting, it
may cause binding and kickback.
m Use extra caution when sawing into
existing walls or other blind areas.
The protruding blade may cut objects that
can cause kickback.

10 JCB-20JS
Instruction & User Manual
m To reduce risk of injury, only charge
JCB rechargeable batteries. The
charger and battery packs are specifically
designed to work together. Other types of
batteries may burst causing fire and personal
injury.
m Do not allow any liquid to get inside
the charger. Electric shock may result.
m Do not expose the charger to rain or
snow.
m Under certain conditions with the
charger plugged into the power
supply, the exposed charging contacts
inside the charger can be shorted by
foreign materials. Foreign materials of a
conductive nature such as, but not limited
to, steel, wool, aluminium foil or any buildup
of metallic particles should be kept away
from charger cavities.
m Always unplug the charger from
the power supply when there is no
battery in the cavity.
m Unplug the charger from the power
supply before attempting to clean.
m Do not operate the charger with a
damaged cord or plug. Have them
replaced immediately.
m The charger is designed to operate
on standard 120 V household
electrical power. Do not attempt to
use it on any other voltage.
m This appliance can be used by
children aged from 8 years and above
and persons with reduced physical,
sensory or mental capabilities or
lack of experience and knowledge
if they have been given supervision
or instruction concerning use of
the appliance in a safe way and
understand the hazards involved.
Children shall not play with the appliance.
Cleaning and user maintenance shall not be
made by children without supervision.
m If the supply cord is damaged, it must
be replaced by the manufacturer, its
service agent or similarly qualified
persons in order to avoid a hazard.
CHARGER SAFETY
Read all safety warnings, instructions
and specifications provided with the
charger. Failure to follow all instructions
listed below may result in electric shock, fire
and/or serious injury. Save all warnings
and instructions for future reference.
WARNING!

11
JCB-20JS
Instruction & User Manual
9
1. TRIGGER SAFETY INTERLOCK
2. ON/OFF TRIGGER
3. DUST NOZZLE
4BASE PLATE LOCKING LEVER
5. BASE PLATE
6. PENDULUM STROKE ADJUSTING
LEVER
7. BLADE GUIDE ROLLER
8. FASTENING SCREWS FOR THE
PARALLEL STOP
9. PARALLEL STOP
10. CHARGER*
11. BATTERY PACK* - PLEASE REFER TO TA-
BLE ON PAGE 12 FOR BATTERY INFORMATION
12.
13.
BATTERY TEST BUTTON AND
CHARGE INDICATOR*
BATTERY RELEASE BUTTON
1
2
3
4
5
7
86
10
11
12
Battery size shown for
illustrative purposes only
COMPONENT LIST
*If applicable
13

12 JCB-20JS
Instruction & User Manual
TOOL TECHNICAL DATA
NOISE INFORMATION
Power 20V DC (From Attached Battery)
No Load Speed 0 - 2500 rpm
Stroke Length 1” (25.4 mm)
Saw Positions 4
Saw Angles 0°/ 15°/ 30°/ 45°
Saw Blade Fixture T
Cutting Capacity Wood 3.1” (80 mm)
Steel 1/4” (6 mm)
Product Weight (Body only, w/o battery) 3.3 lbs (1.5 kg)
A-Weighted Sound Pressure (LpA) 83 dB(A)
A-Weighted Sound Power (LwA) 94 dB(A)
KpA & KwA 5 dB(A)
Wear ear protection when sound pressure is over 80 dB(A)
LITHIUM ION BATTERY TECHNICAL DATA
Battery
Code
Battery
Size
Number
of cells Voltage Battery
Capacity
Charge Time
(Fast Charger:
JCB-20VFC)
Charge Time
(Super Fast Charger:
JCB-20VSFC)
Charge Time
(Dual Charger:
JCB-20DC)
JCB-20-15LI Small 5 20V 1.5Ah 30 mins 20 mins 25 mins
JCB-20-20LI Small 5 20V 2.0Ah 45 mins 30 mins 35 mins
JCB-20-30LI Large 10 20V 3.0Ah 65 mins 40 mins 45 mins
JCB-20-40LI Large 10 20V 4.0Ah 90 mins 55 mins 60 mins
JCB-20-50LI Large 10 20V 5.0Ah 110 mins 65 mins 75 mins
Charger Fuse Rating: T2.4A T3.15A T5A
Times given as a guide only. Battery charge and discharge times dependant on age, usage and condition.
Charger Code Input Data Output Data
JCB-20VFC AC 120 V, 60Hz, 70W 14.4 -20V d.c. 2.4A
JCB-20VSFC AC 120 V, 60Hz, 105W 14.4 -20V d.c. 4.0A
JCB-20DC AC 120 V, 60Hz, 200W 20.5V d.c. 2 x 3.5A
CHARGER TECHNICAL DATA

13
JCB-20JS
Instruction & User Manual
The vibration emission value of the power
tool is tested under IEC 62841-1 and IEC
62841-2-11, and can vary during operation
depending on the following usage conditions:
WARNING!
m How the tool is used and the materials
being cut or drilled.
m The tool being in good condition and well
maintained.
m Using the correct accessory for the tool and
ensuring it is sharp and in good condition.
m The tightness of the grip on the handles and
if any anti-vibration accessories are used.
m The tool being used as intended by its
design and these instructions.
m The declared vibration total value may also
be used in a preliminary assessment of
exposure.
THIS TOOL MAY CAUSE HAND-ARM
VIBRATION SYNDROME IF USAGE IS
NOT ADEQUATELY MANAGED.
To be accurate, an estimation of exposure
level in the actual conditions of use should
also take account of all parts of the operating
cycle. These include times when the tool is
switched off and when it is running idle but
not actually doing work. This may significantly
reduce the total exposure level over the
working period, helping to minimize your
vibration exposure risk.
WARNING!
m ALWAYS use sharp chisels, drills and blades.
m Maintain this tool in accordance with these
instructions and keep well lubricated (where
appropriate).
m If the tool is to be used regularly then invest
in anti-vibration accessories.
m Avoid using tools in temperatures of 10°C
or less.
m Plan your work schedule to spread any high
vibration tool use across a number of days.
VIBRATION INFORMATION
Vibration total values (triax vector sum) determined according to IEC 62841-1
and IEC 62841-2-11
Sawing into Wood Vibration Emission Value (ah)6.2 ms-2
Uncertainty (K) 1.5 ms-2
Sawing into Metal Vibration Emission Value (ah)6.3 ms-2
Uncertainty (K) 1.5 ms-2

14 JCB-20JS
Instruction & User Manual
OPERATING INSTRUCTIONS
Intended Use
This jig saw is intended for cutting and sawing
of wood, metal, plastic and other similar
materials.
The power tool must not be modified or used
for any other purposes than the ones described
in these instructions.
Battery
Make sure the power tool ON/OFF Trigger
is not operated when inserting or removing
the battery. Use with JCB batteries only:
JCB-20-15LI, JCB-20-20LI, JCB-20-30LI,
JCB-20-40LI and JCB-20-50LI.
NOTE
m Do not use excessive force when
inserting or removing the battery
pack from the charger or power
tool. An incorrectly connected battery can
damage the battery terminals or the battery
socket on the power tool or charger.
m Use the button on the battery to check the
charging status; 4 red LEDs indicates fully
charged, where 1 indicates low battery
status.
Charging The Battery
After charging for the first time, ensure the
battery is completely discharged before
placing on charge again. Repeat this charging
and discharging cycle 4 to 5 times to ensure
battery is correctly conditioned.
WARNING!
m Place the battery charger on a level and
stable surface. Connect the battery pack to
the charger so that it clicks in to place.
m Plug the charger into a suitable power
supply. Note: ensure the voltage on the
charger rating label matches the power
supply voltage
m Refer to the Battery Charge Level table
below for battery charger status as indicated
by LED lights.
m When fully charged, unplug the charger
from the power point and remove the
battery from the charger.
Battery Charge Level
Red
LED
Green
LED Battery Charge Status
Charger is connected to
mains power
Connected battery is
charging
Connected battery is fully
charged
Connected battery has a
charging fault
Charger is outside correct
operating temperature
range (<0˚C / >40˚C)
If the LEDs on the charger do not come on
when charging:
m Check that mains plug is properly connected
to the power supply and the supply is
switched on.
m Check that the battery is correctly inserted
in the charger

15
JCB-20JS
Instruction & User Manual
Connecting the battery to the
power tool
m Connect the battery to the battery socket
on the tool so that it clicks into place.
Removing the battery from the
power tool
m Press the battery release button (13) and
remove the battery from the tool.
Inserting the Saw Blade
Prior to any assembly and adjustment always
unplug the tool.
WARNING!
Only use T-shank jig saw blades.
NOTE
m Pull up the blade fixture and slide the saw
blade into the groove as far as it will go with
the blade teeth pointing forward. Make sure
that the lug of the blade is fitted into the
blade clamp, then release the blade fixture.
m Ensure the blade is seated correctly in the
blade guide roller.
m Check the blade is held firmly.
After a cut the saw blade will be very hot. Be
careful when removing the saw blade. Wear
appropriate safety gloves.
WARNING!
ON/OFF Trigger
Before engaging the ON/OFF trigger, check
that the saw blade is properly fitted.
WARNING!
m To operate the jig saw, press and hold the
TRIGGER SAFETY INTERLOCK BUTTON
(1). Gradually press the ON/OFF Trigger (2)
to start the blade moving.
m To stop the jig saw, release the ON/OFF
Trigger. Note: the TRIGGER SAFETY
INTERLOCK button will also automatically
return to the safety position

16 JCB-20JS
Instruction & User Manual
Startup
m Before switching on the jig saw the front
of the base plate must lie flat on the work
piece.
m Always hold the jig saw firmly with both
hands. Make sure that the saw blade is not
in contact with the work piece before the jig
saw is turned on.
m Allow the blade to come to a full stop
before removing it from the cut.
Do not let the jig saw run in continuous
operation at the lowest speed. The motor
can overheat.
NOTE
Mitre Cutting
m For mitre sawing and flush-edge sawing the
base plate can be angled toward either side
in fixed steps (0°, 15°, 30° and 45°).
Only adjust the mitre angle when the jig saw
is switched off.
WARNING!
m Open the base plate locking lever (4).
m Tilt the base plate (5) to the required
position.
m Close the base plate locking lever to lock
the base plate into position.
Use of hex key on base plate
adjustment
A hex key is provided in the package to use
for base plate tightening.
NOTE
m When adjusting the base plate, if required,
use a hex key to tighten the bolt underneath
the base plate.
Adjusting the Pendulum Stroke
m Pendulum stroke is adjusted using the
stroke adjustment lever. The pendulum
stroke moves the saw blade in a horizontal,
pendulum motion.
m At level 0, the jig saw works in linear stroke
and at levels 1-3 in pendulum stroke.
At level 3 the pendulum motion is at its
greatest.
m To facilitate the removal of swarf from the
blade during cutting, the saw is pushed
backwards in the downward stroke.
This increases the cutting speed in the
longitudinal sections and less force is
therefore needed when cutting.
m Using pendulum stroke increases the service
life of blades.
m Correctly adjusting the pendulum stroke
improves the operation of the jig saw. The
blade is protected, the ejection of swarf
is improved and frictional heat is greatly
reduced.
The pendulum stroke can be adjusted while
the jig saw is running.
NOTE
When adjusting the base plate, make sure
the forward and the rear locating teeth in the
jig saw body are aligned and fully engaged
in the corresponding slots in the base plate
before closing the locking lever.
WARNING!

17
JCB-20JS
Instruction & User Manual
Lever Position: 0 - Linear Stroke
m For cutting soft steel, stainless steel, plastic
and HDF boards.
m For precise sawing of all materials for straight
and curved cuts.
m For clean cuts into wood and plywood.
m For sawing of splinter-susceptible materials.
Lever Position 1 - Small Pendulum
m For cutting soft steel, aluminium and
hardwood.
Lever Position 2 - Medium Pendulum
m For cutting wood and plywood.
Lever Position 3 - Large Pendulum
m For fast cutting wood and plywood.
m Only for cutting in straight cuts.
When using pendulum strokes, cutting edges
may splinter more than when working with
linear strokes. Brittle coatings on soft sub-
strates - e.g. laminated board are particularly
prone to this occurring.
NOTE
Dust Collection
The jig saw can produce a lot of sawdust. By
connecting the machine to a vacuum cleaner, a
clean and dust free operation is possible.
Dust extraction is not possible for mitre cuts.
NOTE
m Slide the dust nozzle (3) all the way into the
opening until the snap-in nose visibly and
audibly locks into place.
m Connect the dust nozzle with a vacuum
cleaner or dust extractor.
When sawing wood it is best to use an addi-
tional dust protection mask as wood dust is a
health hazard.
NOTE
Parallel Stop
To cut parallel to a wood edge you can use
the enclosed parallel stop. In order to fix the
parallel stop:
m Loosen the fastening screws (8) slightly.
m Using the scale on the parallel stop, you can
adjust the distance between the stop bar
and the saw blade.
m Secure parallel stop by tightening the
fastening screws in the desired position.
m When not using the parallel stop, tighten the
fastening screws securely. Otherwise the
screws can be unscrewed and fall off due to
the vibration of sawing.
Maintenance
Switch off the power tool and disconnect
the power (remove battery/unplug) before
cleaning and maintenance. This helps avoid
the risk of electric shocks and accidental
starting.
WARNING!
m Wipe the power tool with a dry or damp
cloth. Do not use a wet cloth. Do not
use detergent that contains solvent
or corrosive, abrasive additives. This
risks damaging the surfaces of the power
tool.

18 JCB-20JS
Instruction & User Manual
m Clear the power tool vents and the blade
mount of dust and dirt after each use.
Do not clean ventilation holes by
inserting sharp objects in them, such
as screwdrivers and other similar
objects.
m Stubborn contamination in areas hard to
access can be removed with compressed air
(max. 3 bar).
m Regularly check all fasteners, screws and
bolts to make sure that they are tight.
Tighten any loose screws immediately or
serious injury could occur.
Never open the power tool. The power
tool has no internal parts that the user can
service or repair. Never try to repair the
power tool yourself. Take to an authorised
service centre.
WARNING!
Transport and Storage
m If the power tool will remain unused for any
length of time, it should be stored in the
original packaging.
m Store the power tool and battery in a dry,
frost-free, well ventilated place.
m Keep all tools out of the reach of children.
m Always switch off the power tool and
disconnect it from the power supply
(remove the battery/unplug the power
cord) before transport.
m Always carry the power tool using the
purpose-designed handle.
m Ensure that the power tool is not at risk
of tipping over or exposed to excessive
vibration and shocks during transport,
especially if the tool will be transported by
car or other vehicle.
Operating temperature: 0-40 °C
Storage temperature: 20-60 °C
NOTE

19
JCB-20JS
Instruction & User Manual
WARRANTY STATEMENT
JCB Power Tools are guaranteed against manufacturing defects for
up to 12 months from date of purchase. Proof of purchase required.
This does not affect your statutory rights.
The original sales receipt will be required in the event of any claim within the warranty period.
Warranty cover commences from the date of purchase on the retail sales receipt and is valid only
for JCB Tools products bearing the CE mark and a visible serial number.
In the unlikely event your JCB Power Tool is subject to a manufacturing fault within the warranty
period, please contact the seller/retailer where the item was purchased.
JCB Power Tools used for Hire Fleets or as part of B2B and Service Contracts are not covered by
these terms and conditions.
JCB Tools Warranties excludes the following (where relevant):
m Components normally subject to wear such as carbon brushes.
m Batteries, Chucks and Chargers.
m Accessories and consumable items.
m Cases and tool storage products.
If your product develops a fault, contact the seller/retailer where it was purchased together with
your sales receipt.
Only products purchased from JCB Tools authorised sellers are covered by the warranty.
JCB TOOLS WILL NOT BE LIABLE FOR ANY INJURIES OR CONSEQUENTIAL DAMAGES
RESULTING FROM USE OF THIS PRODUCT.

20 JCB-20JS
Instruction & User Manual
Table of contents
Other jcb Power Tools manuals

jcb
jcb JCB-MC300 Installation manual

jcb
jcb JCB-MS-254SB Planning guide

jcb
jcb 21-DH1300 Planning guide

jcb
jcb 21-I8RT Planning guide

jcb
jcb JCB-20BLCD Planning guide

jcb
jcb MC300 Installation manual

jcb
jcb JCB-18JS Planning guide

jcb
jcb JCB-20MT Planning guide

jcb
jcb 21-18RS Planning guide

jcb
jcb JCB-ID1050 Planning guide