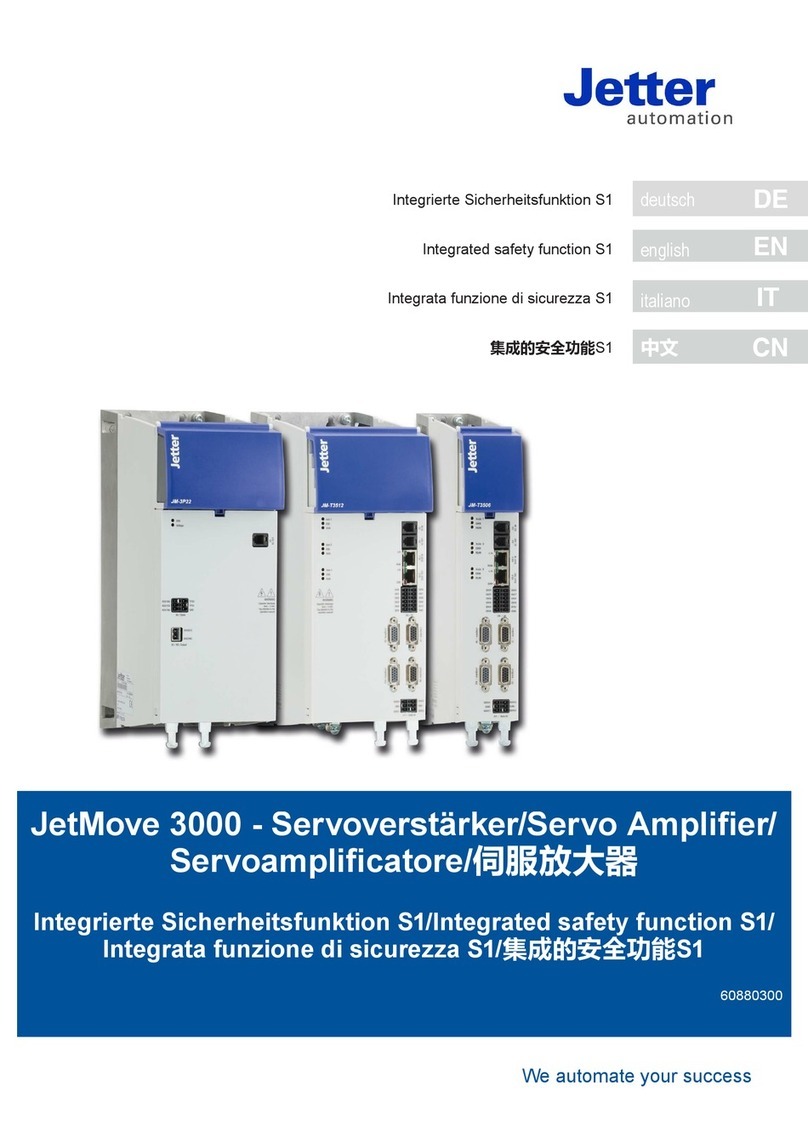
Jetter JetMove 3000 User manual

We automate your success
User Manual
JetMove 3000 – Servo Amplier
608880297

2Jetter AG
Item no. 608 802 97
Revision 1.11
March 2020 / Printed in Germany
Translation of the original document in German language.
This document has been compiled by Jetter AG with due diligence, and based on the known state of the art.
In the case of modications, further developments or enhancements to products shipped in the past, a revised docu-
ment will be supplied only if required by law, or deemed appropriate by Jetter AG. Jetter AG shall not be liable for any
errors either in form or content, or for any missing updates, as well as for any damage or detriment resulting from such
failure.
The logos, brand names, and product names mentioned in this document are trademarks of Jetter AG, of associated
companies or other title owners and must not be used without consent of the respective title owner.
The German manual is the original of the operating instructions.

1 Table of contents
1 Safety...........................................................................................12
1.1 Measures to ensure your safety.....................................................................................12
1.2 Warning symbols ..........................................................................................................13
1.3 Intended use .................................................................................................................13
1.4 Usage other than intended............................................................................................14
1.5 EC declaration of conformity.........................................................................................15
1.6 Responsibility ................................................................................................................17
1.7 Maintenance and repairs...............................................................................................17
1.8 Repairs..........................................................................................................................17
2 Mechanical installation..................................................................18
2.9 Mounting instructions...................................................................................................18
2.9.1 Order and arrangement .................................................................................19
2.10 Mounting clearances.....................................................................................................20
2.11 Cooling of devices.........................................................................................................21
2.12 Mounting wall-mount devices.......................................................................................22
2.12.2 Dimensions of the version for wall mounting .................................................22
2.13 Mounting ColdPlate devices ..........................................................................................25
2.13.3 Dimensions of the version for wall mounting .................................................25
2.13.4 Mounting on the cooler.................................................................................28
2.13.5 Dimensioning of the cooler............................................................................29
2.14 Dimensions of the system .............................................................................................30
3 Electrical installation .....................................................................34
3.15 Notes on installation .....................................................................................................34
3.16 Installation to EMC rules ...............................................................................................35
3.17 Overview of connections...............................................................................................37
3.17.6 Single-axis servo amplifier..............................................................................39
3.17.7 Twin-axis servo amplifier................................................................................42
3.17.8 Triple-axis servo amplifier...............................................................................46
3.18 Connecting the protective earth conductor...................................................................52
3.19 Electrical isolation concept ............................................................................................54
3.20 Connecting the supply voltages ....................................................................................56
3.20.9 Controller supply voltage (+24 V DC) .............................................................57
3.20.10 DC link supply................................................................................................57
3. 20.11 Overview of busbar connections....................................................................58
3.21 Control terminals ..........................................................................................................59
3.21.12 Digital inputs at X6 (standard functions) ........................................................60
3.21.13 Digital inputs at X11 (safe digital inputs) ........................................................60
3.22 Motor connection .........................................................................................................61
Jetter AG 3
JetMove 3000
3.22.14 Motor connection diagram ............................................................................63
3.22.15 Monitoring of output for motor holding brake...............................................64
3.22.16 Specification of motor terminals ....................................................................64
3.22.17 Switching operations in the motor cable........................................................65
3.23 Encoder connection ......................................................................................................65
3.23.18 Connecting high-resolution encoders ............................................................66
3.23.19 Connecting an additional encoder (X8)..........................................................67
3.24 Specification of cross communication ...........................................................................69
3.25 EtherCAT interface specification....................................................................................70
3.26 Connection example - Supply unit/servo amplifier ........................................................71
4 Diagnostic functions .....................................................................73
4.27 LEDs: Axis status ...........................................................................................................73
4.27.20 Flashing code.................................................................................................74
4.28 Hotline, support and service..........................................................................................75
5 Standard version S1 ......................................................................77
6 Appendix......................................................................................79
6.29 Technical Data of JM-3000 Servo Amplifier, Part 1........................................................79
6.29.21 Control unit - Current data (JM-3xxx 3.0 A)...................................................79
6.30 Current data of JM-3000 switching device....................................................................80
6.31 Technical Data of JM-3000 Servo Amplifier, Part 2........................................................82
6.31.22 Control unit - Current data (JM-3xxx 6.0 A)...................................................82
6.31.23 Control unit - Current data (JM-3xxx 12.0 A) .................................................83
6.31.24 Control unit - Current data (JM-3xxx 16 ... 18 A) ...........................................84
6.31.25 Control unit - Current data (JM-3xxx 24 ... 32 A) ...........................................85
6.32 Switching device - Current data JM-3xxx 6 ... 32 A .......................................................86
6.32.26 Current data - Control unit of servo amplifier (3.0 A).....................................93
6.33 Ambient conditions.......................................................................................................94
6.34 Certifications.................................................................................................................96
6.34.27 CE certification ..............................................................................................96
6.34.28 UL certification ..............................................................................................96
6.34.29 Retroactive grid load due to harmonics..........................................................96
6.35 Accessories ...................................................................................................................97
6.35.30 Connection cables for communication...........................................................97
4 Jetter AG

Navigating through this document
In order that you can commission your new JM-3000 as quickly and
smoothly as possible, we ask that you rst read through this user manual
thoroughly and carefully.
Step Action Comment
11..With this user manual, you will
be able to install and commis-
sion the servo amplier JM-
3000 very easily and quickly.
Instructions for a quick
start
22. Just follow the step-by-step
instructions in the chapters.
Let’s get started!
NOTE:
This user manual covers the JM-3000 servo ampliers only.
Information on the JSC-3000 safety controller* and the supply unit can be
found in the respective user manuals.
* In preparation
Correlation between
number of axes, rated
current and frame sizes
(BG)
Unit BG1
Rated current IRated RMS [A]
BG2
Rated current IRated RMS [A]
1 axis A 6 12 18 - - 24 32*
2 axes A 2 x 3 2 x 6 - - 2 x 12 2 x 16 - -
3 axes A 3 x 3 3 x 6 - - 3 x 12 - - -
* Device in preparation
Jetter AG 5
JetMove 3000

11 Safety
22 Mechanical installation
33 Electrical installation
44 Commissioning
55 Diagnostics
66 Safety features (STO and SBC)
AA Appendix
Documentation
for JM-3000
Document Content Item number Format
JM-3000 Supply Unit -
User Manual
Installation, mounting, safety,
specication 60880298 PDF
JM-3000 Servo Amplier
- User Manual
Installation, mounting, safety,
specication 60880296 PDF
JM-3000-S1
User manual
Description of the safety functions STO
and SBC 60880300 PDF
1) In preparation
Further
documents
Document Content Item number Format
Industrial Automation
Catalog
• Overview and ordering information
for: JM-1000, JM-1432, JM-3000
multi-axis system, conguration
variants and accessories
PDF
JetMove 3000
6 Jetter AG

Order number code for
The item designation provides you with information about the specic
design variant of your servo amplier. You can take the meaning of the
individual positions in the item designation from the following order number
code.
JM - 3 5 16 x - S1 Ix Tx Rx Cx Fx Lx Ax
= Single-axis unit
D = Twin-axis unit, e.g. 2 x 3 A
on one module
T = Triple-axis unit, e.g. 3 x 12
A on one module
3 = Series 3000
5 = DC 560 V from supply unit
01 ... 999 = Rated current in Amps
Device revision (optional)
= First version
B = First revision
= No safety technology
S1 = ST0 (Safe Torque Off) +
SBC (Safe Brake Control)
S2 = Extended functional safety (e.g. SLS, SLT, ...)
for encoder resolver and HIPERFACE DSL® 1)
= Standard, EtherCAT (JX4 Jetter bus)
= No option
TD = HIPERFACE DSL
= No braking resistor
= Standard, air cooling
C1 = ColdPlate
= Standard
= No protective coating (standard)
L1 = Protective coating
Ax = Current hardware revision
A0 = Hardware revision 0
A1 = Hardware revision 1
A2 = Hardware revision 2
...
1) in preparation
Fig. 0.1 Order number code - JM-3000 servo amplier
Jetter AG 7
JetMove 3000

Manufacturing data
You will nd the serial number on the nameplate of JM-3000 servo amplier,
from which you can read the date of manufacture according to the following
code. The location of the nameplate on the JM-3000 can be seen on Fig.
0.3 on page 8 and Fig. 0.4 on page 9.
Fig. 0.2 Nameplate - JM-3000 Supply
T
Fig. 0.3 Nameplate - JM-3000 (T)
Year of manufacture
Week of manufacture Production-specic code
Parts per week
JetMove 3000
8 Jetter AG

A second nameplate (T1) with only the most important information is lo-
cated on the top of the busbar cover. This means that the nameplates are
readable even when the devices are installed in a row.
T1
Fig. 0.4 Nameplate - JM-3000 (T1)
Scope of delivery
The scope of delivery includes:
yJM-3000 servo amplier
yPre-assembled connection cables for cross communication and EtherCAT
yPre-installed busbar elements for 24 V controller supply voltage (UCV) and DC
link supply (UDC link)
yMating connector(s)
yProduct DVD
Jetter AG 9
JetMove 3000

Pictograms
Pictograms are used in these operating instructions to improve orientation;
their meaning is described in the following table. The meaning of each pic-
togram is always the same even when it appears without text such as when
it is placed next to a connection diagram.
NOTICE!
Incorrect operation can damage the drive or cause it to malfunction.
DANGER FROM ELECTRICAL VOLTAGE!
Incorrect actions can endanger human life.
DANGER FROM ROTATING PARTS!
The drive can start up automatically.
Notices & assistance
NOTE:
Useful information or reference to other documents.
11..STEP:
Processing step within a sequence of several actions.
JetMove 3000
10 Jetter AG

1 Safety
Measures to ensure your safety
The following instructions must be read before initial commissioning to
avoid injury and/or damage to property. Observe the safety instructions at
all times.
1. First read the operating instructions!
Do not start the implementation until you have understood these instructions.
Electric drives are in principle a source of hazard:
Electrical voltages of 400 V AC or 565 V DC to 480 V AC or 678 V DC
Dangerous high voltages ≥ 50 V may be present even 3 minutes after dis-
connection from mains power (capacitor charge). Therefore, always check
that there is no voltage.
Follow the instructions of the warning label on the device (see front panel).
Warning of hot surfaces!
Temperatures of up to 100 °C can occur on the heat sink of the unit. Ad-
jacent devices, especially above the heat sink, may be damaged. Contact
with hot surfaces may cause burns.
Maintain sufcient distance to adjacent modules!
Provide suitable protection against accidental contact with the heat sink.
installation and operation:
Persons with heart pacemakers, metallic implants or hearing aids, etc.
must not enter the following areas:
Areas where drive systems are installed, repaired or operated.
Areas where motors are installed, repaired or operated. Motors with perma-
nent magnets are particularly dangerous.
If it is necessary to enter these areas, rst consult a doctor for a decision if
this is safe.
Personal
To prevent injury and property damage, only qualied personnel with an
electrotechnical education are permitted to work on the device.
The qualied person must be familiar with the operating instructions (see
IEC 364, DIN VDE 0100).
Knowledge of national accident prevention regulations (e.g. BGV A3, in
Germany)
Jetter AG 11
JetMove 3000 Safety

During the installation, follow the instructions below:
Always comply with the connection conditions and technical data.
Observe the standards for electrical installation, such as conductor cross-
section and protective conductor and grounding connections.
Do not touch electronic components or contacts (electrostatic discharge can
destroy components).
Warning symbols
The safety instructions describe the following hazard classes.
The hazard class describes the risk if the safety instructions are not fol-
lowed.
Warning symbols Hazard class according to
ANSI Z 535 Consequences of non-observance
Danger!
DANGER indicates a hazardous situation which, if
not avoided, will result in death or serious injury.
Warning!
WARNING indicates a hazardous situation which, if
not avoided, could result in death or serious injury.
Caution!
CAUTION indicates a hazardous situation which, if
not avoided, will result in minor or moderate injury.
Danger from electrical volt-
age!
Death or serious injury will result if the appropriate
precautions are not taken.
Caution hot surface!
CAUTION indicates a hazardous situation which, if
not avoided, will result in minor or moderate injury.
Table 1.1 Explanation of warning symbols
Intended use
The JM-3000 servo ampliers are components designed for installation in
industrial and commercial plants and machines. Installation is only permit-
ted in stationary equipment.
The JM-3000 multi-axis motion system consists of at least one supply unit
and at least one servo amplier. In motor operating mode, the supply unit
draws power from the supply network and provides it to the connected
servo ampliers via the DC link.
Safety
12 Jetter AG

When the servo amplier is installed in a machine, commissioning (i.e.
commencement of DES intended use) is prohibited until it has been de-
termined that the machine complies with Machinery Directive 2006/42/EC.
Commissioning, i.e. the commencement of the intended use is only permit-
ted if the EMC Directive (2004/108/EC) is complied with.
CAUTION!
According to EN ISO 13849-2 the control cabinet must have a degree of protection
of IP54 or higher when using the safety function STO (Safe Torque OFF).
The JM-3000 servo ampliers comply with the Machinery Directive
2006/42/EC. They have been tested and certied according to ap-
plicable standards (see Declaration of Conformity).
Usage other than intended
The servo ampliers must not be used outside a control cabinet.
They must also not be used for other purposes, e.g. for generating higher-
frequency on-board networks from a DC battery.
And they must not be operated on supply units from other manufacturers.
Jetter AG 13
JetMove 3000 Safety

EC declaration of conformity
EU-Konformitätserklärung
EC declaration of conformity
FO_EW_005_9 CE_JMx3xS1xTxRxCxFxLxAx_2019-05-08-11-18-39.docx
Hersteller / manufacturer Jetter AG
Geräteart / model: Servoamplifier incl. option S1
Produkt / product: Serie JM-35xx-S1Ay / Product family JM-35xx-S1Ay
Serie JM-35xx-S1TDAy / Product family JM-35xx-S1TDAy
Serie JM-D35xx-S1Ay / Product family JM-D35xx-S1Ay
Serie JM-T35xx-S1Ay / Product family JM-T35xx-S1Ay
y=0 * y=1 y=0 * y=1
Das aufgeführte Produkt entspricht unter Beachtung der Informationen und Anweisungen in der zugehörigen
Produktdokumentation den folgenden EG-Richtlinien und Normen - jeweils mit Bezug auf die aktuelle Version - unter
Beachtung, dass bei Übergangsfristen stets auf die bisherige (ältere) Version verwiesen wird.
Die Inbetriebnahme des genannten Produktes ist so lange untersagt, bis das Produkt in die Maschine eingebaut wird
und den zutreffenden Richtlinien entspricht. Die Informationen und Anweisungen in der Dokumentation des gelieferten
Produkts sind zusätzlich zu beachten.
The product listed complies with the following EC directives and standards, taking into account the information and
instructions in the associated product documentation – with reference to the current valid version – in compliance of an
existing transitional period always on the previous (older) version is referenced.
It is prohibited to bring the named products into service until it is integrated in the machine and conforms to the relevant
directives. The information and instructions contained in the product documentation must also be observed.
•EG-Richtlinien / EU directives
2011/65/EU RoHS
RoHS
2006/42/EG Maschinen-Richtlinie
electrical equipment design
•harmonisierte, internationale oder nationale Normen / harmonized, international or national standards
Sicherheit / safety
IEC 61508-1: 2010
Funktionale Sicherheit sicherheitsbezogener elektrischer/elektronischer/programmierbarer
elektronischer Systeme - Allgemeine Anforderungen;
Functional safety of electrical/electronic/programmable electronic safety-related systems - General
requirements;
EN 61800-5-2: 2007
Elektrische Leistungsantriebssysteme mit einstellbarer Drehzahl - Anforderungen an die Sicherheit -
Funktionale Sicherheit;
Adjustable speed electrical power drive systems - Safety requirements - Functional;
Produkt-Norm / product norm
EN 61800-3: 2004 + A1: 2012
Drehzahlveränderbare elektrische Antriebe - EMV-Anforderungen einschließlich spezieller
Prüfverfahren;
Adjustable speed electrical power drive systems - EMC requirements and specific test methods;
Safety
14 Jetter AG

EU-Konformitätserklärung
EC declaration of conformity
FO_EW_005_9 CE_JMx3xS1xTxRxCxFxLxAx_2019-05-08-11-18-39.docx
Sicherheit / safety
EN 62061: 2005 + A1: 2013
Sicherheit von Maschinen - Funktionale Sicherheit sicherheitsbezogener elektrischer, elektronischer
und programmierbarer elektronischer Steuerungssysteme;
Safety of machinery - Functional safety of safety-related electrical, electronic and programmable
electronic control systems;
EN 61800-5-1: 2007
Elektrische Leistungsantriebssysteme mit einstellbarer Drehzahl - Anforderungen an die Sicherheit -
Elektrische, thermische und energetische Anforderungen;
Adjustable speed electrical power drive systems - Safety requirements - Electrical, thermal and energy;
EN ISO 13849-1: 2008 /AC: 2009
Sicherheit von Maschinen - Sicherheitsbezogene Teile von Steuerungen - Allgemeine
Gestaltungsleitsätze;
Safety of machinery - Safety-related parts of control systems - General principles for design;
Zur Zusammenstellung technischer Unterlagen bevollmächtigte Person
Authorised person for compiling technical files
Jetter AG, Gräterstr. 2, D-71642 Ludwigsburg
Ort / place: Ludwigsburg
Datum / date: 10.05.2019
Unterzeichner / signed by: Christian Benz
Vorstandsvorsitzender / CEO
Jetter AG 15
JetMove 3000 Safety

Responsibility
Electronic devices are inherently not immune to failure. The constructor
and/or the operator of the machine or system is responsible for ensuring
that if the device fails, the drive will be set to a safe state.
In the section on “Electrical equipment of machines” the standard EN
60204-1/DIN VDE 0113-1 "Safety of machinery" stipulates safety require-
ments for electrical control systems. These requirements are intended to
protect persons and machinery and to maintain the functional capability of
the machine or system, and must be observed.
The function of an emergency stop system (acc. to EN 60204) leads to the
power supply of the drive being switched off which means that the motors
coast to a stop in uncontrolled manner. To avert danger, it may be use-
ful to provide an emergency stop function that keeps individual drives in
operation or initiates certain safety sequences. Emergency stop means
that movement is stopped by switching off the voltage or Safe Torque Off
(STO).
The design of the emergency stop measure is assessed by a risk assess-
ment of the machine or plant including the electrical equipment according
to DIN EN ISO 12100:2011-03 (formerly EN ISO 14121) and determined
according to EN ISO 13849-1 (formerly DIN EN 954-1) "Safety of machines
- General principles for design - Risk assessment and risk reduction" with
selection of the circuit category.
Maintenance and repairs
Maintenance procedures are not required. In the event of a fault, the de-
vice must be replaced and returned to the manufacturer.
Repairs
Only authorized repair centers are permitted to carry out repairs. Unauthor-
ized tampering can lead to death, personal injury and damage to property.
The warranty provided by Jetter AG is rendered void.
Safety
16 Jetter AG

2 Mechanical installation
Mounting instructions
moisture enters into the device
drill chips, screws or foreign objects fall into the device.
Please note:
This device is intended exclusively for installation inside a stationary
control cabinet. The control cabinet must at least meet the IP44 degree
of protection. When using the safety functions (STO and SBC) in the
servo amplier, the control cabinet must have a degree of protection of
IP54 or higher in accordance with EN ISO 13849-2.
Do not install servo ampliers in areas where they will be exposed to
continued shocks. Further information can be found in the appendix.
Maximum pollution degree 2 according to EN 60664-1. For more
information on environmental conditions see the Appendix.
The best result for an EMC-compliant installation can be achieved with
a chromated or galvanized mounting plate. If the mounting plates have
been painted, remove the paint from the contact areas! The devices
themselves have a blue chromated zinc frame.
NOTE:
When installing the servo amplier within a multi-axis system, the operating
instructions of the other devices (supply unit, controller etc.) must also be
observed.
Jetter AG 17
JetMove 3000 Mechanical installation

Order and arrangement
The following basic guidelines apply to the arrangement and installation of
the supply unit and servo ampliers:
Line-up and order
The devices can be mounted directly next to each other and without
any gaps between them. They are fastened with two/four screws to
the mounting plate. Control and power voltages are fed to the servo
ampliers (JM-3000) via DC link and 24 VDC busbars from the supply
unit. Thanks to the same cooling concept, this is possible without
additional compensation measures with regard to device depth.
The units must be mounted in the specied order in a row as shown in
Fig. 2.1. A different order is not permissible, as otherwise problems with
the busbar and the mutual thermal inuence will occur.
1 2 3 1) JM-3000 supply unit
2) JM-3000 servo amplier
3) additional JM-3000 servo
amplier
Fig. 2.1 Order of line-up
CAUTION
Hot surfaces
Protection against hot surfaces during operation. Temperatures of up to
100 °C can occur on the heat sink of the unit. Please ensure that there is
sufcient distance to adjacent modules, especially above the heat sink,
CAUTION
Protection against hot surfaces during operation. Provide suitable
protection against accidental contact with the heat sink.
Mechanical installation
18 Jetter AG

Mounting clearances
CAUTION
The minimum clearances specied in Fig. 2.1 above, below and in front
of the device applies to all units (JM-3000 supply unit and JM-3000 servo
ampliers). The clearance above is important to avoid heat accumulation,
the clearance from the bottom and the front to allow correct cable routing.
≥130
≥100
≥300
*) The bending radius of the connecting cables must be taken into account
Fig. 2.2 Mounting clearances
Jetter AG 19
JetMove 3000 Mechanical installation

Cooling of devices
Cooling air must be able to ow unhindered through the unit (interior
and heat sink). When installing the unit in a control cabinet with natural
convection (= heat loss is dissipated to the outside via the control cabinet
walls), always provide an internal fan. If the unit is switched off due to
excessive temperature, the cooling conditions must be improved.
Fig. 2.3 Cooling air ows unhindered through the unit
Mechanical installation
20 Jetter AG
Other manuals for JetMove 3000
1
This manual suits for next models
10
Table of contents
Other Jetter Amplifier manuals

Jetter
Jetter JetMove 225-480 User manual

Jetter
Jetter JetMove 204-480 User manual

Jetter
Jetter JM-1008 User manual

Jetter
Jetter JM-204-480 User manual

Jetter
Jetter JM-203B-230 User manual

Jetter
Jetter JM-215B-480 User manual

Jetter
Jetter JM-35 S1 Series User manual

Jetter
Jetter JetWeb JetMove 203-230 User manual

Jetter
Jetter JetMove JM-100 S1 Series User manual

Jetter
Jetter JetMove 208-480 User manual