Jinko JK2817N User manual


1/55
Catalog
Chapter one open box installation.
1.1 Open box examination
1.2Power connection
1.3 fuse
1.4 environment
1.5 use test fixture
1.6 preheating
1.7 other characteristics of the instrument
Chapter two Summary
2.1 Front panel specification
2.2 Rear panel specification
2.3 Display area definition
2.4 Main menu key and corresponding display page
2.4.1 Display main menu key [DISP]
2.4.2 Parameter settings main menu key [SETUP]
2.4.3 System setup main menu key [SETUP]
2.5 basic operation
Chapter three [DISP] Menu key description
3.1 <element measurement display>page
3.1.1 test function
3.1.2 test range
3.1.3 test frequency
3.1.4 test level
3.1.5 DC bais
3.1.5 test speed
3.1.6 other tools
3.2 <BIN number display>page
3.2.1 Comparator function
3.2 <BIN count display>page
3.2.1 parameter
3.2.2 nominal
3.2.3 BIN
3.2.4 Upper and lower limits
3.2.5 count
3.2.6 Auxiliary(AUX)
3.2.7 overproof (OUT)
3.3 <Measurement Settings > page
3.3.1 Trigger mode
3.3.2 automatic level control function
3.3.3output resistance
3.3.4 DC resistance polarity
3.3.5 DC resistance range

2/55
3.3.6 DC level
3.3.7 deviation test function
3.4< user correction > page
3.4.1 open circuit correction
3.4.2 short circuit correction
3.5 < limit table setting > page
3.5.1 tuning parameters
3.5.2 comparative functional limit mode
3.5.3 tolerance mode nominal value setting
3.5.4 Comparator function ON/OFF
3.5.5 Auxiliary BIN ON/OFF
3.5.6 Upper and lower limits
Chapter four [SYSTEM]Menu key description and file management
4.1 < System Settings > page
4.1.1 instrument function
4.1.2 Keystroke sound
4.1.3 U disk switch
4.1.4 display language
4.1.5 Menu disping
4.1.6 time
Chapter five Performing LCR measurement operations and some examples
5.1 ”Zero clearing” correction operation
5.1.1 Full frequency reset
5.1.2 Point frequency zero(It is better to use a single frequency test.)
5.2 The correct connection of the tested components
5.3Eliminating the influence of stray impedance
5.4 JK2817N test inductor fast operation example
5.5 JK2817N used for multi frequency list scanning to test capacitance fast operation
5.6 Comparator setup instance
5.6.1 Capacitor sorting
5.6.2 Load calibration operation example
Chapter six Performance and testing
6.1 measuring function
6.1.1 measurement parameters and symbols
6.1.2 equivalent mode
6.1.3 range
6.1.4 triggering
6.1.5 trigger delay
6.1.6 test end connection mode
6.1.7 measurement speed (frequency >=10kHz)
6.1.8 averag
6.1.9 display digit
6.1.10 test signal frequency
6.1.11 signal mode

3/55
6.1.12 test signal level
6.1.13 output impedance
6.1.14 test signal level monitor
6.1.15 measurement shows maximum range.
6.1.16 DC bias voltage source
6.1.17 │Z│,│Y│,L,C,R,X,G,B accuracy
6.1.18 D accuracy
6.1.19 Q accuracy
6.1.20 θ accuracy
6.1.21 G accuracy
6.1.22 Rp accuracy
6.1.23 Rs accuracy
6.1.24 Accuracy factor
6.1.25 DC resistance DCR accuracy
6.1.26 leakage inductance Lk accuracy
6.2 safety requirements
6.2.1 insulation resistance
6.2.2 insulation strength
6.2.3 leakage current
6.3 electromagnetic compatibility requirements
6.4 performance testing
6.4.1 working conditions
6.4.2 test instruments and equipment are shown in the table below.
6.4.3 function check
6.4.4 test signal level
6.4.5 frequency
6.4.6 measurement accuracy
6.4.7 capacitance C, loss D accuracy
6.4.8 inductance L accuracy
6.4.9 impedance Z accuracy
6.4.10 DC resistance DCR accuracy

4/55
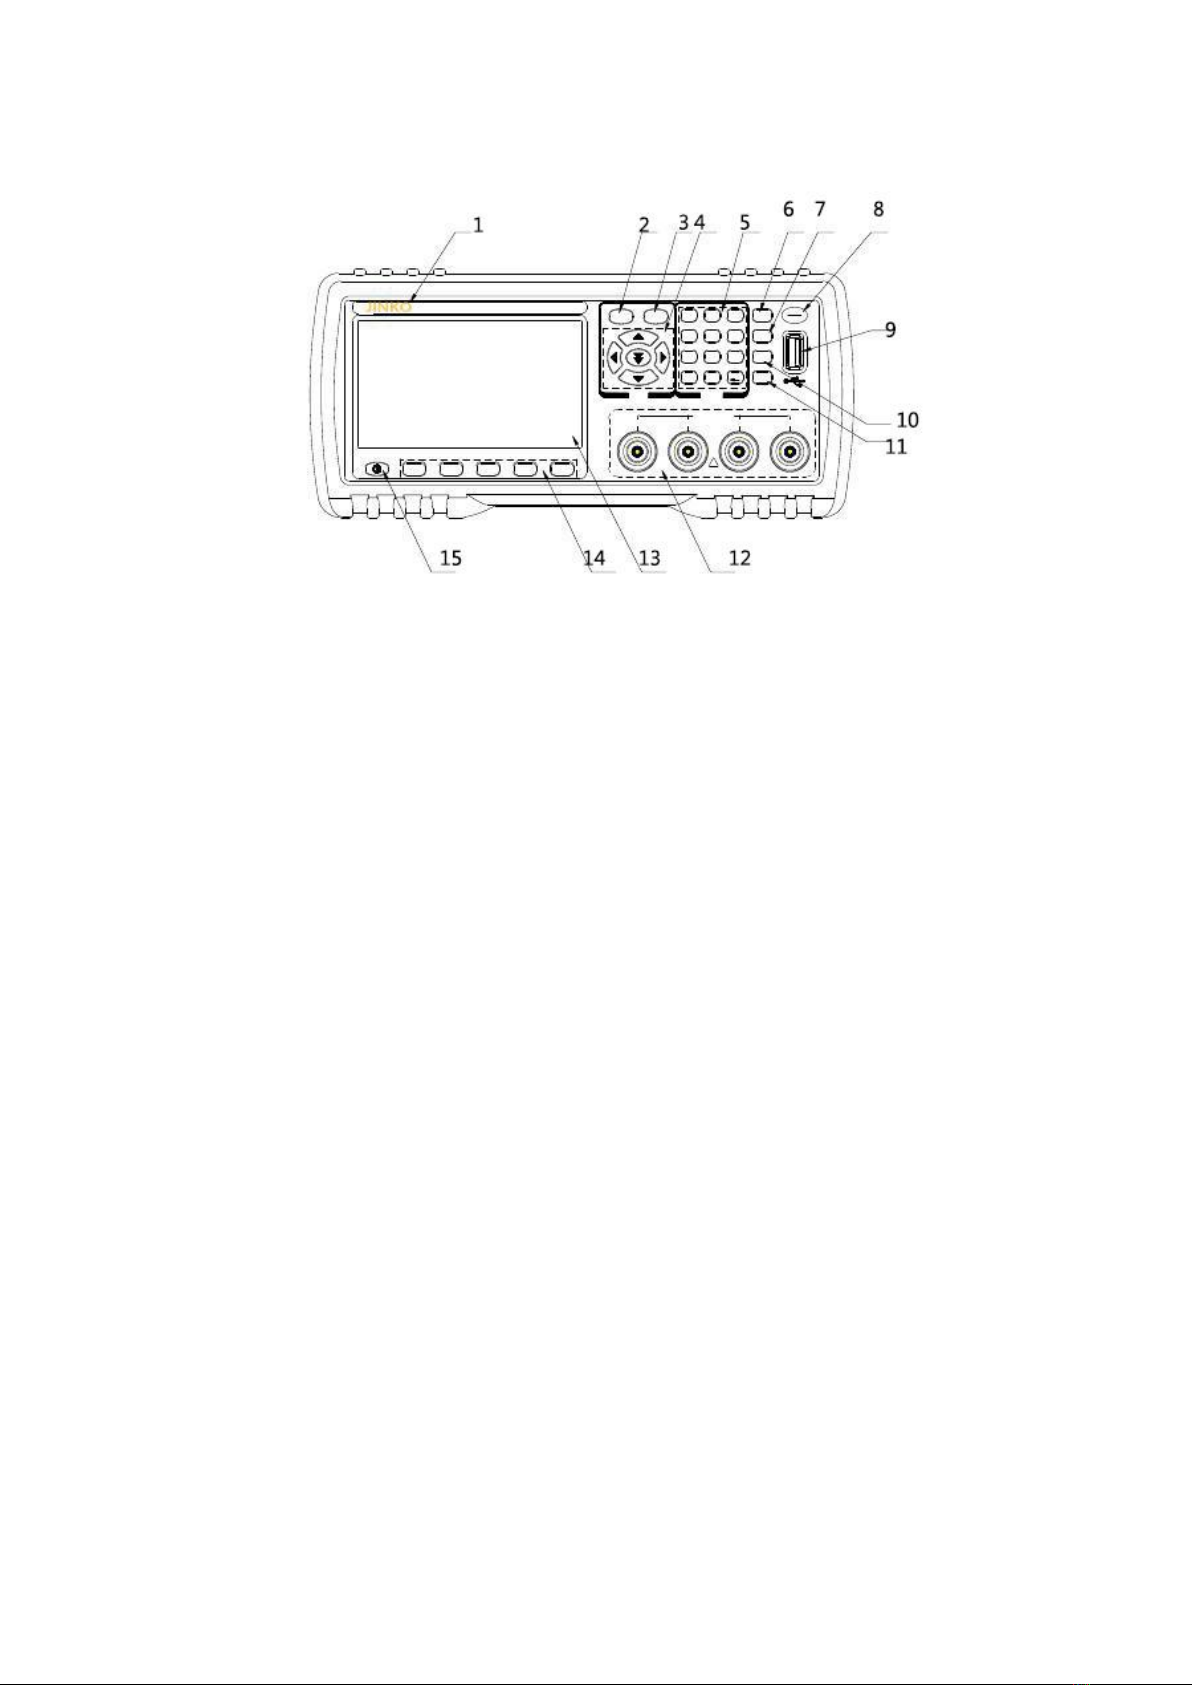
Chapter one Unbox installation
This chapter describes some of the checks that must be done when you receive the instrument, and
the conditions that must be understood and met before installing and using the instrument.
1.1 Open box examination
Thank you for purchasing and using our products. After opening the case, you should check
whether the instrument is damaged due to transportation. We do not recommend that you power
the instrument in case of damaged appearance.
Then confirm according to packing list, if there is any discrepancy, you can contact our company
or distributor as soon as possible to protect your rights and interests.
1.2 Power connection
(1)Power supply voltage range: 198 ~242 Vac.
(2)Power supply frequency range: 47 ~63 Hz.
(3)Power supply range: no less than 80 VA.
(4)The power input phase line L, zero line N, ground wire E should be the same as the power plug
of this instrument.
(5)This instrument has been carefully designed to reduce the clutter interference caused by AC
power input. However, it should be used in low noise environment as far as possible. If
unavoidable, install power filter.
———————————————————————————————————————
Warning: In order to prevent leakage of electricity to the instrument or human damage, users must
ensure that the power supply to the ground reliable connection.
———————————————————————————————————————
1.3 Fuse
The instrument has been equipped with fuses, and users should use the fuse provided by our
company.
——————————————————————————————————————
Warning: before the power up, you should pay attention to whether your fuse position is in line
with the supply voltage range.
——————————————————————————————————————
1.4 Environment
(1)Please do not use instruments in dusty, vibrant, direct sunlight and corrosive gases.
(2)The normal working temperature of the instrument should be between0℃~40℃, relative
humidity≤75% environment, so please try to use the instrument in this condition to ensure the
accuracy of measurement.
(3)The rear panel of the instrument is equipped with a heat dissipation device to avoid internal
temperature rise. In order to ensure good ventilation, do not block the left and right vents, so as to
maintain the accuracy of the instrument.
(4)This instrument has been carefully designed to reduce the clutter interference caused by AC

5/55
power input. However, it should be used in low noise environment as far as possible. If
unavoidable, install power filter.
(5)If the instrument is not used for a long time, please put it in the original packing box or similar
box and store it in the ventilation room with the temperature of 5℃~40℃and the relative
humidity of not more than 85% RH. Air should not contain harmful impurities in the corrosion
gauge, and direct sunlight should be avoided.
(6)Instruments, especially those connected with the tested parts, should be far away from strong
electromagnetic fields, so as to avoid interference with measurement.
1.5 Use test fixture
Please use the test fixtures or cables provided by our company, user-made or other company's test
fixtures or test cables may result in incorrect measurement results.The instrument test fixture or
test cable should be kept clean, and the pins of the device under test should be kept clean to ensure
good contact between the device under test and the fixture.Connect the test fixture or cable to
Hcur, Hpot, Lcur and Lpot of the front panel of the instrument.For the tested parts with shielding
shell,The shielding layer can be connected to“┴”of the instrument.
Note: when the test fixture or test cable is not installed, the instrument will display an unstable
measurement result.
1.6 Preheat
(1)To ensure accurate measurement of the instrument, the warm-up time should be no less than 15
minutes.
(2)Please do not switch the instrument frequently, so as to avoid the confusion of internal data.
1.7 Other characteristics of instrument
(1)Power consumption: power consumption≤80VA.
(2)Size (W*H*D):235(w)*105(H) *360(D);
(3)Upper frame size(W*H*D):215(w)*88(H)*335(D);
(4)Weight:about 3.6kg;
Chapter two Summary
This chapter describes the basic operation characteristics of JK2817N/2811B series
instruments.Read this chapter carefully before using the JK2817N/2811B series of instruments so
that you can quickly learn how to operate JK2817N/2811B
2.1 Front panel specification
Figure 2-1 gives a brief description of the JK2817N/2811B front panel.

6/55
Fig 2-1. Front panel specification
⑴Trademarks and modes: instrument trademarks and modes
⑵[DISP] Menu key : Press [DISP] key to enter the corresponding test display page.
⑶[SETUP] Menu key : Press the [SETUP] key to enter the test setup page and system setup
interface of the instrument function(LCR Meter, transformer measurement, transformer scanning)
alternately.
⑷Direction key (CURSOR)
The direction keys are used to move cursors between the domain and domain of the LCD display
page.When the cursor moves to a certain domain, the domain is highlighted on the LCD
screen.Fast down arrow keys can jump to a certain area.
⑸Numeric key
Numeric keys are used to input data to instruments. Numeric keys consist of numeric keys [0] to
[9], decimal points [.] and [+ / -] (bond) keys.
Press the [+/-]() key, If it is in the input data is the first sign selection, otherwise it is equivalent to
BACKSPACE, delete the last number function.(Note: long pressing the decimal point [.] key is
equivalent to the function of copying screen.
⑹[KEYLOCK] key
Press [KEYLOCK] key,The [KEYLOCK] button will be lit to indicate that the current panel key
function is locked.Press the [KEYLOCK] button again, and the [KEYLOCK] button will go out,
which means that the keyboard is released.If the command function is set to ON, enter the correct
command when unlocking the keyboard, otherwise the keyboard can not be unlocked.When the
instrument is controlled by RS232, the [KEYLOCK] button will be lit. Press the [KEYLOCK]
button again, and the [KEYLOCK] button will go out, which means that the keyboard will be
released to the local state.
⑺[BIAS]key
[BIAS] key is used to allow or prohibit 0-50mA/5V DC bias power output.Press the [BIAS] key
and the [BIAS] button will be lighted to indicate that the DC bias output is allowed.Press the
[BIAS] button again, and the [BIAS] button will go out, which means that the DC bias output is
prohibited.There are some non test screens that can not be added to DC BIAS. Press this button

7/55
will not respond.(JK2817N and JK2832A no this function).When the measurement function is
DCR, Lp-Rd and Ls-Rd, the function is invalid.
⑻PASS Indicator light,FAIL Indicator light
Test qualified PASS LED Instructions,Test failed FAIL LED Instructions
(9) USB HOST Interface
It is used to connect U disk memory, save and invoke files, copy and save data and so on.
⑽[RESET] key
Press[RESET] key ,When the transformer is scanned automatically, the scan will be terminated.
Other page devices will not perform any operation.
⑾[TRIGGER] key
When the trigger mode is set to MAN (manual) mode, the instrument can be triggered manually.
⑿test terminal(UNKNOWN)
The four terminal test terminal is used to connect the four end test fixture or test cable to measure
the measured parts.
Current Motivating high end(Hcur);
Voltage sampling high end(Hpot);
Voltage sampling low end(Lpot);
Current Motivating low end(Lcur).
⒀LCD liquid crystal display
480x272 Color TFT LCD display, display measurement results, measurement conditions, etc.
⒁softkey
Five soft keys can be used to select control and parameters. Each soft key has a corresponding
function definition at the top. The definition of soft key varies with the display page.
⒂POWER(POWER)
Power switch
2.2 Description of rear panel
Figure 2-2 gives a brief description of the JK2817N rear panel.
Figure 2-2. shows the rear panel
1.blowhole
2.Power socket (without fuse, fuse in instrument).

8/55
3.PLC Interface
4.RS232 Interface
——————————————————————————————————
Warning: before the power up, you should pay attention to whether your fuse position is in line
with the supply voltage range.
——————————————————————————————————
2.3 display area definition
JK2817N/2811B uses a 65K color 4.3 inch wide screen TFT display. The display contents are
divided into the following display areas, as shown in Figure 2-3.
Figure 2-3. display area definition
1) Display page area
This area indicates the name of the current page.
2) Soft key area
This area is used to display the functional definition of soft keys. The definition of a soft key has
different functions as the location of the cursor is different.
3) Measurement result / condition display area
This area displays test results and current test conditions.
2.4 Main menu key and corresponding display page
2.4.1 Display main menu key [DISP]
When the function of the LCR Meter is used, it is used to enter the component measurement
display page. The start button of the menu of capacitance, resistance, inductance and impedance
measurement function is mainly concerned.
This part of the function page has (using the "soft key" to select the following page functions, the
same below):
< measurement display>
< BIN number display >
< BIN count display >

9/55
< data preservation >
Note: The data storage software is valid in the measurement display interface and the list scan
display interface. After inserting the U disk, press the data to save and the state becomes ON. The
data is saved to the CSV directory of the U disk. CSV format. When the data storage software is
pressed again, the state becomes OFF and the data is save finished.
This key automatically records the test data after inserting the U disk at the MEAS interface, and
saves the system settings in SYSTEM.
2.4.2 Parameter set the main menu button[SETUP]
When the function of the LCR Meter is used, it is used to enter the settings of each component test.
The functional pages of this part include:
< component test Settings >
< user correction >
< limit Settings >
< list Settings >
< System Settings >
2.4.3 System setup main menu button[SETUP]
For entering the system settings home page. Mainly on the system settings, file list function menu
start button. The functional pages of this part include:
< System Settings >
< System Settings >
< Default Settings >
< system reset >
2.5 basic operation
The basic operation of JK2817N is as follows:
Use menu key ([DISP], [SETUP]) and soft key to select the page you want to display.
Use cursor keys ([口][口] [口] [口]) to move the cursor to the domain you want to set.When
the cursor moves to a certain domain, the domain will be highlighted and displayed. The domain is
the cursor area that can be set.
The corresponding soft key function in the current cursor area will be displayed in the "soft key
area". Select and press the required soft keys, [←] keys, and data for data entry.
When a numeric key is pressed, the soft key area will display the unit soft key that can be used.
You can end the data entry by the unit soft key.

10/55
Chapter three [DISP] Menu key description
3.1 < element measurement display> page
When the instrument is in the bridge function, press the [DISP] menu button and the < Element
Measurement Display > page will be displayed on the screen.
Figure:
On this page, the test results will be displayed in large characters. The following measurement
control parameters can be set on this page.
● Test function (function)
● Test frequency (frequency)
● Test level (level)
● Test range (range)
● Test speed (speed)
This display page has 5 domains: function, frequency, level, range, speed . Each control function
domain will be explained in detail in the following paragraphs.
The test results / condition display area on this display page shows the following test condition
information. These conditions can be set on the < measurement Settings > page or < user
correction > page.
●Signal source voltage / current monitoring(Vm,Im)
●Open circuit, short circuit, load correction ON/OFF setting status (correction)
3.1.1 Test function
JK2817N can simultaneously measure two parameters of impedance element in one measurement
cycle: one main parameter and one secondary parameter. The measurable parameters are as
follows:
Main parameter
● |Z| (impedance mode)
● |Y| (admittance module)
● L (inductor)
● C (capacitance)

11/55
● R (resistance)
● G (conductance)
● DCR (DC Resistance)
Secondary parameters:
● D (Loss factor)
● Q (quality factor)
● Rs (Equivalent series resistance ESR)
● Rp (equivalent parallel resistance EPR)
● Rd (DC resistance )
● X (Reactance)
● B (electrical susceptance)
● Ө (phase angle)
The test results of the main parameters and the auxiliary parameters are displayed in two lines of
large characters. The main parameter is displayed on the top row, and the secondary parameters
are displayed under the main parameter.
Measure function settings steps:
1) use cursor keys to move the cursor to the function domain, and the following soft keys will be
displayed.
● Cp-…
● Cs-…
● Lp-…
● Ls-…
● more
1/3
2) Press Cp-...Soft key,The following parameters will be selected:
●Cp-D
●Cp-Q
●Cp-G
●Cp-Rp
●Return
●Press the corresponding soft key, select the required parameters, press the return soft key, return
to previous soft key menu
3)press Cs-…Soft key,The following parameters will be selected:
●Cs-D
●Cs-Q
●Cs-Rs
●Return 口
●Press the corresponding soft key, select the required parameters, press the return soft key, return

12/55
to previous soft key menu
4)press Lp-…Soft key,The following parameters will be selected:
●Lp-Q
●Lp—Rp
●Lp—Rd
●more
1/2
●Return
●Press the corresponding soft key, select the required parameters, press the return soft key, return
to previous soft key menu
5)press more Soft key,Select the next group of soft keys:
● Lp-D
● Lp-G
● more
● 2/2
● Return
Press the corresponding soft key, select the required parameters, press the return soft key, return to
previous soft key menu,Press more soft keys to Select the previous group of soft keys.
6) Press Ls-…Soft key,The following parameters will be selected:
●Ls-D
●Ls-Q
●Ls-Rs
●Ls-Rd
●Return 口
Press the corresponding soft key, select the required parameters, press the return soft key, return to
previous soft key menu
7) Press more Soft key,Select the next group of soft keys:
●Z-…
●Y-…
● R-…
● G-B
●More
2/3
8) Press Z-…Soft key,The following parameters will be selected:

13/55
●Z-d
●Z-r
●Return
Press the corresponding soft key, select the required parameters, press the return soft key, return to
previous soft key menu
9) Press Y-…Soft key,The following parameters will be selected:
●Y-d
●Y-r
●Return
Press the corresponding soft key, select the required parameters, press the return soft key, return to
previous soft key menu
10) Press R-…Soft key,The following parameters will be selected:
●R-X
●Rp-Q
●Rs-Q
●Return
Press the corresponding soft key, select the required parameters, press the return soft key, return to
previous soft key menu
11) Press more Soft key,The following parameters will be selected:
●DCR
●more
3/3
Press DCR Soft key,select the required parameters, press the return soft key, return to previous
soft key menu
3.1.2 Test range
The test range is selected according to the impedance value of the tested LCR element.
JK2817N has 11 AC test ranges:1Ω, 3Ω, 10Ω, 30Ω, 100Ω, 300Ω, 1kΩ, 3kΩ, 10kΩ,30kΩ,100kΩ.
Test range setting Operation steps:
1)Use cursor keys to move cursors to range fields. The screen will display the following soft keys
● automatic The soft key is used to set the range to AUTO (automatic) mode.
● HOLD The soft key is used to switch the range from the AUTO (automatic) mode to
the HOLD (hold) mode. When the range is set to HOLD (hold) mode, the range will be locked in
the current test range. The current test range will be displayed in the range of the screen..
● plus + The soft key is used to increase the range in the range lock (HOLD) mode.
● minus - The soft key is used to decrease the range in the range lock (HOLD) mode..

14/55
2)Use the soft key to set the test range.
3.1.3 Test frequency
JK2817N test frequency range from 50 Hz to 100 kHz, resolution 0.01 Hz, The specific frequency
range and see the following table.When the test function is set to DCR, the frequency domain
shows "----".
Model
frequency range
Point number
JK2817N
50Hz-100kHz
34
JK2811B
100Hz-10kHz
4
JK2831
50Hz-200kHz
37
JK2832
20Hz-200kHz
15025
Test frequency setting steps:
JK2817N/JK2811B have two ways to test frequency settings.One is to use soft keys, the other is to
use numeric keys to input directly.
1) use cursor keys to move the cursor to the frequency domain. The screen soft key area displays
the following soft keys.
plus ++
The soft key is frequency increase coarse adjustment key. Each time the key is pressed, the
frequency increases in the six typical frequency points of the following table.
The frequency points that can be set with this soft key are as follows:
Model
frequency points
JK2817N
50Hz,60Hz,75Hz,100Hz,120Hz,150Hz,200Hz,250Hz,300Hz,
400Hz ,500Hz,600Hz,750Hz,1 kHz,
1.2kHz,
1.5kHz,
2kHz,2.5kHz,
3kHz,4kHz,
5kHz,
6kHz,
7.5kHz,
10kHz,
12kHz,
15kHz,
20kHz,25kHz,
30kHz,40kHz,50kHz,60kHz,75kHz,100kHz,
JK2811B
100Hz,120Hz,1kHz,10kHz
JK2831
50Hz,100Hz,1kHz,10kHz,100kHz,200kHz
JK2832
20Hz,100Hz,1kHz,10kHz,100kHz,200kHz
■plus +
The soft key is frequency increasing fine adjustment key. Each time the key is pressed, the
frequency increases to the next higher frequency point. The frequency points that can be set with
this soft key are as follows:
20Hz,
25Hz,
30Hz ,
40Hz,
50Hz,60Hz,
75Hz,
100Hz,120Hz,
150Hz,
200Hz,250Hz,

15/55
300Hz,400Hz ,500Hz,600Hz,750Hz,1 kHz,1.2kHz,1.5kHz,2kHz,2.5kHz,3kHz,
4kHz
,5kHz,6kHz,7.5kHz,10kHz,12kHz,15kHz,20kHz,25kHz,30kHz,40kHz,50kHz,
60kHz,75kHz,100kHz,120kHz 150kHz,200kHz
JK2817N/JK2831/JK2832 Three different types of instruments with different frequency ranges in
the above range according to the minimum frequency and maximum frequency automatically
determine the range.
■ minus -
The soft key is a frequency reduced fine adjustment key. Each time the key is pressed, the
frequency is reduced to the next lower frequency point. Use the soft key to set the frequency point
plus+
■ minus --
The soft key is frequency reduction coarse adjustment key. Each time the key is pressed, the
frequency decreases in the six typical frequency points of the following table. Use the soft key to
set the frequency point plus plus + +.
2)
Choose or set the test frequency using soft keys or numeric input keys. Soft keys display the
currently available frequency units (Hz, kHz, MHz) when the required frequency values are
entered with a digital key. You can use these unit soft keys to input units and data.
Note: If the input frequency is not the frequency supported by JK2817N/JK2811B, it is
automatically corrected above the frequency point nearest to the input frequency.
3.1.4 Test level
The test level of JK2817N /JK2811B is set according to the valid value of the sine wave
signal.The frequency of the sine wave is the test frequency, and is generated by the internal
oscillator of the instrument.You can set the test voltage value.can also set test current value.The
output impedance of the JK2817N/JK2811B signal source can be chosen as 30 Ω or 100 Ω. test
level:0.1V ,0.3V,1V,When the current input mode is used, the maximum current is equal to the
maximum level divided by the internal resistance of the source.
Note: the test current set by JK2817N/JK2811B is the output current value when the terminal is
short circuited.The test voltage set is the output voltage value when the terminal is open.
JK2817N/JK2811B's automatic level control function enables constant voltage or current
measurement.The automatic level control function (constant level domain) can be set from <
measurement Settings > page to ON.When the automatic level control function is turned on, a "*"
number is displayed after the current level value is displayed. For more information, please refer
to the < measurement Settings > page.

16/55
Test level setting operation steps:
JK2817N/JK2811B has two ways to set the test signal source level. One is the use of soft keys, the
other is the use of numeric input keys.
1) Use cursor keys to move cursor to level domain. The soft key in the screen will display the
following soft keys.
● plus +
The output level of the signal source is increased by this soft key.
● minus -
The output level of the signal source is reduced by this soft key.
2) Select or set the test level using soft keys or numeric input keys.When the required level value
is entered with a digital key, the soft key area displays the currently available level units (mV, V, A,
m A, and A).You can use these unit soft keys to input units and data.
Note: When you need to switch the test level between current and voltage, you must use the
numeric input key and the unit soft key.
Press the front panel [BIAS] key to allow the set of DC bias output.When DC offset is allowed to
output, the [BIAS] button will be lit.
3.1.5 Test speed
JK2817N/JK2811B test speed is mainly determined by the following factors:
Integration time (A/D conversion)
Average times (average number of measurements per time)
Measurement delay (from start-up to start testing time)
Measurement results show time.
Generally speaking, when testing slowly, the test results are more stable and accurate. You can
choose 3 test speeds: FAST (fast), MED (medium speed) and SLOW (slow).
1)Test speed setting Operation steps:
Use cursor keys to move the cursor to the speed domain. The soft key area in the screen will
display the following soft keys.
●fast speed
●Medium speed
●Slow speed
1) select the soft key, set the test speed FAST (fast), MED (medium speed), SLOW (slow).
3.1.6 Other tools
The JK2817N/JK2811B test result data is displayed by the 5 digit number floating at the decimal
point.The decimal point locking function enables JK2817N to output test results in a fixed decimal
point position. This function can also be used to change the display digits of test results.
Tools Operation steps:
Set the fixed display mode of decimal points according to the following steps.
1) Move the cursor to the main parameter or sub-parameter of the display area of the measurement

17/55
result. The soft key area of the screen will display the following soft keys.
●Decimal automatic
●Decimal lock
●Small print location plus +
●Small print location Minus-
2) Press the soft key decimal automatically to restore the position of the decimal point of the test
result of the primary or secondary parameters at the corresponding cursor to the default decimal
point position.
3)Lock by the soft key decimal, lock the main parameter or the side parameter test result's decimal
point position.
4)Press the soft key decimal position plus + ,For each click, the last digit will be added. The
number of display bits will be increased by one digit.
5)Press the soft key decimal position minus - ,For each click, the last digit will be reduced. The
number of display bits will be decreased by one digit.
Note: The decimal point position locking function will automatically cancel and return to floating
decimal point display in the following cases.
●Test function change.
●In the bias test, the deviation test method (ABS,%, OFF) was changed.
3.2 < BIN number display > page
Press the menu key [DISP], then press the soft key [No.DISP] and enter the <BIN number
display > page.The < BIN number display > page number is displayed in large characters, and the
current test results are displayed in normal small characters.
Figure:
The following measurement control parameters can be set in < BIN number display > page.
Comparative function ON/OFF (comparison)
There are two domains in this display page. They are: BIN number display, comparison. Each
control domain will be described in detail in the following paragraphs.
The test results / condition display area on this display page shows the following test condition
information.These monitoring domains look very similar to the set fields, but these monitoring
domains can not be set on this display page.These fields can be set on the< Measurement
Settings> page, <Component Measurement> Display page, or <User Correction> page.

18/55
●Test function (function A)
●Test frequency (frequency)
●Test level (level)
●Test range (range)
●Test speed (speed)
3.2.1 Comparator function
JK2817N/JK2811B built-in comparison function can divide the tested components into up to 10
BINS.(BIN1 to BIN9 and BIN OUT).can set 9 pairs of main parameter BIN limits and a pair of
Auxiliary parameters BIN limits.If the main parameter of the part under test is within the BIN
limit, but the Auxiliary parameters is not within the BIN limit,The tested parts are sorted into the
auxiliary BIN.When JK2817N/JK2811B installs the HANDLER interface attachment, the
comparison test results can be output to the automatic test system for automatic sorting test. These
limit settings can only be set on the <Limit List Settings> page. The comparison field allows you
to set the comparison function ON or OFF.
Comparative function Operation steps:
1)Move the cursor to the comparison domain. The soft key area of the screen displays the
following soft keys.
●ON
●OFF
2)Use the soft key to set the comparison function to ON (open) or OFF (close).
3.2 < BIN count display > page
Press the menu key [DISP], then press the soft key [count[, enter the < BIN count display > page.
Display the count value of each file in the < BIN count display > page.
Figure:
The following measurement control parameters can be set in <BIN count display > page.
●Counting function ON/OFF (count)
This display page has two fields, they are: BIN count display, count. Each control function field
will be described in detail in the following paragraphs.
The test results / condition display area on this display page shows the following test condition
information.These surveillance domains look like settings, but they cannot be set on this display
Table of contents
Other Jinko Measuring Instrument manuals
Popular Measuring Instrument manuals by other brands

Endress+Hauser
Endress+Hauser tmt142 Brief operating instructions

Hanna Instruments
Hanna Instruments HI 93717 instruction manual

PCB Piezotronics
PCB Piezotronics ICP 350C23 Installation and operating manual

YOKOGAWA
YOKOGAWA AQ6376 user manual

Triplett
Triplett EM300 user manual

Brandson
Brandson 302735/20170214ZH006 user manual

Kobold
Kobold MAN-SC operating instructions

Solar-Log
Solar-Log PRO380 Quick reference guide

Hanna Instruments
Hanna Instruments GROCHEK COMBO instruction manual

Sensitron
Sensitron MULTISCAN++PK-16 Installation and use manual

International Light Technologies
International Light Technologies ILT1000 Operation manual

Lanberg
Lanberg PCS-0804-0050 user manual