manuals.online logo
Brands
  1. Home
  2. •
  3. Brands
  4. •
  5. JKS
  6. •
  7. Automobile Accessories
  8. •
  9. JKS JKSOGS122 User manual

JKS JKSOGS122 User manual

JKSOGS122JKS Adjustable Trackbar Installation Page 1
INSTALLATION
INSTRUCTIONS
Product: Adjustable Track Bar
Part Number: JKSOGS122
Applications: Wrangler JK RHD, 2007-14
Welcome
CONGRATULATIONS on purchasing a new Adjust-
able Trackbar from JKS Manufacturing. We are com-
mitted to providing you with the best products avail-
able and your satisfaction is our rst priority.
PLEASE READ these Installation Instructions careful-
ly, and save them for future reference, as they contain
important installation and maintenance information.
Important
NOT COMPATIBLE WITH frame-mounted track bar
drop brackets.
CHECK TORQUE SPECIFICATIONS regularly.
Tools Required
Hydraulic Floor Jack & Jack Stands
Metric/Standard Socket Wrench Set
Torque Wrench
1-7/8” Open-End Wrench
Tape Measure
Heavy Duty Ratchet Strap *
Anti-Seize Lubricant
Factory Service Manual (recommended)
* Asterisk denotes tools that are not required for some applica-
tions. Thoroughly read instructions rst to determine which tools
will be required for your application.
Parts
Description QTY
AMale Threaded (Frame) End 1
BFemale Threaded (Axle) End 1
C1-1/4” NF Jam Nut 1
DRubber Bushing 2
Installation
1. REMOVE FRONT TRACK BAR
Remove the front track bar mounting hardware
from the axle and chassis brackets. Retain origi-
nal hardware.
Remove original track bar from vehicle.
2. MOUNT ADJUSTABLE TRACKBAR TO
AXLE BRACKET
Apply anti-seize lubricant to bolt threads of original
track bar mounting hardware.
JKSOGS122 JKS Adjustable Trackbar Installation
2 Page
Insert Axle End (B) of Adjustable Trackbar into the
axle bracket.
Loosely install the original mounting hardware.
3. CENTER FRONT AXLE HOUSING
Vehicle must be at normal ride height, on level
ground, with the suspension supporting the full
vehicle weight.
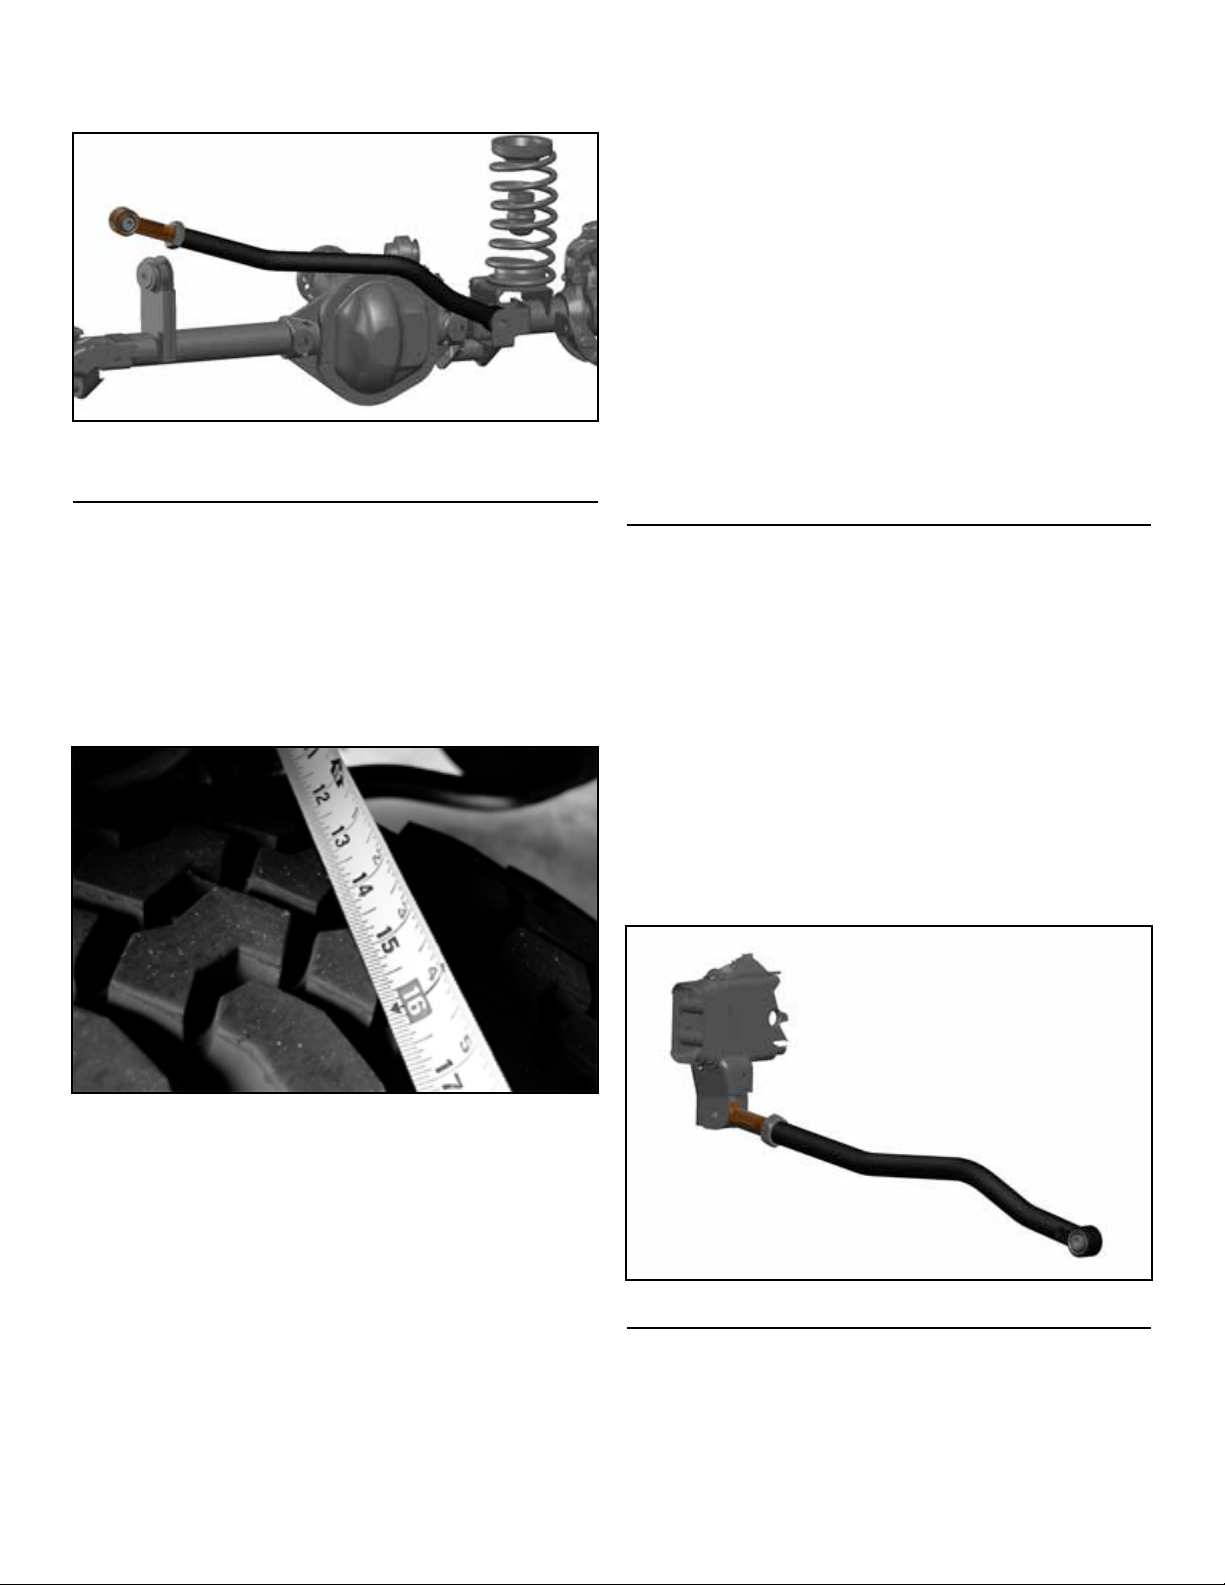
Determine if the axle housing is centered by mea-
suring the distance between the tire and chassis,
using the exact same points on each side of the
vehicle to ensure accuracy.
HINT: For example, measure from the edge of a tire
tread lug to the outboard side of the chassis, then
repeat the measurement on the other side of vehicle
using exact same points.
If the two measurements are equal, the axle is
centered. If the measurements vary, divide the dif-
ference in half to determine the amount of adjust-
ment required.\
If the axle housing is not centered, the chassis
can be laterally shifted using either of the following
methods:
Ratchet Strap (preferred)
ÂAttach a heavy duty ratchet strap to the chassis
on one side of the vehicle, and to the axle housing
on the other side.
ÂTighten the strap in small increments to pull the
chassis in alignment with the axle.
ÂTake measurements after each adjustment until
centered.
Steering Wheel
ÂHave a partner turn the steering wheel in small in-
crements to shift the vehicle chassis side-to-side.
ÂAfter each adjustment, have your partner hold the
steering wheel steady while you take measure-
ments.
4. SET ADJUSTABLE TRACKBAR
LENGTH AND MOUNT TO FRAME
With the axle housing centered beneath the chas-
sis, adjust the length of Adjustable Trackbar by
rotating the Frame End (A) until the steel sleeve in
the Rubber Bushing (D) aligns with the mounting
holes on the frame bracket.
Apply anti-seize lubricant to original mounting bolt
threads and adjustment threads of trackbar.
Mount Frame End (A) of Adjustable Trackbar to
the frame bracket by loosely installing the original
mounting hardware. Note: This product is NOT
compatible with frame-mounted track bar drop
brackets.
5. POST-INSTALLATION
Take measurements again to ensure axle housing
is perfectly centered and make any nal adjust-
ments if necessary.
JKSOGS122JKS Adjustable Trackbar Installation Page 3
IMPORTANT: The front axle housing must be in
perfect lateral alignment with vehicle chassis be-
fore you proceed with installation.
Once all adjustments are complete, fully tighten
the Jam Nut (C).
Using a torque wrench, tighten mounting hardware
at both ends of track bar to 125 ft-lbs.
A professional steering alignment should be
performed to correct toe position and to ensure ve-
hicle meets proper alignment specications.
Maintenance
Check torque specications regularly.
Regular cleaning with pressurized water is recom-
mended to maximize reliability.
Learn more about suspension parts on our website.

Other JKS Automobile Accessories manuals

JKS ACOS Pro JKS2770 User manual

JKS

JKS ACOS Pro JKS2770 User manual

JKS PN 6155 User manual

JKS

JKS PN 6155 User manual

JKS Steering Brace System User manual

JKS

JKS Steering Brace System User manual

JKS JKS1610 User manual

JKS

JKS JKS1610 User manual

JKS SuperNerfs OGS825 User manual

JKS

JKS SuperNerfs OGS825 User manual

JKS PN 2400 User manual

JKS

JKS PN 2400 User manual

JKS HD X-Member User manual

JKS

JKS HD X-Member User manual

JKS Quicker Disconnects User manual

JKS

JKS Quicker Disconnects User manual

JKS PAC2151 User manual

JKS

JKS PAC2151 User manual

JKS PAC2112K User manual

JKS

JKS PAC2112K User manual

JKS OGS125 User manual

JKS

JKS OGS125 User manual

JKS JKSOGS960 User manual

JKS

JKS JKSOGS960 User manual

JKS 2944 User manual

JKS

JKS 2944 User manual

Popular Automobile Accessories manuals by other brands

Steren POD-299 user manual

Steren

Steren POD-299 user manual

Blue Sky Network SKYLINK Frequently asked questions

Blue Sky Network

Blue Sky Network SKYLINK Frequently asked questions

Safe Fleet PRIME DESIGN HRR-369-E-UM3 quick start guide

Safe Fleet

Safe Fleet PRIME DESIGN HRR-369-E-UM3 quick start guide

Kompernass KH 4042 operating instructions

Kompernass

Kompernass KH 4042 operating instructions

Fortin EVO ONE THAR-GM7 installation guide

Fortin

Fortin EVO ONE THAR-GM7 installation guide

VBG Onspot Mounting instructions

VBG

VBG Onspot Mounting instructions

BRANDRUP ISO-TOP MK V manual

BRANDRUP

BRANDRUP ISO-TOP MK V manual

Cruz Evo Rack Module E15 Assembly instructions

Cruz

Cruz Evo Rack Module E15 Assembly instructions

TAUBENREUTHER 50-TG500-0 manual

TAUBENREUTHER

TAUBENREUTHER 50-TG500-0 manual

Directed Directechs DB3 installation guide

Directed

Directed Directechs DB3 installation guide

Parrot ASTEROID Tablet quick start guide

Parrot

Parrot ASTEROID Tablet quick start guide

Directed 403.CHRYSLER6 installation guide

Directed

Directed 403.CHRYSLER6 installation guide

Viatek HC44 instruction manual

Viatek

Viatek HC44 instruction manual

Metra Electronics 108-GM3B installation instructions

Metra Electronics

Metra Electronics 108-GM3B installation instructions

Polaris 2881113 quick start guide

Polaris

Polaris 2881113 quick start guide

Steren POD-090 user manual

Steren

Steren POD-090 user manual

Kuda 047100 Installation instruction

Kuda

Kuda 047100 Installation instruction

PUTCO 11514 Installation sheet

PUTCO

PUTCO 11514 Installation sheet

manuals.online logo
manuals.online logoBrands
  • About & Mission
  • Contact us
  • Privacy Policy
  • Terms and Conditions

Copyright 2025 Manuals.Online. All Rights Reserved.