Step2
Use the semi-assembled side-rail to determine the correct position on the boat. Bear in mind the height in the boat, the windscreen window, adittional tower
accessories, wiring etc etc… When you have determined the correct position mark the position on the masking tape using the mounting brackets.
!Make sure the mounting feet are mounted completely level (on a at spot)!
TIP : start +/- 20cm in front of the windscreen to determine the correct position.
This for possible mirror mount on the tower.
Step 3
After marking one side you can mark the other side using the mounting brackets. Make sure to mark the mounting
brackets on the direct oposite of the boat using xed ponts of reference on the boat.
Step 4
Keep in mind you are going to be placing backing plates and need access to t a wrench to tighten the nut on the
mounting feet bolts on the inside of your boat. Be-
fore drilling inspect the inside of these locations for
obstructions such as wires or cables. You are now
ready to drill the holes. When drilling in breglass
rst use a pilot bit size 6 than a drill bit size 12. After drilling the 4 holes, it is recommended to
countersink the holes using the countersink bit, this prevents the gelcoat from cracking.
Step 5
IMPORTANT: When the BOAT DECK is less than 9mm thick we strongly advise to reinforce the
mounting bracket with wood or breglass cloth which is at least 1cm thick. The reinforcement
should be as big as possible. This to prevent stress on the boat which causes the gelcoat to
crack. WARRANTY DOES NOT COVER: Any cracks or other damage to the gelcoat or boat because
of mounting the tower. Snug the bolt but do not fully tighten at this time.
Step 6
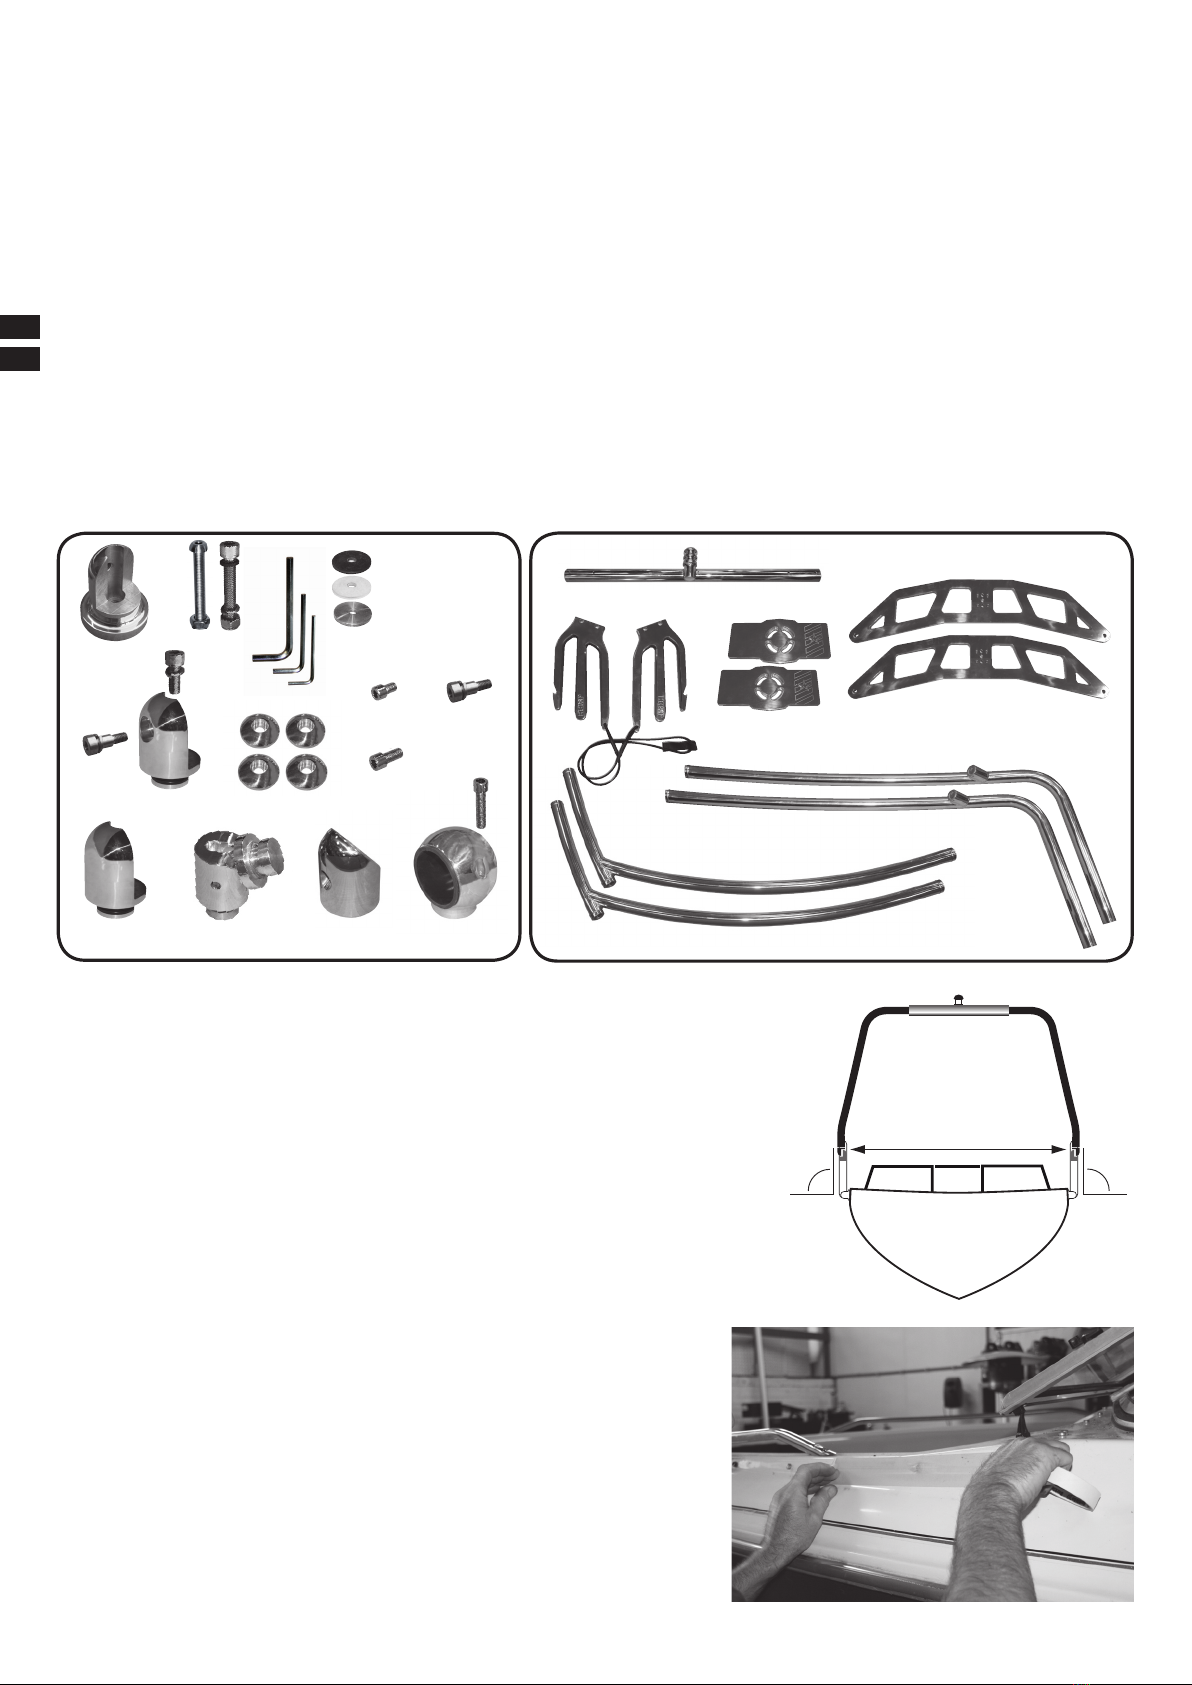
Install the bottom bars with the MOUNT SET (a). All feet are swivel and can work with various mounting angles. Be sure to mount
the bottom bar vertical. When you fail to mount the bottom bar vertical, you will not be able to fold the tower. Snug the bolt but
do not fully tighten at this point. Remove the Bottom bars and Tighten the 4 Mounting Brackets. Reinstall the bottom bar on the
Mounting Brackets and tighten the bolts.
Step 7
Assemble one front bar on the bottom bars with MOUNT SET (D), all mounts are swivel to work with various mounting angles. Snug the bolts but do not tighten
at this point. Before mounting the other front bar you needs to slide the taped top bar over the front bars. Beware for scratches. Keep in mind that the towpoint
needs to be towards the back of the boat. Slide the second front bar into the Top Cross bar and attach the front bar on the other mounting bracket.
NOTE: When you have a narrow boat you probably need a shorter Top Bar to make the tower t to your boat. Shorter Top Bar is available at JOBE
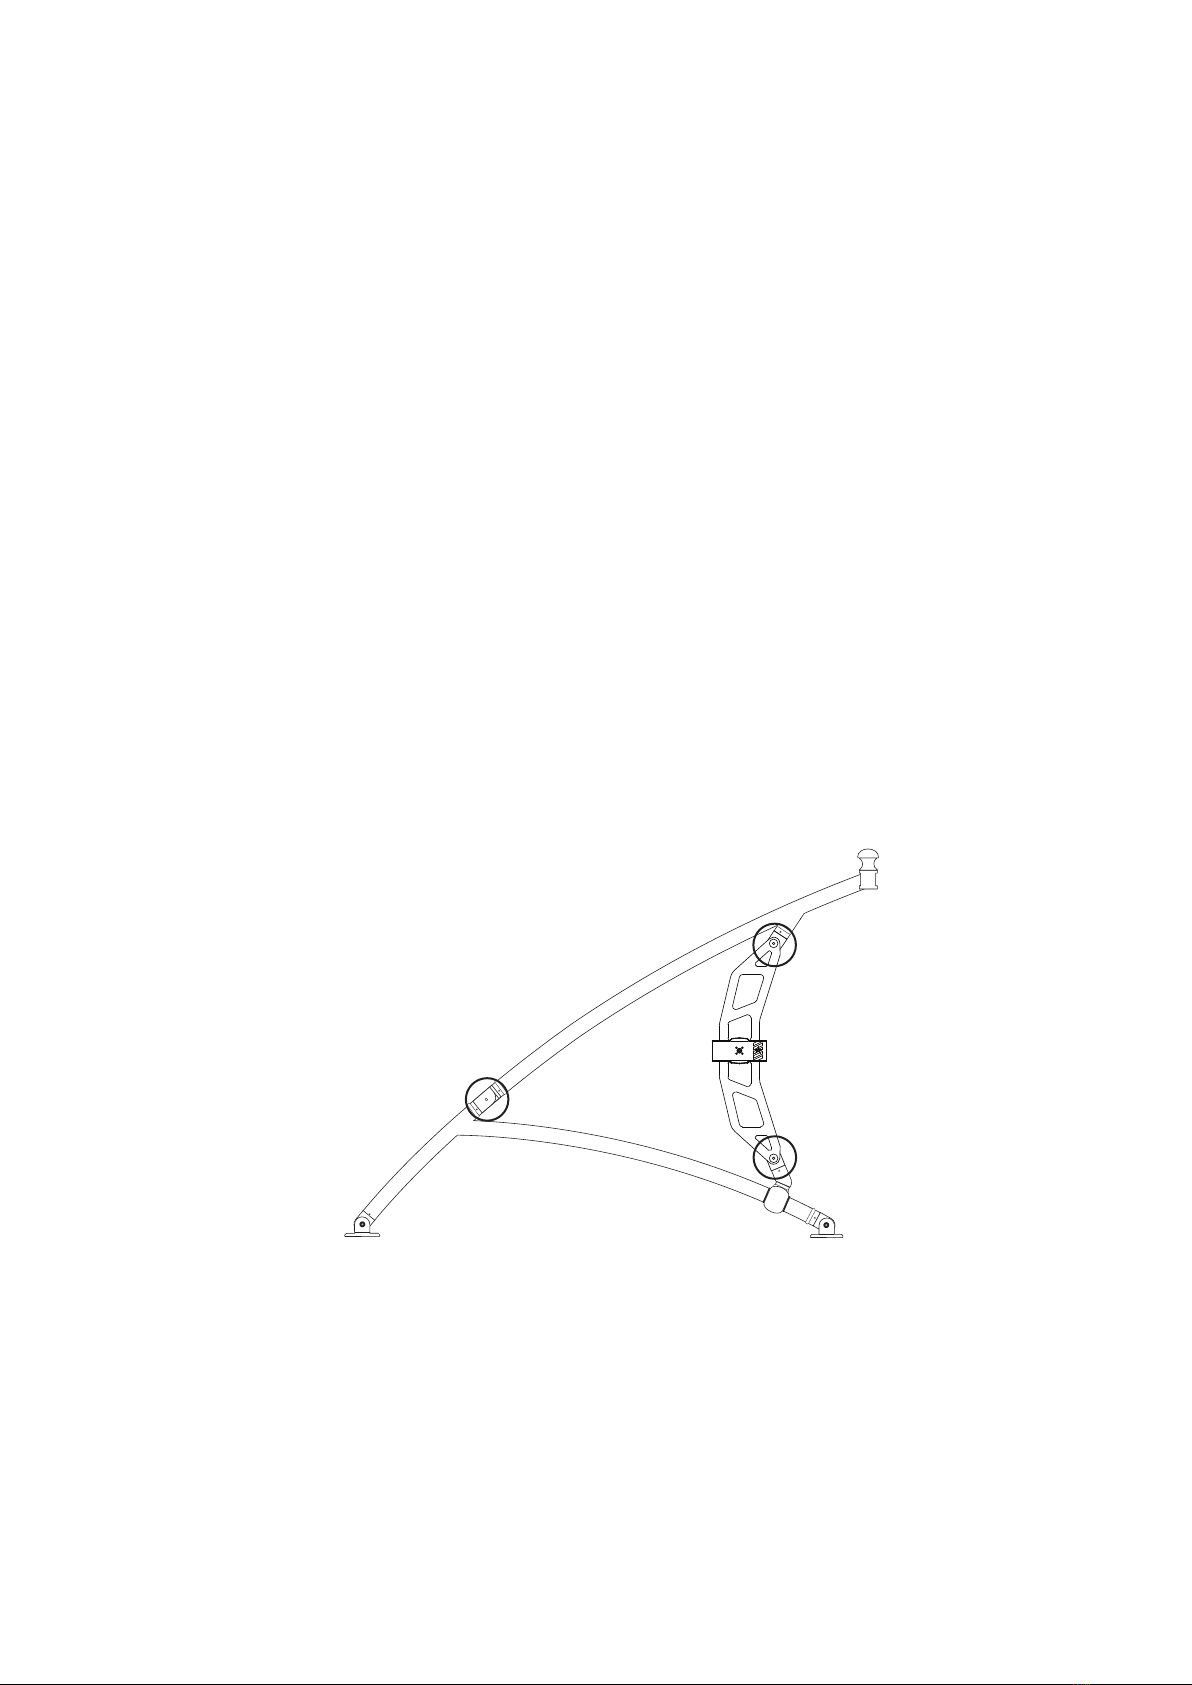
Connection A Connection B Connection C
Connection A
Connection B
Connection C
Rubber gasket
BOAT DECK
Backing Plate
Reinforcement
Rubber gasket
Nylon plate