manuals.online logo
Brands
  1. Home
  2. •
  3. Brands
  4. •
  5. JOBE
  6. •
  7. Boating Equipment
  8. •
  9. JOBE Addict Tower 2.0 User manual

JOBE Addict Tower 2.0 User manual

ADDICT SWEPT FORWARD
WAKEBOARD TOWER
INSTALLATION GUIDE
Step 6
Attach the tower onto the deck mounts. To make your job easier, you can remove the short front curve legs from the tower assembly at this stage, and move the front horizontal
bars in or out to fit the rear deck mounts and connect it with M12 washer and bolts. Then lift the tower and re-assemble the curve legs on, rotate it to fit the front deck mounts, and
connect to the mounts with M12 bolts and washer.
NOTE: When you have a narrow boat you probably need to shorten the overhead bar to make the tower fit to your boat.
Step 7
Drill through the predrilled holes in the center section from each side with size 10 drill bit and install bolts and cap nuts. One person will still be stabilizing the tower through this
step. Tighten all hardware for completion of tower installation.
Step 8
Double check If the tower is in the correct position you can fasten all the bolts and screws
How to fold the tower
I. Disconnect tower front legs from the deck mounts.
II. Loosen the connection between the front legs and rear legs.
III. Push the tower top it will fold from front to down position.
Care and maintenance
I. Be sure to check and tighten all fasteners and connections prior to every use.
II. Be cautious when driving under obstacles, low hanging structures or trees with your tower mounted.
III. Use soap and water or general cleaners to clean your tower. Avoid abrasive materials that might scratch the bimini’s finish.
IV. Always rinse tower after contact with salt (brackish) water.
JOBE Addict Tower Warranty
Jobe Sports International warrants this product (not including other 3rd party accessories) against manufacturers defects. Anodizing and powder coated surfaces as well as all
hardware corrosion are specifically excluded as their care and use cannot be controlled by Jobe Sports International. Any modifications or improper use shall void this warranty.
Jobe Sports International is not responsible for personal injury or damage to the boat caused by the use of this tower. JOBE’s obligation under this warranty shall not include any
transportation charges or costs of installation or any liability for direct, indirect or consequential damages resulting from delay or improper installation. No dealer, retailer or
manufacturer is the agent of Jobe Sports International and may not assume for Jobe Sports International any liability in connection with this warranty. This warranty is in lieu of all.
Distributed by:
Jobe Sports International
Heerewaardensestraat 30, 6624 KK Heerewaarden
The Netherlands WWW.JOBESPORTS.COM
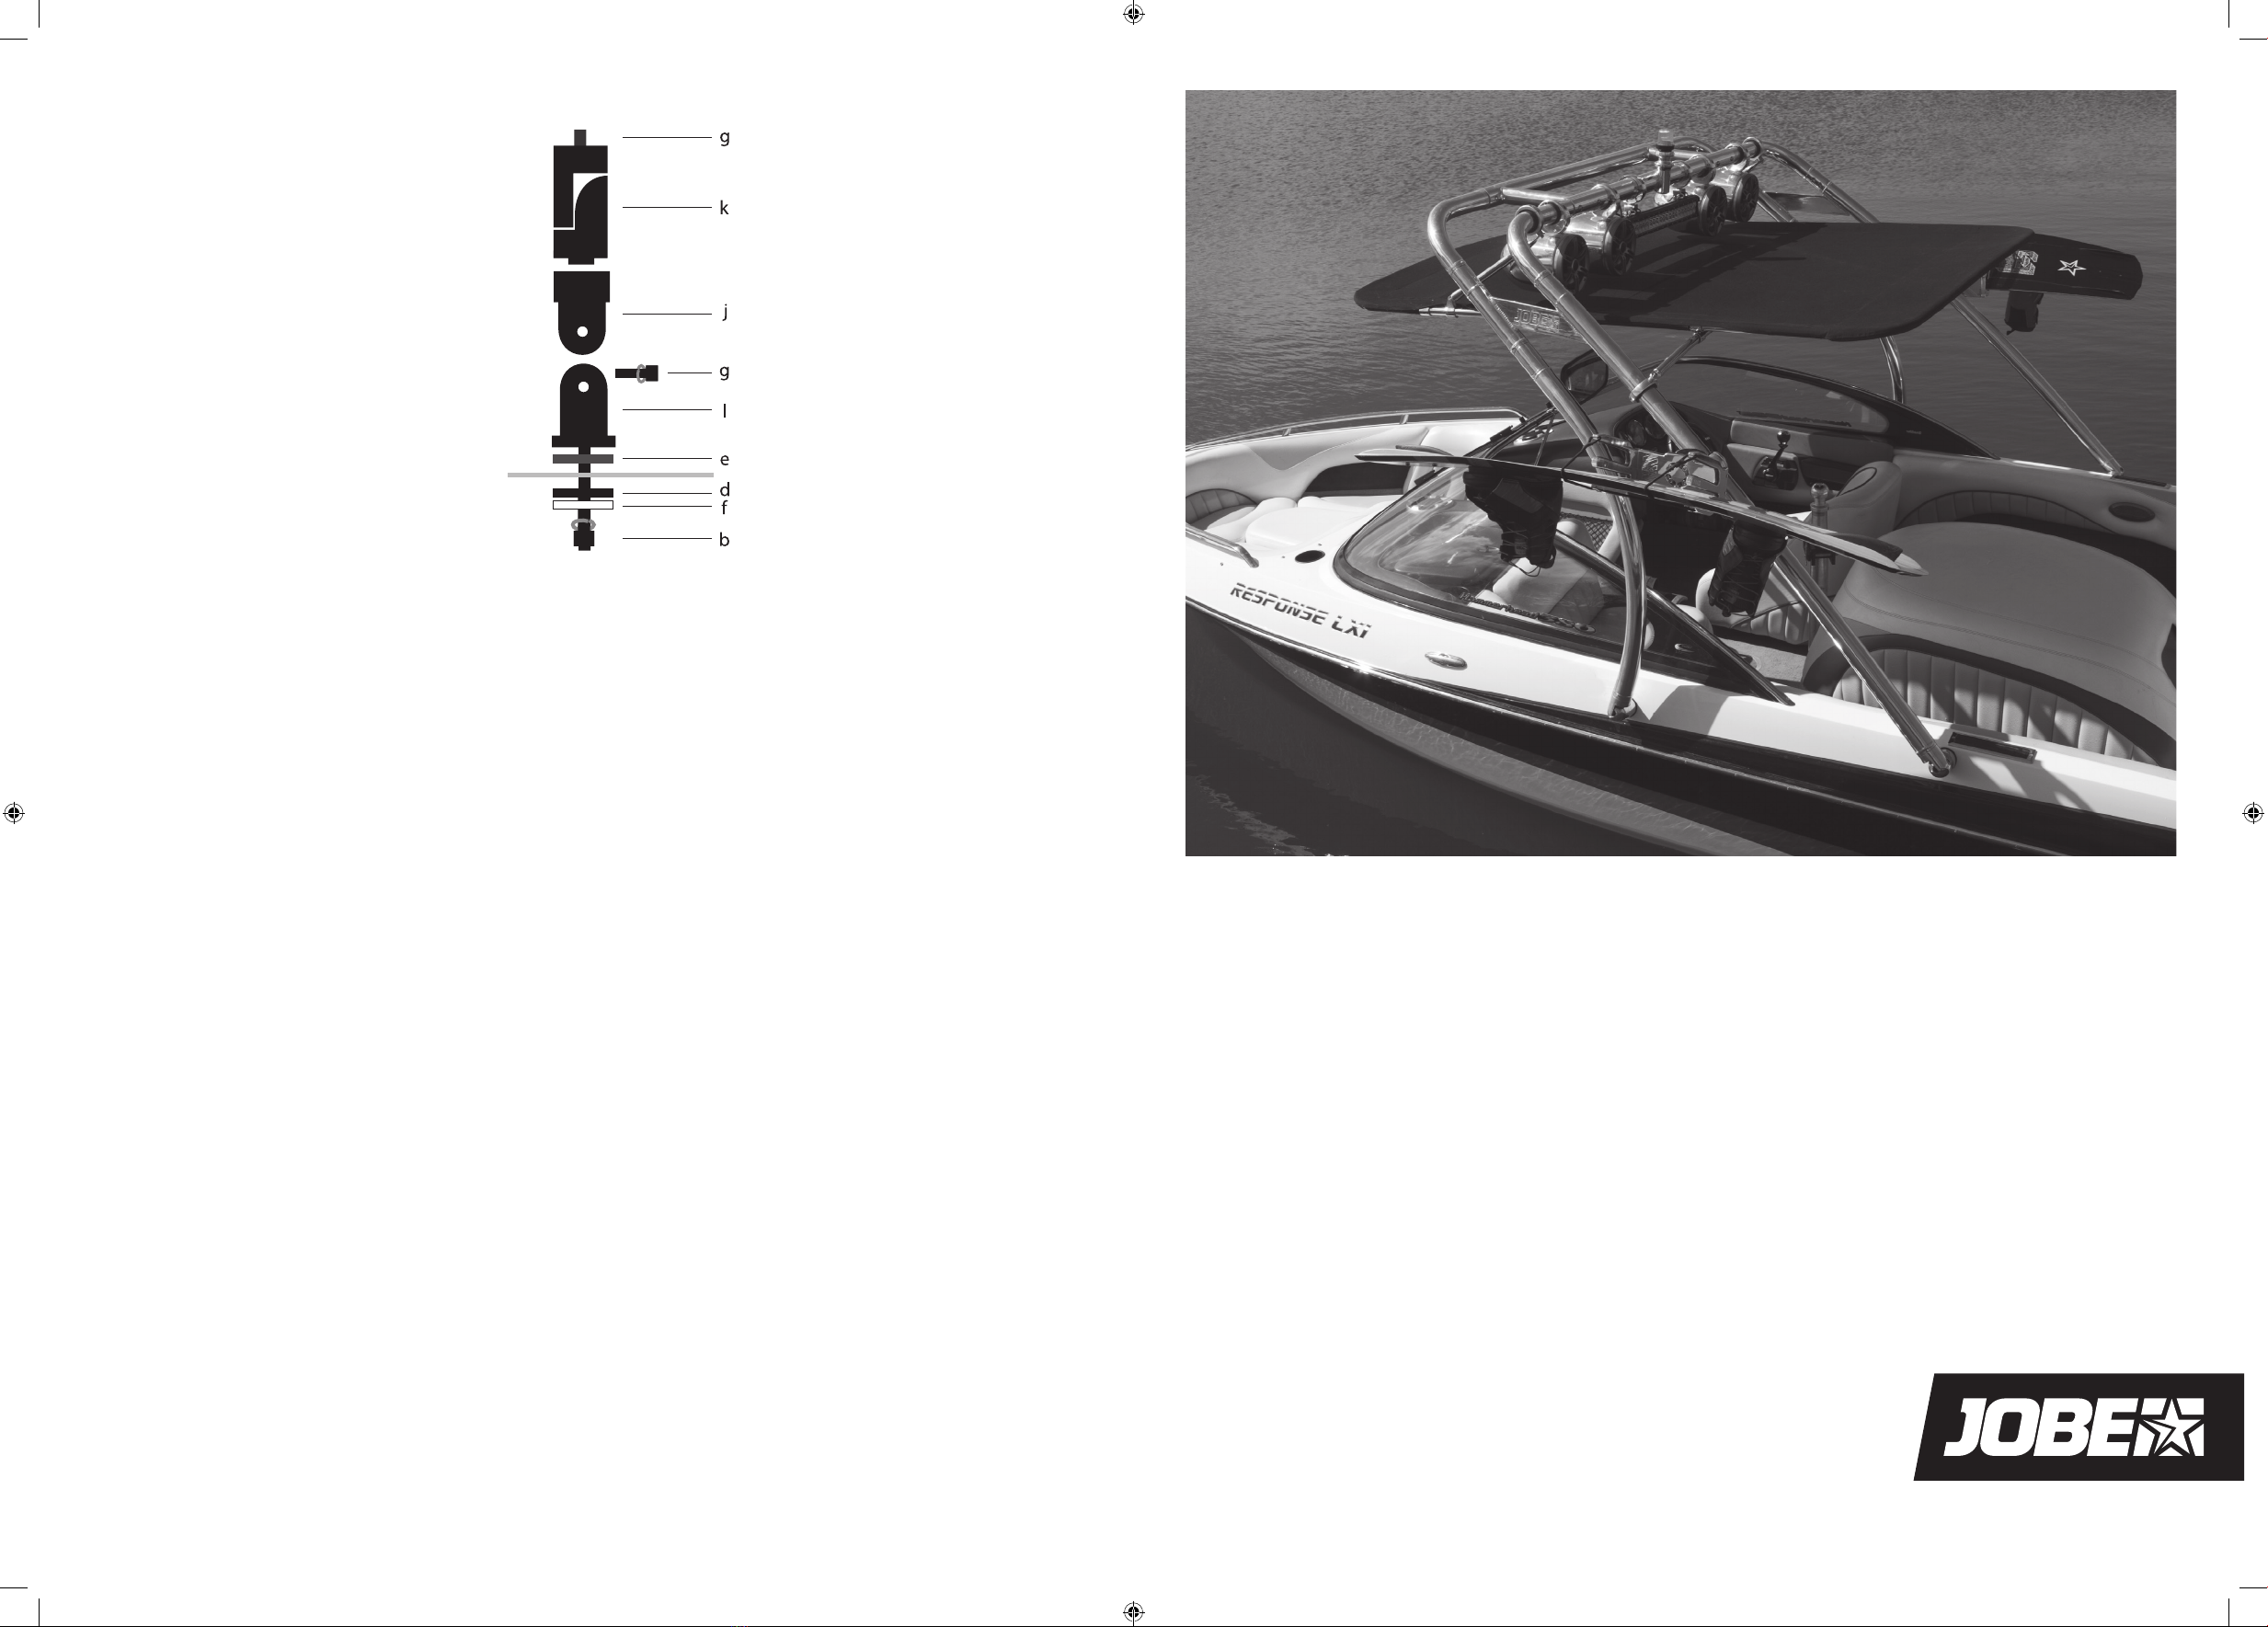
REAR MOUNT ASSEMBLY FRONT MOUNT ASSEMBLY
Warning: Before drilling into your boat, please check that
you have clear access to the area beneath and that no
objects, wires, or other hazards are present.
Tip: Do not measure from windscreen, cleats or vents.
These reference points are not always square and in the
same position as the opposite side of the boat. It’s the best
to use the front of the boat as the reference point, the top
edge of the deck mould, or similar measurement points
whenever possible. Always triple-measure and check
before drilling.
Tighten the deck mounts firmly so that the mounts will
rotate under pressure while turning the mount with the
leg attached (note the mounts will be very hard to rotate
by hands)
tower manual.indd 1-2 03-10-16 13:29
Operating under the theory that an ounce of prevention is worth a pound of headaches, here is some useful information that will prevent any
scratching during the Wakeboard Tower assembly.
As you are taking the arms and top center section out of the box, place masking tape strips around the top conjunction sections of the tubes that slide inside. This allows you to
move and adjust the tubes without scratching the surface. But please use caution when sliding the sections together.
Keep the masking tape in place through the final assembly step, then, after drilling, remove the masking tape and your surface will be perfect.
Note that this installation guide is only a guideline. Each boat is dierent and improvisation is needed to mount your tower on your boat. We advise you to have your tower moun-
ted by a professional who has experience in boat constructions and mounting other towers. All hardware is to be hand tightened. Do not use air tools or electric drills to tighten
hardware. Tower is designed for one rider at a time. Do not tow tube riders or multiple riders with tower.
Contents of Box Inspect the package for missing or damaged parts caused by shipping.
TOP CROSS BAR 1pc FRONT BAR 2pcs
SIDE BAR 4pcs REAR BAR 2pcs
TOWER MOUNT SET
Step 1
Please attach the 2x small curved legs onto the 2x long legs with the fittings and bolts,
don’t forget to use the washer with the bolt. Don’t tighten the bolt.
Step 2
Connect the 2x short L arms with the left and right legs using the M12 bolts and washer.
Step 3
Insert above horisontal bar into the top section, then insert the other 2x L arms into the top section and
at the same timeconnect the L arms onto the opening legs, and lift the tower assambly on the ground, do
not tighten any bolts at this stage.
Step 4
Put the tower assembly on the boat and find the best position it could sit, keep in mind this is a facing
forward tower, make sure the tow point towards rear. The horizontal bar could be moved in or outto fit
the width between the rear mounts, the 2 curved legs could be rotatable to fit the with between the front
mounts. if you are not sure where is the best position to install the tower, please see the right picture for
a reference.
Step 5
Determine the exact position for the deck mount and make a mark, install the deck mounts onto your
boat. IMPORTANT: When the BOAT DECK is less than 10mm thick we strongly advise to reinforce the moun-
ting bracket with wood or fibreglass cloth. Reinforcement should be as big as possible. This prevents stress
on the boat which causes the gelcoat to crack. WARRANTY DOES NOT COVER: Any cracks or other damage to
the gelcoat or boat because of mounting the tower.
Snug the bolt but do not fully tighten at this point.
(1)
(3)
(2)
(4)
4x 8x 4x 4x 2x 2x 2x 2x4x2x22x 4x4x
(2)
i
(4)
6x
(3)
(1)
2x
6x
tower manual.indd 3-4 03-10-16 13:29

This manual suits for next models

1

Other JOBE Boating Equipment manuals

JOBE ADDICT 1.3 User manual

JOBE

JOBE ADDICT 1.3 User manual

JOBE Addict The POD User manual

JOBE

JOBE Addict The POD User manual

JOBE Addict Adjustable Pro Ski Pylon User manual

JOBE

JOBE Addict Adjustable Pro Ski Pylon User manual

JOBE ADDICT 1.6 User manual

JOBE

JOBE ADDICT 1.6 User manual

JOBE BIMINI TOP User manual

JOBE

JOBE BIMINI TOP User manual

JOBE TOWER BIMINI User manual

JOBE

JOBE TOWER BIMINI User manual

Popular Boating Equipment manuals by other brands

Harken 252 instruction manual

Harken

Harken 252 instruction manual

Vetus HPW Installation and user manual

Vetus

Vetus HPW Installation and user manual

Fluid Concepts Rear Bimini instruction manual

Fluid Concepts

Fluid Concepts Rear Bimini instruction manual

MAKE A WAKE MARINE Pro2 T-Top installation guide

MAKE A WAKE MARINE

MAKE A WAKE MARINE Pro2 T-Top installation guide

Ultraflex A97 Installation and maintenance manual

Ultraflex

Ultraflex A97 Installation and maintenance manual

Gumotex SOLAR user manual

Gumotex

Gumotex SOLAR user manual

Floe VSD 5000 Assembly instructions

Floe

Floe VSD 5000 Assembly instructions

Hobie Spinnaker Snuffer Assembly manual

Hobie

Hobie Spinnaker Snuffer Assembly manual

Wichard Gyb'Easy manual

Wichard

Wichard Gyb'Easy manual

tebben 7500-07 Owner's operation manual

tebben

tebben 7500-07 Owner's operation manual

Hobie Wave Assembly manual

Hobie

Hobie Wave Assembly manual

HydroHoist HarborHoist HH-4400 installation manual

HydroHoist

HydroHoist HarborHoist HH-4400 installation manual

Reverso Outboard Flushing System 1.5 manual

Reverso

Reverso Outboard Flushing System 1.5 manual

Sea Tel 4006-23 IN A 60" RADOME Installation and operation

Sea Tel

Sea Tel 4006-23 IN A 60" RADOME Installation and operation

South Pacific Industrial VA Series Owner's installation & operations manual

South Pacific Industrial

South Pacific Industrial VA Series Owner's installation & operations manual

BRP SEA-DOO Switch 13 user guide

BRP

BRP SEA-DOO Switch 13 user guide

SureShade MTF Installation guides

SureShade

SureShade MTF Installation guides

SeaView PMADM4M1 installation instructions

SeaView

SeaView PMADM4M1 installation instructions

manuals.online logo
manuals.online logoBrands
  • About & Mission
  • Contact us
  • Privacy Policy
  • Terms and Conditions

Copyright 2025 Manuals.Online. All Rights Reserved.