JOCCA 1590 User manual

Ref: 1590 (EN) Instructions manual
(ES) Manual de instrucciones
(FR) Mode d’emploi
(IT) Istruzioni per l’uso
(PT) Manual de instruções

DESCRIPTION/ DESCRIPCIÓN/ DESCRIPTION/ DESCRIZIONE/ DESCRIÇÃO
4.
1.
2.
3.
a.
c.
i.
b. d.
c. f.
g. h.

EN
3
English
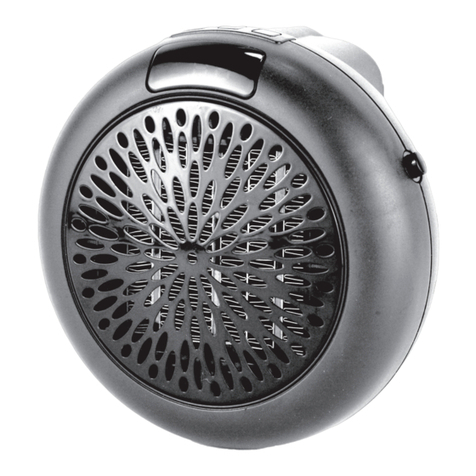
WALL HEATER
PURCHASE ACKNOWLEDGEMENT
Thank you for your purchase we are confident that you will be
satisfied with this item.
DESCRIPTION
1. ON / OFF button.
2. Air outlet grille.
3. Knob.
a. ON / OFF button.
b. Power selector button.
c. Open window detection button.
d. Timer button.
e. Temperature adjustment button.
f. OK button.
g. Weekly timer button.
h. Temperature cancellation button and weekly timer.
i. “+” and “-” buttons.
4. LED display.
SAFETY WARNINGS
-These instructions are highly important,
please read this instruction manual before
using the device and save it for future
reference.
-JOCCA is only responsible for proper use of
this product as describe in this manual.
- Before using the device for the first time,
unpack and verify that it is in perfect condition,
if not, do not use the device and go to JOCCA
as the warranty covers all manufacturing

EN
4
English
defects.
- This product is only suitable for domestic
use. Do not use the device outdoors. Do not
leave the device upon exposure to outside
factors such as rain, snow, sun, etc.
- This appliance can be used by children
of 8 and above, and people with reduced
physical, sensory or mental capabilities or
lack of experience or knowledge if they are
supervised or instructed in an appropriate
and safe way about the use of the appliance
and understand the hazards involved. Any
cleaning and maintenance must be carried
out by the user or if they are carried out by a
child of 8 or above they must be supervised.
- Keep the appliance and its cable out of the
reach of children under 8 years old.
- Children should be supervised to ensure
they do not play with the device.
- Do not immerse the appliance or any part
of it in water or any other liquid.
- If your appliance has been dropped or
fallen into water or any other liquid do not
use it or try to repair it. Contact to the JOCCA
technical service department.
- Do not pull the cable to unplug the appliance
from the mains, always pull from the plug.

EN
5
English
- For your safety and for the appliance to work
correctly, always use JOCCA spare parts and
accessories.
- If the power supply cable or the plug are
damaged, do not use the appliance or try to
replace the cable yourself. Contact the customer
service where they will replace it correctly for
you.
- Please unplug the appliance from the mains
electricity supply when not in use, before
cleaning, and if it is not working.
- Use the appliance on a smooth, horizontal,
stable and level surface.
- Do not move the appliance when it is working.
- Do not leave the appliance on or near a hot
gas or electric burner; next to a hot oven or a
microwave oven.
- Leave sufficient space above and to the sides
of the unit for proper air circulation.
- Do not leave product unattended.
- Before connecting the appliance to the mains,
check that the cable and plug are in perfect
conditions. Also check that the voltage indicated
on the appliance is valid for your electrical
installation.
- Unwind the power cord completely to prevent
overheating.

EN
6
English
-This device will only be totally disconnected
when it is unplugged from the mains.
-Do not use the appliance with wet hands or
bare feet.
-Do not cover. Do not use the appliance as a
source of heat or source of drying. Do not use
the appliance to dry clothes.
-Do not use the appliance in association with
a programmer, timer or other device that
automatically switches it on.
INSTALLATION
-Drill two holes in the wall, at a distance of more than 2.0 m
from the ground, the diameter of the dowel is 6 mm. After
placing the dowel in the hole, fix the hook with a screw.
-Use the components of the machine (screws and dowels) by
fixing them on the wall as shown in the following figure, then
assemble the machine.
Note: the maximum weight is 4.1 kg, the wall must be able to
support this weight.

EN
7
English
- The distance between the product and the ceiling (and the
side) must be ≥30 cm.
Note: When the product is installed, the hook (screw) aligns with
hole “A” in the product. After hanging, it should be moved to the
“B”, in order to fix firmly.
When the product is removed, it should be moved from “B” to
“A” and then take out.
INSTRUCTIONS FOR USE
-CAUTION: Before assembling and disassembling, make sure that
the appliance is not plugged in.
- Connect the appliance to the mains.
-Once the ON / OFF button is pressed, the LED display will turn on
showing the room temperature.
Display Symbols:
FAN
Low heat 1000W
High heat 2000W
Timer
Week timer
Set temperature

EN
8
English
NOTE: If the light is on you can select the desired temperature,
temperature range 18-45ºC.
If the light blinks, it indicates open window detection.
- Press the button and the fan will start.
Press again and the appliance will turn off, but the fan
continues to run for 30 seconds.
-Pressing the button to select a higher or lower
temperature.
-The operating time of the appliance can be controlled.
-Press the button to program the timer from 1 hour to 8
hours.
-Press the button , the temperature setting mode is on
standby, press “+” “-” to adjust the temperature,
temperature range: 18-45ºC.
- If the selected temperature is equal to or lower than the
ambient temperature, the appliance will stop heating.
-To start the set temperature mode press the OK button after
the LED display has flashed for 5 seconds.
-The window open function can only be started when the
appliance is in heating mode (it cannot be started when the
appliance only works with the fan) or in the set temperature
mode.
-Temperature detection starts after 1 minute from the start of
open window detection. This operation is repeated every 5
min.
Note: The weekly timer can only be started when the appliance
is in heating mode (it cannot be started when the appliance
only works with the fan) or in the set temperature mode.
-If there is a power outage, it is necessary to set the current
time.
Setting method:
-The device comes with 6 default programming modes (P1-
P6), to select one of them use the + or - buttons and then
press OK.
Note: If the OK button is not pressed within 10 seconds after
the adjustment, it will give an error.
-The P6 mode is free mode, you can select the days and hours
of operation.
English

EN
9
English
9
a. Set day of the week: LED display 01, it is Monday, press
+ or - to set the day, 01-07, it is Monday to Sunday. Press OK
to finish setup.
b. Set the hours: LED display 00, it is 0H, press + or - to
adjust the hour, 00 to 23, it is 0H to 23H. Press OK to finish
setup.
c. Set the minutes: LED display 00, it is 0min, press + or - to
adjust the minute, 00 to 59, it is 0min to 59min. Press OK to
finish setup.
-Only one time slot can be selected for each day.
-The button serves both to cancel the temperature selection
and the weekly programming.
-The device turns off automatically when it detects a
temperature higher than 51ºC.
CLEANING AND STORAGE
-Make sure that the appliance is disconnected from the power
supply before cleaning.
-Allow the appliance to cool down before cleaning it.
-Use a damp cloth or a sponge to clean the external surfaces
of the device.
-Clean the dust that accumulates in the air outlet grilles
periodically with a vacuum cleaner.
-Do not use abrasive detergents or products that could
damage the appliance.
-Store the appliance in a safe and dry place.
TECHNICAL DATA
220-240V~ 50-60Hz-2000W
This device conforms to the safety requirements and provisions
of directives 2014/35/EU on Low tension devices and
2014/30/EU on Electromagnetic Compatibility.
PRODUCT RECYCLING – ENVIROMENT
Packaging
The materials used in the package of the item are
included in a system of waste collection, sorting and
English

EN
10
English
recycling. If you wish to dispose of these materials, you should
use rubbish bins or other means of waste collection that are
appropriate for each type of material.
Electrical and Electronic Product
This symbol means that if you wish to dispose of
this product at the end of its life, you must take it
to a waste collection company authorized for the
selective collection of Waste Electronic and Electrical
Equipment (WEEE).
This product does not contain concentrations of materials
considered harmful to the environment.
PROTECTION OF THE ENVIROMENT DIRECTIVE 2012/96/EC
This product has been designed and manufactured with high
quality materials and components that can be recycled and
reused. When you see the symbol of a crossed out litter bin
on wheels next to a product, this means that the product
conforms to the European Directive 2012/96/EC. Please
obtain information about the local recycling system for electric
and electronic products. Follow the local rules and do not
dispose of used products by throwing them in the normal bins
at home. Proper recycling of your used product will help avoid
negative impacts on the environment and people’s health.

ES
Español
11
CALEFACTOR DE PARED
AGRADECIMIENTO DE COMPRA
JOCCA le agradece la confianza depositada en nuestros
productos y estamos seguros de que quedará completamente
satisfecho con cualquiera de éstos. Para atender mejor todas
sus dudas y necesidades, el servicio de atención al cliente
de JOCCA queda a su plena disposición para solucionar
cualquier consulta:
DESCRIPCIÓN
1.Botón ON/OFF.
2.Rejilla salida de aire.
3.Mando.
a.Botón ON/OFF.
b.Botón selector potencia.
c.Botón detección ventana abierta.
d.Botón temporizador.
e.Botón ajuste temperatura.
f.Botón OK.
g.Botón temporizador semanal.
h.Botón cancelación de temperatura y temporizador
semanal.
i.Botones” +” y “-“.
4.Pantalla LED.
ADVERTENCIAS DE SEGURIDAD
-Estas instrucciones son muy importantes. Lea
atentamente este manual de instrucciones
antes de utilizar el aparato y guárdelo para
posteriores consultas.
-JOCCA no se responsabiliza de las
posibles consecuencias derivadas de un uso
inadecuado del producto u otro uso que no
Español

ES
Español
12
estuviera descrito en este manual.
-Antes de utilizar el producto por primera
vez, desembale el producto y compruebe que
está en perfecto estado. De no ser así, no
utilice el aparato y diríjase a JOCCA ya que
la garantía cubre cualquier daño de origen o
defecto de fabricación.
-Este producto sólo está indicado para un
uso doméstico. No utilizar el aparato en
la intemperie. No deje el aparato bajo la
exposición de agentes climáticos como la
lluvia, nieve, sol, etc. que puedan deteriorar
su funcionamiento.
-Este aparato pueden utilizarlo niños con
edad de 8 años y superior y personas
con capacidades físicas, sensoriales o
mentales reducidas o falta de experiencia y
conocimiento, si se les ha dado la supervisión
o instrucción apropiadas respecto al uso del
aparato de una manera segura y comprenden
los peligros que implica. Los niños no deben
jugar con el aparato. La limpieza y el
mantenimiento a realizar por el usuario no
deben realizarlos los niños a menos que sean
mayores de 8 años y estén bajo supervisión.
-Mantener el aparato fuera del alcance de
los niños menores de 8 años.

ES
Español
13
-Los niños deben ser supervisados para
asegurar que no juegan con el aparato.
-No sumerja el aparato, ni ninguna parte del
aparato en agua u otro líquido.
-Si su aparato ha sufrido una caída o bien
ha caído en agua u otro líquido no utilice
el aparato ni intente repararlo. Llévelo al
servicio técnico de JOCCA.
-Para desenchufar el aparato de la red
eléctrica no tire del cable, tire siempre del
enchufe.
-Para su seguridad y mejor funcionamiento
del aparato utilice siempre accesorios y
repuestos de JOCCA.
-Si detecta que el cable de alimentación o
el adaptador están dañados, no utilice el
aparato, ni intente sustituir el cable. Vaya
directamente al servicio técnico autorizado de
JOCCA donde lo remplazaran correctamente.
-Desenchufe el aparato de la red eléctrica
siempre que haya finalizado su uso, antes de
proceder a su limpieza y si este no funciona
correctamente.
-Utilizar el aparato en una superficie plana,
lisa y horizontal.
-No mover el aparato mientras esté en
funcionamiento.

ES
Español
14
-No deje el aparato encima o cerca de
un quemador de gas o eléctrico caliente;
dentro, junto a un horno caliente o un horno
microondas.
-Deje suficiente espacio encima y a los lados
del aparato para una correcta circulación de
aire.
-No deje el aparato desatendido.
-Antes de conectar el aparato a la red eléctrica
compruebe que el cable y el enchufe están
en perfecto estado, además compruebe que
la tensión indicada en el aparato es válida
para su instalación eléctrica y que el enchufe
dispone de toma de tierra.
-Desenrolle el cable de alimentación por
completo para evitar el sobrecalentamiento.
-Este aparato sólo se desconectará
totalmente, cuando se desconecte de la red
eléctrica.
-No utilice el aparato con las manos húmedas
y los pies descalzos.
-No cubrir. No utilice el aparato como fuente
de calor o fuente de secado. No utilizar el
aparato para secar ropa.
-No usar el aparato asociado a un

ES
Español
15
programador, temporizador u otro dispositivo
que conecte el aparato automáticamente.
INSTALACIÓN
-Taladre dos orificios en la pared, a una distancia de más de
2,0 m del suelo, el diámetro del taco es de 6 mm . Después
de colocar el taco en el agujero, fije el gancho con un tornillo.
-Utilice los componentes de la máquina (tornillos y tacos)
fijándolos en la pared como se muestra en la siguiente figura,
luego monte la máquina.
Nota: el peso máximo es de 4,1 kg, la pared debe poder
soportar este peso.
- La distancia entre el producto y el techo (y el lateral) debe
ser ≥30 cm.
Nota: cuando el producto está instalado, el gancho (tornillo)
se alinea con el orificio “A” del producto. Después de colgar, se
debe mover a la “B”, con el fin de fijar firmemente.

ES
Español
16
Cuando se retire el producto, se debe mover de “B” a “A” y
luego sacar.
MODO DE EMPLEO
-ATENCIÓN: Antes de realizar el montaje y desmontaje
asegúrese de que el aparato no esté enchufado.
-Enchufe el aparato a la red eléctrica.
-Una vez presionado el botón ON/OFF la pantalla LED se
encenderá mostrando la temperatura del ambiente.
Símbolos de la Pantalla:
Ventilador
Calor bajo 1000W
Calor alto 2000W
Temporizador
Temporizador semanal
Temperatura establecida
NOTA: Si la luz está encendida puede seleccionar la
temperatura deseada, rango de temperatura 18-45ºC.
Si la luz parpadea indica detección de ventana abierta.
- Presione el boton y el ventilador se pondrá en
funcionamiento. Presione otra vez y el aparato se apagará,
pero el ventilador sigue funcionando durante 30 segundos.
-Presionando el botón para seleccionar una temperatura
más alta o más baja.
-El tiempo de funcionamiento del aparato se puede controlar.
-Presione el botón para programar el temporizador de 1
hora hasta 8 horas.
-Presione el botón , el modo de ajuste de temperatura
está en espera, presione “+” “-” para ajustar la temperatura,

ES
Español
17
rango de temperatura: 18-45ºC.
- Si la temperatura seleccionada es igual o inferior a la
temperatura ambiental el aparato dejara de calentar.
-Para iniciar el modo de temperatura establecida presione el
botón OK después de que la pantalla LED haya parpadeado
5 segundos.
-La función de ventana abierta solo se puede iniciar cuando
el aparato está en modo de calefacción (no se puede iniciar
cuando el aparato solo funciona con el ventilador) o en el
modo de temperatura establecida.
-La detección de temperatura se inicia después de 1 minuto
desde el inicio de la detección de ventana abierta. Esta
operación se va repitiendo cada 5 min.
Nota: El temporizador semanal solo se puede iniciar cuando
el aparato está en modo de calefacción (no se puede iniciar
cuando el aparato solo funciona con el ventilador) o en el
modo de temperatura establecida.
-Si hay un corte de energía es necesario configurar la hora
actual.
Método de configuración:
-El aparato viene con 6 modos predeterminados de
programación (P1-P6), para seleccionar uno de ellos utilice
los botones + o – y después presione OK.
Nota: Si no se presiona el botón OK en los 10 segundos
posteriores al ajuste este dará error.
-El modo P6 es modo libre, se puede seleccionar los días el
horario de funcionamiento.
a. Establecer día de la semana: la pantalla LED 01, es lunes,
presione + o - para ajustar el día, 01-07, es de lunes a
domingo. Presione OK para finalizar la configuración.
b. Establecer las horas: pantalla LED 00, es 0H, presione +
o - para ajustar la hora, 00 a 23, es de 0H a 23H. Presione OK
para finalizar la configuración.
c. Establecer los minutos: pantalla LED 00, es 0min, presione
+ o - para ajustar los minutos, 00 a 59, es de 0min a 59min.
Presione OK para finalizar la configuración.
-Solo se puede seleccionar una franja horaria por cada día.
-El botón sirve tanto para cancelar la selección de

ES
Español
18
temperatura como la programación semanal.
-El aparto se apaga automático cuando detecta una
temperatura superior a 51ºC.
LIMPIEZA Y ALMACENAMIENTO
-Antes de proceder a su limpieza, asegúrese que el aparato
está desconectado de la red eléctrica.
-Dejar enfriar el aparato antes de proceder a su limpieza.
-Utilice un paño húmedo para limpiar el exterior del aparato.
-Limpie periódicamente el polvo que se acumula en las rejillas
de salida de aire con un aspirador.
-No utilice detergentes abrasivos ni productos que puedan
dañar el aparato.
-Guarde el aparato en un lugar seco una vez este se haya
enfriado.
DATOS TÉCNICOS
220-240V~ 50-60Hz-2000W
Este aparato está conforme con la directiva 2014/35/EU de
Baja Tensión y con la Directiva 2014/30/EU de Compatibilidad
Electromagnética.
RECICLADO DEL PRODUCTO – MEDIO AMBIENTE
Embalaje
Los materiales que constituyen el envase de este
aparato, están integrados en un sistema de
recogida, clasificación y reciclado de los mismos. Si
desea deshacerse de ellos, puede utilizar los
contenedores públicos apropiados para cada tipo de material.
Producto Eléctrico/Electrónico
Este símbolo significa que si desea deshacerse del
producto, una vez transcurrida la vida del mismo
debe depositarlo por los medios adecuados a
manos de un gestor de residuos autorizado para la
recogida selectiva de Residuos de Aparatos
Eléctricos y Electrónicos (RAEE).
Este producto está exento de concentraciones de sustancias
que se puedan considerar dañinas para el medio ambiente.

ES
Español
19
PROTECCIÓN DEL MEDIO AMBIENTE - DIRECTIVA
2012/96/CE
Su producto ha sido diseñado y fabricado con materiales
y componentes de alta calidad, que pueden ser reciclados
y reutilizados. Cuando vea este símbolo de una papelera
con ruedas tachada junto a un producto, esto significa
que el producto está bajo la Directiva Europea 2012/96/
CE. Deberá informarse sobre el sistema de reciclaje local
separado para productos eléctricos y electrónicos. Siga
las normas locales y no se deshaga de los productos
usados tirándolos en la basura normal de su hogar. El
reciclaje correcto de su producto usado ayudará a evitar
consecuencias negativas para el medio ambiente y la
salud de las personas.

FR
Français
20
CHAUFFAGE MURAL
REMERCIEMENTS D’ACHAT
Nous vous remercions de la confiance que vous nous avez
accordé et espérons que vous serez complètement satisfaits
DESCRIPTION
1. Bouton ON/OFF.
2. Grille de sortie d’air.
3. Télécommande.
a. Bouton ON/OFF.
b. Bouton de sélection de puissance.
c. Bouton de détection de fenêtre ouverte.
d. Bouton de minuterie.
e. Bouton de réglage de la température.
f. Bouton OK.
g. Bouton de minuterie hebdomadaire.
h. Bouton d’annulation de la température et minuterie
hebdomadaire.
i. Boutons “+” et “-”.
4. Affichage LED.
AVERTISSEMENTS DE SÉCURITÉ
-Ces instructions sont très importantes, lisez
attentivement ce manuel d’instructions avant
d’utiliser l’appareil, et conservez-les pour des
consultations postérieures.
-JOCCA ne sera pas responsable d’une
utilisation inadéquate du produit, ou autre
utilisation qui ne serait pas décrite dans cette
notice.
-Avant de brancher l’appareil au réseau
Table of contents
Languages:
Other JOCCA Heater manuals