15 16
Installing the
i-anchor Advance seat in the
i-BaseTM Advance
see images 12 - 27
Baby Mode (Rearward Facing Mode)
Rearward Facing Child height 40cm-105cm/Child weight 18.5kg
Recline position Position 1-7
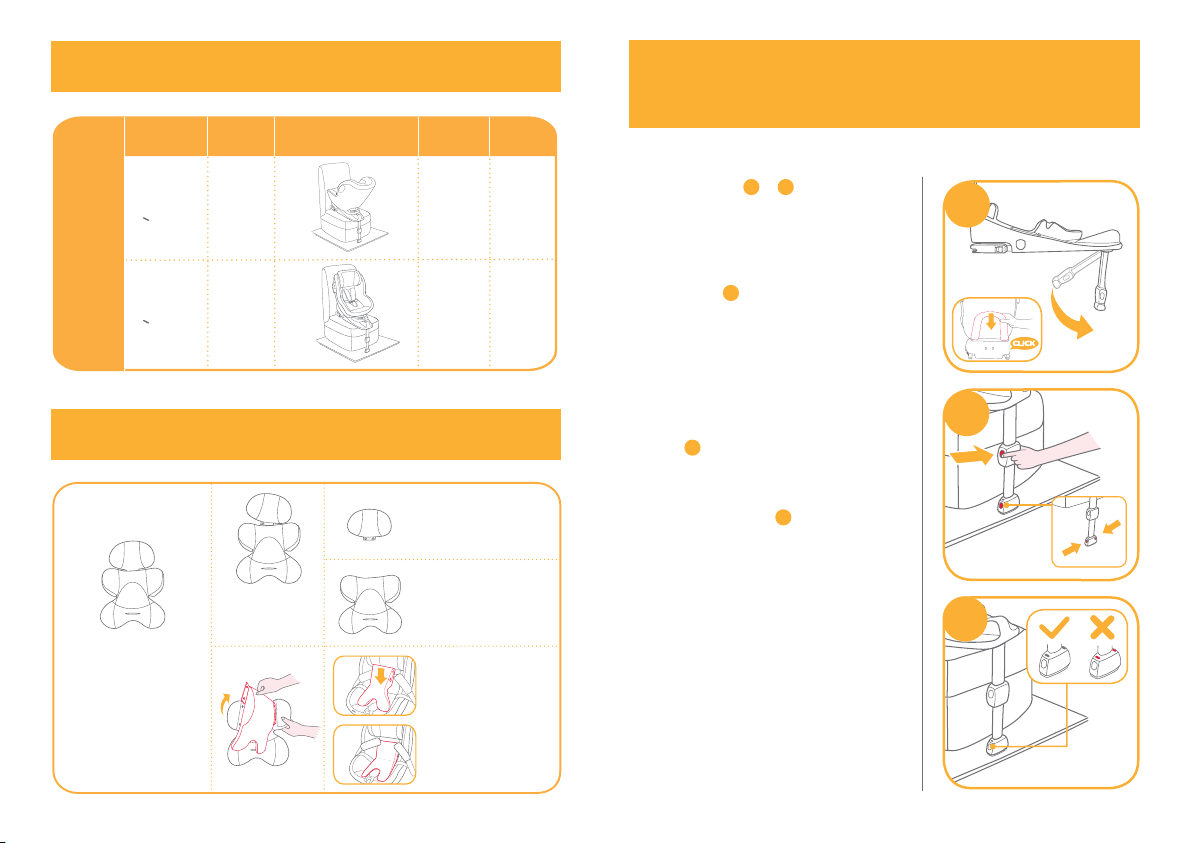
!Please install the i-base Advance on the vehicle seat (with rebound
bar attached), then install the shell, and then put the child in the
i-anchor advance.
!Ensure rebound bar is fitted to i-BaseTM Advance.
!The most convenient way to install the shell is when the i-BaseTM
Advance is in the 7th position.
12
1 2
13
1
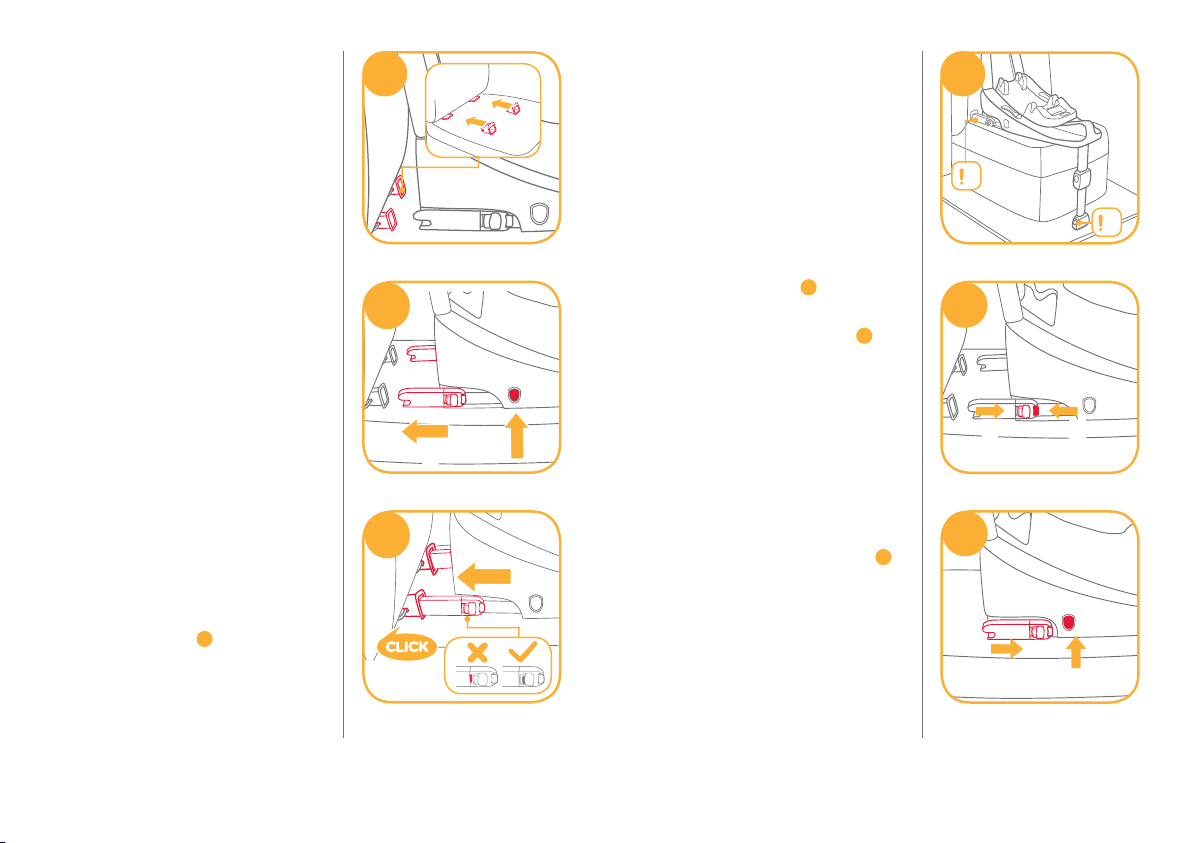
!Pull up on the i-anchor advance
seat to be sure it is securely latched
into the i-BaseTM Advance.
!Please ensure that there is no gap
between the vehicle seat upper
surface and the bottom of the
i-BaseTM Advance.
!Make sure to open the side impact
protection shield for more side
impact safety. 12 -1The side impact
shield opposite the vehicle door can
be closed to allow more seating
space. 12 -2
If the i-anchor advance is secure, the
i-anchor advance latched indicator
shows green. If the i-anchor advance
is not secure, the i-anchor advance
shows red. 13 -1
14
15
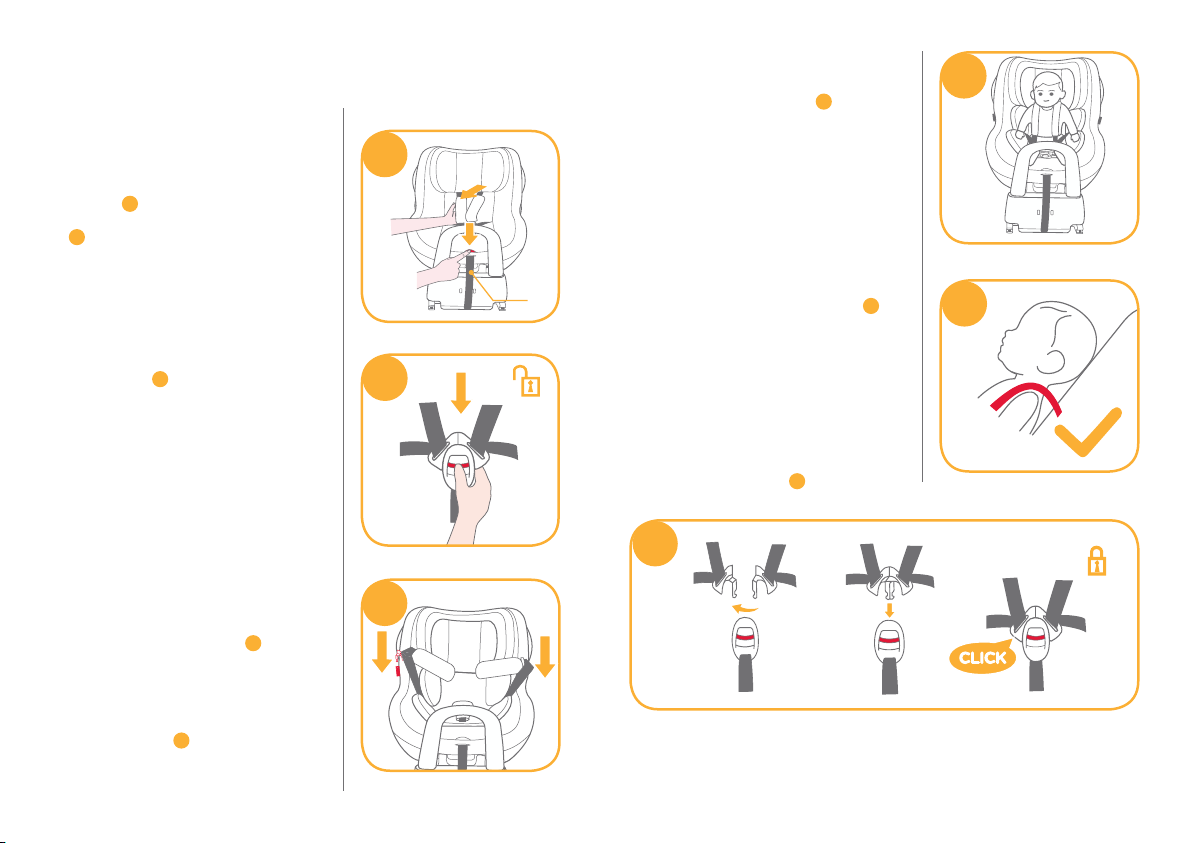
1. Infant insert is for children's
protection. Children whose height
is under 60cm are suitable to use
the infant insert.
2. Infant insert includes head support
and body portion and wedge.
3. Please install the i-anchor advance
base on the vehicle seat, then
install the shell, and then put the
child in the i-anchor advance.
4. After the child is placed into the
seat, check whether the shoulder
harnesses are at correct from
proper height.
5. After removing the wedge from
the infant insert, please store it in
a place where the child can not
access it.
6. Please make sure the infant insert
has the wedge assembled before
using it for infant. 14
7. Detach the snaps on the head
support, and then remove the head
support. To assemble head support
in reverse steps. 15