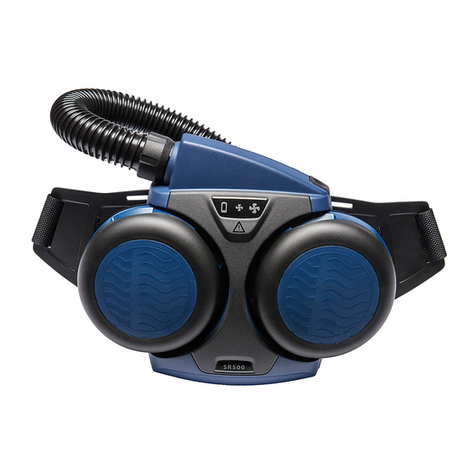
JSP JETSTREAM Operator's manual

EN12941 : 1998
RESPIRATORY PROTECTIVE DEVICE -
POWERED FILTERING DEVICE, INCORPORATING A HELMET OR HOOD,
CLASS TH2 DEVICE
USER INSTRUCTION MANUAL
JETSTREAM™&
JETSTREAM™GV-X
IMPORTANT - This manual must be read and fully understood before the
Jetstream™ is used. This manual must be retained for future reference. A copy
of this manual and the Declaration of Conformity for the product can be found on
the product page: documents.jspsafety.com.
EN

Important - Please read these instructions carefully before unpacking your Jetstream™ product.
Failure to comply with the instructions in this leaflet may void your warranty and adversely affect your health. If you
have any questions regarding the suitability of this product to your task, please contact an occupational hygienist or call
the manufacturers technical help line. Address and Telephone number information is printed at the back of this leaflet.
Unpacking - Your Jetstream™ Powered Respirator should include:
a) Blower Unit b) Belt c) Head Cape with Hose d) Airflow Test Unit e) Battery Charger
f) Instruction Leaflet g) Filter (Type depends on model)
If any of the above components are not included in your kit, please contact the supplier immediately.
Approvals - Jetstream™ - Jetstream™ has been designed and manufactured to comply with EN12941: 1998 as a
TH2 device. BS4275 (Guide to implementing an effective respiratory protective device programme), which the user
is advised to read, defines an EN12941 TH2 device as offering an Assigned Protection Factor of 20. Jetstream™ can
only provide this level of protection when used with filters provided by the manufacturer marked “Jetstream™” and
“EN12941:1998 TH2”. Jetstream™ is manufactured under a BS EN ISO 9001 Quality System.
Limitations To Use - This Respirator must be used strictly in accordance with this instruction leaflet and the
instructions supplied with corresponding head-units.
When the blower unit is switched off little or no respiratory protection is to be expected. When the blower unit is
switched off a rapid build up of carbon dioxide and depletion of oxygen within the head unit may occur.
DO NOT use Jetstream™ with the blower unit switched off.
DO NOT use Jetstream™ in an atmosphere that is immediately hazardous to user hygiene or health,
has oxygen content of less than 19.5% or contains unknown substances
DO NOT expose to flames and/or sparks.
DO NOT use Jetstream™ in an explosive atmosphere.
DO NOT use Jetstream™ in confined spaces or areas of poor ventilation.
DO NOT use Jetstream™ in high winds.
DO NOT alter or modify in any way.
DO NOT touch any of the moving parts.
DO NOT remove the Battery cover, this is for use by the Manufacturer only.
DO NOT allow water or other liquids to enter the Impeller Chamber / Volute or Battery Compartment.
There is a possibility that the hose to the head unit may become caught up in use.
The blower unit should be positioned on the person in such a way as to reduce this possibility.
Filters cannot be fitted directly to the head units and should not be adapted to do so.
Correct respiratory protection will not be provided if any parts of the equipment are modified.
At very high work rates the pressure in the device may become negative at peak inhalation flow.
Jetstream™ are for use only by competent, trained personnel.
Jetstream™ and Jetstream™ GV-X filters are not interchangeable.
Filters should not be modified to fit different blower units.
The user is advised to leave the contaminated area immediately if:
The Manufacturer’s Minimum Design Flow (MMDF) warning buzzer sounds.
Breathing becomes difficult. Dizziness or distress occurs. Any part of the system becomes damaged.
Airflow into the Head-Unit decreases or stops. Contaminant can be smelt or tasted inside the Head-Unit.
Materials that may come into contact with the users skin are not known to cause allergic reactions to the majority of
individuals but in the unlikely event of a reaction, the user should immediately leave the contaminated area, remove the
unit and seek medical advice.
System Overview - Jetstream™
Jetstream™ is a belt mounted powered respirator with a replaceable, disposable high efficiency particle filter system.
Jetstream™ contains an 8hr rechargeable battery pack. Jetstream™ will warn the user when the MMDF of 140 L/min, is
reached. The pleated filter has been developed especially for this unit. It is used to filter the air the user will breathe.
The filter is intended to be disposed of once clogged to the point of triggering the warning signal.

Note: Jetstream™ will only
protect against particulate
hazards in the industries shown
below. For gases and gas/
particulate combinations use
the Jetstream™ GV-X with
appropriate filter
System Overview - Jetstream™ GV-X
Jetstream™ GV-X is a belt mounted powered respirator with a range of filters for protection against Particles and/or
Organic gases and vapours with boiling points above 65°C. Jetstream™ GV-X contains an 8hr rechargeable battery
pack. Jetstream™ GV-X will warn the user when the MMDF of 140 L/min, is reached.
The Jetstream™ GV-X range of Filters have been developed especially for this unit. They are used to filter the air the
user will breath. The Jetstream™ GV-X Filters are intended to be disposed of once clogged to the point of triggering
the warning signal.
A number of alternative head pieces are available, an impact protective browguard unit, a range of different material
hoods, a helmet assembly with a sealed visor (for heavier duty industrial applications) and a welding visor using the
Chameleon solar powered automatic welding shield.
The rechargeable battery used is a Nickel Metal Hydride cell. When supplied the battery may hold a small charge, the unit
should be run flat and then charged for sixteen hours before the first use.
Application Guide
Hood Browguard Helmet Cobra Welding/
Grinding Shield
Agriculture ü ü
Aluminium ü
Animal Allergies ü
Asbestos MUST HAVE QUANTITATIVE FACE FIT TEST CARRIED OUT
Building & Construction ü
Chemical Plants üüü
Demolition & Maintenance üüü
DIY üüüü
Electronic/PCB Manufacture ü ü ü
Flour Mills & Silos üüüü
Food Processing ü ü ü
Foundries üüü
GRP Manufacture ü ü ü
Isocyanates USE COMPRESSED AIR FED EQUIPMENT
Laboratories ü ü ü
Lead Processing ü
Mining ü
Nuclear ü
Paint Spraying (water based) ü ü ü
Pest Control üüü
Petrochemical üüü
Pharmaceutical üüüü
Purication & Sewage üüüü
Shipyards ü ü
Steel Industry
Textiles ü ü ü
Tunnelling/Quarrying ü
Waste disposal üüü
Welding ü
Wineries/Market Gardens üüüü

Waist-Belt Adjustment
Put the belt around your waist and fasten the two ends together; If the belt is too loose, slide the male adjuster down
the belt, towards the female half. If the belt is too tight, slide the male adjuster away from the female half.
Repeat the above processes until a comfortable and secure fit is achieved. (See Diagram 1)
Once the belt fits correctly, secure any excess belt material using the Velcro sections.
Fitting the Filters
After first having checked the filter for it’s sealing gasket and that it’s filter element is undamaged (See Diagram 4),
place the filter over the corresponding circular recess in the blower unit. Twist lightly until the 5 location lugs, fall into the
corresponding recesses. (See diagrams 5 & 6.) Force the filter down towards the blower unit and apply a twisting force in
an anti-clockwise direction (See Diagram 7) until the 5-way bayonet system is heard locking into place. (See Diagram 8).
Filter Selection
Use only “Jetstream™ and Jetstream™ GV-X” Filters
manufactured by JSP Ltd. (See Diagram 2). It should
first be ascertained by consulting an occupational
hygienist or by calling the manufacturers technical
help line as to whether or not the Jetstream™ Filter
will offer suitable protection from the hazard.
Removing the Filter
Push the Filter-Housing down towards the body of the
Blower Unit and apply a twisting force in a Clock-Wise
Direction. (See Diagram 3) It will now be possible to
pull the filter away from the Unit.
Diagram 1:
Diagram 2:
Loosen Tighten
Diagram 3:
Diagram 4: Jetstream™ Diagram 5:
Jetstream™ GX-V
Diagram 6: Diagram 7: Diagram 8:
PUSH DOWNPUSH DOWN
AND TWISTAND TWIST
PUSH DOWNPUSH DOWN
AND TWISTAND TWIST
LOCATIONLOCATION
RECESSRECESS
LOCATION LUGSLOCATION LUGS
FILTERFILTER GASKETGASKET
LOCATIONLOCATION
LUGSLUGS
LOCKED INLOCKED IN
TWISTTWIST
GASKETGASKET
FILTERFILTER
Diagram 4: GX-V

Spark Guard
The Spark Guard is included with the Jetstream™ TH2P filter (not suitable for fitting to the Jetstream™ TH2A2 or
TH2A2P filters or other types of JSP filters).
The Spark Guard is a simple push fit. Line up the finger recess on the Spark Guard with the finger recess on the filter
housing (see diagram 9, 10 and 11) and push into place. Ensure a positive click fit is heard.
When the Jetstream™ TH2P filter is exhausted simply pull off the Spark Guard.
Under normal circumstances the Spark Guard can be used up to 5 times. The
Spark Guard should be cleaned between each use. Use a cloth moistened in a
warm diluted mild detergent solution, the Spark Guard should be allowed to air
dry. Under no circumstances should you use any solvents or abrasive cleaners
be used. The unit must not be dried using hot air or radiant heat.
Diagram 9: Diagram 10: Diagram 11:
Diagram 12:
Starting the Blower-Unit
Activate the Power-Switch at the rear of the unit (See Diagram 12.) and wait to see that the buzzer turns off after about
10 seconds. If this does not occur, the unit may require recharging or a new filter fitting.
Checking the Airflow
With the Blower-Unit running, place the Flow-Test-Unit onto the Blower-Unit so that the sealing gasket is securely
gripping the ‘chimney’. (See Diagrams 13 & 14.) Check that the indicator lever rises above the red fail and into green
pass sector. (See Diagram 15.)
Diagram 13: Diagram 14: Diagram 15:
Donning the Blower Unit
Place belt around waist and fasten snap fit buckle. To adjust fit of belt pull free end away from the Velcro fastening and
pull through buckle. The belt should be tightened/loosened so that the blower unit sits comfortably, usually at the small
of the back. The free end of the belt should be flattened against the Velcro fastening.
FINGER RECESSFINGER RECESS FINGER RECESSFINGER RECESS
SWITCHSWITCH
FLOW TEST UNITFLOW TEST UNIT
GASKETGASKET
INDICATOR LEVELINDICATOR LEVEL
FAILFAIL
PASSPASS

Attaching the Hose to the Blower Unit
Switch on the blower unit and allow it to stabilise, the warning buzzer will stop when the unit is stabilised. If the buzzer
fails to stop either the filter requires replacement or the battery needs recharging. Once the buzzer has stopped attach
the hose. Place the Bayonet connector (See Diagram 16) over the ‘Chimney’ of the Jetstream™, push down and twist
in an anti-clockwise direction (See Diagram 17.) until the locating pin clips into place. (See Diagram 18.)
Diagram 16: Diagram 17: Diagram 18:
NOTE: The hose is permanently attached to the head units and no attempt should be made to remove it.
Donning the Cape
Place the Head-Unit on the head and
adjust the headband until a comfortable
fit is achieved. (See Diagram 19). Feed a
finger underneath each side of the sealing
skirt and pull it into place around the neck,
ensuring that the rear edge of the cape
sits behind the ears. (See Diagram 20)
Diagram 19: Diagram 20:
Donning the Mk 6/7 helmet
Open the internal harness out to it’s maximum extension (see Diagram 21). Insert the chin into the skirt at the base of
the Visor and rotate the helmet down over the back of the head (see Diagram 22). Lift the rear of the skirt up over the
rear of the harness (see Diagram 23). Adjust the harness until a firm but comfortable fit is achieved (see Diagram 24).
Pull the rear of the skirt back down over the harness, the skirt will now be sealed all the way around the wearer’s neck
(see Diagram 25).
Diagram 21: Diagram 22: Diagram 23:
Diagram 24: Diagram 25:
BAYONET FITTINGBAYONET FITTING
BLOWER CHIMNEYBLOWER CHIMNEY
TWISTTWIST

Donning the Browguard and Welding Visor
Open the internal harness out to its maximum extension by loosening the wheel ratchet (see Diagram 26). Place on head,
adjust the harness until a firm but comfortable fit is achieved (see Diagram 27). Grasp the tag on the inner skirt (see
Diagram 28) and pull the visor down (see Diagram 29). Ensure that the skirt is under the chin (see Diagram 30). If donning
the Welding Visor, pull the outer visor down into place (see Diagram 31). If required tighten the side knobs to hold the
visor and welding visor in place (see Diagram 32).
Maintenance of Unit and Head Pieces
The Blower unit, filter housing and head units can all be cleaned with a cloth moistened in a warm diluted mild
detergent solution. Water must not be allowed to enter the workings of the blower unit or get on to the element of the
filter. Parts should be allowed to air dry. Under no circumstances should any solvents or abrasive cleaning agents be
used. The unit must not be dried using hot air or radiant heat.
The unit should continue to provide protection to the designed specification for 2 to 3 years, when maintained in
accordance with these instructions. Prior to each use the user should check that the unit is free from defect, such as
cracks, spilt filters and hoses, cracked visors and helmet components as appropriate.
Diagram 26: Diagram 27: Diagram 28:
WHEEL RATCHETWHEEL RATCHET TIGHTENTIGHTEN
Diagram 31:
Diagram 29: Diagram 30:
Diagram 32:

Storage and Transportation
When not in use or during transportation the blower and head units should be stored in the container in which they
were provided, or other similar container, such that it is out of direct sunlight, not in contact with solvents and cannot be
damaged by physical contact with hard surfaces/items. Do not store outside the temperature range of +2°C to +55°C
or with humidity above 75%RH.
Charging the Battery
Once the unit has reached it’s MMDF, it is best to leave it to run down completely before recharging.
Plug the Charger into the mains Socket, fit the Plug on the end of the lead into the Socket at the back of the Blower
Unit (See Diagram 33). The Socket is to be found underneath the Waist Belt, in line below the Power-Switch, (See
Diagram 34).
On receipt of the unit run battery flat and then charge the unit for a period of 17-18hrs. Repeat charges after this
should take about 16hrs for batteries to reach full capacity.
If the unit is run completely flat or not used for a long period it would be adviseable to repeat the 17-18hr charge cycle.
A reduced charging time of the battery will reduce the time that the unit operates at its intended flow rate.
Guarantee
Jetstream™ or Jetstream™ GV-X is guaranteed for a period of 6 months from date of Purchase against mechanical
or electrical defects. The Company undertakes to exchange or repair without charge, any part found to be defective
within this period. Alternatively and at it’s discretion, the Company may replace.
This guarantee is subject to:-
Jetstream™ or Jetstream™ GV-X has been used solely for the purpose for which it is intended.
Jetstream™ or Jetstream™ GV-X has not been subject to misuse, accident, modification or repair.
N.B. In the event of a claim, contact the retailer from which Jetstream™ was purchased.
This guarantee does not cover normal wear and tear.
This guarantee does not affect your legal rights.
This guarantee applies to the UK only.
Diagram 33: Diagram 34:
PLUGPLUG
SOCKETSOCKET
Battery Information
Battery Type: Nickel Metal Hydride
8hr Unit 6V 4.5 amphr
Battery packs should be disposed of
under local disposal regulations.
Batteries should not be disposed of
in general waste bins.
SOCKETSOCKET

EN12941 : 1998
ATEMSCHUTZVORRICHTUNG -
BETRIEBENE FILTERVORRICHTUNG MIT EINEM HELM ODER EINER HAUBE,
GERÄT DER KLASSE TH2
BEDIENUNGSANLEITUNG
JETSTREAM™ &
JETSTREAM™ GV-X
WICHTIG - Dieses Handbuch sollte vor Gebrauch von Jetstream-Geräten
gelesen und vollständig verstanden werden. Dieses Handbuch sollte für spätere
Verwendung aufbewahrt werden. Eine Kopie der Konformitätserklärung dieses
Produkts finden Sie unter: documents.jspsafety.com
DE

Wichtig! - Bitte lesen Sie diese Anleitung sorgfältig durch, bevor Sie Ihr Jetstream-Produkt auspacken.
Nichtbefolgung der Anleitungen in dieser Broschüre könnte die Garantie Ihres Produkts gefährden und Auswirkungen
auf Ihre Gesundheit haben. Sollten Sie irgendwelche Fragen zur Eignung des Produktes für Ihre spezielle Aufgabe
haben, wenden Sie sich bitte an einen Hygieniker oder an den technischen Informationsdienst des Herstellers.
Sie finden Adresse und Telefonnummer auf der Rückseite dieser Broschüre.
Auspacken - Ihr motorbetriebenes Atemschutzgerät von Jetstream sollte folgende Teile enthalten:
a) Gebläse-Einheit b) Gurt c) Kopfhaube mit Schlauch d) Luftstrom-Testeinheit e) Batterie Ladegerät
f) Anleitung g) Filter (Filtertyp ist von Modell abhängig)
Sollte Ihrem Bausatz einer der obigen Einzelteile fehlen, wenden Sie sich bitte sofort an Ihre Lieferfirma.
Zulassungen - Jetstream - Design und Herstellung von Jetstream entsprechen, gemäß EN12941: 1988 dem Standard
eines TH2 Geräts. Nach BS4275, einer Richtschnur zur Einführung eines effektiven Programms für Atemschutzgeräte,
die der Benutzer durchlesen sollte, wird dem EN12941: 1988 TH2 Gerät der Schutzfaktor 20 zugewiesen. Jetstream
kann diesen Schutzgrad jedoch nur gewährleisten, wenn es gemeinsam mit Filtern des Herstellers benutzt wird, die als
“Jetstream” und “EN12941: 1988 TH2” bezeichnet sind. Jetstream wurde unter einem Qualitätssystem von BS EN ISO
9000 hergestellt.
Einsatzbeschränkungen - Anweisungen des entsprechenden Kopfteils. Wenn das Gebläse ausgeschalten ist, kann
kein oder wenig Atemschutz erwartet werden. Wenn das Gebläse ausgeschalten ist, kann es zu schneller Ansammlung
von Kohlendioxyd und zu Sauerstoffmangel innerhalb der Kopfmaske führen. Verwenden Sie Jetstream NICHT, wenn
das Gebläse ausgeschalten ist
Verwenden Sie Jetstream AUF KEINEN FALL in einer für die Gesundheit des Benutzers unmittelbar gefährlichen
Umgebung, einem Umfeld mit Sauerstoffgehalt von weniger als 19,5% oder unbekannten Substanzen.
Setzen Sie das Gerät NICHT Flammen und / oder Funken aus.
Verwenden Sie Jetstream NICHT in explosiver Umgebung.
Verwenden Sie Jetstream NICHT in geschlossenen Räumen mit schlechter Belüftung.
Verwenden Sie Jetstream NICHT bei starkem Wind.
Das Gerät sollte AUF KEINEN FALL geändert oder umgebaut werden.
Berühren Sie KEINE der sich bewegenden Teile.
Entfernen Sie den Batteriefachdeckel NICHT, dies wird nur vom Hersteller vorgenommen.
Es darf KEIN Wasser oder andere Flüssigkeit in die Gebläseradkammer / das Spiralgehäuse oder das Batteriefach
geraten. Es besteht die Möglichkeit, dass sich der Schlauch zur Kopfmaske während der Verwendung verfängt. Das
Gebläse sollte an der Person so angebracht werden, dass diese Möglichkeit verringert oder ausgeschalten wird. Filter
können nicht direkt an der Kopfmaske angebracht werden, und Anpassungen dieser Art sollten nicht vorgenommen
werden. Für richtigen Atemschutz wird nicht garantiert, wenn irgendein Teil der Ausrüstung umgeändert wurde. Bei
sehr hoher Arbeitsleistung kann es im Gerät bei Spitzeneinatmung zu niederem / negativem Druck kommen.
Jetstream sollte nur von kompetent ausgebildetem Personal verwendet werden.
Jetstream und Jetstream GV-X Filter sind nicht wechselseitig austauschbar.
Filter sollten nicht geändert werden, um in andere Gebläse-Einheiten zu passen.
Es wird dem Benutzer geraten, das verunreinigte Gebiet sofort zu verlassen, wenn:
- der Empfohlene Mindestluftstrom (MMDF) Warnsummer des Herstellers ertönt.
-die Atmung schwierig wird,
-Schwindel oder Unruhe auftritt,
-irgendein Teil des Systems beschädigt wurde,
-sich der Luftstrom zur Kopfmaske verringert oder stoppt,
-Verunreinigungen innerhalb der Kopfmaske gerochen oder geschmeckt werden.
Es ist gemeinhin nicht bekannt, dass Stoffe, die mit der Haut des Benutzers in Berührung kommen, allergische
Reaktionen verursachen, wenn es jedoch zu einer Reaktion kommen sollte, dann wird dem Benutzer geraten, das
verunreinigte Gebiet sofort zu verlassen und medizinischen Rat zu suchen.
Systemüberblick - Jetstream
Jetstream ist ein gurtmontiertes, motorbetriebenes Atemschutzgerät mit austauschbarem, hochwirksamem
Teilchenfilter-System, das nach Verwendung entsorgt werden kann. Jetstream enthält ein 8 Stunden anhaltendes
wiederaufladbares Akkupack.Jetstream warnt den Benutzer, wenn ein MMDF von 140 Liter pro Minute erreicht ist.
Der Plisseefilter wurde speziell für diese Einheit entwickelt. Er dient dazu, die Luft zu filtern, die der Benutzer einatmet.
Der Filter sollte entsorgt werden, sobald er so verschmutzt ist, dass er das Warnsignal auslöst.
Anmerkung: Jetstream schützt nur
vor speziellen Gefahren in den unten
angegebenen Industriebereichen.
Für Gase oder Gas- und
Partikelkombinationen verwenden
Sie bitte Jetstream GV-X mit dem
entsprechenden Filter.
Systemüberblick - Jetstream GV-X
Jetstream GV-X ist ein gurtmontiertes, motorbetriebenes Atemschutzgerät, das mit einer Auswahl an Filtern gegen
Partikel und / oder organische Gase und Dämpfe mit Siedepunkt über 65°C schützt.
Jetstream GV-X enthält ein 8 Stunden anhaltendes wiederaufladbares Akkupack.
Jetstream GV-X warnt den Benutzer, wenn ein MMDF von 140 Liter pro Minute erreicht ist.
Die Filterauswahl für den Jetstream GV-X wurde speziell für diese Einheit entwickelt. Sie dienen dazu, die Luft zu
filtern, die der Benutzer einatmet. Die Jetstream GV-X Filter sollten entsorgt werden, sobald sie so verschmutzt sind,
dass sie das Warnsignal auslösen. Es stehen eine Anzahl von Kopfmasken zur Verfügung, sowie eine stoßfeste
Augenschutzeinheit, eine Auswahl an Hauben aus verschiedenen Materialien, ein Helm mit abgedichtetem Visier (für
hochleistungsfähige Industrieanwendung) und ein Schweißvisier mit solarbetriebenem automatischem Chamäleon
Schweißschutz.
Der verwendete Akku besteht aus einer Nickel-Metallhydrid Zelle. Bei Lieferung kann die Batterie leicht geladen sein.
Sie sollte leergelaufen und vor Erstgebrauch sechzehn Stunden aufgeladen werden.
Anleitung zur Anwendung
Haube Gesichtsschutz Helm Cobra Welding/
Grinding Shield
Landwirtschaft ü ü
Aluminium ü
Tierallergien ü
Asbest QUATITATIVER TEST FÜR GESICHTSPASSFORM MUSS DURCHGEFÜHRT WERDEN
Baugewerbe & Gebaudeerrichtung ü
Chemiefabriken üüü
Abbruch & Instandhaltung üüü
Heimwerken üüüü
Elektronik / Platinenherstellung ü ü ü
Getreidemühlen & Silos üüüü
Nahrungsmittelverarbeitung ü ü ü
Gießerein üüü
GFK-Herstellung ü ü ü
Isozyanide BENÜTZEN SIE DIE AUSRÜSTUNG FÜR DRUCKLUFTEINSPEISUNG
Laboratorien ü ü ü
Bleiverarbeitung ü
Bergbau ü
Nukleare Betriebe ü
Farbspritzen ü ü ü
Schädlingsbekämpfung üüü
Petrochemie üüü
Pharmazie üüüü
Reinigung & Kläranlagen üüüü
Schiffswerften ü ü
Stahlindustrie
Textilindustrie ü ü ü
Tunnelbau / Steinbrüche ü
Müllentsorgung üüü
Schweißen ü
Weinkellereien / Markgärten üüüü

Waist-Belt Adjustment
Put the belt around your waist and fasten the two ends together; If the belt is too loose, slide the male adjuster down
the belt, towards the female half. If the belt is too tight, slide the male adjuster away from the female half.
Repeat the above processes until a comfortable and secure fit is achieved. (See Diagram 1)
Once the belt fits correctly, secure any excess belt material using the Velcro sections.
Einsatz des Filters
Nachdem Sie vorerst das Dichtungsprofil des Filters untersucht und die Unversehrtheit des Filterelements festgestellt
haben (siehe Abbildung 4), setzen Sie den Filter auf die entsprechende runde Ausnehmung im Gebläse auf. Drehen
Sie ihn leicht, sodass die 5 Halteböckchen in die entsprechenden Ausnehmungen rasten (siehe Abbildungen 5 und
6). Pressen Sie den Filter nach unten gegen den Gebläsekörper und drehen Sie ihn danach gegen den Uhrzeigersinn
(siehe Abbildung 7), bis die fünffache Bajonettfassung hörbar einrastet (siehe Abbildung 8).
Filter Selection
Use only “Jetstream™ and Jetstream™ GV-X”
Filters manufactured by JSP Ltd. (See Diagram
2). It should first be ascertained by consulting
an occupational hygienist or by calling the
manufacturers technical help line as to whether
or not the Jetstream™ Filter will offer suitable
protection from the hazard.
Entfernung des Filters
Drücken Sie das Filtergehäuse nach unten gegen
den Gebläsekörper und drehen Sie es danach im
Uhrzeigersinn (siehe Abbildung 3). Nun kann der
Filter aus der Einheit genommen werden.
Abbildung 1:
Abbildung 2:
Loosen Tighten
Abbildung 3:
Abbildung 4: Jetstream™ Abbildung 5:
Jetstream™ GX-V
Abbildung 6: Abbildung 7: Abbildung 8:
NIEDERDRÜCKENNIEDERDRÜCKEN
UND DREHENUND DREHEN
POSITION DERPOSITION DER
AUSNEHMUNGAUSNEHMUNG
POSITION DER HALTEBÖCKCHENPOSITION DER HALTEBÖCKCHEN
FILTERFILTER DICHTUNGDICHTUNG
POSITION DERPOSITION DER
HALTEBÖCKCHENHALTEBÖCKCHEN
EINGERASTETEINGERASTET
DREHENDREHEN
FILTERFILTER
Abbildung 4: GX-V
DICHTUNGDICHTUNG
NIEDERDRÜCKENNIEDERDRÜCKEN
UND DREHENUND DREHEN

Funkenschutz
Mit dem Jetstream TH2P Filter wird ein Funkenschutz mitgeliefert (kann nicht mit Jetstream TH2A2 oder TH2A2P
Filtern oder anderen JSP Filtern eingesetzt werden). Der Funkenschutz besitzt eine einfache Steckverbindung. Richten
Sie die Fingervertiefung des Funkenschutzes mit der Fingervertiefung des Filtergehäuses aus (siehe Abbildung p, 10
und 11) und drücken Sie ihn in Position. Die Teile sollten hörbar einrasten.
Wenn der Jetstream TH2P Filter aufgebraucht ist, ziehen Sie einfach den
Funkenschutz ab. Generell kann der Funkenschutz bis zu 5 Mal verwendet
werden. Er sollte nach jeder Verwendung gesäubert werden. Dazu sollten
Sie ein in einer Lösung aus mildem Reinigungsmittel und warmem Wasser
angefeuchtetes Tuch verwenden; lassen Sie danach den Funkenschutz an der
Luft trocknen. Unter keinen Umständen sollten zur Reinigung Lösungsmittel
oder Scheuermittel verwendet werden. Trocknen Sie den Teil nicht mit heißer
Luft oder Wärmebestrahlung.
Abbildung 9: Abbildung 10: Abbildung 11:
Abbildung 12:
Das Gebläse starten
Setzen Sie den Schalter auf der Rückseite der Einheit in Gang (siehe Abbildung 12) und warten Sie etwa 10
Sekunden, bis sich der Warnsummer ausschaltet. Wenn dies nicht geschieht, muss die Einheit entweder neu
aufgeladen werden oder benötigt einen neuen Filter.
Überprüfen des Luftstroms
Setzen Sie, während das Gebläse läuft, den Luftstrom-Testteil so auf das Gebläse, dass die Dichtung sicher an
der Luftausfuhr festsitzt (siehe Abbildung 13 und 14). Stellen Sie sicher, dass der Anzeigehebel vom roten (nicht
ausreichenden) in den grünen (ausreichenden) Bereich steigt (siehe Abbildung 15).
Abbildung 13: Abbildung 14: Abbildung 15:
Die Gebläse-Einheit aufsetzen
Platzieren Sie den Gurt um die Taille und schließen Sie den Schnappverschluss. Um den Gürtel anzupassen, ziehen
Sie ihn vom Klettverschluss weg und durch die Schnalle hindurch. Der Gurt sollte enger / weiter gestellt werden, um
einen bequemen Sitz des Gebläses, gewöhnlich am Rücken, zu gewährleisten. Das lose Ende des Gurts sollte am
Klettverschluss flach festgemacht werden.
FINGERVERTIEFUNGFINGERVERTIEFUNG
SCHALTERSCHALTER
LUFTSTROM-LUFTSTROM-
TESTEINHEITTESTEINHEIT
DICHTUNGDICHTUNG
ANZEIGEHEBELANZEIGEHEBEL
NICHTNICHT
AUSREICHENDAUSREICHEND
FINGERVERTIEFUNGFINGERVERTIEFUNG

Anbringung des Schlauchs am Gebläse
Schalten Sie das Gebläse ein und warten Sie ein wenig, bis es sich stabilisiert hat; der Warnsummer schaltet sich
gewöhnlich aus, nachdem die Einheit konstant läuft. Wenn sich der Warnsummer nicht ausschaltet, muss entweder
ein neuer Filter eingesetzt oder die Batterie neu aufgeladen werden. Wenn der Warnsummer nicht mehr zu hören
ist, können Sie den Schlauch anbringen. Platzieren Sie das Bajonettanschlussstück (siehe Abbildung 16) über die
Luftausfuhr des Jetstream, drücken Sie sie nach unten und drehen Sie sie gegen den Uhrzeigersinn (siehe Abbildung
17), bis der Sicherungsstift in Position ist (siehe Abbildung 18).
Abbildung 16: Abbildung 17: Abbildung 18:
ANMERKUNG: Der Schlauch ist permanent an der Kopfmaske befestigt, und es sollten keine Versuche
unternommen werden, ihn zu entfernen.
Die Haube aufsetzen
Setzen Sie die Kopfmaske auf und
justieren Sie das Kopfband, bis die
Einheit bequem sitzt (siehe Abbildung 19).
Ziehen Sie den Dichtungsrand der Haube
mit dem Finger an jeder Seite zurecht,
sodass sie um den Nacken herum richtig
sitzt, wobei Sie sicherstellen, dass sich
das rückwärtige Ende hinter den Ohren
befindet (siehe Abbildung 20).
Abbildung 19: Abbildung 20:
Den Mk 6/7 Helm aufsetzen
Öffnen Sie den internen Gurt so weit wie möglich (siehe Abbildung 21). Schieben Sie Ihr Kinn in die Schürze unten am Visier
und ziehen Sie den Helm über Ihren Hinterkopf (siehe Abbildung 22). Ziehen Sie das hintere Ende der Schürze über das
hintere Ende des Gurts (siehe Abbildung 23). Justieren Sie den Gurt, bis er fest und doch bequem sitzt (siehe Abbildung 24).
Ziehen Sie das hintere Ende der Schürze wieder über den Gurt nach unten, die Schürze ist nun rund um den Nacken des
Trägers dicht (siehe Abbildung 25).
Abbildung 21: Abbildung 22: Abbildung 23:
Abbildung 24: Abbildung 25:
BAJONETTANSCHLUSSSTÜCKBAJONETTANSCHLUSSSTÜCK
GEBLÄSE LUFTAUSFUHRGEBLÄSE LUFTAUSFUHR
DREHENDREHEN

Anbringen des Stirnschutzes und des Schweißvisiers
Öffnen Sie den Innengurt so weit wie möglich, indem Sie den Rad-Ratschenverschluss lösen (siehe Diagramm 26).
Setzen Sie das Teil auf den Kopf und stellen Sie das Gurtzeug so ein, dass es fest und doch bequem sitzt (siehe
Diagramm 27). Fassen Sie die Lasche an der Innenschürze (siehe Diagramm 28) und ziehen Sie das Visier nach
unten (siehe Diagramm 29). Achten Sie darauf, dass die Schürze unter dem Kinn liegt (siehe Diagramm 30). Ziehen
Sie beim Anbringen des Schweißvisiers das äußere Visier nach unten in Position (siehe Diagramm 31). Ziehen Sie bei
Bedarf die seitlichen Knöpfe fest, um das Visier und das Schweißvisier in Position zu halten (siehe Diagramm 32).
Wartung der Einheit und der Kopfstücke
Gebläse, Filtergehäuse und Kopfstücke können mit einem Tuch, das in einer Lösung aus mildem Reinigungsmittel
und warmem Wasser angefeuchtet wurde, gereinigt werden. Es darf kein Wasser in den Lauf des Gebläses oder zum
Filterelement gelangen. Die Teile sollten an der Luft trocknen. Unter keinen Umständen sollten Lösungsmittel oder
Scheuermittel verwendet werden. Trocknen Sie den Teil nicht mit heißer Luft oder Wärmebestrahlung.
Abbildung 26: Abbildung 27: Abbildung 28:
Abbildung 31:
Abbildung 29: Abbildung 30:
Abbildung 32:
ROTES KLINKENRADROTES KLINKENRAD FESTZIEHENFESTZIEHEN

Aufbewahrung und Transport
Ist das Gerät nicht in Verwendung oder wird transportiert, sollten Gebläse und Kopfteile in dem oder einem ähnlichen
Behälter aufbewahrt werden, in dem sie geliefert wurden. Der Behälter sollte vor Kontakt mit direktem Sonnenlicht,
Lösungsmitteln und Schäden durch harte Oberflächen / Teile schützen. Das Gerät sollte nicht unter +2°C oder über
+55°C gelagert und einer Luftfeuchtigkeit von über 75% ausgesetzt werden.
Laden der Batterie
Wenn das Gerät seinen Empfohlenen Mindestluftstrom (MMDF) erreicht hat, sollte es solange verwendet werden, bis
die Batterie vollständig leer ist, bevor Sie es wieder aufladen. Stecken Sie das Ladegerät in die Steckdose und stecken
Sie den Stecker am Ende des Kabels in die Buchse an der Rückseite des Gebläses (siehe Abbildung 33). Die Buchse
kann auf der Unterseite des Leibgurts gleich unter dem Ein / Ausschalter gefunden werden (siehe Abbildung 34). Eine
rote Leuchtdiode am Ladegerät zeigt nach Anschluss an das Stromnetz an, dass das Gerät geladen wird. Das Gerät
sollte nicht länger als maximal 16 Stunden geladen werden. Kürzere Ladezeit ergibt kürzere Laufzeit des Jetstream.
Garantie
Jetstream oder Jetstream GV-X stehen gegen mechanische oder elektrische Funktionsstörungen für 6 Monate
nach Einkauf unter Garantie. Das Unternehmen übernimmt kostenlos Austausch oder Reparatur eines jeden Teils,
der innerhalb dieses Zeitraums als fehlerhaft befunden wird. Nach Ermessen des Unternehmens kann es auch zu
Umtausch kommen. Die Garantie unterliegt:
Jetstream oder Jetstream GV-X wurden ausschließlich zu vorgesehenen Zwecken verwendet.
Jetstream oder Jetstream GV-X unterlagen keinem Missbrauch, Unfall, Änderungen oder Reparaturen.
Bitte beachten Sie: Im Falle eines Anspruchs wenden Sie sich bitte an die Lieferfirma, von der Sie Jetstream erworben haben.
Die Garantie schützt nicht vor normalem Verschleiß.
Diese Garantie beeinträchtig Ihre gesetzlichen Rechte nicht.
Diese Garantie gilt nur für Großbritannien.
Abbildung 33: Abbildung 34:
STECKERSTECKER
BUCHSEBUCHSE
BUCHSEBUCHSE
Batterieinformationen
Batterietyp: Nickel-Metallhydrid
8-Std.-Einheit 6 V, 4,5 A
Battery packs should be disposed of
under local disposal regulations.
Batteries should not be disposed of
in general waste bins.

EN12941 : 1998
DISPOSITIF DE PROTECTION RESPIRATOIRE -
DISPOSITIF DE FILTRATION ALIMENTÉ INCORPORANT UN CASQUE OU
UNE HOTTE, DISPOSITIF DE CLASSE TH2
MODE D’EMPLOI UTILISATEUR
JETSTREAM™ &
JETSTREAM™ GV-X
BELANGRIJK - Ce manuel doit être lu et entièrement compris avant d’utiliser
le Jetstream. Ce manuel doit être conservé pour être consulté ultérieurement.
Une déclaration de conformité pour ce produit peut être consultée sur ce site :
documents.jspsafety.com
FR

Important - Merci de lire ces instructions attentivement avant de déballer votre produit Jetstream.
Si les instructions contenues dans ce dépliant ne sont pas respectées cela risque de nuire à votre santé, et votre garantie pourra être
annulée. Pour toute question relative à l’adéquation du produit par rapport la tâche que vous souhaitez accomplir, merci de contacter
un hygiéniste professionnel ou appeler le service d’assistance technique du fabricant. Les coordonnées téléphoniques et postales
figurent au dos de ce dépliant.
Déballage- Votre respirateur Jetstream à ventilation assistée doit comprendre les articles suivants:
a) Unité de ventilation b) Ceinture c) Coiffe pour le tête, équipée d’un tuyau
d) Système de contrôle du débit d’air e) Chargeur de batterie f) Dépliant “mode d’emploi”
g) Filtre (type de filtre en fonction du modèle)
Si l’un de ces articles ne figure pas dans votre kit, merci de contacter votre fournisseur immédiatement.
Agrément - Jetstream - Le Jetstream a été conçu et fabriqué en conformité avec la norme EN12941: 1998 pour correspondre à
la dénomination d’appareil TH2. Selon le BS4275 (Guide pour la mise en œuvre d’un programme d’appareil protection respiratoire
efficace), dont la lecture est recommandée à l’utilisateur, un appareil TH2 EN12941 est un équipement présentant un Facteur de
Protection de Référence égal à 20. Jetstream ne peut offrir un tel niveau de protection qu’en utilisant des filtres fournis par le fabricant
et portant la mention “Jetstream” et “EN12941:1998 TH2”. Jetstream est fabriqué en conformité avec le Système de Qualité BS EN
ISO 9000.
Restrictions d’utilisation - Ce respirateur doit être utilisé en respectant strictement les instructions figurant dans ce dépliant et les
instructions fournies avec les unités faciales correspondantes.
Lorsque l’unité de ventilation est éteinte, la protection respiratoire est faible ou inexistante. Lorsque l’unité de ventilation est éteinte,
une accumulation de dioxyde de carbone et une diminution d’oxygène dans l’unité faciale peuvent se produire.
N’utilisez PAS le Jetstream lorsque l’unité de ventilation est éteinte.
N’utilisez PAS le Jetstream dans une atmosphère présentant un danger immédiat pour l’utilisateur au niveau hygiénique et sanitaire,
contenant un taux d’oxygène inférieur à 19.5% ou contenant des substances inconnues.
N’exposez PAS le Jetstream aux flammes et/ou aux étincelles.
N’utilisez PAS le Jetstream dans une atmosphère contenant des matières explosives.
N’utilisez PAS le Jetstream dans des espaces confinés ou dans des zones mal aérées.
N’utilisez PAS le Jetstream par vent fort.
N’altérez PAS ni modifier le Jetstream d’aucune manière.
NE touchez AUCUN des éléments mobiles.
NE retirez PAS le couvercle de la batterie, son usage est réservé au fabricant uniquement.
NE laissez PAS d’eau ou tout autre liquide s’introduire dans le logement des hélices du ventilateur / volute ou le logement réservé à
la batterie.
Le tuyau relié à l’unité faciale risque d’être entraîné lors de l’utilisation. L’unité de ventilation doit être positionnée sur l’utilisateur de la
manière permettant de réduire ce risque.
Les filtres ne peuvent être installés directement sur les unités faciales et ils ne doivent pas subir d’adaptation dans ce but. La
protection respiratoire ne sera pas correcte si des éléments de l’appareil sont modifiés.
Lorsque le rythme de travail est élevé, la pression exercée sur l’appareil peut devenir négative au niveau du flux d’inhalation maximum.
Le Jetstream est prévu pour être utilisé par du personnel compétent et formé.
Les filtres du Jetstream et du Jetstream GV-X ne sont pas interchangeables.
Les filtres ne doivent pas être modifiés pour s’adapter aux différentes unités de ventilation.
Il est conseillé à l’utilisateur de quitter immédiatement la zone contaminée si :
Si l’alarme d’avertissement du Débit Minimum Garanti par le Fabricant (MMDF - Manufacturer’s Minimum Design Flow) est émise.
La respiration devient difficile. Des vertiges ou des troubles se produisent. Si une partie du système est endommagée. Le débit d’air
vers l’unité faciale baisse ou s’arrête. Les impuretés peuvent être ressenties dans l’unité faciale par l’odorat et le goût. Les matières
qui ont pu être en contact avec la peau de l’utilisateur ne suscitent généralement pas de réactions allergiques chez la majorité des
individus mais dans le cas d’une réaction éventuelle, l’utilisateur doit quitter la zone contaminée immédiatement, retirer l’unité faciale
et consulter un médecin.
Vue d’ensemble du système Jetstream
De filtre à particules de grande efficacité, jetable et remplaçable. Le Jetstream comprend un bloc batterie rechargeable de 8 heures.
Le Jetstream prévient l’utilisateur quand le MMDF atteint 140 L/min. Le filtre plissé a été développé spécialement pour cette unité. Il
est utilisé pour filtrer l’air inhalé par l’utilisateur. Le filtre est prévu pour être jeté lorsque le niveau d’encrassage générant un signal
d’avertissement est atteint.

Remarque : Le JetStream
protège uniquement contre les
dangers liés aux particules dans
les secteurs industriels ci-dessous.
En cas de mélanges de gaz/
particules utilisez le Jetstream
GV-X équipé du filtre
qui convient
Vue d’ensemble du système Jetstream GV-X
Le Jetstream GV-X est un respirateur à ventilation assistée monté à la ceinture et doté d’un ensemble de filtres à particules ou contre
les gaz et vapeurs organiques dont la température d’ébullition est supérieure à 65°C.
Le Jetstream GV-X comprend un bloc batterie rechargeable de 8 heures. Le Jetstream GV-X prévient l’utilisateur quand le MMDF
atteint 140 L/min.
La gamme de filtres Jetstream GV-X a été développée spécialement pour cette unité. Ils sont utilisés pour filtrer l’air inhalé par
l’utilisateur. Les filtres Jetstream GV-X sont prévus pour être jetés lorsque le niveau d’encrassage générant un signal d’avertissement
est atteint.
Un certain nombre de pièces faciales sont disponibles, une unité de protection frontale contre les impacts, une gamme de cagoules
en matériaux de différents types, un casque constitué d’une visière hermétique (pour les travaux industriels lourds) ou à écran de
soudage à énergie solaire automatique Chameleon.
La batterie rechargeable utilisée est à hydrure métallique de nickel. À la livraison, la batterie peut ne contenir qu’une faible charge ; il
convient d’utiliser l’unité jusqu’à épuisement de la batterie puis de la charger pendant seize heures avant la première utilisation.
Guide relatif
aux applications
Cagoule Pare-visage Casque Cobra Welding/
Grinding Shield
Agriculture ü ü
Aluminium ü
Allergies aux animaux ü
Amiante UN TEST QUANTITATIF D’ADAPTATION AU VISAGE DOIT TRE
Bâtiment & Travaux Publics ü
Usines chimiques üüü
Démolition & Entretien üüü
Bricolage üüüü
Électronique/Carte de circuit ü ü ü
Moulins & silos à farine üüüü
La transformation des aliments ü ü ü
Fonderies üüü
Fabrication de PRV ü ü ü
Isocyanates UTILISER UN ÉQUIPEMENT ALIMENTÉ AVEC DE L’AIR COMPRIMÉ
Laboratoires ü ü ü
Transformation du plomb ü
Exploitation minière ü
Nucléaire ü
Pulvérisation de peint ure (à base d’eau) ü ü ü
Lutte antiparasitaire üüü
Pétrochimie üüü
Industrie pharmaceutique üüüü
Épuration & Eaux usées üüüü
Chantiers navals ü ü
Industrie sidérurgique
Industrie textile ü ü ü
Tunnels/Exploitation de carrières ü
Élimination des déchets üüü
Soudage ü
Exploitations vinicoles/maraîchères üüüü

Réglage de la ceinture
Placez la ceinture autour de la taille et attachez les deux extrémités ensemble. Si la ceinture n’est pas assez serrée, faites glisser
l’équipement de réglage mâle vers le bas, en direction de son équivalent femelle. Si la ceinture est trop serrée, faites glisser
l’équipement de réglage mâle en direction opposée à celle de son équivalent femelle. Répétez la procédure ci-dessus jusqu’à ce que
le réglage soit confortable et sûr. (voir la Figure 1).
Quand la ceinture est réglée correctement, sécuriser l’excédent de ceinture en utilisant les parties en Velcro.
Protection contre les étincelles
Le filtre Jetstream TH2P comprend une protection contre les étincelles (ne pouvant pas s’adapter aux filtres TH2A2, TH2A2P ou tout
autre type de filtres JSP).La protection contre les étincelles s’installe par simple pression. Aligner le logement prévu pour les doigts
de la protection contre les étincelles avec le logement prévu pour les doigts sur le carter du filtre (voir Figures 9, 10 et 11) et appuyer
pour mettre l’ensemble en place. Vous devez entendre un clic confirmant que l’assemblage est correct.
Choix du filtre
Utilisez uniquement les filtres “Jetstream” et
“Jetstream GV-X” fabriqués par JSP Ltd. (voir figure 2)
Ceci devra être déterminé en consultant un hygiéniste
professionnel ou en appelant le service d’assistance
technique du fabricant afin de définir quel filtre Jetstream est
à même d’offrir une protection adaptée au danger.
Retrait du filtre
Appuyez sur le carter contenant le filtre, vers le bas et en
direction de l’unité de ventilation, et tournez dans le sens des
aiguilles d’une montre. (voir la Figure 3). Il est maintenant
possible de dégager le filtre de l’unité de ventilation.
Figure 1:
Figure 2:
Desserrer Resserrer
Figure 3:
Figure 4: Jetstream™ Figure 5:
Jetstream™ GX-V
Figure 6: Figure 7: Figure 8:
APPUYER ETAPPUYER ET
TOURNERTOURNER
LOCATIONLOCATION
RECESSRECESS
LOCATION LUGSLOCATION LUGS
FILTREFILTRE JOINTJOINT
VERROUILLAGEVERROUILLAGE
DES CRANSDES CRANS
DE POSITIONNEMENTDE POSITIONNEMENT
TWISTTWIST
GASKETGASKET
FILTERFILTER
Figure 4: GX-V
APPUYER ETAPPUYER ET
TOURNERTOURNER
This manual suits for next models
1
Table of contents
Languages:
Other JSP Respiratory Product manuals

JSP
JSP SPRINGFIT User manual

JSP
JSP POWERCAP ACTIVE Series Operator's manual

JSP
JSP PowerCap Operator's manual

JSP
JSP 51 45 80 User manual

JSP
JSP POWERCAP ACTIVE Lite Operator's manual

JSP
JSP Powercap Infinity User manual

JSP
JSP AFP-25 User manual

JSP
JSP Powercap Infinity User manual

JSP
JSP POWERCAP ACTIVE Operator's manual

JSP
JSP AVENGER N-AF-KIT User manual