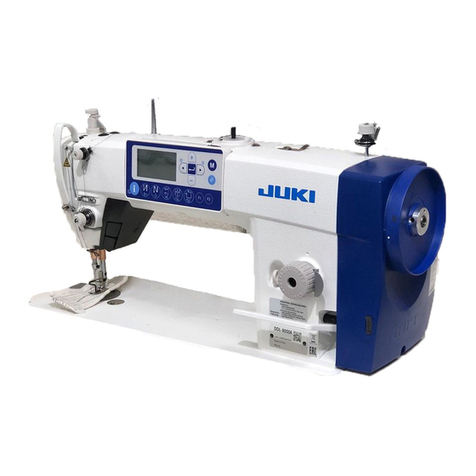
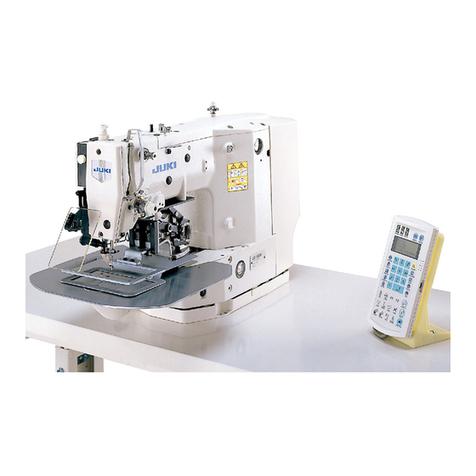
JUKI CP-160 User manual

CP-160
INSTRUCTION
MANUAL
BETRIEBSANLEITUNG
MANUEL
D'UTILISATION
•JUKI
MANUAL
DEINSTRUGGIONES
MANUALE
D'ISTRUZIONI
A
CAUTION
:
This
Instruction
Manual is
Instruction
Manual for
the
CP-160.
Read
and
fully
understand
the
instructions
given
under
"For
safe
operation"
in
the
Instruction
Manual for
the
control
box
that
is
supplied
with
this
instruction
Manual
before
putting
the
machine
into
service.
A
VORSICHT:
Diese
Betriebsanleitung
ist
fur
das
CP-160
vorgesehen.
Lesen
sie
zum
Verstandnis
die
Anweisungen
unter
"Fur
Sicheren
Betrieb" in
der
Betriebsanleitungfur die
Schaltkasten,
die
mit
dieser
Betriebsanleitung
geliefert
wird,
durch,
bevor
Sie
die
Maschine
in
Betrieb
nehmen.
A
ATTENTION:
Ce
manuei
d'utiiisation
est
desitne
a la
CP-160.
Avant
de
mettre
la
machine
en
marche
lire
attentivement,
afin
de bien les comprendre, les instructions donnees au chapitre "Consignes de Securite Importantes" figurant au
manuei d'utiiisation de la boite de
commande
accompagnant
le
present
manuei d'utiiisation.
A
iPRECAUCION!
Este Manual de Instrucciones
corresponde
a la CP-160. Antes de
poner
la maquina en funcionamfento, le
recomendamos
leer
detenidamente
las
instrucciones
incluidas
en
la
seccion
"Para
una
operacion
segura"
del
Manual
de
Instrucciones
de
la
caja
de
control,
ique
se
suministra
con
este
Manual
de
Instrucciones.
A
ATTENZIONE:
Questo
Manuals d'Istruzioni E
destinato
al CP-160.
Leggere
e
comprendere
pienamente
le istruzioni
mostrate
al par. "Per un utilizzosicuro" nel Manuals d'Istruzioni per il centralina di controilo prima di mettere ia
macchina
in
uso.
No.02
29297900
From the library of: Superior Sewing Machine & Supply LLC

CONTENTS
1.
INSTALLING
THE
CONTROL
PANEL
1
2.
CONNECTING
THE
CORD
2
3.
CONFIGURATION
3
4.
CONTROL
PANEL
3
5.
HOW
TO
OPERATE
THE
CONTROL
PANEL
FOR
SEWING
STITCHING
PATTERNS
9
6.
HOW
TO
USE
THE
BOBBIN
THREAD
COUNTER
18
7.
NEEDLE
UP/DOWN
COMPENSATION
SWITCH
23
8.
KEY
LOCK
FUNCTION
24
9.
ON/OFF
SWITCH
@ OFTHE
MATERIAL
EDGE
SENSOR
25
10.
AUTOMATIC
THREAD
TRIMMING
SWITCH
0 26
11.
ONE-SHOT
AUTOMATIC
STITCHING
SWITCH
(§) 27
12. THREAD TRIMMING PROHIBITION SWITCH 0 27
INHALT
1.
INSTALLIEREN
DER
STEUERTAFEL
1
2.
ANSCHLIESSEN
DES
KABELS
2
3.
KONFIGURATION
3
4.
STEUERTAFEL
3
5.
BEDIENUNG
DER
STEUERTAFEL
ZUM
NAHEN
VON
STICHMUSTERN
9
6.
VERWENDUNG
DES
SPULENFADENZAHLERS
18
7.
TASTE
FUR
NADEL-HOCH/TIEF-KOMPENSATION
23
8.
TASTENSPERRFUNKTION
24
9.
TASTE
FUR
AUTOMATISCHES
FADENABSCHNEIDEN
@ 25
ID.
STOFFKANTENSENSOR-EIN/AUS-TASTE
0 26
11. TASTEFOR
EINSCHUB-NAHAUTOMATIK
(§) 27
12. TASTE ZUR VERHUTUNG VON FADENABSCHNEIDEN 0 27
SOMMAIRE
1.
INSTALLATION
DU
PANNEAU
DE
COMMANDE
1
2. RACCORDEMENT DU CABLE 2
3. CONFIGURATION 3
4. PANNEAU DE
COMMANDE
3
5.
COMMENT
UTILISER LE PANNEAU DE COMMANDE POUR EXECUTER DES CONFIGURATIONS DE
COUTURE
9
6.
COMMENT
UTLISER
LE
COMPTEUR
DE
FIL DE
CANETTE
18
7. TOUCHE DE COMPENSATION DES POINTS PAR LE RELEVAGE/ABAISSEMENT DE L'AIGUILLE 23
8. FONCTION DE
VERROUILLAGE
DES
TOUCHES
24
9.
TOUCHE
D'ACTIVATION/DESACTIVATION
® DU
CAPTEUR
DE
BORD
DU
TISSU
25
ID.
TOUCHC
DE
COURAGE
AUTOMALIQUE
DU
FIL0 26
11. TOUCHEDECOUTURE
AUTOMATIQUE
NON
REPETITIVE (§) 27
12. TOUCHE D'INTERDICTION DE COURAGEDU FIL 0 27
From the library of: Superior Sewing Machine & Supply LLC

INDICE
1.
MODE
DEINSTALAR
EL
PANEL
DE
CONTROL
I
2.
MODO
DE
CONECTAR
EL
CABLE
2
3.
CONFIGURACION
3
4.
PANEL
DE
CONTROL
3
5.
MODO
DE
OPERAR
EL
PANEL
DE
CONTROL
PARA
COSER
PATRONES
DE
PESPUNTE
9
6.
MODO
DE
USAR
EL
CONTADOR
DE
HILO
DE
BOBINA
18
7. INTERRUPTOR DE
C0MPENSAC|6n
DE AGUJA ARRIBA/ABAJO 23
8.
FUNCTION
DE
ENCLAVAMIENTO
DE
TECLA
24
9.
INTCUUPTOR
0
ON/OFF
DEL
SENSOR
DE
BORDE
EL
MATERIAL
25
10.
INTERRUPTOR
0 DECORTE
AUTOMATICO
DEHILO 26
11.
INTERRUPTOR
0 DE
PESPUNTE
AUTOMATICO
DE
UN
GOLPE
27
12.
INTERRUPTOR
0 DE
PROHIBICION
DE
CORTE
DE
HILO
27
INDICE
1.
INSTALLAZIONE
DEL
PANNELLO
Dl
COMANDO
1
2.
COLLEGAMENTO
DEI
CAVI
2
3.
CONFIGURAZIONE
3
4.
PANNELLO
Dl
COMANDO
3
5.
COME
AZIONAREIL
PANNELLO
Dl
COMANDO
PER
CUCIRE
MODELLI
Dl
CUCITURA
9
6.
COME
US
ARE
IL
CONTATORE
Dl
FILO
DELLA
BOBINA
18
7.
INTERRUTTORE
Dl
COMPENSAZIONE
SU/GIU
DELL'AGO
23
8.
FUNZIONE
Dl
BLOCCAGGIO
A
CHIAVE
24
9.
INTERRUTTORE
Dl
SENSORE
BORDO
MATERIALE
0 25
10.
INTERRUTTORE
Dl
TAGLIO
DEL
FILO
AUTOMATICO
0 26
11.
INTERRUTTORE
Dl
CUCITURA
AUTOMATICA
"Dl
UN
COLPO"
0 27
12. INTERRUTTORE Dl PROIBIZIONE DEL TAGLIO DEL FILO 0 27
From the library of: Superior Sewing Machine & Supply LLC

1.
INSTALLING
THE
CONTROL
PANEL
/
INSTALLIEREN
DER
STEUERATAFEL
/
INSTALLATION
DU
PANNEAU
DE
COMMANDE/
MOOD
DE
INSTALAR
EL
PANEL
DE
CONTROL/
INSTALLAZIONE
DEL
PANNELLO
Dl
COMANDO
A
WARNING:
Turn
OFF
the
power
before
starting
the
work
so
as
to
prevent
accidents
caused
by
abrupt
start
of
the
sewing
machine.
WARNUNG:
Schalten
Sie
vor
Beginn
der
Arbeit
die
Stromversorgung
aus,
um
durch
plotzlichesAniaufen
der
Nahmaschine
verursachte
Unfalle
zu
verhuten.
AVERTISSEMENT:
Couper
{'alimentation
de
la
machine
(position
OFF)
avant
de
commencer
{'operation
afin
de
prevenir
les
accidente
eventuels
causes
par
un
demarrage
saudain
de
la
machine
a
coudre.
{AVISO!
Desconecte
la
corriente
electrica
antes
de
comenzar
el
trabajo
para
evitar
accidentes
causados
por
un
arranque
brusco
de
la
maquina
de
coser.
CAUTELA:
Prima di
effettuare
le
seguenti
operazioni
assicurarsi
di
spegnere
I'interruttore deH'alimentazione al fine di
evitare
incidenti
causati
daH'avvio
improvviso
della
macchina
per
cucire.
'
Attach
control
panel
O to
the
machine
head
using
screw
0,
washer
and
toothed
lock
washer
O
(for
type
B,
C,
D)
supplied
with
the
control
panel.
'
Befesligen
Sie
die
Steuertafel
O
mit
der
beiliegenden
Schraube
©
und
Unterlegscheibe
©
bzw.
Zahnscheibe
O
(fur
Typ
B,
C,
D)
am
Maschinenkopf.
'
Monter
le
panneau
de
commande
O
sur
la
tete
de
la
machine
a
I'aide
de
la
vis
©,
de
la
rondelle
© et
de
la
rondelle-frein
dventail
O
(pour
type
B,
C,
D)
foumies
avec
le
panneau
de
commande.
•
Monte
el
panel
de
control
O
en
el
cabezal
de
la
maquina
usando
los
tornillos
©,
la
arandela
© y
la
arandela
dentada
de
cierre
©
(P^i^
eltipo
B,
C,
D)que
se
suministran
conel
panel
de
control.
•
Installare
pannello
di
comando
O
alia
testa
della
macchina
usando
vite
©,
rondella
d'appoggio
©e
rondella
di
sicurezza
O
(par
tipo
B,
C,
D)
in dotazionecon
11
pannellodi comando.
- 1 -
From the library of: Superior Sewing Machine & Supply LLC

2.
CONNECTING
THE
CORD
/
ANSCHLIESSEN
DES
KABELS/
RACCORDEMENT
DU
CABLE
/
MODO
DE
CONECTAR
EL
CABLE
/
COLLEGAMENTO
DEI
CAVI
( I \
u ^
•BODcm
•l 1) PasscordO of the
control
panel
through
holeO in the
machine
table
to
route
it
to
the
underside
of
the
table.
2) As for the connection
of
the connector, refer to the instruction
manual
for
control
box.
0 Das
Kabel
O der Steuertafel durch die OffnungO im
Ma.schinentisch filhren, um es entlang der Unterseite des
Tisches zu verlegen.
2) Niiheres
zum
AnschluB des
Steckverbinders
entnehmen
Sie
bilte der Bedienungsanleitung der Schaltkaslen.
1)
Introduire
le
cable
O du
panneau
de
commande
parrorificeO dela
table
dela
machine
afin
dele
faire
passer
au-dessous
dela
table.
2) Pour le branchement du connecteur, se reporter au manuci d'utllisation pour la
boTte
de commande.
1) Paseel
cable
O del
panel
de
control
porel
ngujero
O enla
mesa
dela
mdquina
enrutarlo
a
debajo
dela
mesa.
2) Para la conexion del conector, consulte el Manual de Instrucclones para la caja de control.
I) Far
passare
cavo
O del
pannello
di
comando
attraverso
foro
O per
dirigerlo
sotto
II
tavolo.
2} Per quanlo riguarda il collegamento del conncltore fare riferimento al Manuale d'Istruzioni per centralina di controllo.
-2-
From the library of: Superior Sewing Machine & Supply LLC

3.
CONFIGURATION
/
KONFIGURATION
/
CONFIGURATION
/
CONFIGURACION
/
CONFIGURAZIONE
o
'^•-1
»K' [
I
>1
>1
r
A»c»e
Jf
1/14!
I/I
N\i|N
(fe
©
e
I 1 _
[
ocnflcsD
cp^ieoj
O
O Powerindicator lamp(LED):
Lights
upwhenthe
power
switch
is
turned
ON.
Max.speed limitation variableresistor: Limits the speed whenit is movedto the left ( ).
O
Netzlampe
(LED);
Leuchtet
auf,
wenn
der
Netzschalter
eingeschaltet
wird.
oStellwiderstand zur Begrenzung derMaximalgeschwindigkeit:
Durch
Verschieben
nach
links
( ) wirddie Geschwindigkeit begrenzt.
O T^moin d'alimentation (diode 61ectroluminescente);s'allume lorsqueI'interrupteur d'alimentation est enclenche.
eResistance variable de limitation de vitesse maximale : Limite la vitesse lorsqu'elle est positionnde ^ gauche ( ).
O
Ldmpara
indicadora
de
corriente
eiectrica
(LED);
Se
ilumina
cuando
se
posiciona
en
ON
el
interrupter
dela
corriente
eiectrica.
o Resistor variable limitador de velocidad maxima : iimita la velocldad cuando se mueve a la izquierda ( ).
O Indicatore a LED dell'alimentazione : Si accende quando TinterruttoredeH'alimentazione viene acceso.
e
Resistore
variabile
perla
limitazione
di
velocita
massima
:
Limita
la
velocity
quando
esso
viene
spostato
verso
sinistra
( ).
4.
CONTROL
PANEL
/STEUERTAFEL/PANNEAU DE COMMANDE /
PANEL
DE
CONTROL
/
PANNELLO
DI
COMANDO
0 o
Vl/Iil/I
aLbI
n
aM ^
a
aM
'I AA E
—
ABC8C
J
'ji\I\l
[
/b'
I
IS
|5u|u5)>6(S)
d
DflTlEa)
cp-ieo
J A
I— ?ll
m
(All
the
indications
on
the
control
panel
are
illustrated
in
the
lip-up
state
for
the
sake
of
explanation.)
(Zur
besseren
Veranschaulichung
sind
alle
Anzeigen
der
Steuertafel
in
ihrem
erleuchteten
Zustand
abgebildet.)
(Pour
faciliter
les
explications,
toutes
les
indications
du
panneau
de
commande
sont
illustr^s h
I'etat
eclaire.)
(Todas
las
indicaciones
enel
panel
de
control
se
ilustran
iluminadas
para
facilitar
la
explicacion.)
(Tutte
le
indicazioni
sul
pannello
di
comando
sono
illustrate
nella
fase
di
accensione
allo
scopo
di
descriverle.)
-3
-
From the library of: Superior Sewing Machine & Supply LLC

O
Pattern
selector
switch
• Used for selecting a pattern from among the four different
patterns.
O
Touche
de
selection
de
configuration
»
Permet
dechoisirone
configuration
parnii
quatre.
O
Interruttore
di
selezione
del
modello
• Usato per selezionare un modello ira i quattro modelli
dilTerenli.
O
Musterwahitasten
•
Diencn
zur
Wahl
cincs
von
vicr
vcrschicdcncn
Mustcm.
OInterruptor del
selector
de
patrbn
• Seusaparaseleccionarunpatrondeentreloscuatrodifercntes
patroncs.
0
Double
reverse
stitching
(for
start)
switch
• Used for tuming ON/OFFthe double reversestitchingfor
start.
0Taste fur Doppelrtickwartsstlche (am Ntihbeginn)
• Dient zum Bin- bzw.
Au.sschaltcn
der Doppelruckwiirtsstichc
am Nahbeginn.
O
Touche
d'execution
de
points
arriere
doubles
(pour
le
debut
de
la
couture)
Permetd'activer/ddsactiverI'executiondepointsarriere
doubles
au
ddbut
de
la
couture.
O Interruttore di affrancatura doppia (per rinizio)
•
Usalo
per
accendere/spegnere
I
'affrancatura
doppia
per
I'inizio.
0
Double
reverse
stitching
(for end)
switch
• Usedfor
turning
ON/OFFthedouble
reverse
stitching for
end.
©
Touche
d'execution
de
points
arriere
doubles
(pour
la
fin
de
la
couture)
• Permetd'activer/ddsactiverTexdcution de pointsarridre
doubles
d
la
fin
de
la
couture.
OInterruttore di affrancatura doppia (per la fine)
• Usaloperaccendcre/spegncre raffrancaluradoppiaperla
fine.
O
Automatic
reverse
stitching
(for start)
switch
• Usedfor
turning
ON/OFF
the
automatic
reverse
stitching
for
start.
OTouche d'execution automatique de points
arriere
(pour
la
debut
de
la
couture)
•
Permet
d'activer/ddsactiver I'exdcution
automatique
de
points
arridre au
ddbut
de
la
couture.
O
Interruttore
di
affrancatura
automatica
(per
I'inizio)
•
Usato
per
accendere/spegnere
I'affrancatura
automatica
per
I'inizio.
O
Interruptor
de
doble
puntada
invertida
(para
Iniclo)
• Sc usa para activar/dcsactivar el cosido de doble puntada
invertida para inicio.
0 Taste ftir Doppelrtickwartsstlche(am Nahende)
• Dient zum
Bin-
bzw.
Au.sschaltcn
dor
E)oppclruckwarts.sticlic
am
Nahende.
0Interruptor
de
doble
puntada
invertida
(para
fin)
• Se usa para activar/desaetivar el cosido de doble
pimtada
invertida para fin.
O
Taste
fiir
automatische
Ruckwdrtsstiche
(am
Nahbeginn)
•
Dient
zum
Bin-
bzw.
Ausschalten
der
automatischen
Riickwailsstiche
am
Nahbeginn.
O
Interruptor
de
puntada
automatica
invertida
(para
inicio)
• Scusapara
activ
ar/dcsactiv
arel
cosido
automatico
dcpuntada
invertida para inicio.
-4
-
From the library of: Superior Sewing Machine & Supply LLC

0
Automatic
reverse
stitching
(for end)
switch
• Used for turning ON/OFF the automatic reverse stitching
for
end.
0
Touche
d'execution
automatique
do
points
arriere
(pour
la
fin
de
la
couture)
• Permet d'activer/ddsactiver I'ex^cution automatique de
points
arrifere
^la
Fin
dela
couture.
0Interruttorediaffrancaturaautomatica (per lafine)
• Usato per acccndcre/spegnere 1'affrancatura automatica per
la
fine.
0
Switches
for
setting
the
number
of
stitches
• Used for setting the number of stitches to be sewn in
processes Athrough D.
0Touches pour le reglage du nombre de points
• Permettent de specifier le nombre de points h ex6cuter
pour
les
operations
A&D.
0
Interruttori
per
impostare
il
numero
di
punti
• Usati per impostare il numero di punii da cucire in process!da
AaD.
0
Material
edge
sensor
ON/OFF
switch
• Renderedeffectivewhenthematerialedgesensoris installed
on
the
machine.
• Used for setting whether or not the material edge sensor is
used during sewing.
O
Touche
d'activatlon/desactivation
du
capteur
de
bord
du
tissu
• Cettetouche n'estactive que si lecapteur deborddu tissu
a
ete
install^
sur
la
machine.
•Gette touche
permet
d'activer
et de d^sactiver le
fonctionnement du capteur de bord du tissu pendant la
couture.
O
Interruttore
di
sensore
bordo
materiale
• Reso valido quando il sensore bordo materialee installato sulla
macchina.
• Usato per Impostare se il sensore bordo materiale e usalo o
meno
durante
la
cucitura.
0 Tastefurautomatische Ruckwdrtsstiche
(am
Ndhende)
•
Diciil
zum
Ein-
bzw.
Ausschaltcn
dor
automalischcn
RUckwartsstiche
am
Niihcndc.
0
Interruptor
de
puntada
automatica
invertida
(para
fin)
•Seusaparaactivar/desactivarelcosidoautomaticodepuntada
invertida para fm.
0Stichzahl-Elnstelltasten
•
Dlcncn
zum
Einstcllcn
dor
in
den
Prozesscn
A
bis
D zu
niihendcn
Anzahl
von
Stichcn.
0
Interruptores
para
fijar
el
numero
de
puntadas
• Se usan para fijar el numero de puntadas a coser en los
procesos
A al D.
o
Stoffkantensensor-Ein/Aus-Taste
•
Nur
wirksam,
wcnn
dcr
Stoffkantctiscnsor
an
dcr
Maschinc
angcbracin ist.
• Dient zur Akiivicrung bzw. Deaktivicrung dcs
Stoflkantcnscnsors
wiihrcnd
dcs
Nahcns.
O
Interruptor
ON/OFF
de
sensor
de
horde
de
material
•
Dcvicne
inefeciivo cuandocsta instalado en la
m^uina
dc
coser
el
sensor
de
borde
de
material.
• Se usa para fijar si el sensor de borde de material se usa o no
duranle
el
cosido.
5 -
From the library of: Superior Sewing Machine & Supply LLC

O
One-shot
automatic
stitching
switch
• Rendered effectivewhen the material edgesensorisinstal
led on the machine or when the sewing machine is operated
under the constant-dimension stitching mode.
• Start the sewing machine with this switch, and the sewing
machine will run automatically until the material edge is
detected or the end of a constant-dimension stitching is
reached.
©
Touche
de
couture
automatique
non
repetitive
•Cettetouche
n'est
active
que
lorsquelecapteurde bord du
tissu est install^ sur la machine ou que la machine est
utilis6e
dans
le
mode
de
couture
k
dimensions
constantes.
•Lorsqu'on fait fonctionner la machine avec cette touche
enclench^e,elle executeunecoutureautomatiquejusqu'k
ce que le bord du tissu soit d^tectd ou que la fin de la
couture
k
dimensions
constantes
soit
atteint.
Interruttore
di
cucitura
automatica
"di
un
colpo"
• Reso vatido quando
11
scnsore bordo matcriale &installato sulla
macchina o quando la inacchina per cucire viene azionata nel
modo di cucitura programmata.
• Avviare la macchina per cucire con queslo interruttore, e la
macchina per cucire funzionerii automaticamente finche il
bordo materiale sia rilevalo o finch6 il numero di punti
imposlato sia raggiunto.
€>
Automatic
thread
trimming
switch
• Rendered effective whenthe material edge sensor isinstal
ledon the machineor whenthe sewing machine is operated
under the constant-dimension stitching mode.
• Even keepdepressingthe front part of the pedal,thesensor
can detect the material edge, or after the completion of the
constant-dimensionstitchingmode, the machine will auto
matically perform thread trimming.
©Touche
de
coupage
automatique
du fil
• Cettetouchen'est activequelorsquelecapteurdeborddu
tissu est install^ sur la machine ou que la
machine
est
utilisee
dans
le
mode
de
couture
k
dimensions
constantes.
• MemelorsqueI'avant de la p^daleest maintenuenfonc€,
lecapteurpeutdetecterle borddu
tissu.
Aprfes
la finde
la couture kdimensions constantes, la machine effectue
automatiquement le coupage du fil.
Interruttore
di
taglio
del
filo
automatico
• Reso valido quando il sensore bordo materiale hinstallato
sullamacchina o quandolamacchinapercucirevieneazionata
nel modo di cucitura programmata.
• Pur tenendo premutala parte anterioredel pedale,quando
viene
rilevato
il
bordo
materiale
o al
termine
del
modo
di
cucitura adimensloni costanti, la macchina eseguir^
automaticamente il taglio del filo.
O
Taste
fiir EinschuO-NMhautomatIk
• Nur wirksam, wenn dcr Stoffkantcnscnsor an dcr Ma.schine
angebracht ist odcr die
Ma.schine
unter dcr
KonstantmaB-
Nahbetriebsart
betriebcn
wird.
• Wird die Nahmaschine mit dicscr Taste gestartct, liiuft sic
automatisch solange, bis die Stoflkante
crfaBt
odcr das Endc
dcs KonstantmaB-Niilivorgangs crrcicht wird.
O Interrupter de pespunte automatico de un goipe
•
Dcviene
efectivo
cuando
el
selector
de
borde
de
material
esta
instalado en la maquina de coser o cuando la
m^uina
de
coser es operada bajo la modalidad de puntadade dimension
constante.
• Ponga en marcha la maquina de coser con este interruptor, y
la maquina de coser funcionard automdticamente hasta que
se detecteel bordedel material o hasta
que
se llegueel ftn de
un cosido de puntada de dimensidn constante.
OTaste fur
automatlsches
Fadenabschneiden
•
Nur
wirksam.
wenn
der
Stoffkantcnscnsor
an
dcr
Maschiiie
angebracht Ist
odcr
die Maschine unter
der
KonstantmaB-
Nahbctrieb.sart
betriebcn
wild,
• Bei Beiiitigung dicscr Taste
fUhrt
die Nahma.schine nach der
Erkcnnung dcr Stoffkantc odcr nach dcr Bcendigung dcr
KonstanimaB-Nahbciricb.sart aulomati.scli Fadenabschneiden aus,
selbst
wenn
dcr
vordcre
Toil
dcs
Pedals
gcdriickt
gchallcn
wird.
©
Interruptor
de
corte
automatico
de
hllo
•
Devicne
efectivo
cuamloel
selector
de
borde
de material
esta
instalado
en la
maquina
de cosero
cuando
la m^uina de
coser es operada bajo la modalidad de puntada de dimension
constante.
•
Aunque
mantcnga
presionada
la parte
frontal
del
pedal,
el
sensorpuededctectar el borde del
material
o
despues
de
complctadalamodalidad decosidodepuntadadedimension
constante, o despues de completerla modalidad de cosido de
puntada
de
dimensidn
constante,
la
mdquina
de
coser
ejecutara
automaticamente
el
corte
de
hilo.
-6
-
From the library of: Superior Sewing Machine & Supply LLC

(E)
Thread
trimming
prohibition
switch
•Used for prohibiting thread trimming at any occasion.
(D
Touche
d'interdiction
de
coupage
du
fil
•Permet d'interdire le coupage du fil dans tous les cas.
Interruttore
di
proibizione
del
taglio
del
filo
• Usato per proibire il taglio del file ad ogni caso.
0
Bobbin
thread
counter
•
Indicates
the
amount
of
bobbin
thread
while
count
ing it by subtracting from the set value.
•
When
the bobbin thread remaining amount detecting
device is installed on the machine, the counter indi
cates the number
of
times of detecting.
0
Compteur
de
fil
de
canette
• Indique la quantite restante de fil de canetteen diminuant
la valeur spdcifide en fonction du nombre de points
ddtectds.
• Lorsque le detecteurde quantite restante de fil de canette
est installs sur la machine, le compteurindiquele nombre
de
detections.
0
Contatore
di
filo
della
bobina
•Indica la
quantit<^
di filo della bobina conteggiandola per
sottrazione da! valore di imposiazione.
•Quando il dispositivo per rilevare la quantila rimanente di
nio
della
bobina
e
installato
sulla
macchina,
il
contatore
indica
il
numero
di
volte
della
rilevazione.
0
Bobbin
counter
reset
switch
• Used for returning the value shown on the bobbin thread
counter
to
the
initial
value.
0
Touche
de
reinitialisation
du
compteur
de
fil
de
canette
• Permet de ramenerlecompteurde fil decanette &lavaleur
initiale.
0
Interruttore
di ripristino
del
contatore
di filo
della
bobina
•
Usato
perripoiiareil valore
mostrato
sulcontatore di filodella
bobina
a!
valore
iniziale.
Taste
zur
Verhiitung
des
Fadenabschneidens
• Diem zur Verhiitung des Fadenabschneidens unter alien
Umsiiinden.
<E)
Interrupter
de
prohibicibn
de
corte
de
hilo
• Sc usa para prohibir cl corte de hilo en cualquier ocasidn.
0Spulenfadenzdhler
• Zcigl die rcsllichc Spulenfadenmcnge durch Subtraktion von
dcni vorgcgcbcncn Wen an.
• Wcnn dcr Spulcnfaden-Rcstbctragdctcktor an dcr Maschinc
angcbracht
ist,
zcigt
dcr
Ziihlcr
die
Anzahl
dcr
Erkennungnsvorglingc an.
0
Contador
de
hilo
de
bobina
•
Indica
la
cantidad
de
hilo
de
bobina
mientas
la
cucnta
rcstandola del valor fijado.
•Cuandocl dispositivodetectorde cantidadremanenlede hilo
de bobina esta instalado en la maquina de coser, el contador
indica
el
numero
de
veccs
de
deteccidn.
0SpulenfadenzShler-Ruckstelitaste
* Dicnt zur RUckstcllung des auf dem Spulenfadcnzahler
angezciglcnWeilesauf den Ausgangswcrt.
0Interruptor
de
reposicidn
de
contador
de
bobina
• Se usaparavolverel valorquese inuestraen el contador de
hilo
de
bobina
al
valor
inicial.
0
Bobbin
thread
amount
setting
switch
• Used for setting the amount of bobbin thread.
0Spulenfadenmengen-Einstelltaste
• Dicnt zum Einstcllen dcr Spulenfadenmcnge.
0
Touche
de
reglage
de
la
quantite
de
fil
de
canette
• Permetde specifier la quantite de filde canette.
0
Interruptor
de
fijacibn
de
cantidad
de
hilo
de
bobina
• Se usa para fijar la cantidadde hilo de bobina.
0
Interruttore
di
impostazione
della
quantita
di
filo
della
bobina
• Usatoper imposlarela quantitadi filo della bobina.
-7-
From the library of: Superior Sewing Machine & Supply LLC

<D
No.
of
pcs.
counter
•The
indication
shown
on
the
counter
increase
while
couplingup the numberof finishedpiecesof garment
every time the machine performs thread trimming.
(D
Compteur
de
nombre
do
pieces
•L'indication du compteur augmente en comptant le
nombre de pieces termindes ^chaquefoisque lamachine
effectue un coupage du fil.
<E)
Interruttore
di
compensazione
su/giu
deii'ago
• Usatoquando si esegue lacucituradi compensazione su/giu
deii'ago.
<1^
Werkstuckzdhter
• Dor auf dcm Ziiiilcf angc/.ciglc Wcrt wird mil jcdcm
fcrtiggcslclltcn Wcrksluck crhblu, jcdcsmal, wcnn die
Maschinc
Fadcnabschnciden
ausfUhrt.
(D
Contador
de
No.
de
plezas
•
La
indicacion
se
mueslra
en
el
contador
aumenta
micntras
se
acoplaclnumcrodcplezasacabadascadavezquela
m^uina
ejecuiaelcorlcdc hilo.
-8-
From the library of: Superior Sewing Machine & Supply LLC

5.
HOW
TO
OPERATE
THE
CONTROL
PANEL
FOR
SEWING
STITCHING
PATTERNS/
BEDIENUNG
DER
STEUENAFEL
ZUM
NAHEN
VON
STICHMUSTERN
/
COMMENT
UTILISER
LE
PANNEAU
DE
COMMANDE
POUR
EXECUTER
DES
CONFIGURATIONS
DE
COUTURE
/
MODO
DE
OPERAR
EL
PANEL
DE
CONTROL
PARA
COSCR
PATRONES
DE
PESPUNTE/
COME
AZIONARE
IL
PANNELLO
Dl
COMANDO
PER
CUCIRE
MODELLI
Dl
CUCITURA
(1)
Reverse
stitching
pattern
(1)
Riickwartsstichmuster
(1)
Configuration
de
conture
arriere
(1)
Patrdn
de
pespunte
invertido
(1)
Modello
di
affrancatura
O & @
aUI
aM ^
cc
i A A
ABCDC
V y I
«—D—'
A.
Ic^cf
eW
l/l/lil/l
^ p.-
:
LI
IWiN
0 O
Sewing pallern
Nahmuster
0N
• ^ i
•I
'1
k%%%
OFF
ON
AUS
EIN
OFF
OFF
AUS
AUS
OFF
AUS
ON
EIN
"G
ON
EIN
ON
EIN
1) Press reverse stitching pattern switch O to specify the re
verse stitching pattern.
2) The reverse stitching pattern is selected, and the number of
stitches and data on reverse stitching which have already been
specified are shown on the panel.
3) If you want to change the number of stitches, operate the "+"
or
"-"switch
of switches O for setting the numberof stitches
A
through
D.
(The range of the number of stitches that can be changed : 0
to 19
stitches)
4) Fourdifferentstitchingpatternscan be performed by match
ing
the
ON
and
OFF
settings
of
automatic
reverse
stitching
(for start) switch 0 and automatic reverse stitching (for
end) switch
0.
5) Furthermore, the double
reverse
stitching can be selected
by
operating
double
reverse
stitching
(for
start)
switch
©
and double
reverse
stitching (for end) switch © .
1) Die Taste fiir RUckwiirissiichmuster © ciriickcn, urn das
Riickwailsslichmusler anzugcbcn.
2) Das Riickwart.sslichmu.sier wird gcvvahli, und die bcrcils
angegcbencn
Wcric
fur die Slich/ahl und die
Dalcn
fur die
Ruckwiirtsstichc wcrdcn auf dcr Sicueiiafcl angc/.cigl.
3) Zum Andcm dcr Stich/uhi die Scilc " + " odor " - " dcr
Ta.sicn
o driickcn, urn die Siichzahl fiir die Prozc.ssc A bis D
cinzustclicn.
(Einsicilbcrcich dcr Slich/ahl: 0 bis 19 Stichc)
4)
Durch
Kombinicrcn
dcr
BIN-
und
AUS-Zusiande
dcr
Tastcn
0
und © fiir
auiomali.schc
Ruckwiiilsstichc
(am
Nahbcginn
bzw.
am
Niihende)
slchcn
vicr
verschiedenc
Stichmusicr
zur
Vcifiigung.
5) DailibcrhinauskonncnDoppclriickwiiilsslichc durch
Bctiitigung
dcr
Tasic
©
fiir
Doppclriickwansstichc
(am
Nahbcginn)
und
dcr
Taste
©
fiir
Doppclriickwari.s.stichc
(.nm
Niihende)
gcwiihli
wcrdcn.
-9-
From the library of: Superior Sewing Machine & Supply LLC

0 0
aIb",
Dpcj
~]
*1^1
a
*r»4
J?
I A A
ABCBC
V V I
^D—'
ic%r
:•
1/1
.
3—c-o.
: N 1
'I
'I
'I 'I
i\NlN
o e
lA
Configuration de
couture
Patrones de pespunle
Modelli
di
cucltura
eN
DESEN-
CLENCHEE
OFF
DESEN-
CLENCHEE
OFF
EN-
CLENCHEE
ON
DESEN-
CLENCHEE
OFF
DESEN-
CLENCHEE
OFF
EN-
CLENCHEE
ON
T]
EN-
CLENCHEE
ON
EN-
CLENCHEE
ON
1) Appuyersur la touche deconfigurationde couture
arrifere
O pourspecifieruneconfiguration decouture
arri^re.
2) La configuration de couture
arri&re
est sdlectionnde. Le
nombredepointsetlesdonndesdepoints
arrifere
ayantddjk
dte specifies sont indiques sur le panneau.
3) Pour changer le nombre de points, utiliserles touches"+"
ou"-"
Oquipermettentdespecifierlenombredespoints
des operations A a D.
(Le nombre de points peut etre rdgl6 entre 0 et 19.)
4) On peut obtenir quatre configurations de couture dif-
ferentes en combinant les positions ENCLENCHEE et
DESENCLENCHEE
de
la
touche
d'exdcution
auto-
matique
de
points
arrifere
(pour
le
d€but
dola
couture)
O
et de la touche d'execution automatique de points arri^re
(pour la fin de la couture) 0 .
5) De plus, I'execution de points
arri&re
doubles peut etre
choisie en utilisant la touche d'execution de points arri^re
doubles (pour le debut de la couture) 0 et touche
d'execution de points arri^re doubles
(pour
la fin de la
couture)
0 .
1) Pulse el interruptor O de patrdn de pespunte
invertido
para
espccificar el patron de pespunte invertido.
2) Se haseleccionado el patrdndc pespunte invertido,yscmuestran
en el panel el numero de puntadas y datos sobre el pespunte
invertido que ya ha sido ya especificado.
3) Siustedquiere
cambiar
el
numero
depuntadas,opereelinterruptor
"+"oel"-"delos
interruptores
O para
fijar
el
numero
de
puntadas
A a D. (Gamadel numerode puntadas que se puede cambiar: 0
a 19 puntadas)
4) Sc pueden cjecutar cualro diferentes patrones dc pespunle
acoplando
las
fijaciones
ONyOFFdel
interruptor
0 de
pespunte
automatico
invertido (parainicio)y el interruptor 0 depespunte
automatico invertido (para fin).
5)
Ademas,
el
pespunte
doble
invertido
se
puede
scleccionar
operando
el
interruptor
© de
pespunte
doble
invertido
(para
inicio)
y el
interruptor
© dc
pespunte
doble
invertido
(para
fin).
1)
Premere
interruttore
di
modello
di
affrancatura
O
per
sclezioiiare
il
modello
di
affrancatura.
2)
11
modellodi affrancatura viene selezionalo, e il numero di punti
e datisuaffrancaturachesonostatigihimpostativengonomostrati
sul pannello.
3) Qualora si desideri cambiare il numero di punti, agire
sull'interruttore "+" o di
interruttori
O per
impostare
il
numerodi puntiper
process!
da Aa D.
(11
campodi impostazione
del numero di punti: da 0 a 19 punti)
4) Quattro different! modellidi cucitura possonoessere eseguiti
accoppiando
le iinpostazioni di ON e
OFF
di interruttore di
affrancatura automatica (per I'inizio) 0 ed interruttore di
affrancatura
automatica
(perla
fine)
0.
5) Inoltre, Taffrancatura doppia puo essere selezionata agendo su
interruttore
di
affrancatura
doppia
(per
I'inizio)
© ed
interruttore
di
affrancatura
doppia(perla line)
©.
-10-
From the library of: Superior Sewing Machine & Supply LLC

(2)
Constant-dimension
stitching
pattern
(2)
KonstantmaB-Stichmuster
o o
0in
Sewing paiiern
Nahmuster
0N
OFF
AUS
CD
OFF
AUS
lU
>g
ON
OFF
EIN
AUS
CD
CD
OFF
ON
AUS
EIN
ON
EIN
CD
ON
EIN
1) Die Taste o fiir KonslaniinaB-Slichmustcr an dcr
Sieucrtafcl
driicken, urn
das
KonslaniinaB-Stichinusicr zii wahlcn.
2) Das KonsianimaB-Siiciiinustcr wird gcwiihlt. Nun wcrden die
vorbesiimmte
Anzahl
von
Stichcn
und
dcr
Zusiand
dcr
RUckwartsslichfunklion auf dcr Slcucrtafcl angezcigl.
2um
Andern
der
Slichzahl
der
Prozesse
C
und
D im
3)
KonslantmaB-Sliclimuslcr
die
Slichzahl-Einsielliastcn
0
fiir
die
Prozesse
C
und
D
driicken.
Die
Riickwiirlsstiche
cntsprechend wahlcn. Zuin Andern dcr Anzahl dcr
Riickwiirtsstiche
die
Slichzahl-Einslclltaslcn
=4=
fiir die
Prozesse
A
und
B
driicken.
(Einslcllbercich: A, B= 0 bis 19SiicheC, D= 5 bis500Sliche)
4)
Durcli
Kombinicrcn
der
EIN-
und
AUS-Zusliindc
der
Tasien
0
und 0 fiir
aulomalische
Rtickwiiiissliciie
(am
Niihbcginn
bzw.
am
Nahcndc)
stchen
vicr
vcrschicdcnc
Slichmustcr
zur
Verfiigung.
5)
Dariibcr
hinaus
konncn
Doppclriickwart.ssliche
durch
Beialigung
dcr
Taste
O
fiir
Doppclriickwailsstichc
(am
Niihbcginn)
unddcr
Taste
0 fiir
Doppclruckwart.sstiche
(am
Nahcndc)
gewiihlt
wcrden.
1) Press constant-dimension stitching pattern switch
Oon
the
control panel to select the constant stitching pattern.
2) The constant-dimension stitching pattern is selected. Now,
the predetermined number of stitches and the state of reverse
stitching function are shown on the control panel.
3) To change the number of stitches of the processesin the
constant-dimension stitching
pattern,
change the number
of stitches for processes C and D by operating switches
0 for setting the number of stitches,for processes C
and D. Select the reverse feed stitching accordingly. To
change the number
of
reverse-feed stitches, operate
switches
O for setting the number of stitches for pro
cesses
A
and
B.
(Adjustable range: A, B = 0 to 19 stitches
C, D = 5 to 500 stitches)
4) Four different kinds of stitching patterns can be performed
according to thecombination of ON/OFFsettingsautomatic
reverse stitching (for start) switch 0 and automatic reverse
stitching (forend)switch
0.
5) Furthermore,thedoublereversestitching modecan bespecified
by
operating
double
reverse
stitching
(for
start)
switch
O
and
double
reverse
stitching
(forend)
switch
©.
6) If
automatic
thread
trimming switch 0 is turned ON, the
sewingmachinewill automatically performthreadtrimming
after it finishes thepredetermined number of stitches between
C and D. (If the automatic reverse stitching (for end) is se
lected,
thesewingmachinewillautomatically performthread
trimmingafter it finishes the automatic reverse stitching (for
end).)
If
automatic
thread
trimming switch© is turnedOFF,operate
the touch-back switch after the completion of processes C and
D. Then the machine runs at a low speed (stitch compensation
operation).
Also,if thepedalis returned to its
neutral
positionanddepressed
its front part again, the sewing can be continued regardless of
the selling of number of stitches.
7) If
thread
trimming
prohibiting
function
0 is
chosen,
the machine
will
stop with the needleup without per
forming thread trimming.
8) If
one-shot
automatic
stitching
function
© is
chosen,
the machine
wUl
automatically perform sewing at a
stretch,at the
specified
speedby
depressing
the pedal.
6)
Wcnn
die Taste0
fiir
aulomatisches
Fadenabschneiden
belSligt
wird, lost die
NUhmaschine
auiomalisch den Fadcnabschneider
aus, nachdem sie die vorbesiimmte Anzahl von Stichcn
zwi.schen
C und D ausgefuhrt hat. (Falls die Funktion fiir
automatischc Riickwartsslichc (am Nahcndc) gewahlt wird, lost
die NUhmaschine den Fadcnabschneider aus, nachdem sie die
aulomatischen Ruckwartssiiche (am Nahcndc) ausgefiihrt hat.)
Falls der Schaller © fiir aulomatisches Fadenabschneiden
deaktivieri
ist,
beiUtigen
Sieden
Tippschaller
nach
AbschluB
der Prozesse C und D. Die Maschine lauft dann mil niedriger
Gesehwindigkeii
(Slichkompensaiionsbelrieb).
Durch RUckstellen des Pedals
auf
seine Nullslellung und
emeules Niederdriickendes vorderenTeils kannder Nahvorgang
ohne Rucksichl auf die Einsiellung der Slichzahl fortgesetzt
werden.
7)
Falls
die
Taste
©zur
Verhiilung
des
Fadenab-schneidens
beialigl
wird,
bleibl
die
Maschine
milangehobener
Nadel
slehen,
ohne
Fadenabschneiden
auszufiihren.
8)
Falls
die
Trisie
0 fiir
EinschuB-Nahauiomalik
beialigl
wird,
fiihrl die Maschine auf Niederdriicken des Pedals auiomalisch
den Nahvorgang iiber die vorgegebene Sirecke mil der
vorgegebenen
Gesehwindigkeii aus.
-
11
-
From the library of: Superior Sewing Machine & Supply LLC

(2)
Configration
de
couture
a
dimensions
constantes
(2)
Patron
de
puntada
de
dimension
constants
aLb1
aM ^
0-:
aM
t A A
ABCBC,
K K 1
«—D—'
O O
i/i/iii/i
-«
I/]
_ A
_—
B C DN
:
i\l
III
'u|>g
mn
O 0 0 0
o
I/I
Configuration de
couture
Patrones de pespunte
Modeili
di
cucitura
eN
DESEN-
CLENCHEE
OFF
CD
DESEN-
CLENCHEE
OFF
EN-
CLENCHEE
ON
CD
DESEN-
CLENCHEE
OFF
DESEN-
CLENCHEE
OFF
EN-
CLENCHEE
ON
EN-
CLENCHEE
ON
EN-
CLENCHEE
ON
1) Appuyer sur la louche de configuration de couture h
dimensionsdeconstante O surlepanneaudecommande
pour choisir la configuration de couture a
dimensions
constantes.
2) La configuration de couture ^dimensions constantes est
s61ectionn6e. Le nombre predetermin6 de points et Tetat
de la fonction d'execution de points arrifere sont alors
indiqu^s sur le panneau de commande.
3) Pour changer le nombre de points des operations de la
configurationde couturehdimensionsconstantes, changer
le nombre de points des operations Cet D avec les touches
0 qui permettent de specifier le nombre de pointsdes
operationsCetD. Choisirlacouture
arrifere
enconsequence.
Pour changer le nombre de points arri^re, utiliser les
touches O. qui permettent de specifier le nombre de
points
pourles
operations
AetB.
(Plage de reglage: A, B = 0 k 19 points
C, D = 5 a
5(X)
points)
4) On peut obtenir quatre configurations de couture dif-
ferentes en combinant les positions ENCLENCHEE et
DESENCLENCHEE
de
la
touche
d'execution
auto-
matique de points arrifere (pour Icdebut de la couture) 0
et de la touche d'execution automatique de points arriere
(pour la fin de la couture) 0 .
5) De plus, I'execution de points arriere doubles peut etre
choisie en utilisant la touche d'executionde points arriere
doubles (pour le debut de la couture) O et la touche
d'execution de points arriere doubles (pour la fin de la
couture) 0 .
6) Si la
touche
de
coupage
automatique
du fil © est en-
clenchee, lamachine coupe automatiquement le fll apres
avoir
execute
le
nombre
de
points
predetermine
entre
C
et D. (Si I'execution automatique de points arriere (pour
la fin de la couture) est choisie, la machine coupe
automatiquement le fil apres avoir termine I'execution
automatique de points arriere (pourla fin de la couture).)
Si I'interrupteur de
coupe-fil
automatique
0 estsur
arr6t,
agir sur I'interrupteur "touch-back"
aprfes
avoir termine les
operations C et D. La machine se met alors hfonctionner h
petite
Vitesse
(operation de compensation des points).
Si Ton ram^ne la pedale au neutre, puis
qu'on
I'enfonce h
nouveau en avant, on peut continuer ^ coudre quel que soit le
nombre de points predetermine.
7) Si la fonction d'interdiction de coupage du fil 0 est
choisie, la machine s'arrete avec I'aiguille compl^tement
relevee sans couper le fil.
8) Si la fonction de couture automatique non repetitive.
0:
est choisie, la machine effectue automatiquement la cou
ture
d'un
trait h la vitesse specifiee
par
I'enfoncement de
la pedale.
1) PulseelinterruptorOdepatrondcpuntadadedimension
constante
6)
cn el panel de control para seleccionar el patron de puntada
constante.
2) Se haseleccionadoelpatrdndepuntadadedimensionconstante.
Ahora, el numero predeterminadode puntadas y el estado de la
funcidnde puntadainvertidase muestranen el panelde control.
3) Paracambiarel numerode puntadasdelprocesoenel patrdnde
puntada de dimensidri constante, cambie el numero de puntadas
paralos
procesos
Cy D
operando
los
interruptores
0 para
fljar
el mlmcro de puntadas para los procesos C y D.. Seleccionc el
numero de puntadas para los procesos C y D. Selecciones en
conformidad la pespunte de transporte invertido, opere los
interruptores
O fijarel
numero
de
puntadas
paralos
procesos
AyB.
(Gamaajustable: A,B = 0 a 19puntadas
C, D = 5 a
500
puntadas.)
4) Sepucdenejecutarcuatrodiferentesclasesdepatronesdepuntada
de
acuerdo
a la
combinacion
de
las
fijaciones
ON/OFF
del
gj
interruptor
0 de
puntada
automdtica
invertida
(para
inicio)
y
del
interrupter 0 de
puntada
automatica
invertida
(para
fin).
5) Adcmas, la modalidad de puntada invertida doble se puede
cspccificar
operando
elinterruptor 0 depuntadadoble
invertida
(parainicio)y cl interruptor0 de puntadadobleinvertida(para
f"")-
- 12-
Si se posiciona en ON el interruptor0 de corte automdtico de
hilo, la maquina de coserejecutara automaticamente el corte de
hilo dcspudsque termina el numero predeterminado de puntadas
entreCyD. (Siseseleccionala modalidad de puntadaautomdtica
invertida(parafin),lamdquinadecoserejccutar^automdticamente
el corte de hilo despuds que termina la puntada automdtica
invertida (para fm).)
Siel
Interruptor
© del
cortahilo
autom^tico
estdenOFF,
vuelva
aaccionar el Interruptor asimple tacto para completar los
procesosC y D. Enlonces la maquina funclonarda baja velocldad
(operacldn de compensaclon de puntada).
Atlemds,siel pedal se vuelve a su poslcion neutral y si se vuelve
a preslonar la pane frontal del pedal, el cosldo puede contlnuar
sea cual fuere la fijacidn de numero de puntadas.
Si se seleccionala funcion0 de prohibicidnde cortede hilo,la
maquina
de coserse detendracon la agujaarribasin ejecutarel
corte
de
hilo.
Sise
selecciona
la
funcion
0 de
puntada
automatica
deun
golpe,
la maquina de coser ejecutara automaticamente el cosido cn un
tramo,a la velocidadespecificadapresionandoel pedal.
From the library of: Superior Sewing Machine & Supply LLC

(2)
Modelio
di
cucitura
a
dimensioni
costanti
O 0
ABCac
1)
Premere
interrullore di modelio di cucilura adimensioni cosianti
O per
selezionare
il
modelio
di
cucitura
a
dimensioni
costanti.
2) li
modeilo
di
cucitura
a
dimensioni
costanti
viene
seiezionato, e
il numero di punti e dati su affrancatura ecc. ciie sono stati gia
impostati vengono mostrati sui panneilo.
3) Qualora si desideri cambiare ii numero di punti dei processi nei
modelio
di
cucitura
a
dimensioni
costanti,
cambiare
ii
numero
di
punti
per
processi
CeD
agendo
sugii
intemittori
©
per
imposture
il numero di punti per processiC e D. Se viene seiezionata anche
raffrancatura, per cambiare ii numero di punti dcii'affrancatura,
agire
sugli
interruttori
O per
imposture
il
numero
di
punti
per
processi A e B.
(IIcampo di impostazione: A, B = da 0 a 19punti C, D = da 0 a
500 punti)
4) Quattro differenti modelli di cucitura possono essere eseguiti
accoppiando ie impostazioni di ON e OFF di interruttore di
affrancatura automatica(per i'inizio) 0 ed interruttoredi
affrancatura
automatica
(peria
fine)
©.
5) Inoltre, 1'affrancatura doppia puo essere seiezionata agendo su
interruttore
di
affrancatura
doppia
(per
I'inizio)
O ed
interruttore
di
affrancatura
doppia
(perla
flne)
O.
(3)
Overlapped
stitching
pattern
e
14
Modelli
di
cudlura
N
OFF
CD
OFF
ON
OFF
ON
CD
CD
CD
OFF
ON
ON
6) Se I'interruttore di
taglio
del
filo
automatico
© b
acceso,
la
macchina per cucire eseguira automaticamente il taglio del filo
dopo
die
la stessa fmisce il predeterminato numero di punti tra
C e D. (Se I'affrancatura automatica (per la fine) e seiezionata,
la macchina percucire
eseguir^i
automaticamenteil taglio del filo
dopo
die
la stessa finisce i'affrancatura automatica (per la fine).
Se
i'interruttore
di
tagiio
del
filo
automatico
© b
spento,
azionare
I'interruttore "ouch-back" al termine dei processi C e D. La
macchina quindi ruota a bassa velocita (compensazione di punto).
Inoltre, se il pedale viene riportato in folle e la parte anteriore
dei pedale viene premuta nuovamente, la cucitura pu6 essere
continuataindifferentemente all'impostazionedel numerodi punti.
Se
I'interruttore
di
taglio
del
filo
automatico
©e
spento,
azionare
rinierrutiore
"touch-back"
al termine dei processi C e D. La
macchinaquindi ruotaa bassa velocita(compensazione di punto).
Inoltre, se ii pedaie viene riportato in folle e la
pane
anteriore
del pedal eviene premuta nuovamente, la cucitura pub essere
continuata indifferentementeall'impostazione del numero di punti.
7) Se
funzione
di
proibizione
dei
taglio
del
filo
© b
seiezionata,
la
macchinasi
fermcrb
con I'ago inaltosenzaeseguireil tagliodei filo.
8) Se
funzione
di
cucitura
automatica
"diun
coipo"
® b
seiezionata,
ia macchina eseguir^ automaticamente la cucitura di Ilia, alia
velocitit impostata premendo il pedale.
dH
B-
C-
On
L'
1si s
>g
o
1) Press overlapped stitching pattern switch O to specify the
overlapped stitchingpattern. 4)
2) The overlappedstitchingpatternisselected,and thenumber of
stitches and data on overlapped stitching which have already
been specified are shown on the panel.
3) Ifyouwant tochange the numberof stitches,operatethe"+"
orswitch
ofswitches © for setting the number of stitches
for processes A through C. If you want to change the num
berofwholeprocesses,operatethe"+"
orswitch
ofswitch 5)
© for setting the number of processes D.
(The range of the number of stitches A, B and C that can be
changed
: 0 to 19 stitches) (The range of the number of
-
13
-
processes
D
that
canbe
changed
:0 to 9 times)
Depress
thefront part ofthe
pedal
once,
andthe
sewing
machine
will
repeat the normal stitching and
reverse
stitching by the predetermined time. Then, the
sewing
machine
wOl
automatically make the thread trimmer
actuate and
will
stop to complete the overlappedstitch
ingprocedure. (Theone-shot automaticstitchingcannot
be turned OFF.)
If
thread
trimming
prohibiting
function
O is
chosen,
the machine
will
stop with tire needle up upon comple
tion of tire overlapped stitching procedure witlrout
performing thread trimming.
From the library of: Superior Sewing Machine & Supply LLC

(3)
Uberlappendes
Stichmuster
(3) Configuration
de
couture
superposee
(3)
Patron
de
pespunte
superpuesto
(3) Modeiio di
cucitura
sovrapposta
Ata'i
aUb1
CO
l/l/l{l/l
_ B C
On
;•
1
LM
' '
1 1 1 5
>g
1) DieTasle. O fur
Obcrlappungsstichmuslcr
driicken,
um das
Oberlappungsstichniusler
anzugebcn.
2) Das Oberlappungsslichmustcr wird gcwahit, und die bercils
angcgcbcnen Wertc fiir die Stichzahl und die Dalcn fUr
Uberlappendes Nahenwerden aufder Steueitafel angezeigt.
3)
Zum
Andem
der Stichzahl die
Seile
" + "
oder
" - " der Tasicn
e drUcken, um die Stichzahl fur die Prozesse A bis C
einzustellen. Zum Andem der Anzahl der ganzen Prozesse die
Seite
" + "
Oder"
- "
der
Taste
drucken,
um
die
Anzahl
der
Prozesse
unter
D
einzustellen.
(Einstellbereich der Stichzahl fur die Prozes.seA, B und C: 0 bis
19Sliche) (Ein.stellbereich der Anzahl von Proze.ssen D: 0 bis 9)
1) Appuyer sur la louche de configuration de couture
superposee Opour specifier une configuration de cou
ture superposee.
2) La configuration de couture superposee est seiectionnee.
Le nombre de points et les
donnees
de couture superposee
ayant dej^ ete specifies
sent
indiques
sur
le panneau.
3) Pour changer le nombre de points, utiliser les touches
"+"
ou 0 qui permettentde
sped
fier le nombre des points
desoperations A &C. Pour changer le nombred'operations
completes,utiliserlestouches
"+"ou"-"
© quipermettent
de specifier le nombre des operations D.
(Lenombre de points pour les operationsA,BetCpeutetre
1) Pulse el intcmiptor O de patrdn de pespunte
invertido
para
especificar el patrdn de pespunte invertido.
2) Se ha seleccionado el patrdn de pespunte invertido, y el numero
de puntadas y los datos sobre el pespunte invertido ya se ban
especificado como se muestran en el panel.
3) Si quiere cambiar el numero depuntadas, opere el interruptor
"+"
o de los interruplores © para fijarel numerode
puntadas
desde A a C. Si quiere cambiarel numero de todos los proccsos,
opereel
interruptor
"+"o"-"del
interruptor
© para
fijar
el
numero
de procesos D.
(Gama del numero de puntadas A, B y C que se puedcn cambiar;
0 a 19 puntadas) (Gama del numero de proccsos D que se pucde
1)
Premere
interrullorc
di
modello
di
cucitura
sovrapposta
O per
selezionare il modello di cucitura sovrapposta.
2) II modello di cucitura sovrapposta viene selezionato, e il numero
di punti e dati su cucitura sovrapposta chc sono stati gia impostati
vengono mostrati sul pannello.
3)
Qualora
si
desideri
cambiare
il
numero
di
punti,
agire
suirinterruttore o di interrullori © per
imposture
il
numero di punti per processi da A a C. Per cambiare il numero di
interi
processi,
agire
suH'intenuttore
o di
interruttore
©
per impostare il numero di processi D.
(11
campo
di impostazione del numero di punti A, B e C: da 0 a
19punti) (IIcampo di impostazione del numero di processi D: da
0 a 9
volte)
qDC
4)
Den
vordcren
Teil
des
Pedals
einmal
niederdriicken,
woraufliin
die
Nahmaschine
die
Vorwiirts-
und
Ruckwiirlsslichc
um
die
vorgcgebene
Anzahl
wicdcrholt.
Dann
lost
die
Nahma.schine
aulomati.sch
den
Fadcnabschncidcr
aus
und
becndcl
den
Obeiiappungsvorgang.
(Die
Ein.schuB-Nahauiomalik
kann
nichl
au.sgc.schallel werden.)
5) Falls die
Ta.sle
O zur Verhiilung des Fadcnabschncidens
bcliiligt wird, bleibi die Maschine nach Beendigung des
Uberlappungsvorgangs mit angehobener Nadcl slehen, ohne
Fadenabschnciden
au.szuriihrcn.
r^gl^ entre 0 et 19. Le nombre d'operations D peut etre
change entre 0 et 9.)
4) Appuyer une fois sur I'avant de la pedale. La machine
r^pfete
lacouture normaleetla couture arriere lenombrede
fois indiqu^. Le coupe-filest ensuiteactionneet lamachine
s'arrete, terminant la procedure de couture superposee.
(La couture automatique non repetitive ne peut pas etre
desactivee.)
5) Si la fonction d'interdiction de coupage du fil O est
choisie, la machine
s'arrete
avec I'aiguille compietement
relevee kla fin de la procedurede couture superposee sans
couper le fil.
cambiar: 0 a 9 veces)
4) Presione la parte frontaldel pedal una vez, y la maquina de coser
repelirael pespunte normal y el pespunte invertido
por
el tiempo
predeterminado.
Luego,
la
maquina
de
coser
actuara
automaticamente el corta-hilo y se detendra para completar el
procedimiento de pespunte. (No se puede cancelar el pespunte
automatico de un golpe.)
5) Sise
selecciona
la
funcion
© deprohibicion decortedehilo,la
maquina se detendra con la aguja
aniba
al completar el
procedimiento de pespunte superpuesto sin ejecutar el corte de
hilo.
4) Premere la parte anteriore del pedale una volta, e la macchina per
cucire
ripeter«^
la cucitura normale e cucitura ad inversione per il
predeterminato numero di volte. La macchina per cucire quindi
automaticamente fara funzionare il rasafilo e si arrestera per
complctare la procedura di cucitura sovrapposta. (La cucitura
automatica "di un colpo" non puo essere spenta.)
5) Se la
funzione
di
proibizione
del
taglio
delfiloO t
scelta,
la
macchina si arresterh con I'ago in alto al termine della procedura
di cucitura sovrapposta senza eseguire il taglio del filo.
-14-
From the library of: Superior Sewing Machine & Supply LLC

(4)
Rectangular
stitching
pattern
(4)
Rechteck-Stichmuster
(4) Configuration
de
points
rectanguiaire
(4)
Patron
de
pespunte
rectangular
(4) Modello di
cucitura
rettangolare
5)
eN
Sewing pattern
Niihmuster
Coufiguration de couture
Patrones de pespunte
Modelli
di
cucitura
0
l/i
0 0
ABCBC
OFF
AUS
DESENCLENCHEE
OFF
AUS
DESENCLENCHEE
'U
>€
ON
OFF
ON
EIN
AUS
EfN
ENCLENCHEE
DESENCLENCHEE
ENCLENCHEE
U
OFF
AUS
H
"Z
ON
EIN
"Z
ON
EIN
DESENCLENCHEE
ENCLENCHEE
ENCLENCHEE
0 0
1)
Press
rectangular
stitching
pattern
switch
O onthe
control
panel to select the rectangular stitching pattern.
2) The rectangular stitching pattern is selected. Now, the
predetermined number
of
stitches and
other
sewing
data
are shown on the control panel.
3) To change the number
of
stitches
of
the processes in the
rectangle stitching pattern, operate switches 0 (for
processes C and D) to change the number
of
stitches for
processes C and D.
Select
the
reverse
feed
stitching
accordingly.
To
change
the
number
of
reverse-feed
stitches, operate
switches
O
for setting the number
of
stitches for processes A and B.
(Adjustable range : A, B = 0 to 19 stitches,
C,
D = 0 to
99
stitches)
4) Four different kinds of stitching patterns can be performed
according to the
combination
of
ON/OFF
settings
automatic
reverse stitching (for start) switch 0 and
automatic
reverse
slitiching
(for
end)
switch
©.
6)
Furthermore,
the
double
reverse
stitching
mode
can
be
specified
by
operating
double
reverse
stitching
(for
start)
switch
0
and
double
reverse
stitching
(for
end)
switch
O.
At each step the sewing machineautomaticallystops after sewingthe predetermined numberof stitches.
At this time, if the touch-back switch is operated, the sewing machineruns at a low speed (stitch compensation operation).
Also,
ifthe
pedal
is
returned
toits
neutral
position
and
depressed
its
front
part
again,
the
sewing
canbe
continued
regradless
of the
setting
of
number
of
stitches.
If
automatic
thread
trimming
switch
O is
turned
ON,the
sewing
machine
will
automatically
perform
thread
trimming
afterthe
completion
of the last process. (If the automaticreversestitching(forend) isselected,the sewingmachinewill automaticallyperformthread trimming
after it finishes the automatic reverse stitching (for end).)
If
thread
trimming
prohibiting
function
0 is
chosen,
the
machine
will
stop
with
the
needle
up
without
perfontiing
thread
trimming.
If
one-shot
automatic
stitching
function
® is
chosen,
the
machine
will
automatically
perform
sewing
at a stretchuntil the
number
of
stitchesspecifiedis reached, at the predetermined sewingspeedbydepressing the pedalwhilethesewingmachineis engagedin the sewing
of processC or D.The machineperformsthread trimmingin the last processof one-shotautomaticstitchingpattern.
Forthesewingmachineequippedwithan auto-lifter, the presserfootwillautomatically go up after the completionof each sewing process.
7)
8)
9)
15-
From the library of: Superior Sewing Machine & Supply LLC

1)
Die
Taste
O
fur
Rechteck-Stichmustcr
an
cler
Sleuertafel
drUcken,
urn
das
Rechteck-Sticlimuster
zu
wahlen.
2)
Das
Rechteck-Stichmusler
wird
gewiihit.
Nun
wcrden
die
voibestinimle
Anzahl
von
Stichen
und
andere
Nahdaten
auf
der
Steuertafei
angezeigt.
3)
Zum
Andern
der
Slichzahl
der
Prozesse
C
und
D
im
Rechteck-Stichmusler
die
Stichzahl-Einstelltasten
0
fur
die
Prozesse
C
und
D
drUcken.
Die
Ruckwtirtsstiche
entsprechend
wahlen.
Zum
Andern
der
Anzahl
der
Ruckwartssriche
die
Stichzahl-Einstelltasten
O
fOr
die
Prozesse
A
und
B
driicken.
(Einstellbereich: A, B = 0 bis 19Sliche C, D = 0 bis 99 Stiche)
4)
Durch
Kombinieren
der
EIN-
und
AUS-Zuslande
der
Tasleu
O
und
©
fur
automatische
Ruckwartsstiche
(am
Nahbeginn
bzw.
am
Ntihende)
stehen vier verschiedene Stichmuster
zur
Verfugung.
5)
Dariiber
hinaus
konnen
Doppelruckwartssliche
durch
Betatigung
der
Taste
©
fur
Doppelriickwartsstiche
(am
Nahbeginn)
und
der
Taste
©
fiirDoppelruckwartssliche (am Nahende)
gewUhlt
werden.
Naeh
jedem
Schritt
bleibt
die
Nahmaschine
automatisch
stehen,
nachdem
siedie
vorbestimmte
Anzahl
von
Stichen
ausgefUhrt
hat.
Wird
dann
der
Tippschalter
bctUtigt,
lliuft
die
Nahmaschine
mil
niedriger
Geschwindigkeit
(Stichkompensationsbetrieb).
Durch
RUckstellen
des
Pedals
auf
seine
Nullstellung
und
erneutes
Niederdrucken
des
vorderen
Teils
kann
der
Nahvorgang
ohne
RUcksicht
auf
die Einstellung der Stichzahl fortgesetzt werden.
6)
Wenn
die
Taste
©
Tiir
automatisches
Fadcnab.schneidcn
betatigl
wird,
lost
die
Nahmaschine
nach
Bcendigung
des
letzten
Prozesses
automati.sch
den Fadenabschneideraus. (Falls die Funktion
fUr
automatische Ruckwartsstiche (am Nahende) gewahit wird, lost die Nahmaschine den
Fadenabschneider aus, naehdcm sie die automatischen Ruckwartsstiche (am Nahende) ausgePuhnhat.)
7) Falls die
Taste
© zur
VerhUtung
des
Fadenabschneidens
betatigt
wird,
bleibt
die
Maschine
mil
angehobener
Nadel
stehen,ohne
Fadenabschneiden
auszufiihren.
8)
Falls
die
Taste
©
fur
EinschuB-Nahautomatik
betatigt
wird,
fiihrt
die
Maschine
auf
NiedcrdrUcken
des
Pedals
wahrcnd
der
Verarbeitung
des
Prozesses
C oderD
automatisch
den
Nahvorgang
Uber
die
vorgegebene
Strecke
milder
vorgegebenen
Geschwindigkeit
aus,bisdie
angegebene
Stichzahl erreicht ist. Im letzten ProzcB
der
EinschuB-Nahautomatik fuhrt die Maschine Fadenabschneiden aus.
9) Bei
Nahmaschinen
mil
automatischer
NiihfuBluftung
wird
der
NiihfuB
nach
Beendigung
jedes
Nahprozesses
automatisch
angehoben.
1)
Pulse
el
interruptor
O de
patron
de
pespunte
rectangular
enel
panel
de
control
para
seleccionar
el
patrdn
de
pesprnte
rectangular.
2) Seha
seleccionado
el
patrdn
de
pespunte
rectangular.
Ahora,
el
ndmero
predeterminado
de
puntadas
y
otros
datos
de
cosido
se
muestran
enel
panel de control.
3)
Para
cambiar
el
nuinero
de
puntadas
del
proceso
en
el
paton
de
pespunte
rectangular,
opere
los
interruptores
©
(para
los
procesos
Cy
D)
para
cambiar el numero de puntadas para los procesos C y D.
Seleecione el numerode puntadasparalosprocesos C y D.Selecciones enconformidad lapespuntedetransporte invertido, operelos interruptores
O
para
fijar
el
numero
de
puntadas
para
los
procesos
Ay
B.
(Gama ajustable: A, B = 0 a 19 puntadas
C, D = 0 a 99 puntadas.)
4)
Sepueden
ejecutar
cuatro
diferentes
clases
de
patrones
de
puntada
de
acuerdo
ala
combinacidn
de
las
fijaciones
ON/OFF
del
interruptor
© de
puntada
automdtica
invertida
(para
inicio)
y
del
interruptor
© de
puntada
automatica
invertida
(para
fin).
5)
Ademds,
la
modalidad
de
puntada
invertida
doble
.se
puede
especificar
operando
el
interruptor
© de
puntada
doble
invertida
(para
inicio)
yel
interruptor
© de
puntada
doble
invertida
(para
fin).
A chaque etape, la machine s'arrete automatiquement apr^s avoir effectue le nombre de points predetermine.
Si Ton agit alors sur I'interrupteur"touch-back",la machinefonctionne itpetite vitesse(operationde compensationdes points).
Si Ton ramene la p6daleau neutre, puisqu'on I'enfonce h nouveauen avant, on peut continuer a coudre quel que soit le nombr de points
predetermine.
6) Sila louchede coupageautomatique du fil 0 est
enclench^e,
la
machine
execute
automatiquement lecoupagedu fil
apr^s
la
demifere
operation. (Si Tex^cutionautomatique de
points
arri&re
(pour la fin de la couture) est choisie, la machine coupe
automatiquement le fil apr^s avoir termini I'ex^cution automatiquede points arriere (pour la fin de la couture).)
7) Silafunctiond'interdictiondecoupage du fil © estchoisie,lamachines'arreteavecI'aiguille compl^tement relev^e sanscouper
le
fil.
8) Si la function decouture automatique nun r^p^titive © estchoisie,la machineeffectueautomatiquement la couture d'un trait
^la Vitessesp^cifi^e par I'enfoncement de la p^dalependantI'ex^cutionde la couturede reparation C ou D. La machine coupe
le fil dans la
demi^re
operation
de
la configuration de couture automatique non repetitive.
9) Si la machine est ^quip€e
d'un
releveur automatique, le pied presseur remonte automatiquement ^ la fin de chaque operation de
couture.
-16-
From the library of: Superior Sewing Machine & Supply LLC

1)
Appuyer
surla
touche
de
configuration
de
couture
rectangulalre
O
pour
spdcifier
une
configuration
de
couture
rectangulaire.
2) La
configuration
de
couture
rectangulaire
est
selectionnde.
Le
nombre
de
points
etles
autres
doun^sde
couture
rectangulaire
pr6d6termin6s
sont indiques sur le panneau.
3) Pour
changer
le
nombre
de
points
des
operations
d'une
confrguration
de
couture
rectangulaire,
utiliser
les
touches
0 (pourles
operations
C et D) qui permettentde speciller les pointspourles operationsC et D.
Choisir
rexdcution
de
points
arriSre
en
consequence.
Pour
changer
le
nombre
de
points
arriere,
utiliser
les
touches
O qui
permettent
de
specifier le nombre de points pour les operations A et B.
(Plage de reglage ; A, B = 0 &19 points
C, D = 0 h 99 points)
4) On pent obtenir quatre types difiercnls de configurationsde pointsselon la position ENCLENCHEE/DESENCLENCHEE de la touche
d'execution
automatiqiie
de
points
an
ierc
(pour
le
debut
dela
couture)
0 etdela
touche
d'execution
automatique
de
points
arriere
(pour
lafinde la
couture)
0.
5) De plus, I'execution de pointsarriere doubles peuletre choisieen utilisantla touched'execution de pointsarrieredoubles (pour le debut de
la
couture)
0 et la
touche
d'execution
de
points
arriere
doubles
(pour
la
fin
dela
couture)
0.
En cada paso la maquina de coser se para automaticamcnte despues de coser el numero de puntadas predeterminado. Ahora, si se vuelve
aaccionar el interruptor a simple tacto, la maquina de coser funciona a baja velocidad (operacidn de compensacidn de puntada).
Ademds, si el pedal se vuelve a su posicidn neutral y si se vuelvea presionar la pane frontal del pedal, el cosido puede continuar sea cual
fuere la fijacidn de numero de puntada.
6) Sisc
posiciona
enONel interruptor 0 decone
automatico
de
hilo,
la
maquina
decoser
ejecuiara
autom^ticamente
elcone dehilo
despues
de
completar el ultimo proceso. (Si se selecciona la modalidad de puntada aulom^tica invcrtida (para fm), la mdquina de coser ejecutard
automdticamente el corte de hilo despues que termina la puntada auiomdlica invcrtida (para fin).)
7) Sise
selecciona
la
funcidn
0 de
prohibicidn
de
corte
de
hilo,
la
mdquina
de
coser
se
dctcndrS
conla
aguja
arriba
sin
ejccutar
elconede
hilo.
8) Siseselecciona la
funcidn
0 depespunte
automatico
deun
golpe,
la
mdquina
decoserejccutara
automaticamcnte
el cosidoenun
tramo
hasta
que sc llegue alnumero especificadode puntadas, ala velocidadprcdctcrminada de cosido prcsionando elpedal mientras que la
m^uina
de coser
estdejecutandoelcosidodelosprocesosCoD. Lamaquinadecoserejccutaelcortedehiloenelliltimoprocesodepatrdndepespunteautomatico
de un golpe.
9) Para la mdquina de coserequipada con un clcvador automatico, el prcnsatclas subira automaticamcnte despues de completar cada proceso de
cosido.
1)
Premere
interruttore
di
modello
di
cucilura
reltangolare
O
per
selezionarc
il
modello
di
cucitura
retiangolare.
2) IImodellodi cuciturarettangolarevieneselezionato, e il numerodi puntie altridaii che sonostatigid impostati vengonomostratisul pannello.
3) Qualora si desideri cambiare
11
numero di puntidei process! nel modello di cucitura reltangolare, cambiare il numero di punti per processi C e
D
agendo
sugli
interruttori
0 per
impostare
il
numero
di
punti
per
processi
Ce
D.
Se
viene
selezionata
anche
I'affrancatura,
per
cambiare
il
numero
di
punti
dell'affrancatura,
agire
sugli
interruttori
O per
impostare
il
numero
di
punti
per
processi
Ae
B.
(IIcampo di impostazione: A, B= da 0 a 19punti C, D = da0 a 99 punti)
4) Quattro different! modellidi cucitura possonoessere eseguiti accoppiandole impostazionidi ON e OFF di iniermttore di affrancatura automatica
(per
I'inizio)
0 ed
interruttore
di
affrancatura
automatica
(per
la
fine)
0.
5)
Inoltre,
I'affrancatura
doppia
pub
essere
selezionata
agendo
su
interruttore
di
affrancatura
doppia
(per
I'inizio)
0 ed
intemittore
di
affrancatura
doppia
(perla
fine)
0.
Aciascuna fase la macchina per cucire si ferma automaticamente dopo aver cucito il predeterminato numero di punti.
Aquesto punto, se 1'interruttore "touch-back" viene azionato, la macchina per cucire ruota a bassa velocity (compcnsazione di punto).
Inoltre, se il pedale viene riportato in folle e la parte anteriore del pedale viene premuta nuovamente, la cucitura pub essere continuata
indifferentemente all'impostazione del numero di punti.
Aciascuna fase la macchina per cucire si ferma automaticamente dopo aver cucito il predeterminato numero di punti.
A questo punto, se 1'interruttore "touch-back" viene azionato, la macchina per cucire ruota a bassa velocilh (compensazione di punto).
Inoltre, se il pedale viene riportato in folle e la parte anteriore del pedale viene premuta nuovamente, la cucitura pub essere continuata
indifferentemente all'impostazione del numero di punti.
6) Se
I'interruttore
di
taglio
del
filo
automatico
© b
acceso,
la
macchina
per
cucire
eseguirb
automaticamente
il
taglio
del
filo
al
termine
dell'ultimo
processo.
(SeI'affrancatura automatica (perla
fine)
hselezionata, la
macchina
per
cucire
eseguira automaticamente il tagliodel filodopoche
la stessa finisce I'affrancatura automatica (per la fine).
7) Se
funzione
di
proibizione
del
taglio
del
filo
0 e
selezionata,
la
macchina
si
fermera
con
I'ago
in
alto
senza
eseguire
il
taglio
del
filo.
8) Se
funzione
di
cucitura
automatica
"diun
colpo"
0 e
selezionata,
la
macchina
eseguira
automaticamente
la
cucitura
di
fila
finchb
il
numero
di
punti
impostato
sia
raggiunto
premendo
la
parte
anteriore
del
pedale
mentre
la
macchina
per
cucire
e
impegnata
nella
cucitura
di
processo
Co
D. La macchinaesegue il tagliodel filo nell'ultimo processodel modellodi cucitura automatica"di un colpo".
9) Per la macchina percucire dotatadi alzapiedinoautomatico,il piedino premistoffasi solleveraautomaticamenteal termine di ciascun processo
di
cucitura.
-17-
From the library of: Superior Sewing Machine & Supply LLC
Other manuals for CP-160
1
Table of contents
Other JUKI Sewing Machine manuals

JUKI
JUKI HZL-G220 User manual

JUKI
JUKI LU-2210N-7 User manual

JUKI
JUKI MH-1410 User manual

JUKI
JUKI AMB-289 Quick start guide

JUKI
JUKI DDL-900BB User manual

JUKI
JUKI LZ-2290A/IP-110A/SC-915 User manual

JUKI
JUKI Q141 User manual

JUKI
JUKI TL-2200QVP Mini User manual

JUKI
JUKI HZL-G Series User manual

JUKI
JUKI AMS-210EN/IP-420 User manual

JUKI
JUKI DP-2100 User manual

JUKI
JUKI MO-2404 User manual

JUKI
JUKI SC-922 User manual

JUKI
JUKI DLD-5430NE Series User manual

JUKI
JUKI DDL-9000B User manual

JUKI
JUKI LK-1900AN-SS User manual

JUKI
JUKI MO-51EN User manual

JUKI
JUKI DLN-6390 Quick start guide

JUKI
JUKI MO-655N User manual

JUKI
JUKI SC-922 Quick start guide