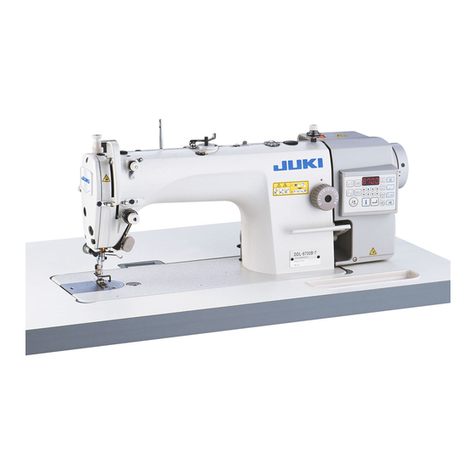
JUKI LG-158 User manual

No.02
40095659
INSTRUCTION MANUAL
NOTE : Read safety instructions carefully and understand them before using.
Retain this Instruction Manual for future reference.
LG-158
LG-158-1
Copyright
Ⓒ
2011-2013 JUKI CORPORATION
• All rights reserved throughout the world.
Please do not hesitate to contact our distributors or agents in your area for further information when neces-
sary.
*The description covered in this instruction manual is subject to change for improvement of the
commodity without notice.
13 · 09 Printed in Japan
SEWING MACHINERY BUSINESS UNIT
2-11-1, TSURUMAKI, TAMA-SHI,
TOKYO, 206-8551, JAPAN
PHONE : (81)42-357-2371
FAX : (81)42-357-2380
http://www.juki.com

i
i
For the sewing machine, automatic machine and ancillary devices (hereinafter collectively referred to as
"machine"), it is inevitable to conduct sewing work near moving parts of the machine. This means that there
is always a possibility of unintentionally coming in contact with the moving parts. Operators who actually
operate the machine and maintenance personnel who are involved in maintenance and repair of the machine
are strongly recommended to carefully read to fully understand the following SAFETY PRECAUTIONS
before using/maintaining the machine. The content of the SAFETY PRECAUTIONS includes items which
DUHQRWFRQWDLQHGLQWKHVSHFL¿FDWLRQVRI\RXUSURGXFW
7KHULVNLQGLFDWLRQVDUHFODVVL¿HGLQWRWKHIROORZLQJWKUHHGLIIHUHQWFDWHJRULHVWRKHOSXQGHUVWDQGWKHPHDQLQJ
of the labels. Be sure to fully understand the following description and strictly observe the instructions.
Warning label
❶
❷
❸
❶7KHUHLVWKHSRVVLELOLW\WKDWVOLJKWWRVHULRXVLQMXU\RUGHDWKPD\EHFDXVHG
7KHUHLVWKHSRVVLELOLW\WKDWLQMXU\PD\EHFDXVHGE\WRXFKLQJPRYLQJSDUW
❷7RSHUIRUPVHZLQJZRUNZLWKVDIHW\JXDUG
7RSHUIRUPVHZLQJZRUNZLWKVDIHW\FRYHU
7RSHUIRUPVHZLQJZRUNZLWKVDIHW\SURWHFWLRQGHYLFH
❸%HVXUHWRWXUQWKHSRZHU2))EHIRUHFDUU\LQJRXWPDFKLQHKHDGWKUHDGLQJ
QHHGOHFKDQJLQJEREELQFKDQJLQJRURLOLQJDQGFOHDQLQJ
❸
❷
❶
(OHFWULFDOVKRFN
GDQJHUODEHO
DANGER :
7KLVLQGLFDWLRQLVJLYHQZKHUHWKHUHLVDQLPPHGLDWHGDQJHURIGHDWKRUVHURXVLQMXU\LIWKHSHUVRQLQFKDUJHRUDQ\WKLUG
SDUW\PLVKDQGOHVWKHPDFKLQHRUGRHVQRWDYRLGWKHGDQJHURXVVLWXDWLRQZKHQRSHUDWLQJRUPDLQWDLQLQJWKHPDFKLQH
WARNING :
7KLVLQGLFDWLRQLVJLYHQZKHUHWKHUHLVDSRWHQWLDOLW\IRUGHDWKRUVHULRXVLQMXU\LIWKHSHUVRQLQFKDUJHRUDQ\WKLUG
SDUW\PLVKDQGOHVWKHPDFKLQHRUGRHVQRWDYRLGWKHGDQJHURXVVLWXDWLRQZKHQRSHUDWLQJRUPDLQWDLQLQJWKHPDFKLQH
CAUTION :
7KLVLQGLFDWLRQLVJLYHQZKHUHWKHUHLVDGDQJHURIPHGLXPWRPLQRULQMXU\LIWKHSHUVRQLQFKDUJHRUDQ\WKLUGSDU
W\PLVKDQGOHVWKHPDFKLQHRUGRHVQRWDYRLGWKHGDQJHURXVVLWXDWLRQZKHQRSHUDWLQJRUPDLQWDLQLQJWKHPDFKLQH
,WHPVUHTXLULQJVSHFLDODWWHQWLRQ
3LFWRULDOZDUQLQJLQGLFDWLRQ
7KHUHLVDULVNRILQMXU\LIFRQWDFW
LQJDPRYLQJVHFWLRQ
3LFWRULDOZDUQLQJ
LQGLFDWLRQ
%HDZDUHWKDWKROGLQJWKHVHZLQJ
PDFKLQHGXULQJRSHUDWLRQFDQ
KXUW\RXUKDQGV
7KHUHLVDULVNRIHOHFWULFDOVKRFNLI
FRQWDFWLQJDKLJKYROWDJHVHFWLRQ
7KHUHLVDULVNRIHQWDQJOHPHQWLQ
WKHEHOWUHVXOWLQJLQLQMXU\
7KHUHLVDULVNRIDEXUQLIFRQWDFW
LQJDKLJKWHPSHUDWXUHVHFWLRQ
7KHUHLVDULVNRILQMXU\LI\RX
WRXFKWKHEXWWRQFDUULHU
%HDZDUHWKDWH\HGH¿FLHQF\FDQ
EHFDXVHGE\ORRNLQJGLUHFWO\DWWKH
ODVHUEHDP
,QGLFDWLRQODEHO
7KHFRUUHFWGLUHFWLRQLVLQGLFDWHG
7KHUHLVDULVNRIFRQWDFWEHWZHHQ
\RXUKHDGDQGWKHVHZLQJPD
FKLQH
&RQQHFWLRQRIDHDUWKFDEOHLV
LQGLFDWHG
TO ENSURE SAFE USE OF YOUR SEWING MACHINE
,([SODQDWLRQRIULVNOHYHOV
(II)
([SODQDWLRQRISLFWRULDOZDUQLQJLQGLFDWLRQVDQGZDUQLQJODEHOV
– 15 –
Problems Causes Corrective measures
⑤Height of needle bar is not matched.
⑥When skip-stitches occur at step-sewing
part.
⑦When the blade point of the sewing hook
is crushed.
⑧When the needle is defective.
○When the needle bar is at lowest point make
the distance between the bottom of needle
clamp and upper surface of throat plate to 21.
2 mm (53/64").
○Increase the alternate lifting amount of the
presser foot.
○Remove the sewing hook and repair with a fine
mesh oil whetstone or exchange the hook with
a new sewing hook.
○Exchange with a new needle.
3. Stitching flaw. ①The bobbin thread is not passing the
center of the thread tension spring of
bobbin case holder.
②The outer rim of the bobbin is not smooth.
③When the thickness of the needle is not
matched with the using thread.
④When the supply of oil to the sewing hook
is not adequate.
⑤Bobbin thread tension is too weak.
○Make the bobbin thread to pass the center of
the tension spring.
○Exchange the bobbin or polish the outer rim of
the bobbin with a fine mesh paper file. (sand
paper).
○Exchange with an appropriate thick needle.
○Refer to the chapter on "3. LUBRICATION".
○Refer to the chapter on "8. THREAD
TENSION".
a. In case of stitching
flaw due to change
of sewing speed.
①Pressure of take-up spring is too weak.
②Timing of bobbin case opening lever is
not matched.
③Finish of thread paths of all parts are bad.
④Sewing hook is defective.
○Make the strength of take-up spring stronger.
(Refer to the chapter on "8. THREAD
TENSION"
○Refer to the chapter on "13. ADJUSTING THE
BOBBIN CASE OPENING LEVER".
○Polish with a fine mesh paper file (sand paper)
or by buffing.
○Exchange the sewing hook with a new hook.
4. On feed pitch error
a. In case feed pitch
is too big.
①Pressing pressure of presser foot is too
weak.
○Tighten the pressure regulating themb screw.
b. In case feed pitch
is too small.
①Feed dog is too low.
②Tension of needle thread and bobbin
thread is too strong.
○Refer to the chapter on "17. ADJUSTING THE
HEIGHT OF THE FEED DOG".
○Refer to the chapter on "8. THREAD
TENSION".
5. Isolated idling loops
are produced
①Tension of the needle threa is too weak.
②Timing of the bobbin case opening lever
is not matched.
(Pulling of the bobbin case opening lever
is insufficient)
○Strengthen the tension of the needle thread.
○Refer to the chapter on "11. ADJUSTING THE
WALKING FOOT AND PRESSER FOOT".
6. Even with the safety
device in action, good
stitching condition can
not be attained.
①When the safety device has not returned
to the correct position.
②Due to the strong impact, sometimes the
timing belt slides by one pitch.
○Bring the safety device to the correct position.
○Refer to the chapter on the timing of the main
shaft and the hook shaft.

– 14 –
26. PROBLEMS WITH SEWING AND CORRECTIVE MEASURES
Problems Causes Corrective measures
1. Needle thread
breakage.
a. Needle thread
ravels and wears
out.
①Bruise on thread path, needle point,
blade point of sewing hook and groove
of bobbin case holder rotation stopper
on backside of throat plate.
②Tension of needle thread is too strong.
③Hardly no clearance between bobbin
case opening lever and bobbin case
holder.
④Needle and the sewing hook are hitting
each’ other.
⑤The oil supply to the sewing hook is
insufficient.
⑥Needle is too fine against the using
thread.
○Polish off the bruise of blade point of hook with
a fine mesh paper file. Finish the groove part of
throat plate by buffing.
○Refer to the chapter on "8. THREAD TENSION".
○Loosen the set screw of the bobbin case opening
lever and make the clearance between bobbin
case opening lever and bobbin case holder to 0.4
mm(1/64")
(Refer to the chapter on "13. ADJUSTING THE
BOBBIN CASE OPENING LEVER".)
○Tap the hook driving shaft saddle lightly and
adjust the clearance between the needle and
the blade point of the sewing hook. (Refer to the
chapter on "11. ADJUSTING THE WALKING
FOOT AND PRESSER FOOT".)
○Adjust the oiling amount to the sewing hook.
○Refer to the chapter on "STANDARD STITCHING
SPECIFICATIONS".
b. Thread breaks at
step-sewing part.
①Lifting amount of presser foot and
walking foot is too small.
○Increase the lifting amount of presser foot and
walking foot. (Refer to the chapter on "20.
ADJUSTING THE LIFTING AMOUNT OF THE
PRESSER FOOT AND THE WALKING FOOT".)
c. Due to inferior
quality of the needle
thread.
①When the twist has flows and knots or
constrictions are formed.
②When old threads are used sometimes
they break easily with slight pressure.
○Exchange the thread.
○Exchange with new thread.
d. Needle thread
breaks at the start
of sewing or slips
out.
①Position of the thread take-up lever is
not at the upper dead point.
○Bring the thread take-up lever to the upper dead
point and start sewing.
e. Bobbin thread
breaks.
①Bobbin is defective and rotation is not
smooth.
②When thread hards get between the
bobbin and the bobbin case opener.
○Exchange the bobbin with a new one.
○Take out the bobbin and after removing the
thread hards, reset the bobbin.
2. Skip-stitching ①Clearance between the needle and
blade point of hook is too wide.
②Timing of sewing hook and needle is
either too fast or too slow.
③Presser foot is "floating". (When
pressing pressure is too weak.)
④Installed angle of the needle is bad.
○Adjust the clearance between the needle and the
blade point of sewing hook. (Refer to the chapter
on "11. ADJUSTING THE WALKING FOOT
AND PRESSER FOOT".)
○Adjust the timing of needle and sewing hook.
(Refer to the chapter on "11. ADJUSTING THE
WALKING FOOT AND PRESSER FOOT".)
○Tighten the pressure regulating thumb screw.
○Refer to the chapter on "4. HOW TO INSTALL
THE NEEDLE".
ii
ii
SAFETY PRECAUTIONS
:KHQLWLVQHFHVVDU\WRRSHQWKHFRQWUROER[FRQWDLQLQJHOHFWULFDOSDUWVEHVXUHWRWXUQWKHSRZHU
RIIDQGZDLWIRU¿YHPLQXWHVRUPRUHEHIRUHRSHQLQJWKHFRYHULQRUGHUWRSUHYHQWDFFLGHQWOHDGLQJWR
HOHFWULFDOVKRFN
$FFLGHQWPHDQVWRFDXVH
SHUVRQDOLQMXU\RUGHDWKRU
GDPDJHWRSURSHUW\
DANGER
CAUTION
%DVLFSUHFDXWLRQ
%HVXUHWRUHDGWKHLQVWUXFWLRQPDQXDODQGRWKHUH[SODQDWRU\GRFXPHQWVVXSSOLHGZLWKDFFHVVRULHVRI
WKHPDFKLQHEHIRUHXVLQJWKHPDFKLQH&DUHIXOO\NHHSWKHLQVWUXFWLRQPDQXDODQGWKHH[SODQDWRU\GRFX
PHQWVDWKDQGIRUTXLFNUHIHUHQFH
7KHFRQWHQWRIWKLVVHFWLRQLQFOXGHVLWHPVZKLFKDUHQRWFRQWDLQHGLQWKHVSHFL¿FDWLRQVRI\RXUSURGXFW
%HVXUHWRZHDUVDIHW\JRJJOHVWRSURWHFWDJDLQVWDFFLGHQWFDXVHGE\QHHGOHEUHDNDJH
7KRVHZKRXVHDKHDUWSDFHUKDYHWRXVHWKHPDFKLQHDIWHUFRQVXOWDWLRQZLWKDPHGLFDOVSHFLDOLVW
6DIHW\GHYLFHVDQGZDUQLQJODEHOV
%HVXUHWRRSHUDWHWKHPDFKLQHDIWHUYHULI\LQJWKDWVDIHW\GHYLFHVLVFRUUHFWO\LQVWDOOHGLQSODFHDQG
ZRUNVQRUPDOO\LQRUGHUWRSUHYHQWDFFLGHQWFDXVHGE\ODFNRIWKHGHYLFHV
,IDQ\RIWKHVDIHW\GHYLFHVLVUHPRYHGEHVXUHWRUHSODFHLWDQGYHULI\WKDWLWZRUNVQRUPDOO\LQRUGHUWR
SUHYHQWDFFLGHQWWKDWFDQUHVXOWLQSHUVRQDOLQMXU\RUGHDWK
%HVXUHWRNHHSWKHZDUQLQJODEHOVDGKHUHGRQWKHPDFKLQHFOHDUO\YLVLEOHLQRUGHUWRSUHYHQWDFFLGHQW
WKDWFDQUHVXOWLQSHUVRQDOLQMXU\RUGHDWK,IDQ\RIWKHODEHOVKDVVWDLQHGRUFRPHXQVWXFNEHVXUHWR
FKDQJHLWZLWKDQHZRQH
$SSOLFDWLRQDQGPRGL¿FDWLRQ
1HYHUXVHWKHPDFKLQHIRUDQ\DSSOLFDWLRQRWKHUWKDQLWVLQWHQGHGRQHDQGLQDQ\PDQQHURWKHUWKDQWKDW
SUHVFULEHGLQWKHLQVWUXFWLRQPDQXDOLQRUGHUWRSUHYHQWDFFLGHQWWKDWFDQUHVXOWLQSHUVRQDOLQMXU\RU
GHDWK-8.,DVVXPHVQRUHVSRQVLELOLW\IRUGDPDJHVRUSHUVRQDOLQMXU\RUGHDWKUHVXOWLQJIURPWKHXVHRI
WKHPDFKLQHIRUDQ\DSSOLFDWLRQRWKHUWKDQWKHLQWHQGHGRQH
1HYHUPRGLI\DQGDOWHUWKHPDFKLQHLQRUGHUWRSUHYHQWDFFLGHQWWKDWFDQUHVXOWLQSHUVRQDOLQMXU\RU
GHDWK-8.,DVVXPHVQRUHVSRQVLELOLW\IRUGDPDJHVRUSHUVRQDOLQMXU\RUGHDWKUHVXOWLQJIURPWKHPD
FKLQHZKLFKKDVEHHQPRGL¿HGRUDOWHUHG
(GXFDWLRQDQGWUDLQLQJ
,QRUGHUWRSUHYHQWDFFLGHQWUHVXOWLQJIURPXQIDPLOLDULW\ZLWKWKHPDFKLQHWKHPDFKLQHKDVWREHXVHG
RQO\E\WKHRSHUDWRUZKRKDVEHHQWUDLQHGHGXFDWHGE\WKHHPSOR\HUZLWKUHVSHFWWRWKHPDFKLQHRSHU
DWLRQDQGKRZWRRSHUDWHWKHPDFKLQHZLWKVDIHW\WRDFTXLUHDGHTXDWHNQRZOHGJHDQGRSHUDWLRQVNLOO7R
HQVXUHWKHDERYHWKHHPSOR\HUKDVWRHVWDEOLVKDQHGXFDWLRQWUDLQLQJSODQIRUWKHRSHUDWRUVDQGHGX
FDWHWUDLQWKHPEHIRUHKDQG
,WHPVIRUZKLFKWKHSRZHUWRWKHPDFKLQHKDVWREHWXUQHGRII
7XUQLQJWKHSRZHURII 7XUQLQJWKHSRZHUVZLWFKRIIWKHQUHPRYLQJWKHSRZHUSOXJIURPWKHRXWOHW
7KLVDSSOLHVWRWKHIROORZLQJ
%HVXUHWRLPPHGLDWHO\WXUQWKHSRZHURIILIDQ\DEQRUPDOLW\RUIDLOXUHLVIRXQGRULQWKHFDVHRISRZHU
IDLOXUHLQRUGHUWRSURWHFWDJDLQVWDFFLGHQWWKDWFDQUHVXOWLQSHUVRQDOLQMXU\RUGHDWK
7RSURWHFWDJDLQVWDFFLGHQWUHVXOWLQJIURPDEUXSWVWDUWRIWKHPDFKLQHEHVXUHWRFDUU\RXWWKHIROORZ
LQJRSHUDWLRQVDIWHUWXUQLQJWKHSRZHURII)RUWKHPDFKLQHLQFRUSRUDWLQJDFOXWFKPRWRULQSDUWLFXODU
EHVXUHWRFDUU\RXWWKHIROORZLQJRSHUDWLRQVDIWHUWXUQLQJWKHSRZHURIIDQGYHULI\LQJWKDWWKHPDFKLQH
VWRSVFRPSOHWHO\
)RUH[DPSOHWKUHDGLQJWKHSDUWVVXFKDVWKHQHHGOHORRSHUVSUHDGHUHWFZKLFKKDYHWREHWKUHDG
HGRUFKDQJLQJWKHEREELQ
)RUH[DPSOHFKDQJLQJRUDGMXVWLQJDOOFRPSRQHQWSDUWVRIWKHPDFKLQH
)RUH[DPSOHZKHQLQVSHFWLQJUHSDLULQJRUFOHDQLQJWKHPDFKLQHRUOHDYLQJWKHPDFKLQH
%HVXUHWRUHPRYHWKHSRZHUSOXJE\KROGLQJWKHSOXJVHFWLRQLQVWHDGRIWKHFRUGVHFWLRQLQRUGHUWRSUH
YHQWHOHFWULFDOVKRFNHDUWKOHDNDJHRU¿UHDFFLGHQW
%HVXUHWRWXUQWKHSRZHURIIZKHQHYHUWKHPDFKLQHLVOHIWXQDWWHQGHGEHWZHHQZRUNV
%HVXUHWRWXUQWKHSRZHURIILQWKHFDVHRISRZHUIDLOXUHLQRUGHUWRSUHYHQWDFFLGHQWUHVXOWLQJRIEUHDN
DJHRIHOHFWULFDOFRPSRQHQWV

iii
iii
35(&$87,21672%(7$.(1,19$5,28623(5$7,2167$*(6
7UDQVSRUWDWLRQ
%HVXUHWROLIWDQGPRYHWKHPDFKLQHLQDVDIHPDQQHUWDNLQJWKHPDFKLQHZHLJKWLQFRQVLGHUDWLRQ5HIHU
WRWKHWH[WRIWKHLQVWUXFWLRQPDQXDOIRUWKHPDVVRIWKHPDFKLQH
%HVXUHWRWDNHVXI¿FLHQWVDIHW\PHDVXUHVWRSUHYHQWIDOOLQJRUGURSSLQJEHIRUHOLIWLQJRUPRYLQJWKH
PDFKLQHLQRUGHUWRSURWHFWDJDLQVWDFFLGHQWWKDWFDQUHVXOWLQSHUVRQDOLQMXU\RUGHDWK
2QFHWKHPDFKLQHKDVEHHQXQSDFNHGQHYHUUHSDFNLWIRUWUDQVSRUWDWLRQWRSURWHFWWKHPDFKLQHDJDLQVW
EUHDNDJHUHVXOWLQJIURPXQH[SHFWHGDFFLGHQWRUGURSSLQJ
8QSDFNLQJ
%HVXUHWRXQSDFNWKHPDFKLQHLQWKHSUHVFULEHGRUGHULQRUGHUWRSUHYHQWDFFLGHQWWKDWFDQUHVXOWLQ
SHUVRQDOLQMXU\RUGHDWK,QWKHFDVHWKHPDFKLQHLVFUDWHGLQSDUWLFXODUEHVXUHWRFDUHIXOO\FKHFNQDLOV
7KHQDLOVKDYHWREHUHPRYHG
%HVXUHWRFKHFNWKHPDFKLQHIRUWKHSRVLWLRQRILWVFHQWHURIJUDYLW\DQGWDNHLWRXWIURPWKHSDFNDJH
FDUHIXOO\LQRUGHUWRSUHYHQWDFFLGHQWWKDWFDQUHVXOWLQSHUVRQDOLQMXU\RUGHDWK
,QVWDOODWLRQ
(,7DEOHDQGWDEOHVWDQG
%HVXUHWRXVH-8.,JHQXLQHWDEOHDQGWDEOHVWDQGLQRUGHUWRSUHYHQWDFFLGHQWWKDWFDQUHVXOWLQSHU
VRQDOLQMXU\RUGHDWK,ILWLVLQHYLWDEOHWRXVHDWDEOHDQGWDEOHVWDQGZKLFKDUHQRW-8.,JHQXLQHRQHV
VHOHFWWKHWDEOHDQGWDEOHVWDQGZKLFKDUHDEOHWRVXSSRUWWKHPDFKLQHZHLJKWDQGUHDFWLRQIRUFHGXULQJ
RSHUDWLRQ
,IFDVWHUVDUH¿WWHGWRWKHWDEOHVWDQGEHVXUHWRXVHWKHFDVWHUVZLWKDORFNLQJPHFKDQLVPDQGORFN
WKHPWRVHFXUHWKHPDFKLQHGXULQJWKHRSHUDWLRQPDLQWHQDQFHLQVSHFWLRQDQGUHSDLULQRUGHUWRSUHYHQW
DFFLGHQWWKDWFDQUHVXOWLQSHUVRQDOLQMXU\RUGHDWK
,,&DEOHDQGZLULQJ
%HVXUHWRSUHYHQWDQH[WUDIRUFHIURPEHLQJDSSOLHGWRWKHFDEOHGXULQJWKHXVHLQRUGHUWRSUHYHQW
HOHFWULFDOVKRFNHDUWKOHDNDJHRU¿UHDFFLGHQW,QDGGLWLRQLILWLVQHFHVVDU\WRFDEOHQHDUWKHRSHUDWLQJ
VHFWLRQVXFKDVWKH9EHOWEHVXUHWRSURYLGHDVSDFHRIPPRUPRUHEHWZHHQWKHRSHUDWLQJVHFWLRQ
DQGWKHFDEOH
%HVXUHWRDYRLGVWDUEXUVWFRQQHFWLRQLQRUGHUWRSUHYHQWHOHFWULFDOVKRFNHDUWKOHDNDJHRU¿UHDFFLGHQW
%HVXUHWRVHFXUHO\FRQQHFWWKHFRQQHFWRUVLQRUGHUWRSUHYHQWHOHFWULFDOVKRFNHDUWKOHDNDJHRU¿UH
DFFLGHQW,QDGGLWLRQEHVXUHWRUHPRYHWKHFRQQHFWRUZKLOHKROGLQJLWVFRQQHFWRUVHFWLRQ
,,,*URXQGLQJ
%HVXUHWRKDYHDQHOHFWULFDOH[SHUWLQVWDOODQDSSURSULDWHSRZHUSOXJLQRUGHUWRSUHYHQWDFFLGHQWFDXVHG
E\HDUWKOHDNDJHRUGLHOHFWULFVWUHQJWKYROWDJHIDXOW,QDGGLWLRQEHVXUHWRFRQQHFWWKHSRZHUSOXJWRWKH
JURXQGHGRXWOHWZLWKRXWH[FHSWLRQV
%HVXUHWRJURXQGWKHHDUWKFDEOHLQRUGHUWRSUHYHQWDFFLGHQWFDXVHGE\HDUWKOHDNDJH
,90RWRU
%HVXUHWRXVHWKHVSHFL¿HGUDWHGPRWRU-8.,JHQXLQHSURGXFWLQRUGHUWRSUHYHQWDFFLGHQWFDXVHGE\
EXUQRXW
,IDFRPPHUFLDOO\DYDLODEOHFOXWFKPRWRULVXVHGZLWKWKHPDFKLQHEHVXUHWRVHOHFWRQHZLWKDQHQWDQ
JOHPHQWSUHYHQWLYHSXOOH\FRYHULQRUGHUWRSURWHFWDJDLQVWEHLQJHQWDQJOHGE\WKH9EHOW
%HIRUHRSHUDWLRQ
%HVXUHWRPDNHVXUHWKDWWKHFRQQHFWRUVDQGFDEOHVDUHIUHHIURPGDPDJHGURSRXWDQGORRVHQHVVEH
IRUHWXUQLQJWKHSRZHURQLQRUGHUWRSUHYHQWDFFLGHQWUHVXOWLQJLQSHUVRQDOLQMXU\RUGHDWK
1HYHUSXW\RXUKDQGLQWRWKHPRYLQJVHFWLRQVRIWKHPDFKLQHLQRUGHUWRSUHYHQWDFFLGHQWWKDWFDQUHVXOW
LQSHUVRQDOLQMXU\RUGHDWK
,QDGGLWLRQFKHFNWREHVXUHWKDWWKHGLUHFWLRQRIURWDWLRQRIWKHSXOOH\DJUHHVZLWKWKHDUURZVKRZQRQ
SXOOH\
,IWKHWDEOHVWDQGZLWKFDVWHUVLVXVHGEHVXUHWRVHFXUHWKHWDEOHVWDQGE\ORFNLQJWKHFDVWHUVRUZLWK
DGMXVWHUVLISURYLGHGLQRUGHUWRSURWHFWDJDLQVWDFFLGHQWFDXVHGE\DEUXSWVWDUWRIWKHPDFKLQH
'XULQJRSHUDWLRQ
%HVXUHQRWWRSXW\RXU¿QJHUVKDLURUFORWKLQJFORVHWRWKHPRYLQJVHFWLRQVVXFKDVWKHKDQGZKHHO
KDQGSXOOH\DQGPRWRURUSODFHVRPHWKLQJQHDUWKRVHVHFWLRQVZKLOHWKHPDFKLQHLVLQRSHUDWLRQLQRUGHU
WRSUHYHQWDFFLGHQWFDXVHGE\HQWDQJOHPHQWWKDWFDQUHVXOWLQSHUVRQDOLQMXU\RUGHDWK
%HVXUHQRWWRSODFH\RXU¿QJHUVQHDUWKHVXUURXQGDUHDRIWKHQHHGOHRULQVLGHWKHWKUHDGWDNHXSOHYHU
FRYHUZKHQWXUQLQJWKHSRZHURQRUZKLOHWKHPDFKLQHLVLQRSHUDWLRQLQRUGHUWRSUHYHQWDFFLGHQWWKDW
FDQUHVXOWLQSHUVRQDOLQMXU\RUGHDWK
7KHPDFKLQHUXQVDWDKLJKVSHHG1HYHUEULQJ\RXUKDQGVQHDUWKHPRYLQJVHFWLRQVVXFKDVORRSHU
VSUHDGHUQHHGOHEDUKRRNDQGFORWKWULPPLQJNQLIHGXULQJRSHUDWLRQLQRUGHUWRSURWHFW\RXUKDQGV
DJDLQVWLQMXU\,QDGGLWLRQEHVXUHWRWXUQWKHSRZHURIIDQGFKHFNWREHVXUHWKDWWKHPDFKLQHFRPSOHWH
O\VWRSVEHIRUHFKDQJLQJWKHWKUHDG
%HFDUHIXOQRWWRDOORZ\RXU¿QJHUVRUDQ\RWKHUSDUWVRI\RXUERG\WREHFDXJKWEHWZHHQWKHPDFKLQH
DQGWDEOHZKHQUHPRYLQJWKHPDFKLQHIURPRUUHSODFLQJLWRQWKHWDEOHLQRUGHUWRSUHYHQWDFFLGHQWWKDW
FDQUHVXOWLQSHUVRQDOLQMXU\RUGHDWK
– 13 –
24. ADJUSTING THE FORE & AFT POSITION OF NEEDLE BAR ROCKER
FRAME
WARNING :
To protect against possible personal injury due to abrupt start of the machine, be sure to start the following
work after turning the power off and ascertaining that the motor is at rest.
25. MOTOR PULLEY AND SEWING SPEED
Model Sewing speed
Effective
diameter of
handwheel
Number
of poles of
motor
Frequency
Number of
revolution of
motor
Effective diameter
of motor pulley
LG-158
LG-158-1 1,500 sti/min φ108.5 2
50Hz 2,865 rpm φ55
60Hz 3,430 rpm φ45
1) Use a 3-phase 400 W AC clutch motor.
2) Use an M type V-belt.
3) The relation among the motor pulley, the sewing speed of sewing machine is as shown in the table below:
(Caution) The effective diameter of motor pulley is obtained by subtracting 5 mm from its outside diameter.
The correct distance between the walking foot bar ❶and the presser bar ❷is
17 mm (43/64”) at the place shown in the figure when the stitch length is “0”.
1. Set the stitch length to “0”.
2. Loosen the needle bar driving crank clamp screw ❸.
3. Then, by making the clearance between the walking bar and the presser bar
to 17 mm (43/64”), tighten the screw ❸.
Adjust the relationship between the needle and the feed dog needle hole
as follows:
1. Set the stitch length to “0”.
2. Loosen the clamp screw ❹of the feed rock shaft crank.
3. Then, by bringing the needle to about the center or nearer to front from the
center of the needle hole of feed dog, tighten the feed rock shaft crank clamp
screw.
❶❷
❸❹
– 12 –
When the timing belt is removed or exchanged, match the timing of the main
shaft and the hook shaft as follows:
1. Place the thread take-up at the highest dead point.
2. Match the carved line ❶of the sewing hook thrust guard with the red carved
line ❷of the belt.
3. With this condition, pass the timing belt to the lower sprocket.
21. EXCHANGING THE TIMING BELT
WARNING :
To protect against possible personal injury due to abrupt start of the machine, be sure to start the following
work after turning the power off and ascertaining that the motor is at rest.
22. TIMING OF MAIN SHAFT AND HOOK SHAFT
WARNING :
To protect against possible personal injury due to abrupt start of the machine, be sure to start the following
work after turning the power off and ascertaining that the motor is at rest.
23. HOW TO REMOVE THE BOBBIN CASE HOLDER
WARNING :
To protect against possible personal injury due to abrupt start of the machine, be sure to start the following
work after turning the power off and ascertaining that the motor is at rest.
1. Remove the timing belt from the sprocket.
2. Remove the handwheel.
3. Loosen the set screw of the rear bushing and pull out the main shaft rear
bushing but be careful not to damage the bushing.
4. Pull out the timing belt from the hole from which the bushing was pulled out.
5. Install the new belt in the reverse order.
Remove the set screw ❶of the left and right bobbin case pressers and pull out
the bobbin case holder.
❶❷
❶
iv
iv
%HVXUHWRWXUQWKHSRZHURIIDQGFKHFNWREHVXUHWKDWWKHPDFKLQHDQGPRWRUFRPSOHWHO\VWRSEHIRUHUH
PRYLQJWKHEHOWFRYHUDQG9EHOWLQRUGHUWRSUHYHQWDFFLGHQWFDXVHGE\DEUXSWVWDUWRIWKHPDFKLQHRUPRWRU
,IDVHUYRPRWRULVXVHGZLWKWKHPDFKLQHWKHPRWRUGRHVQRWSURGXFHQRLVHZKLOHWKHPDFKLQHLVDWUHVW
%HVXUHQRWWRIRUJHWWRWXUQWKHSRZHURIILQRUGHUWRSUHYHQWDFFLGHQWFDXVHGE\DEUXSWVWDUWRIWKHPRWRU
1HYHUXVHWKHPDFKLQHZLWKWKHFRROLQJRSHQLQJRIWKHPRWRUSRZHUER[VKLHOGHGLQRUGHUWRSUHYHQW¿UH
DFFLGHQWE\RYHUKHDW
/XEULFDWLRQ
%HVXUHWRXVH-8.,JHQXLQHRLODQG-8.,JHQXLQHJUHDVHWRWKHSDUWVWREHOXEULFDWHG
,IWKHRLODGKHUHVRQ\RXUH\HRUERG\EHVXUHWRLPPHGLDWHO\ZDVKLWRIILQRUGHUWRSUHYHQWLQÀDPPD
WLRQRULUULWDWLRQ
,IWKHRLOLVVZDOORZHGXQLQWHQWLRQDOO\EHVXUHWRLPPHGLDWHO\FRQVXOWDPHGLFDOGRFWRULQRUGHUWRSUH
YHQWGLDUUKHDRUYRPLWLQJ
0DLQWHQDQFH
,QSUHYHQWLRQRIDFFLGHQWFDXVHGE\XQIDPLOLDULW\ZLWKWKHPDFKLQHUHSDLUDQGDGMXVWPHQWKDVWREH
FDUULHGRXWE\DVHUYLFHWHFKQLFLDQZKRLVWKRURXJKO\IDPLOLDUZLWKWKHPDFKLQHZLWKLQWKHVFRSHGH¿QHG
LQWKHLQVWUXFWLRQPDQXDO%HVXUHWRXVH-8.,JHQXLQHSDUWVZKHQUHSODFLQJDQ\RIWKHPDFKLQHSDUWV
-8.,DVVXPHVQRUHVSRQVLELOLW\IRUDQ\DFFLGHQWFDXVHGE\LPSURSHUUHSDLURUDGMXVWPHQWRUWKHXVHRI
DQ\SDUWRWKHUWKDQ-8.,JHQXLQHRQH
,QSUHYHQWLRQRIDFFLGHQWFDXVHGE\XQIDPLOLDULW\ZLWKWKHPDFKLQHRUHOHFWULFDOVKRFNDFFLGHQWEHVXUH
WRDVNDQHOHFWULFDOWHFKQLFLDQRI\RXUFRPSDQ\RU-8.,RUGLVWULEXWRULQ\RXUDUHDIRUUHSDLUDQGPDLQWH
QDQFHLQFOXGLQJZLULQJRIHOHFWULFDOFRPSRQHQWV
:KHQFDUU\LQJRXWUHSDLURUPDLQWHQDQFHRIWKHPDFKLQHZKLFKXVHVDLUGULYHQSDUWVVXFKDVDQDLUF\O
LQGHUEHVXUHWRUHPRYHWKHDLUVXSSO\SLSHWRH[SHODLUUHPDLQLQJLQWKHPDFKLQHEHIRUHKDQGLQRUGHUWR
SUHYHQWDFFLGHQWFDXVHGE\DEUXSWVWDUWRIWKHDLUGULYHQSDUWV
%HVXUHWRFKHFNWKDWVFUHZVDQGQXWVDUHIUHHIURPORRVHQHVVDIWHUFRPSOHWLRQRIUHSDLUDGMXVWPHQW
DQGSDUWUHSODFHPHQW
%HVXUHWRSHULRGLFDOO\FOHDQXSWKHPDFKLQHGXULQJLWVGXUDWLRQRIXVH%HVXUHWRWXUQWKHSRZHURII
DQGYHULI\WKDWWKHPDFKLQHDQGPRWRUVWRSFRPSOHWHO\EHIRUHFOHDQLQJWKHPDFKLQHLQRUGHUWRSUHYHQW
DFFLGHQWFDXVHGE\DEUXSWVWDUWRIWKHPDFKLQHRUPRWRU
%HVXUHWRWXUQWKHSRZHURIIDQGYHULI\WKDWWKHPDFKLQHDQGPRWRUVWRSFRPSOHWHO\EHIRUHFDUU\LQJRXW
PDLQWHQDQFHLQVSHFWLRQRUUHSDLURIWKHPDFKLQH)RUWKHPDFKLQHZLWKDFOXWFKPRWRUWKHPRWRUZLOO
NHHSUXQQLQJIRUDZKLOHE\LQHUWLDHYHQDIWHUWXUQLQJWKHSRZHURII6REHFDUHIXO
,IWKHPDFKLQHFDQQRWEHQRUPDOO\RSHUDWHGDIWHUUHSDLURUDGMXVWPHQWLPPHGLDWHO\VWRSRSHUDWLRQDQG
FRQWDFW-8.,RUWKHGLVWULEXWRULQ\RXUDUHDIRUUHSDLULQRUGHUWRSUHYHQWDFFLGHQWWKDWFDQUHVXOWLQSHU
VRQDOLQMXU\RUGHDWK
,IWKHIXVHKDVEORZQEHVXUHWRWXUQWKHSRZHURIIDQGHOLPLQDWHWKHFDXVHRIEORZLQJRIWKHIXVHDQG
UHSODFHWKHEORZQIXVHZLWKDQHZRQHLQRUGHUWRSUHYHQWDFFLGHQWWKDWFDQUHVXOWLQSHUVRQDOLQMXU\RU
GHDWK
%HVXUHWRSHULRGLFDOO\FOHDQXSWKHDLUYHQWRIWKHIDQDQGLQVSHFWWKHDUHDDURXQGWKHZLULQJLQRUGHUWR
SUHYHQW¿UHDFFLGHQWRIWKHPRWRU
2SHUDWLQJHQYLURQPHQW
%HVXUHWRXVHWKHPDFKLQHXQGHUWKHHQYLURQPHQWZKLFKLVQRWDIIHFWHGE\VWURQJQRLVHVRXUFHHOHFWUR
PDJQHWLFZDYHVVXFKDVDKLJKIUHTXHQF\ZHOGHULQRUGHUWRSUHYHQWDFFLGHQWFDXVHGE\PDOIXQFWLRQRI
WKHPDFKLQH
1HYHURSHUDWHWKHPDFKLQHLQDQ\SODFHZKHUHWKHYROWDJHÀXFWXDWHVE\PRUHWKDQUDWHGYROWDJH
LQRUGHUWRSUHYHQWDFFLGHQWFDXVHGE\PDOIXQFWLRQRIWKHPDFKLQH
%HVXUHWRYHULI\WKDWWKHDLUGULYHQGHYLFHVXFKDVDQDLUF\OLQGHURSHUDWHVDWWKHVSHFL¿HGDLUSUHVVXUH
EHIRUHXVLQJLWLQRUGHUWRSUHYHQWDFFLGHQWFDXVHGE\PDOIXQFWLRQRIWKHPDFKLQH
7RXVHWKHPDFKLQHZLWKVDIHW\EHVXUHWRXVHLWXQGHUWKHHQYLURQPHQWZKLFKVDWLV¿HVWKHIROORZLQJ
FRQGLWLRQV
$PELHQWWHPSHUDWXUHGXULQJRSHUDWLRQ &WR&
5HODWLYHKXPLGLW\GXULQJRSHUDWLRQ WR
'HZFRQGHQVDWLRQFDQRFFXULIEULQJLQJWKHPDFKLQHVXGGHQO\IURPDFROGHQYLURQPHQWWRDZDUPRQH
6REHVXUHWRWXUQWKHSRZHURQDIWHUKDYLQJZDLWHGIRUDVXI¿FLHQWSHULRGRIWLPHXQWLOWKHUHLVQRVLJQ
RIZDWHUGURSOHWLQRUGHUWRSUHYHQWDFFLGHQWFDXVHGE\EUHDNDJHRUPDOIXQFWLRQRIWKHHOHFWULFDOFRPSR
QHQWV
%HVXUHWRVWRSRSHUDWLRQZKHQOLJKWQLQJÀDVKHVIRUWKHVDNHRIVDIHW\DQGUHPRYHWKHSRZHUSOXJLQ
RUGHUWRSUHYHQWDFFLGHQWFDXVHGE\EUHDNDJHRUPDOIXQFWLRQRIWKHHOHFWULFDOFRPSRQHQWV
'HSHQGLQJRQWKHUDGLRZDYHVLJQDOFRQGLWLRQWKHPDFKLQHPD\JHQHUDWHQRLVHLQWKH79RUUDGLR,IWKLV
RFFXUVXVHWKH79RUUDGLRZLWKNHSWZHOODZD\IURPWKHPDFKLQH
,QRUGHUWRHQVXUHWKHZRUNHQYLURQPHQWORFDOODZVDQGUHJXODWLRQVLQWKHFRXQWU\ZKHUHWKHVHZLQJ
PDFKLQHLVLQVWDOOHGVKDOOEHIROORZHG
,QWKHFDVHWKHQRLVHFRQWUROLVQHFHVVDU\DQHDUSURWHFWRURURWKHUSURWHFWLYHJHDUVKRXOGEHZRUQDF
FRUGLQJWRWKHDSSOLFDEOHODZVDQGUHJXODWLRQV
'LVSRVDORISURGXFWVDQGSDFNDJHVDQGWUHDWPHQWRIXVHGOXEULFDWLQJRLOVKRXOGEHFDUULHGRXWSURSHUO\
DFFRUGLQJWRWKHUHOHYDQWODZVRIWKHFRXQWU\LQZKLFKWKHVHZLQJPDFKLQHLVXVHG

v
1. Keep your hands away from needle when you turn ON the power switch or while the machine is
in operation.
2. Do not put your fingers into the thread take-up cover while the machine is operating.
3. Turn OFF the power switch when tilting the machine head, or removing the belt cover or the V
belts.
4. During operation, be careful not to allow your or any other person’s head, hands or clothes to
come close to the handwheel, V belt and motor. Also, do not place anything close to them.
5. Do not operate your machine with the belt cover and finger guard removed.
6. When tilting the machine head, be sure to confirm that the head support bar is properly attached
to your machine head, and be careful not to allow your fingers or the like to be pinched in the
machine head.
1. To ensure safety, never operate the machine with the ground wire for the power supply removed.
2. When inserting/removing the power plug, the power switch has to be turned OFF in advance.
3. In time of thunder and lightening, stop your work and disconnect the power plug from the re-
ceptacle so as to ensure safety.
4. If the machine is suddenly moved from a cold place to a warm place, dew condensation may be
observed. In this case, turn ON the power to the machine after you have confirmed that there is
no danger of water drops in the machine.
5. To prevent fires, periodically draw out the power plug from the plug socket and clean the root of
the pins and the space between pins.
6. The hook rotates at a high speed while the machine is in operation.
To prevent possible injury to hands, be sure to keep your hands away from the vicinity of the
hook during operation. In addition, be sure to turn OFF the power to the machine when replac-
ing the bobbin.
7. To avoid possible accidents due to abrupt start of the machine, be sure to turn OFF the power to
the machine.
8. Be careful of handling this product so as not to pour water or oil, shock by dropping, and the
like since this product is a precision instrument.
9. When tilting or returning the sewing machine to the home position, hold the upper side of the
machine head with both hands and perform the work quietly so that fingers or the like are not
caught in the machine.
• Before you put the machine into operation for the first time after the set-up, clean it thoroughly.
Remove all dust gathering during transportation and oil it well.
• Confirm that voltage has been correctly set.
Confirm that the power plug has been properly connected to the power supply.
• Never use the machine in the state where the voltage type is different from the designated one.
• The direction of normal rotation of the machine is counterclockwise as observed from the pulley side.
Take care not to allow the machine to rotate in the reverse direction.
• Never operate the machine unless the head base has been filled with oil.
• For a test run, remove the bobbin case and the needle thread.
• Be sure to use your sewing machine with the speed of stitch lowered to 600 sti/min or less for the first
month after installation.
• Operate the handwheel after the machine has totally stopped.
BEFORE OPERATION
CAUTION :
Check the following so as to prevent maloperation of and damage to the machine.
CAUTION :
Note that safety devices such as “eye guard”, “finger guard”, etc. may be omitted from the
illustrations in this Instruction Manual for easy explanation.
When operating the machine, be sure not to remove these safety devices.
Precautions to be taken so as to use the LG-158, 158-1 more safely
– 11 –
19. ADJUSTING THE PRESSER FOOT AND THE WALKING FOOT
WARNING :
To protect against possible personal injury due to abrupt start of the machine, be sure to start the following
work after turning the power off and ascertaining that the motor is at rest.
20. ADJUSTING THE LIFTING AMOUNT OF THE PRESSER FOOT AND
THE WALKING FOOT
WARNING :
To protect against possible personal injury due to abrupt start of the machine, be sure to start the following
work after turning the power off and ascertaining that the motor is at rest.
1)When the lifting amount of the presser foot and the walking foot is to be made equal:
1. Lower the presser foot and loosen the clamp screw ❶of the upper feed spring rod.
2. Rotate the handwheel in the normal direction and when the lower surface of the presser foot and walking foot come to the
same position as the surface of the throat plate, tighten the clamp screw ❶.
2)When the walking foot is to be raised higher than the presser foot:
1. Lower the presser foot, rotate the handwheel in the normal direction and when the lower surface of the presser foot and walk-
ing foot come to the same position as the upper surface of the throat plate, loosen the set screw of the upper feed spring rod.
2. Then, rotate the handwheel toward the normal direction and firmly tighten the clamp screw.
3)When the presser foot is to be raised higher than the walking foot:
1. Lower the presser foot, rotate the handwheel in the normal direction and when the upper surface of the presser foot and
walking foot come to the same position as the upper surface of the throat plate, loosen the screw ❶of the feed rod, adjust as
follows:
2. Then rotate the handwheel toward the reverse direction and firmly tighten the clamp screw.
* In both cases of 2) and 3) above, after the set screw of the upper feed spring rod is loosened, the more the handwheel is rotated
in the normal or reverse direction, the difference of the lifting amount of the presser foot and the walking foot gets larger.
The lifting amount of the presser foot and the walking foot is adjusted according
to the thickness of the sewing cloth. To make this adjustment, remove the feed
adjusting screw nut ❶with a spanner and by changing the position of the hole
of the feed adjusting screw ❷, the lifting amount changes.
The adjustment can be done in 4 steps. If it’s positioned to screw hole of top-
most position, the lifting amount becomes maximum and if it’s positioned to the
screw hole of bottom position, the lifting amount becomes minimum. After this
adjustment, securely tighten the nut ❶.
❶
❶
❷

– 10 –
17. ADJUSTING THE HEIGHT OF THE FEED DOG
WARNING :
To protect against possible personal injury due to abrupt start of the machine, be sure to start the following
work after turning the power off and ascertaining that the motor is at rest.
16. ADJUSTING THE STITCH LENGTH
18. ON REVERSE SEWING
While pushing the feed adjusting button ❶, rotate the handwheel and when the
end of the button has entered the groove of the cam, rotate the handwheel fore
and aft while the feed adjusting button ❶is being pushed, until the desired fig-
ure of the graduator plate is matched with the carved line ❷of the feed adjuster.
When the desired figure and the carved line ❷are matched, release the feed
adjusting button.
The figure indicates the length of the stitch in mm unit. (10 →stitch length =
10mm (25/64”)).
The figure on the graduation plate can be seen from the sight window even with
the top cover in closed condition.
The maximum height of the feed dog above the throat plate is 1.2 - 1.4 mm (3/64
- 1/16”).
Adjust to this position by loosening the screw ❶.
* When the feed dog is exchanged, be sure to tighten the ❷set screw of the
feed dog firmly. Further, loosen nut ❷, tighten screw ❸so that screw push
up the feed dog lightly and tighten the nut ❷.
* In case the height of the feed dog does not become parallel, adjust by screw
❸.
Hang the chain to the lifting crank link spring latch plate ❶with a hook and catch
the other end of the chain to the pedal.
When reverse sewing is to be performed, step on this pedal until the variable
speed link hits the stopper ❷.
❶
❷
❶
❸
❷
❶
❷
vi
DECLARATION OF INCORPORATION OF PARTLY COMPLETED MACHINERY
We hereby declare that the sewing machine (sewing head) described below ;
1. Must not be put into service until the machinery to which it is incorporated has been declared in
conformity with the provisions of the Directive 2006/42/EC, and
2. Conforms to the essential requirements of the Directive 2006/42/EC, described in the technical
documentation, and
3. To be prepared with the above technical documentation compiled in accordance with part B of
Annex VII, and
4. Also to conform to the RoHS Directive 2011/65/EU
5. Relevant information on which should be transmitted in response to a reasoned request by the
national authorities, by the electronic method or other according to the request.
Applied harmonized standards, in particular :
EN ISO12100, EN ISO10821, EN 50581
Manufacturer :
JUKI CORPORATION
2-11-1, Tsurumaki, Tama-shi, Tokyo, Japan
Model
Description Industrial Sewing Machine
Function make stitches and sew
LG-158 Series

vii
CONTENTS
SPECIFICATIONS........................................................................................................................ 1
1. INSTALLING THE MACHINE ................................................................................................ 1
2. INSTALLING THE THREAD STAND..................................................................................... 2
3. LUBRICATION ....................................................................................................................... 3
4. HOW TO INSTALL THE NEEDLE ......................................................................................... 3
5. ON THREADS........................................................................................................................ 4
6. HOW TO PASS THE BOBBIN THREAD............................................................................... 4
7. HOW TO THREAD THE MACHINE HEAD............................................................................ 4
8. THREAD TENSION................................................................................................................ 5
9. HOW TO WIND A BOBBIN THREAD.................................................................................... 6
10. ON THE SAFETY DEVICE .................................................................................................... 6
11. ADJUSTING THE WALKING FOOT AND PRESSER FOOT ................................................ 7
12. INSTALLING AND DISMANTLING THE SEWING HOOK .................................................... 8
13. ADJUSTING THE BOBBIN CASE OPENING LEVER.......................................................... 8
14. HEIGHT OF THE PRESSER FOOT....................................................................................... 9
15. INSTALLING POSITION OF THE PRESSER FOOT............................................................. 9
16. ADJUSTING THE STITCH LENGTH................................................................................... 10
17. ADJUSTING THE HEIGHT OF THE FEED DOG ................................................................ 10
18. ON REVERSE SEWING ...................................................................................................... 10
19. ADJUSTING THE PRESSER FOOT AND THE WALKING FOOT...................................... 11
20. ADJUSTING THE LIFTING AMOUNT OF THE PRESSER FOOT AND THE WALKING
FOOT................................................................................................................................... 11
21. EXCHANGING THE TIMING BELT ..................................................................................... 12
22. TIMING OF MAIN SHAFT AND HOOK SHAFT .................................................................. 12
23. HOW TO REMOVE THE BOBBIN CASE HOLDER............................................................ 12
24. ADJUSTING THE FORE & AFT POSITION OF NEEDLE BAR ROCKER FRAME ........... 13
25. MOTOR PULLEY AND SEWING SPEED............................................................................ 13
26. PROBLEMS WITH SEWING AND CORRECTIVE MEASURES......................................... 14
– 9 –
14. HEIGHT OF THE PRESSER FOOT
WARNING :
To protect against possible personal injury due to abrupt start of the machine, be sure to start the following
work after turning the power off and ascertaining that the motor is at rest.
15. INSTALLING POSITION OF THE PRESSER FOOT
WARNING :
To protect against possible personal injury due to abrupt start of the machine, be sure to start the following
work after turning the power off and ascertaining that the motor is at rest.
Raise up the knee lifter.
The presser foot will go up 16 mm (5/8”) from the surface of the throat plate and
stops.
When this height is less than 16 mm (5/8”):
1. With the knee lifter in raised up condition, loosen the set screw ❶of the knee
lifter mounting bracket, insert a wooden block of 16 mm (5/8”) between the
presser foot and the throat plate and in that condition, tighten the set screw
❶of the knee lifter mounting bracket.
2. Remove the wooden block.
* Maximum rising amount of the presser foot by means of the knee lifter is 16
mm (5/8").
When the presser foot hits the walking foot or the needle, adjust as follows:
1. Loosen the pressure regulating thumb screw .
2. If the presser foot is lowered and screw ❶and ❷are loosened, the presser
bar will rotate freely.
3. Adjust the position of the presser foot and by determining the position of the
needle and the needle hole of the walking foot and tighten the screw ❶.
4. After these adjustments if the presser foot does not go up or down smoothly,
loosen the set screw of the presser bar guide sleeve , rotate the presser
bar guide sleeve to right and left and by bringing the presser foot to the posi-
tion where it will go up and down smoothly, tighten the set screw.
❶
❷
❶

– 8 –
Rotate the handwheel toward the normal direction (with the bobbin case open-
er in rotated condition toward the arrow direction) and as shown in the figure,
when the bobbin case opening lever has retreated to the rearest position, loos-
en the clamp screw ❶of the bobbin case opening lever and adjust so that the
clearance between the bobbin case opener and the bobbin case opening lever
comes to 0.3 - 0.4 mm (3/256 - 1/64”).
12. INSTALLING AND DISMANTLING THE SEWING HOOK
WARNING :
To protect against possible personal injury due to abrupt start of the machine, be sure to start the following
work after turning the power off and ascertaining that the motor is at rest.
13. ADJUSTING THE BOBBIN CASE OPENING LEVER
WARNING :
To protect against possible personal injury due to abrupt start of the machine, be sure to start the following
work after turning the power off and ascertaining that the motor is at rest.
1. Dismantling the sewing hook
1) Remove the presser foot, walking foot, throat plate, feed dog and bobbin case
opening lever.
2) Tilt the machine and loosen the set screw ❶of the small gear.
3) Rotate the handwheel to bring the needle bar to its highest position and re-
move the sewing hook by pulling it upwards.
(Note) At this point, be sure to see that the interlocking of the large gear
and the small gear is not slipping. (If the gears are marked, it will
help)
2. How to install the sewing hook
1) To install the sewing hook, reverse the dismantling procedure. In so doing,
watch the following:
* That the bobbin case opening lever link is inserted into the link pin.
* Make the No.1 set screw of the small gear (the first screw seen when it is ro-
tated in normal direction) enter the V-groove of the sewing hook driving shaft.
2) In order that the protruding part of the bobbin case holder enters the groove
of the throat plate, rotate the bobbin case holder by the hand and after that,
set the throat plate.
0.3-0.4mm
❶
Protruding part
❶
– 1 –
SPECIFICATIONS
Model LG-158 LG-158-1
Type of sewing
machine head
2-needle, unison-feed lockstitch machine
(with a reverse-feed stitching function)
1-needle, unison-feed, lockstitch machine
(with a reverse-feed stitching function)
Usage For sewing extremely heavy weight & heavy weight materials
Sewing speed Max. 1,500 sti/min
Lift of presser foot Max. 16 mm
Stitch length 0 〜10 mm
Needle DD x 1 #25 2 ea. DD x 1 #25 1 ea.
Reverse sewing By treading pedal
Needle gauge 3/4" (Standard), 1/4", 5/16", 3/8", 1/2", 5/8", 7/8",
1", 1-1/4", 1-1/2", 2", 2-1/4", 2-1/2" -
Lubricating oil JUKI New Defrix Oil No. 1
Noise
- Equivalent continuous emission sound pressure
level (LpA) at the workstation:
A-weighted value of 87.5 dB; (Includes KpA = 2.5
dB); according to ISO 10821- C.6.2 - ISO 11204
GR2 at 1,500 sti/min.
- Sound power level (LWA);
A-weighted value of 97.5 dB; (Includes KWA = 2.5
dB); according to ISO 10821- C.6.2 - ISO 3744
GR2 at 1,500 sti/min.
- Equivalent continuous emission sound pressure
level (LpA) at the workstation:
A-weighted value of 87.5 dB; (Includes KpA = 2.5
dB); according to ISO 10821- C.6.2 - ISO 11204
GR2 at 1,500 sti/min.
- Sound power level (LWA);
A-weighted value of 96.5 dB; (Includes KWA = 2.5
dB); according to ISO 10821- C.6.2 - ISO 3744
GR2 at 1,500 sti/min.
1. INSTALLING THE MACHINE
1) When carrying the sewing machine, be sure to carry by two
people.
(Caution) Do not hold the pulley.
2) Do not place a protruding object, such as a screw driver, at
a place where the sewing machine is to be installed.
3) Fix the oil pan supplied with the machine on the table in 10
placed with nails.
Set the oil pan so that its U-shaped notch is brought to the
opposite side of the operator.
4) Attaching the hinge arm
Install hinge arms ❶to the front and rear (at one location
each) of the sewing machine head with screws ❷. Hook
hinge seats ❸on hinge arms ❶.
(When hooking hinge seats ❸on the hinge arms ❶, face
the counter sunk plane of the hinge seats ❸upward.)
❸
❷
❶
2mm 2mm
30mm

– 2 –
❹
5) Installation of the machine
Put the sewing machine head on the table with the sewing
machine head and hinge seats ❸aligned.
Fix hinge seat ❸with screw ❹, washer ❺and nut ❻sup-
plied with the machine.
6) Installing the coupling chain
Attach chain
❽supplied with the unit to S-shaped fitting ❼
which has been installed on the presser lifting lever.
Install S-shaped fitting ❿and chain ⓫to changeover link
spring peg plate ❾.
Bring down chains ❽to ⓫respectively from the oil pan to
connect to the table stand.
❺
❻
2. INSTALLING THE THREAD STAND
Assemble the thread stand device. Fit it in the hole in the table.
Tighten locknut ❶so that the thread stand does not fluctuate.
❶
❽
❾
❼❿
⓫
– 7 –
1. Timing of the needle with the sewing hook
First, set the feed amount to “0” and verify that the clearance between the presser bar and the walking bar is 17mm (43/64”).
Raise up the presser foot and after matching the feed graduator plate to “0”, remove the throat plate.
When the needle has risen 3.5 mm (9/64”) from the lowest point,
Match the blade point of the sewing hook with the center of the needle. At this point,
* The clearance between the needle side surface and the blade point of the sewing hook comes to 0 -0.05 mm (1/512”),
* The clearance between the needle side surface and the needle guard of the sewing hook comes to 0 -0.05 mm (1/512”),
* The distance between the upper tip of the thread hole of the needle and the tip of the sewing hook blade comes to 3.0 mm (1/8”).
2. Height of the needle bar
First, set the feed graduator to 0 mm, and bring the needle bar to its lowest point. At this point, make the distance between the
bottom end of the needle clamp to the surface of the throat plate to 21.2 mm (53/64”) and tighten the needle bar clamping screw.
11. ADJUSTING THE WALKING FOOT AND PRESSER FOOT
WARNING :
To protect against possible personal injury due to abrupt start of the machine, be sure to start the following
work after turning the power off and ascertaining that the motor is at rest.
3. How to match the timing of sewing hook
Loosen the set screw ❶of the large gear of the hook shaft,
move the large gear ❷to right and left and when the center
of the needle and the blade point of the sewing hook are
matched together, tighten the set screw ❶. At this point, be
careful to see that the center gear of the large gear and the
center of the hook shaft do not slide each other.
4. Adjusting the clearance between the needle and blade point of the sewing hook
Make adjustment as follows:
1) Remove the presser foot and the throat plate and tilt the machine.
2) Loosen the clamp screw ❸and set screw ❹of the hook driving shaft saddle of the adjusting side.
3) Tap the hook driving shaft saddle ❺lightly and move it to right and left and by making the clearance between the needle and the
blade point of the hook to 0 - 0.05 mm (1/512"), tighten the clamp screw ❸and set screw ❹firmly.
0 - 0.05mm
0 - 0.05mm
❶
❷
❸
❹
❺

– 6 –
9. HOW TO WIND A BOBBIN THREAD
10. ON THE SAFETY DEVICE
The bobbin thread winder of this machine is built-in to the frame of the machine.
To wind the bobbin thread, first insert the bobbin to the bobbin winding shaft ❶
as far as it will go. Next, pass the thread to bobbin thread guide base ❸and
bobbin thread winder guide ❷, as shown in the figure, and wind the thread to
the bobbin several times from the bottom. Then, push in the bobbin trip latch ❹
and rotate the machine. When the fixed amount of thread is wound, the winding
will stop automatically.
During the running of the machine, sometimes the thread gets caught by the
sewing hook, causing an unnecessary exertion to the machine. In such cases,
the safety device goes into action automatically to prevent damages to the ma-
chine. When the safety device is acting, the feed and the sewing hook do not
move even if the handwheel is rotated.
When the safety device is acting, remove the cause of the defect and set the
safety device to the original status by the following method:
1. While pushing the push button ❶, push the auxiliary handwheel and rotate
strongly toward the left direction.
Be sure to verify that the safety device is set and then operate the machine.
2. When the safety device jumps into action quickly, remove the timing belt and
rotate the adjusting screw ❷to right.
Conversely, when the safety device does not go into action and the machine is
damaged (needle, sewing hook, etc.), rotate the adjusting screw ❷to left. With
a slight force, the safety device will spring to action.
❶
❷
❸
❹
❶
❷
– 3 –
3. LUBRICATION
WARNING :
To protect against possible personal injury due to abrupt start of the machine, be sure to start the following
work after turning the power off and ascertaining that the motor is at rest.
4. HOW TO INSTALL THE NEEDLE
WARNING :
To protect against possible personal injury due to abrupt start of the machine, be sure to start the following
work after turning the power off and ascertaining that the motor is at rest.
* Before starting the machine:
1. For lubrication, use JUKI New Defrix Oil No.1 which is in the accessory box.
2. Before operating the machine, lubricate the parts shown by arrows in the figure. To lubricate the face part, loosen the face plate
set screw and by placing the face plate on top, lubricate the oil wick and the moving parts.
3. When the machine is to be used continuously, lubricate it at least twice a day.
4. Finally, when the machine is to be used for the first time or when it is used to sew long length material continuously, be sure to
lubricate it often.
Use DD×1 needle. There are many types and size numbers of needles but all of
them depend upon the thickness of the thread or kinds of sewing material, so be
sure to select appropriate type and size number.
Standard is #25.
To install the needle:
1. Raise up the needle bar to its highest position.
2. Long grooves of both right and left needles should be facing inside (both long
grooves facing each other) and insert the needles deep into the needle hole
as far as they will go in and set them tightly with needle clamp screw.

– 4 –
5. ON THREADS
6. HOW TO PASS THE BOBBIN THREAD
WARNING :
To protect against possible personal injury due to abrupt start
of the machine, be sure to start the following work after turning
the power off and ascertaining that the motor is at rest.
7. HOW TO THREAD THE MACHINE HEAD
WARNING :
To protect against possible personal injury due
to abrupt start of the machine, be sure to start
the following work after turning the power off
and ascertaining that the motor is at rest.
For the needle thread, left-twist thread should be used. For the bobbin thread,
either left-twist or right-twist thread can be used.
To verify the twist of thread, hold the thread as shown in the figure and if the
thread is twisted toward front by the left hand and is wound tight, it is a right-
twist thread. On the contrary, if the thread in the right hand is twisted toward
front and is wound tightly, it is left-twist thread.
Open the lever of the sewing hook, insert the bobbin and knock down the lever
to its original position.
If the bobbin thread is pulled out from the groove of the sewing hook, the thread
will pass under the bobbin thread tension spring.
Pull out the bobbin thread about 5cm (about 2”) on top of the slide plate.
Pass the needle threads in order shown in below.
As you face the machine, left side needle thread should be
passed from ❶-⓭(Left thread tension disc →upper hole of
take-up lever →left needle)
The right side needle should be passed, in order, from
---❺-❽--❿-⓫-- (right thread tension
disc →lower hole of take-up lever →right needle)
❶
❽
❿
⓫
❷
❸
❹
❺
❻
❼
❾
⓬
⓭
– 5 –
8. THREAD TENSION
WARNING :
To protect against possible personal injury due to abrupt start of the machine, be sure to start the following
work after turning the power off and ascertaining that the motor is at rest.
* Needle thread tension
The thread tension of the right side needle can be adjusted by the right side
thread tension nut ❶and the left side needle thread can be adjusted by the left
side thread tension nut. Turn the nut to right to make the needle thread tension
stronger and to left to make the tension weaker.
* Bobbin thread tension
The thread tension of the bobbin thread can be adjusted by turning the thread
tension screw of the bobbin case holder.
If the screw is tightened, the tension becomes stronger and if it’s loosened, the
tension becomes weaker.
* Thread take-up spring
To adjust the strength of the thread take-up spring, loosen the thread take-up
spring shaft screw ❶, and turn the thread take-up guide shaft ❷gently toward
left. To weaken the tension, rotate it toward right. After the adjustment, tighten
the screw ❶. To adjust the stroke of the take-up spring, loosen the stopper set
screw ❸and move the stopper ❹to right and left. If the stopper is moved to-
ward right, the stroke gets bigger.
Thread tension screw
❶
❷
❶
❷
❸
❹

– 6 –
9. HOW TO WIND A BOBBIN THREAD
10. ON THE SAFETY DEVICE
The bobbin thread winder of this machine is built-in to the frame of the machine.
To wind the bobbin thread, first insert the bobbin to the bobbin winding shaft ❶
as far as it will go. Next, pass the thread to bobbin thread guide base ❸and
bobbin thread winder guide ❷, as shown in the figure, and wind the thread to
the bobbin several times from the bottom. Then, push in the bobbin trip latch ❹
and rotate the machine. When the fixed amount of thread is wound, the winding
will stop automatically.
During the running of the machine, sometimes the thread gets caught by the
sewing hook, causing an unnecessary exertion to the machine. In such cases,
the safety device goes into action automatically to prevent damages to the ma-
chine. When the safety device is acting, the feed and the sewing hook do not
move even if the handwheel is rotated.
When the safety device is acting, remove the cause of the defect and set the
safety device to the original status by the following method:
1. While pushing the push button ❶, push the auxiliary handwheel and rotate
strongly toward the left direction.
Be sure to verify that the safety device is set and then operate the machine.
2. When the safety device jumps into action quickly, remove the timing belt and
rotate the adjusting screw ❷to right.
Conversely, when the safety device does not go into action and the machine is
damaged (needle, sewing hook, etc.), rotate the adjusting screw ❷to left. With
a slight force, the safety device will spring to action.
❶
❷
❸
❹
❶
❷
– 3 –
3. LUBRICATION
WARNING :
To protect against possible personal injury due to abrupt start of the machine, be sure to start the following
work after turning the power off and ascertaining that the motor is at rest.
4. HOW TO INSTALL THE NEEDLE
WARNING :
To protect against possible personal injury due to abrupt start of the machine, be sure to start the following
work after turning the power off and ascertaining that the motor is at rest.
* Before starting the machine:
1. For lubrication, use JUKI New Defrix Oil No.1 which is in the accessory box.
2. Before operating the machine, lubricate the parts shown by arrows in the figure. To lubricate the face part, loosen the face plate
set screw and by placing the face plate on top, lubricate the oil wick and the moving parts.
3. When the machine is to be used continuously, lubricate it at least twice a day.
4. Finally, when the machine is to be used for the first time or when it is used to sew long length material continuously, be sure to
lubricate it often.
Use DD×1 needle. There are many types and size numbers of needles but all of
them depend upon the thickness of the thread or kinds of sewing material, so be
sure to select appropriate type and size number.
Standard is #25.
To install the needle:
1. Raise up the needle bar to its highest position.
2. Long grooves of both right and left needles should be facing inside (both long
grooves facing each other) and insert the needles deep into the needle hole
as far as they will go in and set them tightly with needle clamp screw.

– 2 –
❹
5) Installation of the machine
Put the sewing machine head on the table with the sewing
machine head and hinge seats ❸aligned.
Fix hinge seat ❸with screw ❹, washer ❺and nut ❻sup-
plied with the machine.
6) Installing the coupling chain
Attach chain
❽supplied with the unit to S-shaped fitting ❼
which has been installed on the presser lifting lever.
Install S-shaped fitting ❿and chain ⓫to changeover link
spring peg plate ❾.
Bring down chains ❽to ⓫respectively from the oil pan to
connect to the table stand.
❺
❻
2. INSTALLING THE THREAD STAND
Assemble the thread stand device. Fit it in the hole in the table.
Tighten locknut ❶so that the thread stand does not fluctuate.
❶
❽
❾
❼❿
⓫
– 7 –
1. Timing of the needle with the sewing hook
First, set the feed amount to “0” and verify that the clearance between the presser bar and the walking bar is 17mm (43/64”).
Raise up the presser foot and after matching the feed graduator plate to “0”, remove the throat plate.
When the needle has risen 3.5 mm (9/64”) from the lowest point,
Match the blade point of the sewing hook with the center of the needle. At this point,
* The clearance between the needle side surface and the blade point of the sewing hook comes to 0 -0.05 mm (1/512”),
* The clearance between the needle side surface and the needle guard of the sewing hook comes to 0 -0.05 mm (1/512”),
* The distance between the upper tip of the thread hole of the needle and the tip of the sewing hook blade comes to 3.0 mm (1/8”).
2. Height of the needle bar
First, set the feed graduator to 0 mm, and bring the needle bar to its lowest point. At this point, make the distance between the
bottom end of the needle clamp to the surface of the throat plate to 21.2 mm (53/64”) and tighten the needle bar clamping screw.
11. ADJUSTING THE WALKING FOOT AND PRESSER FOOT
WARNING :
To protect against possible personal injury due to abrupt start of the machine, be sure to start the following
work after turning the power off and ascertaining that the motor is at rest.
3. How to match the timing of sewing hook
Loosen the set screw ❶of the large gear of the hook shaft,
move the large gear ❷to right and left and when the center
of the needle and the blade point of the sewing hook are
matched together, tighten the set screw ❶. At this point, be
careful to see that the center gear of the large gear and the
center of the hook shaft do not slide each other.
4. Adjusting the clearance between the needle and blade point of the sewing hook
Make adjustment as follows:
1) Remove the presser foot and the throat plate and tilt the machine.
2) Loosen the clamp screw ❸and set screw ❹of the hook driving shaft saddle of the adjusting side.
3) Tap the hook driving shaft saddle ❺lightly and move it to right and left and by making the clearance between the needle and the
blade point of the hook to 0 - 0.05 mm (1/512"), tighten the clamp screw ❸and set screw ❹firmly.
0 - 0.05mm
0 - 0.05mm
❶
❷
❸
❹
❺

– 8 –
Rotate the handwheel toward the normal direction (with the bobbin case open-
er in rotated condition toward the arrow direction) and as shown in the figure,
when the bobbin case opening lever has retreated to the rearest position, loos-
en the clamp screw ❶of the bobbin case opening lever and adjust so that the
clearance between the bobbin case opener and the bobbin case opening lever
comes to 0.3 - 0.4 mm (3/256 - 1/64”).
12. INSTALLING AND DISMANTLING THE SEWING HOOK
WARNING :
To protect against possible personal injury due to abrupt start of the machine, be sure to start the following
work after turning the power off and ascertaining that the motor is at rest.
13. ADJUSTING THE BOBBIN CASE OPENING LEVER
WARNING :
To protect against possible personal injury due to abrupt start of the machine, be sure to start the following
work after turning the power off and ascertaining that the motor is at rest.
1. Dismantling the sewing hook
1) Remove the presser foot, walking foot, throat plate, feed dog and bobbin case
opening lever.
2) Tilt the machine and loosen the set screw ❶of the small gear.
3) Rotate the handwheel to bring the needle bar to its highest position and re-
move the sewing hook by pulling it upwards.
(Note) At this point, be sure to see that the interlocking of the large gear
and the small gear is not slipping. (If the gears are marked, it will
help)
2. How to install the sewing hook
1) To install the sewing hook, reverse the dismantling procedure. In so doing,
watch the following:
* That the bobbin case opening lever link is inserted into the link pin.
* Make the No.1 set screw of the small gear (the first screw seen when it is ro-
tated in normal direction) enter the V-groove of the sewing hook driving shaft.
2) In order that the protruding part of the bobbin case holder enters the groove
of the throat plate, rotate the bobbin case holder by the hand and after that,
set the throat plate.
0.3-0.4mm
❶
Protruding part
❶
– 1 –
SPECIFICATIONS
Model LG-158 LG-158-1
Type of sewing
machine head
2-needle, unison-feed lockstitch machine
(with a reverse-feed stitching function)
1-needle, unison-feed, lockstitch machine
(with a reverse-feed stitching function)
Usage For sewing extremely heavy weight & heavy weight materials
Sewing speed Max. 1,500 sti/min
Lift of presser foot Max. 16 mm
Stitch length 0 〜10 mm
Needle DD x 1 #25 2 ea. DD x 1 #25 1 ea.
Reverse sewing By treading pedal
Needle gauge 3/4" (Standard), 1/4", 5/16", 3/8", 1/2", 5/8", 7/8",
1", 1-1/4", 1-1/2", 2", 2-1/4", 2-1/2" -
Lubricating oil JUKI New Defrix Oil No. 1
Noise
- Equivalent continuous emission sound pressure
level (LpA) at the workstation:
A-weighted value of 87.5 dB; (Includes KpA = 2.5
dB); according to ISO 10821- C.6.2 - ISO 11204
GR2 at 1,500 sti/min.
- Sound power level (LWA);
A-weighted value of 97.5 dB; (Includes KWA = 2.5
dB); according to ISO 10821- C.6.2 - ISO 3744
GR2 at 1,500 sti/min.
- Equivalent continuous emission sound pressure
level (LpA) at the workstation:
A-weighted value of 87.5 dB; (Includes KpA = 2.5
dB); according to ISO 10821- C.6.2 - ISO 11204
GR2 at 1,500 sti/min.
- Sound power level (LWA);
A-weighted value of 96.5 dB; (Includes KWA = 2.5
dB); according to ISO 10821- C.6.2 - ISO 3744
GR2 at 1,500 sti/min.
1. INSTALLING THE MACHINE
1) When carrying the sewing machine, be sure to carry by two
people.
(Caution) Do not hold the pulley.
2) Do not place a protruding object, such as a screw driver, at
a place where the sewing machine is to be installed.
3) Fix the oil pan supplied with the machine on the table in 10
placed with nails.
Set the oil pan so that its U-shaped notch is brought to the
opposite side of the operator.
4) Attaching the hinge arm
Install hinge arms ❶to the front and rear (at one location
each) of the sewing machine head with screws ❷. Hook
hinge seats ❸on hinge arms ❶.
(When hooking hinge seats ❸on the hinge arms ❶, face
the counter sunk plane of the hinge seats ❸upward.)
❸
❷
❶
2mm 2mm
30mm

vii
CONTENTS
SPECIFICATIONS........................................................................................................................ 1
1. INSTALLING THE MACHINE ................................................................................................ 1
2. INSTALLING THE THREAD STAND..................................................................................... 2
3. LUBRICATION ....................................................................................................................... 3
4. HOW TO INSTALL THE NEEDLE ......................................................................................... 3
5. ON THREADS........................................................................................................................ 4
6. HOW TO PASS THE BOBBIN THREAD............................................................................... 4
7. HOW TO THREAD THE MACHINE HEAD............................................................................ 4
8. THREAD TENSION................................................................................................................ 5
9. HOW TO WIND A BOBBIN THREAD.................................................................................... 6
10. ON THE SAFETY DEVICE .................................................................................................... 6
11. ADJUSTING THE WALKING FOOT AND PRESSER FOOT ................................................ 7
12. INSTALLING AND DISMANTLING THE SEWING HOOK .................................................... 8
13. ADJUSTING THE BOBBIN CASE OPENING LEVER.......................................................... 8
14. HEIGHT OF THE PRESSER FOOT....................................................................................... 9
15. INSTALLING POSITION OF THE PRESSER FOOT............................................................. 9
16. ADJUSTING THE STITCH LENGTH................................................................................... 10
17. ADJUSTING THE HEIGHT OF THE FEED DOG ................................................................ 10
18. ON REVERSE SEWING ...................................................................................................... 10
19. ADJUSTING THE PRESSER FOOT AND THE WALKING FOOT...................................... 11
20. ADJUSTING THE LIFTING AMOUNT OF THE PRESSER FOOT AND THE WALKING
FOOT................................................................................................................................... 11
21. EXCHANGING THE TIMING BELT ..................................................................................... 12
22. TIMING OF MAIN SHAFT AND HOOK SHAFT .................................................................. 12
23. HOW TO REMOVE THE BOBBIN CASE HOLDER............................................................ 12
24. ADJUSTING THE FORE & AFT POSITION OF NEEDLE BAR ROCKER FRAME ........... 13
25. MOTOR PULLEY AND SEWING SPEED............................................................................ 13
26. PROBLEMS WITH SEWING AND CORRECTIVE MEASURES......................................... 14
– 9 –
14. HEIGHT OF THE PRESSER FOOT
WARNING :
To protect against possible personal injury due to abrupt start of the machine, be sure to start the following
work after turning the power off and ascertaining that the motor is at rest.
15. INSTALLING POSITION OF THE PRESSER FOOT
WARNING :
To protect against possible personal injury due to abrupt start of the machine, be sure to start the following
work after turning the power off and ascertaining that the motor is at rest.
Raise up the knee lifter.
The presser foot will go up 16 mm (5/8”) from the surface of the throat plate and
stops.
When this height is less than 16 mm (5/8”):
1. With the knee lifter in raised up condition, loosen the set screw ❶of the knee
lifter mounting bracket, insert a wooden block of 16 mm (5/8”) between the
presser foot and the throat plate and in that condition, tighten the set screw
❶of the knee lifter mounting bracket.
2. Remove the wooden block.
* Maximum rising amount of the presser foot by means of the knee lifter is 16
mm (5/8").
When the presser foot hits the walking foot or the needle, adjust as follows:
1. Loosen the pressure regulating thumb screw .
2. If the presser foot is lowered and screw ❶and ❷are loosened, the presser
bar will rotate freely.
3. Adjust the position of the presser foot and by determining the position of the
needle and the needle hole of the walking foot and tighten the screw ❶.
4. After these adjustments if the presser foot does not go up or down smoothly,
loosen the set screw of the presser bar guide sleeve , rotate the presser
bar guide sleeve to right and left and by bringing the presser foot to the posi-
tion where it will go up and down smoothly, tighten the set screw.
❶
❷
❶

– 10 –
17. ADJUSTING THE HEIGHT OF THE FEED DOG
WARNING :
To protect against possible personal injury due to abrupt start of the machine, be sure to start the following
work after turning the power off and ascertaining that the motor is at rest.
16. ADJUSTING THE STITCH LENGTH
18. ON REVERSE SEWING
While pushing the feed adjusting button ❶, rotate the handwheel and when the
end of the button has entered the groove of the cam, rotate the handwheel fore
and aft while the feed adjusting button ❶is being pushed, until the desired fig-
ure of the graduator plate is matched with the carved line ❷of the feed adjuster.
When the desired figure and the carved line ❷are matched, release the feed
adjusting button.
The figure indicates the length of the stitch in mm unit. (10 →stitch length =
10mm (25/64”)).
The figure on the graduation plate can be seen from the sight window even with
the top cover in closed condition.
The maximum height of the feed dog above the throat plate is 1.2 - 1.4 mm (3/64
- 1/16”).
Adjust to this position by loosening the screw ❶.
* When the feed dog is exchanged, be sure to tighten the ❷set screw of the
feed dog firmly. Further, loosen nut ❷, tighten screw ❸so that screw push
up the feed dog lightly and tighten the nut ❷.
* In case the height of the feed dog does not become parallel, adjust by screw
❸.
Hang the chain to the lifting crank link spring latch plate ❶with a hook and catch
the other end of the chain to the pedal.
When reverse sewing is to be performed, step on this pedal until the variable
speed link hits the stopper ❷.
❶
❷
❶
❸
❷
❶
❷
vi
DECLARATION OF INCORPORATION OF PARTLY COMPLETED MACHINERY
We hereby declare that the sewing machine (sewing head) described below ;
1. Must not be put into service until the machinery to which it is incorporated has been declared in
conformity with the provisions of the Directive 2006/42/EC, and
2. Conforms to the essential requirements of the Directive 2006/42/EC, described in the technical
documentation, and
3. To be prepared with the above technical documentation compiled in accordance with part B of
Annex VII, and
4. Also to conform to the RoHS Directive 2011/65/EU
5. Relevant information on which should be transmitted in response to a reasoned request by the
national authorities, by the electronic method or other according to the request.
Applied harmonized standards, in particular :
EN ISO12100, EN ISO10821, EN 50581
Manufacturer :
JUKI CORPORATION
2-11-1, Tsurumaki, Tama-shi, Tokyo, Japan
Model
Description Industrial Sewing Machine
Function make stitches and sew
LG-158 Series

v
1. Keep your hands away from needle when you turn ON the power switch or while the machine is
in operation.
2. Do not put your fingers into the thread take-up cover while the machine is operating.
3. Turn OFF the power switch when tilting the machine head, or removing the belt cover or the V
belts.
4. During operation, be careful not to allow your or any other person’s head, hands or clothes to
come close to the handwheel, V belt and motor. Also, do not place anything close to them.
5. Do not operate your machine with the belt cover and finger guard removed.
6. When tilting the machine head, be sure to confirm that the head support bar is properly attached
to your machine head, and be careful not to allow your fingers or the like to be pinched in the
machine head.
1. To ensure safety, never operate the machine with the ground wire for the power supply removed.
2. When inserting/removing the power plug, the power switch has to be turned OFF in advance.
3. In time of thunder and lightening, stop your work and disconnect the power plug from the re-
ceptacle so as to ensure safety.
4. If the machine is suddenly moved from a cold place to a warm place, dew condensation may be
observed. In this case, turn ON the power to the machine after you have confirmed that there is
no danger of water drops in the machine.
5. To prevent fires, periodically draw out the power plug from the plug socket and clean the root of
the pins and the space between pins.
6. The hook rotates at a high speed while the machine is in operation.
To prevent possible injury to hands, be sure to keep your hands away from the vicinity of the
hook during operation. In addition, be sure to turn OFF the power to the machine when replac-
ing the bobbin.
7. To avoid possible accidents due to abrupt start of the machine, be sure to turn OFF the power to
the machine.
8. Be careful of handling this product so as not to pour water or oil, shock by dropping, and the
like since this product is a precision instrument.
9. When tilting or returning the sewing machine to the home position, hold the upper side of the
machine head with both hands and perform the work quietly so that fingers or the like are not
caught in the machine.
• Before you put the machine into operation for the first time after the set-up, clean it thoroughly.
Remove all dust gathering during transportation and oil it well.
• Confirm that voltage has been correctly set.
Confirm that the power plug has been properly connected to the power supply.
• Never use the machine in the state where the voltage type is different from the designated one.
• The direction of normal rotation of the machine is counterclockwise as observed from the pulley side.
Take care not to allow the machine to rotate in the reverse direction.
• Never operate the machine unless the head base has been filled with oil.
• For a test run, remove the bobbin case and the needle thread.
• Be sure to use your sewing machine with the speed of stitch lowered to 600 sti/min or less for the first
month after installation.
• Operate the handwheel after the machine has totally stopped.
BEFORE OPERATION
CAUTION :
Check the following so as to prevent maloperation of and damage to the machine.
CAUTION :
Note that safety devices such as “eye guard”, “finger guard”, etc. may be omitted from the
illustrations in this Instruction Manual for easy explanation.
When operating the machine, be sure not to remove these safety devices.
Precautions to be taken so as to use the LG-158, 158-1 more safely
– 11 –
19. ADJUSTING THE PRESSER FOOT AND THE WALKING FOOT
WARNING :
To protect against possible personal injury due to abrupt start of the machine, be sure to start the following
work after turning the power off and ascertaining that the motor is at rest.
20. ADJUSTING THE LIFTING AMOUNT OF THE PRESSER FOOT AND
THE WALKING FOOT
WARNING :
To protect against possible personal injury due to abrupt start of the machine, be sure to start the following
work after turning the power off and ascertaining that the motor is at rest.
1)When the lifting amount of the presser foot and the walking foot is to be made equal:
1. Lower the presser foot and loosen the clamp screw ❶of the upper feed spring rod.
2. Rotate the handwheel in the normal direction and when the lower surface of the presser foot and walking foot come to the
same position as the surface of the throat plate, tighten the clamp screw ❶.
2)When the walking foot is to be raised higher than the presser foot:
1. Lower the presser foot, rotate the handwheel in the normal direction and when the lower surface of the presser foot and walk-
ing foot come to the same position as the upper surface of the throat plate, loosen the set screw of the upper feed spring rod.
2. Then, rotate the handwheel toward the normal direction and firmly tighten the clamp screw.
3)When the presser foot is to be raised higher than the walking foot:
1. Lower the presser foot, rotate the handwheel in the normal direction and when the upper surface of the presser foot and
walking foot come to the same position as the upper surface of the throat plate, loosen the screw ❶of the feed rod, adjust as
follows:
2. Then rotate the handwheel toward the reverse direction and firmly tighten the clamp screw.
* In both cases of 2) and 3) above, after the set screw of the upper feed spring rod is loosened, the more the handwheel is rotated
in the normal or reverse direction, the difference of the lifting amount of the presser foot and the walking foot gets larger.
The lifting amount of the presser foot and the walking foot is adjusted according
to the thickness of the sewing cloth. To make this adjustment, remove the feed
adjusting screw nut ❶with a spanner and by changing the position of the hole
of the feed adjusting screw ❷, the lifting amount changes.
The adjustment can be done in 4 steps. If it’s positioned to screw hole of top-
most position, the lifting amount becomes maximum and if it’s positioned to the
screw hole of bottom position, the lifting amount becomes minimum. After this
adjustment, securely tighten the nut ❶.
❶
❶
❷

– 12 –
When the timing belt is removed or exchanged, match the timing of the main
shaft and the hook shaft as follows:
1. Place the thread take-up at the highest dead point.
2. Match the carved line ❶of the sewing hook thrust guard with the red carved
line ❷of the belt.
3. With this condition, pass the timing belt to the lower sprocket.
21. EXCHANGING THE TIMING BELT
WARNING :
To protect against possible personal injury due to abrupt start of the machine, be sure to start the following
work after turning the power off and ascertaining that the motor is at rest.
22. TIMING OF MAIN SHAFT AND HOOK SHAFT
WARNING :
To protect against possible personal injury due to abrupt start of the machine, be sure to start the following
work after turning the power off and ascertaining that the motor is at rest.
23. HOW TO REMOVE THE BOBBIN CASE HOLDER
WARNING :
To protect against possible personal injury due to abrupt start of the machine, be sure to start the following
work after turning the power off and ascertaining that the motor is at rest.
1. Remove the timing belt from the sprocket.
2. Remove the handwheel.
3. Loosen the set screw of the rear bushing and pull out the main shaft rear
bushing but be careful not to damage the bushing.
4. Pull out the timing belt from the hole from which the bushing was pulled out.
5. Install the new belt in the reverse order.
Remove the set screw ❶of the left and right bobbin case pressers and pull out
the bobbin case holder.
❶❷
❶
iv
iv
%HVXUHWRWXUQWKHSRZHURIIDQGFKHFNWREHVXUHWKDWWKHPDFKLQHDQGPRWRUFRPSOHWHO\VWRSEHIRUHUH
PRYLQJWKHEHOWFRYHUDQG9EHOWLQRUGHUWRSUHYHQWDFFLGHQWFDXVHGE\DEUXSWVWDUWRIWKHPDFKLQHRUPRWRU
,IDVHUYRPRWRULVXVHGZLWKWKHPDFKLQHWKHPRWRUGRHVQRWSURGXFHQRLVHZKLOHWKHPDFKLQHLVDWUHVW
%HVXUHQRWWRIRUJHWWRWXUQWKHSRZHURIILQRUGHUWRSUHYHQWDFFLGHQWFDXVHGE\DEUXSWVWDUWRIWKHPRWRU
1HYHUXVHWKHPDFKLQHZLWKWKHFRROLQJRSHQLQJRIWKHPRWRUSRZHUER[VKLHOGHGLQRUGHUWRSUHYHQW¿UH
DFFLGHQWE\RYHUKHDW
/XEULFDWLRQ
%HVXUHWRXVH-8.,JHQXLQHRLODQG-8.,JHQXLQHJUHDVHWRWKHSDUWVWREHOXEULFDWHG
,IWKHRLODGKHUHVRQ\RXUH\HRUERG\EHVXUHWRLPPHGLDWHO\ZDVKLWRIILQRUGHUWRSUHYHQWLQÀDPPD
WLRQRULUULWDWLRQ
,IWKHRLOLVVZDOORZHGXQLQWHQWLRQDOO\EHVXUHWRLPPHGLDWHO\FRQVXOWDPHGLFDOGRFWRULQRUGHUWRSUH
YHQWGLDUUKHDRUYRPLWLQJ
0DLQWHQDQFH
,QSUHYHQWLRQRIDFFLGHQWFDXVHGE\XQIDPLOLDULW\ZLWKWKHPDFKLQHUHSDLUDQGDGMXVWPHQWKDVWREH
FDUULHGRXWE\DVHUYLFHWHFKQLFLDQZKRLVWKRURXJKO\IDPLOLDUZLWKWKHPDFKLQHZLWKLQWKHVFRSHGH¿QHG
LQWKHLQVWUXFWLRQPDQXDO%HVXUHWRXVH-8.,JHQXLQHSDUWVZKHQUHSODFLQJDQ\RIWKHPDFKLQHSDUWV
-8.,DVVXPHVQRUHVSRQVLELOLW\IRUDQ\DFFLGHQWFDXVHGE\LPSURSHUUHSDLURUDGMXVWPHQWRUWKHXVHRI
DQ\SDUWRWKHUWKDQ-8.,JHQXLQHRQH
,QSUHYHQWLRQRIDFFLGHQWFDXVHGE\XQIDPLOLDULW\ZLWKWKHPDFKLQHRUHOHFWULFDOVKRFNDFFLGHQWEHVXUH
WRDVNDQHOHFWULFDOWHFKQLFLDQRI\RXUFRPSDQ\RU-8.,RUGLVWULEXWRULQ\RXUDUHDIRUUHSDLUDQGPDLQWH
QDQFHLQFOXGLQJZLULQJRIHOHFWULFDOFRPSRQHQWV
:KHQFDUU\LQJRXWUHSDLURUPDLQWHQDQFHRIWKHPDFKLQHZKLFKXVHVDLUGULYHQSDUWVVXFKDVDQDLUF\O
LQGHUEHVXUHWRUHPRYHWKHDLUVXSSO\SLSHWRH[SHODLUUHPDLQLQJLQWKHPDFKLQHEHIRUHKDQGLQRUGHUWR
SUHYHQWDFFLGHQWFDXVHGE\DEUXSWVWDUWRIWKHDLUGULYHQSDUWV
%HVXUHWRFKHFNWKDWVFUHZVDQGQXWVDUHIUHHIURPORRVHQHVVDIWHUFRPSOHWLRQRIUHSDLUDGMXVWPHQW
DQGSDUWUHSODFHPHQW
%HVXUHWRSHULRGLFDOO\FOHDQXSWKHPDFKLQHGXULQJLWVGXUDWLRQRIXVH%HVXUHWRWXUQWKHSRZHURII
DQGYHULI\WKDWWKHPDFKLQHDQGPRWRUVWRSFRPSOHWHO\EHIRUHFOHDQLQJWKHPDFKLQHLQRUGHUWRSUHYHQW
DFFLGHQWFDXVHGE\DEUXSWVWDUWRIWKHPDFKLQHRUPRWRU
%HVXUHWRWXUQWKHSRZHURIIDQGYHULI\WKDWWKHPDFKLQHDQGPRWRUVWRSFRPSOHWHO\EHIRUHFDUU\LQJRXW
PDLQWHQDQFHLQVSHFWLRQRUUHSDLURIWKHPDFKLQH)RUWKHPDFKLQHZLWKDFOXWFKPRWRUWKHPRWRUZLOO
NHHSUXQQLQJIRUDZKLOHE\LQHUWLDHYHQDIWHUWXUQLQJWKHSRZHURII6REHFDUHIXO
,IWKHPDFKLQHFDQQRWEHQRUPDOO\RSHUDWHGDIWHUUHSDLURUDGMXVWPHQWLPPHGLDWHO\VWRSRSHUDWLRQDQG
FRQWDFW-8.,RUWKHGLVWULEXWRULQ\RXUDUHDIRUUHSDLULQRUGHUWRSUHYHQWDFFLGHQWWKDWFDQUHVXOWLQSHU
VRQDOLQMXU\RUGHDWK
,IWKHIXVHKDVEORZQEHVXUHWRWXUQWKHSRZHURIIDQGHOLPLQDWHWKHFDXVHRIEORZLQJRIWKHIXVHDQG
UHSODFHWKHEORZQIXVHZLWKDQHZRQHLQRUGHUWRSUHYHQWDFFLGHQWWKDWFDQUHVXOWLQSHUVRQDOLQMXU\RU
GHDWK
%HVXUHWRSHULRGLFDOO\FOHDQXSWKHDLUYHQWRIWKHIDQDQGLQVSHFWWKHDUHDDURXQGWKHZLULQJLQRUGHUWR
SUHYHQW¿UHDFFLGHQWRIWKHPRWRU
2SHUDWLQJHQYLURQPHQW
%HVXUHWRXVHWKHPDFKLQHXQGHUWKHHQYLURQPHQWZKLFKLVQRWDIIHFWHGE\VWURQJQRLVHVRXUFHHOHFWUR
PDJQHWLFZDYHVVXFKDVDKLJKIUHTXHQF\ZHOGHULQRUGHUWRSUHYHQWDFFLGHQWFDXVHGE\PDOIXQFWLRQRI
WKHPDFKLQH
1HYHURSHUDWHWKHPDFKLQHLQDQ\SODFHZKHUHWKHYROWDJHÀXFWXDWHVE\PRUHWKDQUDWHGYROWDJH
LQRUGHUWRSUHYHQWDFFLGHQWFDXVHGE\PDOIXQFWLRQRIWKHPDFKLQH
%HVXUHWRYHULI\WKDWWKHDLUGULYHQGHYLFHVXFKDVDQDLUF\OLQGHURSHUDWHVDWWKHVSHFL¿HGDLUSUHVVXUH
EHIRUHXVLQJLWLQRUGHUWRSUHYHQWDFFLGHQWFDXVHGE\PDOIXQFWLRQRIWKHPDFKLQH
7RXVHWKHPDFKLQHZLWKVDIHW\EHVXUHWRXVHLWXQGHUWKHHQYLURQPHQWZKLFKVDWLV¿HVWKHIROORZLQJ
FRQGLWLRQV
$PELHQWWHPSHUDWXUHGXULQJRSHUDWLRQ &WR&
5HODWLYHKXPLGLW\GXULQJRSHUDWLRQ WR
'HZFRQGHQVDWLRQFDQRFFXULIEULQJLQJWKHPDFKLQHVXGGHQO\IURPDFROGHQYLURQPHQWWRDZDUPRQH
6REHVXUHWRWXUQWKHSRZHURQDIWHUKDYLQJZDLWHGIRUDVXI¿FLHQWSHULRGRIWLPHXQWLOWKHUHLVQRVLJQ
RIZDWHUGURSOHWLQRUGHUWRSUHYHQWDFFLGHQWFDXVHGE\EUHDNDJHRUPDOIXQFWLRQRIWKHHOHFWULFDOFRPSR
QHQWV
%HVXUHWRVWRSRSHUDWLRQZKHQOLJKWQLQJÀDVKHVIRUWKHVDNHRIVDIHW\DQGUHPRYHWKHSRZHUSOXJLQ
RUGHUWRSUHYHQWDFFLGHQWFDXVHGE\EUHDNDJHRUPDOIXQFWLRQRIWKHHOHFWULFDOFRPSRQHQWV
'HSHQGLQJRQWKHUDGLRZDYHVLJQDOFRQGLWLRQWKHPDFKLQHPD\JHQHUDWHQRLVHLQWKH79RUUDGLR,IWKLV
RFFXUVXVHWKH79RUUDGLRZLWKNHSWZHOODZD\IURPWKHPDFKLQH
,QRUGHUWRHQVXUHWKHZRUNHQYLURQPHQWORFDOODZVDQGUHJXODWLRQVLQWKHFRXQWU\ZKHUHWKHVHZLQJ
PDFKLQHLVLQVWDOOHGVKDOOEHIROORZHG
,QWKHFDVHWKHQRLVHFRQWUROLVQHFHVVDU\DQHDUSURWHFWRURURWKHUSURWHFWLYHJHDUVKRXOGEHZRUQDF
FRUGLQJWRWKHDSSOLFDEOHODZVDQGUHJXODWLRQV
'LVSRVDORISURGXFWVDQGSDFNDJHVDQGWUHDWPHQWRIXVHGOXEULFDWLQJRLOVKRXOGEHFDUULHGRXWSURSHUO\
DFFRUGLQJWRWKHUHOHYDQWODZVRIWKHFRXQWU\LQZKLFKWKHVHZLQJPDFKLQHLVXVHG
Other manuals for LG-158
1
This manual suits for next models
1
Table of contents
Other JUKI Sewing Machine manuals

JUKI
JUKI DDL-8000A User manual

JUKI
JUKI HZL-70HW-B User manual

JUKI
JUKI HZL-G220 User manual

JUKI
JUKI LU-1520N-7 User manual

JUKI
JUKI J-350QVP User manual

JUKI
JUKI MCS-1500 User manual

JUKI
JUKI PS-800SB-2850 Series User manual

JUKI
JUKI SC-510 Quick start guide

JUKI
JUKI DNU-1541 User manual

JUKI
JUKI MF-7500-E11 User manual