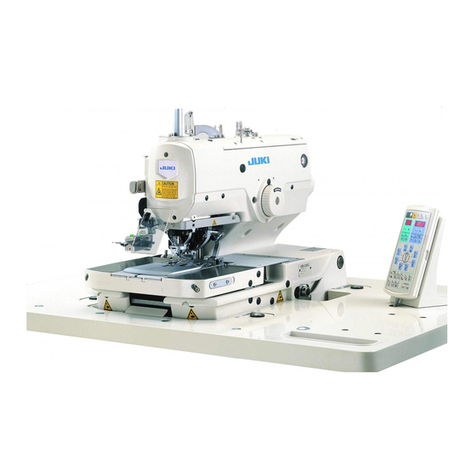
JUKI DNU-1541 Quick start guide

R
ENGINEER’S MANUAL
29353505
No.E349-01
1-Needle, Unison Feed, Lockstitch Machine
DNU-1541
1-Needle, Unison Feed, Lockstitch Machine
(with Safety Mechanism)
DNU-1541S
1-Needle, Unison Feed, Lockstitch Machine
(with Automatic Thread Trimmer)
DNU-1541-7

PREFACE
This Engineer’s Manual is written for the technical personnel who are responsible for the service and maintenance
of the machine.
The Instruction Manual for this machine intended for the maintenance personnel and operators at an apparel
factory contains operating instructions in detail. And this manual describes “Standard Adjustment”, Adjustment
Procedures”, “Results of Improper Adjustment”, and other important information which are not covered in the
Instruction Manual.
It is advisable to use the relevant Instruction Manual and Parts List together with this Engineer’s Manual when
carrying out the maintenance service of this machine.
Regarding the motor for the sewing machine with automatic thread trimmer, separately refer to the Instruction
Manual for the motor and Engineer’s Manual. In addition, for the control panel, refer to the Instruction Manual
for the control panel.
This manual gives the “Standard Adjustment” on the former page under which the most basic adjustment value
is described and on the latter page the “Adjustment Procedures” and “Results of Improper Adjustment” under
which the steps of adjusting procedure, and stitching errors and troubles arising from mechanical failures are
described.

CONTENTS
1. SPECIFICATIONS ...................................................................................1
2. STANDARD ADJUSTMENT....................................................................2
(1) Needle entry position .............................................................................................. 2
(2) Longitudinal position of the feed dog ...................................................................... 2
(3) Lateral position of the feed dog .............................................................................. 4
(4) Height of the feed dog ............................................................................................ 4
(5) Adjusting the opener (DNU-1541S) ........................................................................ 6
(6) Needle-to-hook timing............................................................................................. 6
(7) Lift of the presser foot ............................................................................................. 8
1) Hand lifter...................................................................................................................................... 8
2) Knee lifter ...................................................................................................................................... 8
(8) Feed motion.......................................................................................................... 10
1) Amount of alternate vertical movement....................................................................................... 10
2) Alternate momentum................................................................................................................... 12
(9) Feed cam timing ................................................................................................... 12
1) Horizontal feed cam timing.......................................................................................................... 12
2) Top feed cam timing.................................................................................................................... 14
(10) Needle sway (Optional selection only of DNU-1541-7) ........................................ 16
(11) Stitch length of normal/reverse feed ..................................................................... 16
(12) Balancer (DNU-1541, DNU-1541S)...................................................................... 18
(13) Position of the reverse feed control lever ............................................................. 20
(14) Safety clutch (DNU-1541S) .................................................................................. 22
(15) Lubrication ............................................................................................................ 22
3. STANDARD ADJUSTMENT OF THREAD TRIMMER COMPONENTS
(DNU-1541-7) .........................................................................................24
(1) Thread trimmer device.......................................................................................... 24
1) Cam follower ............................................................................................................................... 24
2) Solenoid arm ............................................................................................................................... 24
3) Thread trimmer cam timing ......................................................................................................... 26
4) Rotary knife and fixed knife......................................................................................................... 26
(2) Alternate vertical dial ............................................................................................ 28
(3) Adapting SC-380 to DNU-1541-7 ......................................................................... 30
4. INSTALLATION OF THE OPTIONAL PARTS ......................................32
(1) Automatic reverse feed device ............................................................................. 32
1) Removing the window plate (List of the parts to be removed) .................................................... 32
2) Removing the reverse feed control lever (List of the parts to be removed) ................................ 32
3) Installing the reverse feed link hinge screw (List A) .................................................................... 32
4) Installing the reverse feed control lever1. Reverse feed control lever (List B) ............................ 33
5) Installing the automatic reverse feed device (List C) .................................................................. 33
6) Installing the touch-back switch (List D)...................................................................................... 34
7) Installing the pneumatic components (List E) ............................................................................. 34
8) Parts list ...................................................................................................................................... 34
(2) Automatic presser foot lifter .................................................................................. 36
1) Installing the automatic presser foot lifter (List A) ....................................................................... 36
2) Installing the pneumatic device components .............................................................................. 37
3) Parts list ...................................................................................................................................... 38
(3) Installing the DL device......................................................................................... 40
1) When installing the DL device to DNU-1541-7 after set-up of the machine (List A) ................... 40
2) Installing the pneumatic device components (List B) .................................................................. 40
3) Installing the 5-step switch (List C) ............................................................................................. 40
4) Parts list ...................................................................................................................................... 41
5. PORTION TO WHICH LOCKTITE IS APPLIED ....................................42
6. SELECTIVE PARTS AND CONSUMABLE PARTS..............................43
7. ENGRAVED MARKER DOTS ON THE HANDWHEEL.........................44
8. LUBRICATION ROUTE DIAGRAM .......................................................44
9. PNEUMATIC PIPING .............................................................................45
10. MACHINE HEAD WIRING (WITH THREAD TRIMMER ONLY) ............46
(1) Connector coming from the machine head ........................................................... 46
(2) Connector coming from the pneumatic device ..................................................... 47
(3) Connector coming from the relay cable (Inserting side to the control box)........... 48
11. TABLE OFTROUBLES AND CORRECTIVE MEASURES................... 49
(1) With reagard to sewing ......................................................................................... 49
(2) With regard to lubrication...................................................................................... 50
(3) With regard to thread trimming ............................................................................. 51
(4) Others ................................................................................................................... 52
12. DRAWING OFTHETABLE .................................................................... 53

−1−
1. SPECIFICATIONS
No.
1
2
3
4
5
6
7
8
9
10
11
12
13
14
15
16
17
18
19
20
21
22
23
24
Item
Model
Model name
Application
Sewing speed
Needle
Thread possible to be
sewn
Thread possible to be
trimmed
Stitch length
Presser foot lift
Stitch length adjusting
mechanism
Reverse stitch selection
method
Thread take-up
Needle bar stroke
Alternate foot stroke
Hook
Feed mechanism
Top and bottom feed
actuation mechanism
Thread trimming
mechanism
Lubrication
Lubricating oil
Bed size
Free space for sewing
Size of handwheel
Motor
Specifications
DNU-1541
1-needle, unison-feed,
lockstitch machine
DNU-1541S
1-needle, unison-
feed,lockstitch machine
(with safety mechanism)
For heavy-weight materials
Max. 2,500 rpm
SCHMETZ 135 X 17 Nm 125 to 180 Standard : Nm 160
#30 to #5
Max. 9 mm (normal/reverse feed)
Hand lifter : 9 mm Knee lifter : 16 mm
By dial
Lever type
Slide thread take-up
36 mm
2.5 mm to 6.5 mm
Slot adjusting type
Horizontal-axis, 2-fold hook
Ellipse feed
By timing belt
Hook : automatic lubrication
Others : Concentration tank type oil wick lubrication (excluding some parts)
JUKI New Defrix Oil No. 2 (equivalent to ISO VG32)
476.6 mm x 178 mm
255 mm x 99 mm
V belt effective diameter : ø93.3 mm
Outer diameter : ø160 mm
2P, 400W
DNU-1541-7
1-needle, unison-feed
lockstitch machine (with
automaticthreadtrimmer)
Max. 3,000 rpm
#30 to #5
Air cylinder type (with
touch-back switch)
1 mm to 6.5 mm
Alternate foot stroke
adjusted by dial
Cam-driven scissors
type
SC-380

−2−
Standard Adjustment
Standard Adjustment
(2) Longitudinal position of the feed dog
2. STANDARD ADJUSTMENT
(1) Needle entry position
1
2
3
1
2
3
8±0.2 mm
60 mm
a’
a
A
Top surface of
throat plate
Conditions
• Needle bar at lowest
dead point
• Feed amount : 0 mm
Conditions
• Needle bar at lowest dead point
• Feed amount : 0 mm
A = Clearance between the feed dog and the throat plate
when the feed dog travels fully to the front.

−3−
Adjustment Procedures Results of Improper Adjustment
1. Set the stitch dial to “0”.
2. Turn the handwheel to bring the needle bar to the lowest dead
point of its stroke.
3. Loosen clamping screw 1in the needle bar rocking rear arm.
4. Provide a clearance of 8 ±0.2 mm between presser bar 2and
walking bar 3and securely tighten the clamping screw.
(In the state that the presser foot is raised, adjust the clearance
to 8 ±0.2 mm at the position where the distance from the top
surface of the throat plate to the presser foot is 60 mm.)
(Caution) Tighten the screw so that the needle bar rocking
shaft has no thrust play.
™The throat plate comes in
contact with the feed dog and
contacting noise occurs and the
throat plate or the feed dog may
be damaged.
™Irregular stitches may result.
™Stitch skipping or needle
breakage will result.
™Poorly tensed stitches will result.
1. Set the stitch dial to “0”.
2. Turn the handwheel to bring the needle bar to the lowest dead
point of its stroke.
3. Loosen clamping screw 3in the feed rocker.
4. Move the feed base and adjust so that needle 1enters in the
center of the needle hole in feed dog 2. Then securely tighten
the clamping screw in the feed rocker.
(a = a’)
(Standard)
When the feed amount is maximum, A = approximately 1.5
mm.

−4−
Standard Adjustment
Standard Adjustment
(4) Height of the feed dog
(3) Lateral position of the feed dog
1
2
1
2
3
4
aa’ AB
A
Conditions
• Needle bar at lowest dead point
• Feed amount : 0 mm
Adjust the position to almost A = B.
Conditions
• Feed amount : 0 mm
• Height of feed dog is maximum.
Model Dimension A
DNU-1541 0.8 to 0.9 mm
DNU-1541S
DNU-1541-7 0.4 to 0.5 mm

−5−
Adjustment Procedures Results of Improper Adjustment
1. Set the stitch dial to “0”.
2. Turn the handwheel to bring the needle bar to the lowest dead
point of its stroke.
3. Loosen the clamping screw in the feed rocker described in the
previous item (2).
4. Move the feed base and adjust so that needle 1enters in the
centerof feed dog2.Thensecurely tighten the clamping screw.
(a = a’)
In addition, adjust the lateral clearances (A, B) of the feed dog
in terms of the window of throat plate to almost equal values.
When the height of the feed dog is
higher than the specified value :
™Stitch pitch becomes larger than
the scale of the feed dial.
™Balloon stitches will result.
™Return of sewing product will
occur.
When the height of the feed dog is
lower than the specified value :
™Stitch pitch becomes smaller
than the scale of the feed dial.
™Feed force will be deteriorated.
™Stitch skipping or thread
breakage will result.
™Poorlytensed stitches will result.
™Needle breakage will result.
1. Set the stitch dial to “0”.
2. Turn the handwheel to bring the height of the feed dog to the
maximum.
(Bring the needle bar to the lowest dead point of its stroke.)
3. Loosen setscrew 1in the vertical feed bar shaft, turn vertical
feed bar shaft 2and adjust feed dog 3from top surface 4of
the throat plate (center section) to the dimension A. Then
securely tighten the setscrew.

−6−
Standard Adjustment
Standard Adjustment
(6) Needle-to-hook timing
(5) Adjusting the opener (DNU-1541S)
1
2
3
4
5
6
7
8
1
2
34
5
A
C
3
4
6
C
B
0.02 to 0.05 mm
A
Condition
• Swing angle of opener is maximum.
A = Clearance betwen top end of
opener 1and inner hook 7(Axial
direction)
B = Clearance between inner hook 7
and nail 8of inner hoop presser
when opener 1moves to front
end (Diameter direction)
C = Clearance between opener and
nail 2of inner hook 2when
opener 1moves to front end
(Diameter direction)
Conditions
• Feed amount : 0 mm
• Needle bar goes up from the lowest dead point.
Model Dimension A
DNU-1541 56.55 mm
DNU-1541S
DNU-1541-7 58.55 mm
8B

−7−
Adjustment Procedures Results of Improper Adjustment
Timing of the opener
1. Turn the handwheel to move the opener 1to the front end in
the direction of the arrow mark.
2. Loosen clamping screw 5in the opener arm and turn opener
shaft 4to adjust the clearance B to B = 0.4 mm in the state
that opener 1comes in contact with nail 2of inner hook.
Then tighten the clamping screw. (Reference : C = 0.8 mm)
(Standard) Screw No. 2 of the opener cam faces almost directly
below at the lowest dead point of the thread take-up.
Adjusting the position of the opener
1. Loosen setscrews 3and 6in the thrust collars of opener shaft.
2. Move the opener shaft and adjust the clearance A to A = 0.8 ±
0.15 mm. Then tighten the setscrews.
(Caution) Tighten the screws so that the opener shaft 4has
no thrust play.
™Stitch skipping or thread
breakage will result.
™Poorlytensedstitcheswillresult.
Standard of the lowest dead point of the needle bar
1. Set the scale of stitch dial to “0”.
2. Turn the handwheel to bring needle bar 1to the lowest dead
point of its stroke.
3. Loosen the setscrew in the face plate to remove the face plate.
4. Loosen clamping screw 2in the needle bar bracket.
At this time, if the screw is fully loosened, needle bar 1falls.
Loosen the screw to such an extent that needle bar1is moved
up or down by hand.
5. Adjust the distance from the bottom end of the needle bar frame
to the bottom end of the needle bar to the dimension A, and
tighten the clamping screw.
(For DNU-1541-7, there is a marker line engraved on needle
bar 1.)
Timing between the needle and the blade point of the hook
1. Set the scale of stitch dial to “0”.
2. Loosen clamping screw 2in the needle bar bracket, turn the
handwheel, and adjust so that the distance from the top end of
needle eye in needle 3to blade point 4of the hook to 2.0 ±
0.2 mm (C) when needle bar 1is raised by 2.15 ±0.15 mm
(B) from its lowest dead point. Then retighten the screw. (For
DNU-1541-7, there is a marker line engraved on needle bar 1.)
3. Turn the handwheel to raise the needle bar by 2.15 ±0.15 mm
(B) from its lowest dead point. Loosen hook setscrewss 5and
adjust so that blade point 4of the hook almost aligns with the
center of the needle 3. Then retighten the screws. For DNU-
1541S, loosen setscrews 6in the lower shaft gear to perform
the adjustment. Then retighten the screws.
4. Loosen hook setscrews 5, move the hook to the left or the
right and adjust so that a clearance of 0.02 to 0.05 mm is provide
between blade point 4of the hook and needle3at the position
where blade point 4of the hook almost aligns with the center
of needle 3. Then securely tighten the screws.
0
-0.15

−8−
Standard Adjustment
(7) Lift of the presser foot
1) Hand lifter
2) Knee lifter
1
23
1
2
9±0.3 mm
16±0.5 mm
Hand lifter
Top surface of
throat plate
Condition
• State that the hand lifter is raised
Top surface of
throat plate
Condition
• Lifting amount when the stopper screw
of knee lifter spring hook comes in
contact with the machine bed
* In case of the machine provided with the auto-lifter, refer to the item “4. (2) Auto-lifter”.

−9−
Adjustment Procedures Results of Improper Adjustment
1. Loosen setscrew 1in the side cover located on the
antioperator’s side of the machine arm and remove side cover
2.
2. Loosen clamping screw 3in the presser bar bracket to set the
hand lifter to the raised state.
3. Adjust the lifting amount to 9 ±0.3 mm. At this time, the
adjustment can be easily performed when inserting a thing of
9 mm thick between the top surface of the throat plate and the
bottom face of the presser foot.
4. Tighten clamping screw 3in the presser bar bracket. Move
the presser foot to the left or the right and tighten the screw in
the state that the presser foot does not interfere with the walking
foot.
5. Remove the thing inserted between the top surface of the throat
plate and the bottom face of the presser foot, and attach side
cover 2.
1. Remove the knee press plate and tilt the machine arm.
2. Loosen stopper screw nut 1and adjust the lifting amount by
the screwing amount of stopper screw 2.
Adjust the height from the top surface of the throat plate to the
bottom face of the presser foot to 16 ±0.5 mm.
3. Taking care not to move stopper screw 2, tighten stopper screw
nut 1.
™Tighten stopper screw 2→Lifting amount is decreased.
™Loosen stopper screw 2→Lifting amount is increased.
When the lifting amount is higher
than the specified value
™The top end of the needle bar
interferes with the walking foot
and the walking foot may be
damaged when the presser foot
is raised.
When the lifting amount is lower
than the specified value
™The presser foot is not sufficiently
raised and the working property
may be deteriorated.
When the lifting amount is higher
than the specified value
™The presser foot is held raised
from the top surface of the throat
plate even when the hand lifter
is returned to its home position.
When the lifting amount is lower
than the specified value
™The presser foot is not sufficiently
raised and the working property
may be deteriorated.

−10 −
Standard Adjustment
(8) Feed motion
1) Amount of alternate vertical movement
™In case of the machine without the thread trimmer
1
23
4
1
2
3
4
83 to 84 mm
1
Lower engraved
marker line
Hinge screw
Standard of amount of alternate vertical movement
• Upper engraved marker line : Approx. 5 mm
• Medium engraved marker line : Approx. 4 mm
• Lower engraved marker line : Approx. 3 mm (Standard)
Table of sewing speed
™In case of DNU-1541 and DNU-1541S
Amount of alternate vertical
movement of the walking foot and
presser foot
Less than 3 mm
3 mm to less than 4 mm
4 mm to less than 6.5 mm
Stitch length :
6 mm or less
2500 rpm
2000 rpm
1600 rpm
Stitch length :
More than 6 mm
and 9 mm or less
2000 rpm
2000 rpm
1600 rpm
™In case of DNU-1541-7, refer to “ 3. (2) Alternate vertical dial ”.
™In case of the machine with the thread trimmer
Operator’s
side
Edge of
machine arm
To align
with edge

−11 −
Adjustment Procedures Results of Improper Adjustment
1) Amount of alternate vertical movement
™In case of the machine without the thread trimmer
1. Loosen hinge screw nut 1in the top feed rod.
2. Move the position of boss 2on the cam rod up or down to
adjust the position.
3. After the adjustment, tighten the nut.
™If the boss is fixed in the upper section of the long hole →
Amount of movement becomes large.
™If the boss is fixed in the lower section of the long hole →
Amount of movement becomes small.
(Standard) The lower engraved marker line on top feed rear
arm 3aligns with the center of hinge screw 4.
(Caution)
1. The max. sewing speed is specified in accordance with
the sewing conditions.
2. Set the max. sewing speed appropriately in accordance
with the respective conditions given taking care not to
exceed the corresponding specified value.
™In case of the machine with the thread trimmer
1. Remove the top cover.
2. Loosen setscrew 4in the vertical adjusting arm.
3. Adjust the position of vertical adjusting arm 1to 83 to 84 mm
from edge 2of the machine arm and assemble it so that it
aligns with the edge of vertical change base 3in the lateral
direction.
4. Securely tighten setscrew 4in the vertical adjusting arm.
5. Set the alternate vertical dial to the minimum and attach the
top cover.
6. Turn the alternate vertical dial and check to be sure that the
scale of dial and the amount of alternate vertical movement
are correct.
Increase the vertical stroke of the
walking foot in accordance with the
sewing products.
™Sewing sponge material or the
like
™Sewingmaterial with overlapped
sections
If the the amount of alternate
vertical movement is increased, the
stitch pitch may be different from
the value set by the dial.
Decrease the number of revolution
of the motor a little since the feed
efficiency is decreased.

−12 −
Standard Adjustment
2) Alternate momentum
12
3
B
Top surface of
feed dog
Top surface of
throat plate
Top surface of
throiat plate
Conditions
• Feed amount : 0 mm
• Amount of alternate vertical movement
In case of the machine without thread trimmer In case of the machine with thread trimmer
Standard Adjustment
(9) Feed cam timing
1) Horizontal feed cam timing
1
2
3
Screw No. 1 Main shaft Conditions
• Blade point of the hook aligns
with the center of needle when
feed amount is “0”.
• Feed amount : maximum
A
3

−13 −
Adjustment Procedures Results of Improper Adjustment
™Pitch error at high or low speed
is apt to occur.
™Needle thread tension will vary.
™Stitch tightness at normal and
reverse feed will vary.
1) Horizontal feed cam timing
1. Set the scale of stitch dial to “0”.
2. Loosen two setscrews 1in the horizontal feed eccentric cam.
3. Turn the handwheel to make the blade point of the hook align
with the center of needle.
4. Set the scale of stitch dial to the maximum.
5. Turn feed eccentric cam 2and adjust the timing so that the
feed dog no longer moves even when the reverse feed control
lever is moved.
6. Securely tighten the setscrews.
(Standard) The setscrew No. 1 in the horizontal feed eccentric
cam faces almost right above when the blade point of hook
aligns with the center of needle.
(Caution)
1. If the cam slips in the axial direction at the time of
adjustment, torque becomes heavy. So, be careful.
2. Adjust the horizontal feed rod so that it comes almost
in the center between the edge of horizontal feed cam
lid 3and that of horizontal feed eccentric cam.
3. After adjusting the horizontal feed timing, re-adjust the
vertical feed timing.
Adjustment Procedures Results of Improper Adjustment
2) Alternate momentum
1. Set the stitch dial to “0”.
2. Turn the handwheel to make sure that the amount of alternate
vertical movement of walking foot 1and presser foot 2is
almost equal.
3. When the amount is not equal, loosen setscrew 3in the top
feed rear arm and adjust so that the amount should be equal.
Adjust the amount almost to A = B.
™When the amount of alternate vertical movement of the walking
foot is larger than that of the presser foot :
1) Loosen setscrew 3in the top feed rear arm in the state that
walking foot 1is raised a little, press walking foot 1to the
feed dog.
2) Re-tighten the setscrew and turn the handwheel to make sure
of the amount of the amount of alternate vertical movement of
the walking foot and the presser foot.
Adjust the vertical stroke of the
walking foot so that it is larger than
thatof the presser footinaccordance
with the sewing products.
™Sewing sponge material or the
like
™Sewingmaterial with overlapped
sections
When the alternative vertical
strokes of the walking foot and
presser foot are considerably
different
™The stitch pitch is different from
the value set by the dial.
™Decreasethe number of revolution
of the motor a little since the feed
efficiency is decreased.

−14 −
Standard Adjustment
2) Top feed cam timing
™In case of DNU-1541 and DNU-1541S
™In case of DNU-1541-7
1
2
3
4
5
1
5
Main shaft
Top feed cam rod
To align
Conditions
• Feed amount : 6 mm
• When needle and walking foot are lowered.
Main shaft
Top feed cam rod
Screw No. 2
Top feed cam rod
2
3
4
To align

−15 −
Adjustment Procedures Results of Improper Adjustment
2) Top feed cam timing
™In case of DNU-1541 and DNU-1541S
1. Set the scale of stitch dial to “6”.
2. Adjust the amount of alternate vertical movement to the
standard value.
(Refer to the item “8) Feed motion”.)
3. Loosen two setscrews 1in the top feed cam.
4. Turn top feed cam 5to the position where three points of top
end 2of the needle eyelet, top surface 3of the throat plate
and walking foot 4(pressing face) are aligned with one another
on condition that the amount of alternate vertical movement of
both the walking foot and the presser foot is equal.
5. Securely tighten the setscrews.
(Standard) The screw No. 2 in top feed cam 5faces almost
right above at the lowest dead point of the thread take-up.
™In case of DNU-1541-7
1. Set the scale of stitch dial to “6”.
2. Set the scale of alternate vertical dial to “3”.
3. Remove the setscrews in the window place C and remove the
window plate C and the window plate packing C.
4. Loosen two setscrews 1in the top feed cam.
5. Turn top feed cam 5to the position where three points of top
end 2of the needle eyelet, top surface 3of the throat plate
and walking foot 4(pressing face) are aligned with one another
on condition that the amount of alternate vertical movement of
both the walking foot and the presser foot is equal.
6. Securely tighten the setscrews.
(Standard) The screw No. 2 in top feed cam 5faces almost
the front at the highest dead point of the needle bar as
observed from the window plate side.
™Pitch error at high or low speed
is apt to occur.

−16 −
Standard Adjustment
(10) Needle sway (Optional selection only of DNU-1541-7)
12
3
20±0.5 mm
Horizontal feed shaft
Engraved marker line
Standard Adjustment
(11) Stitch length of normal/reverse feed
1
2
A
B
Feed adjusting base
Notch Feed adjusting rod
Conditions
• Feed amount : 6 mm
Notch portion
Other manuals for DNU-1541
2
This manual suits for next models
2
Table of contents
Other JUKI Sewing Machine manuals

JUKI
JUKI DLN-9010A User manual

JUKI
JUKI MO-655N User manual

JUKI
JUKI HZL-27Z User manual

JUKI
JUKI ASN-690 User manual

JUKI
JUKI LU-2810-6 User manual

JUKI
JUKI MO-6900J Series Quick start guide

JUKI
JUKI MO-613V User manual

JUKI
JUKI SC-510 Quick start guide

JUKI
JUKI LH-3126F Installation guide

JUKI
JUKI MF-7900-E22 User manual