i
CONTENTS
Ⅰ. SPECIFICATIONS .........................................................................................................1
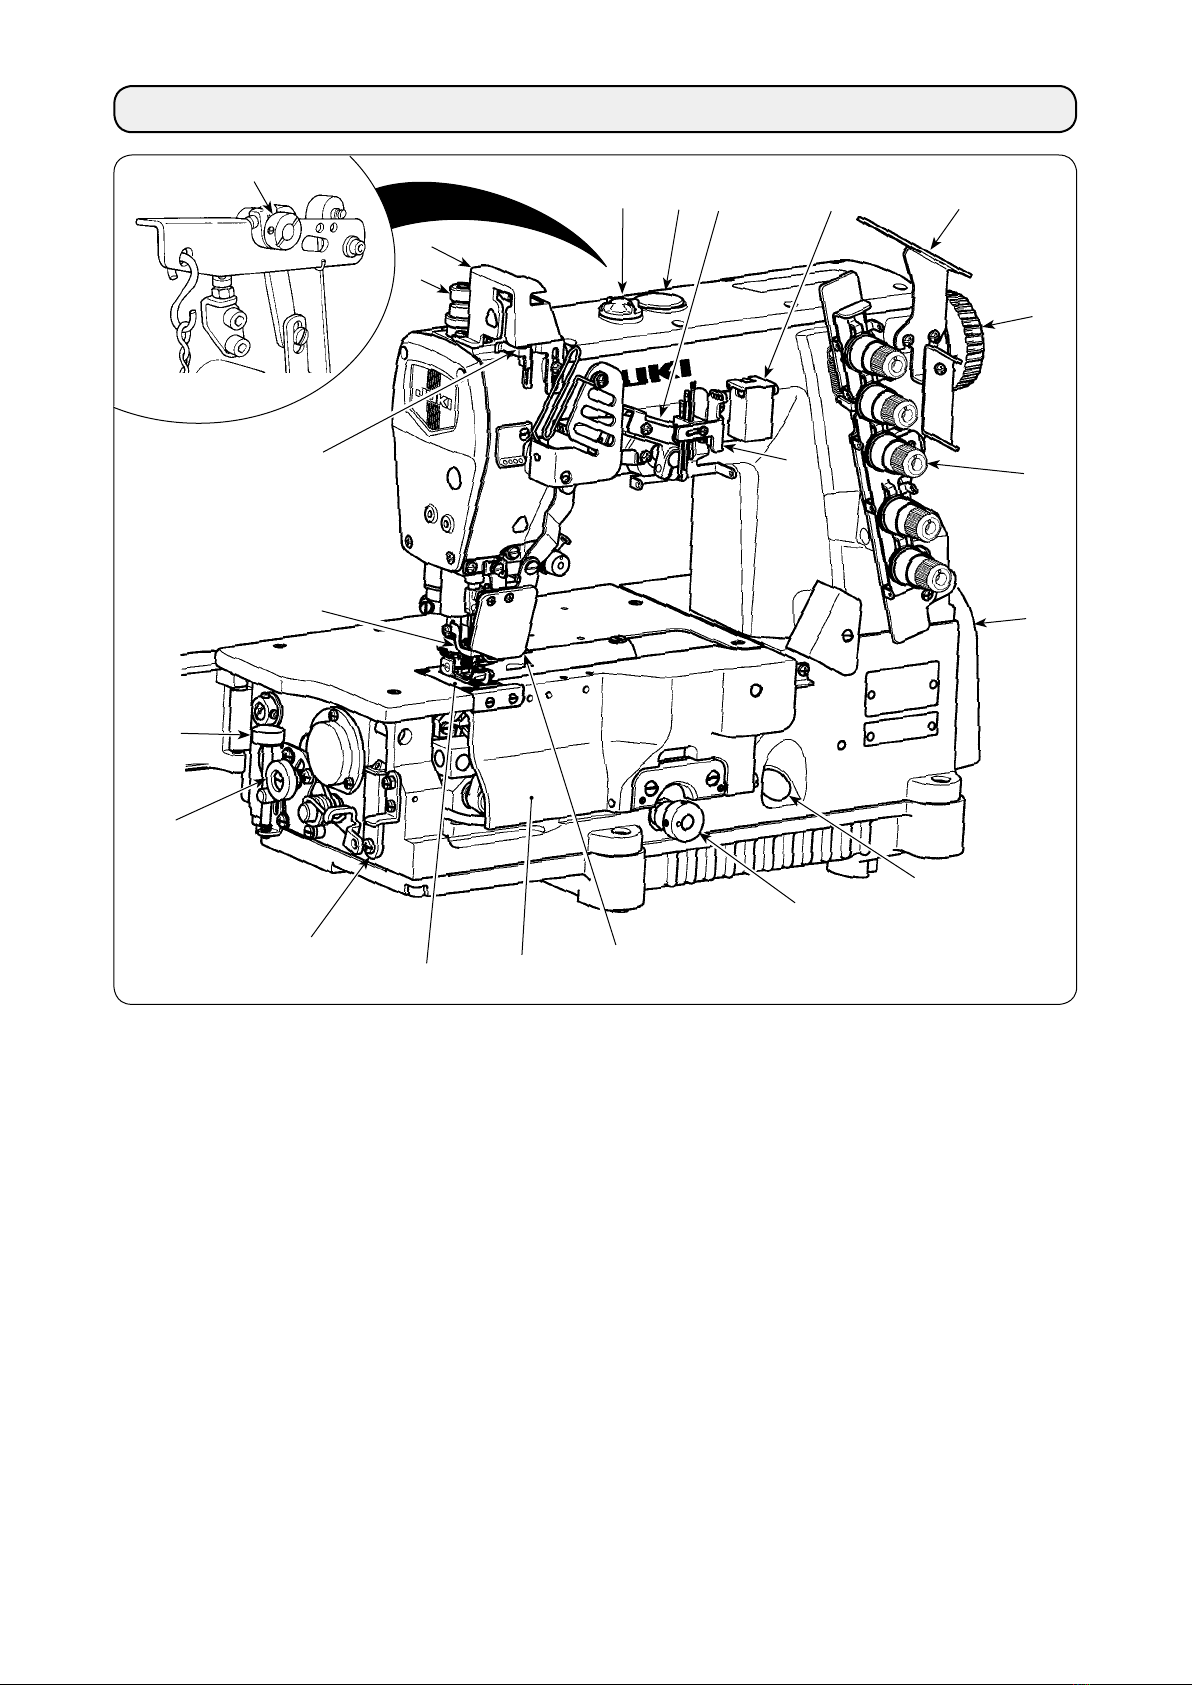
Ⅱ. CONFIGURATION OF THE MACHINE COMPONENTS ..............................................2
Ⅲ.
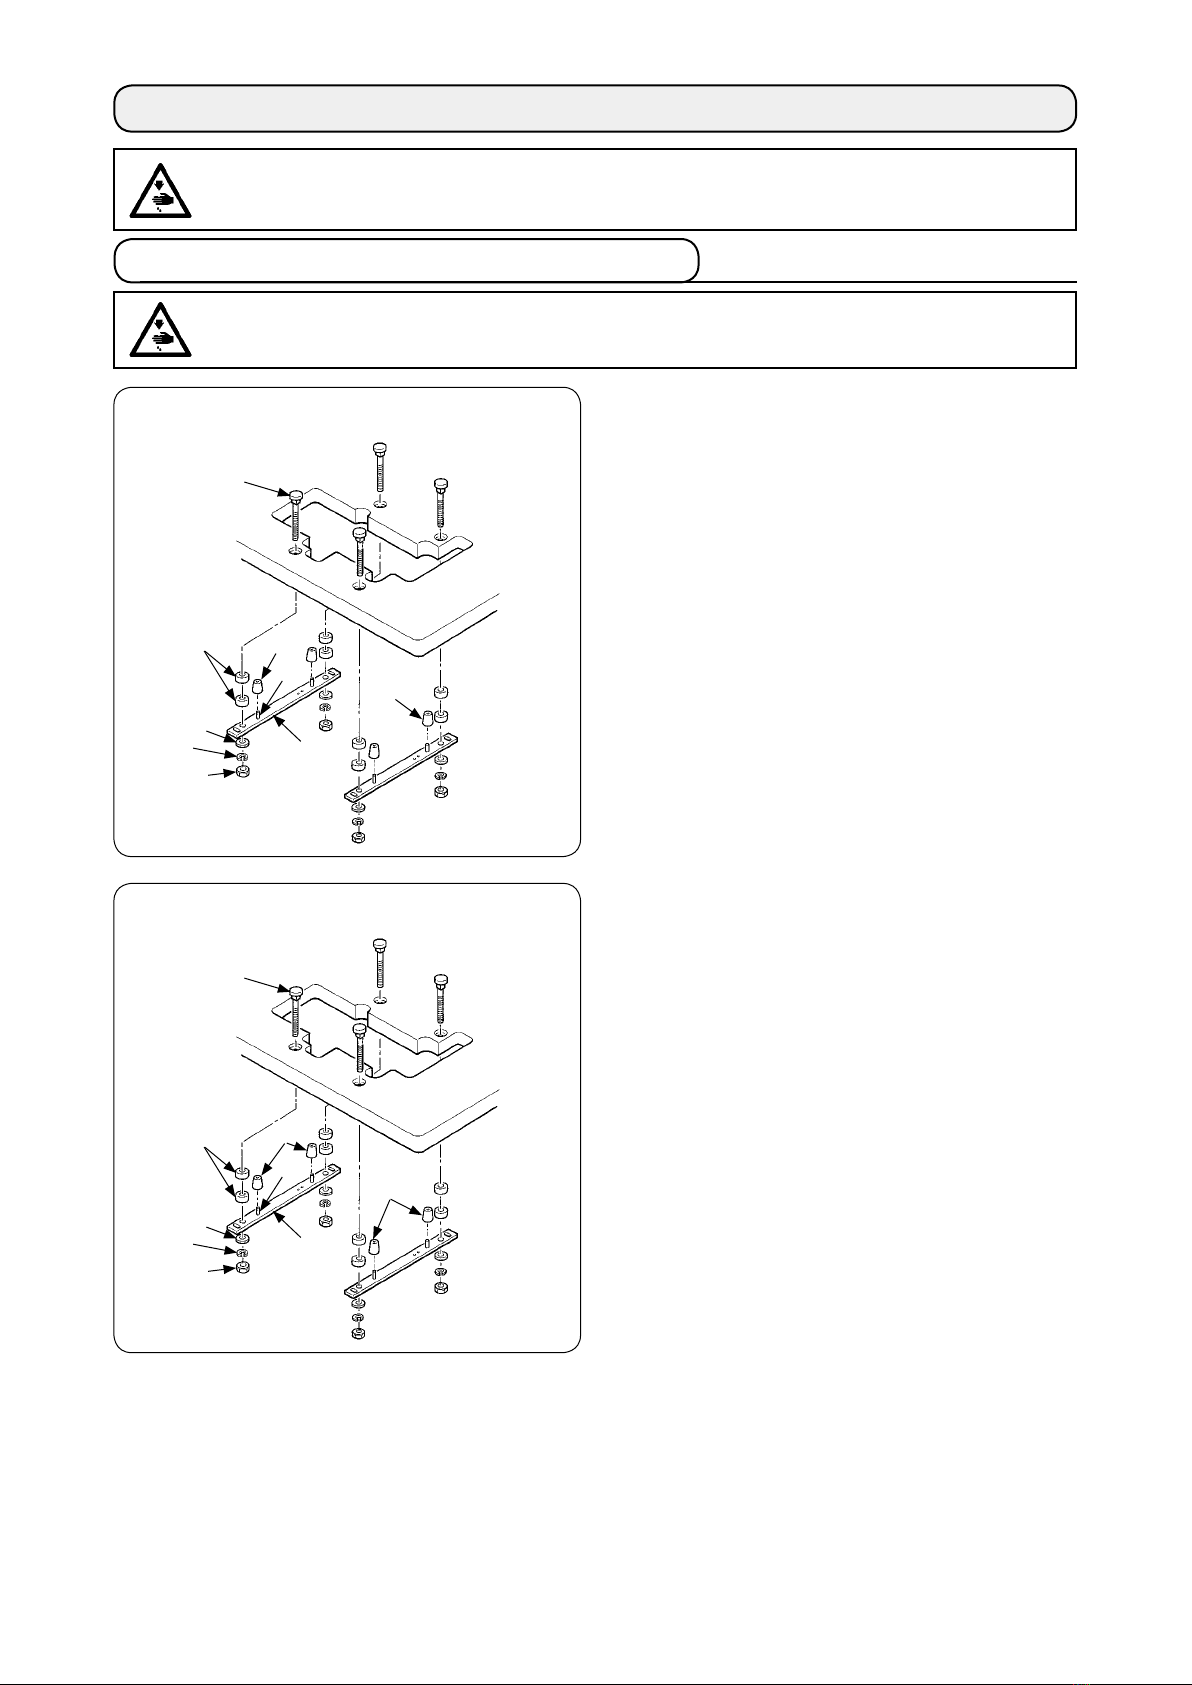
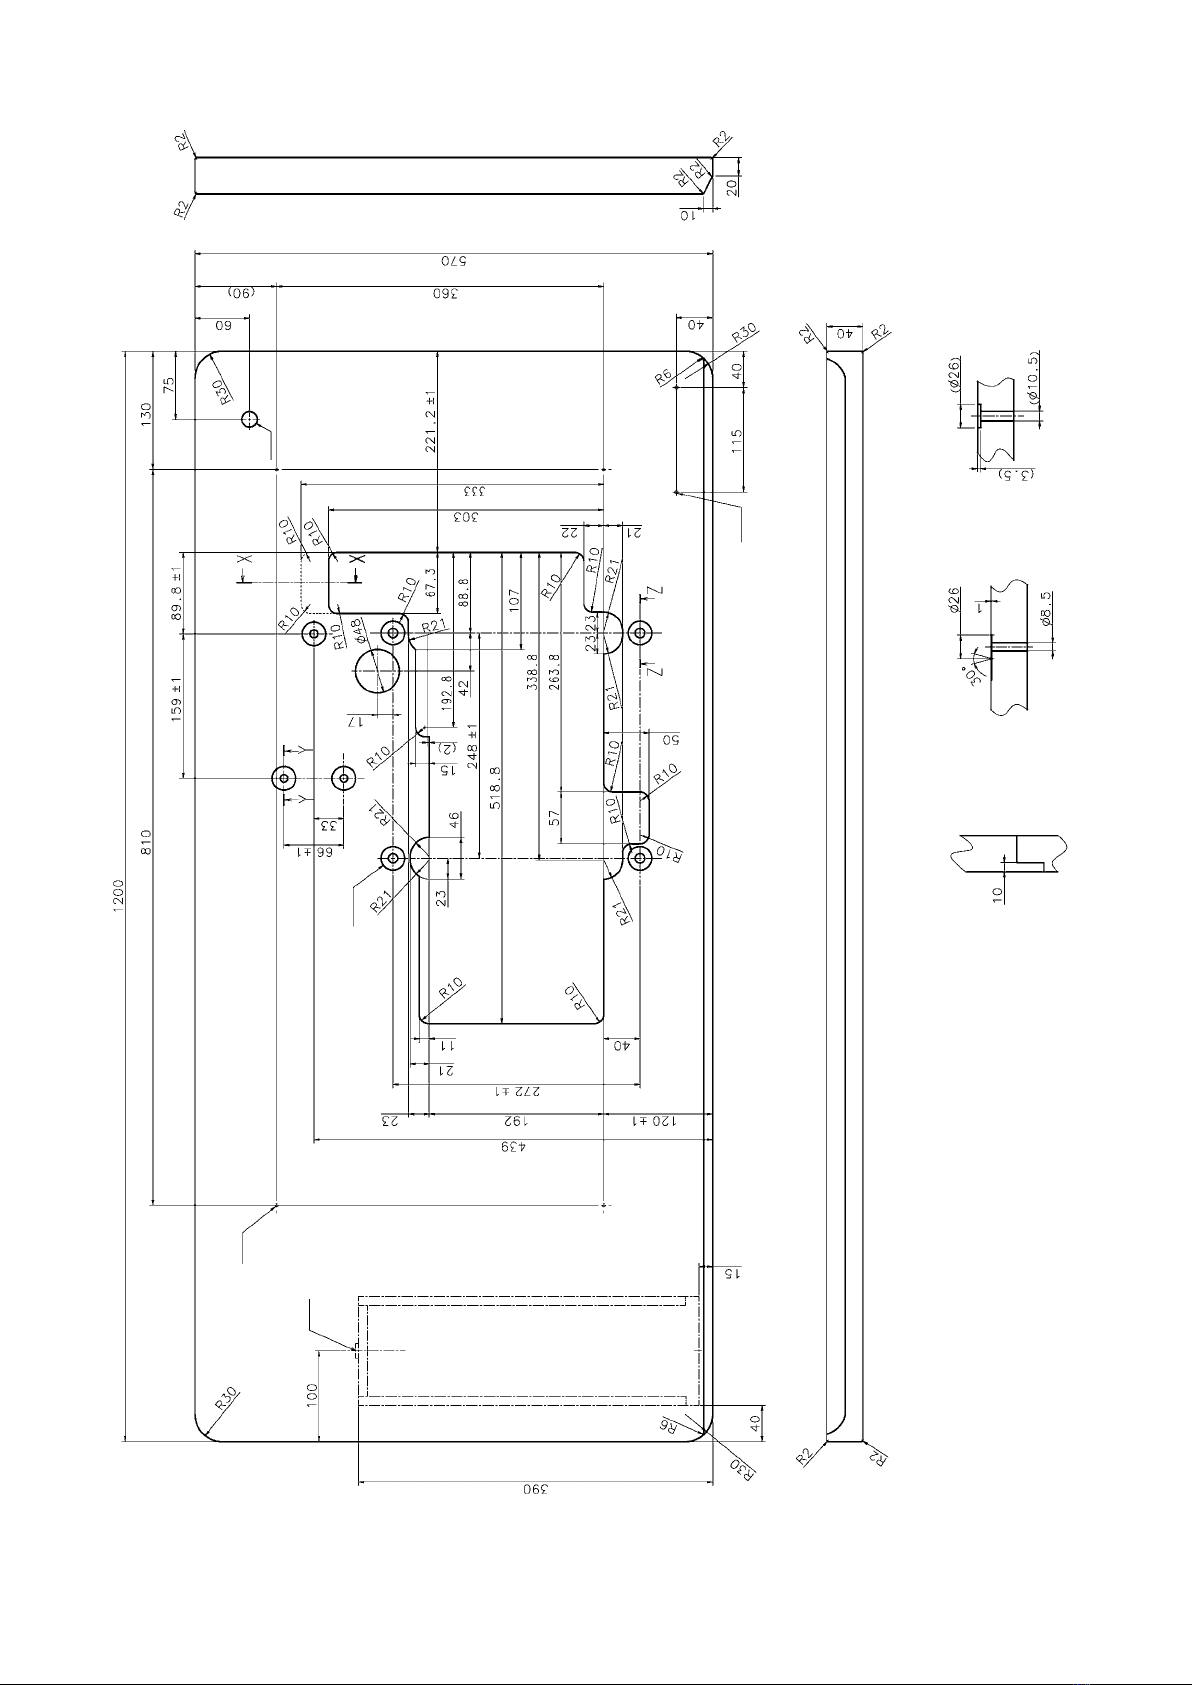
INSTALLATION......................................................................................................................3
1. Installing the machine head onto the table................................................................................ 3
2.Selecting the motor pulley and the belt....................................................................................... 7
3.Installing the motor ....................................................................................................................... 7
4.Setting the belt............................................................................................................................... 7
5.Installing the belt cover................................................................................................................. 8
6.Installing the chain ........................................................................................................................ 8
7.Installing the thread guide............................................................................................................ 8
8.Installing the needle bar thread take-up cover ........................................................................... 9
Ⅳ. LUBRICATION AND OILING ........................................................................................9
1.Lubricating oil................................................................................................................................ 9
2.Oiling............................................................................................................................................. 10
3.Silicon oil lubricating unit........................................................................................................... 10
Ⅴ. OPERATION................................................................................................................11
1.Needle........................................................................................................................................... 11
2.Attaching the needle ................................................................................................................... 11
3.Threading the machine head...................................................................................................... 12
4.Adjusting the stitch length ......................................................................................................... 13
5.Adjusting the differential feed ratio ........................................................................................... 13
6.
Adjusting the presser foot pressure ..................................................................................................14
7.Adjusting the thread tension...................................................................................................... 14
Ⅵ.
ADJUSTING THE SEWING MACHINE......................................................................................15
1.Adjusting the silicon container thread guide............................................................................ 15
2.Adjusting the needle bar thread take-up thread receiver ........................................................ 15
3.Adjusting the rocking thread take-up........................................................................................ 16
4.Adjusting the spreader thread guide......................................................................................... 16
5.Adjusting the looper thread cam................................................................................................ 16
6.Adjusting the looper thread cam eyelet .................................................................................... 17
7.Adjusting the looper.................................................................................................................... 17
8.Adjusting the height of the needle............................................................................................. 18
9.Adjusting the rear needle guard................................................................................................. 18
10.Relation between the rocking thread take-up timing and the needle thread loop ................ 19
(1) Adjustment by means of the crank ............................................................................................. 19
(2) Adjustment by the eccentric cam................................................................................................ 19
11.Adjusting the height of the feed dog ......................................................................................... 20
12.Installing position of the spreader............................................................................................. 20
13.Adjusting the spreader thread guide and the needle clamp thread guide............................. 21
14.Adjusting the front needle guard............................................................................................... 21
15.
Adjusting the presser foot lift ......................................................................................................22
16.Adjusting the micro-lifter............................................................................................................ 22
17.Adjusting the feed locus............................................................................................................. 23
(1) Changing the feed driving movement......................................................................................... 23
(2) Changing the feed rock movement ............................................................................................ 24
(3) Restoring to the standard adjustment ........................................................................................ 24
18.Adjustment value of balloon ...................................................................................................... 25
19. Adjustment of the feed dog in longitudinal direction ............................................................. 27
(1) Longitudinal position of the feed dog.......................................................................................... 27
(2) For C11....................................................................................................................................... 28
Ⅶ.
MAINTENANCE ...................................................................................................................29
1. Cleaning the sewing machine ................................................................................................... 29
2. Replacing the lubricating oil...................................................................................................... 29
3. Inspecing and replacing the oil lter ........................................................................................ 29