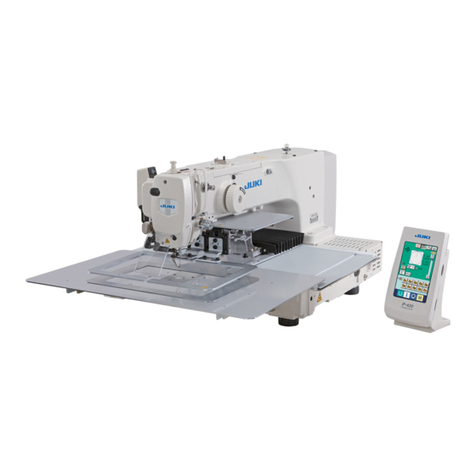
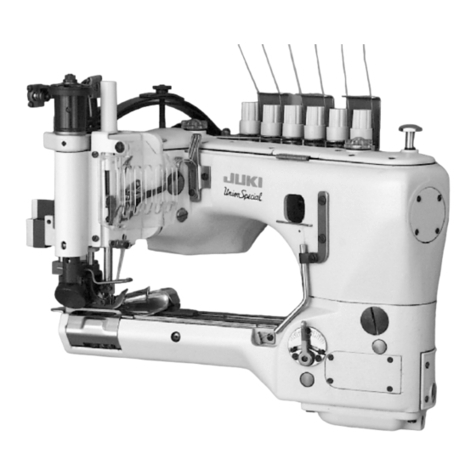
JUKI AMS-221ENTS Manual

1
INSTRUCTION MANUAL
AMS-221ENTS / IP-420
No.03
40142419
* "CompactFlash(TM)" is the registered trademark of SanDisk Corporation, U.S.A.

i
CONTENTS
I. MECHANICAL SECTION (WITH REGARD TO THE SEWING MACHINE)....1
1. SPECIFICATIONS ........................................................................................................1
2. CONFIGURATION ........................................................................................................2
3. INSTALLATION ............................................................................................................3
3-1. Removing the bed xing bolt....................................................................................................... 3
3-2. Adjusting the safety switch.......................................................................................................... 3
3-3. Installing the throat plate auxiliary cover ................................................................................... 4
3-4. Installing the panel........................................................................................................................5
3-5. Installing the thread stand ........................................................................................................... 6
3-6. Raising the machine head............................................................................................................ 6
3-7. Installing the air hose ................................................................................................................... 8
3-8. Cautions for the compressed air supply (source of supply air) facility .................................. 9
3-9. Installing the eye protection cover............................................................................................ 10
4. PREPARATION OF THE SEWING MACHINE ........................................................... 11
4-1. Lubrication................................................................................................................................... 11
4-2. Attaching the needle................................................................................................................... 11
4-3. How to needle thread the machine head .................................................................................. 12
4-4. Procedure for clamping the needle thread............................................................................... 14
4-5. Installing and removing the bobbin case ................................................................................. 14
4-6. Installing the bobbin................................................................................................................... 15
4-7. Adjusting the thread tension ..................................................................................................... 15
4-8. Procedure for adjusting the thread breakage detection sensor............................................. 16
4-9. Intermediate presser height....................................................................................................... 16
4-10. Adjusting the thread take-up spring ......................................................................................... 17
(1) When you want to change the stroke of the thread take-up spring ............................................. 17
(2) When you want to change the tension of the thread take-up spring............................................ 17
5. OPERATION OF THE SEWING MACHINE................................................................18
5-1. Sewing..........................................................................................................................................18
5-2. Needle thread clamp device....................................................................................................... 18
II.OPERATION SECTION (WITH REGARD TO THE PANEL) ...................... 19
1. PREFACE ...................................................................................................................19
2. WHEN USING IP-420 .................................................................................................23
2-1. Name of each section of IP-420 ................................................................................................. 23
2-2. Buttons to be used in common ................................................................................................. 24
2-3. Basic operation of IP-420 ........................................................................................................... 25
2-4. LCD display section at the time of sewing shape selection ................................................... 27
(1) Sewing shape data input screen.................................................................................................. 27
(2) Sewing screen .............................................................................................................................29
2-5. Performing sewing shape selection.......................................................................................... 31
2-6. Changing item data..................................................................................................................... 33
2-7. How to change the color change mode .................................................................................... 35
2-8. How to input color change commands in pattern data ........................................................... 36
(1) Inputting color change commands by means of the sewing data creation/edit software PM-1 ... 36
(2) Inputting a color change command using the main unit input function ........................................ 38
(3) Checking the color change commands using the main unit input function .................................. 39

ii
(4) Displaying the pattern shape with color-coded using the main unit input function ...................... 40
2-9. Checking pattern shape ............................................................................................................. 41
2-10. Performing modication of needle entry point ........................................................................ 42
(1) Editing the intermediate presser height ....................................................................................... 42
(2) How to edit the color change .......................................................................................................44
2-11. How to use temporary stop........................................................................................................ 46
(1) To continue performing sewing from some point in sewing ......................................................... 46
(2) To perform re-sewing from the start............................................................................................. 47
2-12. When setting of sewing product is difcult because of interruption of needle tip .................... 48
2-13. How the change over the needle bar and thread presser to be threaded ............................. 48
2-14. How to clamp the needle thread................................................................................................ 49
2-15. Winding bobbin thread............................................................................................................... 50
(1) When performing winding bobbin thread while performing sewing ............................................. 50
(2) When performing winding bobbin thread only ............................................................................. 50
2-16. Using counter.............................................................................................................................. 51
(1) Setting procedure of the counter ................................................................................................. 51
(2) Count-up releasing procedure .....................................................................................................53
(3) How to change the counter value during sewing ......................................................................... 53
2-17. Performing new register of users’ pattern................................................................................ 54
2-18. Naming users’ pattern ................................................................................................................ 55
2-19. Performing new register of pattern button............................................................................... 56
2-20. LCD display section at the time of pattern button selection .................................................. 57
(1) Pattern button data input screen.................................................................................................. 57
(2) Sewing screen .............................................................................................................................59
2-21. Performing pattern button No. selection .................................................................................. 61
(1) Selection from the data input screen ........................................................................................... 61
(2) Selection by means of the shortcut button................................................................................... 62
2-22. Changing contents of pattern button........................................................................................ 63
2-23. Copying pattern button .............................................................................................................. 64
2-24. Changing sewing mode.............................................................................................................. 65
2-25. LCD display section at the time of combination sewing......................................................... 66
(1) Pattern input screen.....................................................................................................................66
(2) Sewing screen .............................................................................................................................68
2-26. Performing combination sewing ............................................................................................... 70
(1) Selection of combination data...................................................................................................... 70
(2) Creating procedure of the combination data................................................................................ 71
(3) Deleting procedure of the combination data ................................................................................ 72
(4) Deleting procedure of the step of the combination data .............................................................. 72
(5) Setting of the skip of steps .......................................................................................................... 73
2-27. Using the simple operation mode ............................................................................................. 74
2-28. LCD display when the simple operation is selected................................................................75
(1) Data input screen (individual sewing) .......................................................................................... 75
(2) Sewing screen (individual sewing)............................................................................................... 78
(3) Data input screen (combination sewing)...................................................................................... 81
(4) Sewing screen (combination sewing) .......................................................................................... 83
2-29. Changing memory switch data.................................................................................................. 85
2-30. Using information ....................................................................................................................... 86
(1) Observing the maintenance and inspection information.............................................................. 86
(2) Releasing procedure of the warning ............................................................................................ 87
2-31. Using communication function ................................................................................................. 88
(1) Handling possible data ................................................................................................................ 88

iii
(2) Performing communication by using the media........................................................................... 88
(3) Performing communication by using USB ................................................................................... 88
(4) Take-in of the data ....................................................................................................................... 89
(5) Taking in plural data together.......................................................................................................90
2-32. Performing formatting of the media.......................................................................................... 92
2-33. Operation at the time of X/Y motor position slip...................................................................... 93
(1) When the error is displayed during sewing.................................................................................. 93
(2) When the error is displayed after end of sewing.......................................................................... 94
(3) When the rest switch is not displayed.......................................................................................... 94
2-34. Precautions to be taken when creating patterns ..................................................................... 95
3. MEMORY SWITCH DATA LIST..................................................................................97
3-1. Data list ........................................................................................................................................97
3-2. Initial value list .......................................................................................................................... 103
4. ERROR CODE LIST .................................................................................................105
5. MESSAGE LIST ....................................................................................................... 112
III. MAINTENANCE OF SAWING MACHINE .............................................. 115
1. MAINTENANCE........................................................................................................ 115
1-1. Adjusting the needle-to-shuttle relation ................................................................................. 115
1-2. Adjusting the height of the feeding frame .............................................................................. 117
1-3. Adjusting the vertical stroke of the intermediate presser..................................................... 117
1-4. Wiper position ........................................................................................................................... 118
1-5. The moving knife and counter knife........................................................................................ 119
1-6. Needle thread clamp device..................................................................................................... 119
1-7. Replenishing the designated places with grease .................................................................. 120
(1) Location where exclusive grease is provided ............................................................................ 121
(2) Points to be applied with JUKI Grease A ................................................................................... 121
(3) Points to be applied with the exclusive grease for the LM guide ............................................... 124
1-8. Draining waste oil ..................................................................................................................... 125
1-9. Amount of oil supplied to the hook......................................................................................... 125
1-10. Replacing the fuse .................................................................................................................... 125
1-11. Changing the voltage of 100 ←→ 200V................................................................................... 126
1-12. Troubles and corrective measures (Sewing conditions).......................................................127
2. OPTIONAL................................................................................................................130
2-1. Table of Needle hole guide....................................................................................................... 130
2-2. Felt thread guide ....................................................................................................................... 130
2-3. Bar code reader......................................................................................................................... 131

– 1 –
1. SPECIFICATIONS
. MECHANICAL SECTION (WITH REGARD TO THE SEWING MACHINE)
1 Sewing area X (lateral) direction Y (longitudinal) direction
300 mm × 200 mm
2 Max. sewing speed 2,500 sti/min (When sewing pitch is 3.5 mm or less)
3 Stitch length 0.1 to 12.7 mm (Min. resolution : 0.05 mm)
4
Feed motion of feeding frame
Intermittent feed (2-shaft drive by stepping motor)
5 Needle bar stroke 41.2 mm
6 Needle GROZ-BECKERT 135x17(#90 #120), ORGAN needle DPx17(#14 #20)
Allowable difference in count number between the right and left needles is two or less.
7 Lift of feeding frame Max. 30mm
8
Intermediate presser stroke
4 mm (Standard) (0 to 10 mm)
9 Lift of intermediate
presser
20 mm
10 Intermediate presser
DOWN position variable
Standard 0 to 3.5 mm (Max. 0 to 7.0 mm)
11 Shuttle Double-capacity semi-rotary hook
12 Lubricating oil New Defrix Oil No. 2 (Supplied by oiler)
13 Memory of pattern data Main body, Media
• Main body : Max. 999 patterns (Max. 50,000 stitches/pattern)
• Media : Max. 999 patterns (Max. 50,000 stitches/pattern)
14 Temporary stop facility Used to stop machine operation during a stitching cycle.
15 Enlarging / Reducing
facility
Allows a pattern to be enlarged or reduced on the X axis and Y axis independently
when sewing a pattern. Scale : 1% to 400% times (0.1% steps)
16 Enlarging / Reducing
method
Pattern enlargement / reduction can be done by increasing / decreasing either stitch
length or the number of stitches. (Increasing/decreasing stitch length only can be
performed when pattern button is selected.)
17 Max. sewing speed
limitation
200 to 2,500 sti/min (Scale : 100 sti/min steps)
18 Pattern selection facility Pattern No. selection method
(Main body : 1 to 999, Media : 1 to 999)
19 Bobbin thread counter UP/DOWN method (0 to 9,999)
20 Sewing counter UP/DOWN method (0 to 9,999)
21 Memory back-up In case of a power interruption, the pattern being used will automatically be stored in
memory.
22 2nd origin setting facility Using jog keys, a 2nd origin (needle position after a sewing cycle) can be set in the
desired position within the sewing area. The set 2nd origin is also stored in memory.
Refer to
"II-2-34. Precautions to be taken when creating patterns" p.95
for the
range in which a second origin can be set.
23 Sewing machine motor Servo-motor
24
Dimensions
1,200mm (W) x 1,070mm (L) x 1,200mm (H)
25 Mass (gross mass) 210 kg
26 Power consumption 700 VA
27
Operating temperature range
5˚C to 35˚C
28
Operating humidity range
35 % to 85 % (No dew condensation)
29 Line voltage Rated voltage ±10% 50 / 60 Hz
30 Air pressure used 0.6 MPa (Max. 0.65 MPa)
31 Air consumption 2.8 dm3 / min (ANR)
32 Needle highest position
stop facility
After the completion of sewing, the needle can be brought up to its highest position.
33 Noise - Equivalent continuous emission sound pressure level (LpA) at the workstation:
A-weighted value of 85 dB; (Includes KpA = 2.5 dB); according to ISO 10821- C.6.3
-ISO 11204 GR2 at 2,500 sti/min.
- Sound power level (LwA);
A-weighted value of 90 dB; (Includes KwA = 2.5 dB); according to ISO 10821- C.6.3
-ISO 3744 GR2 at 2,500 sti/min
Time required for sewing: 2.8 sec, using Pattern No. 102

– 2 –
Air regulator
2. CONFIGURATION
Machine head
Scartafilo, Dispositivo di aspirazione del
filo dell'ago
Feeding frame
Intermediate presser
Thread stand
Operation panel (IP-420)
Power switch
(also used as the emergency stop switch)
Control box
Foot pedal

– 3 –
3. INSTALLATION
Remove bed xing bolt . This bolt is necessary
to transport the sewing machine.
In case error 302 occurs when the sewing machine
works after setup, loosen the safety switch tting
screw with a screwdriver, and lower the switch
to the downside of the sewing machine.
3-1. Removing the bed xing bolt
3-2. Adjusting the safety switch

– 4 –
0.8 to 1.0mm
1) Move the cloth feed base to the rear, and
place throat plate auxiliary cover (asm.)
from between lower plate and
throat plate . At this time, be careful
not to bend or damage lower plate .
2) Temporarily x throat plate auxiliary
cover (asm.) with throat plate auxil-
iary cover setscrew and washer .
3) Temporarily x throat plate auxiliary
cover (asm.) to the machine bed
with throat plate auxiliary cover support
setscrews (10 pcs.).
4) Fix throat plate auxiliary cover (asm.)
to the machine bed with two coun-
ter-sunk screws .
5) Move the cloth feed base to the left
front, move up and down throat plate
auxiliary cover (asm.) so that a dis-
tance of 0.8 to 1.0 mm is provided be-
tween the bottom surface of lower plate
installing base and the top surface
of throat plate auxiliary cover (asm.) ,
and x setscrews .
6) Perform the similar work by moving the
cloth feed base to the right front.
7) Fix throat plate auxiliary cover setscrew .
8) Referring to the caution below, perform
positioning of the throat plate auxiliary
cover. When the positioning is not per-
formed enough, perform the positioning
after loosening once throat plate auxil-
iary cover setscrew and throat plate
auxiliary cover base setscrews .
3-3. Installing the throat plate auxiliary cover
1. The stay and the like are set to the throat plate auxiliary cover and the tting screws and
washers to the bed are packed together with the accessories at the time of delivery.
2. When using the cover sheet supplied as accessories, paste it to the throat plate auxilia-
ry cover before installing.

– 5 –
1. Fix the throat plate auxiliary
cover so that is higher than
the throat plate (within 0.3
mm). When it is lower than
the throat plate , needle
breakage or the like due to the
defective feed will be caused.
2. Conrm by putting a ruler or
the like that the throat plate
auxiliary cover is horizon-
tally installed. If not, throat
plate auxiliary cover and
lower plate come in contact
partially with each other, and
abnormal worn-out will be
caused.
3-4. Installing the panel
1) Open cover and remove cable once.
Then connect it again to the panel on the top
surface of the table after passing it through the
hole in the table.
2) Fix operation panel installing plate to an op-
tional place on the table with two wood screws
.
Install the panel at the position where
X-move cover or head grip does not
interfere with it since breakage of the
panel will be caused.
Installing the IP-420
Within 0.3 mm

– 6 –
3-5. Installing the thread stand
1) Assemble the thread stand, and put it in the hole in the top left corner of the machine table.
2) Tighten locknut to x the thread stand.
3) When ceiling wiring is possible, pass the power cord through spool rest rod .
3-6. Raising the machine head
WARNING :
Tilt/raise the sewing machine head with both hands taking care not to allow your ngers to be
caught in the head.
Turn OFF the power before starting the work so as to prevent accidents caused by abrupt start of
the sewing machine.
This sewing machine cannot be raised unless the throat plate auxiliary cover (asm.) is removed.
Raise the sewing machine after removing the throat plate auxiliary cover (asm.) referring to
"I-3-3. In-
stalling the throat plate auxiliary cover" p.4
.
When using the sewing machine, install the throat plate auxiliary cover (asm.) referring to
"I-3-3. Installing the throat plate auxiliary cover" p.4
.
1. To prevent the sewing machine from falling, be sure to raise the machine head after xing
table/stand (casters) at the leveled place so as to prevent it from moving.
2. Be sure to raise the machine after shifting feeding frame to the rightmost position
since X-feed cover interferes with the machine table causing breakage.
3. When the machine is raised, clean portion of the bottom face of the machine to pre-
vent the surface of the machine table from being stained with oil.
The intermediate
thread guide

– 7 –
Never operate stopper release lever at any position other than the maintenance position
so as not to allow your hand or other part of body to be caught between the sewing ma-
chine and the table.
To carry out work with the sewing machine raised,
follow the steps of procedure described below.
1.
Move feeding fame
to the rightmost position and
x it there. Then mount machine head grip
sup-
plied with the unit by fully screwing it into position.
2.
Holding machine head grip
, lift the sewing ma-
chine in the direction of the arrow until the mainte-
nance position (where machine head support
comes in contact with the table) is reached.
• If a 20 kg or more load is neces-
sary to be applied to the position
of machine head grip in order to
lift the machine head, gas spring
has outgassed. Be sure to replace
the gas spring with a new one.
• While raising the sewing machine,
gas spring works to move the
sewing machine in the direction of
the arrow when the sewing machine
is inclined by approximately 45
degrees of an angle with respect to
the table. It is therefore necessary
to lift the sewing machine until the
maintenance position is reached
while supporting the sewing ma-
chine with both hands.
Maintenance position of the sewing machine
3. Turn stopper release lever in the direction of the arrow to secure the sewing machine.

– 8 –
3-7. Installing the air hose
Close
Open
1) Connecting the air hose
Connect the air hose to the regulator .
2) Adjustment of air pressure
Open air cock , pull up and turn air adjustment
knob and adjust so that air pressure indicates
0.6 MPa. Then lower the knob and x it.
* Close air cock to expel air.
Machine head in the xed state
To return the sewing machine to its initial position,
follow the steps of procedure described below.
1. Return stopper release lever to its initial
position. (Return the lever until it is xed.)
2. Carefully return machine head grip to its
initial position with both hands.
• While returning the sewing machine
to its initial position, gas spring
works when the sewing machine
is inclined by approximately 70
degrees of an angle to hold the
machine at that position before the
machine reaches its initial position.
Then, further apply force in the re-
turning direction to return the sew-
ing machine to its initial position.
• If you return the sewing machine to
its initial position swiftly, the sew-
ing machine open/close lock mech-
anism will work. In this case, slight-
ly lift the sewing machine from the
position where it is locked to reset
the lock mechanism. Then, careful-
ly return the sewing machine to its
initial position again.

– 9 –
3-8. Cautions for the compressed air supply (source of supply air) facility
As large as 90 % of failures in pneumatic equipment (air cylinders, air solenoid valves) are caused by "con-
taminated air."
Compressed air contains lots of impurities such as moisture, dust, deteriorated oil and carbon particles. If
such "contaminated air" is used without taking any measures, it can a cause of troubles, inviting reduction in
productivity due to mechanical failures and reduced availability.
Be sure to install the standard air supply facility shown below whenever the machine provided with pneumat-
ic equipment is used.
Standard air supply facility to be prepared by the user
Standard equipment supplied by JUKI
Air compressor
After cooler
Air tank
Main line lter
Air dryer
Mist separator
Auto-drain
Auto-drain
Quality of the air supply
When the supply air contains a considerable amount of moisture
Ambient environment
When our machine is installed at a place where the temperature greatly
changes in the morning and in the evening from that in the daytime or
freeze is like to occur
In the aforementioned cases, be sure to install an air dryer.
(Most troubles in the air solenoid valves are caused by carbon.)
Be sure to install a mist separator.
When the supply air contains a considerable amount of carbon and dust
Filter regulator
Air solenoid valve
Air cylinder
Cautions for main piping
• Be sure to slope main piping by a falling gradient of 1 cm per 1 m in the direction of air ow.
• If the main piping is branched off, the outlet port of the compressed air should be provided at the
top part of the piping using a tee in order to prevent drain settling inside the piping from owing
out.
• Auto drains should be provided at all lower points or dead ends in order to prevent the drain from
settling in those parts.

– 10 –
3-9. Installing the eye protection cover
WARNING :
Be sure to attach this cover to protect the eyes from the disperse of needle breakage.
Use eye protection cover after securely attach-
ing it on face plate cover with screw .

– 11 –
B
A
4. PREPARATION OF THE SEWING MACHINE
4-1. Lubrication
WARNING :
Turn OFF the power before starting the work so as to prevent accidents caused by abrupt start of
the sewing machine.
1) Check that the place between lower line Band
upper line A is lled with oil. Fill there with oil
using the oiler supplied with the machine as
accessories when oil is short.
1. Do not lubricate to the places other than the oil tank and the hook of Caution 2 below.
Trouble of components will be caused.
2. When using the sewing machine for the rst time or after an extended period of disuse,
use the machine after lubricating a small amount of oil to the hook portion. (For remov-
ing the shuttle, see
"III-1-1. Adjusting the needle-to-shuttle relation" p.115
.)
2) Apply one drop of oil to the hook race part to
spread on it.
The oil tank which is lled with oil is only for lubricating to the hook portion. It is possible
to reduce the oil amount when the number of rotation used is low and the oil amount in the
hook portion is excessive. (Refer to "III-1-9. Amount of oil supplied to the hook" p.125 .)
4-2. Attaching the needle
WARNING :
Turn OFF the power before starting the work so as to prevent accidents caused by abrupt start of
the sewing machine.
Loosen setscrew and hold needle with the long
groove facing toward you. Then fully insert it into the
hole in the needle bar, and tighten setscrew .
When tightening setscrew , be sure
to use the minus screwdriver (Part No.
: 12347308) supplied as accessories.
Allowable difference in count number
between the right and left needles is
two or less.

– 12 –
4-3. How to needle thread the machine head
Right thread:
Pass the thread
over the thinner
section.
Left thread:
Pass the thread
over the thicker
section.
WARNING :
Be sure to turn the power OFF before threading the needle in order to prevent an accident caused
by abrupt start of the sewing machine.

– 13 –
1.
It is recommended to change over the needle bar
position on the operation panel before threading
the needle to facilitate threading work. Refer to
"II-2-13. How the change over the needle bar
and thread presser to be threaded" p.48 for
how to change over the needle bar position.
2. It is recommended to change over the needle
presser bar position on the operation panel
before threading the thread presser section
to facilitate threading work. Refer to "II-2-13.
How the change over the needle bar and thread
presser to be threaded" p.48 for how to
change over the needle presser bar position.
Thread
presser section
Right thread
Thread
presser bar
Pass the left thread through
the far side of the thread
presser bar.
Pass the right thread
through the near side of
the thread presser bar.
Left thread
3.
In the case using coated
thread, pass the threader of
the intermediate thread guide
without winding the thread on
the threader. By so doing, the
thread resistance is decreased.
When using a coated thread, thread the threaders of the
rst and second thread guides without winding on them.

– 14 –
4-5. Installing and removing the bobbin case
WARNING :
Turn OFF the power before starting the work so as to prevent accidents caused by abrupt start of
the sewing machine.
1) Open hook cover .
2) Raise latch of bobbin case , and remove
the bobbin case.
3) When entering bobbin case, insert it with the
latch tilted until "click" sounds.
If it is not fully inserted, bobbin case
may slip off during sewing.
4-4. Procedure for clamping the needle thread
1) Press intermediate presser setting button
to display the needle thread suction button.
2) When you press needle thread suction button
, the thread suction screen is displayed
and the thread suction device is brought to the
air-sucking state. Allow thread suction device
to suck the two needle threads of the right
and left needles.
3) After the thread suction device has sucked
the needle threads, touch on the thread
suction screen to stop the air suction to
clamp the needle threads.

– 15 –
4-6. Installing the bobbin
2.5 cm
WARNING :
Turn OFF the power before starting the work so as to prevent accidents caused by abrupt start of
the sewing machine.
1) Set the bobbin into bobbin case in the
direction shown in the gure.
2) Pass the thread through thread slit of bob-
bin case , and pull the thread as it is. By so
doing, the thread will pass under the tension
spring and be pulled out from thread hole .
3) Pass the thread through thread hole of the
horn section, and pull out the thread by 2.5 cm
from the thread hole.
If the bobbin is installed in the bobbin
case orienting the reverse direction, the
bobbin thread pulling out will result in an
inconsistent state.
4-7. Adjusting the thread tension
1) Needle thread tension
Turn thread tension nut No. 2 clockwise to
increase or counterclockwise to reduce the
needle thread tension.
2) Bobbin thread tension
Turn tension adjusting screw clockwise to
increase or counterclockwise to reduce the
bobbin thread tension.

– 16 –
1. When raising the intermediate presser height, turn the pulley by hand to lower the needle
bar, and conrm that the needle bar does not interfere with the intermediate presser.
2. Take care not to get your hands and ngers caught in the feeding frame or intermediate
presser.
4-9. Intermediate presser height
Press INTERMEDIATE PRESSER SETTING button and adjust
with TEN keys so that the clearance between the bottom end of
intermediate presser and the cloth is 0.5 mm (thickness of thread
used).
4-8. Procedure for adjusting the thread breakage detection sensor
The thread breakage detection sensor is a sensor
for detecting that the thread feeding (movement)
is stopped by thread breakage.
The sensitivity of the sensor has been factory-ad-
justed to the standard adjustment value at the
time of shipment. In the following cases, however,
the sensor should be re-adjusted.
The sewing machine stops even when the
thread does not break.
(In the case of using thin thread, the thread
tension is too high, the sewing machine runs at
a low speed, etc.)
Turn the adjusting knob clockwise to in-
crease the sensitivity.
The sewing machine does not stop even when
the thread breaks.
(In the case of the sewing machine runs at a
high speed, etc.)
Turn the adjusting knob counterclockwise to
decrease the sensitivity.
* The sensor sensitivity should be adjusted to
3 to 4.5, as a guide, according to the thread
tension and the type of thread.
The gure shows the adjustment value 3.5.
ON OFF
1. The thread breakage detection sensor is provided with ON-OFF switch . The sensor
does not work unless the switch is placed in ON.
2. The standard adjustment value of adjusting knob is 3.5.
3. One scale mark corresponds to the angle of approximately 45º. After the adjustment,
loosen setscrews to remove the cover and check the scale mark.
4. In the case the sensor sensitivity adjustment dial is set at 5 or larger value, the sensor
can be susceptible to the sewing-machine vibration or noise and can malfunction.
0.5 mm
This manual suits for next models
1
Table of contents
Other JUKI Sewing Machine manuals

JUKI
JUKI MB-1800 series User manual

JUKI
JUKI PS-800-6045 User manual

JUKI
JUKI MO-6904R User manual

JUKI
JUKI MS-191; MS-191A; MS-261; MS-261J User manual

JUKI
JUKI MO-2800 User manual

JUKI
JUKI DU-1181N User manual

JUKI
JUKI PS-700 User manual

JUKI
JUKI HZL-E61 User manual

JUKI
JUKI APW-895/IP-420 User manual

JUKI
JUKI LK-980 Series Quick start guide

JUKI
JUKI LH-3500A series User manual

JUKI
JUKI IP-110 Type F User manual

JUKI
JUKI MO-2000QVP User manual

JUKI
JUKI AMS-224EN6060/IP-420 User manual

JUKI
JUKI LBH-1790 Series User manual

JUKI
JUKI MO-644D User manual

JUKI
JUKI LBH-772NV-1 User manual

JUKI
JUKI MOL-254 User manual

JUKI
JUKI LBH-781 User manual

JUKI
JUKI MO-6704D User manual